

Overview
Survey™ Project on cloud is a free web based survey and (data entry) forms toolkit for processing & gathering data online. Survey™ Project on cloud is ideal for anyone who needs to collect valuable information from customers, visitors or employees efficiently. It enables users without coding knowledge to develop and publish surveys through the internet. Survey™ Project on cloud is an open source web application written in C# .NET based on a MSSQL database. The Survey™ Project on cloud sources save .NET developers time and effort in creating surveys in web application projects and provides many features to fit different requirements and business needs. Also it’s easy to add new types of questions or answers because of an object oriented and modular architecture.
Features include: – Folder structure for surveys – Survey designer and form builder (including text/html editor) – Survey security options – Token Management – Multi-language options – Question libraries – Answer type editor – Results and reporting options – Import and export features – Mailing options – Users and roles administration – Integrated Help files and tooltips – Friendly Url for surveys Special features: – branching and skip logic – answer piping – randomize question order – rating and scored surveys – fileupload answer options.
Survey™ Project is owned by Survey™ Project (https://www.surveyproject.org/) and they own all related trademarks and IP rights for this software.
Survey Project on Cloud runs on Amazon Web Services (AWS) and Azure and is built to create a survey, gather data and analyze results and to create online surveys, quizzes, forms etc.
Cognosys provides pre-configured and ready to run environment for running Survey Project on AWS and Azure marketplace.
Survey Project on Cloud for AWS
Survey Project on Cloud for Azure
Features
Major Features Of Survey™ Project
– 100% FREE.
– Standard web application and easy to use MS Web Platform Installer (WPI)
– Web based administration
– Main Survey control easily extensible through custom events
– Xml based multi languages support files (English, German, Dutch etc …)
Administration
– Multi pages support
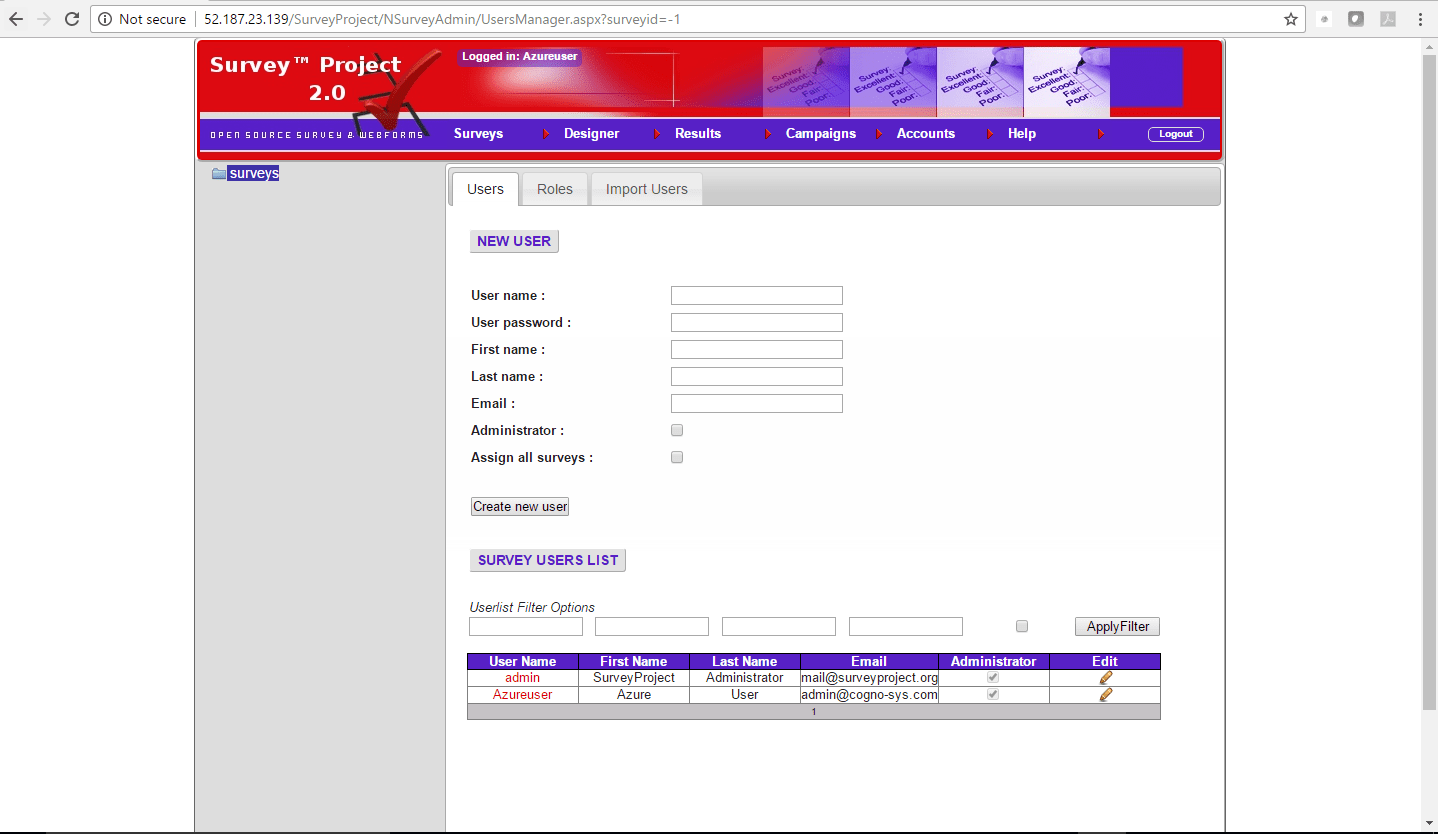
– Multi users / roles management
– Page navigation (previous / next)
– User can save progress and resume it later on (automatic or manual)
Form’s items toolbox
– Extensible plugin based architecture for question and answer types
– Questions can be build / composed using any available answer type
– Questions can be set as “repeatable” to let users duplicate them at will
– Repeatable question’s answers can be fully shown or shown as a grid
Results reporting
– Graphical bar chart results
– Graphical pie chart results
– HTML chart results
– Detailed individual vote reports
Design
– Full design time support for Visual Studio 2003 / WebMatrix
– Customizable header, footer design
– Customizable question, answer design
– Customizable matrix header, rows design
Security
– Single or multiple users and roles support
– Can be integrated in any existing security infrastructure through the “user provider” model
– 30+ rights available to secure each single survey feature for each of your users
– Extensible security addins architecture
– Cookie and IP security addins to prevent double submissions.
AWS
Installation Instructions For Windows
Note: How to find PublicDNS in AWS
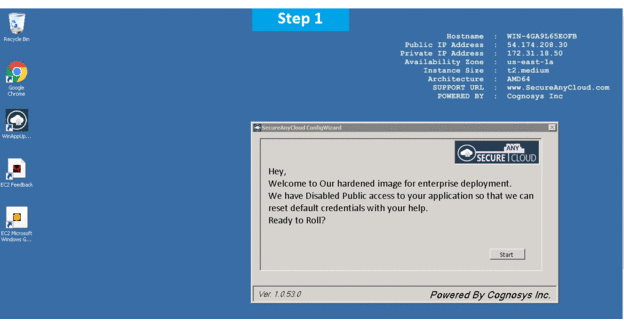
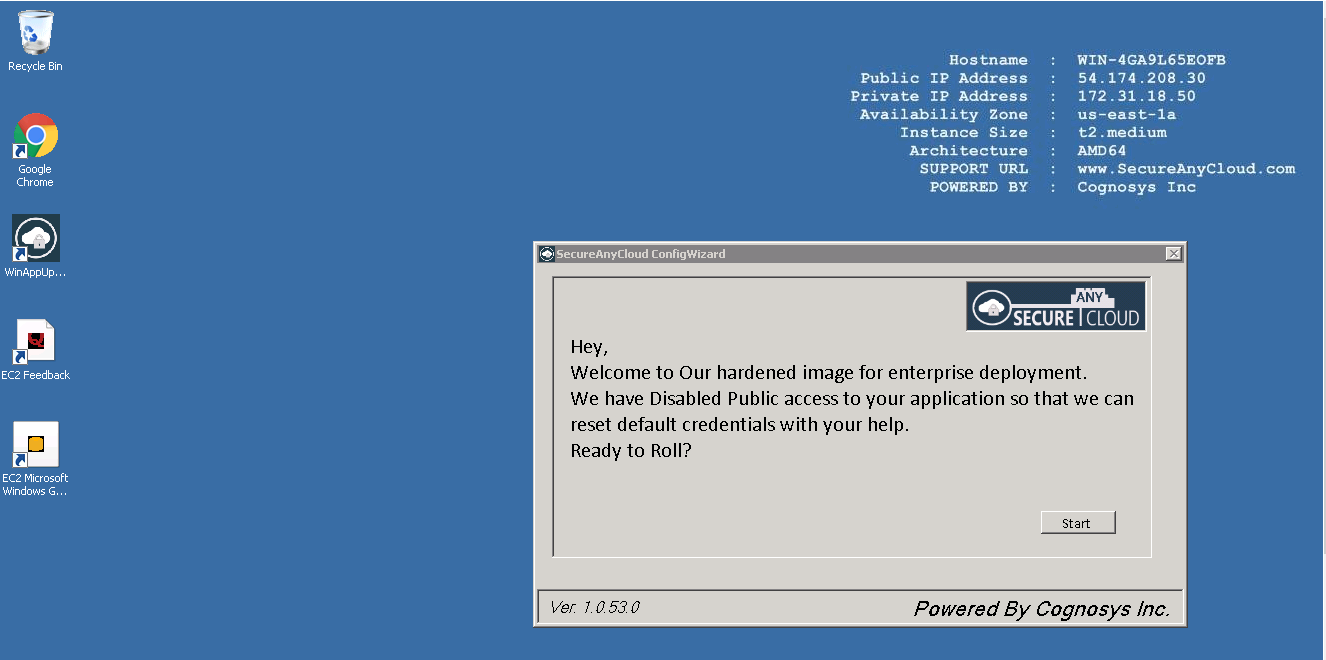
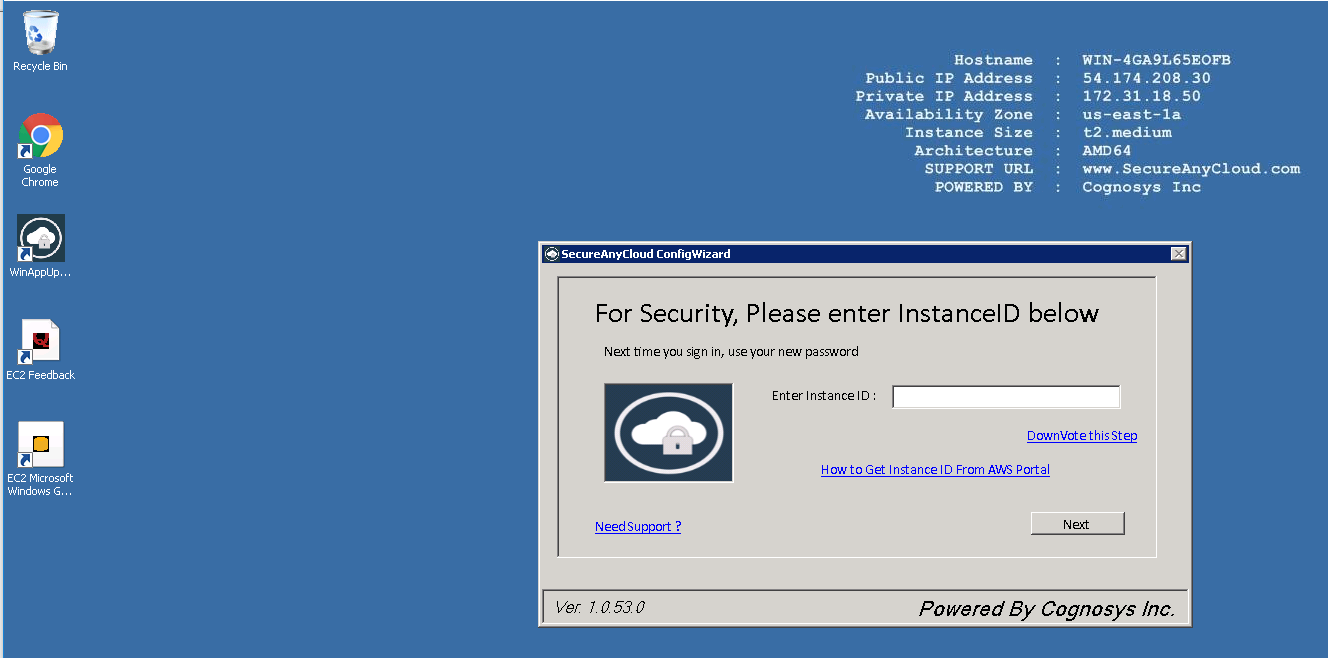
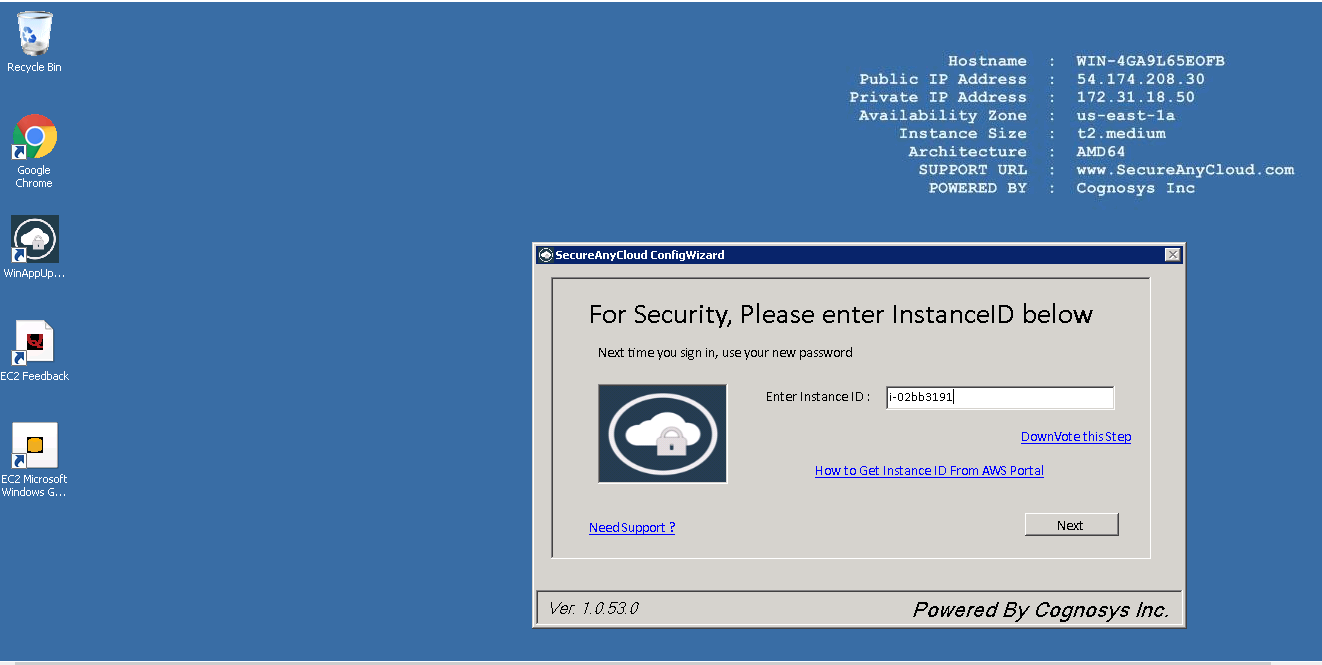
Step 1) RDP Connection: To connect to the deployed instance, Please follow Instructions to Connect to Windows instance on AWS Cloud
Connect to the virtual machine using following RDP credentials:
- Hostname: PublicDNS / IP of machine
- Port : 3389
Username: To connect to the operating system, use RDP and the username is Administrator.
Password: Please Click here to know how to get password .
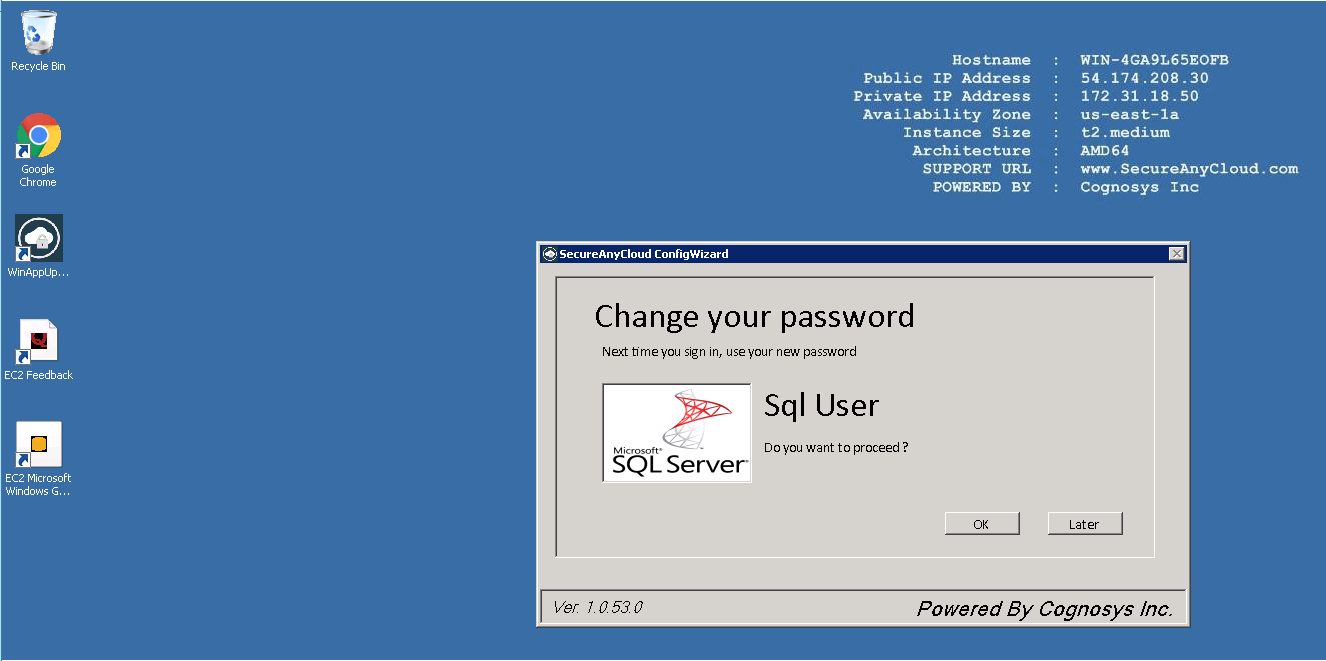
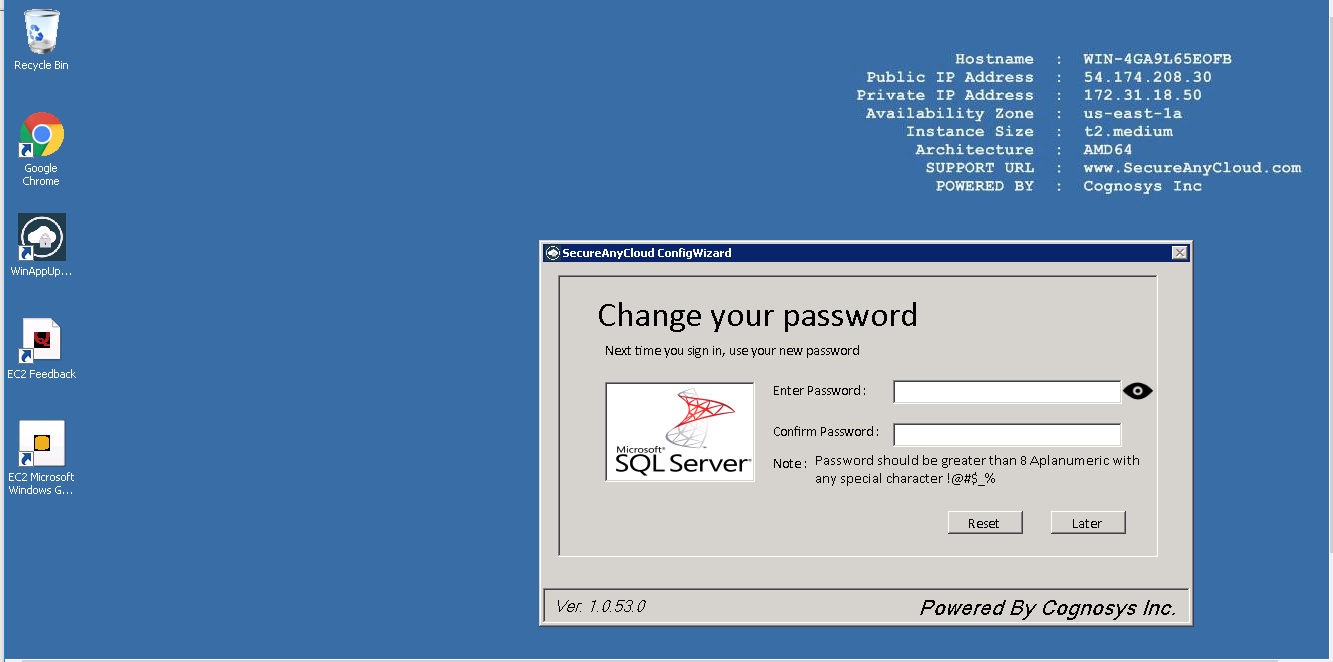
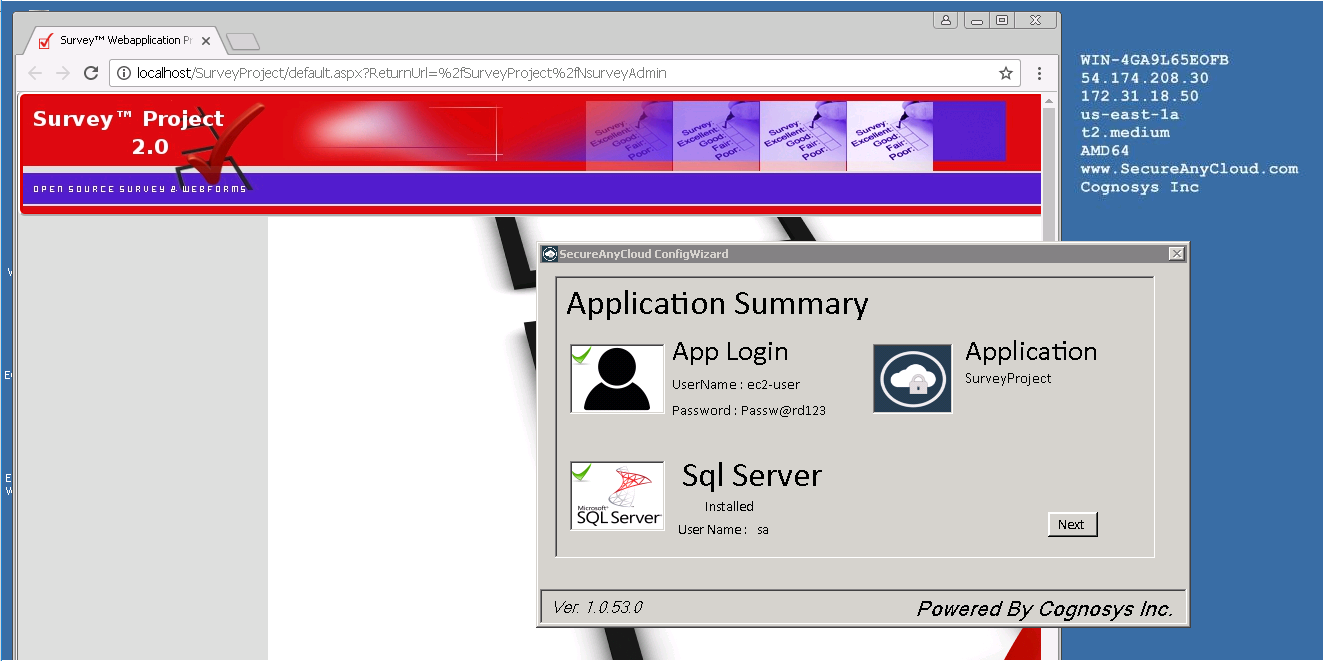
Step 2) Database Login Details:
Username : sa || Password : Passw@rd123
Please change the password immediately after the first login.
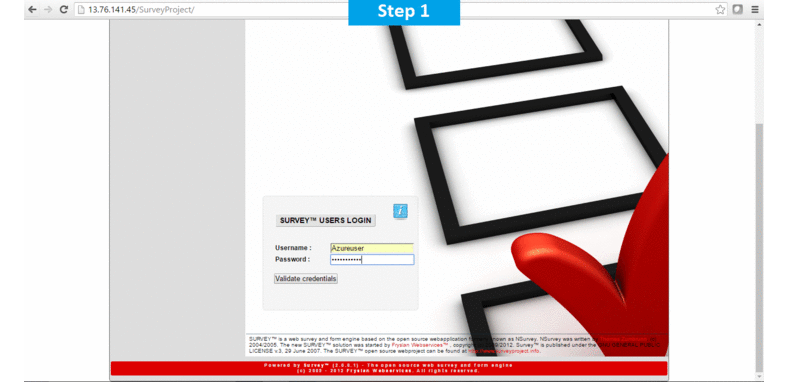
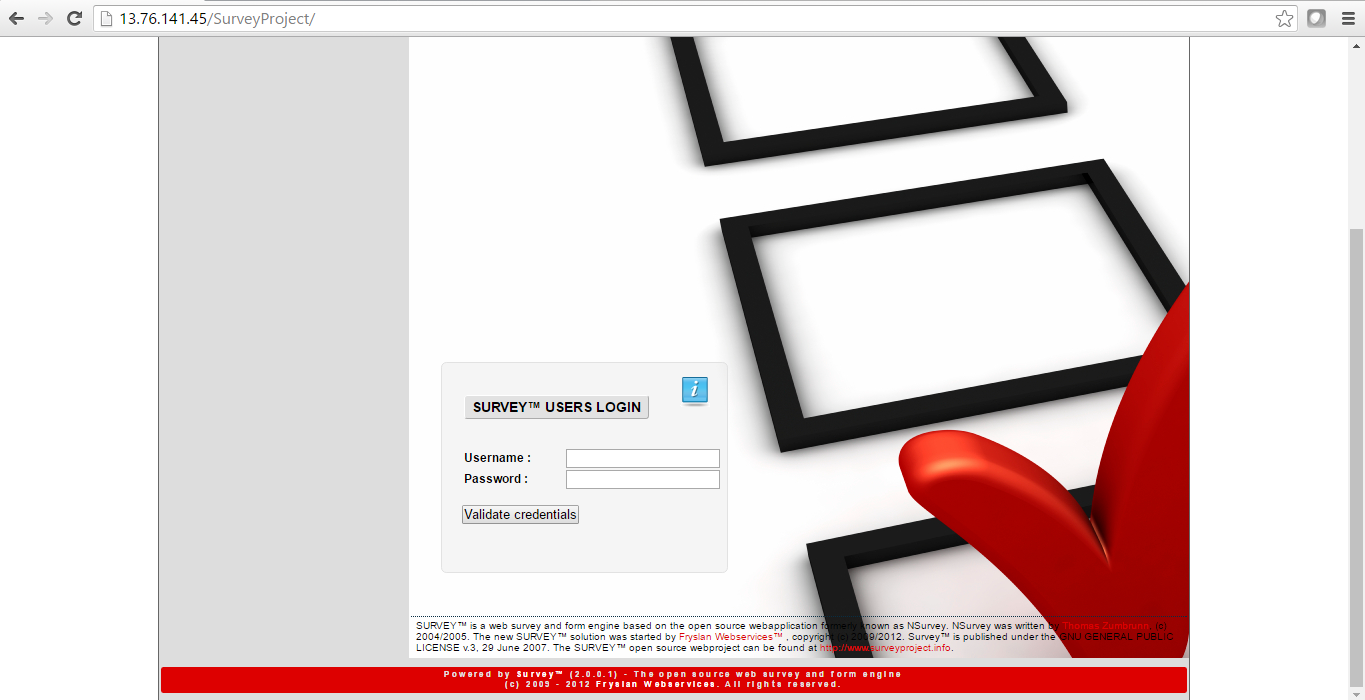
Steo 3) Application URL: Access the application via a browser at http://PublicDNS/surveyproject
- User Name: ec2-user
- Password: Passw@rd123
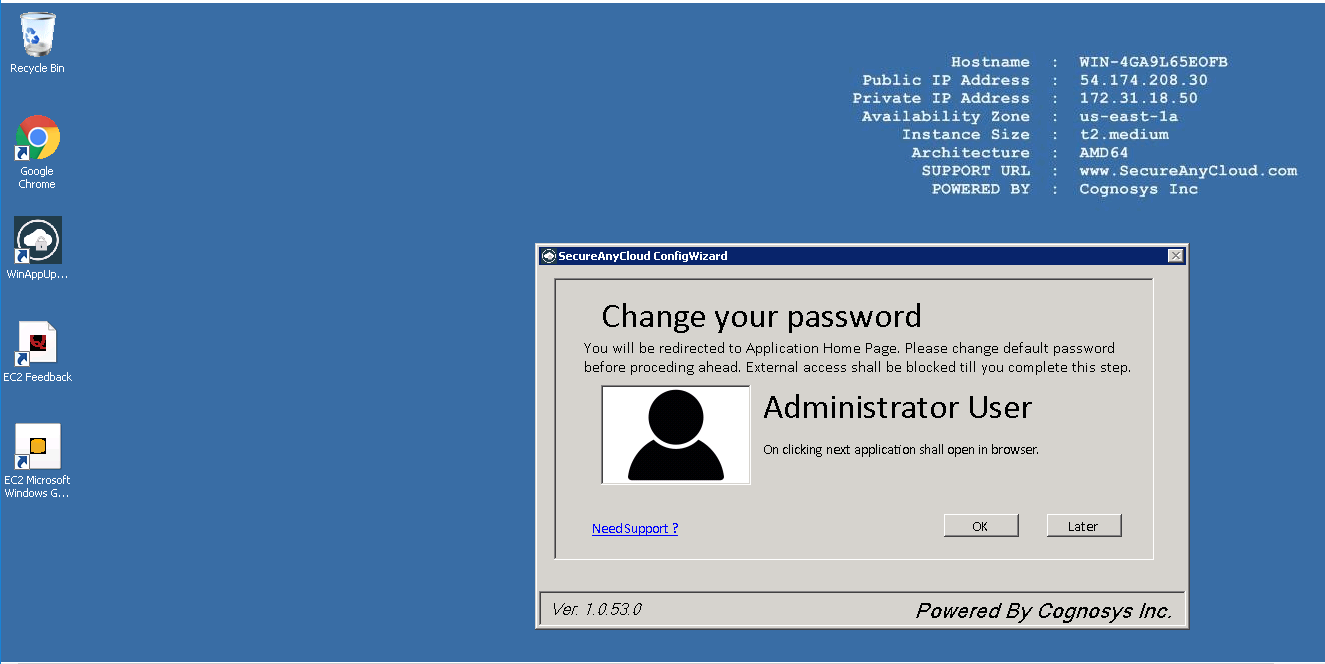
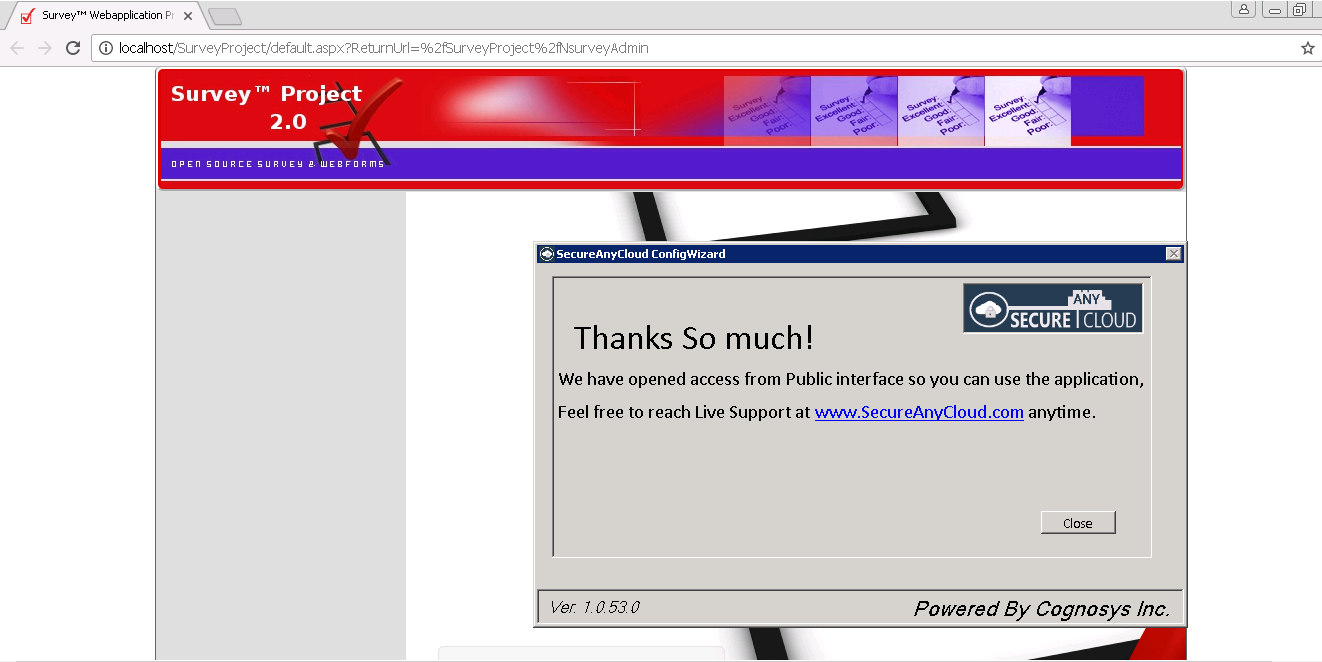
Steps to access the Admin Panel:
- To login to Survey Project Administrative Panel, you need
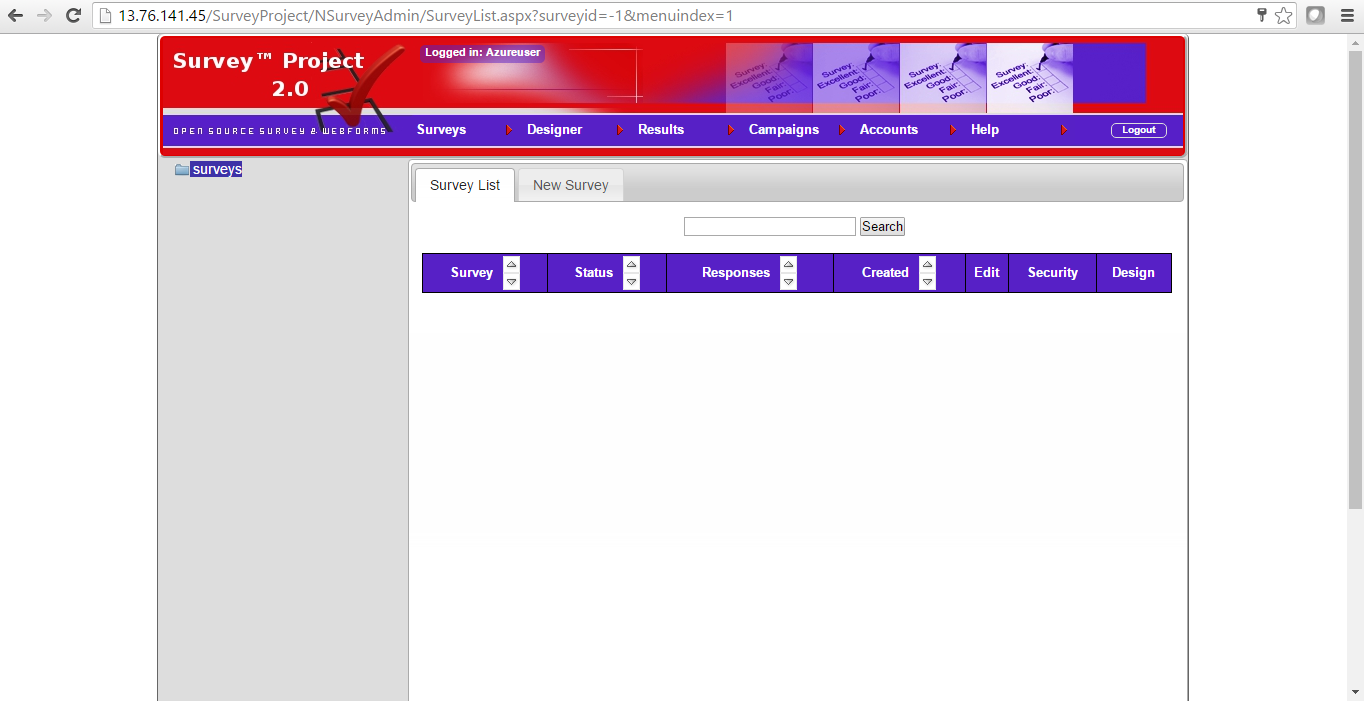
to open your browser and navigate. to http://PublicDNS/SurveyProject/NSurveyAdmin - Enter username and password in the given fields and click on the “Login” button to access the Admin Panel.
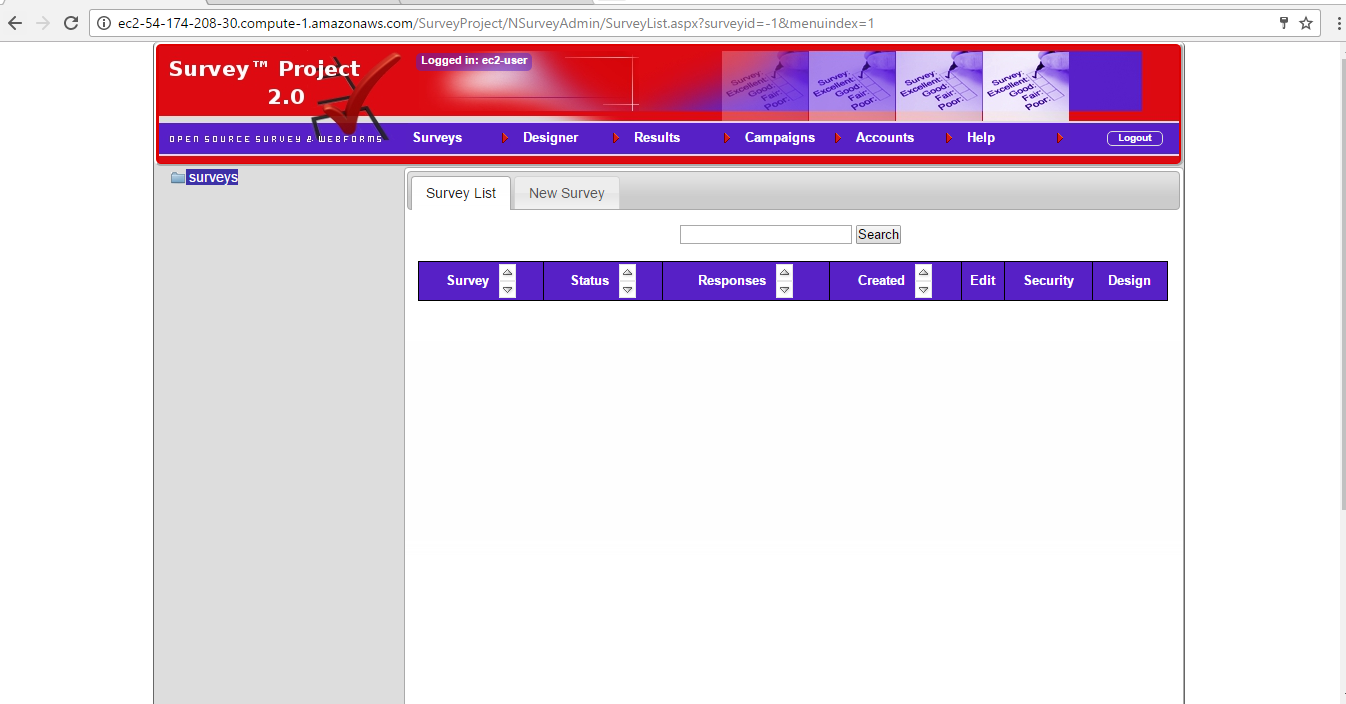
- After successful login to the Admin Panel, you will get access to Survey Project Home Page.
Steo 4) Other Information:
1. Default installation path: will be in your web root folder “C:\inetpub\wwwroot\SurveyProject”
2. Default ports:
- Windows Machines: RDP Port – 3389
- Http: 80
- Https: 443
- Sql ports: By default these are not open on Public Endpoints. Internally Sql server: 1433.
Configure custom inbound and outbound rules using this link.
AWS Step By Step Screenshots


Azure
Installation Instructions for Windows
Note: How to find PublicDNS in Azure
Step 1) RDP Connection: To connect to the deployed instance, Please follow Instructions to Connect to Windows instance on Azure Cloud
Connect to virtual machine using following RDP credentials:
- Hostname: PublicDNS / IP of machine
- Port : 3389
Username: Your chosen username when you created the machine ( For example: Azureuser)
Password : Your Chosen Password when you created the machine ( How to reset the password if you do not remember)
Step 2) Database Login Details:
Username : sa || Password : Passw@rd123
Step 3) Application URL: Access the application via a browser at http://PublicDNS/surveyproject
- User Name: Azureuser
- Password: Passw@rd123
Step 4) Other Information:
1.Default installation path: will be in your web root folder “C:\inetpub\wwwroot\SurveyProject”
2.Default ports:
- Windows Machines: RDP Port – 3389
- Http: 80
- Https: 443
- Sql ports: By default these are not open on Public Endpoints. Internally Sql server: 1433.
Configure custom inbound and outbound rules using this link
Azure Step by Step Screenshots

Installation Instructions For Windows
Step 1) VM Creation:
1.Click the Launch on Compute Engine button to choose the hardware and network settings.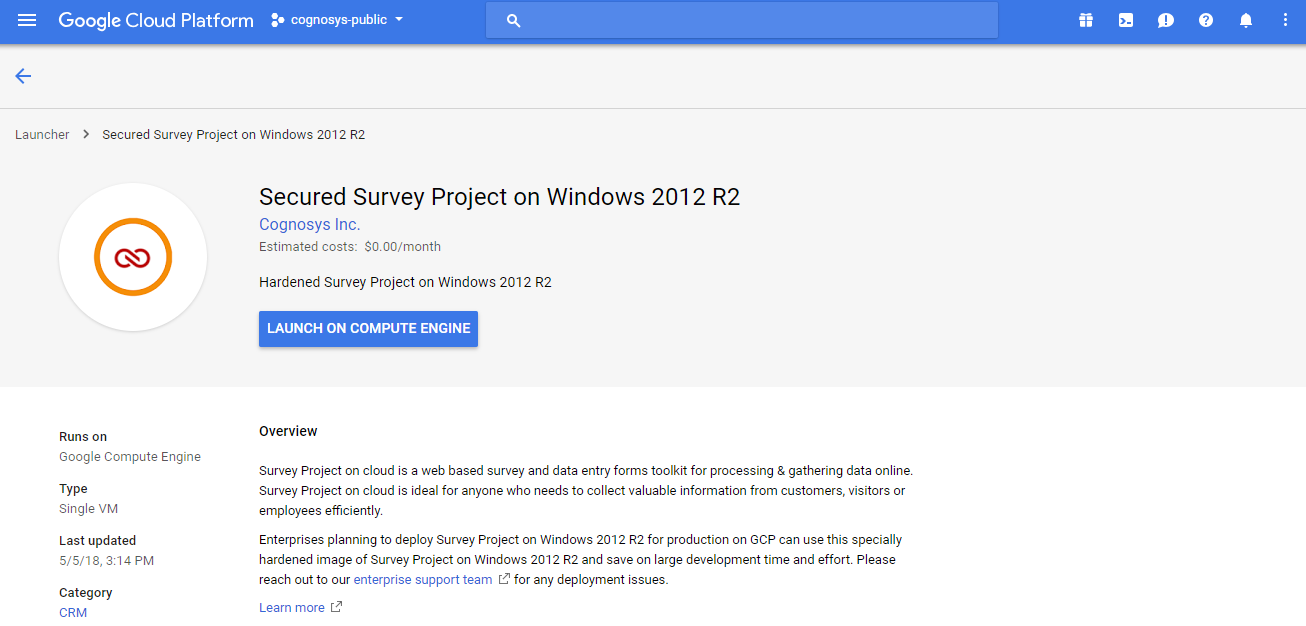
2.You can see at this page, an overview of Cognosys Image as well as some estimated costs of VM.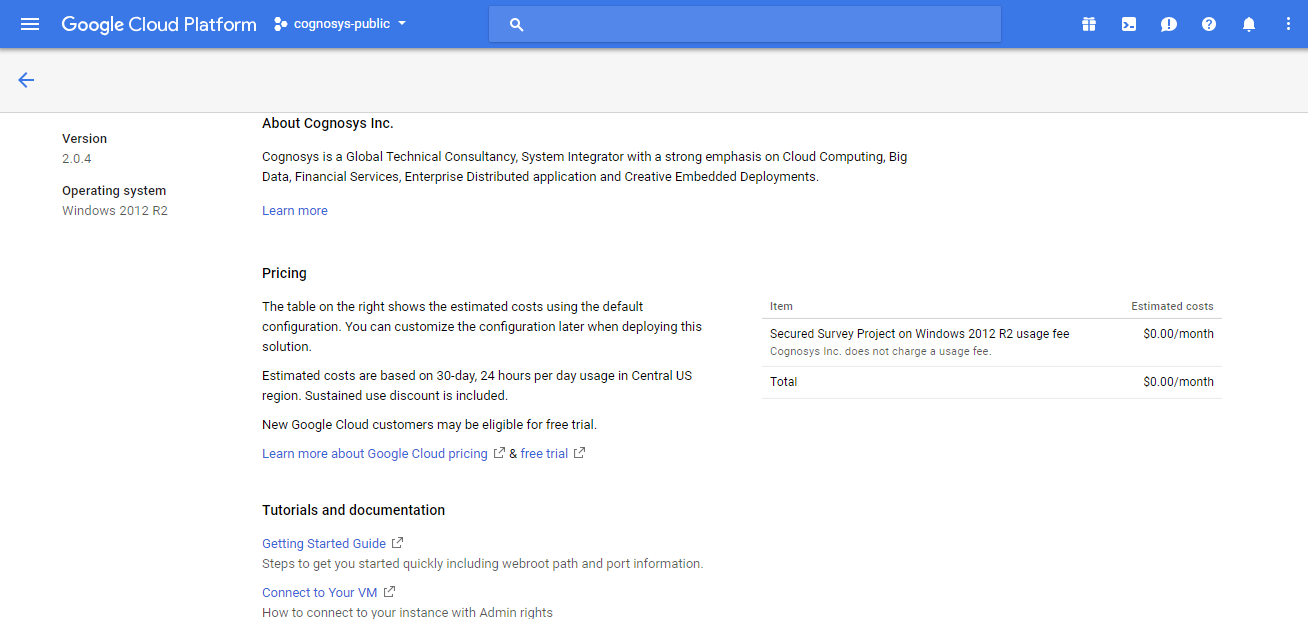
3.In the settings page, you can choose the number of CPUs and amount of RAM, the disk size and type etc.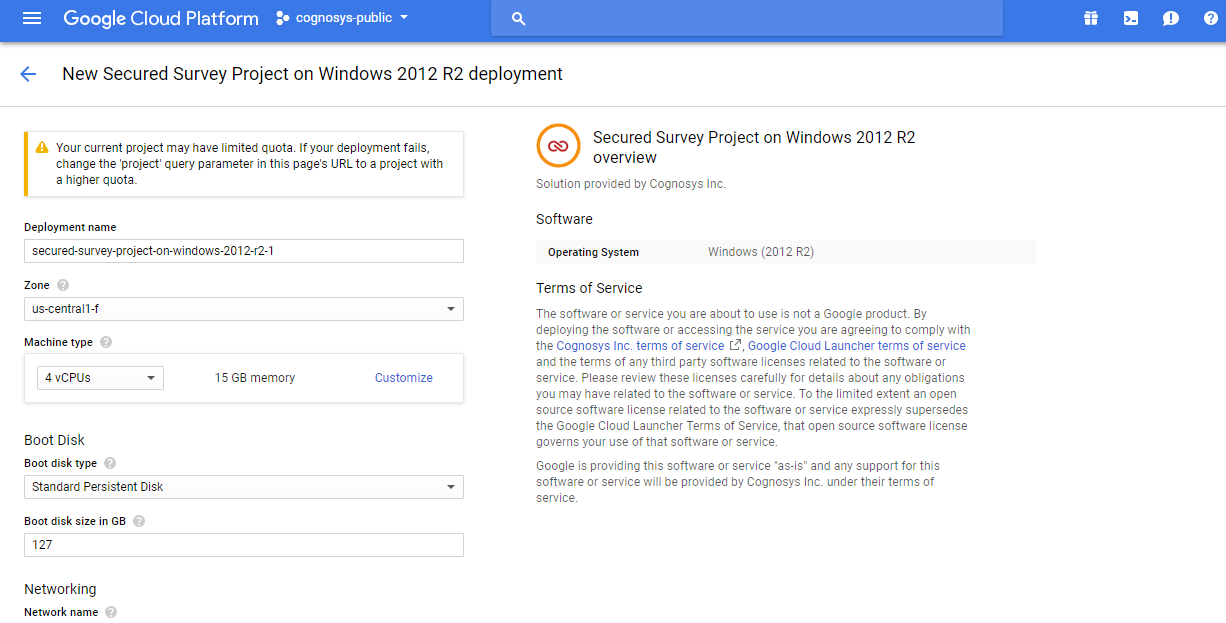
Step 2) RDP Connection: To initialize the DB Server connect to the deployed instance, Please follow Instructions to Connect to Windows instance on Google Cloud
Step 3) Database Login Details:
The below screen appears after successful deployment of the image.

For local MySQL root password, please use the temporary password generated automatically during image creation as shown above.
i) Please connect to Remote Desktop as given in step 2 to ensure stack is properly configured and DB is initialized.
ii) You can use MySQL server instance as localhost, username root and password as shown above.
If you have closed the deployment page you can also get the MySQL root password from VM Details “Custom metadata” Section
Videos
External embedded media removed for production hardening.
