Overview
GIMP is a very widespread graphic program, and however not as popular as Photoshop, there are a good many designer who use it as their first choice.GIMP -GNU Image Manipulation Program, starting out with a new interface can be intimidating, particularly when you downloaded it just because you wanted to make a few simple modifications like cropping or resizing an image. Opportunely, there are lots of resources out there to help you get started. AS a GIMP user for over a decade, I still think of myself a largely being a beginner. I’m not a graphic designer, but I’m constantly finding myself in situations where I need to make small adjustments and modifications to files I have in hand to fit a specific need. Make this image fit a different space. Use this icon but make it fit with a different color palette. Make something that looks like another image but change the text, without having the original. Create a mockup that a real designer can use to turn into a completed layout.There are ton of lists out there of what various users think are the latest and greatest tricks for GIMP, whether it’s adding edges or glowing text or a motion blur or some other cool tip, knowing how to use a program isn’t just a collection of one off recipes. It’s about knowing some foundations, where to look for things, and how to learn more.
How to make GIMP more like Photoshop
If you’re starting off as a fresh user, as opposed to a Photoshop convert, there’s probably no need to take this approach. But if you’re used to the particular look and feel of Photoshop, or a similar photo editing program, GIMP’s interface may feel foreign. Photography Riley Brandt offers some tips for switching the GIMP interface up to be more Photoshop-like.Though, using GIMPshop.com, which installs adware along with your GIMP software packages. You’re better off doing the configuration itself. GIMPshop itself was once a legitimate open source project, and though no longer actively maintained, the old files can still be found on SourceForge.
An Introduction to GIMP Photo Editing:
Before we get started, there are a few things you need to know:
- Images tend to open in a zoomed-out view. To set the image to a more appropriate size go to View > Zoom > Fit Image in Window.
- GIMP does not support non-destructive editing. Any edits you make to a file will be permanent. For this reason, always work on a duplicate copy of the file with the untouched original stored safely.
- Also, consider applying all your edits to duplicate layers within the image (right-click the layer in the Layers panel on the right and select Duplicate Layer). You can then delete the layer if you want to remove that edit later on.
1. How to Straighten the Horizon in GIMP
Getting the horizon askew is one of the most common mistakes in photography, and also the easiest to fix. And unless you’ve deliberately shot your image that way for artistic reasons, it’s the one thing you should always correct.
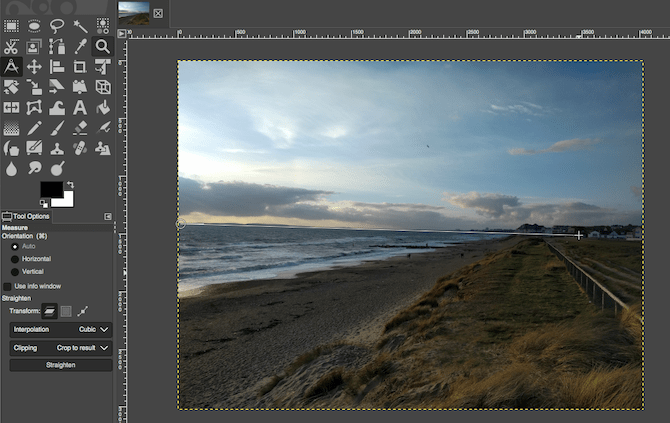
GIMP 2.10 has a dedicated horizon straightening tool. Select the Measure Tool from the Toolbox in the left hand column.
Click on a point on the horizon in your image, drag along the horizon line, then release the mouse button. Now, under Tool Options, set Clipping to Crop to result, then click Straighten.
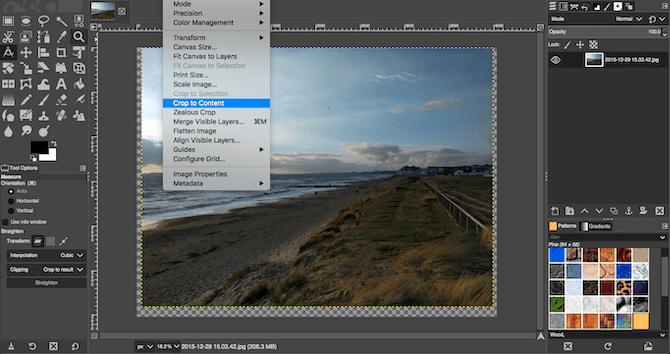
Your image will now be cropped and straightened. If you’re happy with the result, finish the job going to Image > Crop to Content to remove any blank areas around the corners of the canvas. If you aren’t, hit Undo and try again.
2. How to Crop Photos in GIMP
Cropping is an effective way of tightening up a photo’s composition or removing unwanted objects around the edges.Select the Crop tool (Shift + C). Now click and drag inside the image to draw the outline of your new crop. Hold the Shift key to maintain the photo’s original aspect ratio.
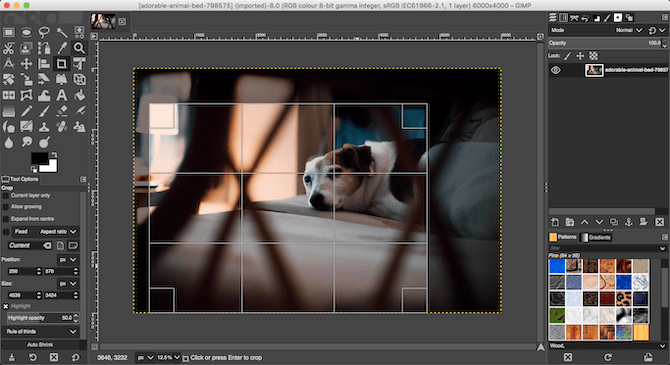
To adjust your selection, hold your mouse in the corners or edges of the frame and then drag in or out to correct. Alternatively, click in the middle of the frame and drag to reposition the cropped area. Hit Enter to confirm.If you’re cropping to improve composition, experiment with the composition guides in the Tool options. This enables you to overlay a rule-of-thirds grid.
3. How to Improve Exposure in GIMP
When your photo is too light or dark, or contains blown highlights where the brightest parts of the frame are rendered as pure white with no detail, you need to fix the exposure.
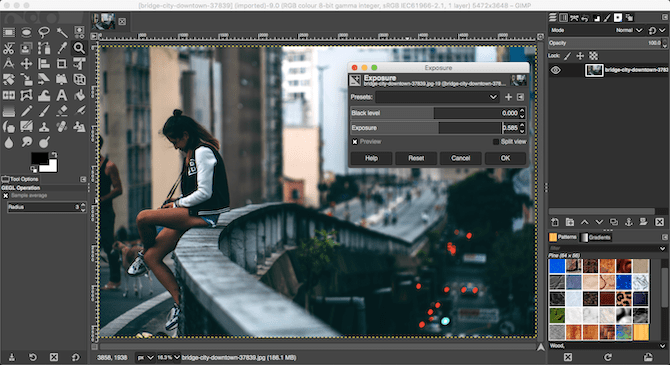
Go to Colors > Exposure. In the dialog box that opens, drag the Black level slider to the right to darken the blacks in your image. Drag the Exposure slider right to brighten the image, and left to darken it.
Make sure Preview is checked to show the real-time effect of your changes, and select Split view to see the before and after effects in the same image. When you’re happy, click OK to apply the change.
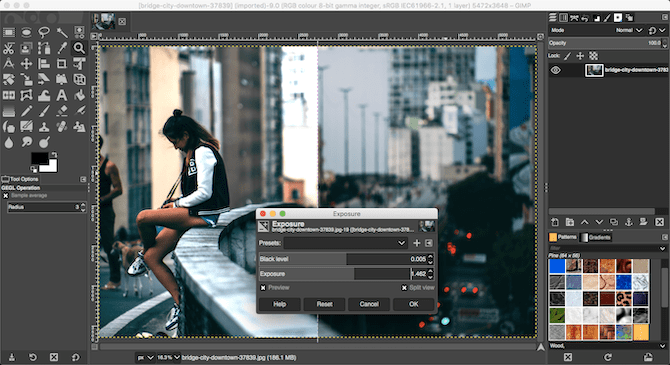
When you’re working with JPEG files, you should try and keep the exposure tweaks fairly subtle or you’ll risk introducing noise or otherwise degrading the image.
4. How to Correct White Balance in GIMP
White balance is used to remove an unrealistic color cast from an image. While it may seem obvious that a white area within an image should look white, sometimes the camera can be thrown off by ambient lighting conditions. Under certain artificial lights, for instance, the image may get an orange hue—or under cloudy skies it may look blue.

To fix this, go to Colors > Auto > White Balance, and it should be instantly corrected.
If you aren’t happy with the automatic results, there’s a manual option you can try. Go to Colors > Levels, and toward the bottom of the window that opens click on the middle eyedropper icon. This will enable you to set a gray point in your image, an area of neutral color off which all the other colors will be based.
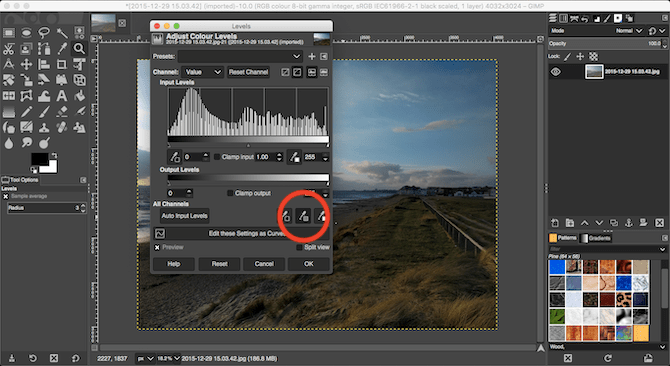
With the eyedropper selected, find an area of gray in the photo and click on it. The color of the photo will update in real time. You can experiment with different grays in different parts of the picture until you find one that you’re happy with.
5. How to Tweak Photo Colors in GIMP
Most photos can benefit from tweaking the colors. Photos with bright, vivid colors often get a strong reaction on social media, but you can also create more subdued colors if that suits the effect you’re going for with your photo.
Start by heading to Colors > Hue-Saturation. You can boost the colors across the entire image with the Saturation slider. Beware that it’s very easy to oversaturate your images, so take it slowly. A good rule is to set the saturation to a level that looks okay, then just drop it back a little.
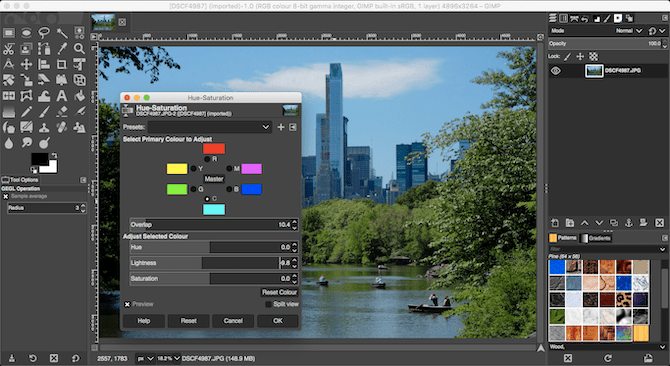
To get even more control you can adjust the red, magenta, blue, cyan, green, and yellow parts of your image separately. Here, the Lightness slider becomes more important than the Saturation slider.
For example, to make a sky look bolder and bluer focus on the blue and cyan colors, and set the Lightness slider to a darker level. Or to make grass and foliage look greener and more vivid, increase the Lightness level for green.
If you’re left with harsh edges around the areas of color that you’ve adjusted, drag the Overlap slider to the right to help blend them better.
6. How to Add Photo Contrast in GIMP
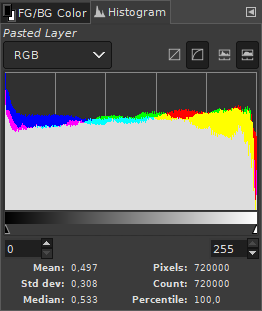
The simplest way to add impact to a photo is to boost the contrast. It can often turn an otherwise flat image into something packed with drama. The best way to do this is with the Levels tool, which you can open at Colors > Levels.This opens the Levels dialog box, with a histogram (labelled Input Levels) in the top half. This graph shows the tonal range of your image: black on the left, white on the right, and all the shades of gray in between.
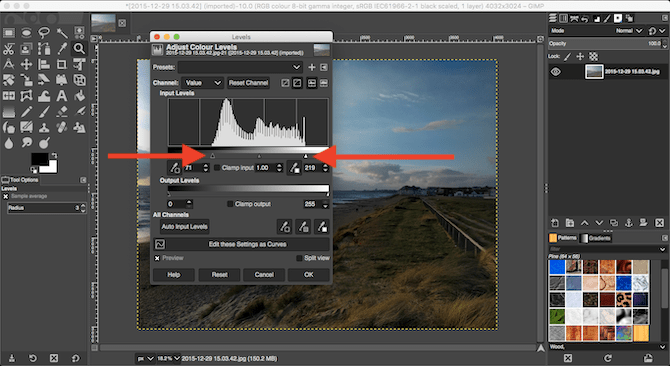
All you need to do is drag the handles below the histogram inwards until they’re in line with the first clump of pixels on the left and right edges of the chart. This sets the darkest point of the image to 100 percent black, and the lightest point to 100 percent white, and maximizes the contrast in the process.
7. How to Remove Dust From Photos in GIMP
GIMP has a quick and easy tool for removing specs from an image caused by dust on your camera’s lens or sensor.
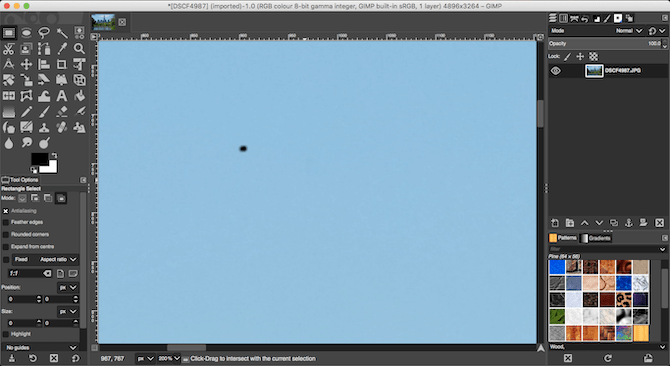
First, zoom into your image by going to View > Zoom > 1:1, or by hitting 1 on your keyboard. You can scroll around the image by holding the spacebar and then clicking and dragging with your mouse.Next, select the Healing Tool (H). Use the square bracket keys ([ and ]) to adjust the size of the healing brush so that it matches the size of the speck you want to remove.

Hold down Ctrl on Windows, or Cmd on Mac, and then click an area of the same color right next to the spot you want to remove. Then release the Ctrl or Cmd key and click the spot. It should now disappear, or you can paint over it a little more until it’s gone.
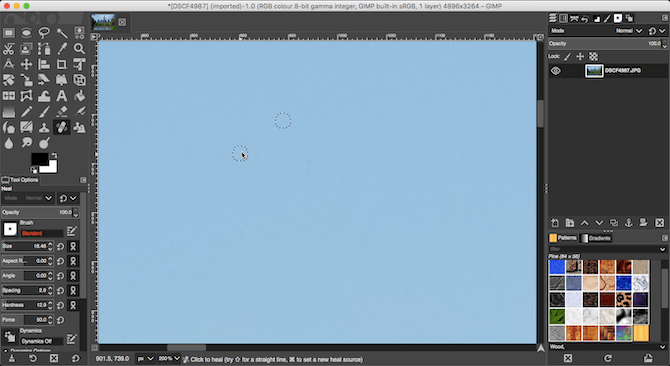
What you’re doing is telling GIMP to copy the pixels from the first click and paste them on top of the second (the speck of dust). It then blends them seamlessly and naturally.Repeat this for all the unwanted spots on your image.
8. How to Remove the Background in GIMP
You can’t always control the conditions you’re shooting in. One of the biggest annoyances is when you’re shooting on a cloudy day, and you end up with large expanses of flat, white sky in your shots. Fortunately, you can remove the background in GIMP, which enables you to replace the sky with something a lot more interesting.
To start, go to Layer > Transparency > Add Alpha Channel. This will let you make the background transparent in GIMP, so you can drop in a new one behind in.
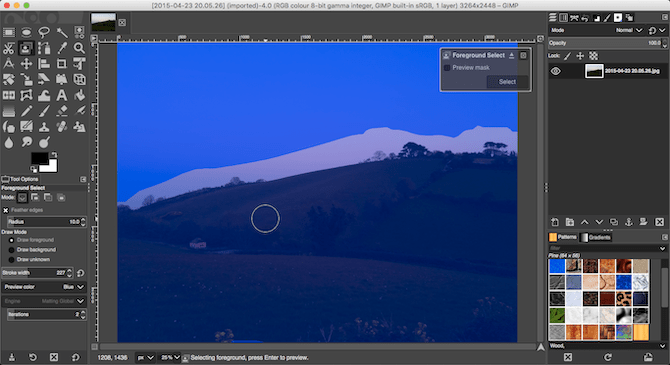
Next, pick the Foreground Select Tool from the Toolbox. Draw a rough selection around the foreground object in your image and hit Enter.
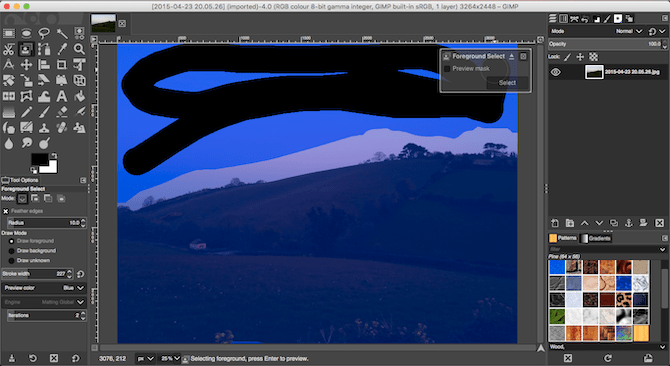
This splits the image into rough foreground and background regions. Now, paint over the background, making sure to include all areas of different color or texture. Hit Enter when you’re done.
![]()
Finally, press Delete. This deletes the selection and makes the background transparent. To finish, just copy another image—such as a blue sky—onto a new layer and place it below this foreground layer.
9. How to Resize Images in GIMP

The last job in editing your photos is to resize them correctly. This is simple. Go to Image > Scale Image, then under Image Size enter a new width for your image, in pixels. Set Interpolation to Cubic, which is the slowest but also the best quality.
Ideally, you should only ever make your images smaller. If you do need to make them bigger, it’s better to do it in multiple increments of 10 percent, rather than all at once.If you’re resizing your photos with the plan to print them, use Image > Print Size instead. make sure you know all about DPI and how it affects the size of your printed images before you do that.
—
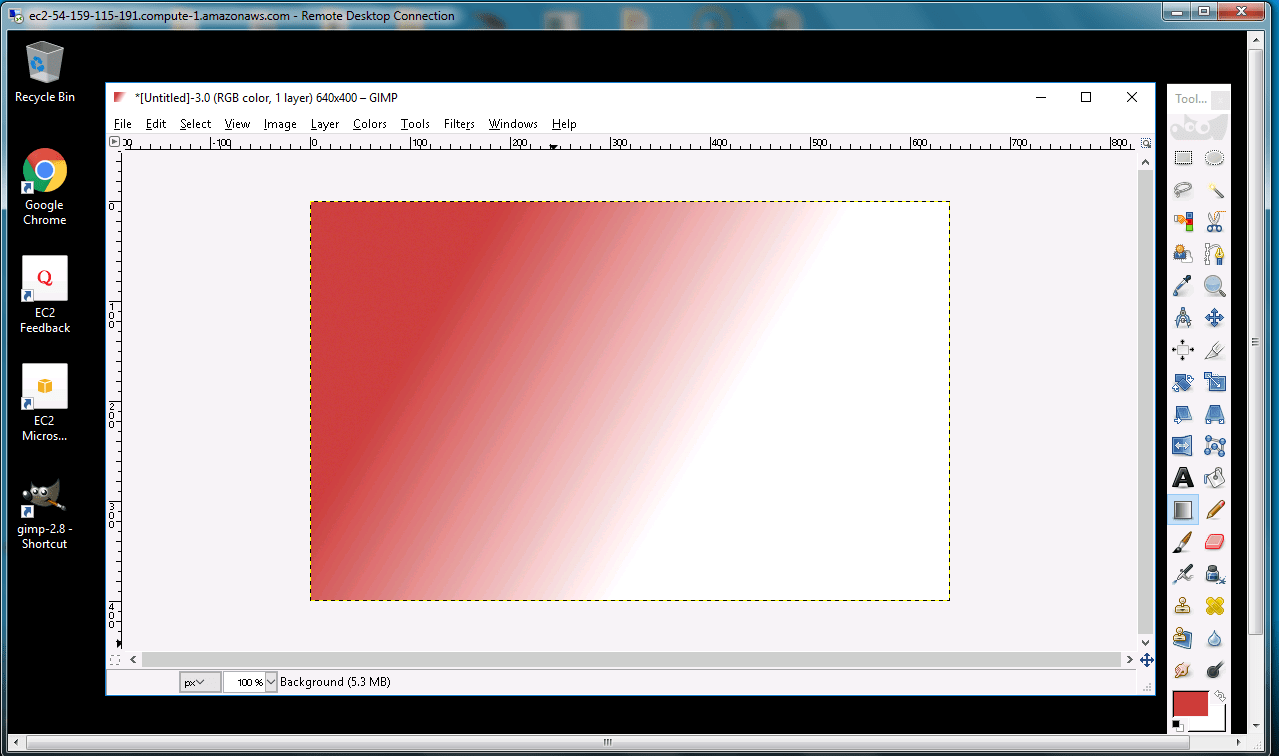
GIMP is an acronym for GNU Image Manipulation Program. It is a freely distributed program for such tasks as photo retouching, image composition and image authoring. The terms of usage and rules about copying are clearly listed in the GNU General Public License.
GIMP is a cross-platform image editor available for GNU/Linux, OS X, Windows and more operating systems. It is free software, you can change its source code and distribute your changes.
Whether you are a graphic designer, photographer, illustrator, or scientist, GIMP provides you with sophisticated tools to get your job done. You can further enhance your productivity with GIMP thanks to many customization options and 3rd party plugins.
GIMP on Cloud runs on Amazon Web Services (AWS) and Azure is built to maintain the program’s legacy as a powerful and up-to-date.
GIMP is owned by GIMP (https://www.gimp.org/) and they own all related trademarks and IP rights for this software.
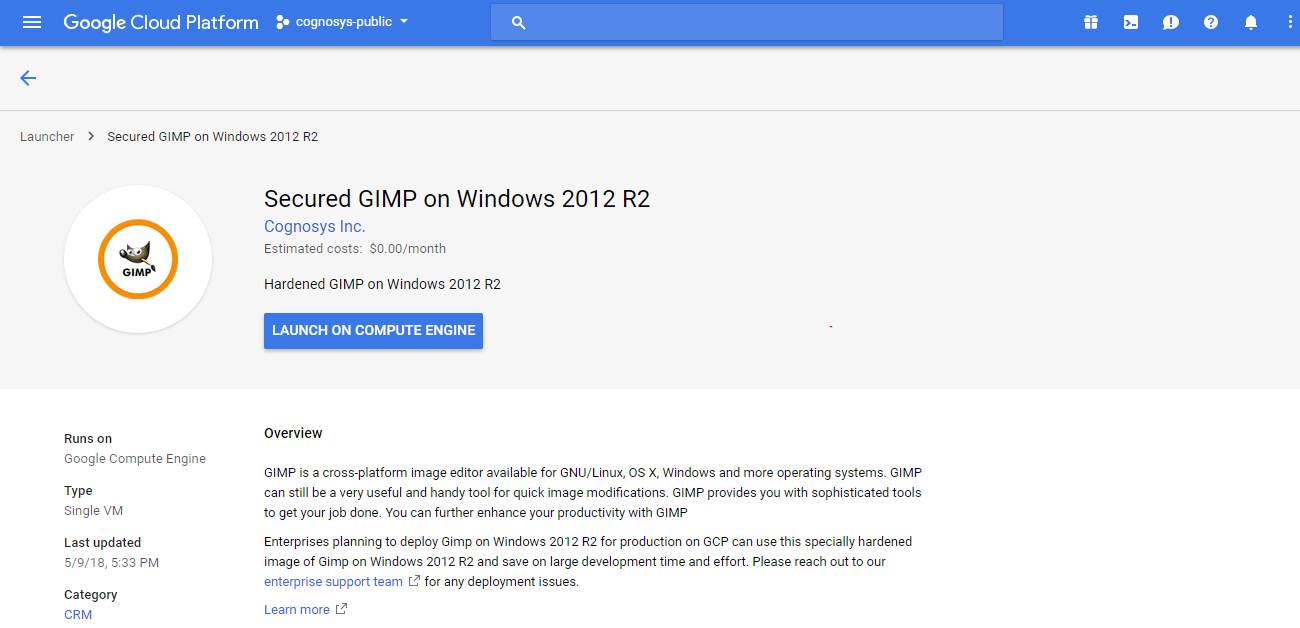
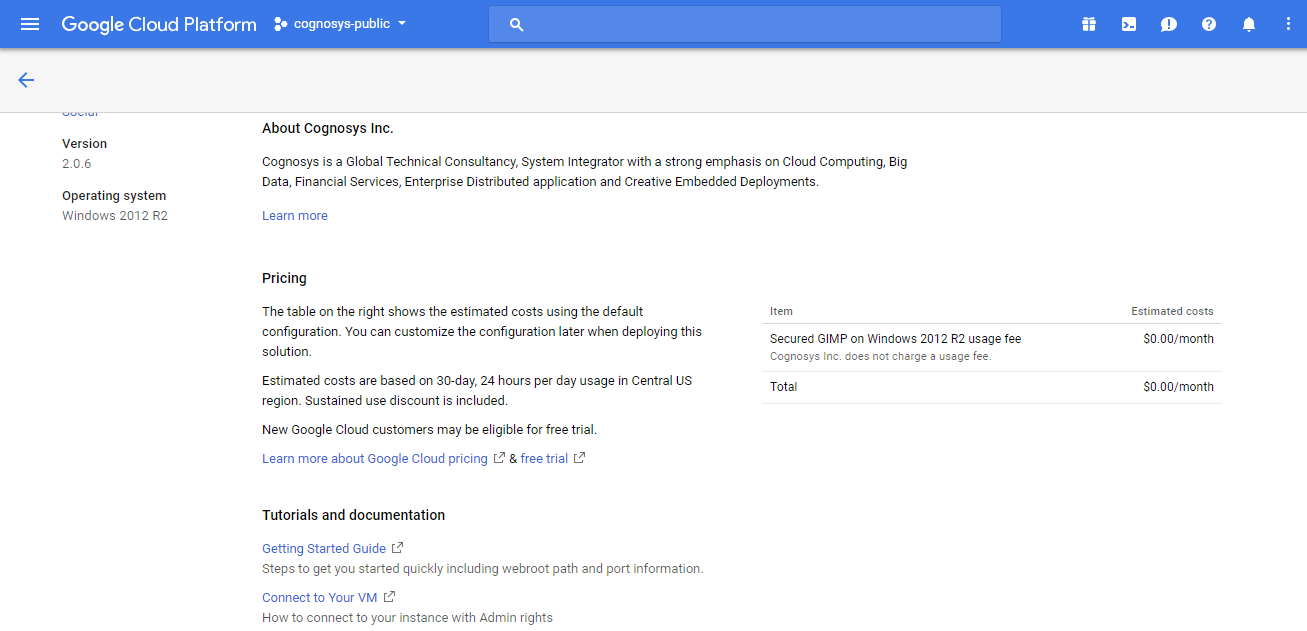
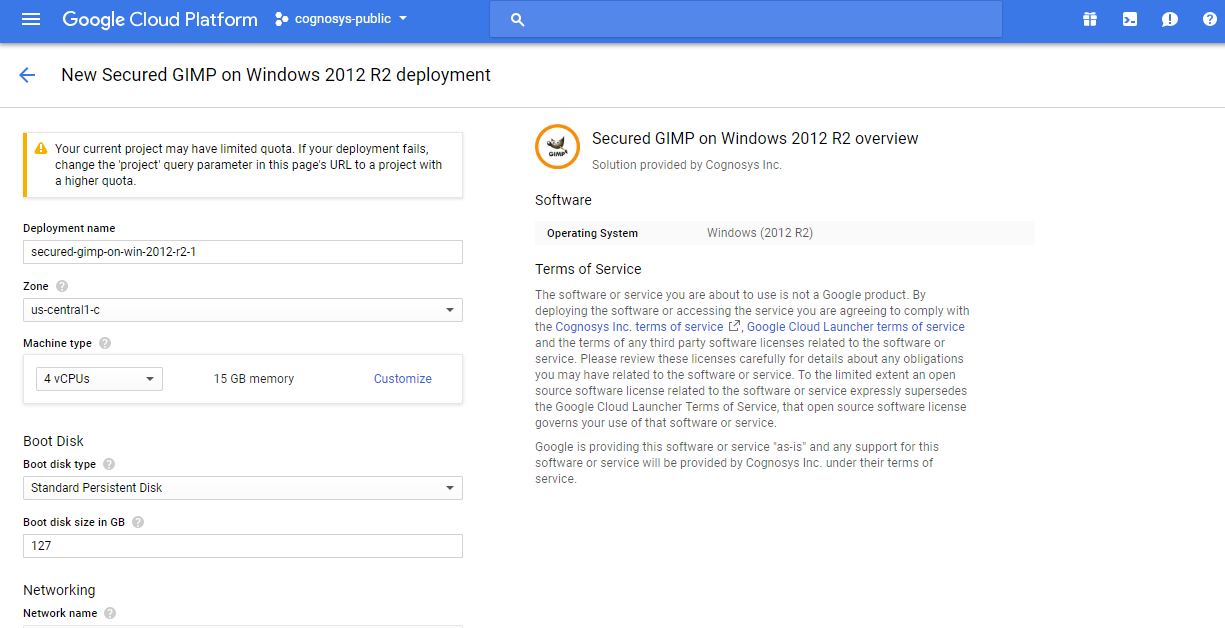
Cognosys provides hardened images of GIMP on all public cloud i.e. AWS marketplace and Azure.
GIMP on cloud for AWS