
1-click AWS Deployment 1-click Azure Deployment 1-click Google Deployment
Overview
Freemind is an open source software program written in Java. A mind map is an informational organization tool used to provoke ideas from one or more users by placing a topic in the center of an empty space and branching out with related ideas. The general principle of mind-mapping software is that it will help you to organize, link, and integrate thoughts. The primary focus of a mind map involves making an arrangement of words into a picture, which has a key concept at the centre or at the top, and related words and concepts linked with the key concept by means of lines and arrows. Mind mapping software can be used for brainstorming and conceptualizing, where you have ideas you need to put down, structure, expand, and connect.
Freemind also works as a tree editor. You can create foldable trees of plain text notes enriched with colors, icons, cloud-shapes, and other graphics. This will help you to customize your map. For example, you can use clouds to group together the nodes that are interrelated, colors to differentiate between completed tasks and other tasks, and icons to prioritize a node.
Freemind is useful for organizing your ideas and for keeping track of all the things that are involved in completing a task. You can use Freemind to keep a personal knowledge base that is easy to manage. You can take advantage of the scientific method and write-everything-down approach in your daily life. Freemind is a valued and real tool for those who really want to manage themselves thoroughly.
Mind maps are one of the best known logical organization tools. It’s a graphic representation of connections between concepts and ideas. The idea starts from a central topic, and we gradually connect them with different branches and label it with notes, symbols, pictures, links, and more.
How to Pick a Mind Map Tool
Choosing a mind map software depends a lot on your needs. With so many apps available in the market, it’s not an easy task. These factors shown on a mind map will help you decide

1.Coggle is an online tool for creating, sharing mind maps and flow charts. The app lets you and your team collaborate on notes, brainstorming sessions, and plans to complete your projects efficiently. Every mind map starts with a single central topic.Click the Plus (+) button to add a branch and enter your text in the box. You can also format your text, insert links, add images, and icons to elaborate on your key points. Continue adding branches as much as you want. Right-click on any item to explore more features.
With a free account, you can create three private diagrams, collaborate in real-time, and upload unlimited images. The export options include TXT, PDF, and JPEG.
Unique Features
- Add multiple central nodes in a single workspace. The app also supports keyboard shortcuts to create mind maps quickly.
- View the entire version history of the mind map. You can check who last edited the map along with the date.
- Message team members, leave notes, and chat in real-time to develop ideas.
- Create loops and branches to connect other mind maps and see relationships.
2. GitMind
GitMind is a free, online mind map tool. It lets you visualize complicated concepts, generate new ideas, make lists with task priorities, and prepare for a presentation. To get started, type in the topic name, right-click and choose Insert node. Then type your text in the box.With GitMind, you can assign a task priority and progress meter with symbols. Also, add images and comments without cluttering the node.Choose Insert subnode to create sub-branches. Then click the Relation line to show the relationship between specific ideas. You can export a finished mind map as text, PNG, JPEG, PDF, or SVG.
Unique Features
- Intuitive with a well-designed toolbar. Keyboard shortcuts help you quickly create a mind map.
- Day and night themes are available. Modify mind maps with custom lines, border color, transparency, shape, and thickness.
- Arrange the mind map in five different layouts and reset them at any time.
- Share the mind map you created with a link or collaborate with other people in real-time.
3. Canva
Canva is a web-based graphic design app that makes it easy to create mind maps. Equipped with ready-to-use templates and toolset, you can create beautiful mind maps without any effort.
Enter the term “mind map” in the search field, and within a few seconds, you’ll see many different templates. The built-in tools allow you to edit photos, customize text, background, and more in your mind map. The export options include PNG, JPEG, and PDF.The free account gives you 1GB of free storage space, access to 8,000 templates, image uploads, and collaboration with ten members.
Unique Features
- Powerful drag and drop editor with a vast selection of tools and templates.
- Embed the mind map and share it on social media or email it right from the app. You can also collaborate in real-time.
- Insert pictures, embed videos from YouTube, TED, links from the web or Twitter, and GIF from Giphy.
- Use symbols, color codes, speech bubbles, and icons for informative presentations.
4. InfoRapid KnowledgeBase Builder
Traditional mind mapping tools are hierarchical. When you start creating complex linkages, they quickly get confusing and unusable. But with this app, you can join multiple ideas, and yet it adjusts your map dynamically to an elegant layout. You click a topic, and everything re-arranges around it automatically.The app lets you build a mind map from scratch. You can import notes, links, images, and attach it to any item or a relation. There is also an option to integrate it with a data source to automatically create a mind map from text files, Wikipedia articles, and Twitter tweets.To get started, type in the topic name and click New Item. For each topic, type a name and add a description. You can add descriptive linking phrases on relationship lines and select colors, dotted or solid lines. Or even customize the style of the ends, with or without arrows.
Unique Features
- Insert multiple items, edit or delete them, and use drag-and-drop for moving relations.
- Toggle between a 2D and 3D displaying mode and also show or hide cross-connections.
- Build a map from MediaWiki, including all the sister Wikipedia sites. You can also import outlines, CSV, RDF, XSD, and more.
- Generate flashcards to memorize items practice with quiz sessions.
5. Sketchboard
Sketchboard is an online digital whiteboard app that allows you to mind map with sketches. The board comes with a wide variety of pre-designed icons for use in software diagrams, mind maps, roadmaps, and more. Drag and drop the icons from the shape gallery and type in the topic name.To create a connection, hold the Shift key and double-click to create a sibling. Double-click the empty area to create sub-branches.Then use the toolbar to change size, color, or add text. With a free account, you can create three private boards with up to five members. Check out the Sketchboard pricing page for more details.
Unique Features
- The drawing board has an unlimited canvas; drag the canvas area to get more space for mind mapping.
- Mix and match ideas with shapes, freehand drawings, notes, and roadmap.
- Do a live chat group discussion to share your design, add-on board comments, and share links. If you’re a Slack user, you can create visual messages right inside Slack.
- Export board as SVG, PNG, and PDF.
6. MindMaster
Edraw MindMaster is a cross-platform and multi-functional mind mapping software. The app offers an interface similar to Microsoft Office. On the ribbon, you’ll find all the key mind map elements. You can insert topics, pictures or clip art, draw relationship lines, add notes, and more.The left panel is your canvas, and in the right sidebar, you’ll find options to adjust the content, change the appearance of your diagrams, add a background, tasks, view and export outlines, and more. There’s a handy color strip below the canvas to set the line and fill color.
Unique Features
- The app offers a vast library of ready-made templates, vector diagrams, and clip art to infuse creativity.
- Automatically create slides by disassembling your mind map into separate branches. Add notes, background, design to the slides, and export them as PPT or PDF.
- Store files in Edraw cloud storage for access and collaboration on the move
- Use a handy Gantt Chart mode to visualize and track progress on any project.
The map will contain information about wine types, about wine tastes and about its production. The first version of the mind map is shown in the below figure:
|
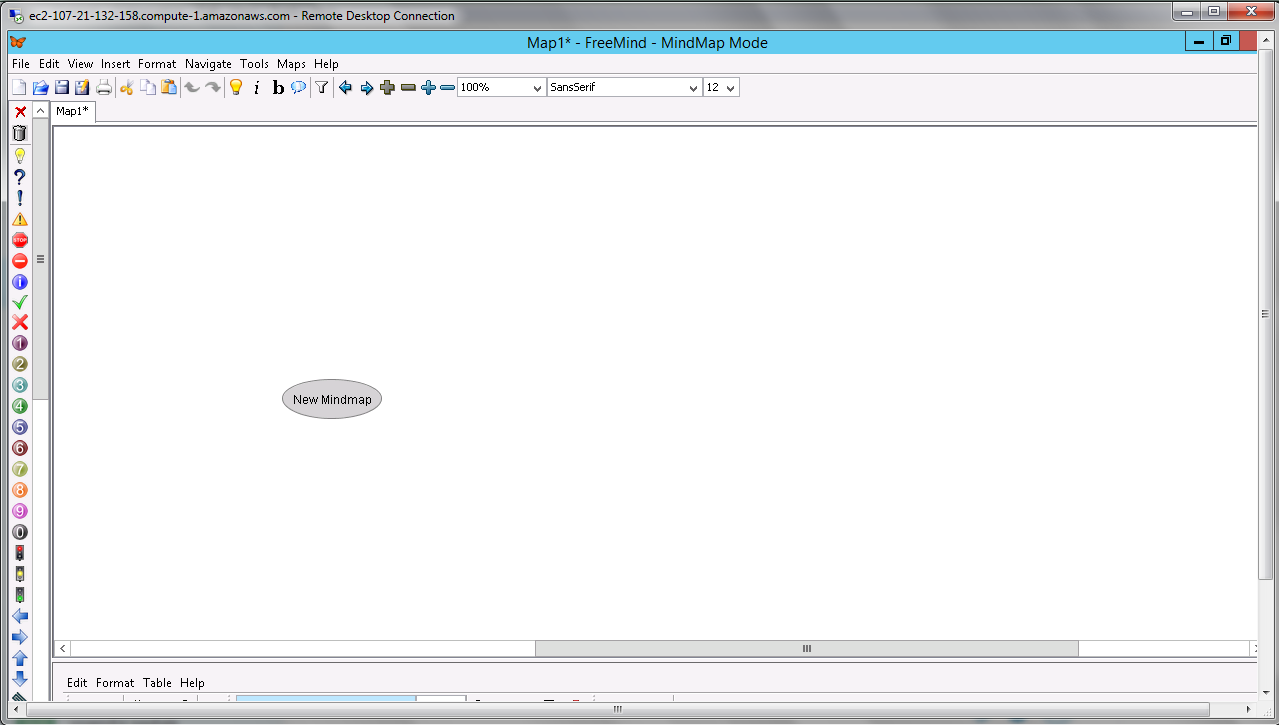
So, let’s launch Freemind and start creating the mind map.
- Create a new map: Select File > New in the menu or press Ctrl-N. The new mind map will contain just the root node.
- Click on the root node and replace the text “New Mindmap” with “Wine”. Press Enter.
- Hit the Insert key — a new node will be created to the right of the root node.
- Type the word “types” and press Enter (this will end the editing of the node).
- Press Enter once more, this will create a new sibling node just below the previously created one.
- Type the text “tastes” and press Enter again.
- Now we need to crate the node “production” but we want to place it to the left of the root node. We will return to the root — either move the mouse pointer to it (no need to click) or use the cursor keys or simply hit the Esc key.
- Press the Insert key — a new node will be created left of the root node.
- Type the word “production” and press Enter.
- Save the mind map (File > Save or Ctrl-S).
New mind map is created.
Now, let’s add more information. First, the wine types. As you certainly know the main wine types are red, white, and rose. We can also add sparkling and fortified wine (the latter is with added alcohol). Let’s proceed as follows:
- Point at the node “types” with your mouse or move to it with cursor keys.
- Press the Insert key. A new child node will be created. Enter the word “red” into the new node. Finish the editing of the node with the Enter key.
- Press Enter once more to crate a new sibling node and write “white” into it.
- Create three more nodes and fill them with “rose”, “sparkling”, and “fortified”.
- Save the mind map (Ctrl-S).
The result of the above steps is shown in the below figure:
|
Let’s continue by adding some information about wine production and about wine tastes. I think it is sufficient to include just the four largest wine producing countries: France, Italy, Spain, and United States. As to taste, the most important taste components are tannins, acid, alcohol, and sugar. The taste of a particular wine depends on how these four are combined and there’s a rich vocabulary of terms that describe the values of these four components.
Now, try to add the four countries and the four taste components into the mind map. Like before, you will need Insert to add a child node and Enter to add a new sibling node. Should you need to add a sibling node above the active node, use the shortcut Shift-Enter. Another useful shortcut might be F2 which allows you to edit an existing node.
Once you extend the mind map, you can compare with the below figure:
|
Maybe you left out the node “components” and connected tannins, acid, alcohol, and sugar directly to “tastes”. This is no big deal, really. Any organization of the mind map is fine as long as you (and other people) can understand the contents. Should you want to reorganize your map to match my example, just add the node for “components” and then drag-and-drop the four nodes to it.
The mind map is now large enough so I can show you a very useful Freemind feature: branch folding. Just click on a non-leaf node to fold the entire branch. Click on the node again and the branch unfolds. This is a great feature if you work with large mind maps. I think it is especially useful if you use mind maps in presentations or when explaining complex issues. If you do not have Freemind installed on your computer yet, you can try folding and unfolding in the flash browser.
First, let’s make the root node stand out. Hit the Esc key to move to the root (or point to it with the mouse). Now, press Ctrl-= (Ctrl with the Equals key) several times to increase the font size. If it looks too big, reduce the size with Ctrl-Minus. We may also choose to set the font to bold by pressing Ctrl-B. We will also apply the bold font to the nodes “types”, “tastes”, and “production”. (We will not use it here, but Ctrl-I sets the font to Italics.)
In the next step, let’s learn how to add icons to the mind map. Freemind offers an assortment of icons that are by default organized in a vertical toolbar at the left border of Freemind’s window.
We will use the icons “1” through “4” to inform about the order of the four countries with the biggest wine production.
- Point at the node “France” with your mouse (or use cursor keys to get there).
- Press and hold the Ctrl key. This will lock the focus — you can move the cursor about the window without switching the focus elsewhere.
- Click the “1” icon in the list of icons. You will see the icon added to the selected node.
- Use the same method to assign “2” to Italy, “3” to Spain, and “4” to the United States.
Figure 4 shows the “decorated” mind map.
|
The “decorating” of the mind map is the last technique I want to teach in this article. Before we conclude, let me mention another useful feature in Freemind: mind map exports. Once you are finished with your mind map, you can share it with other people in a number of formats. Besides JPG, PNG, and HTML, the most useful format in day to day use is probably PDF. The export functions are available in the menu under File > Export.
Mind mapping is a powerful concept and Freemind can be a great tool for creating all kinds of mind maps. I therefore hope you will find Freemind useful and that this mini-tutorial has been a good introduction to working with it.
FreeMind is intended for editing Mind maps, XML/HTML documents, and directory trees. The data is presented to the user as a Mind map. This is achieved with a modular design, which makes it possible to easily write modules, only designing the model of the problem (the data structure), without needing elaborate visual representations.
FreeMind is a good tool to use, if you are not that great at keeping track of projects. It allows you to view sub-tasks, state of sub-tasks and time recording. It has a number of handy tools, such as the ability to view collections of small or middle sized notes, with or without expandable links.
FreeMind is owned by FreeMind (https://sourceforge.net/projects/freemind/) and they own all related trademarks and IP rights for this software.
Cognosys provides hardened images of FreeMind Web Edition on all public cloud i.e. AWS marketplaceand Azure.
FreeMind on cloud For AWS
Features
Features
- Fully functional following of HTML links stored in the nodes, be it www links or links to local files.
- From very early versions, Freemind supports folding which is its essential property.
- Fast one-click navigation, including folding / unfolding on one click and following links on one click at the same time (you don’t have to make choice between fast following of links and fast fold/unfold). You can move the map by dragging the map’s background as well as using mouse wheel.
- Undo
- Smart Drag’n Drop, including the possibility to copy nodes or copy style of nodes; dragging and dropping of multiple selected nodes; dropping of texts or list of files from outside
- Smart copying and pasting into, including pasting of links from HTML or structuring the pasted content on the basis of the number of leading spaces in a line; pasting of lists of selected files
- Smart copying and pasting from, including plain text and RTF (MS Wordpad, MS Word, MS Outlook messages).
- Export of map to HTML, with folding
- Find facility, where found items are shown one by one as you do “find next”, and the map is unfolded only for the current item.
- Possibility to use and edit long multiline nodes; even with newlines
- Possibility to decorate nodes with built-in icons, colors and different fonts.
- Low costs of risk of switching away to another mind mapping tool, because FreeMind stores maps in XML format. If you have a lot of maps created by FreeMind and you want to switch to another program, writing a conversion program should be easy, especially if that program features Visual Basic scripting facility. Christoph
- File mode enables you to browse the files on your computer, seeing the folder structure as mind map.
Major Features of FreeMind
- Fully functional following of HTML links stored in the nodes, be it web links or links to local files.
- FreeMind supports folding, which is its essential property.
- You can move the map by dragging the map’s background as well as using mouse wheel.
- Export of Mind maps to HTML, with folding.
- Possibility to use and edit long multi-line nodes; even with newlines.
- File mode enables you to browse the files on your computer, seeing the folder structure as mind map.
- Smart copying and pasting, including plain text and RTF (MS Wordpad, MS Word, MS Outlook messages). Pasting of links from HTML or structuring the pasted content on the basis of the number of leading spaces in a line
- Possibility to decorate nodes with built-in icons, colors and different fonts.
- Find facility with folding support.
AWS
Installation Instructions For Windows
Note: How to find PublicDNS in AWS
Step 1) RDP Connection: To connect to the deployed instance, Please follow Instructions to Connect to Windows instance on AWS Cloud
1) Connect to the virtual machine using following RDP credentials:
- Hostname: PublicDNS / IP of machine
- Port : 3389
Username: To connect to the operating system, use RDP and the username is Administrator.
Password: Please Click here to know how to get password .
Step 2) Click the Windows “Start” button and select “All Programs” and then point to FreeMind .
Step 3) Other Information:
1.Default installation path: will be in your root folder “C:\Program Files (x86)\FreeMind”
2.Default ports:
- Windows Machines: RDP Port – 3389
- Http: 80
- Https: 443
Note: Click on Desktop icon – Press start then App will open in browser.
Configure custom inbound and outbound rules using this link
Installation Step by Step Screenshots
Installation Instructions For Windows
Installation Instructions for Windows
Step 1) VM Creation:
- Click the Launch on Compute Engine button to choose the hardware and network settings.

- You can see at this page, an overview of Cognosys Image as well as estimated cost of running the instance.

- In the settings page, you can choose the number of CPUs and amount of RAM, the disk size and type etc.

Step 2) RDP Connection: To initialize the DB Server connect to the deployed instance, Please follow Instructions to Connect to Windows instance on Google Cloud
Step 3) Database Login Details:
The below screen appears after successful deployment of the image.
For local MySQL root password, please use the temporary password generated automatically during image creation as shown above.
i) Please connect to Remote Desktop as given in step 2 to ensure stack is properly configured and DB is initialized.
ii) You can use MySQL server instance as localhost, username root and password as shown above.
If you have closed the deployment page you can also get the MySQL root password from VM Details “Custom metadata” Section.
Step 4) Click the Windows “Start” button and select “All Programs” and then point to FreeMind .
Step 5) Other Information:
1.Default installation path: will be in your root folder “C:\Program Files (x86)\FreeMind”
2.Default ports:
- Windows Machines: RDP Port – 3389
- Http: 80
- Https: 443
Note: Click on Desktop icon – Press start then App will open in browser.
Videos
Embedded media removed during static cleanup.
