1-click AWS Deployment 1-click Azure Deployment
Overview
Freeplane is a free and open source software application that supports thinking, sharing information and getting things done at work, in school and at home. The software can be used for mind mapping and analyzing the information contained in mind maps. Freeplane runs on any operating system that has a current version of Java installed. It can be run locally or portably from removable storage like a USB drive.
This Freeplane Tutorial Extensions describes a Tutorial with basic terms and how to use the basic Freeplane functions. In addition it contains examples of use cases and concrete instructions how to make these cases. The Tutorial is divided into parts for the Beginner, Advanced user and Professional user. The examples below are labelled in a similar way helping to indicate the level of difficulty if you want to make a map yourself. It is no problem if the beginner wants to navigate a map for the advanced or professional user.
| ICT Competency | Freeplane is a free and open source software application that helps you create and edit concept maps, as a generic resource creation. For the purposes of this section, we can treat ‘concept mapping’ as nearly synonymous with ‘mind mapping’. |
| Educational application and relevance | Making concept maps can support thinking, brainstorming, sharing information and documenting meetings and group processes.Educators consider that Concept mapping is a good approach for build skills in students for ideating and organizing ideas; they also find it a great asset for teaching. It is a great tool to students to help them organize their thought processes when writing. Teachers and students can use this application to collaboratively or individually create concept maps on an idea or explore a problem. |
| Version | Version – 1.3.15 |
| Configuration | This tool has no specific configuration requirements. It is available as a part of Ubuntu custom distribution. |
| Other similar applications | Freemind |
| The application on mobiles and tablets | There is no concept map creation tool in mobiles, but you can view concept maps In Android Mobiles using Freeplane reader or Simple Mind app.Freeplane is part of the Ubuntu GNU/Linux operating system. It is also available for download on Windows and Mac operating systems as well. |
| Development and community help | Freeplane website |
Overview of Features
Freeplane allows you to create concept maps, as a textual resource that can be organized graphically, in the form of a map or tree of ideas; it provides a pictorial overview of the concepts, related concepts / sub-concepts for a topic. A concept map helps you to create a textual OER with possibilities for linking to additional resources (on your computer as well as on the web), adding annotations as well as images. Freeplane allows you to organize and order ideas into a hierarchy connected by lines (edges). Nodes can also be linked with free lines (connectors) and labels. The concept map can be exported as an image as well as a text document.
Installation
- The application is part of the Ubuntu custom distribution.
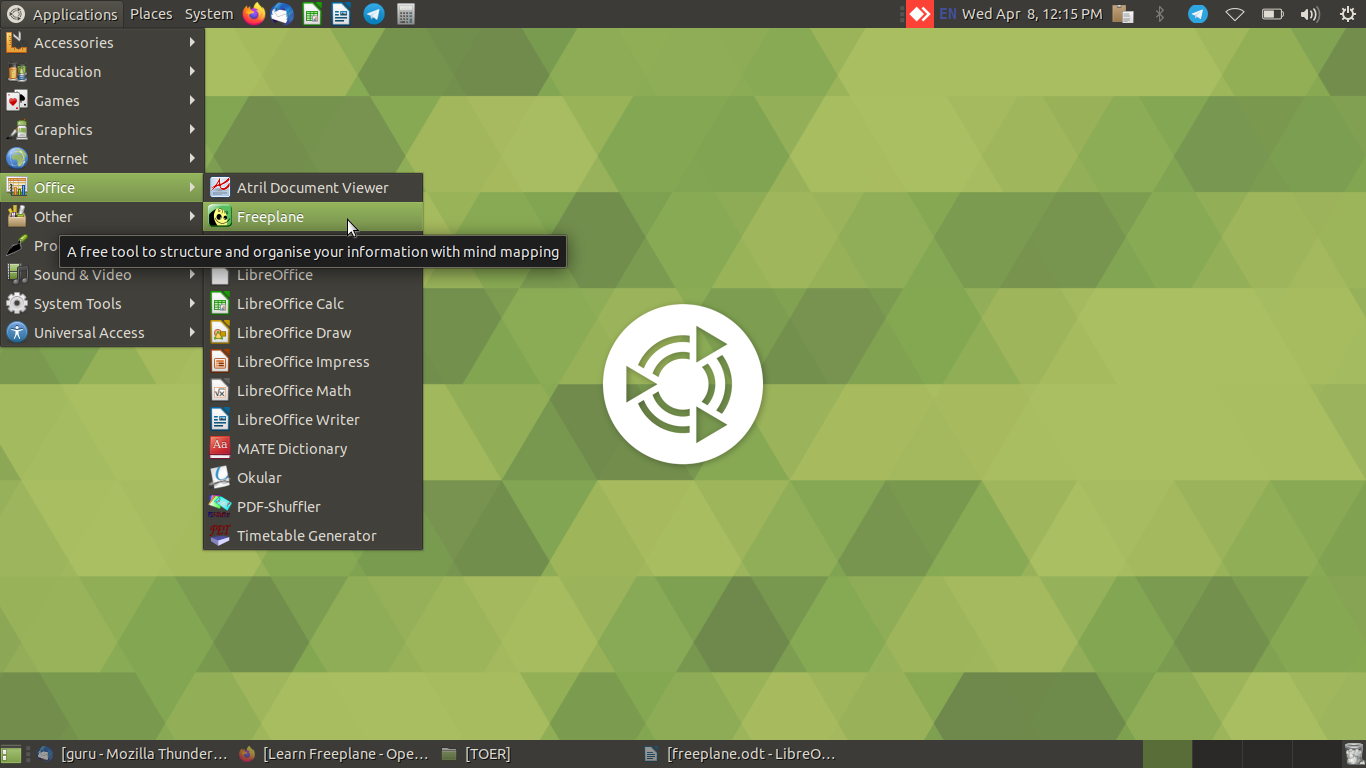
- In case you do not find it on your computer, you can install by typing
Freeplaneon top search bar in Software Centre. - If you would like to install through the terminal follow these steps below:
- Open terminal by clicking Applications->System Tools->Terminal or through Keyboard shortcut
Ctrl+Alt+T - In the terminal window, type below command and press enter to start the installation by providing your machine password:
sudo apt-get install freeplane
- Open terminal by clicking Applications->System Tools->Terminal or through Keyboard shortcut
Working with the application
To download mindmap file click here
Creating a map
- Creating a concept map
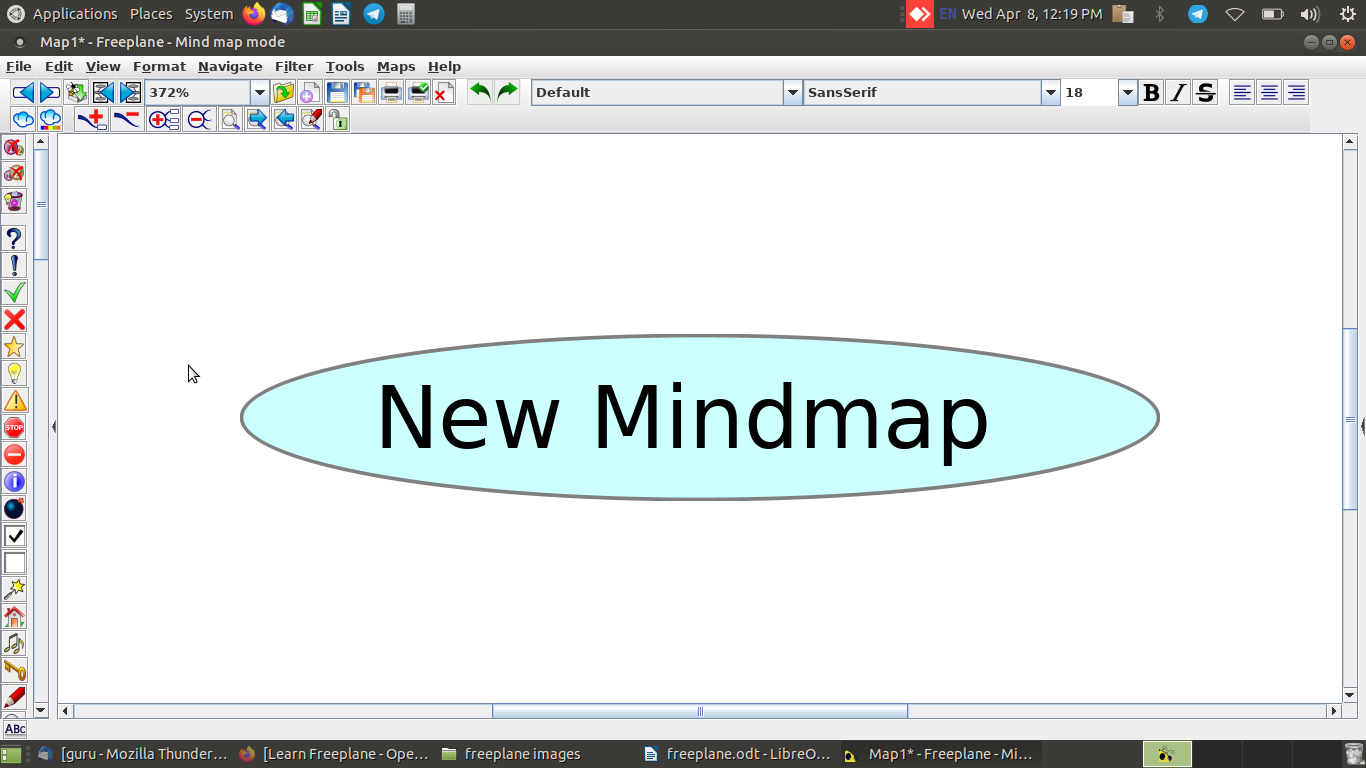
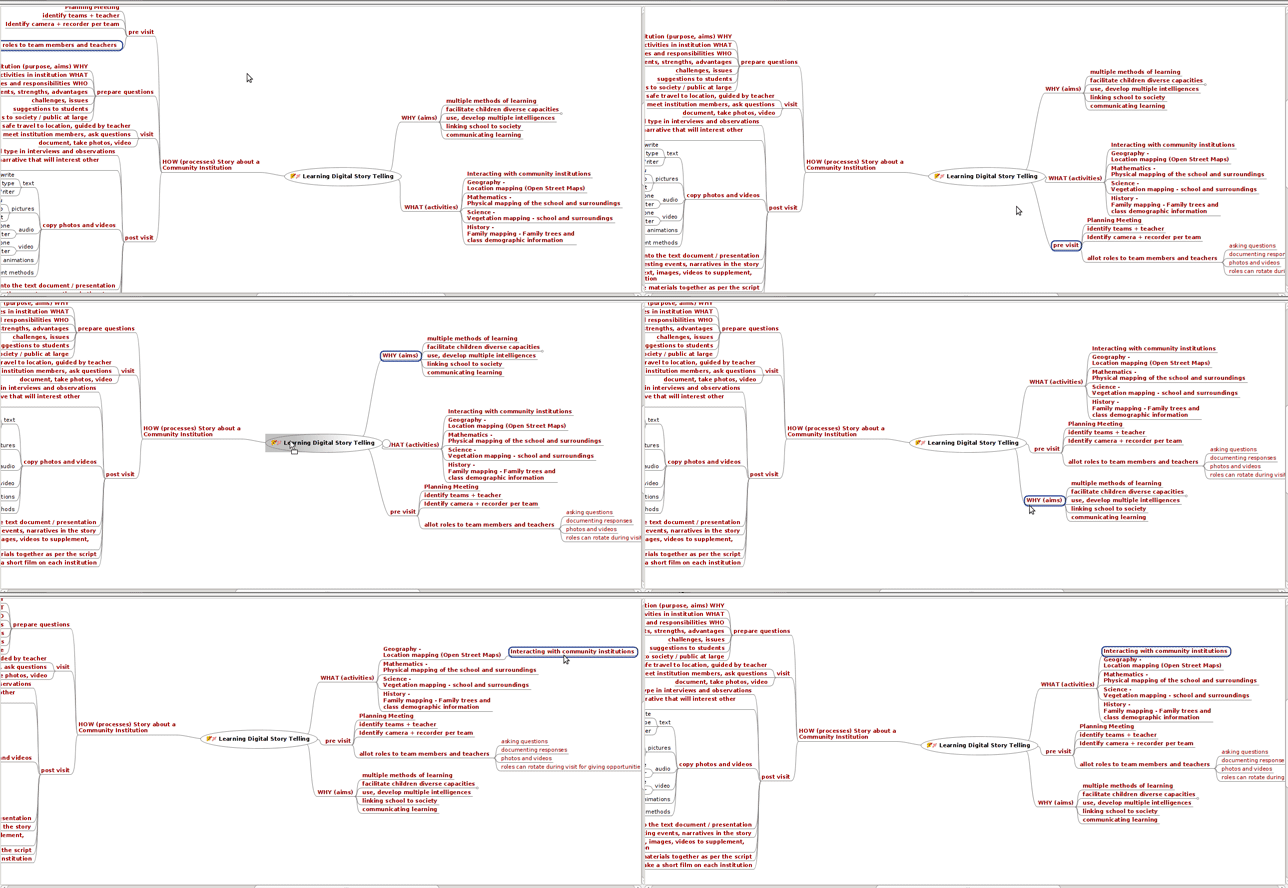
To learn working with Freeplane, we will start creating a concept map for Digital Story Telling; you will see above that Freeplane has opened a window with a box with text “New mindmap”. This node, also called the “root node” will contain the core idea/ theme to be discussed in the concept map. You can click on File option to save this map; when the map is saved it will get saved with the name in the root node.
Inserting nodes
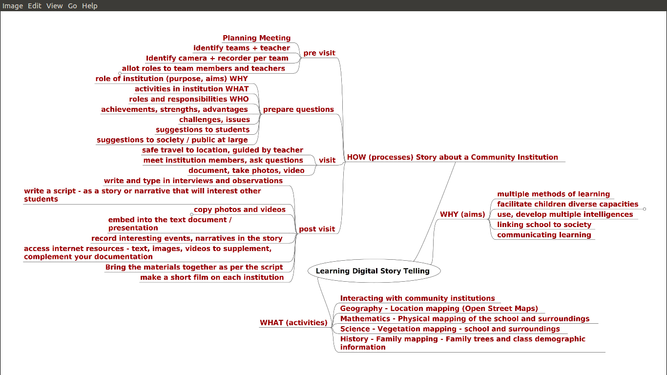
Concept maps can be stored on your folders; they are saved with an extension “.mm”. We have created a concept map called Learning Digital Story Telling.mm. After the root node is created, additional ideas are added by adding more nodes, called child nodes. The concept map gets built by adding further child nodes, for topics and sub-topics. You can keep adding child nodes to any node. Use the ‘insert’ key to create a ‘child node’ this is a sub-concept of your current concept. Use the ‘enter’ key to create a ‘sibling’ this is a parallel concept to your current concept. Thus you can create a concept map with knowing just two functions – add child node (insert) and add sibling node (enter). In this manner, a concept map can be used to classify and categorise information.
- Child and sibling nodes
Our map has nodes for the ‘why’, ‘what’ and ‘how’ of DST, with sub-nodes.
- The first image shows the creation of a concept map with the first child node.
- The second image shows the completed concept map with child nodes and sibling nodes.
Linking nodes
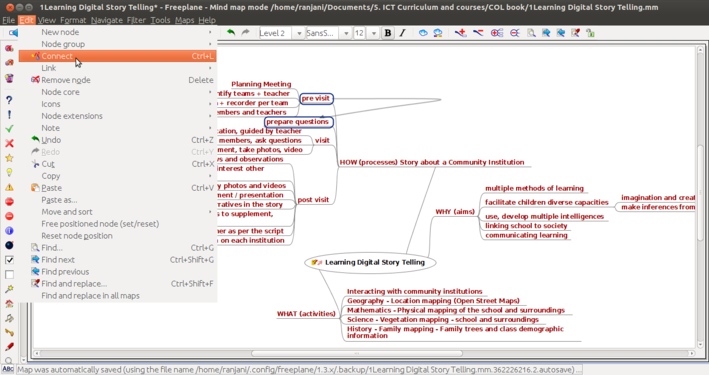
- When you discuss concepts, you can notice that sometimes concepts are connected, and you want to link them to study in detail. For doing this you can add a graphical link (an arrow) to connect two nodes. To do this select two nodes, then go to Menu Bar and choose EDIT > CONNECT option. then you can see graphical link which is connected to two nodes. You can click on the arrow and move it around.
Hyperlinking files and weblinks
- Adding hyperlinks
- In the first image, did you notice the red arrow in the root node of our concept map? This main node has a hyper-link which opens the Wikipedia page on digital story telling. You can embed a hyper-link on a node, such that clicking on the node can connect to related resources. In our Learning Digital Story Telling.mm concept map, we have inserted a hyper-link for the main node ‘Learning Digital Story Telling’.
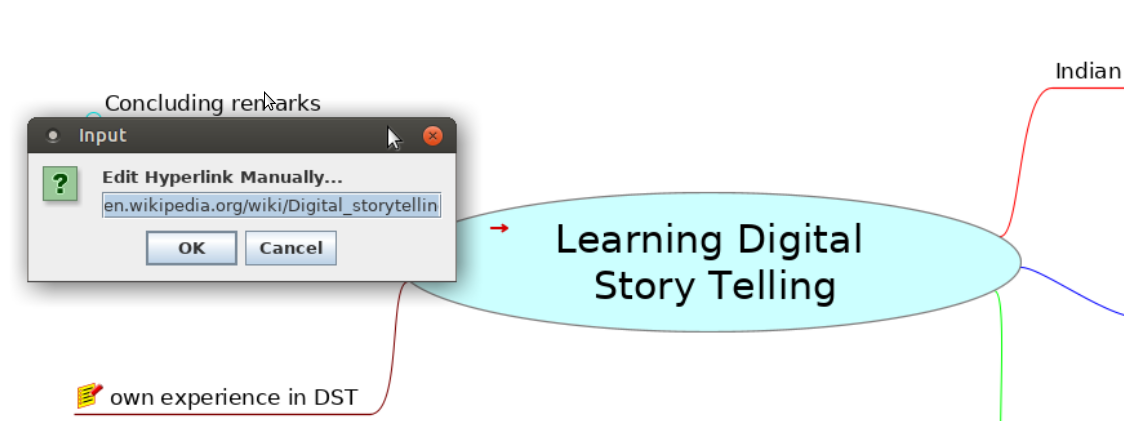
- To do this Move your cursor to this node and select Edit → Link → Add or Modify hyperlink (type). You can also use the keyboard short cut CTRL-K. Freeplane will open an input bar as shown in the second image. We will type in our web page address https://en.wikipedia.org/wiki/Digital_storytelling into this input bar
- You can also add a hyperlink to a local file on your computer. If you select When you click on Edit–>Link–>Add Hyperlink (choose) allows you to link to a file on a folder on your computer. The third image shows how to choose a file from your folders to link.
Adding notes and note window
- Adding notes and note window
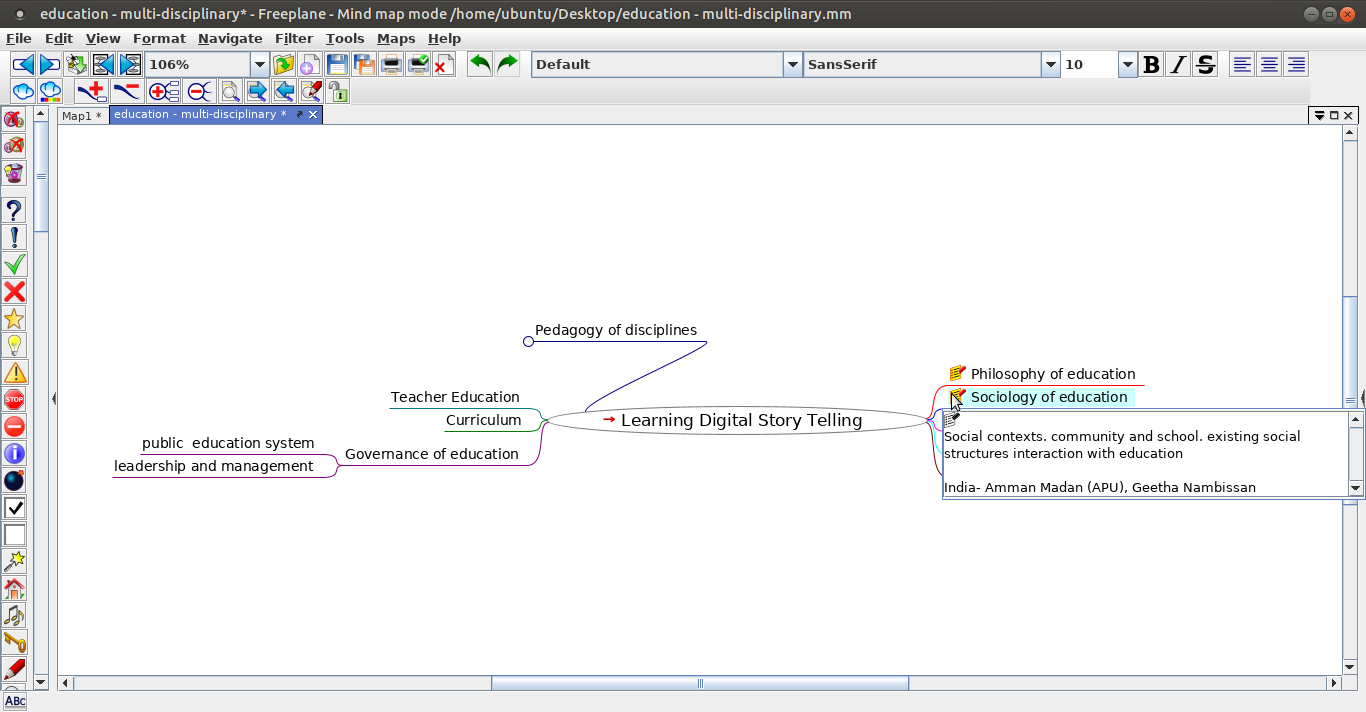
- In our Learning Digital Story Telling.mm concept map, you will also see a yellow label beside the arrow and if you place your mouse over the yellow label, you will see a note description.
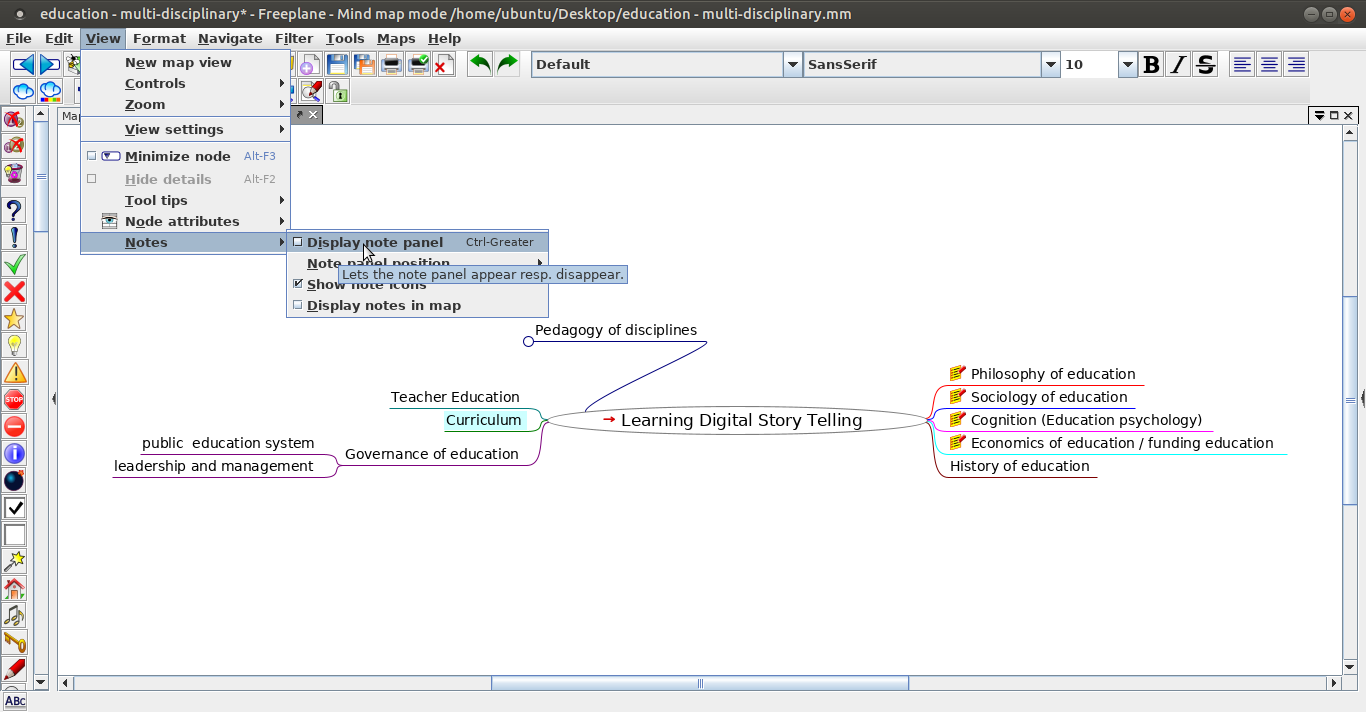
- To add a note, you can click on the node, as shown in the second image, go to View—>Notes—>Display note panel
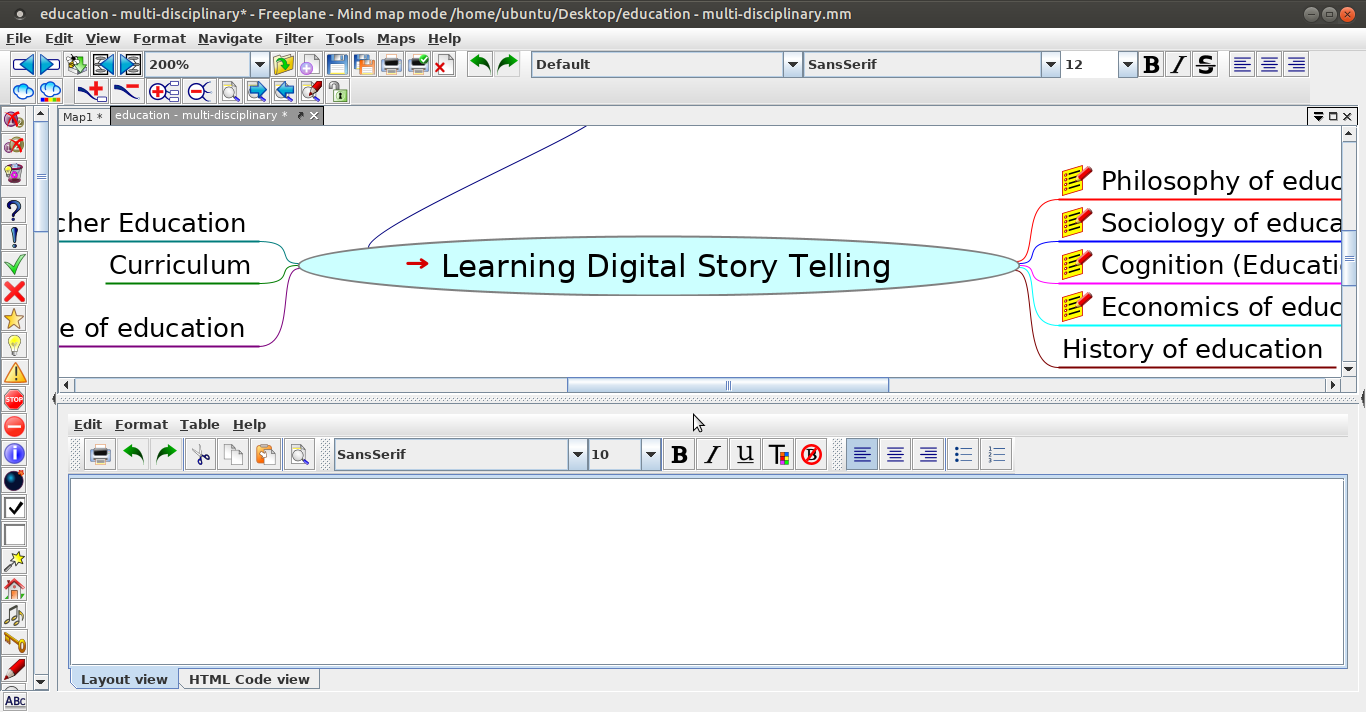
- You can type your note in the note window which opens as shown in the third image. You can change the position and size of this note window.
Moving nodes
To move nodes from one position to other position or to disconnect a node from its current parent and connect it to another parent you can simply click and drag it to its new location. Each node has two positions where you can drop another node. These positions are visible if the cursor is above it.
- If the cursor is near the top of the target node, the whole upper half lights up. If you drop a node here, the node will become a sibling above the target node.
- If the cursor is near the child side of the target node, the left or right side of the node lights up. If you drop the node here it will be connected as a child node.
In case of the root it is possible to drop a node to the left or the right side. This is also true in case of a node with a hidden edge.
Adding different icons to the node
By simply clicking on the left side different icons, you can add those icons into your nodes. You can add different and multiple icons for each indvidual nodes.
Saving and exporting
- Saving and exporting
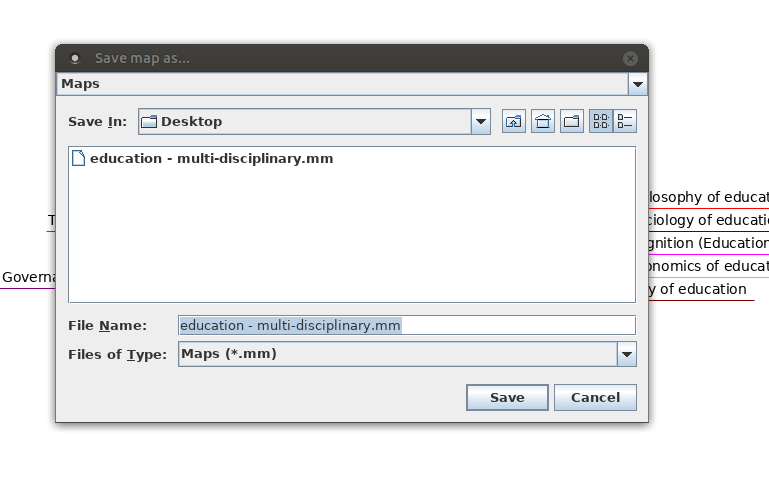
- By default your concept map is saved by Freeplane as a ‘.mm’ format file as shown in the first image. While saving the file, Freeplane will display the file browser, to allow you to select the folder in which you can save your file. By default, the file is saved in your home folder.
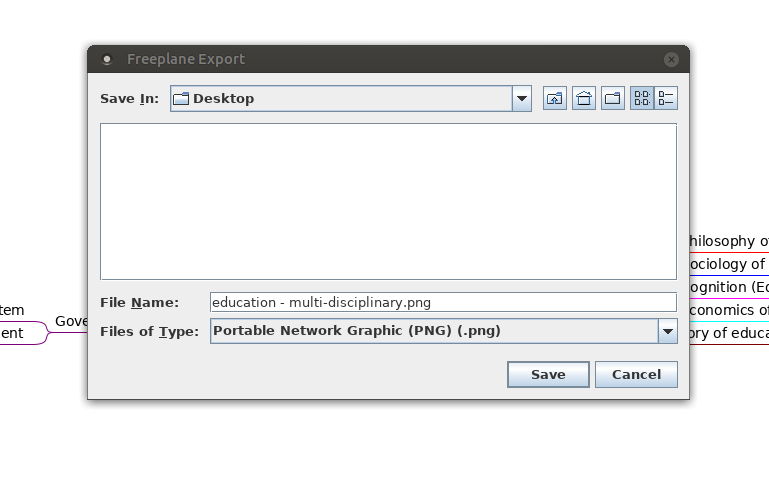
- However, the concept map can be saved in many other formats. You can export the map to a text document file (in .odt or .doc formats). You can also export the map as an image (in .png or .jpeg formats) or as a web page (in .html format), as shown in the second image.
Typing Telugu in Freeplane
Freeplane will not allow you to type Telugu directly, you will need to change font family in Freeplane by the following:
- Go to Tools -> Preferences -> Appearance ->
- In the font family option select Telugu fonts and click on Okay.
- Freeplane may ask you to restart, after which you can type in Telugu.
Note:If you are using older version of Freeplane, this approach will not work. You need to type Telugu in Libreoffice writer and copy paste it into Freeplane, and change the font to Telugu for each node.
Saving the file
Like in most applications, a file can be saved using the FILE – SAVE command, or by the shortcut key CTRL-S. Always give a meaningful file name, reading which you should get an idea of the file contents. Freeplane saves files with a .mm extension. You can also export a concept map to image (png or jpeg) and text (odt and html) formats.
Advanced features
- You can insert images directly in your nodes. You can create visual representation using ‘Cloud’ etc. You can enter detailed notes for any node. When you export it to a ODT, you can see this as a document, with the ‘note’ information being the text in the note, and all the nodes will become headings. This way you can even write a document using Freeplane
- You can import your entire folder structure as a mind map.
- Our aim here is to get you started with concept map OER creation using Freeplane. For advanced functions, you should refer to the User Manual for the application. The Freeplane tutorial is available within Freeplane itself, which you can access any time by pressing the F1 function key. The tutorial itself is a concept map, and you should browse this concept map, not only to get help that you may require, but also as a lesson on how a concept map can communicate so much information in such a simple manner!!
Ideas for resource creation
Freeplane a good tool to start your resource creation work. You should develop a concept map for the topic you want to develop a resource on. The ideas you have about the topic, the sequencing of ideas and sub concepts, the specific points for each idea / sub-concept can be developed on the map. Links between nodes, with web pages, notes explaining concepts can all be inserted in the concept map. The power of the digital concept map is that you can keep revising the nodes, adding and deleting, moving and copying nodes as you want. This makes the process quite dynamic.
Instructional examples of Freeplane maps
What is mind mapping
Mind mapping is a technique for collecting, developing and sharing ideas (like the plot of a story or threads of a new idea) in a visual map. Developing a mind map helps to structure information in a visual way. It follows the random way in which the mind generates thoughts rather than following a linear format such as text in a Word document. You can plan a project, summarise your notes for an exam, brainstorm a new idea, take a brief. The uses are endless.
The mind map on the right shows you some of the processes involved.
The advantage of electronic mind maps over paper mind maps is that you can have as many nodes and branches as you like and can minimise them so as not to have a lot of clutter on your screen. There’s no limit to the amount of information you can put in a mind map. You can also link to documents and web pages, delete unneeded nodes and branches and do lots of editing which is more limited with paper mind maps.
The advantages of Freeplane are presented in the mind map, as hidden information. Click the link below the picture to open the map. Then click the topic help Navigation for learning how to unhide hidden information.
Brainstorming with digital post-its
Generally brainstorming starts with writing ideas on post-its and sticking them to the wall. Freeplane has a “free node” for this: if you Ctrl + double click on a free place of the mind map, a node opens. When you start typing you will see your text in this free node. [Note: This feature doesn’t work on Mac yet.] If you’re done, you can do the same with a different idea in a different place. Once you’re ready, you can move similar ideas closer together and connect them in a hierarchy by dragging and dropping. See Floating nodes for more examples.
Map as index
Beginner. One way to bring structure to linear text is to use categories as we have in this wiki. A limitation of these categories however is that hierarchical relations cannot be displayed in a simple way. A mind map is better suited for this, as is shown by the example map on the right.
In this particular case the categories of the wiki are represented as underlined hyperlinks. The pages of the wiki are represented by red-arrow hyperlinks. The latter are created simply by dragging the page address (URL) of a wiki page onto a node and then editing the title of the node. If you clik on the hyperlink under the image, the mind map opens and you can click the links to jump to the pages of the wiki.
Advanced. An index can have many different forms. The map on the right displays all Freeplane functions. These functions are described in more detail in two maps called Tutorial and Documentation respectively. The map contains two solutions for linking a function to the two descriptive maps. The functions on the left half have the two hyperlinks themselves, but they are hidden until the mouse cursor is hovering over the function (tool tip). The functions on the right half of the map have an external pointer – the nodes with the question mark. These external pointers contain the hyperlinks, which again are hidden until you hover with the cursor over the question mark.
Professional. The map on the right is an index map for the use of cases mentioned in this tutorial. Unlike a classical linear index the indexed items in the mind map can be displayed in any order as can the relationships between them. This map uses most of the functionalities of Freeplane in one map. Click the link under the image to open the mind map. Then read the node called Caption to learn how to navigate the map and unhide hidden information.
Meeting support
Freeplane is very suited for rapid and easy note taking during meetings. In fact Freeplane can support the whole meeting process. This process starts with designing and distributing the topics of the agenda, keeping the attendants list, adding notes to the topics of the agenda and finally producing the decisions and action list of the meeting. Actions can also be supported with time signals. It is even possible to include the incoming and outgoing information in the map, either as hyperlinks or in a special area (Notes). And last but not least, part or all of the information can be password protected.
The maps for the beginner and advanced user display the same meeting information, but differently “formatted”, with the different components available in Freeplane (node core versus node details, attributes, images, styles, etc.). Click on the hyperlinks below the images to open and navigate the respective maps. In Meeting advanced: hover the nodes (texts) to see hidden text like notes.
Instructions (animation) on how to make and use the beginner meeting support are available here. When the example is stripped from its specific information, the remaining structure could be used as a template for meetings in general.
Organize your collection
With Freeplane you can order, index and describe your collections, whether images, audio files or any other kind of information. It’s especially easy to select a group of files and copy them in one action to a mind map. In that case these files appear as clickable arrows (hyperlinks) in separate nodes, as shown in the mind map on the left (Beginner collection). Once in the mind map, you can rename and sort the nodes. For image links, you can turn the links to images which are visible in the map.
Of course it’s possible to build a collection item by item too. And it is possible to add additional information and format it any way you want, as in the mind map on the right (Advanced collection). If you hover over the names, you will see additional information about location and time, which appear in a table of attributes. Or you can click the name of an image, which makes the image appear or disappear (fold).
If you have collections of different kinds in one map, consider using a different style or a different icon for each kind. In that way you can use filtering to create a view of all elements of the same kind.
Vault for information
If you would like to keep certain information private, you can password protect it. It’s possible to protect the whole map or just protect a (sub)tree of nodes. The example on the right contains a protected map “MyVault”. Within this protected map are branches for finance and for websites. These are separately protected.
Open the map by clicking My Vault under the picture. Then find the unlock icon in the menubar and click it. Enter the password “MyVault”. Now the map opens (unfolds) and you see the branches for websites and for finance. Select creditcard of one of the banks, click the unlock menu button and enter password “creditcard”. Now the creditcard information unfolds. You can do the same with the other creditcard. Then go to the websites and select the Freeplane open forum, click the unlock button and enter “Freeplane” as a password. Now the information for login unfolds. Note that an explanation of each node is presented below each node titel.
Dashboard for GTD
When Freeplane opens it starts with a standard map. This map can be modelled into a dashboard with direct access to the most important information at home and on the Internet. You can do this by simply dragging hyperlinks into your map. Besides you can add (hidden) content to hyperlinks to remember their meaning. Alo you can set signals to remember when you have to give attention to this information. This makes Freeplane particularly supportive for Getting Things Done. To view and navigate the map, click on the link below the image.
For advanced features for helping to get your Getting Things Done system work more flawlessly, you can try to use the Freeplane|GTD+ plugin. There is a template designed to help you get started with the plugin available here
SWOT analysis
Mind maps are a fantastic tool for carrying out all kinds of analyses. In this, Freeplane suports using images and arrows with labels to display concepts, which helps to keep oversight and focus. In case this is not enough, Freeplane supports using hidden text which the user can roll down or hover over. Click on the small triangles, or hover the cursor over the images to see a descriptive text. To view and navigate the map, click on the link below the image.
Assignment & Presentation
A map can be used as a student assignment, and can include directions, set questions and give links to literature. The student can click the literature links to open the literature and add answers to the questions – in the map itself.
The map to the left contains a map with keywords for questions and literature links. For the advanced student these could be removed. Once the assigment is completed and the result is entered in the map, the map could be used to learn and do the presentation. The map to the right contains model answers to the questions which could be used to check the result. Answers could be password-protected so that students can only see them once given the password. To view and navigate a map, click on the link below the image. <To DO: translate the maps in English>
Tutorial
Freeplane’s Tutorial is an example of how a Freeplane map can be used to hold extensive amounts of (hidden) information and for delivering it in a user determined way, adapted to the user’s experience level.
In Freeplane the node hierarchy of parent-child-grandchild nodes is by default displayed in left-right direction. Hierarchical levels can be used to display a chapter – (sub)subchapter – content chain. To be visible, the chain needs to be horizontally scrolled. Freeplane helps to do this by automatically scrolling to make the node where the cursor is fully visible. Yet the classic book-view with titles and content oriented in a top down direction may be advantageous in situations where you gradually unfold the text and want to easily read back and forward.
On the left and right side are two example maps which at first glance may appear very similar, yet are very different if you start using them.
- In the map on the right the content node has been moved below its parent sub chapter (= title) node. The title-nodes have Node style combined. As a result, when the title node is folded (child with content is hidden) it has a bubble and when it is unfolded the bubble disappears. When more sub chapters are unfolded, this gives a structured page like appearance with content separated by chapter headers which can be easily read back and forth – without horizontal scrolling. On the other hand, the user has maximum overview if he folds most of the nodes.
- In the map on the left the two nodes for title and content are combined in one node: title and content are displayed in the Core and Details fields respectively. This has the advantage that node core can be styled with a colour, bubble, icon etc. to make the title stand out. And the text in Details can be formatted as a paragraph in a word processor. The result is an appearance which is very similar to a named paragraph of a book. The details field could be hidden and displayed in a tool tip, which is equivalent for the folding discussed above.
If the two maps are compared one can conclude that the view of the left map is relatively static. The view of the right map is more flexible. If in the right map you select a chapter (e.g. chapter 2) and then in the menu bar click the icon “Unfolds all selected nodes and their children”, all text becomes visible as in the view of the left map. In many cases this is not what you want and then you could select a sub chapter and only unfold all text of this subchapter. From these examples it is clear that it is possible to implement book-like view in different ways, with different characteristics.
When implementing a map with tutorial information it is a choice if and when the hierarchical relations should be as prominently left-right oriented as possible or if, for practical reasons or taste, children with content could be shown below parents with titles (right hand map); or alternatively if the mechanism with core-details (and hiding) are used (left hand map).
Freeplane installation for Ubuntu OS
Contents
- 1First: check Java is installed
- 2Option 1 : install from the official Ubuntu software repository
- 3Option 2 : install with .deb file
- 4Option 3 : install with the binary package
First: check Java is installed
Make sure Java is installed:
- Choose Applications > Ubuntu Software center
- Type in the search field: Java
- In the list that opens, choose JDK Java 6 Runtime
- If you see “Remove”, Java is already installed. If you see “Install”, click it to install Java.
Option 1 : install from the official Ubuntu software repository
1. Freeplane is packaged for Debian/Ubuntu, you just need to run: apt-get install freeplane
If the Freeplane package for your distro is out of date, see option 2 or option 3 below (it requires download from SourceForge official Freeplane project hosting).
Option 2 : install with .deb file
For every Freeplane release, starting with 1.6.5, there is a .deb available which includes all libraries, so it works on Debian/Ubuntu.
- download the generic .deb: go to http://sourceforge.net/projects/freeplane/, click “Browse all files”, navigate to “freeplane stable”
- download freeplane_<version>+upstream-1_all.deb
- install it using
dpkg -i *.deb
- this will create a menu entry for Freeplane, mime type mappings etc
- you’re done ;-).
Option 3 : install with the binary package
1. Download Freeplane binary package
- For newest version goto http://www.freeplane.org/preview/ and download Freeplane_bin-XXXX.zip, in which XXXX is a shown version number.
- Or for the official version goto http://sourceforge.net/projects/freeplane/ and press download.
- Then choose Open with Archive manager, and press OK
2. Extract the freeplane directory
- In the download window press extract, select the location (e.g. Documents) and press Extract again.
- Then open the the directory where you extracted freeplane (Documents) and open the newly created Freeplane directory.
3. Then run freeplane
- In the extracted directory, double-click on Freeplane.sh and select Run (or run in terminal window). Now Freeplane opens and you can use it.
If you want you can customize the installation as follows.
4. For easy access, add Freeplane to Applications > Office:
- Right-click Apllications and select Edit Menus
- Select Office (left) and select Add Menu item (right)
- Type a name, e.g. freeplane
- Browse to the directory with freeplane, click freeplane.sh and press ok
- With freeplane selecte, press Properties
- Click on the icon on the left and browse via Documenten > FreeplaneXXX to the file freeplane.svg; and select it.
Now freeplane is added to Office with the freeplane icon.
5. For faster access, add the freeplane icon to the toolbar:
- Goto Applications > Office and right-click Freeplane.
- Select add this launcher to toolbar.
6. Now you can start freeplane by pressing its icon in the toolbar
Freeplane is owned by Freeplane(www.freeplane.org) and they own all related trademarks and IP rights for this software.
Freeplane on cloud for AWS
Features
Major Features of Freeplane
- Note taking with freely position-able, unconnected nodes (post-it’s);
- Ordering ideas (nodes) into a hierarchy connected by lines (edges);
- Classifying nodes with metadata (attributes) and style types (system styles, user defined styles, level styles);
- Grouping nodes with visual containers (clouds) and accolade (summary node);
- Connecting nodes with dynamic links, free lines (connectors) and labels;
- Automatically styling nodes (with a bubble, color, edge type, etc.) according to hierarchical level and content (conditional styles, automatic edge color, level styles);
- Structuring nodes in terms of content (text, scientific formula, calculation, icon, image and hyperlink) and presentation area (core, details, notes, attributes, images and tooltip);
- Changing views by hiding content (folding branches, filtering, roll-up of details and hiding extensions in tooltip), finding, scrolling and navigating;
- Tasking with calendar and reminders;
- Password protecting of whole map and of individual nodes with DES encryption
- Node styles replace style patterns (like in text processors)
- Conditional node styles: node formatting depends on its content and position
- Map templates for new maps (all previous maps can be used)
- Menus and commands have been re-ordered to improve user efficiency (both to better integrate new features and to give a more “natural access” to already existing features)
- Properties panel – Format tab
- Hyperlinks for menu items
- Keyboard shortcut documentation: Map and HTML table generation added for the documentation map
- Check for newer auto save files on opening of a map
- Single instance mode: open files in existing program instance instead of opening a new one.
- Node level dependent filters
- Improvement in search and replace functions
- Different cloud shapes
- New icons for rating
- Automatic Edge Color
- “Grid” for moving nodes (see Preferences>Behaviour, Behaviour section>Grid gap size)
- Copy and paste attributes
- Named filter conditions
- Connectors : different shapes, line types, width and transparency
- Progress icons (standard icon / 25% steps / available in menu “Icons”) or external progress icon (clickable icon / 10% or 25% steps / also available in menu “Icons”)
- You can now create “brackets” to add a graphical and text summary to some nodes, see sample brackets map
- Freeplane portable version (download and install file named FreeplanePortable_X.paf.exe)
- File -> Properties… dialog shows informations about the map (e.g. total number of nodes)
- Add new icons in main and contextual menus to improve user efficiency
- Formulas: Use of formulas in node text, nodes and attributes (like in spreadsheet processors)
- Node numbering and Formats/templates as style attributes
- Parsing and formatting of numbers and dates in node texts and attribute values.
AWS
Installation Instructions For Windows
Note: How to find PublicDNS in AWS
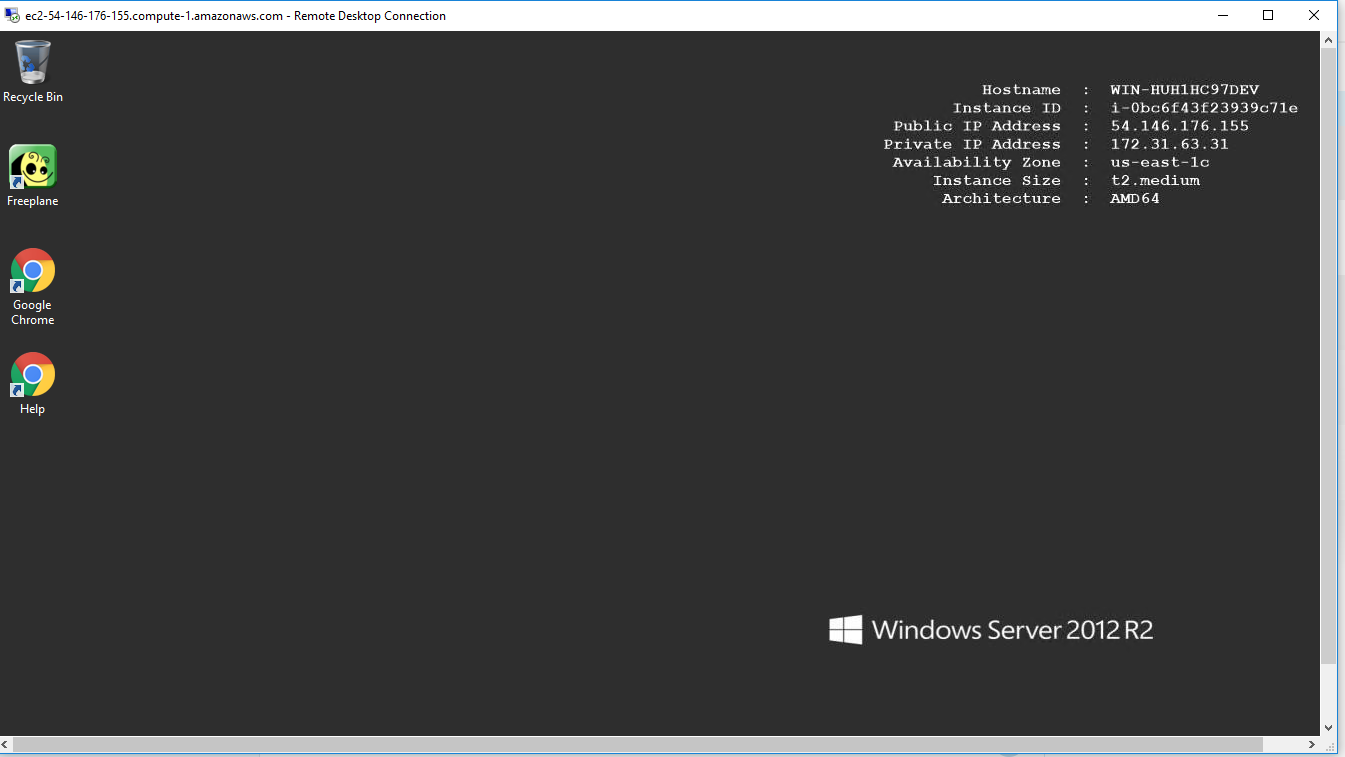
Step 1) RDP Connection: To connect to the deployed instance, Please follow Instructions to Connect to Windows instance on AWS Cloud
1) Connect to the virtual machine using following RDP credentials:
- Hostname: PublicDNS / IP of machine
- Port : 3389
Username: To connect to the operating system, use RDP and the username is Administrator.
Password: Please Click here to know how to get password .
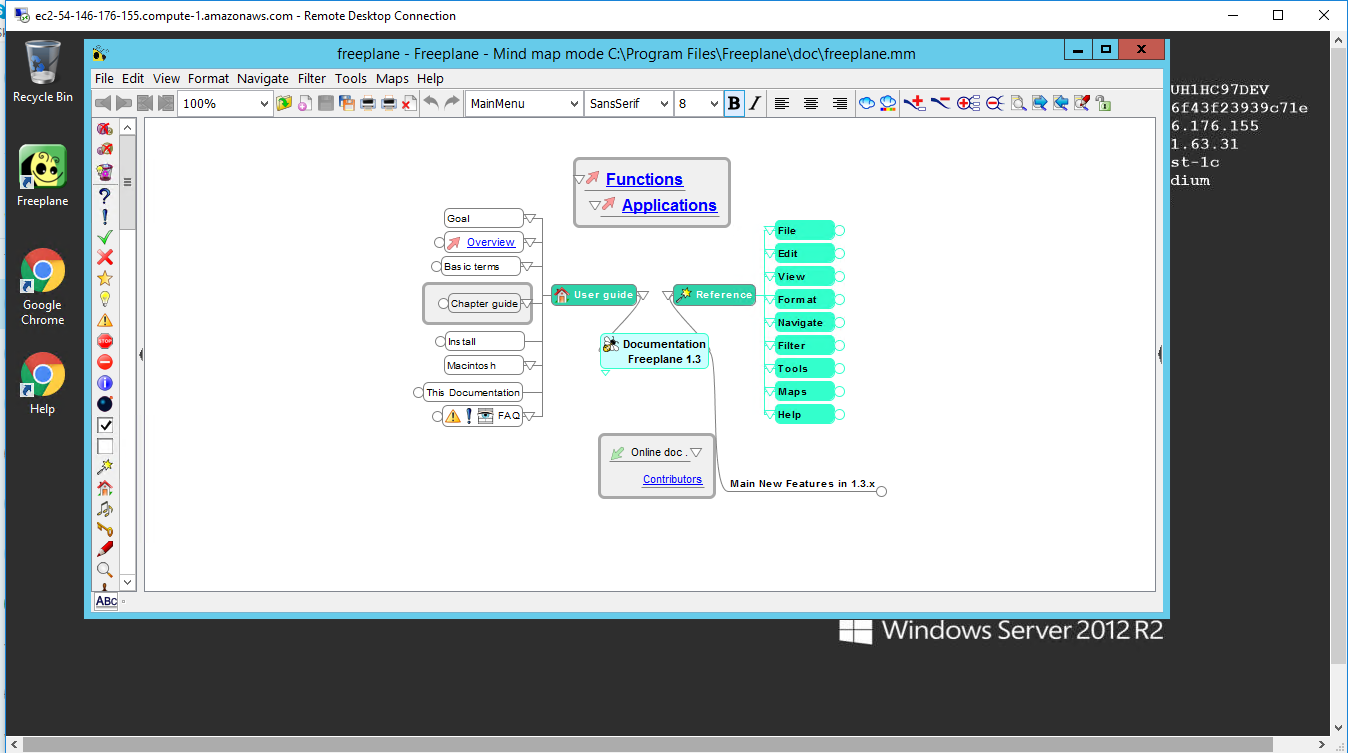
Step 2) Click the Windows “Start” button and select “All Programs” and then point to Freeplane .
Step 3) Other Information:
1.Default installation path: will be in your root folder “C:\Program Files\Freeplane”
2.Default ports:
- Windows Machines: RDP Port – 3389
- Http: 80
- Https: 443
Note: Click on Desktop icon – Press start then App will open in browser.
Configure custom inbound and outbound rules using this link
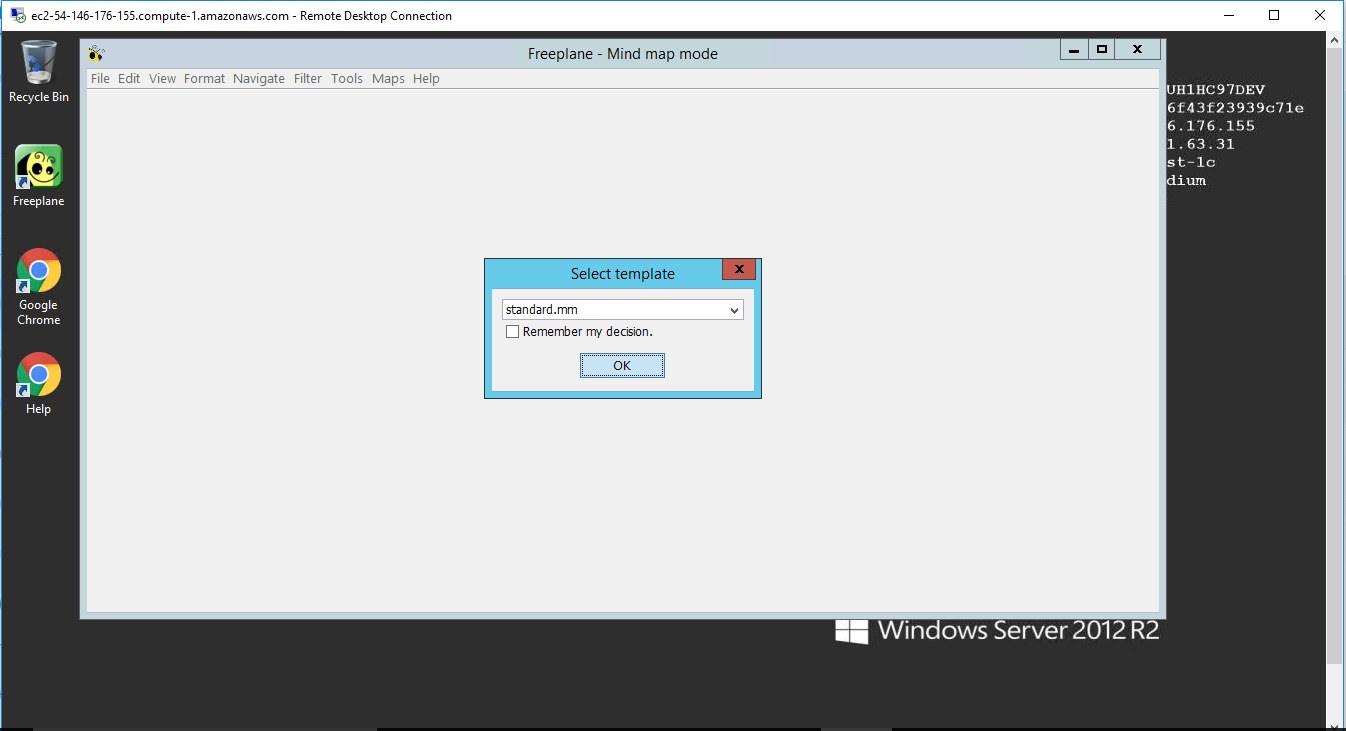
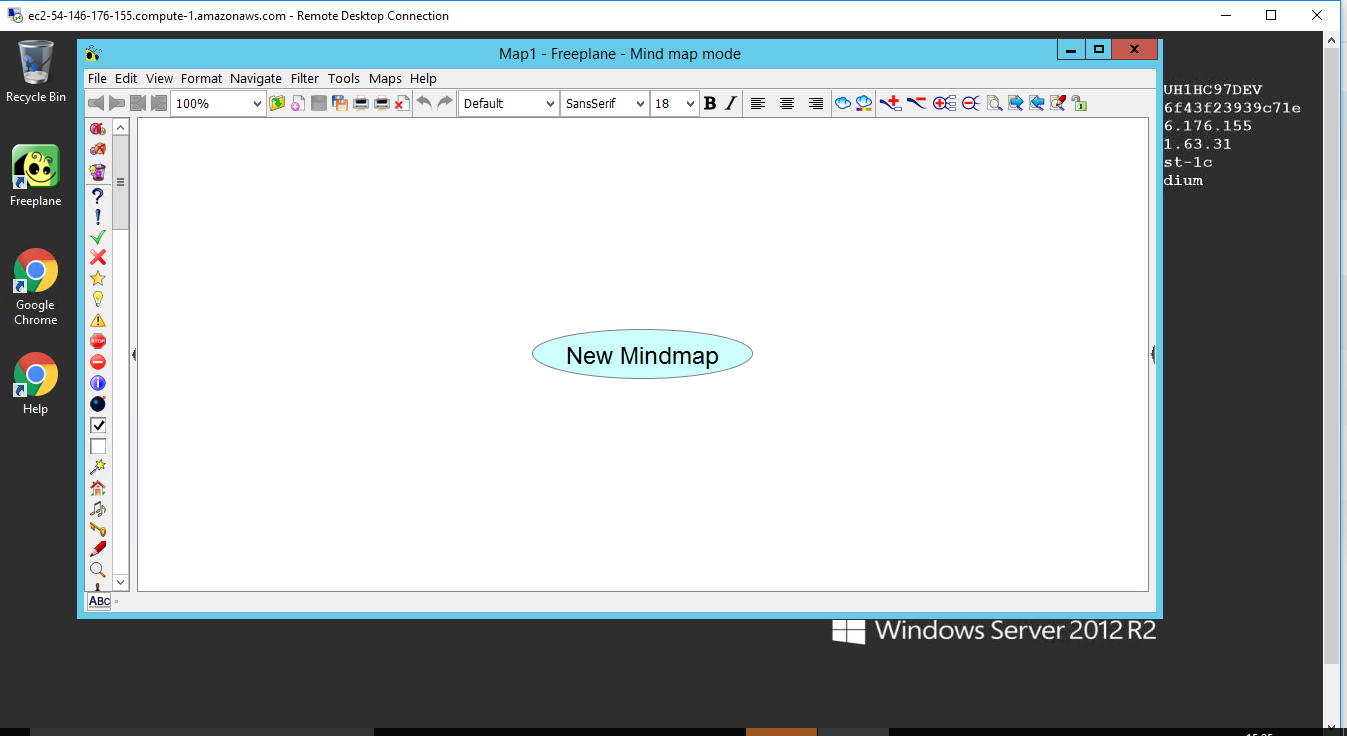
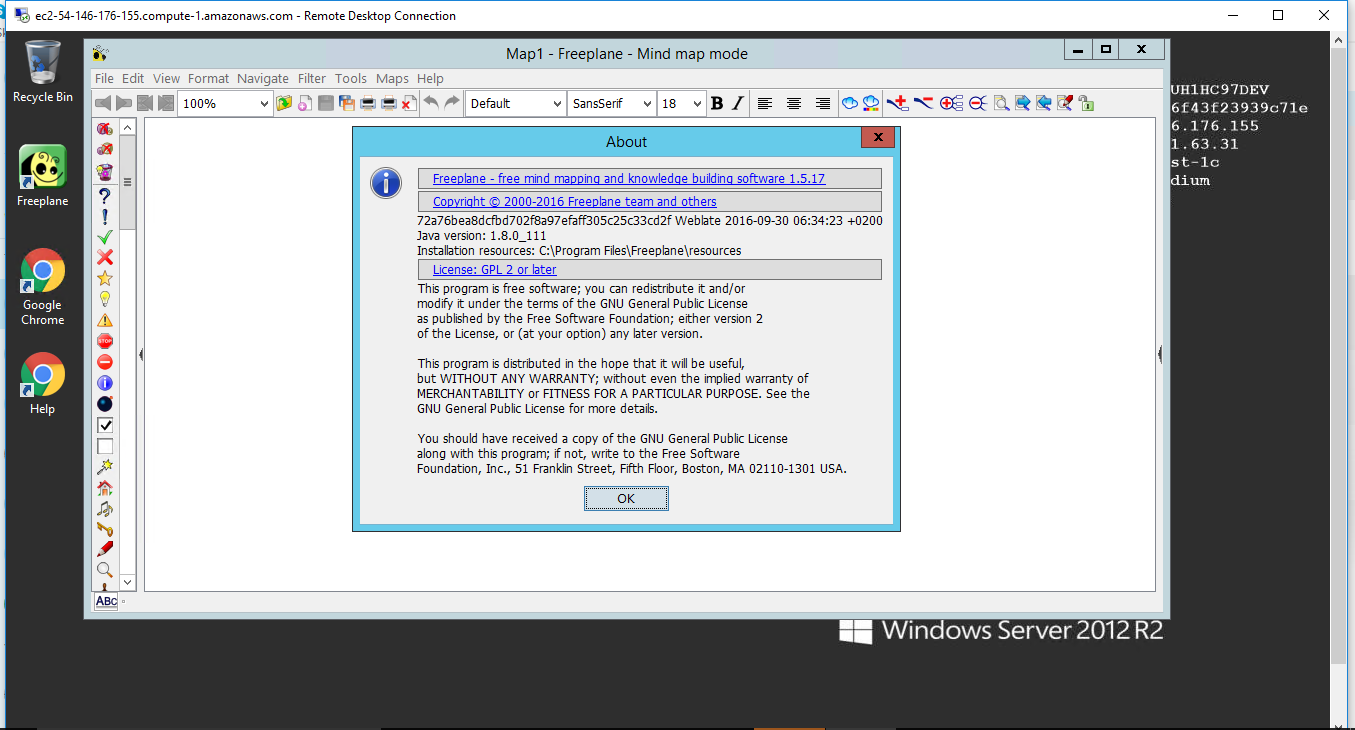
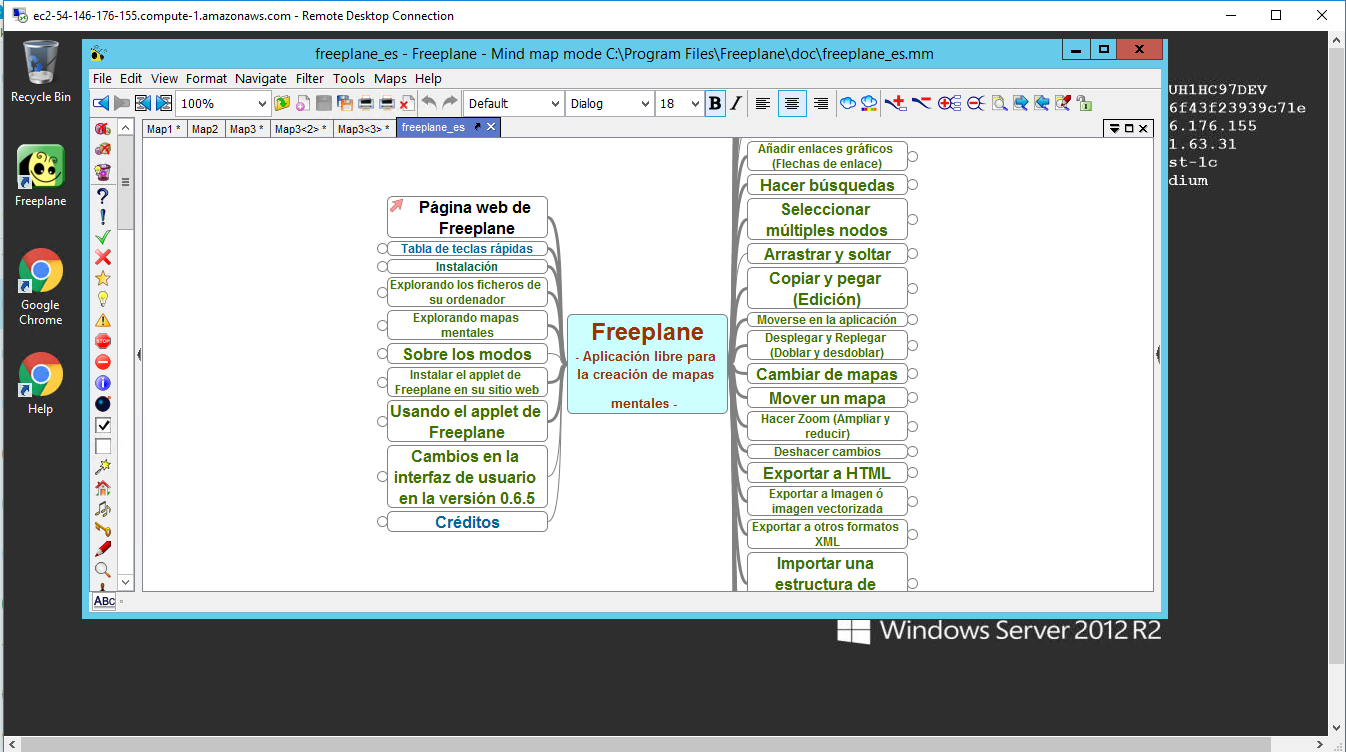
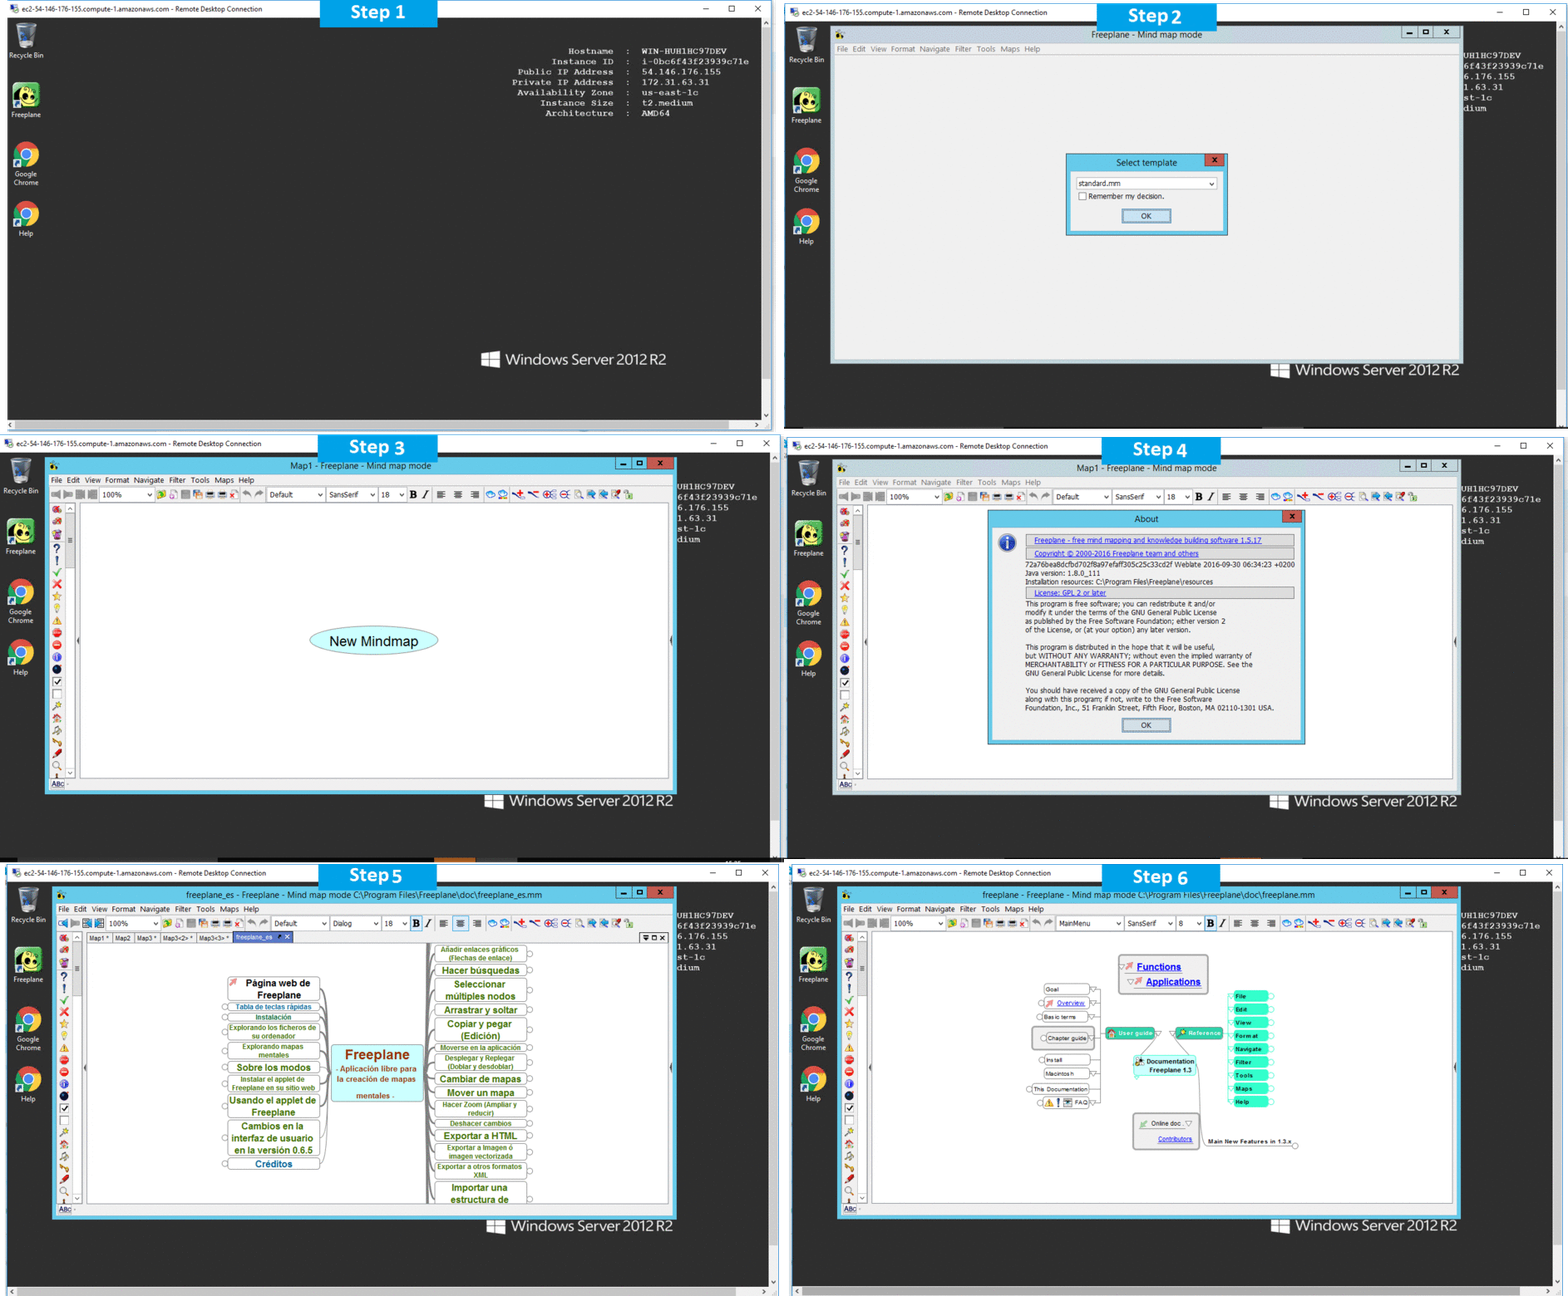
Installation Step by Step Screenshots


