
1-click AWS Deployment 1-click Azure Deployment 1-click Google Deployment
Overview
Coppermine photo gallery is an easy-to-use gallery script. It supports multiple languages and is suitable for any kind of online albums.Coppermine stores the images in albums, which can be grouped in separate categories. It also supports multiple users and the administrator of the gallery can determine the access level to the script features for each one of them. The administrator can also define the allowed actions for the unregistered users.Coppermine Photo Gallery is a fast, feature-rich photo gallery web application with multimedia capabilities. Users can set up a gallery to be private, accessible to registered users only, and/or open to all site visitors. Other features include database and user management, automatic thumbnail creation, an e-card feature and a template system for easy customization to match the rest of a site.
Users, if permitted, can upload pictures with their web browser (thumbnail and intermediate sized images are created on the fly), rate pictures and add comments. The site administrator determines which features are accessible by registered and non-registered users. The site administrator can also manage galleries and batch process large numbers of pictures that have been uploaded onto the server by FTP.
It is possible for multiple users to use Coppermine – the administrator of the website has tools to manage which user groups can have personal albums, send e-cards, and so on. Images files on Coppermine are stored in albums and albums grouped into categories.
Coppermine Configuration and Administration
Here, we are going to cover only the basic administration/configuration. If you wish to know more about the Coppermine functionality you can check the full guide at the Coppermine developers’ web site.
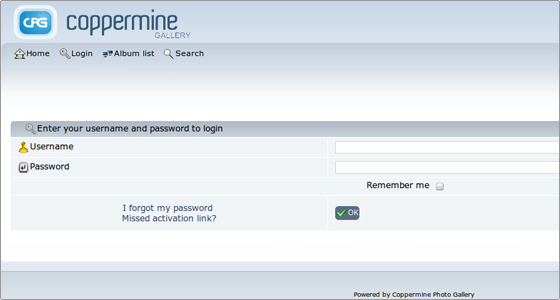
In order to start managing your Coppermine gallery, please log in as the administrator.
Next, navigate to the Config section:
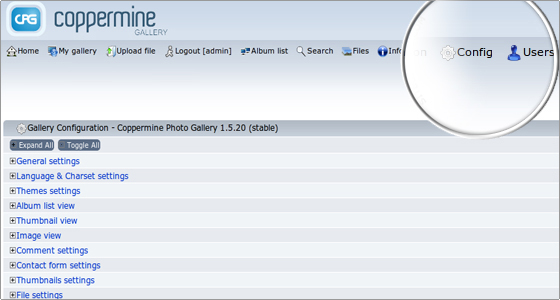
This will bring up the Coppermine configuration menu, which is nicely divided in sections. Expand the General Settings tab.
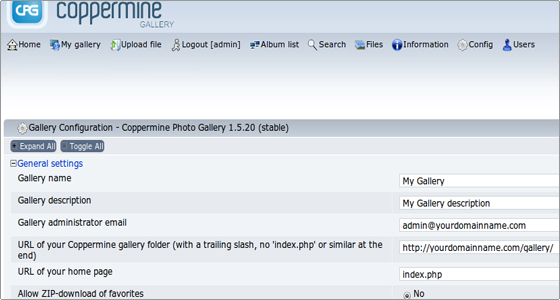
Here is basically all the information that you entered during your gallery installation. You can modify the settings per your personal preferences.
Coppermine Themes
Changing a theme/template with Coppermine is quite an easy task. Generally, you just have to download the theme archive, extract it to your local computer and upload it to your Coppermine themes directory. A good source of free Coppermine themes is the Coppermine themes gallery at FastWebHost.com. Now let us upload a new theme.
First, we will need to find a theme archive to use. For the purpose of this tutorial choose any of the themes available at Coppermine themes gallery. Download the .zip file of any theme on your local computer and extract it. This will create a new directory named after the theme’s name.
However, to make the new theme available for your Coppermine application you will have to upload it on the server. Open an FTP connection using your favorite FTP client and navigate to the directory, where your Coppermine gallery is located (if you access your gallery from your domain name, e.g. http://yourdomainname.com, the Coppermine directory is the public_html folder). Enter the themes directory and upload the whole extracted new theme folder there. This will create a new directory with the theme’s name, which will have the following full path: public_html/themes/theme_name
Changing the Theme of your Coppermine Gallery
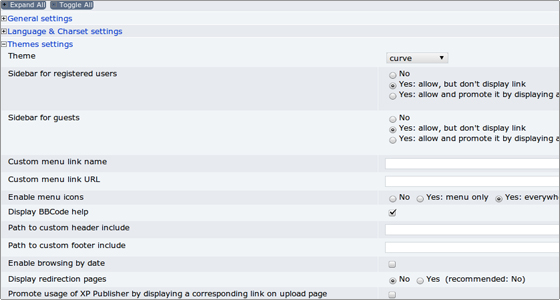
This can be done through the Theme Settings tab. Expand it to see all the features:
Select the new theme from the Theme drop-down menu and save the new configuration.
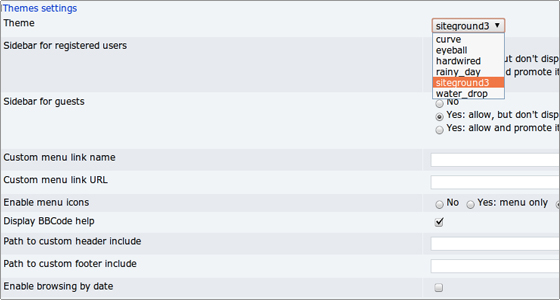
Theme configuration options
Here we will give a brief explanation of the themes settings.
- Sitebar for registered users – The provided sidebar is compatible with the most popular browsers. After its installation the registered users will have a panel with shortcuts to the most useful gallery functions.
- Sitebar for guests – The same sitebar as the one described above. The access to it is allowed for the guest users who have not registered in the web site.
- Custom menu link name – If you want to create a custom link in your Gallery menu enter its name here. For example – Forum.
- Custom menu link URL – This is the actual URL for the link defined in the previous option. If we take the forum example again it would be something like http://yourdomainname.com/forum.
- Enable menu icons – Enabling it will ease the navigation allowing the users to see icons besides the menu options.
- Display BBCode help – The BBCode options will be displayed to help the users with the BBCode usage in the images descriptions.
- Path to custom header include – If you have programmed a custom header for your gallery script you can include the relative path to it in this field.
- Path to custom footer include – If you have developed a custom footer for your gallery script you can include the relative path to it in this field.
- Enable browsing by date – This option will allow the users to list the files uploaded based on a certain date.
- Display redirection pages – When enabled the user will be taken to a predefined page after a certain action and he/she will have to click on a link to be redirected to the default page.
- Promote usage of XP Publisher by displaying a corresponding link on upload page – When enabled it will inform the users that they can use the XP publishing wizard to upload files.
Coppermine with SMF and Joomla (Mambo)
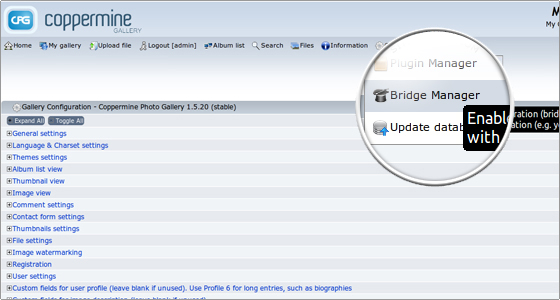
We have made several integrations of Coppermine and Mambo using the Bridge Manager of Coppermine, but the results were not really satisfactory, since there were cases when the integration just crashed the Gallery.
So, we now offer an ever better option – Integrating Coppermine with SMF and Mambo / Joomla. In this way you will have one of the most powerful CMS, one of the most popular discussion boards and one of the best picture galleries all working together, sharing one username and database, so you don’t have to log into each application one by one!
Step 1 Integrating Coppermine with SMF
.Step 2 Integrating SMF with Mambo/Joomla
For this purpose you are going to need a SMF-Mambo/Joomla component which you can download
Then you can follow the detailed instructions about the Joomla-SMF integration here . The Mambo-SMF integration can be completed in the exact same way as the above one.
The SMF bridge Component automatically adds a Forum link on your frontpage, so we can add a Gallery link as well. Log in as administrator on your Mambo/Joomla, click on Menu -> mainmenu.
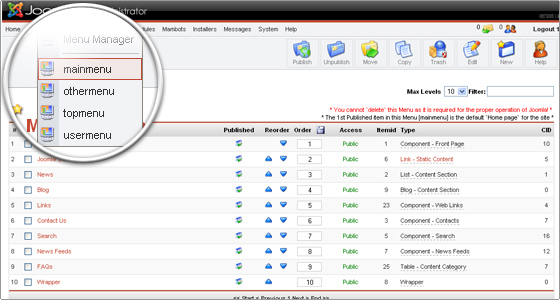
Once inside the mainmenu, please select New – Wrapper and click Next. Select a name for the link (e.g. Gallery) and input the URL that has to be wrapped by Mambo/Joomla. When you are done click Save. Now you have a link for your Forum and your Gallery on your Mambo/Joomla’s frontpage.
Integration of Coppermine with Bulletin Boards
Coppermine can be integrated with the following applications (meaning Coppermine will share the same username/password database with the application it is being integrated with).
- Invision Power Board
- phpBB
- PunBB
- Simple Machines (SMF)
- vBulletin
- Mambo
- MyBB
- XMB
- Xoops
- Phorum
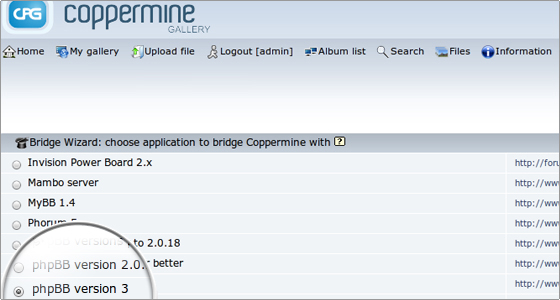
In the Bridge Wizard section pick the application which you want to integrate with Coppermine and click on the next button:
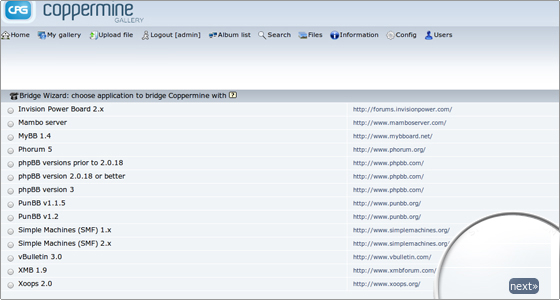
Coppermine with Bulletin Boards
The Coppermine Bridging (integration) Manager lets you integrate the gallery with both the latest version of phpBB and ones prior to it. Please note that the integration process is different for version 3 and the ones prior to it. With that being said, let us proceed with the actual integration. Log in as an administrator and navigate your way to the Bridging Manager.Note that before proceeding with the integration you will have to install the application you are going to bridge with Coppermine, in this case phpBB. You can refer to our phpBB tutorial for further instructions.
Once both the applications are ready, open your Bridge Manager and select the correct phpBB version.
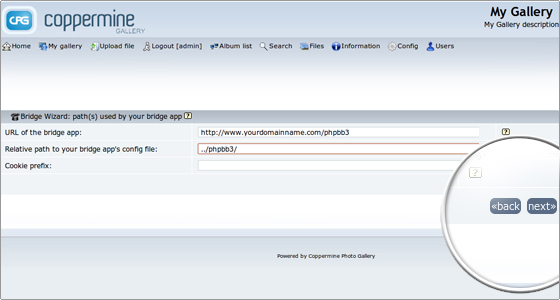
Then you should verify the path used by the forum:
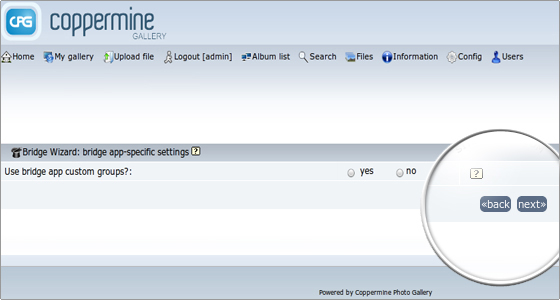
At this point you can decide whether custom users groups different from the default ones should be bridged (if such groups are already added to your phpBB3 script) :
Now you can enable the phpBB3 integration:
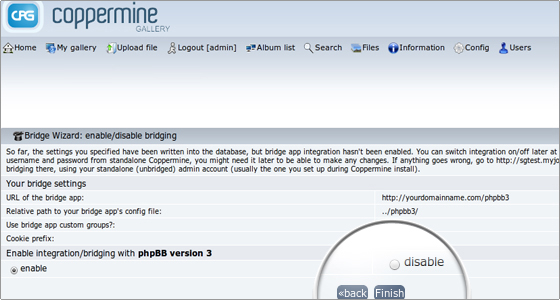
Select enable when you are prompted whether to enable the phpBB integration, click Finish and you are done. Your phpBB forum and your Coppermine gallery now share the same username database and once logged in one of the applications you are automatically being logged in the other as well.
Once you have downloaded the zip file to your local hard drive go to your cPanel -> FileManager and upload the file to your public_html folder. After you have finished uploading the file, extract it using FileManager. You should end up with a folder called cpg15x (where x is a number specifying the script version). You can rename the folder according your personal preference. For example you can set the folder name to “gallery”. In this way your Coppermine gallery will be accessible through http://yourdomainname.com/gallery.
Next you need to create a database for your Coppermine Gallery and add a user to it. Click here to learn how to create a MySQL database.
Once you are ready with the database, you can proceed to the Coppermine web installer and enter the corresponding details. You can access it at http://yourdomainname.com (assuming you have decided to install the script in the main directory for the web site content, otherwise add the gallery folder name in the above URL).
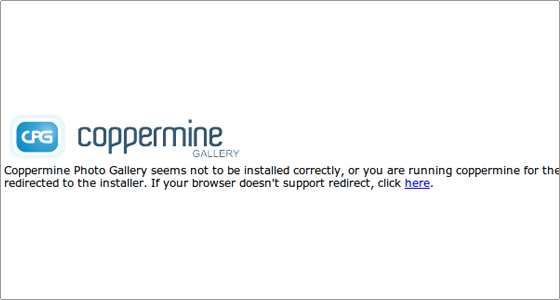
You will be redirected to the Coppermine installation page. If your web browser does not support redirects you should click on the here link.
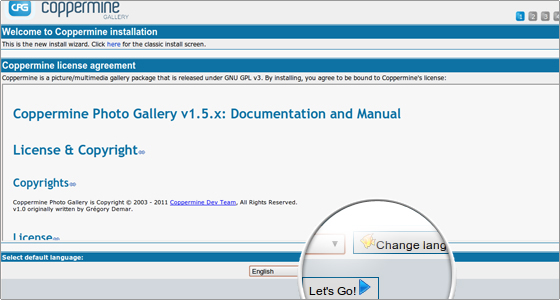
Read the license agreement, pick the preferred language and click on the Let’s Go button to start the installation.
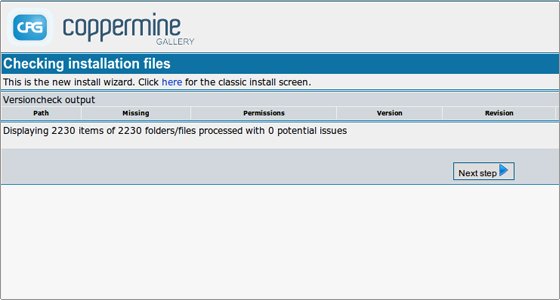
The system will check installation files. To proceed click on Next step.

The directory permissions will be verified. Again, click on Next step.
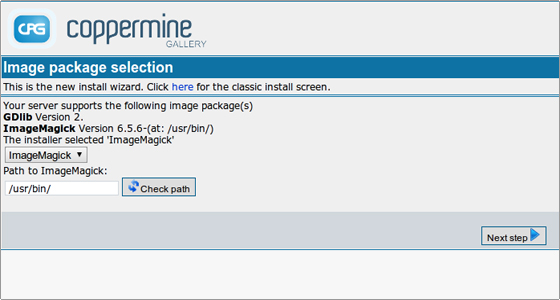
Select the images handler package from the corresponding drop-down menu and proceed to the Next step.
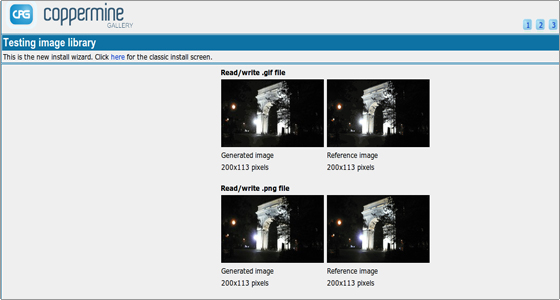
The chosen image library will be tested. Again, proceed with the next step of the installation procedure.
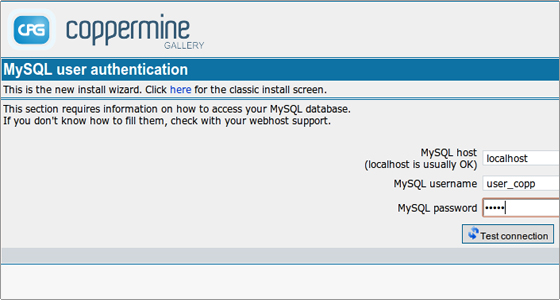
Enter the database details that you have previously set in cPanel- > MySQL databases. Test the connection.
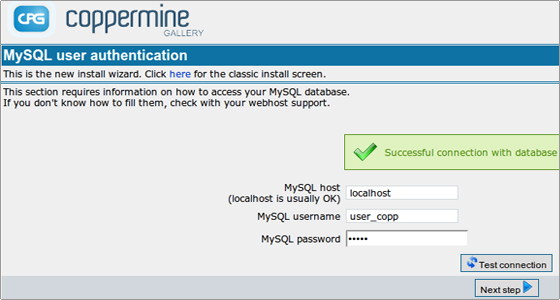
The successful database connection will be confirmed. If some of the database connection details are wrong, enter the correct ones and test it again. Then go to the next stage.
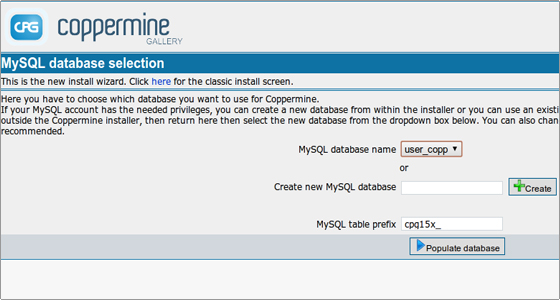
Select your MySQL database that should be used with the Coppermine script and click on the Populate database button.
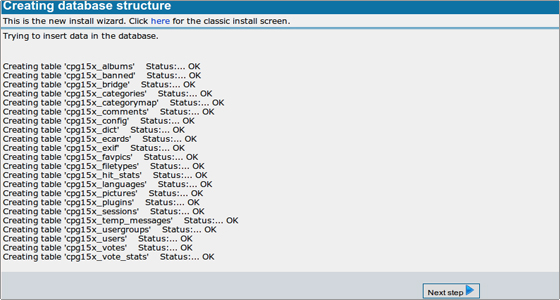
The database tables will be created. Once the procedure is completed click on Next step to continue.
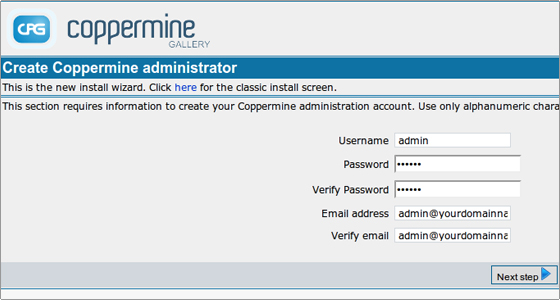
On this stage the Coppermine administrator account should be created. Then proceed in the same way as explained above.
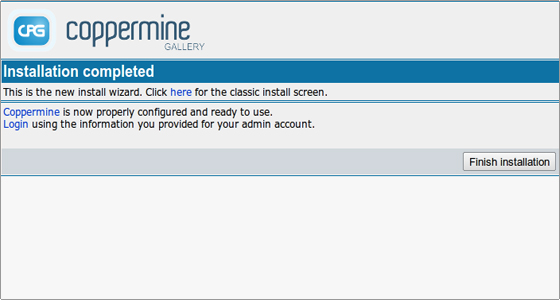
The installation is completed. Click on the Finish Installation button which will load the Coppermine front page.
-Coppermine is a multi-purpose fully-featured and integrated web picture gallery script written in PHP using GD or ImageMagick as image library with a MySQL backend.Coppermine is owned by Coppermine (http://coppermine-gallery.net/) and they own all related trademarks and IP rights for this software.
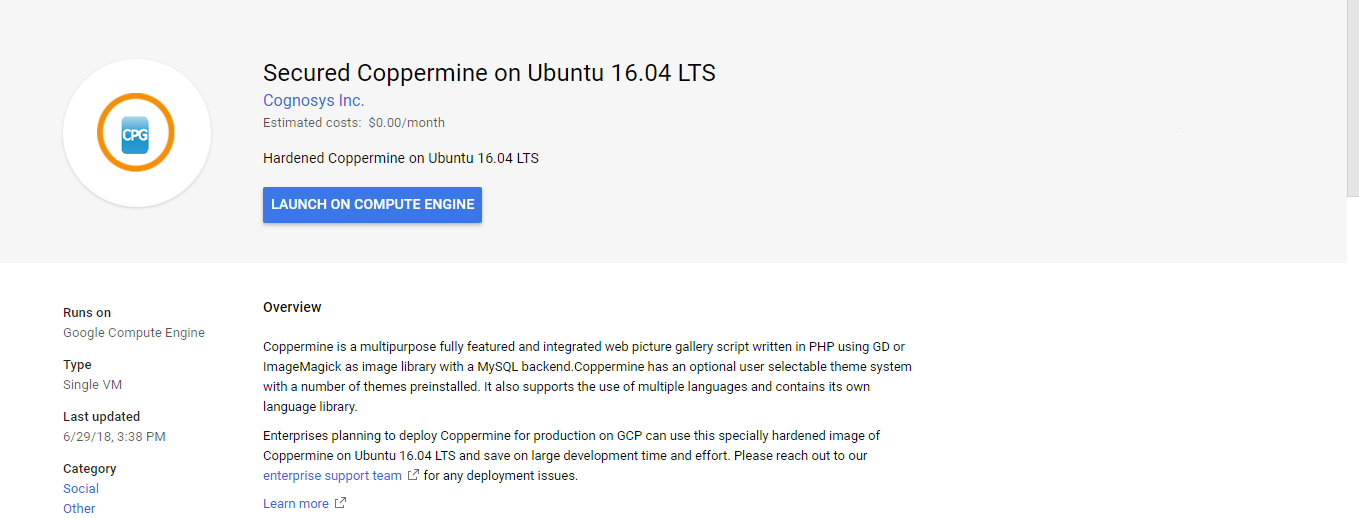
Cognosys provides hardened images of Coppermine on all public cloud ( AWS marketplace and Azure).Deploy your Coppermine securely on cloud i.e. AWS marketplace and Azure with Reliable Services offered by Cognosys at one-click with easy written and video tutorials.
Secured Coppermine on Ubuntu 14-04 LTS
Coppermine On cloud For Azure
CPG is so fully featured it’s not enough to fully list them. Please click the Features Tab to see some of the features. Coppermine Photo Gallery (CPG) is an open source project released under theGNU/GPL terms.
Features
Some of the important features include:
• Albums: Create and arrange pictures in categories and albums. The details of all pictures are stored in the database. It is scalable and flexible with no limits.
• Picture uploads: Users can add pictures in any web form, FTP client or desktop applications. Admins can create batches and add to database. Images can be resized after upload.
• Integration: Coppermine gallery allows easy integration with phpBB, Joomla, Mambo, YaBB SE, Invision Power Board, vBulletin, Simple Machines etc.
• Language: Coppermine is available in most of the leading languages. It allows the users to translate into their native language. In case translation is not possible English is there as a fallback language.
• Privacy: Users have complete control and can decide on the permission levels to be given to viewers. Albums can be protected by restricting users to create ids and password protection. Ability to turn to off mode to unauthorized persons who try to login.
• Visitor preferences: Users have the facility to post comments, give ratings, mark pictures as favorites, add titles.
• Enhanced capabilities: slideshow viewer, e-card features, multi-picture upload, picture resize, random picture selection, last added, image rotation, create thumbnails etc.
• Easy installation features: Users get convenient one click installers which can be downloaded.
• Coppermine allows the users to caption or give a title to the pictures, give a description and define individual fields for each picture.
-Major Feature of Coppermine :
- arrangement of pictures in categories and albums.
- picture information stored in database.
- users can upload pictures with web interface or ftp (and admin can batch-add to database).
- full multimedia support.
- creation of thumbnails and intermediate size pics.
- search feature.
- last added.
- random picture.
- user management (private galleries, groups).
- integration of user management with various bbs (like phpBB, YaBB SE, SMF, Invisionboard, vbulletin).
- caption, title, description and user defined fields for each picture (searchable).
- easy install (installer provided).
- multi-lingual: Arabian, Brazilian Portuguese, Bulgarian, Catalan, Chinese (both Big-5 and GB), Croatian, Czech, Danish, Dutch, English, Estonian, Finnish, French, German (both “Du” and “Sie”), Greek, Hebrew, Hungarian, Indonesian, Italian, Japanese, Latvian, Malay, Norwegian, Polish, Romanian (both with and without diacritics), Russian, Slovenian, Spanish, Swedish, Uighur, Vietnamese; if your language is not on the list, you can easily create a translation for your own language.
- user comments.
- e-card feature.
- slideshow viewer.
- all features customizable with web interface (admin section).
- template system.
- user membership in multiple groups.
- upload approval notice for admin.
- EXIF/IPTC support.
- language selection option in template.
- image rotation.
- multi-pic upload.
- separation of the breadcrumb block so that it can be placed independently of category in the template.
- option to choose max height or width for thumbnails will help in creating nicer looking thumbnail rows and cols.
- option to display a clickable filmstrip of thumbnails below the image display.
- option to show first level albums of a category instead of just statistics of the category.
- option of turning on OR off the showing of “Private” Icon to unlogged / unprivileged user.
- title option to sort in albums.
- online help feature for the admin pages.
- plugin-API.
- English as a fallback language for un-translated entries in language files.
- password-protected albums.
- more admin-settable user profile fields.
- picture-resize on upload.
- bbs integration settable with a wizard-like user interface.
- advanced search (boolean operators).
AWS
Installation Instructions For Ubuntu
Note : Please use “coppermine” in the place of “stack_name”
Access the application via a browser at http://publicdns/stack_name
To connect to the operating system, use SSH and the username is ubuntu.
Please Click here to know how to generate password .
1.Default installation path: will be on your web root folder “/var/www/html/stack_name”
2.Default ports:
Internal Endpoints: Internal Services are normally running on below ports and Shall be NAT-ted with the Public Endpoint as required. Although we do not recommend
Any RDBMS or Nosql admin ports to be opened to Public endpoints and these are all not exposed by default externally.
- 22 – SSH
- 80/443 – Webserver
External Endpoints: For Public Endpoints, normally only below port are Opened, although this can change from stack to stack. We recommend changing SSH and RDP ports to Non Standard ports and Putting ACL to your IP.
- 8080/8443 – Webserver
- 2222 – SSH
Configure custom inbound and outbound rules using this link
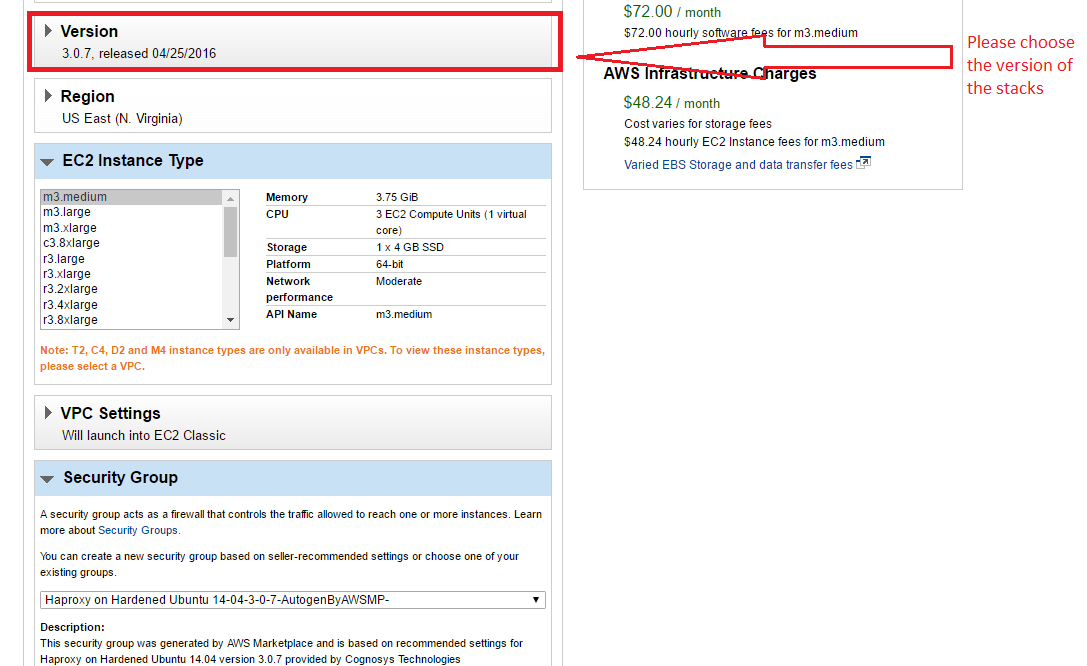
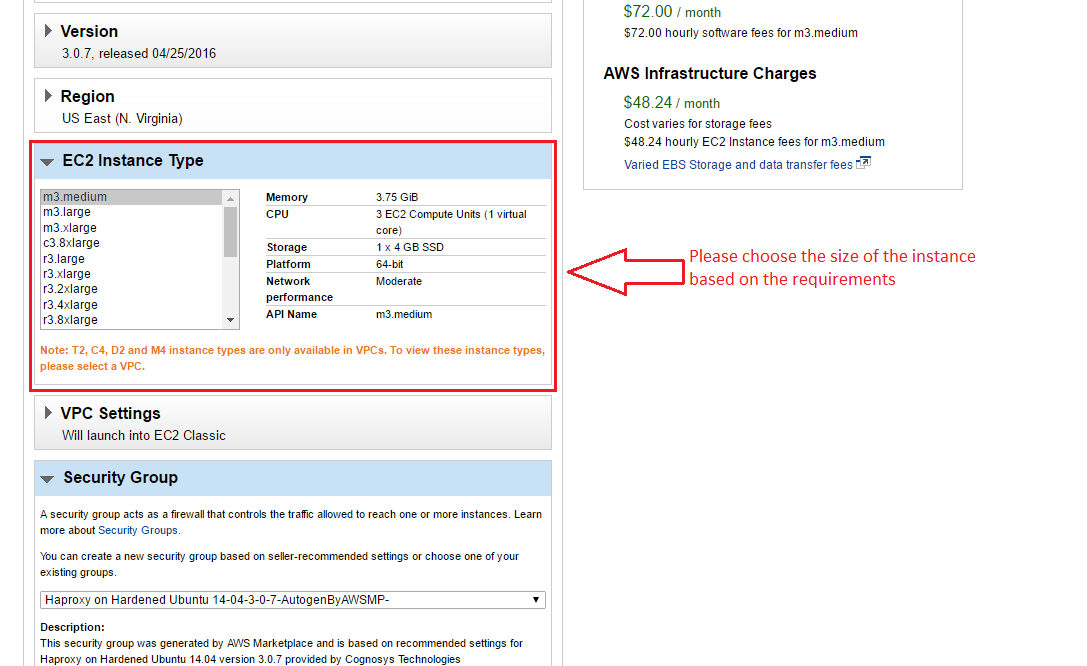
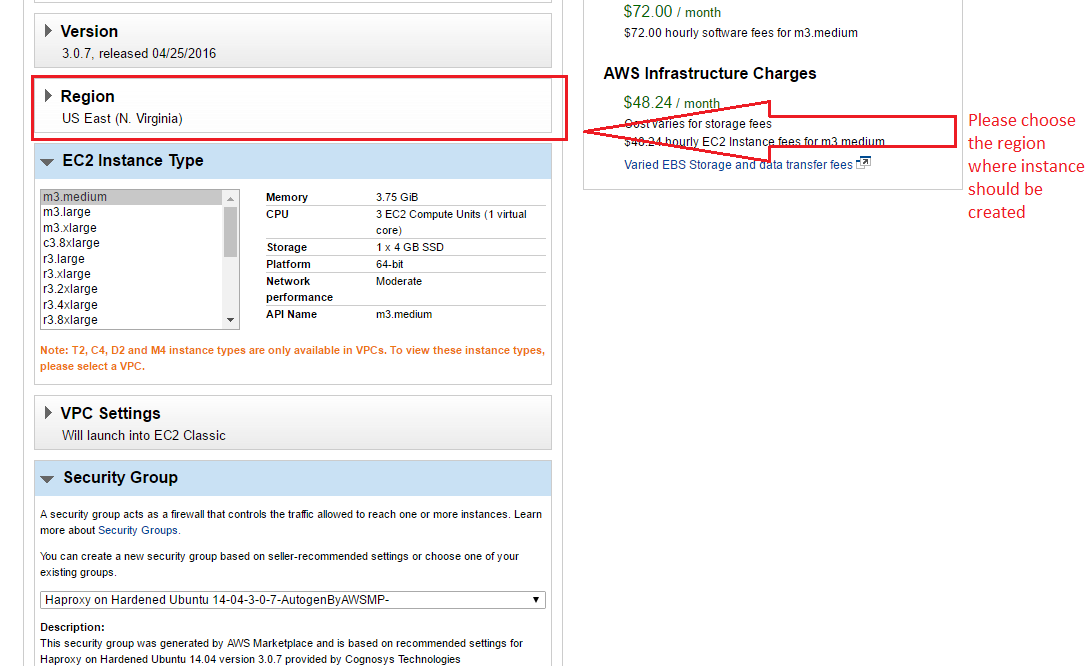
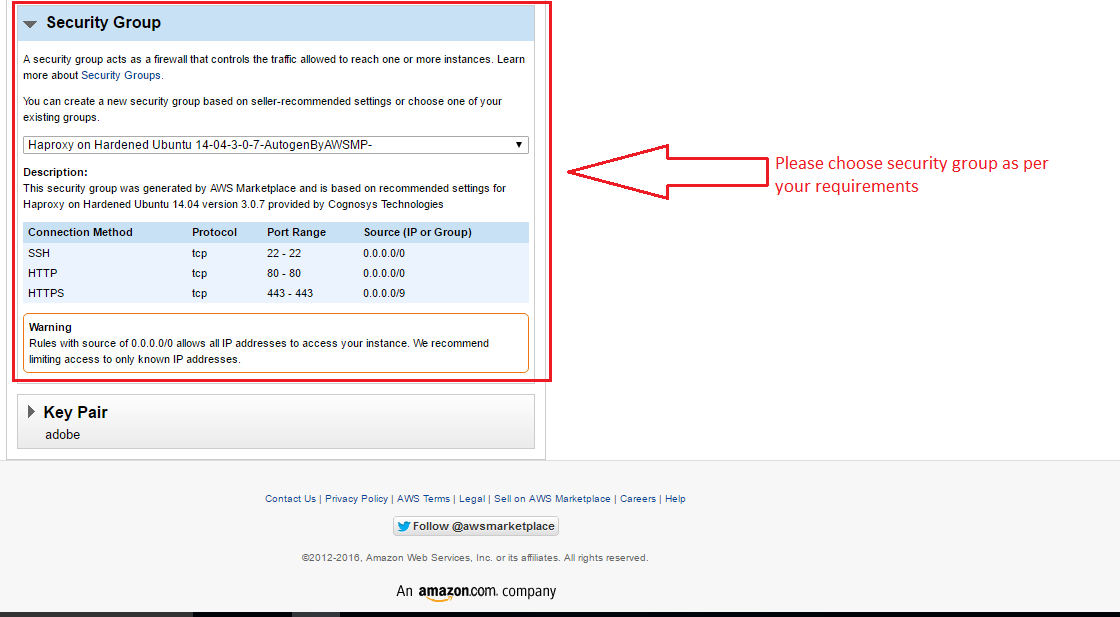
AWS Step by Step Screenshots
Stack Name-This will be your Current stack.

Choose Software Pricing

Choose your Version
Choose your EC2 Instance Type
Choose Your Key Pair

Choose your Region
Choose your Security Group
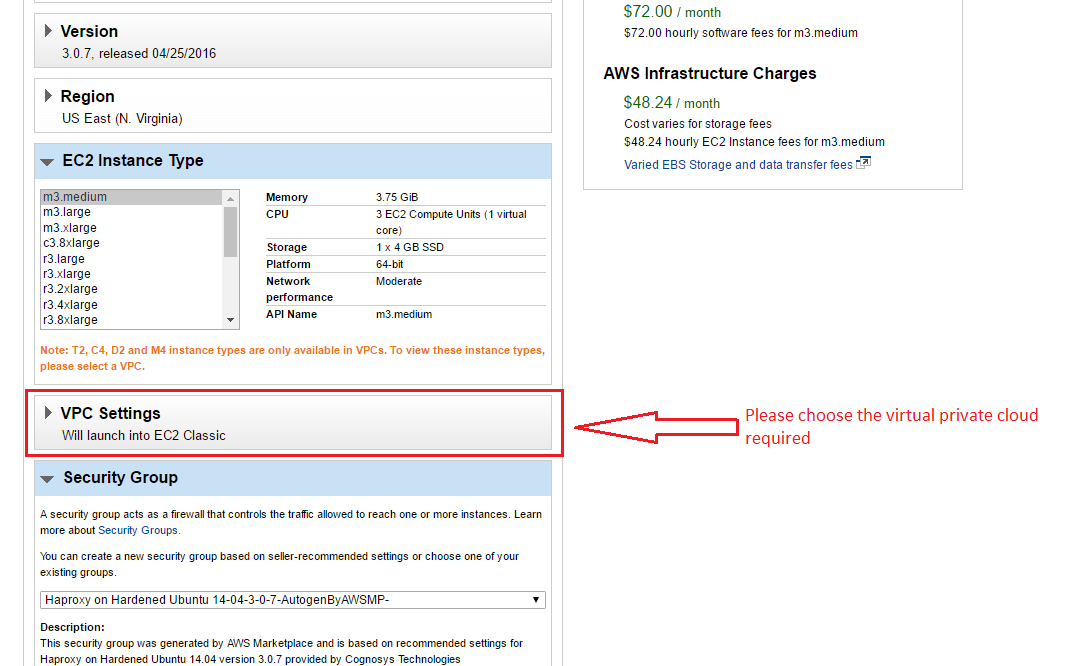
Change VPC Settings
Azure
Installation Instructions For Ubuntu
Note: How to find PublicDNS in Azure
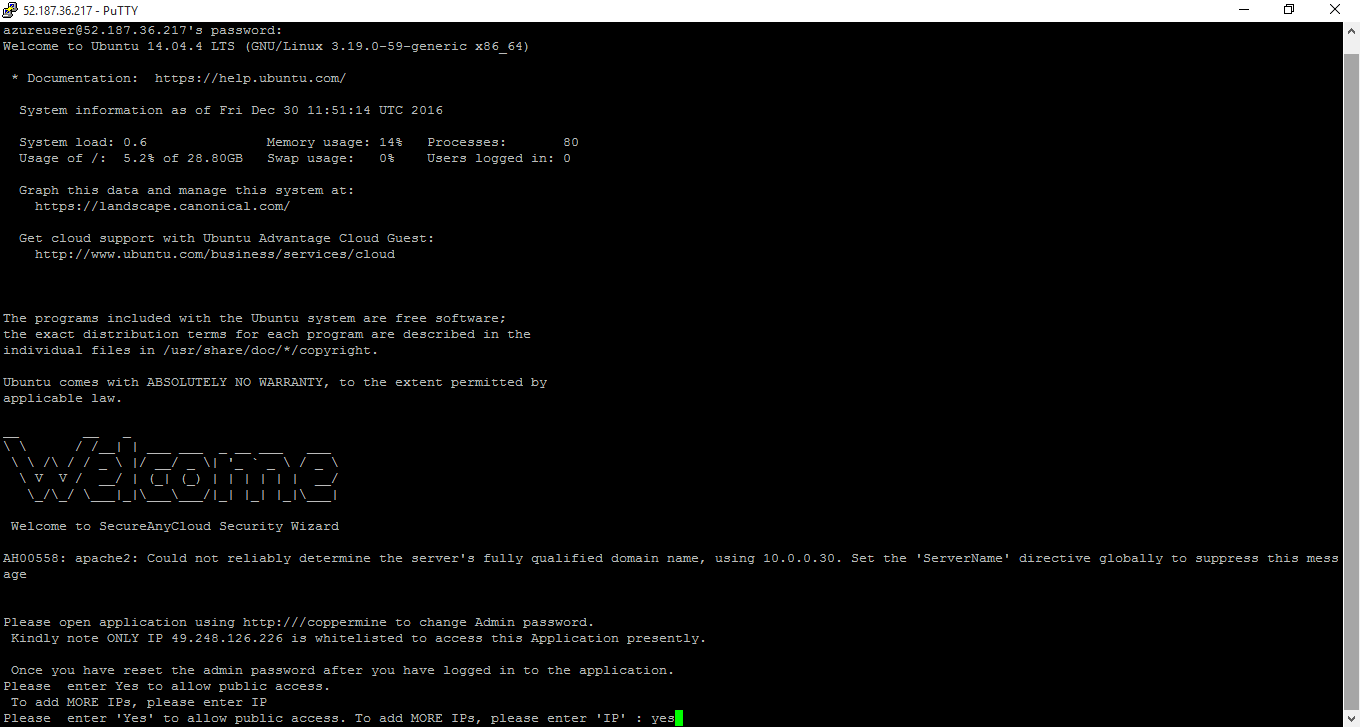
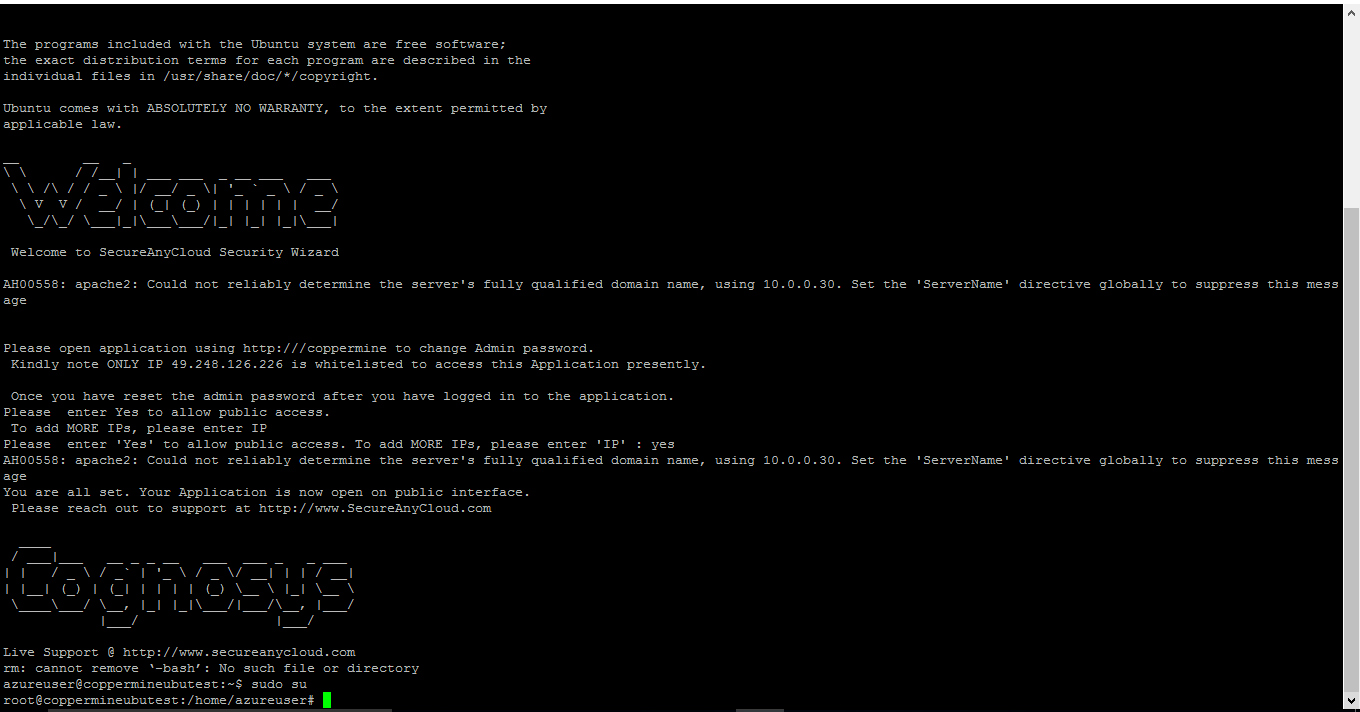
Step 1) SSH Connection: To connect to the deployed instance, Please follow Instructions to Connect to Ubuntu instance on Azure Cloud
1) Download Putty.
2) Connect to virtual machine using following SSH credentials :
- Hostname: PublicDNS / IP of machine
- Port : 22
Username: Your chosen username when you created the machine ( For example: Azureuser)
Password : Your Chosen Password when you created the machine ( How to reset the password if you do not remember)
Step 2) Database Login Details :
- MYSQL Username : root
- MYSQL Password : Passw@rd123
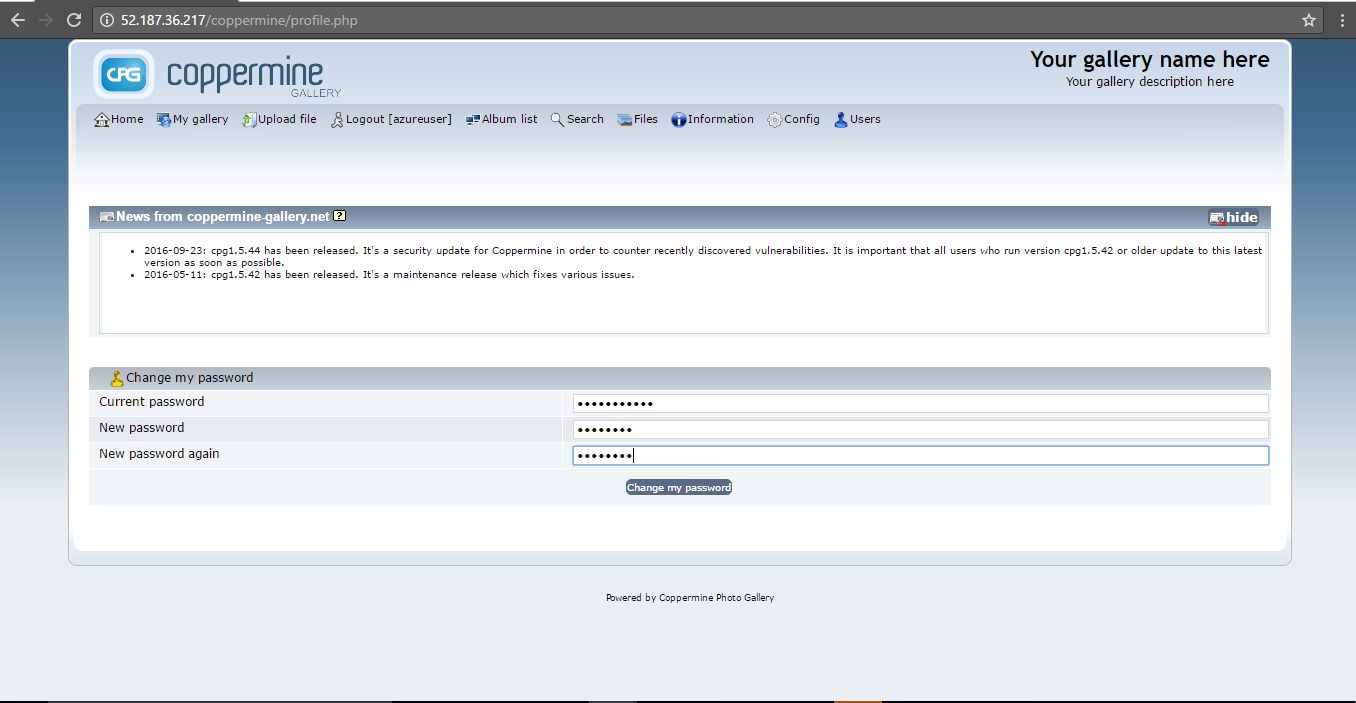
Note :-Please change password immediately after first login.
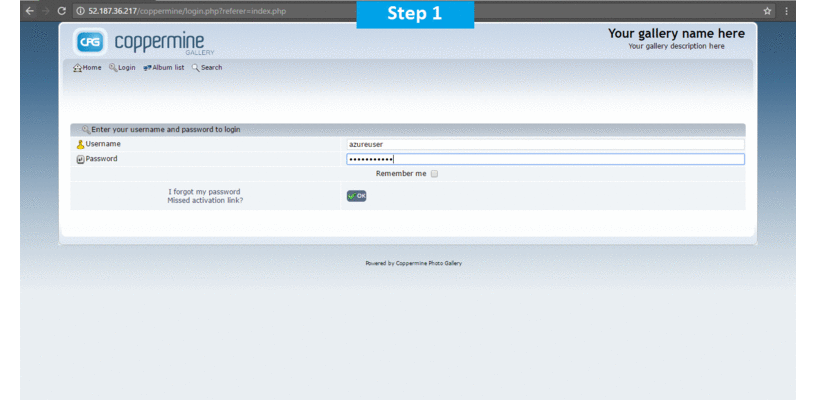
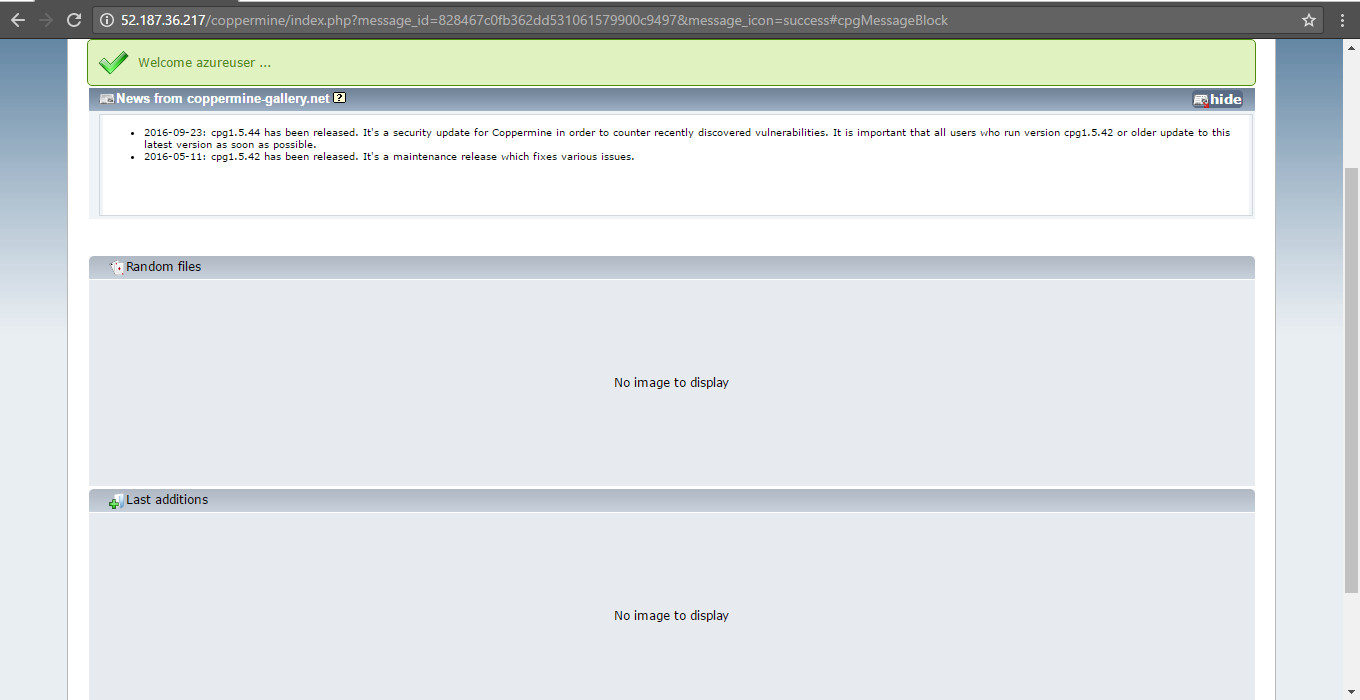
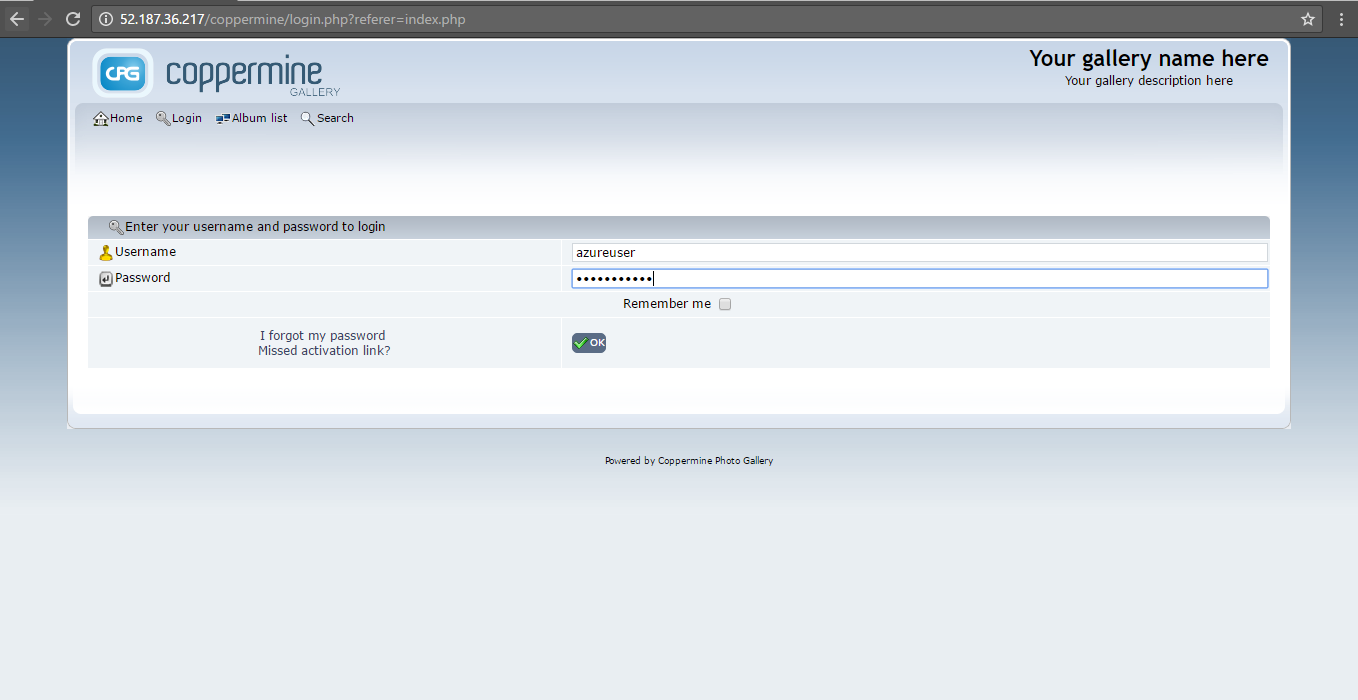
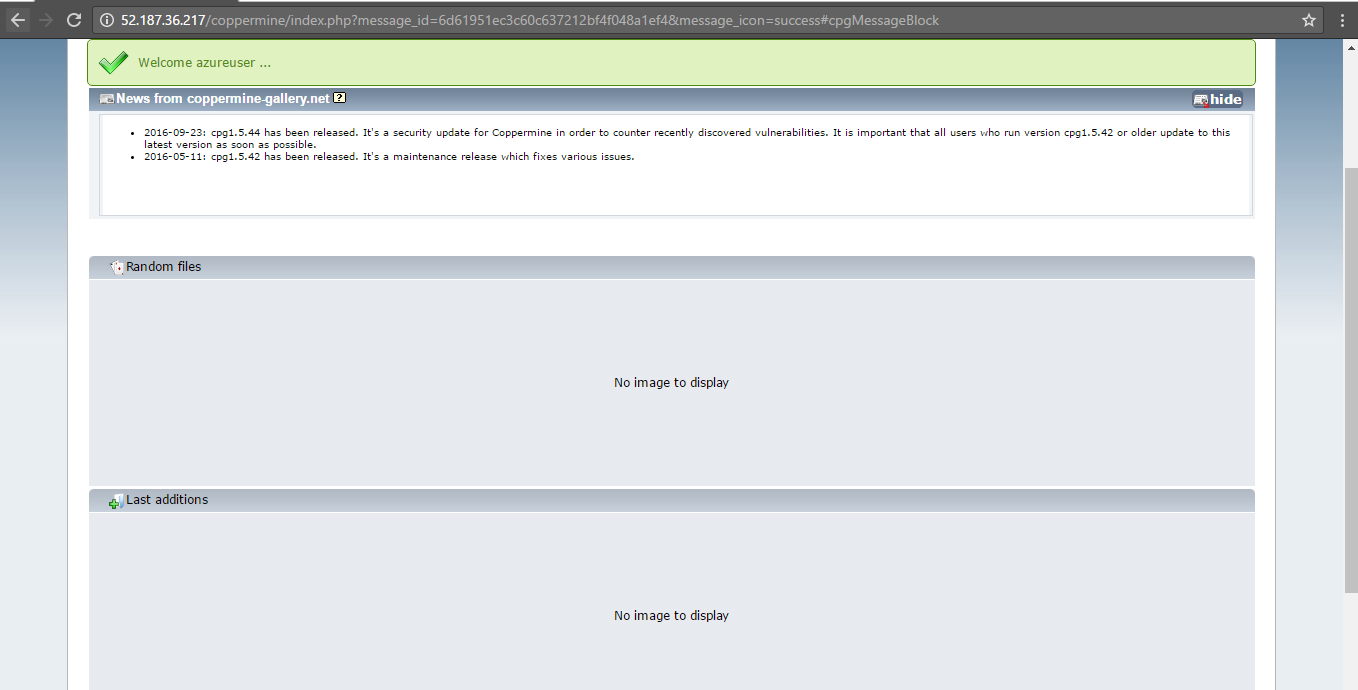
Step 3) Application URL: Access the application via a browser at http:/PublicDNS/coppermine.
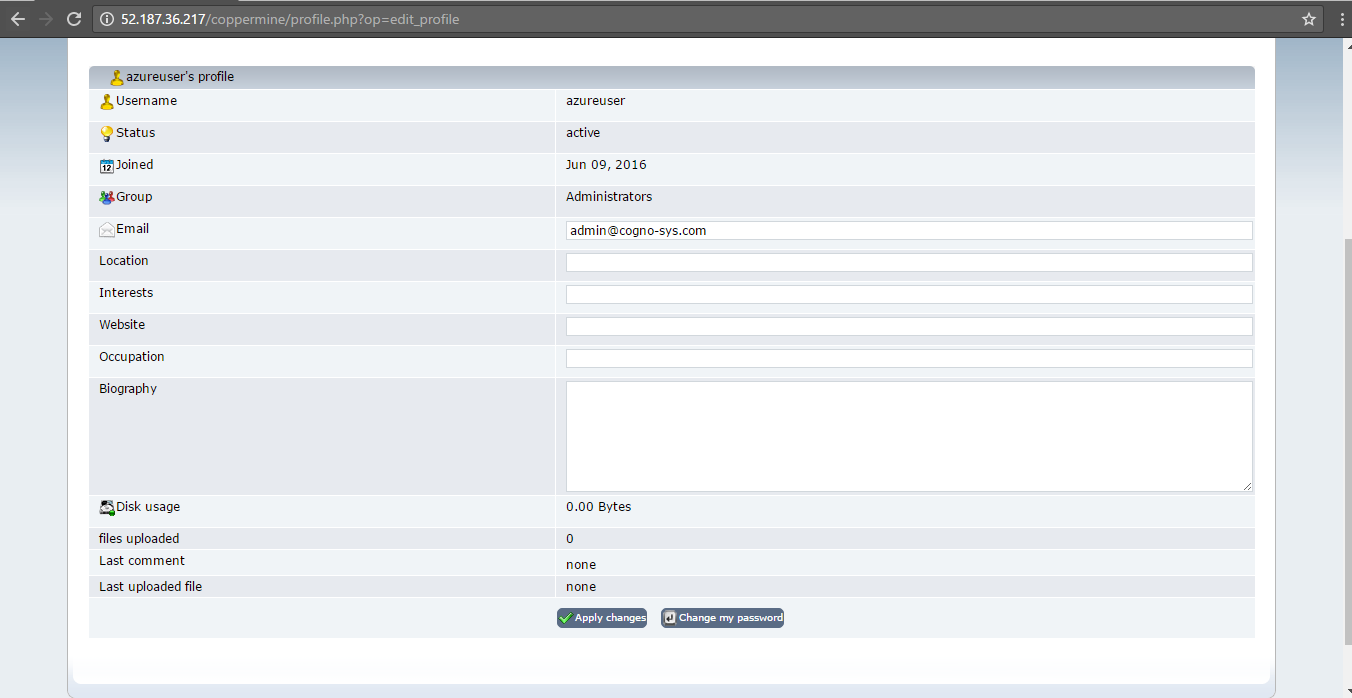
Username : azureuser (Please create new administrator and delete this administrator)
Password : Passw@rd123
Step 4) Other Information:
1.Default installation path: will be on your web root folder “/var/www/html/coppermine”.
2.Default ports:
-
- Linux Machines: SSH Port – 22 or 2222
- Http: 80 or 8080
- Https: 443
- Sql or Mysql ports: By default these are not open on Public Endpoints. Internally Sql server: 1433. Mysql :3306
Configure custom inbound and outbound rules using this link
Installation Instructions For Centos
Note : How to find PublicDNS in Azure
Step 1) SSH Connection: To connect to the deployed instance, Please follow Instructions to Connect to Centos instance on Azure Cloud
1) Download Putty.
2) Connect to virtual machine using following SSH credentials :
- Hostname: PublicDNS / IP of machine
- Port : 22
Username: Your chosen username when you created the machine ( For example: Azureuser)
Password : Your Chosen Password when you created the machine ( How to reset the password if you do not remember)
Step 2)Database Login Details :
- MYSQL Username : root
- MYSQL Password : Passw@rd123
Note :-Please change password immediately after first login.
Step 3) Application URL: Access the application via a browser at http:/PublicDNS/coppermine.
Username : azureuser (Please create new administrator and delete this administrator)
Password : Passw@rd123
Step 4) Other Information:
1.Default installation path: will be on your web root folder “/var/www/html/coppermine” ( Please see above Note for stack name)
2.Default ports:
- Linux Machines: SSH Port – 22 or 2222
- Http: 80 or 8080
- Https: 443
- Sql or Mysql ports: By default these are not open on Public Endpoints. Internally Sql server: 1433. Mysql :3306
Configure custom inbound and outbound rules using this link
Azure Step by Step Screenshots

Installation Instructions For Ubuntu
Installation Instructions for Ubuntu
Step 1) VM Creation:
- Click the Launch on Compute Engine button to choose the hardware and network settings.

- You can see at this page, an overview of Cognosys Image as well as estimated cost of running the instance.
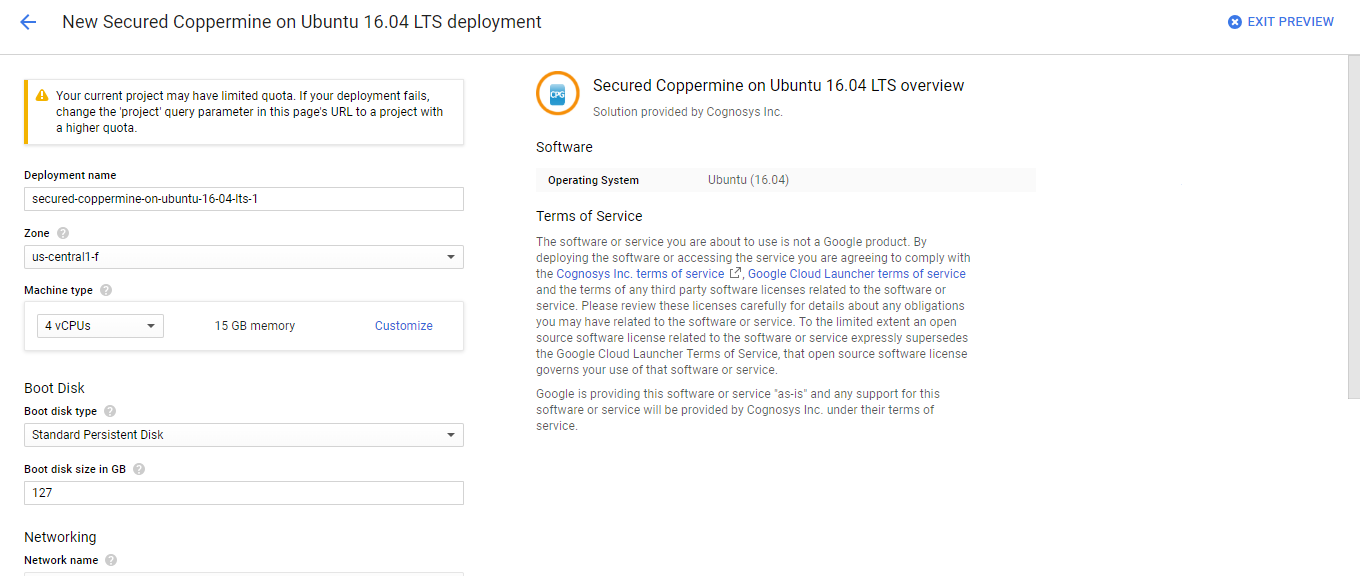

- In the settings page, you can choose the number of CPUs and amount of RAM, the disk size and type etc.


Step 2) SSH Connection:To initialize the DB Server connect to the deployed instance, Please follow Instructions to Connect to Ubuntu instance on Google Cloud
1) Download Putty.
2) Connect to the virtual machine using SSH key
- Hostname: PublicDNS / IP of machine
- Port : 22
Step 3) Database Login Details:
The below screen appears after successful deployment of the image.

For local MySQL root password, please use the temporary password generated automatically during image creation as shown above.
i) Please connect to Remote Desktop as given in step 2 to ensure stack is properly configured and DB is initialized.
ii) You can use MySQL server instance as localhost, username root and password as shown above.
If you have closed the deployment page you can also get the MySQL root password from VM Details “Custom metadata” Section.
Step 4) Application URL: Access the application via a browser at http:/PublicDNS/coppermine.
Step 5) Other Information:
1.Default installation path: will be on your web root folder “/var/www/html/coppermine”
2.Default ports:
- Linux Machines: SSH Port – 22 or 2222
- Http: 80 or 8080
- Https: 443
- Sql or Mysql ports: By default these are not open on Public Endpoints. Internally Sql server: 1433. Mysql :3306
