1-click AWS Deployment 1-click Azure Deployment 1-click Google Deployment
Overview
Silverstripe is an open source PHP content management system. A developer might want to use it because
- BSD License – meaning it can be rebranded as your own application
- Clean Object Oriented code very easy to understand and use – along with extend and customise
- Simple and powerful template engine making themes very easy to create
It can use most databases, primarily MySQL.It provides a large number of essential features for the development of your website and the day-to-day update of the content of your website.The SilverStripe framwork is built with the user in mind, which makes it user-friendly and easy to use. The most important features for the management of a CMS website feel natural and you will quickly get used to SilverStripe. With the large community of people using the application and the regularly updated blog, you will always find a place to share your thoughts or find help for your project.
How to install SilverStripe manually
To manually Install SilverStripe, follow these steps:
Download SilverStripe
The first step of the process is to download the latest stable release of the product. You can complete that via the official SilverStripe website. The latest release is located on the top-left corner of the screen. You need to download the framework and the CMS.

Prepare Files
When you download the package of the script on your local computer, you need to extract it’s contents. We suggest that you extract the files into an empty folder, which will ensure that you will not leave any fild behind. Next, upload the SilverStripe contents to your account on the server. There are two ways of achieving that – using your favorite FTP client or directly using the File Manager service within your cPanel account.
Upload Files
There are two ways of uploading your files to the server – using an FTP client, or uploading directly through your cPanel account > File Manager.
Either way, the important thing is to make sure that all of the files and folders of SilverStripe are properly uploaded to your account and located in the correct directory, where you would like to install the script. For example, if you would like to access your new website directly using your domain, you need to upload the SilverStripe files to the public_html/ directory of your account. However, if your domain name is called example.com and you would like to access your website from a subfolder, such as example.com/silverstripe/, in this case, you will need to create a “silverstripe” folder within the public_html/ directory of your account and then upload the files in it.
Initiate installation
The next step of the process is to access the location, where you have uploaded your SilverStripe files, through your web browser. In this example, we are assuming that you are installing the script within the public_html/ directory of your account. This way, you need to access example.com/install.php, where example.com is your actual domain name and you need to substitute that. All of the installation steps are listed on a single screen with SilverStripe, but we will review them as a separate steps.
The system will attempt to check if the server meets all of the requirements for the installation of SilverStripe. However, as you have not yet entered the database information for your new website, the system will inform you about that within the Database Configuration section of this step.

The next step will allow you to enter the details for the database to be used on your new SilverStripe website. You need to set the new database and ensure it is empty and ready for a new installation.
MySQL Configuration
You can create a new database and a user assigned to it via cPanel.
Once you are ready with your database and a user for it, enter the following details on your SilverStripe installation:
- Database Server – Enter “localhost” without the quotes if the database is stored on the same server as the files of your new installation.
- Database Username – Enter the user assigned to your database.
- Database Password – Enter the password for it.
- Database Name – Enter the database to be used on your new website.
When you are ready, click on the Re-check Requirements button in order to resolve the warning in the previous step.

Next, you need to set the administrative account for your new SilverStripe website. You will be using that account for the management and development of your new website. The details you need to enter are:
- Email – The administrative email address you wish to use.
- Password – The password for your admin account.
- Default Language – Select the language you would like to use on your new website.

You have the option to choose the template for your new website. The Simple template will also include sample data for the new SilverStripe installation. However, if you select the Empty Template option, the installation will be completed with no data on it.

Enable/disable the function to send any information about your website to the SilverStripe development team and click on the Install SilverStripe button to proceed.

Complete the Process
The system will automatically configure your new SilverStripe website as per the information list in the previous chapter.

Make sure that you remove the installation files by clicking on the Click Here To Delete Install Files option.
How to create a new page in SilverStripe
By default, SilverStripe comes with 4 predefined pages – Home, About Us, Contact Us, Page not found.To create a new page, follow the steps below.
STEP 1 Log in to your SilverStripe admin area.
To do this, go to www.yourdomain.com/admin, click the “E-mail & Password” tab and enter the email/username and password you defined during the SilverStripe installation.
STEP 2 Once you have logged in your SilverStripe admin area, click the “Create” button and choose a page from the available page templates:
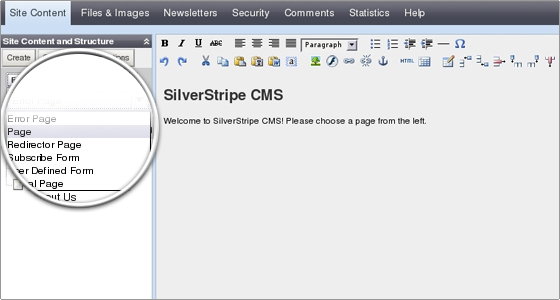
STEP 3 Select “Page” and click the Go button.
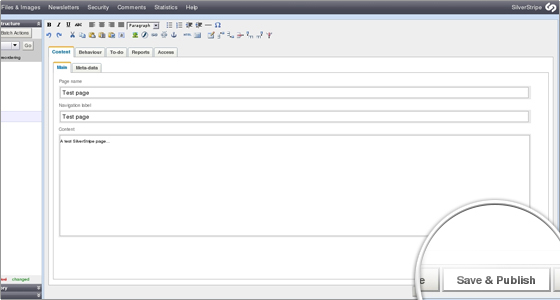
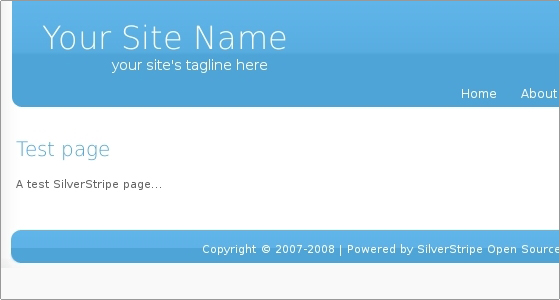
STEP4 Let’s call the page “Test page”.
For “Navigation label” we’ll also put “Test page” and for “Content” we’ll put “A test SilverStripe page…”. To save and publish the page, click the “Save & Publish” button:
STEP 5 Go to http://yourdomainname.com/test-page/ and you will see your new page:
SilverStripe is owned by SilverStripe (https://www.silverstripe.org/) and they own all related trademarks and IP rights for this software.
Secured Silver Stripe CMS on Windows 2012 R2
Secured SilverStripe on Ubuntu 14.04 LTS
Features
Key features of SilverStripe:
- Award winning open source CMS and framework
- An easy-to-use WYSIWIG interface for editing website content
- Some editing features include drag & drop functionality.
- No html knowledge required by content editors
- Unlimited pages
- Unlimited admin users
- Automatic navigation menu updating
- Ability to manage media – images, audio, video, pdf documents, or other industry specific file formats
- A drag and drop media manager for uploading & organizing files
- Asset manager syncs with file repository on server so files can also be transferred through FTP
- Developers can tailor the admin editing functions based on varying content types (e.g. events, types of products, types of services, courses, white papers, locations)
- SEO friendly so that search engines can find relevant content on your site
- Page draft previewing
- Page versioning & rollback
- Automated XML Sitemap – to inform search engines about the website pages that are available for indexing
- Image manipulation i.e. cropping, resizing etc. within the CMS
- Built-in spell checker
- Easy management of heading structure (H1 – H2 – H3 etc.)
- Paste as Text and Import from Word functions facilitating the easy re-purposing of Microsoft Word Content
Key benefits and why they are important:
- Intuitive administrative tool
Administrative users can easily understand how to edit page content with only a small amount of training and instruction. - Extendable framework
It allows a developer to easily customize the admin tool in order to meet business-specific requirements. - Standards-based system that is well documented with a global support community
Programming, database design, and web development technologies can be complicated. If something happens, you can find another developer to perform common maintenance and development tasks on the site without them having to guess about how a proprietary system was built. - Documentation
SilverStripe is well documented on the inner workings of the code base. This is important so that a website developer can spend less time trying to figure out how the framework is built and more time on customizing your site or application. - Normalized database structure
A normalized database structure is key to software application development. Inefficient queries can bog down system resources and slow down a website. Efficient queries allow for quick data lookups and data reporting can be more easily customizable. The framework is built so that custom data must adhere to database normalization rules. - Automatic and partial caching for performance improvements
The front-end is not restricted to page-level caching. It can instead be configured so that common sections are cached as blocks that all users see in the same way. - Page Rollback
If an administrative user makes a data-entry mistake that messes up a page on the live site. The page can be easily rolled back to a previous version and republished. - OS Portability
SilverStripe can run on either a Linux or a Windows based operating system. - Microsoft Certified Web App
SilverStripe is one of a very small number of open source PHP applications that has been certified to run on the Common Web Platform. More Info. - Tiered Workflow Approvals – Add-On*
Administrative users can be assigned to a workflow process and multiple sign-offs can be required before pages can be published to the live site. - Multi-Language – Add-On*
If you have a need to offer your customers the same site in a different language, the administrative interface can be configured to switch modes so that the administrate user can easily enter each of the content translations right next to the English version.
-Major Features of SilverStripe
- EASY PAGE EDITING
- FILE MANAGEMENT
- MEDIA INSERTION
- DRAG & DROP SITE TREE
- SECURITY & AUDIT TRAIL
AWS
Installation Instructions For Ubuntu
Note: How to find PublicDNS in AWS
Step 1) SSH Connection: To connect to the deployed instance, Please follow Instructions to Connect to Windows instance on AWS Cloud
Connect to the virtual machine using following RDP credentials:
- Hostname: PublicDNS / IP of machine
- Port : 3389
Note : Please add Instance id of the instance from ec2 console as shown below

Username: To connect to the operating system, use RDP and the username is Administrator.
Password: Please Click here to know how to get password .
Step 2) Database Login Details:
Username : root || Password : Passw@rd123
Note: Please change the password immediately after the first login.
Step 3) Application URL: Access the application via a browser at http://PublicDNS/silverstrip
- User Name: ec2-user
- Password: Passw@rd123
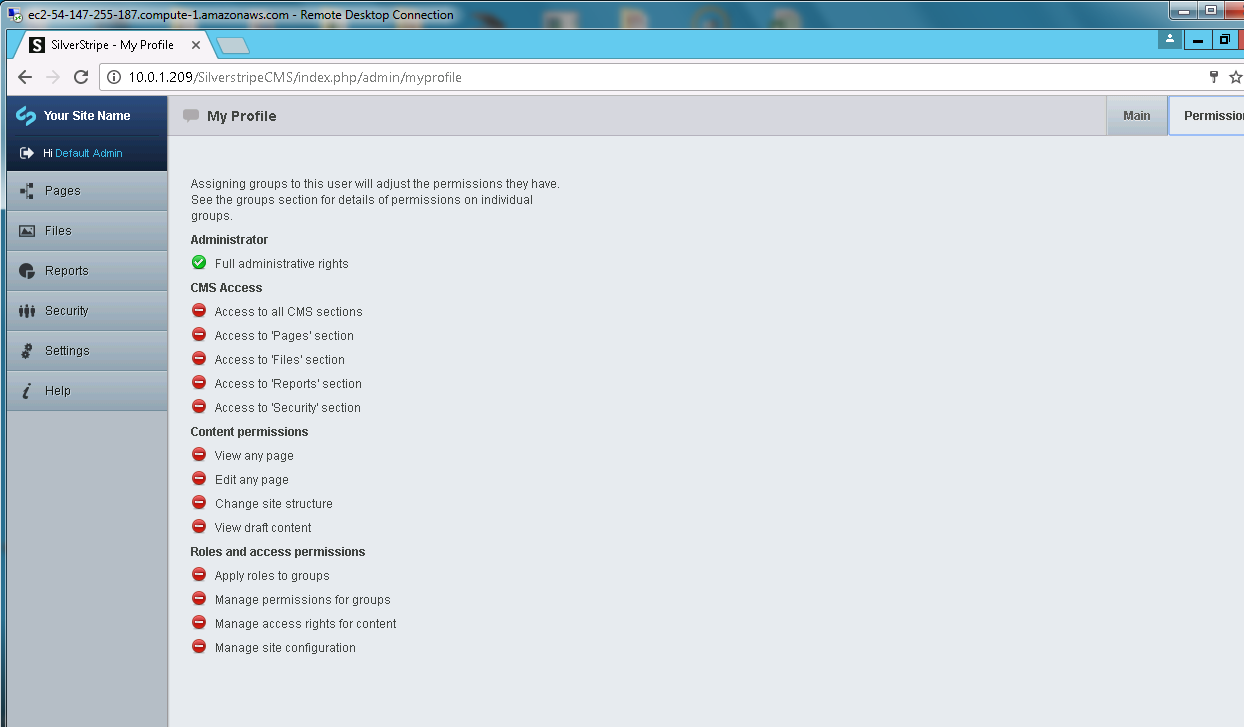
Steps to access the Admin Panel:
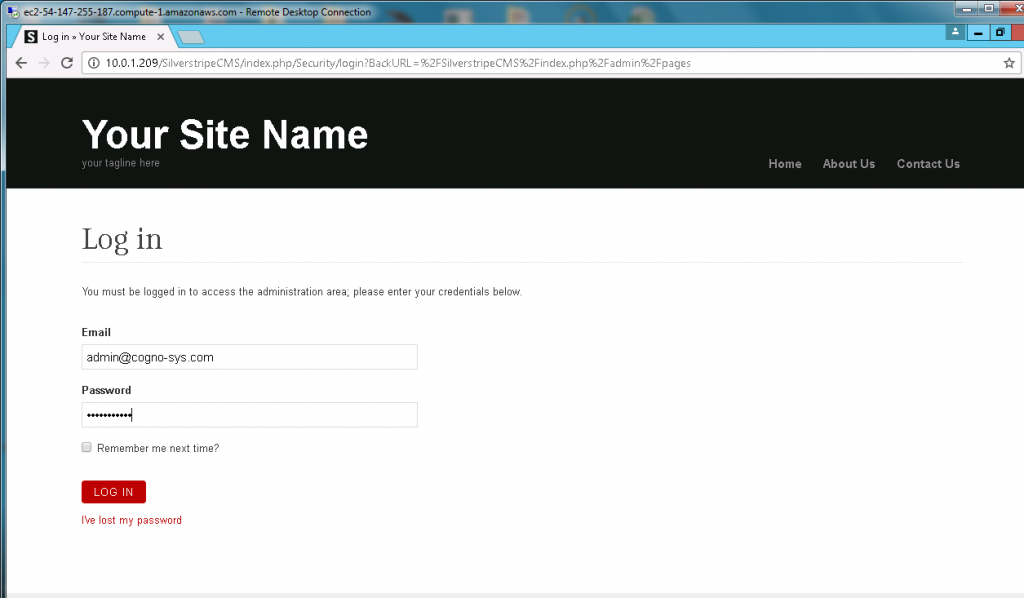
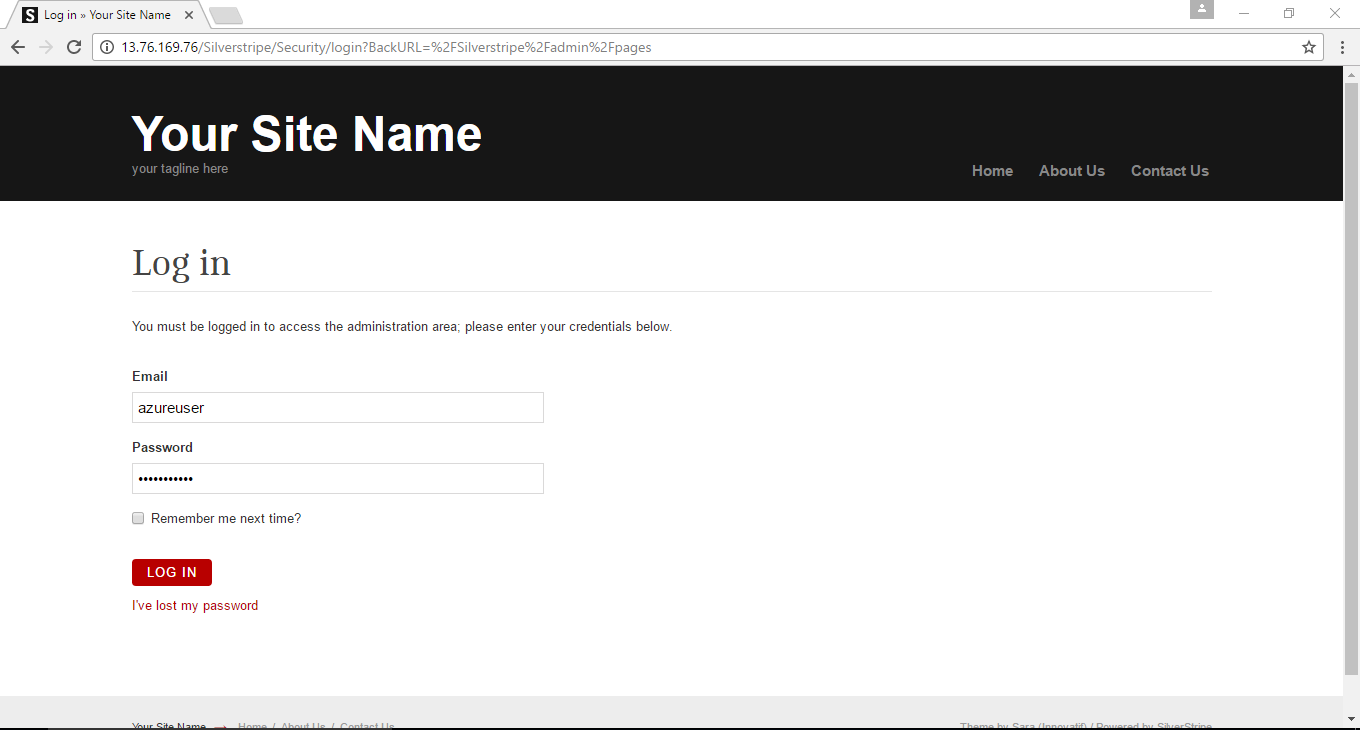
- To login to Silver Stripe Administrative Panel, you need
to open your browser and navigate to http://PublicDNS/silverstripecms - Enter username and password in the given fields and click on the“Login”button to access the Admin Panel.
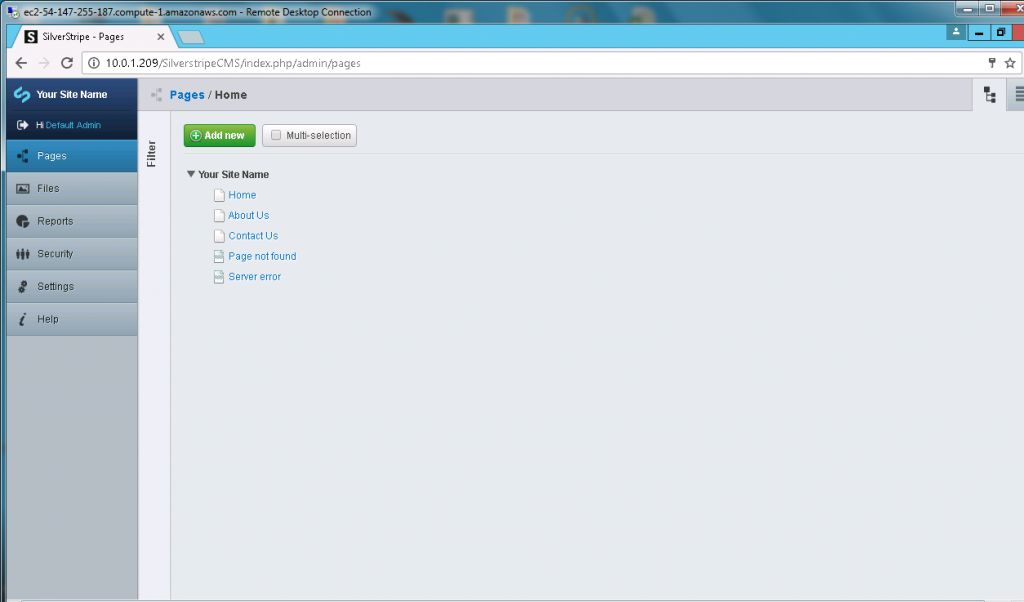
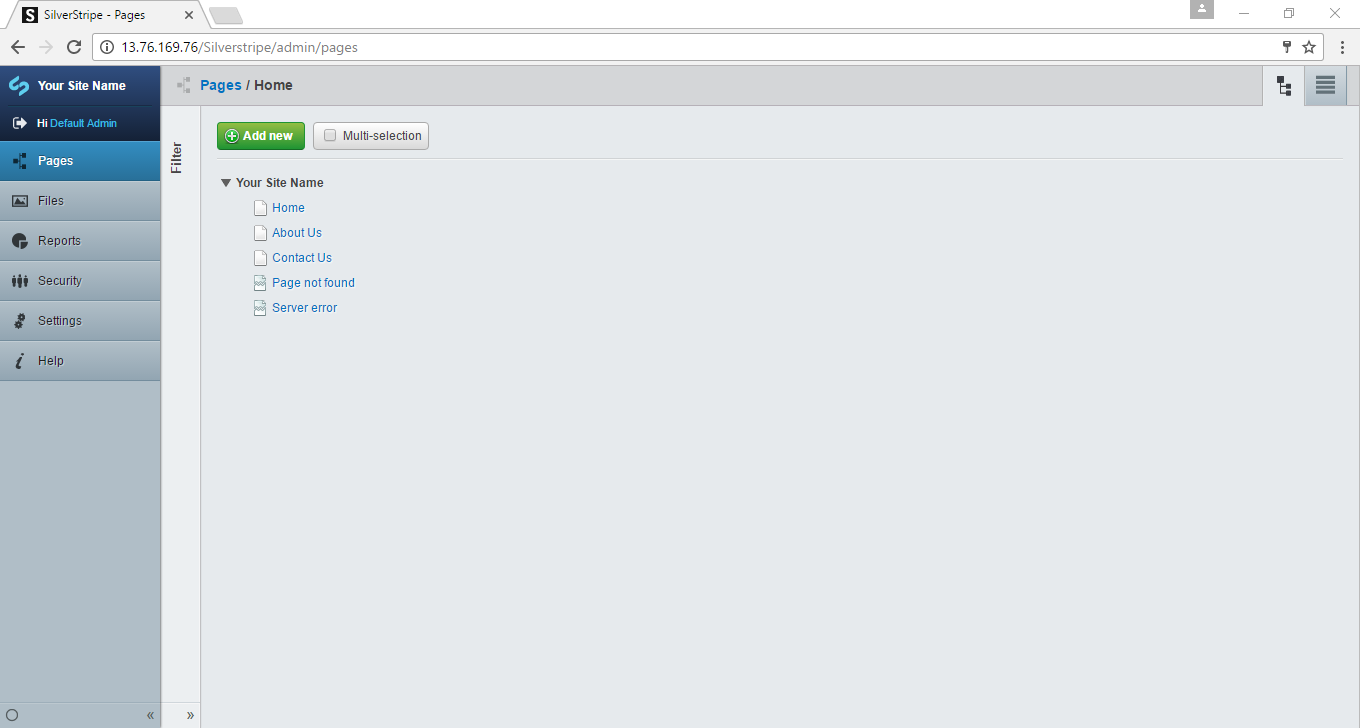
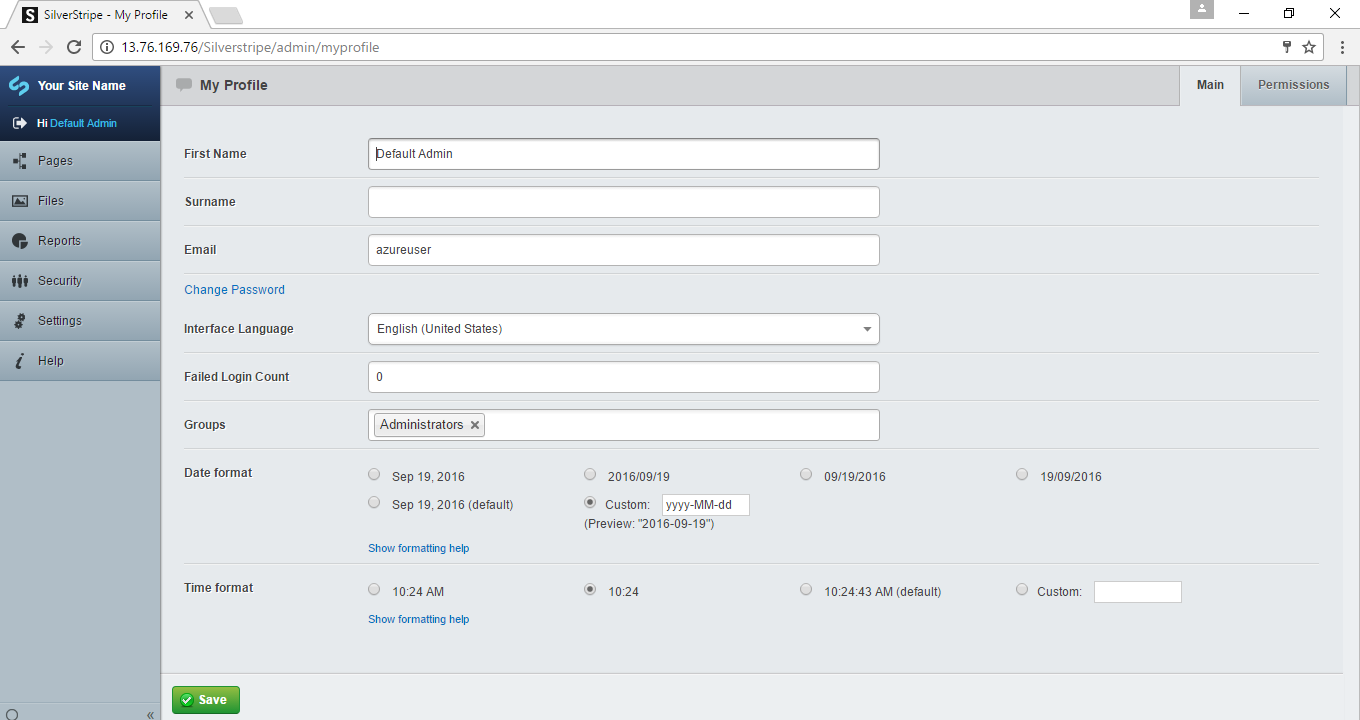
- After successful login to the Admin Panel, you will get access to Silver Stripe Application.
Step 4) Other Information:
1.Default installation path: will be in your web root folder “C:\inetpub\wwwroot\silverstripecms”
2.Default ports:
- Windows Machines: RDP Port – 3389
- Http: 80
- Https: 443
- Mysql ports: By default, these are not open on Public Endpoints. Internally Mysql server: 3306
Configure custom inbound and outbound rules using this link
Installation Instructions For Windows
Note: How to find PublicDNS in AWS
Step 1) RDP Connection: To connect to the deployed instance, Please follow Instructions to Connect to Windows instance on AWS Cloud
Connect to the virtual machine using following RDP credentials:
- Hostname: PublicDNS / IP of machine
- Port : 3389
Username: To connect to the operating system, use RDP and the username is Administrator.
Password: Please Click here to know how to get password .
Step 2) Database Login Details:
Username : root || Password : Passw@rd123
Note: Please change the password immediately after the first login.
Step 3) Application URL: Access the application via a browser at http://PublicDNS/silverstripecms
- User Name: ec2-user
- Password: Passw@rd123
Steps to access the Admin Panel:
- To login to Silver Stripe Cms Administrative Panel, you need
to open your browser and navigate to http://PublicDNS/silverstripecms - Enter username and password in the given fields and click on the“Login”button to access the Admin Panel.
- After successful login to the Admin Panel, you will get access to Silver Stripe Cms Application.
Step 4) Other Information:
1.Default installation path: will be in your web root folder “C:\inetpub\wwwroot\silverstripecms”.
2.Default ports:
- Windows Machines: RDP Port – 3389
- Http: 80
- Https: 443
- Mysql ports: By default these are not open on Public Endpoints. Internally Mysql server: 3306
Configure custom inbound and outbound rules using this link.
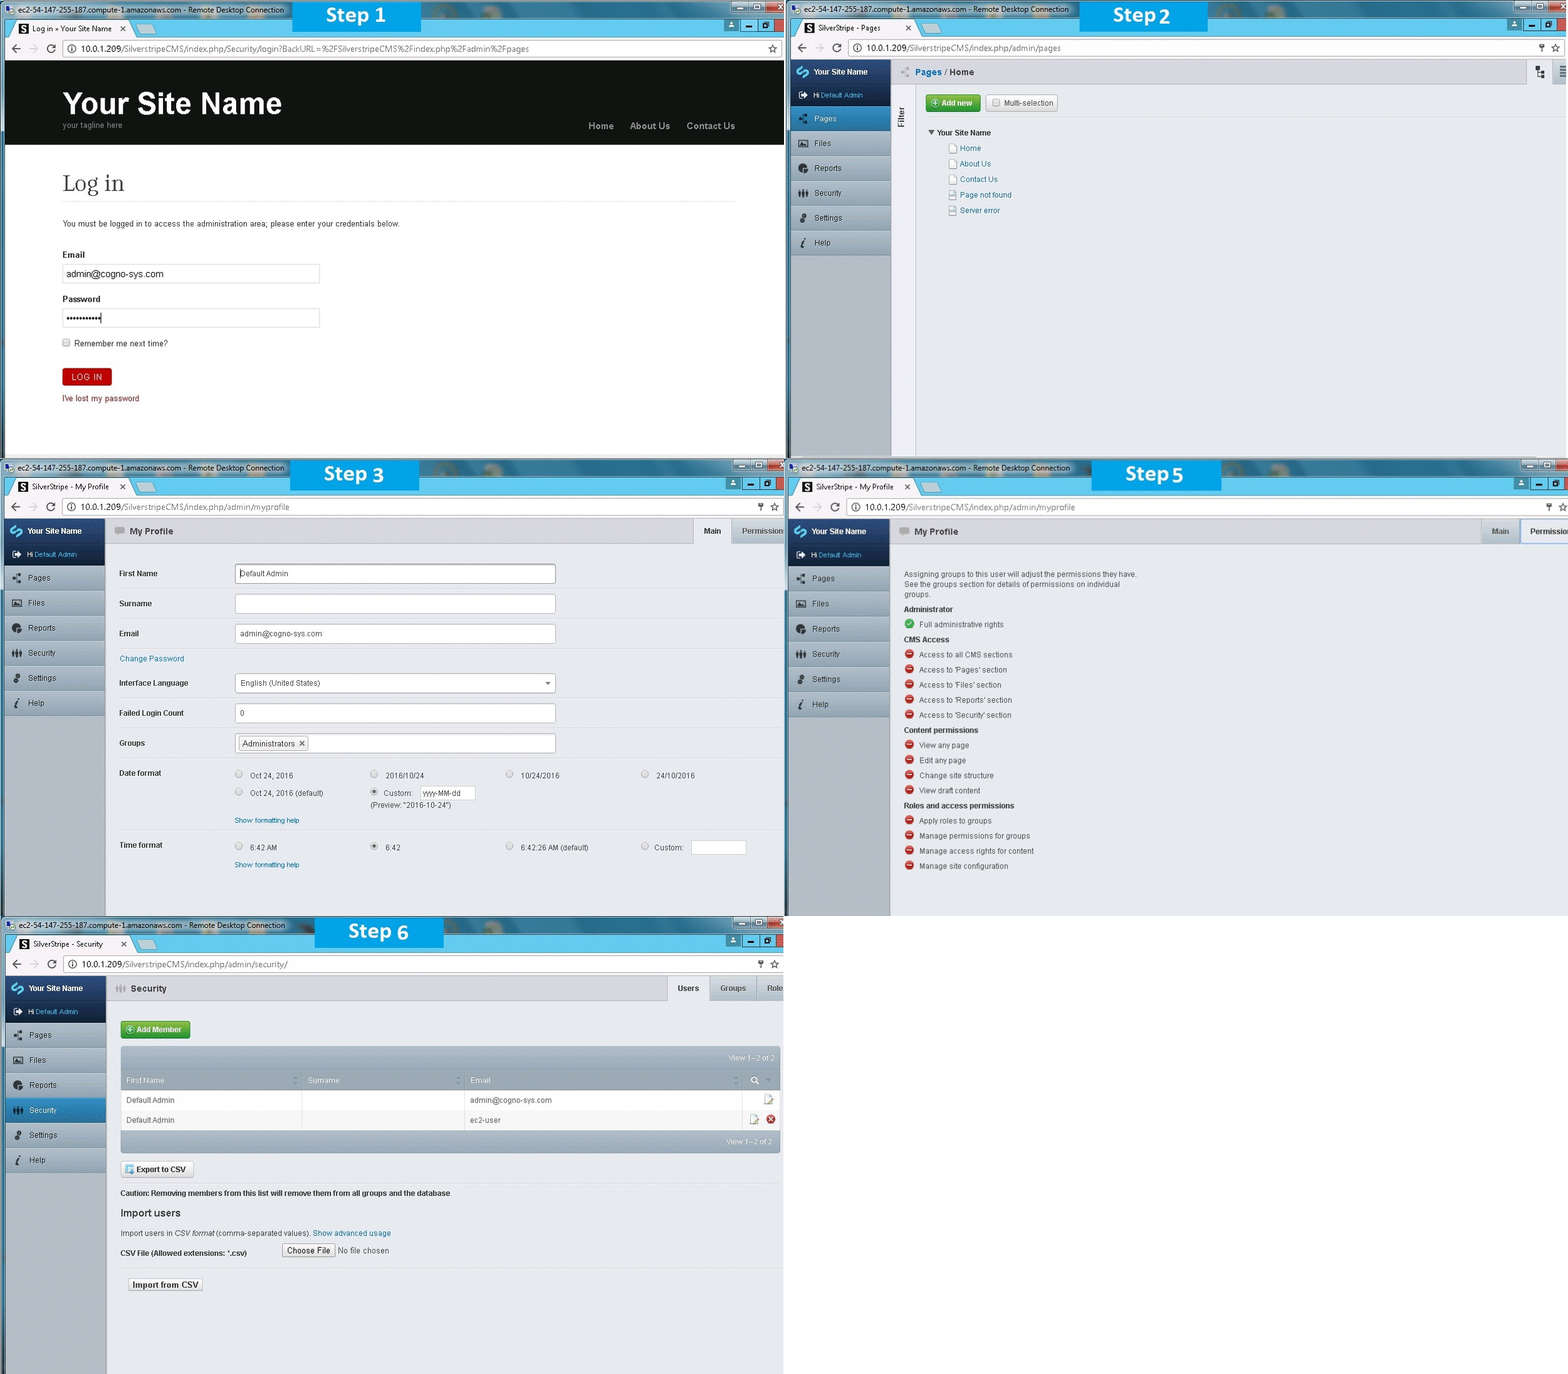
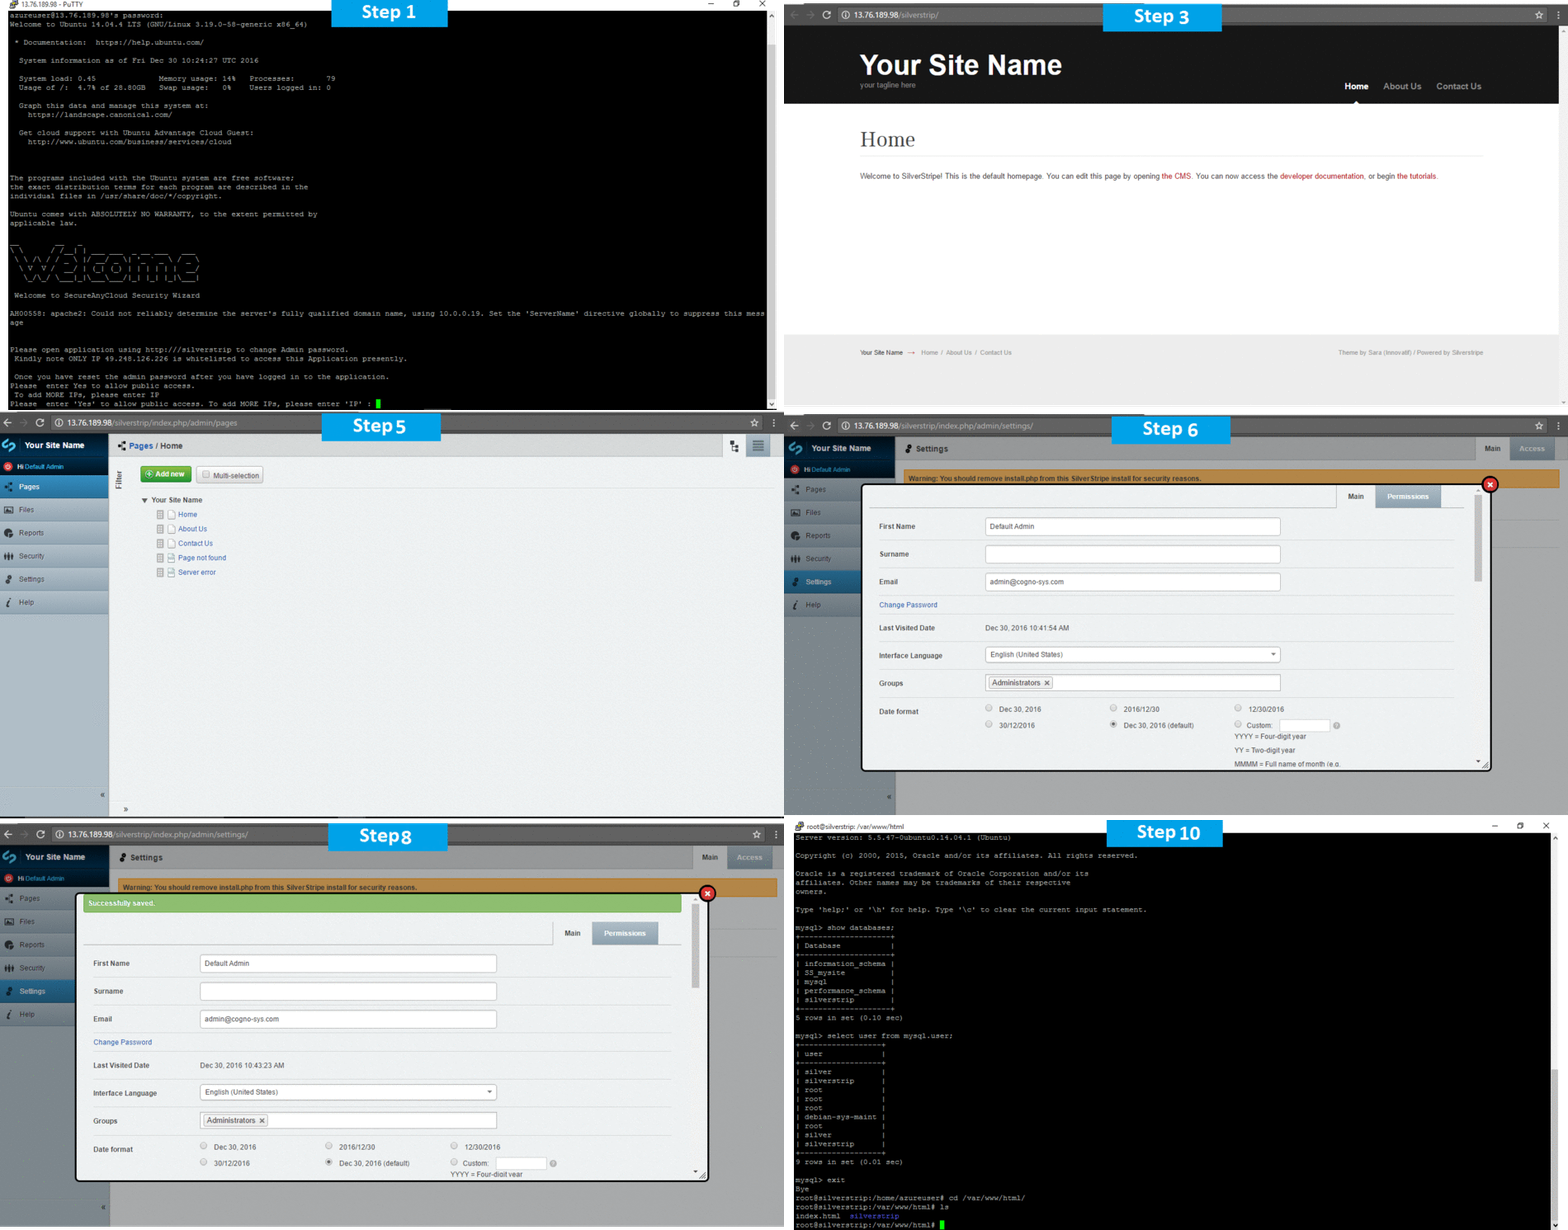
AWS Step by Step Screenshots
Azure
Installation Instructions For Ubuntu
Note : How to find PublicDNS in Azure
Step 1) SSH Connection: To connect to the deployed instance, Please follow Instructions to Connect to Ubuntu instance on Azure Cloud
1) Download Putty.
2) Connect to virtual machine using following SSH credentials:
- Hostname: PublicDNS / IP of machine
- Port : 22
Username: Your chosen username when you created the machine ( For example: Azureuser)
Password : Your Chosen Password when you created the machine ( How to reset the password if you do not remember)
Step 2) Database Login Details:
Username : root || Password : Passw@rd123
Note: Please change the password immediately after the first login.
Step 3) Application URL: Access the application via a browser at http://PublicDNS/silverstripe
- User Name: admin@cogno-sys.com
- Password: Passw@rd123
Step 4) Other Information:
1. Default installation path: will be on your web root folder “/var/www/html/silverstrip” ( Please see above Note for stack name)
2. Default ports:
- Linux Machines: SSH Port – 22 or 2222
- Http: 80 or 8080
- Https: 443
- Mysql ports: By default, these are not open on Public Endpoints. Internally Mysql server: 3306
Configure custom inbound and outbound rules using this link
Installation Instructions For Windows
Note: How to find PublicDNS in Azure
Step1 ) RDP Connection: To connect to the deployed instance, Please follow Instructions to Connect to Windows instance on Azure Cloud
Connect to virtual machine using following RDP credentials:
- Hostname: PublicDNS / IP of machine
- Port : 3389
Username: Your chosen username when you created the machine ( For example Azureuser)
Password : Your Chosen Password when you created the machine ( How to reset the password if you do not remember)
Step 2) Database Login Details:
Username : root || Password : Passw@rd123
Note: Please change the password immediately after the first login.
Step 3) Application URL: Access the application via a browser at http://PublicDNS/silverstrip
- User Name: admin@cogno-sys.com
- Password: Passw@rd123
Step 4) Other Information:
1.Default installation path: will be in your web root folder “C:\inetpub\wwwroot\silverstripecms”.
2.Default ports:
- Windows Machines: RDP Port – 3389
- Http: 80
- Https: 443
- Mysql ports: By default, these are not open on Public Endpoints. Internally Mysql server: 3306
Configure custom inbound and outbound rules using this link
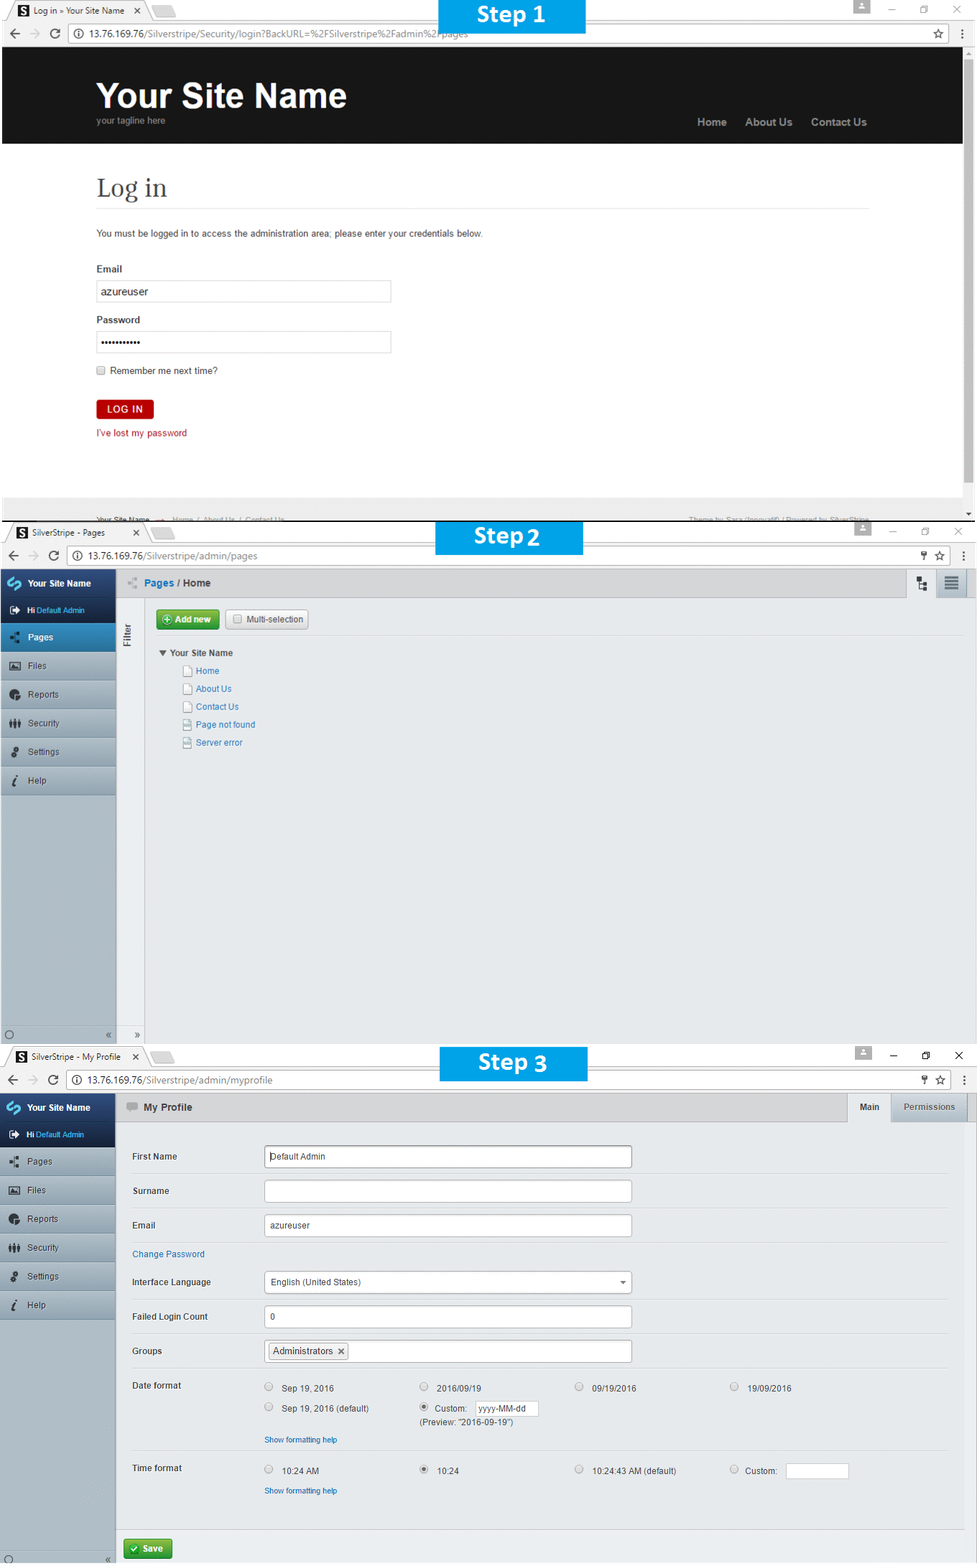
Azure Step by Step Screenshots
Installation Instructions For Ubuntu
Installation Instructions for Ubuntu
Step 1) VM Creation:
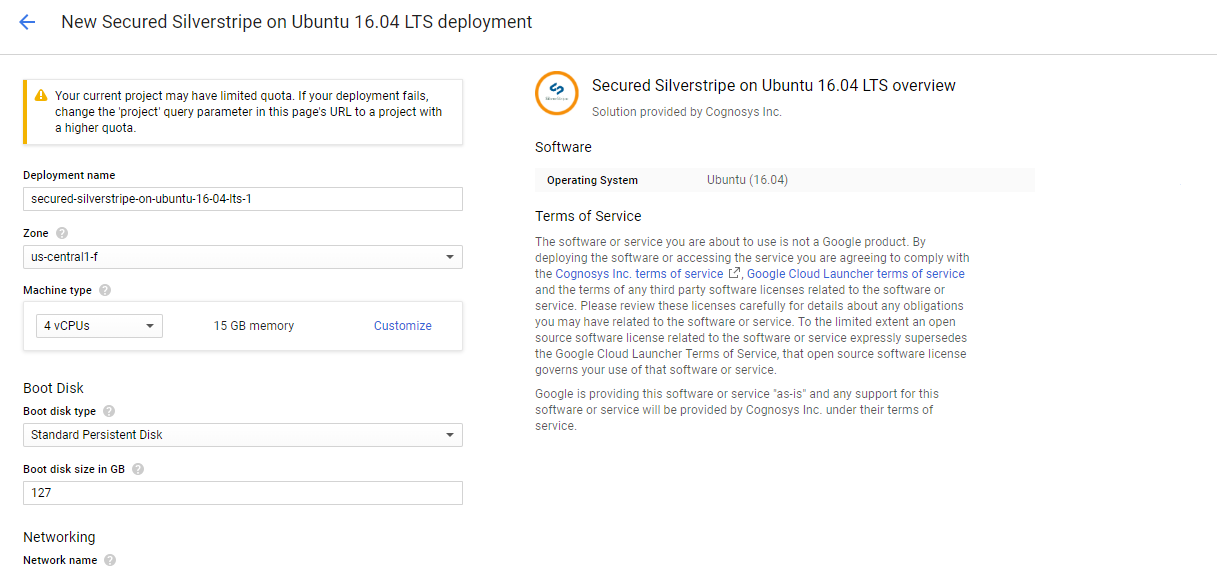
- Click the Launch on Compute Engine button to choose the hardware and network settings.

- You can see at this page, an overview of Cognosys Image as well as estimated cost of running the instance.

- In the settings page, you can choose the number of CPUs and amount of RAM, the disk size and type etc.
 Step 2) SSH Connection:To initialize the DB Server connect to the deployed instance, Please follow Instructions to Connect to Ubuntu instance on Google Cloud
Step 3) Database Login Details:
The below screen appears after successful deployment of the image.

For local MySQL root password, please use the temporary password generated automatically during image creation as shown above.
i) Please connect to Remote Desktop as given in step 2 to ensure stack is properly configured and DB is initialized.
ii) You can use MySQL server instance as localhost, username root and password as shown above.
If you have closed the deployment page you can also get the MySQL root password from VM Details “Custom metadata” Section.
Step 3) Application URL: Access the application via a browser at http://PublicDNS/silverstrip
Step 4) Other Information:
1.Default installation path: will be in your web root folder “C:\inetpub\wwwroot\silverstripecms”.
2.Default ports:
- Linux Machines: SSH Port – 22 or 2222
- Http: 80 or 8080
- Https: 443
- Sql or Mysql ports: By default these are not open on Public Endpoints. Internally Sql server: 1433. Mysql :3306

