
Overview
What is SharePoint?
So, what is SharePoint? You may have asked this question before. SharePoint allows individuals in an organization to easily create and manage collaborative business solutions.
SharePoint can be used for many things: storing documents, collaborating with colleagues on projects, publishing departmental information, and even managing common processes like time off requests and expense reports. It is hard to define since it offers many capabilities, but generally it provides a flexible platform to enable you and your colleagues to get work done. The great part is that all you need is a web browser and you can begin.
There are two types of SharePoint: one that is run on your company’s servers, and one that is hosted by Microsoft through Office 365. Microsoft offers two versions of their web-based platforms: Office Online for consumers, and Office 365 for businesses. You may have an email address from @outlook.com or @live.com or even @hotmail.com; this is the Office Online consumer experience. For Office 365, you log in using your work email and may have access to more functionality, such as SharePoint Online and instant messaging.
From your perspective, there is little difference between SharePoint Server and SharePoint online in Office 365; they both offer great ways to collaborate, and they both are accessed through a web browser. When there are differences, they will be pointed out.
Auto SP Installer works with SharePoint 2016, SharePoint 2013 (including SP1) and SharePoint 2010 with Service Pack 1 & 2. It takes advantage of some of the cmd let updates in the newer SharePoint releases, while remaining largely backward-compatible older versions.
Newer versions often include updates to the input file XML schema, so make sure you compare any of your existing XML files to the newest Auto SP Installer Input.XML. See below for highlights of changes in v3.x.
Auto SP Installer has been used as the go-to SharePoint installation method for hundreds of SharePoint practitioners & partners worldwide! If you or your organization find Auto SP Installer useful, making a donation (any amount) is a great way to support the ongoing development & improvement of the project.
AutoSPInstaller is a PowerShell based tool which automates the deployment of SharePoint 2010-2019. It has the ability to granularly configure most aspects of the farm and includes some interesting features such as: centralized farm deployment, granular database naming, XML configuration and more.
The goal of AutoSPInstaller Online is to simplify this process. It will assist you with all of the configuration including some of the more complicated configurations such as adding additional Web Applications or Site Collections. Furthermore, there is a large amount of code just to make sure that all of the data is valid.
How to:
- Create the following domain accounts (They can be named anything):
- SP_Farm (Farm Account)
- SP_CacheSuperUser (Object Caching Account)
- SP_CacheSuperReader (Object Caching Account)
- SP_Services (Service Application Account)
- SP_PortalAppPool (Portal Application Pool Account)
- SP_ProfilesAppPool (MySites Application Pool Account)
- SP_SearchService (Search Service Application Pool Account)
- SP_SearchContent (Search Content Access Account)
- SP_ProfileSync (User Profile Sync Account)
- Requires Replicate Directory Changes Active Directory permission on the domain with which you’ll synchronize
- Optionally for Enterprise Service Applications (Can be a single account)
- SP_ExcelUser (Excel Unattended ID)
-
- SP_VisioUser (Visio Unattended ID)
-
- SP_PerfPointUser (Performance Point Unattended ID)
- Download the latest version of the AutoSPInstaller Scripts Here
- Assuming that we are going to use this on SharePoint 2010 and that all of your SharePoint servers have Internet access
- There is more work required to place all the files in the correct locations if there is no internet access
- Please Note: The process is almost identical for SharePoint 2013
- Disable Windows Firewall or allow the following ports through the firewall, 22233,22234,22235 and 22236.
- Causes issues with Distributed Cache
- I would recommend enabling the “Auto Admin Login” option as 2013 requires a number of reboots
- Make sure that all the Web Applications use Claims Based Authentication as Classic Based Authentication is now obsolete
- Disable Windows Firewall or allow the following ports through the firewall, 22233,22234,22235 and 22236.
- Extract the contents of the AutoSPinstaller.zip anywhere ie D:\Temp\
- Place the contents of the SharePoint ISO in D:\Temp\SP\2010\SharePoint\
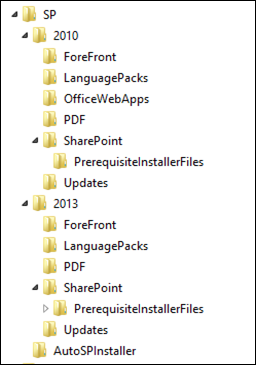
- At this point you should have a folder structure similar to this
- \SP\2010\
- ForeFront (Optional)
- LanguagePacks (Optional)
- OfficeWebApps (Optional)
- PDF (Optional)
- SharePoint (Place the SP2010 binaries here)
- Updates (Place any Cumulative Updates here, do not slip stream updates anymore as the process is broken!)
- SP\2013\
- ForeFront (Optional)
- LanguagePacks (Optional)
- PDF (Optional)
- SharePoint (Place the SP2013 binaries here)
- Updates (Place any Cumulative Updates here, do not slip stream updates anymore as the process is broken!)
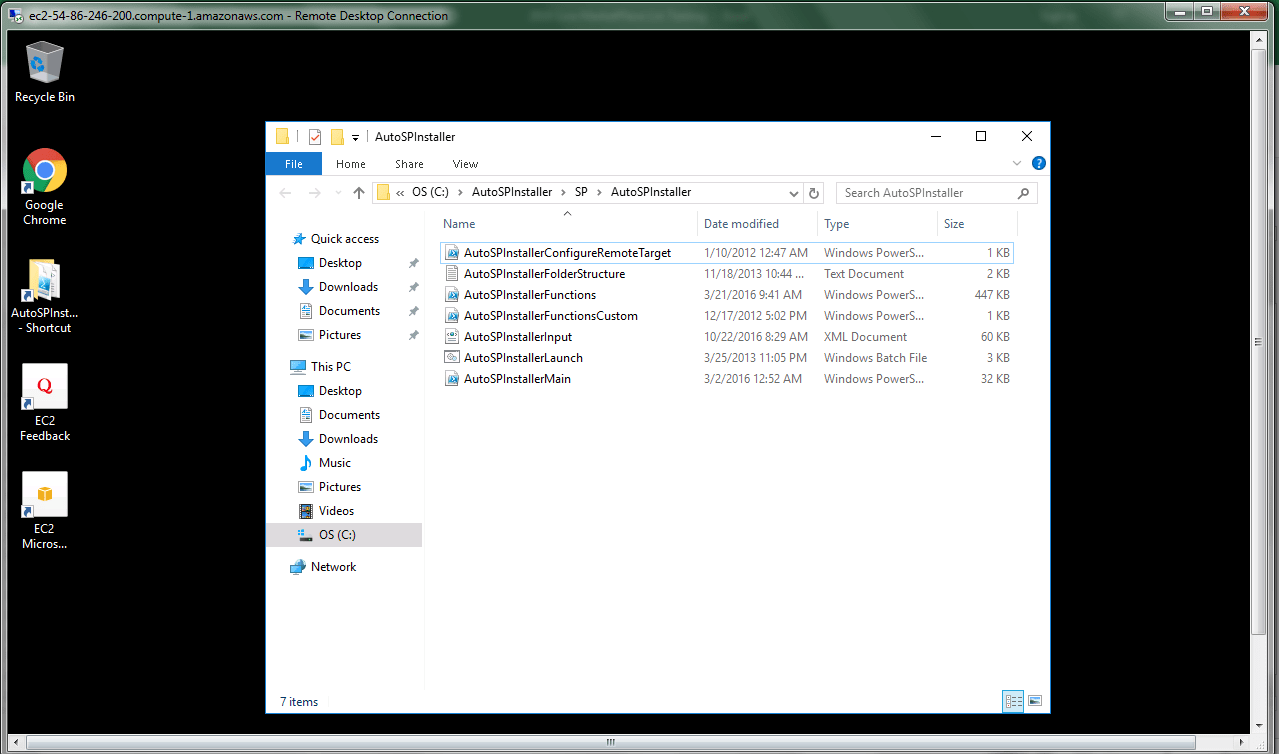
- SP\AutoSPInstaller
- AutoSPInstallerConfigureRemoteTarget.ps1
- AutoSPInstallerFolderStructure.txt (Explains the folder structure further)
- AutoSPInstallerFunctions.ps1
- AutoSPInstallerFunctionsCustom.ps1
- AutoSPInstallerInput.xml (Example XML Configuration, do not edit this one. Leave it for reference)
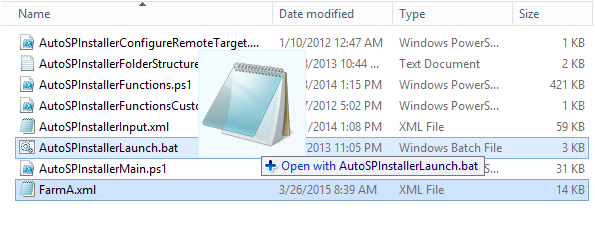
- AutoSPInstallerLaunch.bat (Drag and Drop the XML configuration into this file to start the installation)
- AutoSPInstallerMain.ps1
- \SP\2010\
- Please Note: You can keep both SharePoint versions binaries in the directories. The XML specifies which version will be installed.
Configuration
- At this point we can begin configuring AutoSPInstaller using AutoSPInstaller Online
- Please Note: The site has only been tested with the latest versions of each browser, Chrome, FireFox, IE11 and Safari.
- Browse back to the Home page, then select either “Load Default Template” or “Load from my XML” if you already have an existing configuration
- Navigate through the Farm Options on the left hand side navigation and complete each section
- To Save the Configuration
- Browse to the “Review & Download” Section and copy all of the text and save it to your machine as .xml (For example FarmA.xml)
- Please Note: Spaces in the file name are not supported!
AutoSPInstaller and AutoSPInstallerGUI
AutoSPInstaller is an open source set of PowerShell scripts that installs and performs a base configuration of SharePoint Server 2010 or 2013. These scripts were originally authored by Brian Lalancette and Andrew Woodward as well as other community contributors. It configures a single or multi-server SharePoint farm based on a predefined configuration XML file.
Download link for AutoSPInstaller: http://autospinstaller.codeplex.com/releases/view/38568
For Multi-Server deployment, Provides the Sharing access on extracted folders of AutoSPInstaller. So all other SharePoint Servers can access it while installation.
Files Structure inside AutoSPInstaller Extracted Folder
 AutoSPInstaller can be run either in
- Offline Mode: In Offline mode you need Prerequisites files
- Online Mode: In Online mode, it will automatically download Prerequisites files from internet.
SharePoint 2010 Media
- Download SharePoint 2010 Prerequisites – Here is the download link for SharePoint 2010 Prerequisites
- After Completing the download of prerequisites, put prerequisites files inside PrerequisitesInstallerFiles Folder
- (SP->2010->SharePoint->PrerequisitesInstallerFiles)
- (SP->2010->SharePoint)
- Then Open your SharePoint 2010 installation media and copy it to SharePoint Folder.
SharePoint 2013 Media
- Download SharePoint 2013 Prerequisites
- After Completing the download of prerequisites, put prerequisites files inside PrerequisitesInstallerFiles (SP->2013->SharePoint->PrerequisitesInstallerFiles)
- Then Open your SharePoint 2013 installation media and copy it to SharePoint Folder. (SP->2013->SharePoint)
Why we to use AutoSPInstaller?
PowerShell is recommending for the below reasons:
- Streamlined Deployment
- Reduce Human Error
- Generate Farm Configuration Documentation and
- Repeatable procedures for deploying staging and development environments to mirror production.
Why we to use AutoSPInstallerGUI?
AutoSPInstaller’s configuration required very high knowledge of the PowerShell, SharePoint Architecture, Active Directory and most important accuracy. Because it only contains the PowerShell Script. But if you know basic level of SharePoint Structure, then by using the AutoSPInstallerGUI, it is possible to configure the single server/multiple servers SharePoint Installation.
AutoSPInstallerGUI is a Windows application that helps you build this configuration XML file with useful tooltips, tabular GUI, and error checking on your inputs. AutoSPInstallerGUI is built and maintained by Ivan Josipovic. Both of these projects are hosted on Codeplex and are free to use.
Download link for AutoSPInstallerGUI: http://autospinstallergui.codeplex.com/
Extract both file and put it in right place.
Note: If you get the following issue with AutoSPInstallerGUI opening:
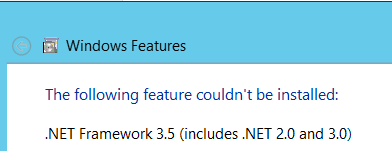
Then you just have to enable .NET Framework 3.5 in just current server where AutoSPInstaller is running.
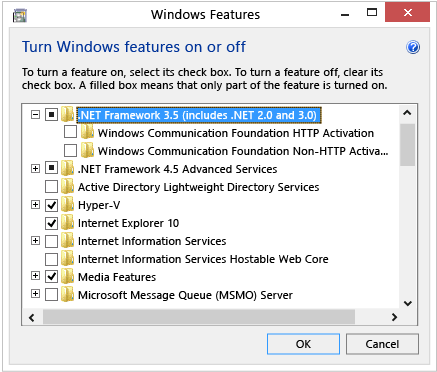
You can enable the .NET Framework 3.5 yourself through Control Panel. In Control Panel, choose Programs and Features, choose Turn Windows features on or off, and then select the .NET Framework 3.5 (includes .NET 2.0 and 3.0) check box. You can also select option child option as per your requirements
Installation
- Copy the SP directory (which we set up above) to all of the SharePoint Servers
- Optionally, the installation can be ran from a File Share
- Make sure that the logged on user has Local Admin on all the SharePoint Servers and SQL Permissions dbcreate and securityadmin
- Browse to the AutoSPInstaller dir ie D:\Temp\SP\AutoSPInstaller
- On each SharePoint Server (One at the time):
- Drag the new XML file ie FarmA.xml into the AutoSPInstaller.bat
- Please Note: If you double click on AutoSPInstaller.bat, it will use the AutoSPInstallerInput.xml config file by default
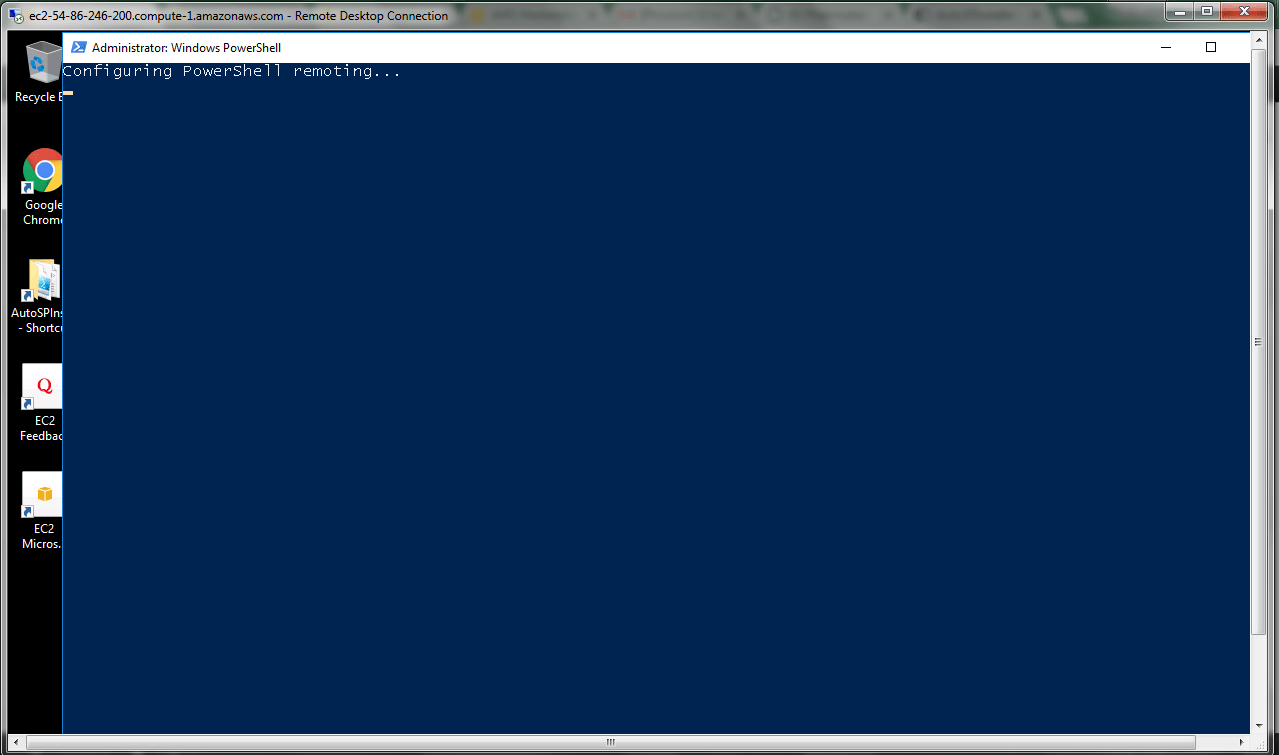
- AutoSPInstaller will now run, it will create a file on the Desktop which will contain the output of the PowerShell window and any errors
SharePoint 2016 Installation using AutoSPInstaller
AutoSPInstaller Online is one of a great project that facilitate Automated SharePoint installation including Sharepoint 2010, 2013 and 2016.
Auto SP Installer provides a powerful way to deploy and configure a single-server development environment to multiple-server SharePoint farm.
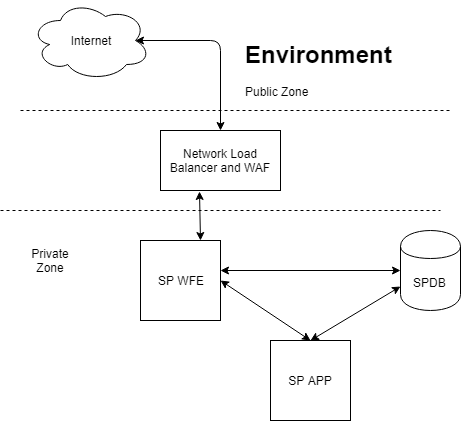
Before doing anything we will set up the environment for SharePoint three server Farm.
Will name these servers as
SPWFE – Share Point Front End Server
SPAPP – Share Point App server
SPDB – DB server
Please find the reference for SharePoint minimum requirement and practices from
https://docs.microsoft.com/en-us/SharePoint/install/install-sharepoint-server-2016-across-multiple-servers
For the the medium segregation, we have to create below list of service accounts.
Service Accounts for Active Directory
Service Account name : spadmin
Rights : Local Admin All Servers (DB,WFE,APP)
SQL DB Rights: SQL DB Creator and Security Admin Rights
Domain Privileges: Service User
Description: Use for set up and Configuration
Service Account name : spfarm
Domain Privileges: Service User
Description: sp timer service , Central Admin Application Pool, Other Configurations
Service Account name : spservices
Domain Privileges: Service User
Description:Service and Pool account user
Service Account name : spsqlservice
Domain Privileges: Service User
Description:Run services in SQL Server (MSSQLSERVER, SQLSERVERAGENT)
Service Account name : spsearch
Domain Privileges: Service User
Description: SP search service , crawlers , search related
Service Account name : spprofile
Domain Privileges: Need Replicating Directory Changes
Description:user profile synchronization account
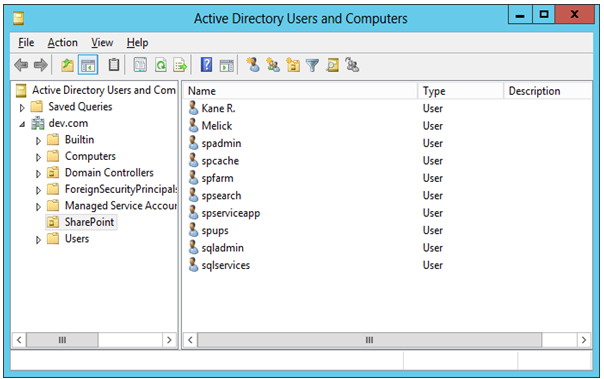
User Profile User Configuration
Run dsa.msc in Run Windows or open Active Directory Users and Computers.
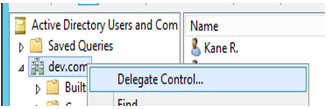
Then Right click the domain and click delegate control.
Then click next and select spprofile user.
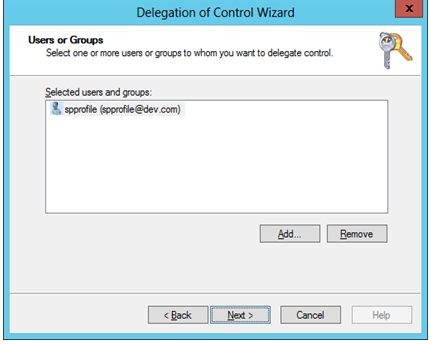
Then Click next and Select Custom Task Delegate and click next.
Then select This folder, Existing objects in this folder, and creation of new objects in this folder and click next.
In here select Replicating Directory Changes and Proceed to finish the wizard.
Configure SQL server
After installing SQL server you need to do following configuration. also you might need to install .NET 3.5 manually in the server by specifying source path manually.
Setting Up DB Server (Login as spadmin)
I installed Windows Server 2012 in the DB server. After installing OS you need to install the SQL server. Following are the steps you need to perform additionally.
In the feature selection you can select Database Services and Management Tools – Basic , Management Tools – Complete , Other than these features you can select other related ones if needed.
Then You can add spadmin as a Admistrator for management.
And you should add spsqlservice as service accounts running credentials for MSSQLSERVER, SQLSERVERAGENT.
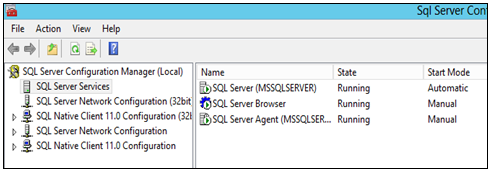
Then complete the installation and Enable TCP/IP , and start the SQL browser in SQL configuration management.

Auto SP Installer on Cloud runs on Amazon Web Services (AWS) and Azure is built for SharePoint Deployment.
Cognosys provides hardened images of Auto SP Installer on all public cloud i.e. AWS marketplace and Azure.
Features
Major Features Of AutoSPInstaller
New Features:
- Automatic Schema upgrade from 3.98 > 3.99
- Simply load your 3.98 XML file and it will be upgrade to 3.99.
- We decided to update the Schema in order to make it more readable and easier to do side by side comparisons.
- We plan to have this feature available for all future Schema updates.
- Alert when leaving the site.
- As the Farm Configuration is only retained in the browsers memory, it will be lost if the user accidentally navigates away from the site.
Planned Features:
- XML Validation using XSD (XML Schema Definition)
- There are many scenarios where the XML file is invalid to the point the site will not accept it.
- One example is boolean values, in the XML world “True” is not a valid value, even though PowerShell accept it.
- The XSD will return very detailed reason on why the XML fails. For example, ERROR: Element ‘ClaimsToWindowsTokenService’, attribute ‘UpdateAccount’: ‘True’ is not a valid value of the atomic type ‘xs:boolean’.
- Server Rename:Allow a Server to be renamed and retain all configuration which was mapped to that server.
- Predefined Templates:Allow the ability to select predefined Farm Templates with recommended topologies, ie 3 Server and 4 Server Farms etc.
- More Validation:There are a lot more places where validation is required.
AWS
Installation Instructions For Windows
Note: How to find PublicDNS in AWS
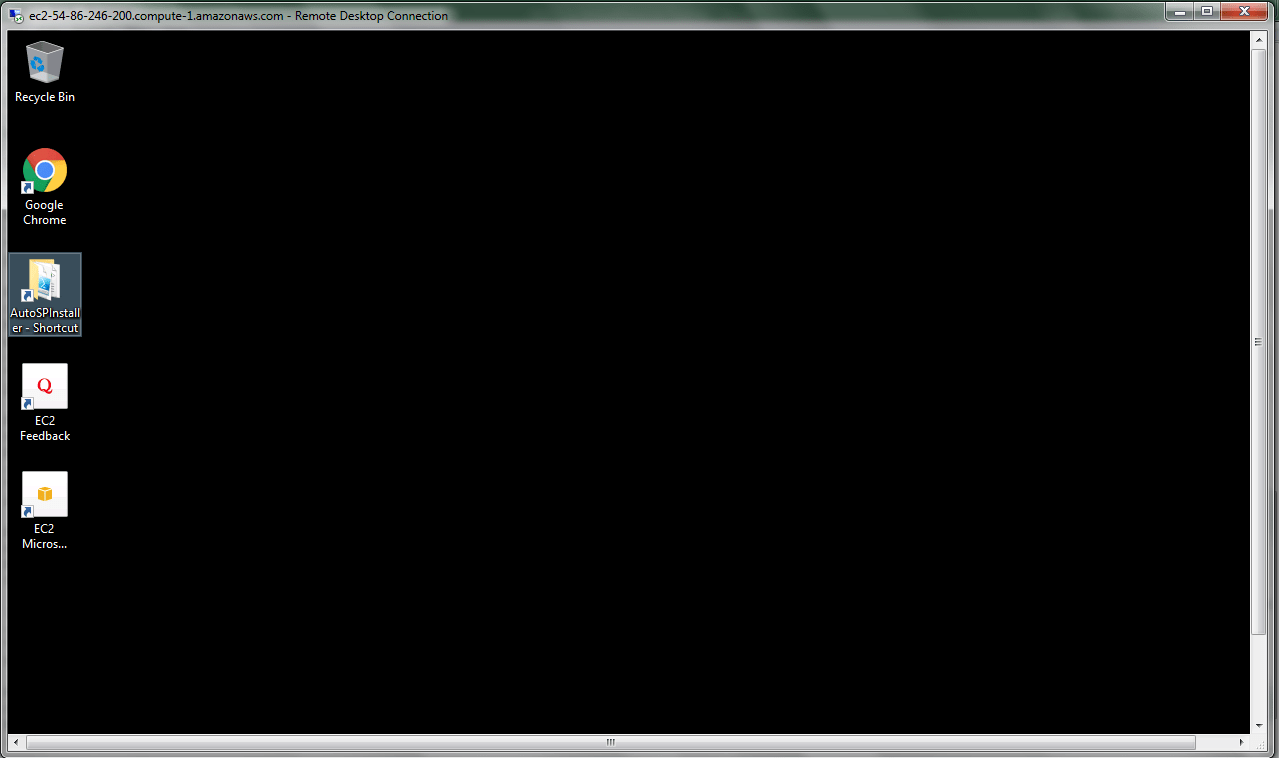
Step 1) RDP Connection: To connect to the deployed instance, Please follow Instructions to Connect to Windows instance on AWS Cloud
1) Connect to the virtual machine using following RDP credentials:
- Hostname: PublicDNS / IP of machine
- Port : 3389
Username: To connect to the operating system, use RDP and the username is Administrator.
Password: Please Click here to know how to get password .
Step 2) Click the Windows “Start” button and select “All Programs” and then point to AutoSPInstaller.
Step 3) Other Information:
1.Default installation path: will be in your root folder “C:\AutoSPInstaller “
2.Default ports:
- Windows Machines: RDP Port – 3389
- Http: 80
- Https: 443
Configure custom inbound and outbound rules using this link
Installation Step by Step Screenshots

Videos
External embedded media removed for production hardening.
