1-click AWS Deployment 1-click Azure Deployment
Overview
- Arachnophilia is a commanding programming editor with some special HTML production and editing features with which we can Create HTML pages using a suite of powerful tools. Upload your Web site to your Internet service provider using Arachnophilia’s built-in FTP service Fully customize Arachnophilia’s menus, toolbars and keyboard commands. Arachnophilia lets you create or remove any commands, toolbars, or menus you want to. Beautify, and analyze the structure of, your Web pages, so they will be more likely to be error-free and work correctly with more browsers. Create working environments for many kinds of programming tasks using Arachnophilia’s fully customizable menus and toolbars
Arachnophilia 5.5 greatly improves the text editing / syntax coloring scheme and the number of supported file types. It also introduces two new beautification (code formatting) engines, for Ruby programs and and Bash shell scripts.
- Arachnophilia 5.4 introduces support for international characters and content, a feature described more fully
- Arachnophilia 5.3 has a new feature called “HTML Validate” that will help you find and correct structural errors in your pages. In essence, this feature takes your page apart, tells you what it finds, and allows you to navigate your page in a hierarchical sense, identifying areas for improvement.
- Arachnophilia 5.3 has a feature called “Instant Search.” Here’s how it works: when you begin typing the word you want to find, Arachnophilia begins searching immediately, as you type, using the letters you have typed so far.
- Arachnophilia 5.3 has a very advanced macro editor that allows you to create, delete, and edit commands, including nearly all the commands one thinks of as “hard-wired” into a program. For example, the main application menu bar and toolbar are part of the Arachnophilia macro system. You can even right-click toolbar buttons and edit them!
- Arachnophilia can dynamically link to external, user-provided Java classes, and those classes can process your documents. This lets you customize Arachnophilia to a remarkable degree.
- When you exit Arachnophilia, it remembers everything — all your changes to menus and toolbars, what documents you were working with, any words you added to the spell checker, even your most recent search and replace strings.
- Each person who logs onto your system or network and accesses Arachnophilia 5.3 gets a fresh installation of the default user files. The files are plain-text, human readable files, and changes can be made both inside and outside Arachnophilia.
Arachnophilia is the newest addition to a series of programs that elasticities over years Apple Writer also had an automation and user-customization ability, at a time when that was very rare. Most modern programs require you to learn from them, but the basic design goal of Arachnophilia is to learn as much as it can from you. Arachnophilia lets you train it, tell it which keys do what, and include new instructions that meet your necessities.If you begin working with Arachnophilia, soon you will create a new toolbar
button, give it some instructions (including Arachnophilia system commands), a name, an icon, and a comment that floats above the button when the mouse is over it (called a “tooltip”) — and when you do, you will begin to understand how Arachnophilia varies from other programs.
Arachnophilia’s menus and toolbars rely almost completely on a command architecture based on “macros” and the HTML editing features depend completely on macros of various kinds mixed with system commands. This is because macros offer a whimsical amount of elasticity.
The fundamental purpose of the macro architecture is to make Arachnophilia capable of doing much more than the author could include explicitly, which is a serious limitation of most modern computer programs. By using macros, Arachnophilia shifts the paradigm away from programs that you simply learn from.
Arachnophilia macros can even invoke external Java classes created by the user or third-party sources, so there really is no limit on the degree to which the user can customize Arachnophilia.
Each Arachnophilia macro has:
- A title that appears on menu items and toolbar buttons and that is used to identify the macro internally,
- A “tooltip,” a message that appears over a toolbar button or menu item when the mouse cursor is located there,
- An optional icon image (Arachnophilia comes with a large set of icons),
- A “content”, which can be one or more of:
- Some text you want to put in your document,
- A specially formatted HTML tag that is used to modify the document content,
- The name of another macro,
- The name of an Arachnophilia system command, like “[Save]”,
- The name of an external Java class provided by the user to do specialized work,
- Any combination of the above.
It is important to understand how macros invoke system behaviors:
- A system command has a fixed name like “[Save]”, and, when this name is included in a macro, it executes a system command.
- A complete list of system command and descriptions can be gotten with the macro “[ListSystemCommands],” and there is a menu item in the default menu set Tools … List System Commands that can be used to create the list. If you haven’t guessed already, the menu item that makes the macro list is itself a macro. 🙂
Unlike system commands, macros are editable, copyable, deletable, and have a name that appears on toolbars (optionally) and menu items (always). Nearly all the Arachnophilia menus and toolbars are composed of macros, which means you can change them to suit your own needs.
Now it’s time to get your feet wet. Let’s make a macro and play with it.
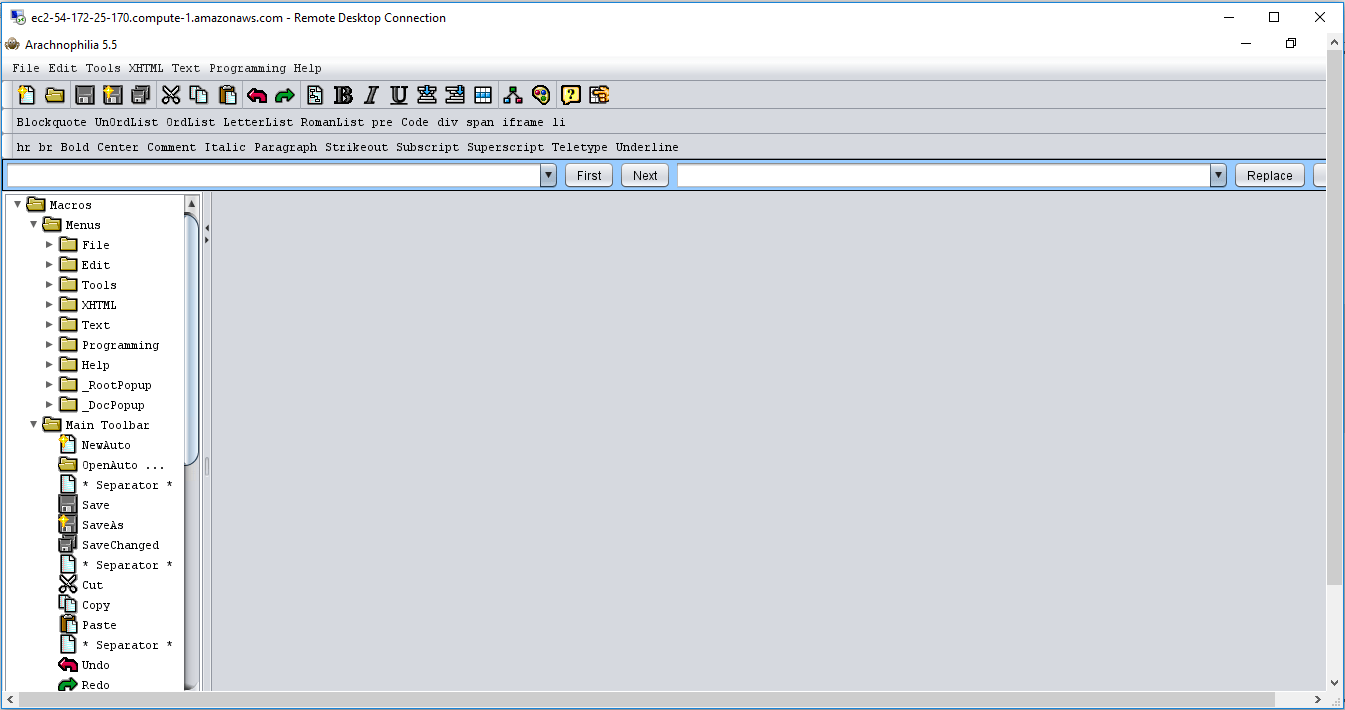
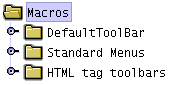
Arachnophilia has two panels in its display — a right panel containing documents to be edited, and a left panel dedicated to macro activities (which, when you want, you may close — just click the left arrow on the dividing bar). Here is a closeup of the left panel
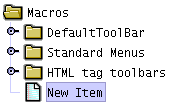
Now take these steps:
- Point the mouse cursor at the folder marked “Macros.”
- Press the right mouse button.
- Choose “New.”
Now the left (macro) panel will look like this –
and the right panel will show the macro editor. Notice about the right panel that there is a tab at the bottom for the macro editor, and also tabs for any documents you may have had open previously. This means you can switch between the macro editor and any documents you care to, without having to close any of them.
Now take these steps:
- Move the editing cursor over to the macro editor at the right, to the large central window marked “Macro Editing Area.”
- Type something there, a sentence of your choosing.
- At the right end of the panel marked “Shortcut Key” above the main editing area, press the button marked “Define.” The program will wait for you to press a key.
- Press Alt-Q (or, if your keyboard doesn’t support this key combination, choose another equally obscure combination).
- You may optionally select an icon for your macro by pressing “Choose Icon.”
- Move to the bottom of the macro editor and press “Accept.”
You have defined a new macro, one that will be activated if you:
- Click it directly, or
- Press the key combination you defined for it.
Now let’s open a new, blank document to receive the macro’s output. Choose menu item File … New … Text File.
Once the new, blank document is on display, press the key combination you defined for your macro. Your sentence should appear. Then try double-clicking the macro directly — you will see the same result.
Now return to the macro editor by clicking the tab marked “Macro Editor” at the bottom of the right pane. Type this:
Right now, it is [DateTime]
Press “Accept” again, return to the blank text document, and press your defined key combination. Your sentence plus the current date and time should appear. This is an example of a macro that contains both user text and a system command.
Normally you will use the dropdown lists at the bottom of the macro editor display to select system commands and the names of other macros — this is a more convenient method than typing them, and you can avoid typographical errors that may prevent your macros from working.
Here is an example that shows an important property of macros that takes effect if they are used to define HTML tags. Move to the macro editor and type this:
<b>|</b>
The vertical bar “|” has a special meaning if it is included in a macro — if you select some document text and activate such a macro, the text you have selected will be placed at the position of the vertical bar. Try it — enter the above macro, move to the text document, select some text, and activate the macro. The result will look more or less like this:
<b> My sentence! </b>
This is a convenient way to wrap a text block in a pair of HTML tags, and it is easy to remember.
Clipboard Support in the Macro Editor
In answer to many inquiries, yes, you can cut, copy and paste text within the macro editor window. Because the macro editor is the repair facility of last resort, the keystrokes for these functions had to be fixed (not user-defined). They are Ctrl+X = cut, Ctrl+C = copy, and Ctrl+V = paste.
Macro Tree Activation and Deactivation
In order to have custom menus appropriate to different tasks, all loaded and available at once, there is a convenient way to make menus and toolbars appear and disappear as needed. Take these steps:
Open the folder named “HTML Tag Toolbars”
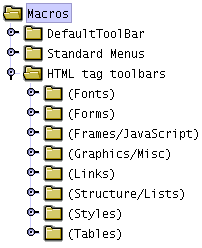
Notice there are (parentheses) around the names of the folders. If you select a folder with the mouse and press “x” at the keyboard, that folder will become “visible,” meaning:
- If it is a toolbar, the toolbar will appear below the main system toolbar at the top of the screen (if this doesn’t happen, press the main toolbar button that looks like this: ),
- If it is a menu, it will appear with the other menus on the Arachnophilia menu bar.
We can make a collection of commands into a menu or toolbar with the macro editor. Note the checkboxes for this purpose on the macro editor display. Remember about these options that a complete tree of commands (a folder that may have other folders “inside” it) can be made into a menu, and that menu will have the appropriate submenus, but a toolbar only has one level, so it cannot contain any macros from subfolders.
You can also manipulate commands and folders in the macro tree display:
- The keyboard arrow keys move the selection point up and down,
- The “+” and “-” keys move the selected item up and down,
- You can cut, copy and paste items or folders using the context (right-click) menu or the usual editing keys Ctrl-X, Ctrl-C and Ctrl-V (this is one of the few places where the menu items and key definitions are hard-wired into the program. Can you guess why this was necessary?).
- You can save all or part of the macro tree as a file by selecting the desired component and then using the context menu file load/save features.
- You can load such a saved file into a particular position by selecting the position you want the file to be a “child” to, and loading it.
- You can import older (pre – version 5.0) Arachnophilia “toolbar” files using the context menu “Read legacy file” command, and use those older toolbars as elements of the new macro system.
An important note on copying, pasting, loading and saving tree components:
- To copy an item (or save a file), simply select it and use the copy or file save feature. The item and all its “children” will be copied or saved.
- To paste an item (or load a file), always choose the folder that is the “parent” of the place you want the commands/folders to be positioned. This puts the pasted item “inside” the selected folder.
Simple rule: If you delete all the children of a folder, it becomes an ordinary item. If you add one or more children to an item, it becomes a folder. And folders can contain folders, ad infinitum.
Q: How to recover from mistakes that have scrambled my menus?
A: Well, there are several ways:
- Log on as a different user, and make a copy of the default menu structure there. Load the copy into your own installation, and delete the scrambled set, replacing it with the copy.
- Activate the system macro [GetRescueMacroSet]. This macro will load a copy of the original menu structure from the Arachnophilia executable file, and place it alongside the existing macro tree (it will not erase or replace any macros you have written). Once it is loaded, you can use it to select individual menus or commands, or you can replace all the changed macros with the originals by deleting the changed folders and using the replacements instead.
- Delete the “. Arachnophilia” directory from your user directory. This is an extreme step, a last resort. If you do this, Arachnophilia will recreate the default user installation the next time it is run. You will lose all your choices and preferences.
- Move the “Arachnophilia” directory elsewhere (or rename it) instead of deleting it, and sort out how to keep the good parts and throw away the bad parts after Arachnophilia creates the default installation file set. Not for the faint of heart.
Q: How to create separate menus and toolbars for different tasks?
A: Not difficult at all. Just make two or more copies of the entire desired menu structure (or any subset you need), change the macros in the individual copies at will, and place them in separate folders. Then unhide only that set you want to use at the moment. Like this example:
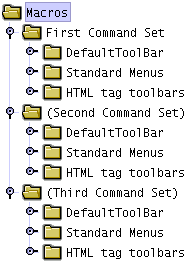
Recollect that an unseen folder’s name is enclosed in (parentheses). Be sure to hide your newly created folders before copying macro sets into them. This will avoid the macro processor from complaining about multiple key mappings. And when you switch macro contexts, always hide the first macro set before unhiding the next, for the same reason. Using the example above, if you hide the first command set (by selecting the desired folder and pressing “x”) when
The other two are already hidden, the entire menu and toolbar structure will disappear from Arachnophilia. That’s why the macro editor must have separate, hard-wired menus and keyboard commands.
Arachnophilia is a full featured HTML editor (written in JAVA) with an internal browser “Instant View” mode shows your HTML changes as you make them with each keystroke!
It supports up to 6 Web browsers, switches between them in a flash. Arachnophilia offers development of HTML, frames, CGI, Perl, C++, Java and Javascript with many intelligent tools and functions, as wellas a built-in intelligent FTP client, that automatically uploads changed filesto your server.
In addition, it offers powerful keyboard macros, that can include system commands, even other macros, for maximum flexibility. User-defined toolbars provide any tags or content you need for any of the supported languages and support system commands as well.
Arachnophilia on Cloud runs on Amazon Web Services (AWS) and Azure and is built to offer development of HTML, frames, CGI, Perl, C++, Java and Javascript.
Cognosys provides hardened images of Arachnophilia on all public cloud i.e. AWS marketplace and Azure.
Arachnophilia on cloud For AWS
Features
Features include:
- Multiple-document interface with full drag-and-drop capabilities.
- Import and automatically convert RTF documents, tables, and outlines.
- HTML Validate.
- Instant Search.
- Advanced macro editor that allows you to create, delete, and edit commands.
- Automatic uploading of changed files.
- Table wizard.
- Dynamically link to external, user-provided Java classes, and those classes can process your documents.
- Spell checker.
- Supports up to six Web browsers, CGI, frames, Perl, C++, Java, and JavaScript development.
- User-defined templates.
- User-customizable toolbars for quick access to frequently used tags.
- Built-in tutorials on HTML development, JavaScript, frames, and the Internet.
- Support for international characters and content
Major Features of Arachnophilia
- Importing fully formatted text, tables, outlines from any Windows-compliant application, automatically converting to HTML
- Supports up to 6 Web browsers, switching between them in a flash
- Supports development of HTML, frames, CGI, Perl, C++, Java and Javascript
- Built-in intelligent FTP client automatically uploads changed files, for complete Internet access in one program
- Powerful keyboard macros
- User-defined toolbars and templates
- Global search & replace across all open documents
- Built-in step-by-step tutorials on HTML development, JavaScript, frames, and the Internet.
AWS
Installation Instructions For Windows
Note: How to find PublicDNS in AWS
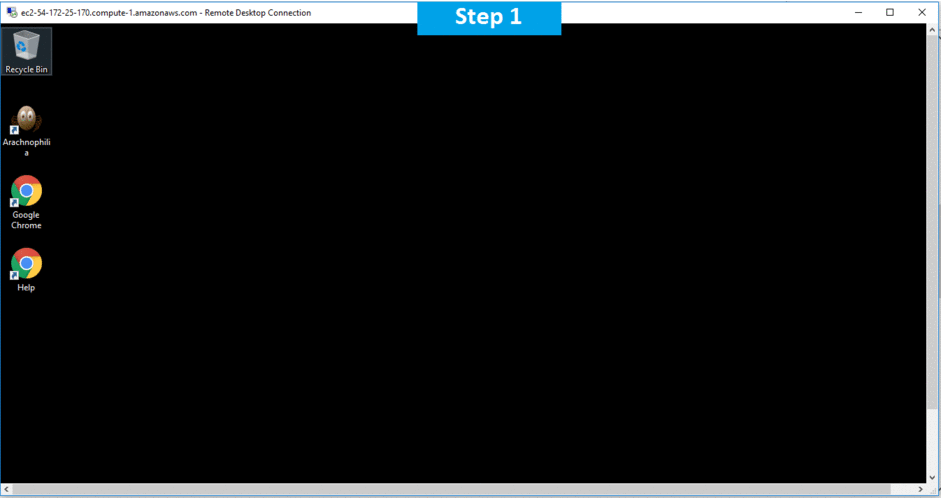
Step 1) RDP Connection: To connect to the deployed instance, Please follow Instructions to Connect to Windows instance on AWS Cloud
1) Connect to the virtual machine using following RDP credentials:
- Hostname: PublicDNS / IP of machine
- Port : 3389
Username: To connect to the operating system, use RDP and the username is Administrator.
Password: Please Click here to know how to get password .
Step 2) Click the Windows “Start” button and select “All Programs” and then point to Arachnophilia
Step 3) Other Information:
1.Default installation path: will be in your root folder “C:\Program Files (x86)\Arachnophilia”
2.Default ports:
- Windows Machines: RDP Port – 3389
- Http: 80
- Https: 443
Configure custom inbound and outbound rules using this link
Users Instructions Screenshots