1-click AWS Deployment 1-click Azure Deployment 1-click Google Deployment
Overview
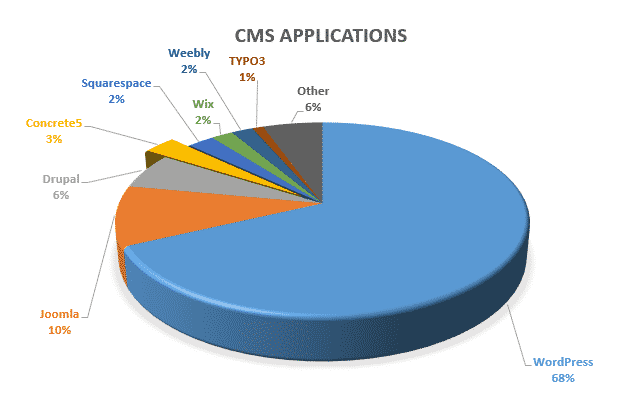
Concrete5 is a free, open-source application. It is designed as a CMS (Content Management System) platform and allows you to build just about any type of a website that you may need. You can use Concrete5 for a social network, a blog or even a forum of people sharing similar interests.Concrete5 is a well-established application, being active for a few years now. It has a strong community of people, dedicated to helping others using the script. Whenever you need assistance, you will always be able to find such in the community section of Concrete5.Concrete5 is used by 3% of all CMS platforms globally up to 2016. On the next graph you can compare it with another CMS platforms by their popularity:
The development of the Concrete5 application was started in 2003 as a new approach toward a web platform, which was being built at that time. It was first released in early June 2008. Due to its easy to use design it gained traction very rapidly and by October that year, it was project of the month on SourceForge.net. By November it was getting well over 1,000 visitors a day.
Today, Concrete5 has reached across the world, sites of every nature are being built, and thousands of people are using it to express themselves online. They have all been attracted by the very little technical skills required in order to built a great website and the ability it gives them to edit any content they have, directly from the front-end. This amazing feature is there due to the Model-View-Controller architecture, which Concrete5 is based on and its whole programming, which is primarily object-oriented.
Regular updates are being rolled since the inception of Concrete5 and there have been multiple releases in 2016, keeping the platform up-to-date. It also has multiple useful features connected with the easy-to-edit outlook of the platform. Using the application you will be able to easily manage not only images and text but also comment systems, maps, list of files and so on.You will also have a variety of different addons, which can be implemented at any given time as well as the option to connect your website directly to the Concrete5 repository, which will activate the option for an automatic upgrade to take place at the time of its very release.All these fabulous features will allow you to build your dream online project with very little technical experience. Here, we will present you with a list of websites you can build using Concrete5:
Online magazines and newspapers.
eCommerce sites.
Government websites.
Small business websites.
Non-profit and organization websites.
Community-based portals.
Personal or family homepages.
Marketing focused sites.
School, college or university website.
How to install Concrete5 automatically:
Concrete5 is a great online platform, but the first step towards using it is to actually install it. There are two ways you can do that and here we are going to cover the easiest one of them – the automatic installation.You should first access your cPanel.Once you are there, navigate to the Software section and locate the App Installer tool:

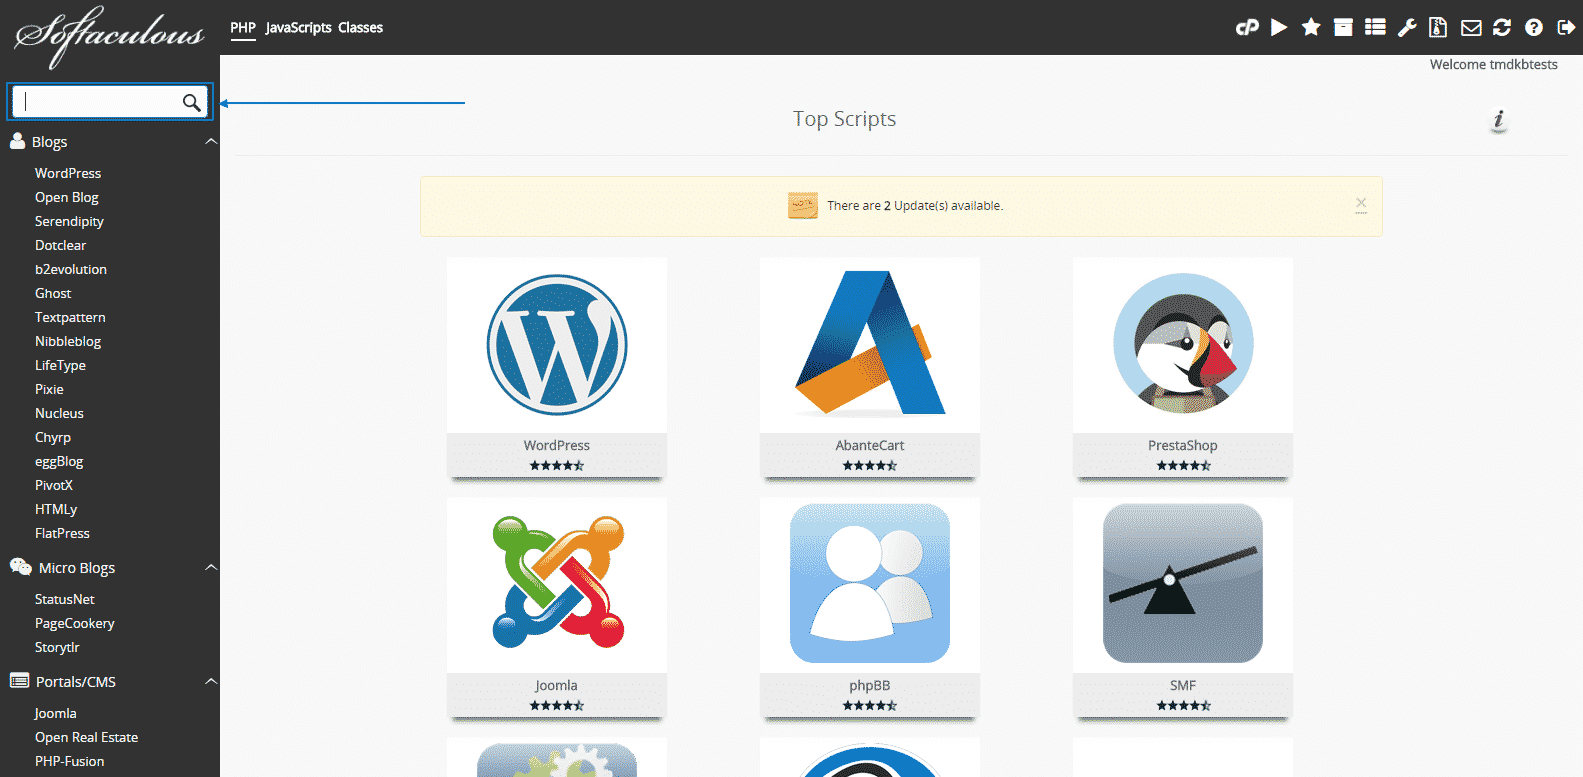
When you enter the installation tool, just click on the top left search bar, as depicted here:
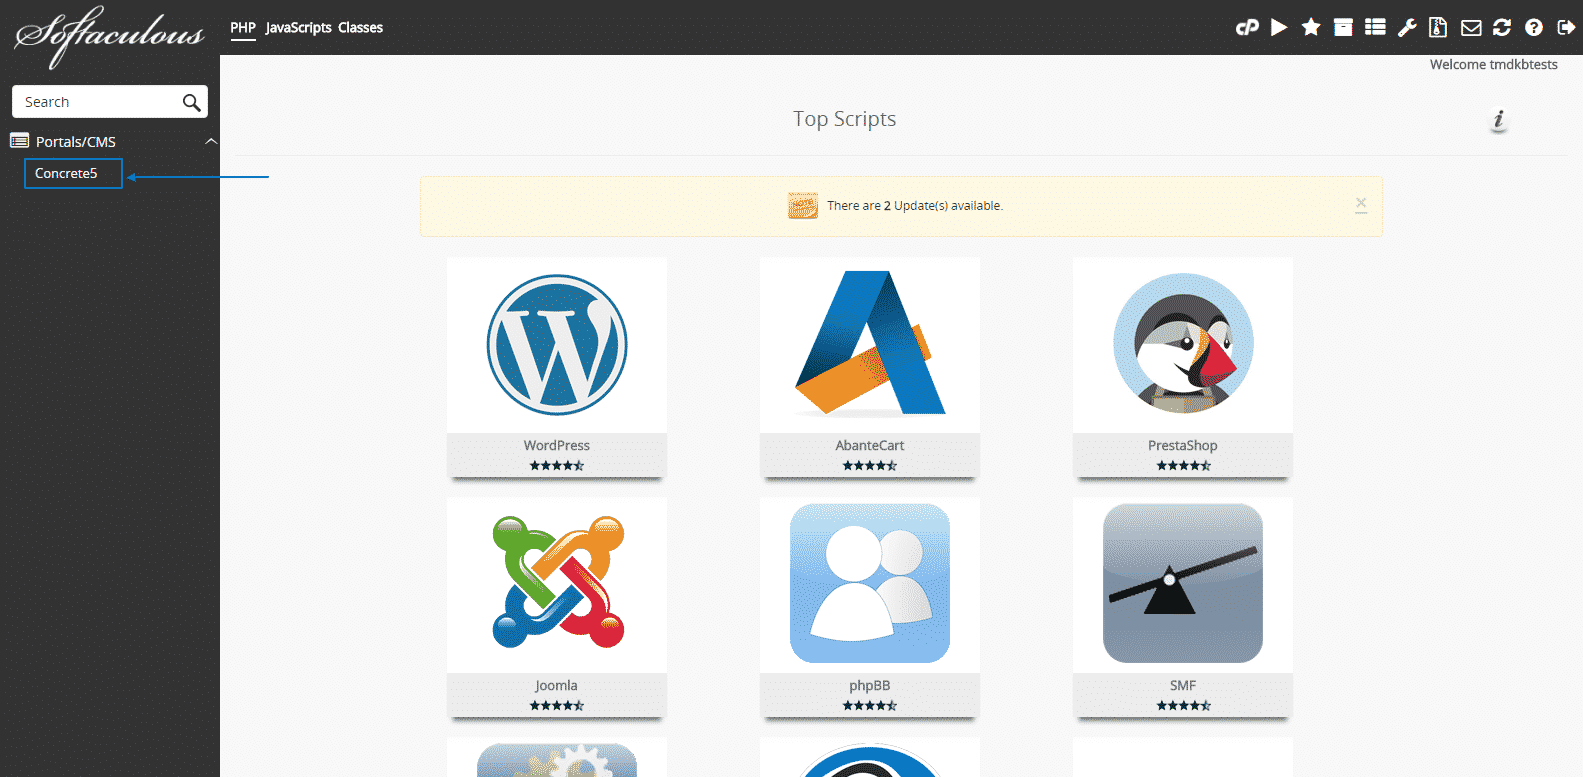
Then type down “Concrete5” and you will see that in the left column you will get a Concrete5 symbol, which you should then click on:
Afterwards, you will see a couple of options. You have to click on Install Now and proceed to the Auto Installation menu:
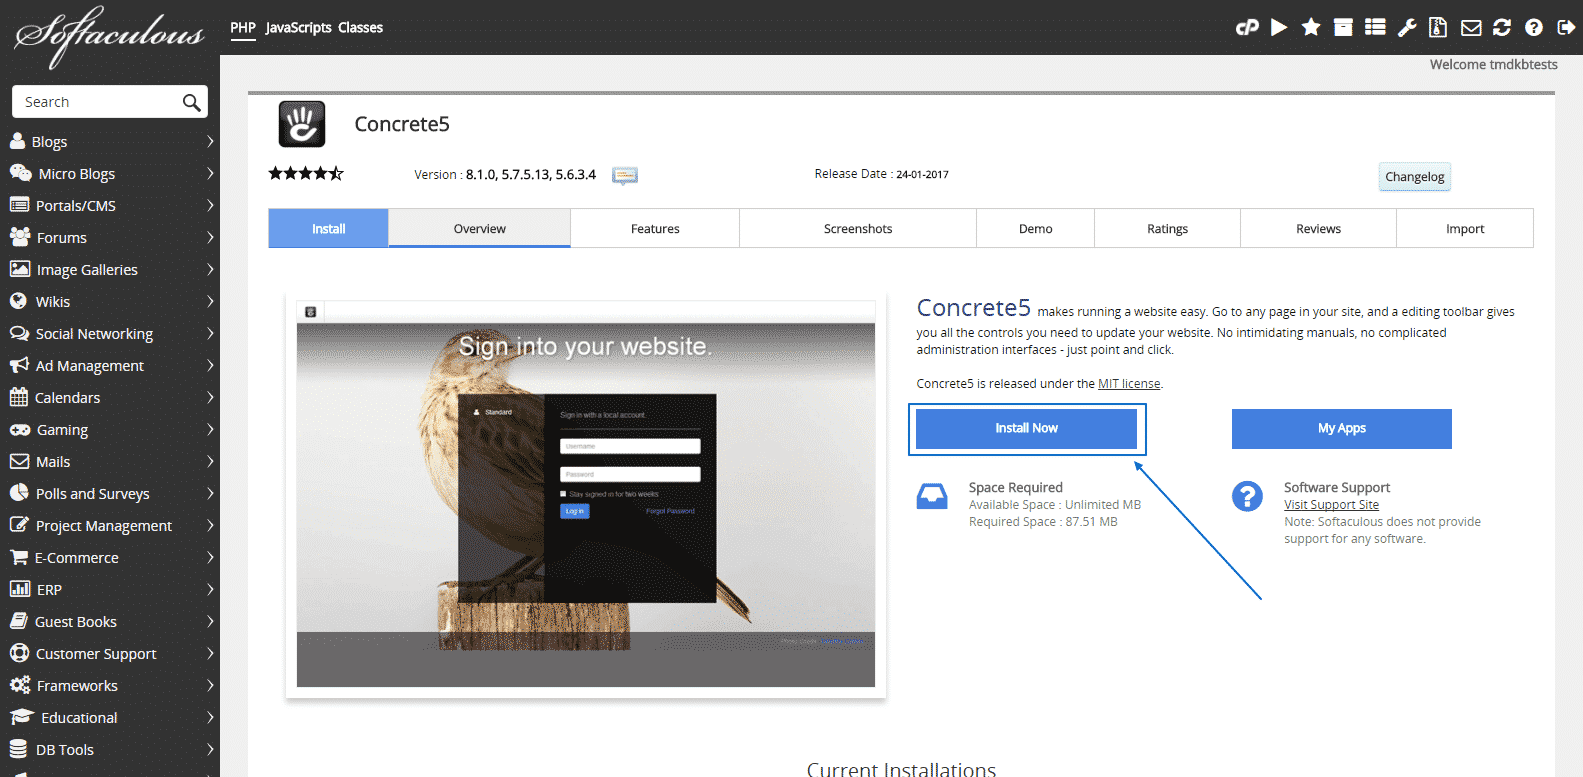
Then, you will see the installation screen with many options to consider. You can first check and make amendments, according to your needs, to the top part of the installation menu, which is named Software Setup. The version of the Concrete5 installation is automatically set to the newest one available, but you can change it if you need to. The same goes for the security protocol as well. Do pay special attention to the In Directory line, because it sets the place where the whole new installation is going to be located:
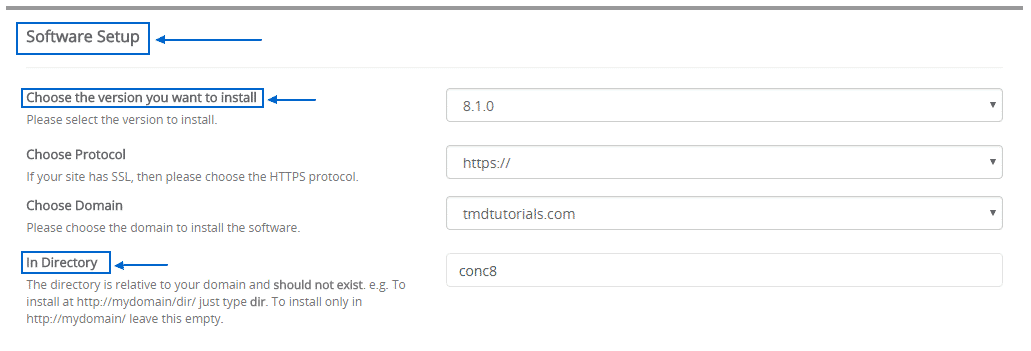
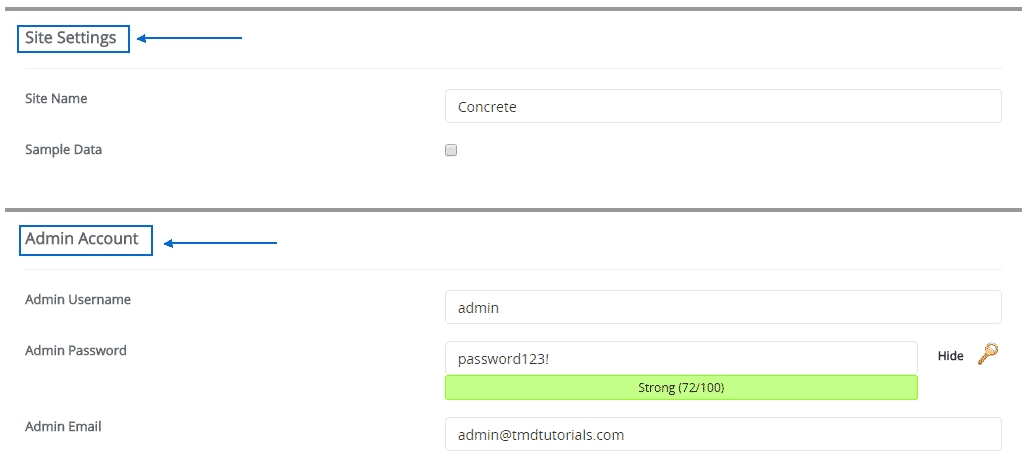
Afterward, you can change the Site Settings and the site’s name and just below that, in the Admin Account section, you can choose your administration username, password and email:
The final step of the process would be to make sure you have chosen your preferred default language and then click on Install:

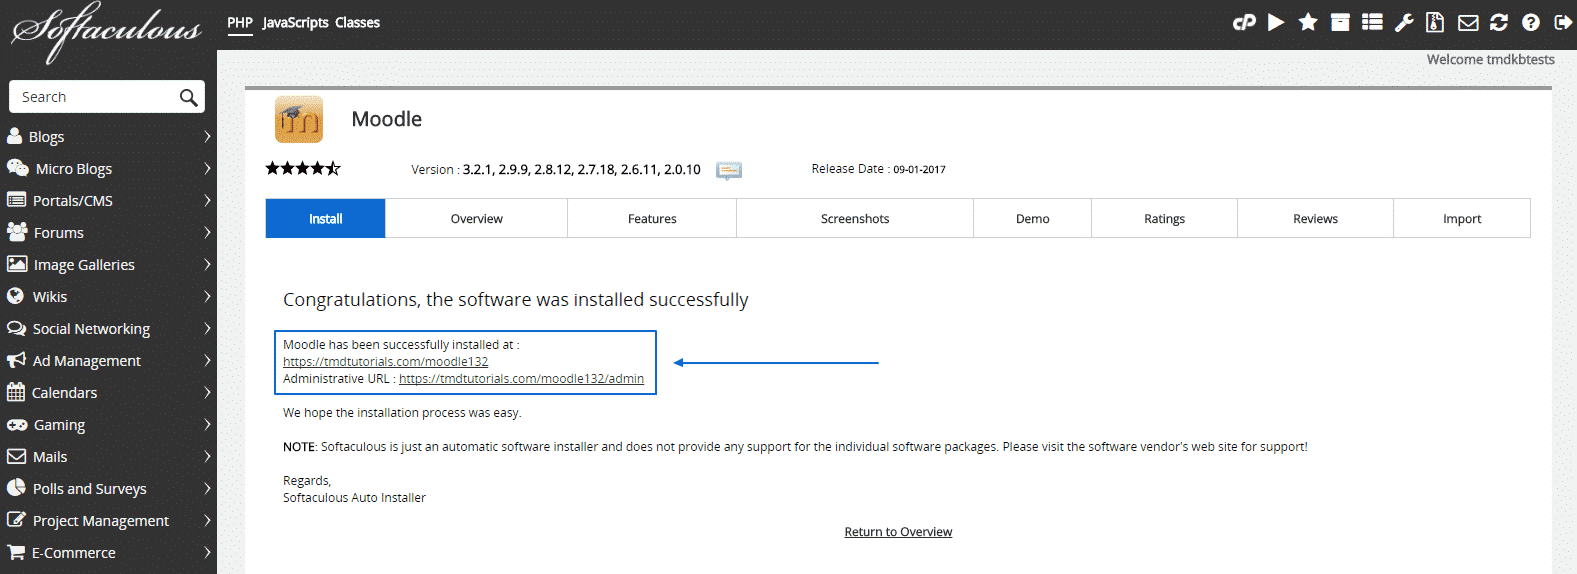
Next you just need to wait for a couple of seconds until the installation process is completed and you will be displayed with the login URLs for your new Concrete5 application:
How to install Concrete5 manually?
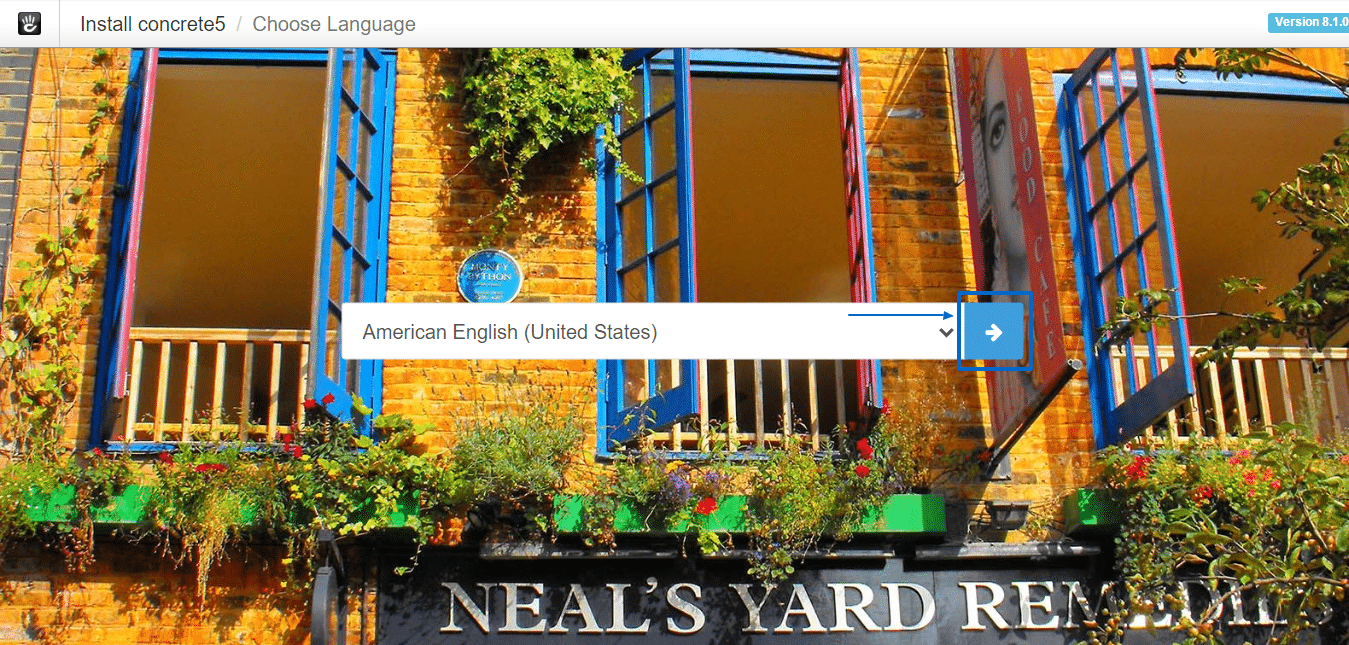
Concrete5 is a very popular online platform and it offers amazing functionality. As with other applications you will find that there are two ways in which you can go through in order to complete the installation procedure and in this section of the tutorial we will focus on the manual installation.The first thing you need to do is to download the latest stable version of Concrete5 from their official website.Afterward, you just need to unzip the downloaded file on your computer and then upload its content via FTP to your hosting account. For the installation, you will need a database to be created. To do so, you should go to your cPanel. Then, to begin the installation, just type down on your Internet browser your exact URL to the folder of the application:Yourdomain.com .If you have uploaded the content in a subfolder of your public_html folder, you should type the full URL address in this manner: yourdomain.com/subfolder. As soon as you do that, you will be redirected to the installation wizard. Here are the steps you need to follow then:There is a drop-down menu in the first window you are about to see. You should choose your preferred language there and click on the right-pointing arrow:
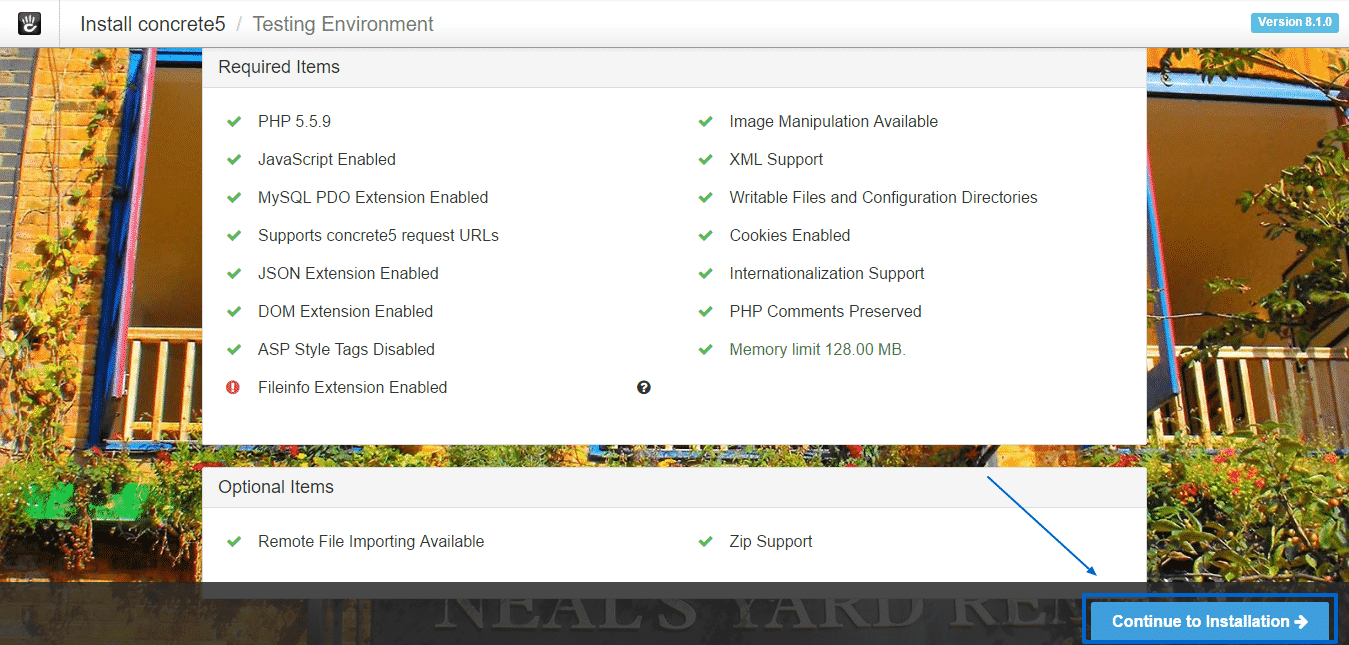
Next а requirements check is made. If everything is ok, you just have to click on Continue to Installation:
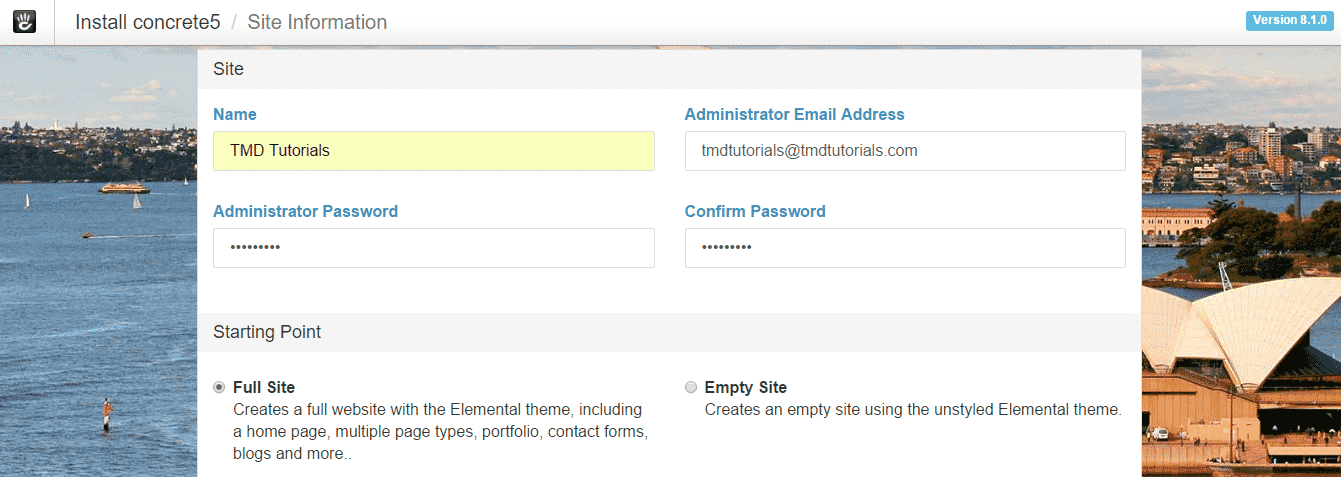
Finally, you will see the installation page. There, in the Site section, you will be able to set the administrator name, password and email address:
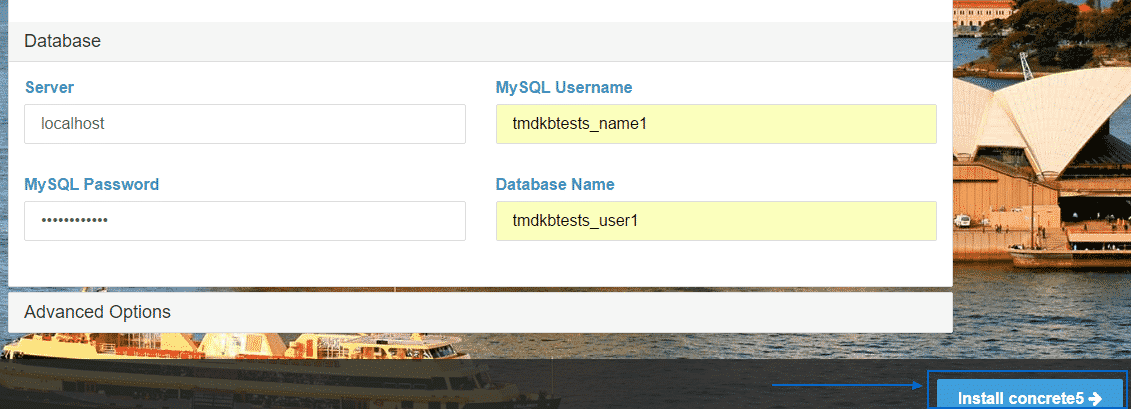
Just below it, in the Database section, you should enter your database’s details and then finally – click on Install concrete5:
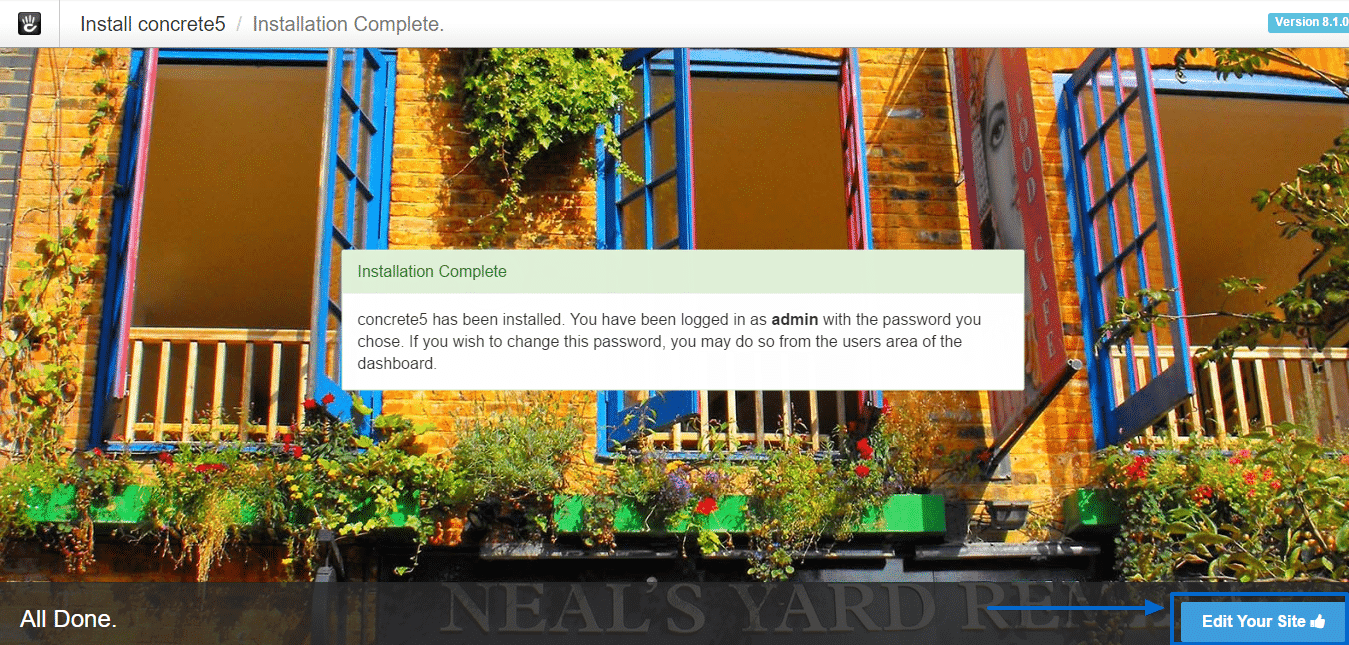
After the installation has been completed, you will see the following window, where, if you click on Edit Your Site, you will go straight to editing your newly installed Concrete5:
If you are experiencing any difficulty with the manual installation process you can try the automatic installation.
Logging into your Concrete5 Dashboard
- In a browser, visit your concrete website.
Example: http://yourdomain.com - At the end of your website URL, add /index.php/loginExample: http://yourdomain.com/index.php/login
- When you navigate to this address, it will prompt you to sign in to Concrete 5. Enter the username (default username is admin) and the password that was setup during the installation. Check the remain logged in to website option if you would like to stay logged in, and select Sign In.Congratulations, you are now logged into your Concrete5 Admin Dashboard!
Changing Your Concrete5 Password in the Dashboard
- Login to the Concrete Admin Dashboard.
- Click the Dashboard button.
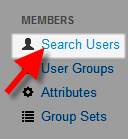
- In the MEMBERS section, click the Search Users option.

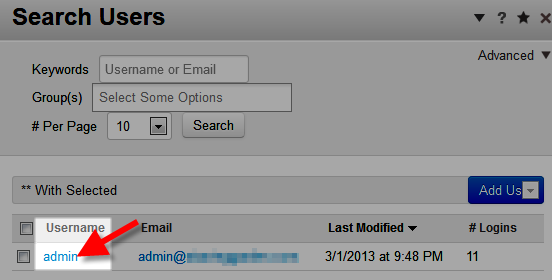
- Click the username for the password that you want to change.

- Click the Edit User button.
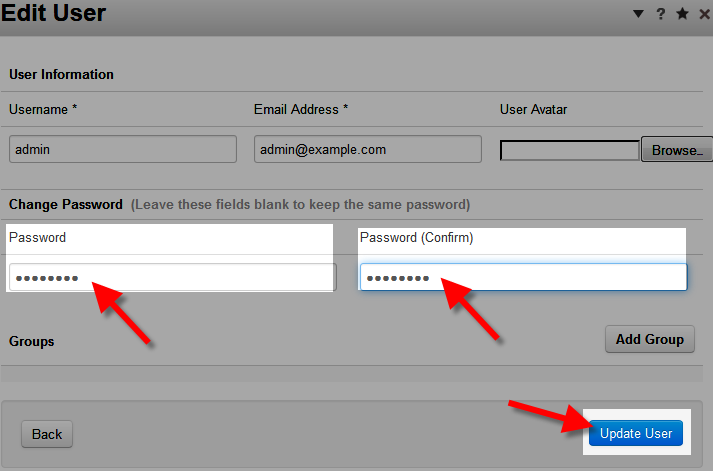
- On the Edit User menu, enter your new password in the 2 available fields, then click the Update User button.

- You will see a message stating “User updated successfully. Password changed.”
Checking for Updates in Concrete5
- Login to your Concrete5 Dashboard.
- Click the Dashboard button on top, to bring up the Dashboard menu.
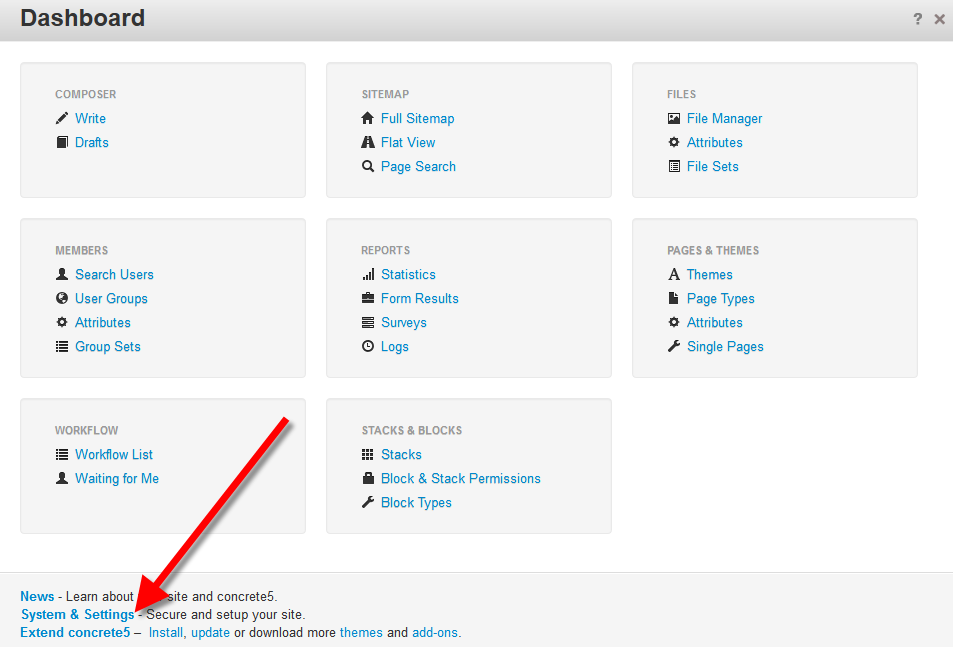
- On the bottom select System & Settings, to bring up the System & Settings menu.

- Under the Backup & Restore section select Update concrete5.
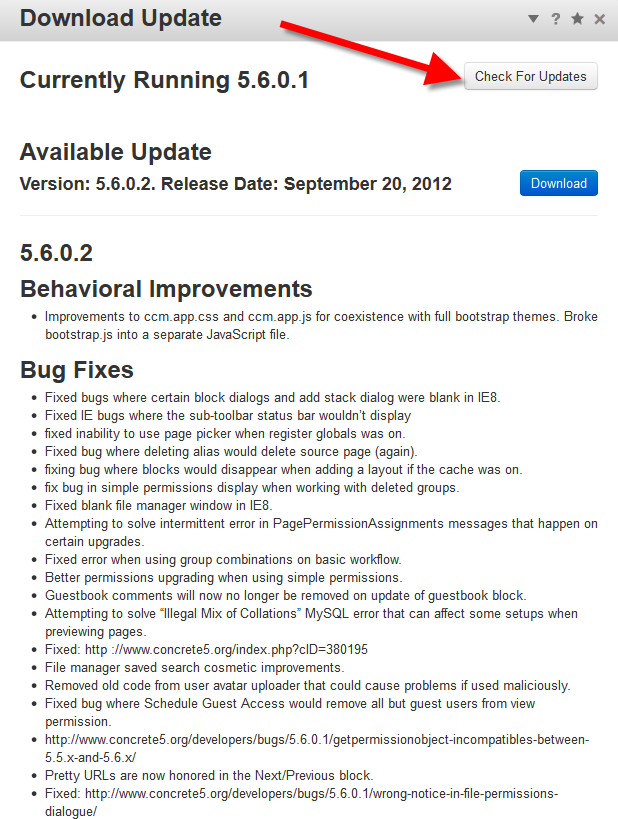
- It will list your current Concrete5 version, and available updates. You can also click the Check for Updates button to look for updates. Take note that it lists Behavioral Improvements, as well as Bug Fixes included in the update. This is so that you are made aware ahead of time, as to what is going to be affected when you perform the update.
 Congratulations, now you know how to check for available updates in Concrete5.
How to Backup a Database in Concrete5
- Login to your Concrete5 website.
- Click the Dashboard button on top.
- On the bottom of the Dashboard menu, select System & Settings. This will bring up the System & Settings menu.

- Under the Backup & Restore section, select Backup Database.
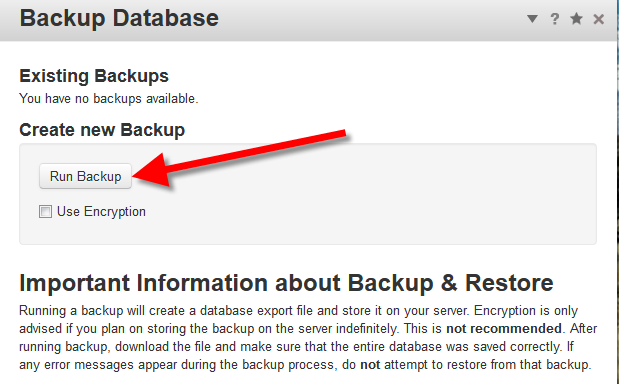
- On the Backup Database menu, click the Run Backup button to perform a backup. There is an option to Use Encryption, but Concrete5 does not recommend using this option unless you plan on storing this backup on the server indefinitely. Concrete5 also warns not to use the backup if an error occurs during the process.
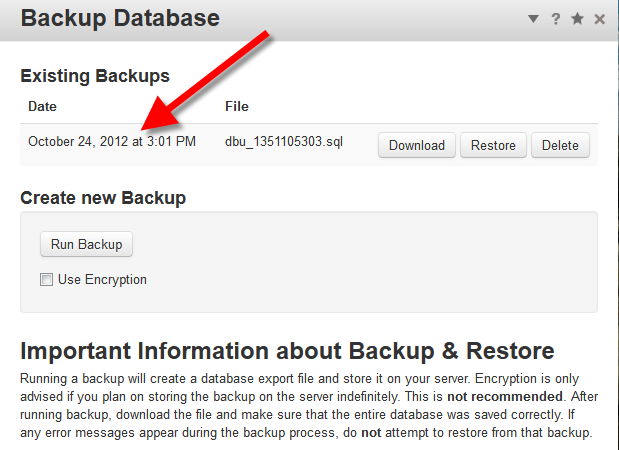
 It will take some time to complete the backup process. When it has concluded, you will see the backup listed under Existing Backups.
 Congratulations, you can now perform a database backup in Concrete5
How to install an addon in Concrete5
Here we will introduce you to the process of installing a new addon on your Concrete5 website. The process is easy and you do not need development knowledge to complete that.
Create a Backup
It is recommended to create Concrete5 backup, before making major changes on your website. This allows you to restore it to a fully operational state if something goes wrong.Sometimes, you may find yourself in the need of additional functionality on your Concrete5 website. There is a solution for that as they is a large number of addons available for the product. The installation of such addons is quite easy using Concrete5 and it is automated as well, which means that you will not need any development knowledge to complete that.The first step is to access your website as administrator and click on the Dashboard button at the top-right corner of the screen. Then, click on the Extend Concrete5 button to proceed.

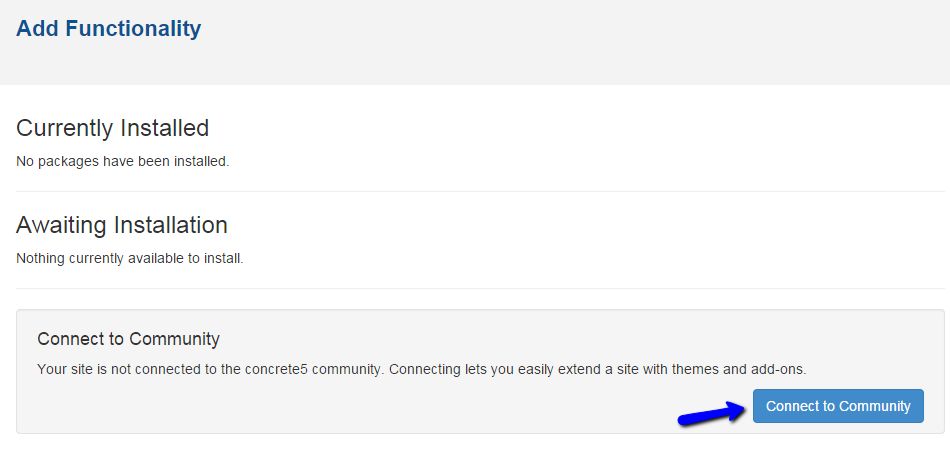
Then, you need to connect to the Concrete5 Community profile. For that purpose, you need to register at the official Concrete5 website. Once you have a valid registration, click on the Connect to Community button to proceed.
Enter your username and password and click on the Sign In button.

Find an addon that you wish to install and click on it.
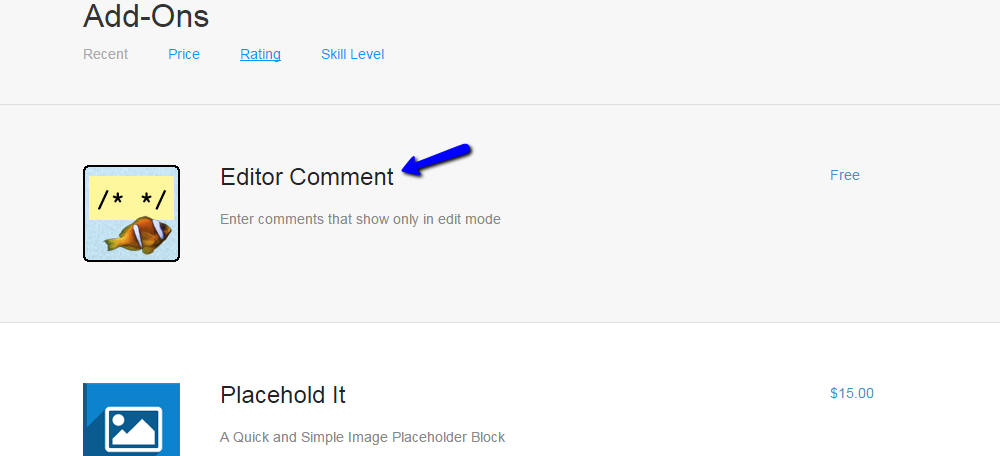
Click on the Download & Install button to initiate the process.

How to install themes in Concrete5
Here we will review the process of installing a theme in Concrete5. At certain point, you may decide that you would like to make your website look different. The installation of a new theme will allow you to achieve that. We will review the steps for such an installation so you can complete it easily on your end.
Create a Backup
It is recommended to create Concrete5 backup, before making major changes on your website. This allows you to restore it to a fully operational state if something goes wrong.There is a number of different themes, designed especially for Concrete5 websites. Those themes will re-design the front end of your website and make it look the way you want. The process is quite easy and automated so we will review the steps for a new theme installation on your Concrete5 website so you can get a better understanding of it.The first step is to access your website as administrator and click on the Dashboard button at the top-right corner of the screen. Then, click on the Extend Concrete5 button to proceed.

Then, you need to connect to the Concrete5 Community profile. For that purpose, you need to register at the official Concrete5 website. Once you have a valid registration, click on the Connect to Community button to proceed.

Enter your username and password and click on the Sign In button.

Find a theme that you wish to install and click on it.
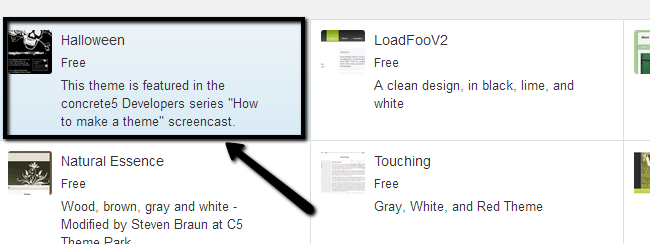
Click on the Download & Install button to initiate the process.
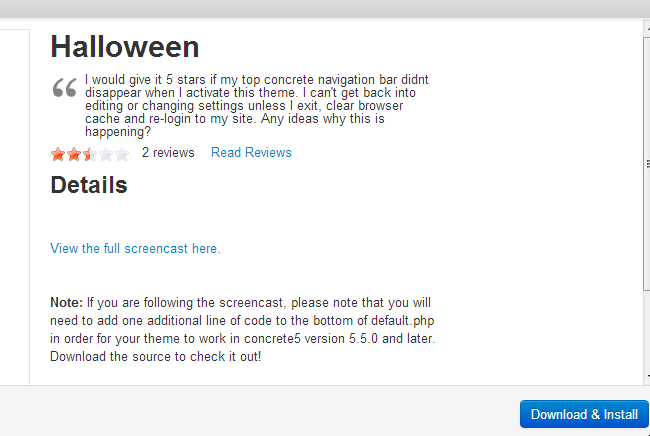
Click on the Dashboard button again and Locate the Pages & Themes section and click on Themes.

Locate the newly installed theme and activate it.

How to manage users in Concrete5
It is important to learn how to manage the users on your website. This allows you to keep up with the audience that is reviewing your website. In Concrete5, this process is quite easy and it is one of the core features of the product.To manage the users on your website and their details, you first need to access the Dashboard of your Concrete5 website.
To fully manage your userbase in Concrete5, follow the steps below:
Add new Users
To add a user on your Concrete5 website, you need to locate the Members section on the Dashboard and click on Add User.

Enter the following details:
- Username – Enter the username of the new user on your website.
- Password – Enter a password for it.
- Email address – Set the email address for the new user on your website.
- Language – Choose a language for the new user.
- Registration Data – Choose if the user will receive notifications from your website via email.
- Groups – Add the user to a certain user group.

When ready, simply click on the Add button below. The system will create the new user automatically for you.
Edit Users
To edit a user on your Concrete5 website, you need to access the Dashboard again and locate the Members section. Click on the Search Users button in the section.

Click on the user that you wish to edit. Note that you can filter the users on your website to find the one you need easily.

Click on the option that you wish to edit and add the new value for it.

Delete Users
To delete a user on your website, you need to follow the same steps as when you edit users. Locate the actual user that you wish to remove and click on the Delete button at the top-right corner of the screen.

How to create a new page in Concrete5
In the current tutorial, we will review how to create a new page on your Concrete5 website. The process is straight-forward it is important for the management of content on your website.To create a new page on your website, you need to access your website as administrator. Navigate to the Add Pages button from the top menu and then select the type of page that you wish to create. In our case, we will create a new Empty Page.

The new page will be created for you. You will be able to review the blocks available on it and you can edit them the way you want.

If you wish to add a block to the page, you simply need to click on the “Add Content to the Page” button at the top.
The pros of Concrete5:
- Concrete5 is open-source, so you can distribute and modify the code as you please.
- In Concrete5, you can drag and drop content blocks into the template itself, this meaning easy editing abilities and organizational features. the unique ability to drag and drop content blocks within a template, offering amazing organizational abilities and easy editing.
- Concrete5 ensures your site’s position in Google, offering many SEO tools, adding Meta Descriptions etc.
- When it comes to site permissions for different levels of admin, Concrete5 gives you the the ability to assign such permissions, so you can have control on what various admins can edit or not on the site.
The cons of Concrete5 CMS:
- Concrete5 has a smaller community than any of the above mentioned CMS, so when you will have a question that needs an answer or help, it’s kind of difficult.
- Althought Concrete5 has so many cool features, additional extensions or add-ons are available for purchase.
-Concrete5 makes running a website easy. Go to any page in your site, and a editing toolbar gives you all the controls you need to update your website. No intimidating manuals, no complicated administration interfaces – just point and click.Concrete5 is owned by Concrete5 (https://www.concrete5.org/) and they own all related trademarks and IP rights for this software.
Cognosys provides hardened images of Concrete5 on all public cloud ( AWS marketplace and Azure).
Deploy your Concrete5 securely on cloud i.e. AWS marketplace and Azure with Reliable Services offered by Cognosys at one-click with easy written and video tutorials.
Secured Concrete5 on centos
Concrete5 on cloud for Azure
Concrete5 is released under the MIT license.
Features
CONCRETE5’S FEATURES :
1.THE EDIT BAR
When you login, you will see the edit bar across the top of the screen. The edit bar only contains a few buttons, but they are very important:
- Edit page
This button puts the current page into edit mode and allows you to make changes. When you are finished, you click the button again and you can discard, save or publish your changes. - Page Settings
The page settings allow you to edit your pages attributes, title and meta tags and design and other settings too, like caching and version. - Add content
Click this and the block panel will slide out where you can add new content to the page. It’s quick and easy to drag a new block in and start adding images, text and other content such as forms. - Add a new page
Let’s you add a new page such as a service or blog page. When you click this you can quickly choose from frequently added pages such as a blog page. It’s so quick and easy! - Dashboard – Change site settings
When you click this button you get a slide out panel with the site settings as contained in the sites’ Dashboard. The Dashboard is the main “back-end” area of a Concrete5 website.The edit bar also contains a search which helps you quickly and easily find settings and pages within your site. The search is a really great feature of the CMS.
2.ADDING & EDITING BLOCKS
Nearly all the editable content on a page is made up of blocks, including text, images, forms, page lists, site navigation etc.Blocks can be moved around between any area on a page. This is where some of the power of “in-context” editing comes from and what makes Concrete5 so flexible to work with.Editing blocks is easy. You can even build powerful forms by clicking on the appropriate options or drag n drop the order of the fields in your form.Just by moving blocks around, you can A/B test your layouts by creating different landing pages and seeing which has the highest conversion rate.We often make custom blocks to offer our clients the easiest possible editing experience. For example, you may want an FAQ block or a Team Member block that you can easily update.

3.THE FILE MANAGER & SITEMAP
The sitemap and file manager are two very important parts of Concrete5 CMS.
- File Manager
This is where you store your sites files. From images to PDFs and videos, you can store them safely in the file manager and they are backed up with the rest of the site. The File Manager stores versions of each file so you can roll it back in case it accidentally gets replaced. There is also a download url for each file and you can add files to folders and sets to keep everything organised. - Sitemap
The sitemap lists all your pages and allows you to reorder, add, remove and edit page properties. For large websites, you can search the sitemap to find a certain page and the Page Activity page within the sitemap section of Concrete5 tells you which pages have been recently worked on.

4.WORKING WITH PAGE TYPES
Concrete5 gives us the tools to create different page types so that we can give you the choice of different layouts, that you can add “at the click of a button”. Once pagetype could be a single column, another two columns etc.Composer forms allow us to make it quicker to add specific content like a blog post because we can customise the composer form to just ask for title, date and introduction for example. We can also set the blog post to automatically add the page to the right place within the site, under the main blog page.The advanced pagetypes in Concrete5 version 5.7 onwards, help make editing your site quicker and easier than ever before.

5.ATTRIBUTES
Attributes are bits of information that we can assign to files, pages and site members such as height, colour etc. We can create custom attributes in Concrete5 that allow us to attach this data and use it in all kinds of interesting ways.Imagine you wanted to create a dating website. We could give members attributes such as gender, eye colour, height, weight etc. Due to Concrete5’s in-built attributes system, the site owner could update these values not only for site members, but maintain the default values for each without needing to modify any code at all.

6.MEMBERS
Concrete5 gives us the tools to create communities and member only areas. Concrete5 has special pages that can be activated to produce a members area and we can build on that to create powerful membership functionality.Site Administrators can add and edit users and set permissions so different users can have different roles within the editing of the website.

-Major Features of Concrete5
- WYSIWYG text editor
- In-context editing toolbar – change your website as you surf!
- Automatic navigations Concrete5 – add a page anywhere and it’s updated everywhere
- Preview your changes before publishing
- Track versions, and compare differences between them
- File manager with bulk upload and image manipulation using Picnik (Picnik integration in v5.3)
- Detailed permissions – create editor groups, approve content, and see an audit trail
- Drag-n-Drop content around your pages.
- Scrapbook lets you copy content and functionality from one part of your site to another
- Integrated spellchecker
- Flexible meta data & vanity URLs for Search Engine Optimization (SEO)
- Easy Google Analytics integration
- Integrated help system with commercial support options (v5.3)
- Automatic add-on & theme installation (v5.3)
- An open marketplace of add-ons
- Content scheduling – write something now, and have it go live automatically later
- Out of the box includes a photo slide show, You Tube integration, guestbook, Flash support, polls, surveys, search, RSS, secure file distribution, Google Maps, and a form generation tool.
Azure
Installation Instructions For Ubuntu
Note: How to find PublicDNS in Azure
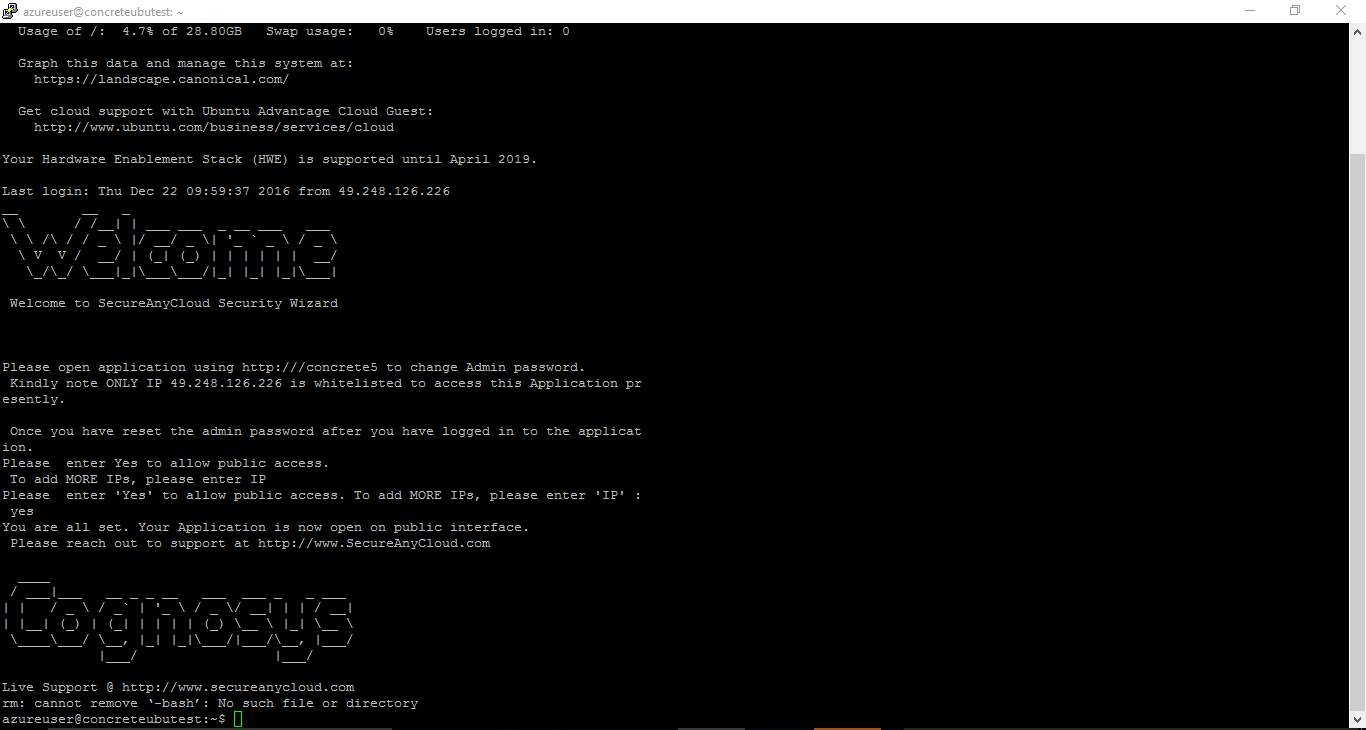
Step 1) SSH Connection: To connect to the deployed instance, Please follow Instructions to Connect to Ubuntu instance on Azure Cloud
1) Download Putty.
2) Connect to virtual machine using following SSH credentials :
- Hostname: PublicDNS / IP of machine
- Port : 22
Username: Your chosen username when you created the machine ( For example: Azureuser)
Password : Your Chosen Password when you created the machine ( How to reset the password if you do not remember)
Step 2) Database Login Details :
- MYSQL Username : root
- MYSQL Password : Passw@rd123
Note :-Please change password immediately after first login.
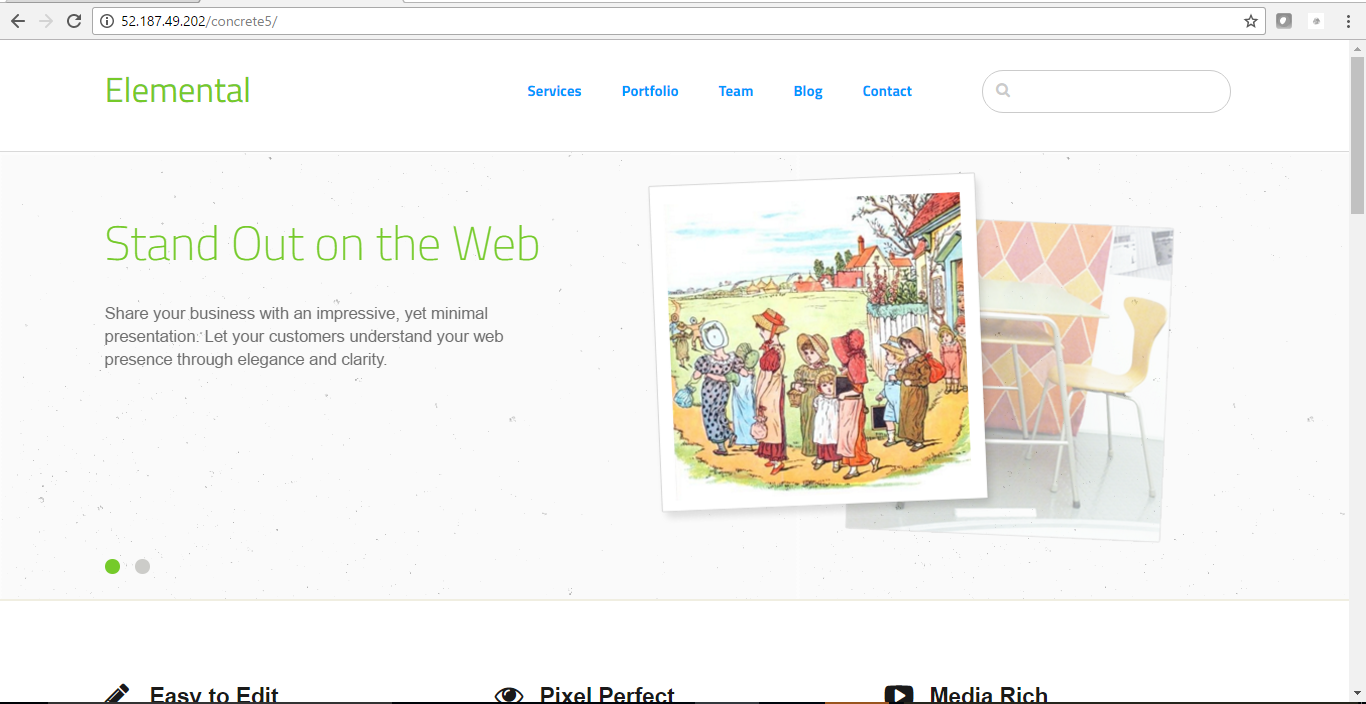
Step 3) Application URL: Access the application via a browser at http://PublicDNS/concrete5
- Username : admin (Please create new user and delete this user)
- Password : Passw@rd123
Step 4) Other Information:
1.Default installation path: will be on your web root folder “/var/www/html/Concrete5”
2.Default ports:
- Linux Machines: SSH Port – 22 or 2222
- Http: 80 or 8080
- Https: 443
- Sql or Mysql ports: By default these are not open on Public Endpoints. Internally Sql server: 1433. Mysql :3306
Configure custom inbound and outbound rules using this link
Installation Instructions For Centos
Note : How to find PublicDNS in Azure
Step 1) SSH Connection: To connect to the deployed instance, Please follow Instructions to Connect to Centos instance on Azure Cloud
1) Download Putty.
2) Connect to virtual machine using following SSH credentials :
- Hostname: PublicDNS / IP of machine
- Port : 22
Username: Your chosen username when you created the machine ( For example: Azureuser)
Password : Your Chosen Password when you created the machine ( How to reset the password if you do not remember)
Step 2) Database Login Details :
- MYSQL Username : root
- MYSQL Password : Passw@rd123
Note :-Please change password immediately after first login.
Step 3) Application URL: Access the application via a browser at http://PublicDNS/concrete5
- Username : admin (Please create new user and delete this user)
- Password : Passw@rd123
Step 4) Other Information:
1.Default installation path: will be on your web root folder “/var/www/html/Concrete5”
2.Default ports:
- Linux Machines: SSH Port – 22 or 2222
- Http: 80 or 8080
- Https: 443
- Sql or Mysql ports: By default these are not open on Public Endpoints. Internally Sql server: 1433. Mysql :3306
Configure custom inbound and outbound rules using this link
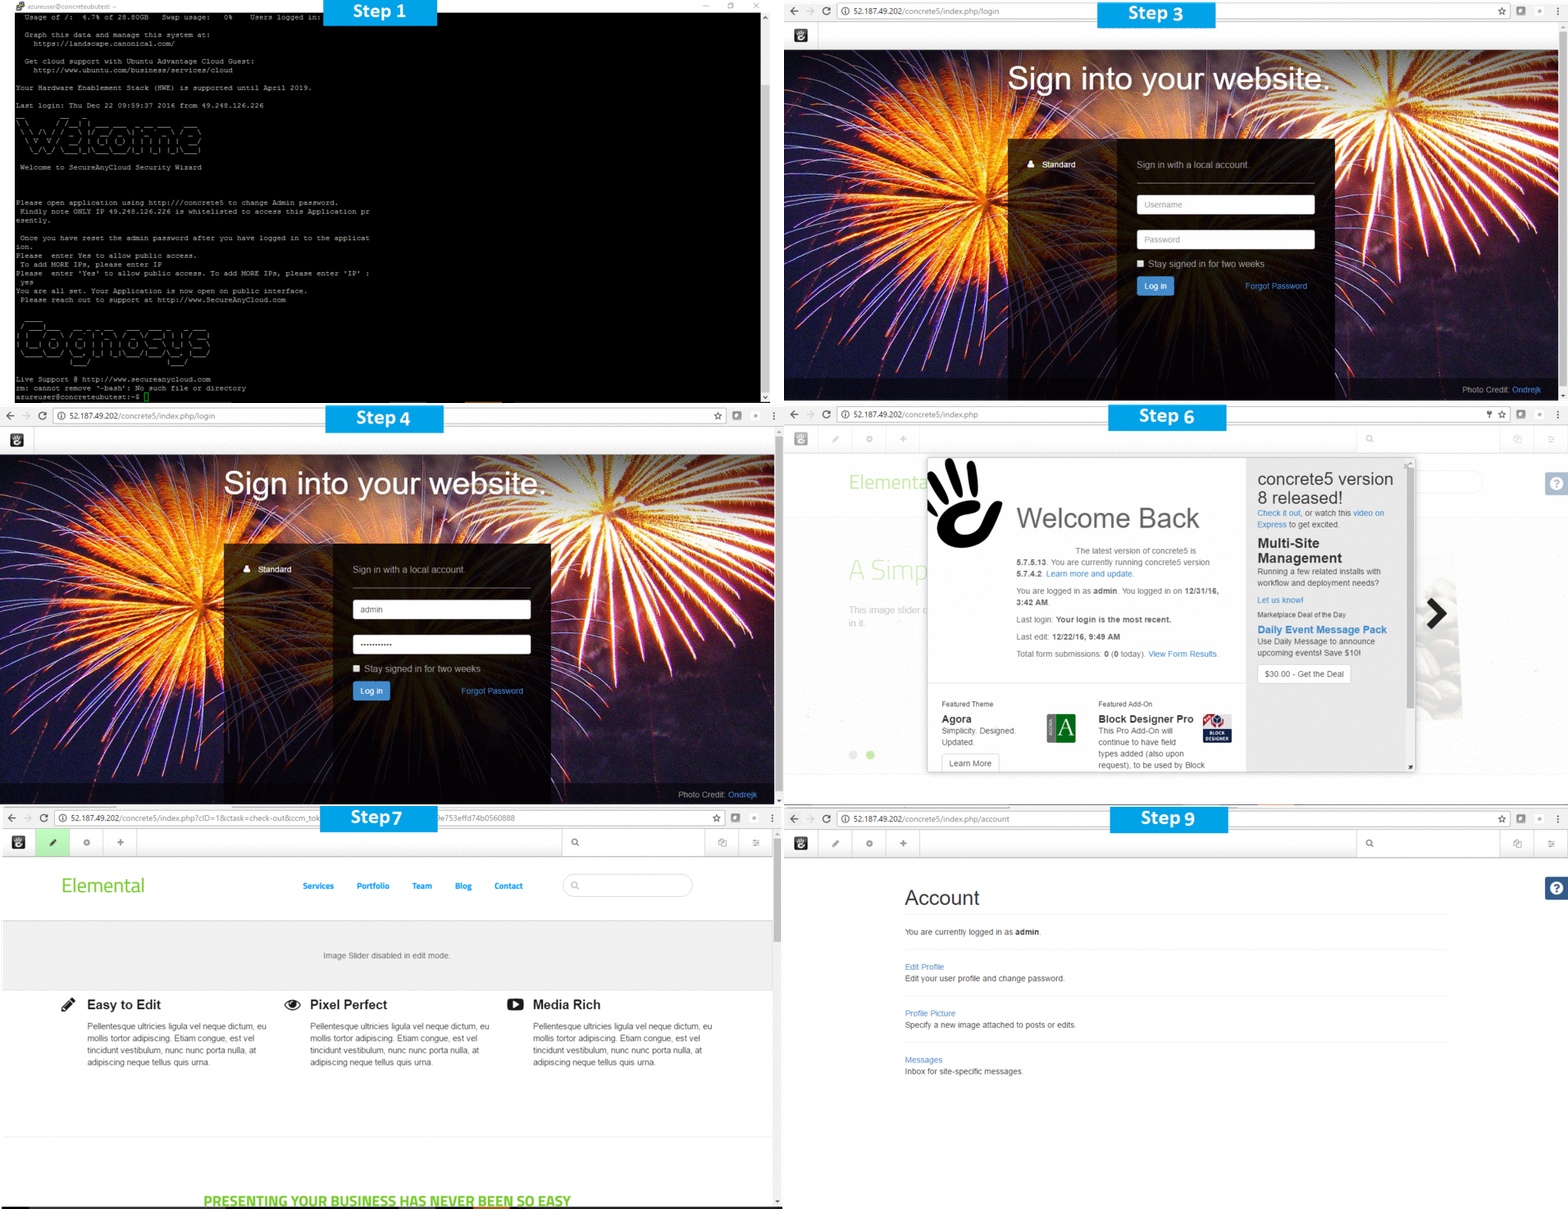
Azure Step by Step Screenshots for Ubuntu 14.04 LTS

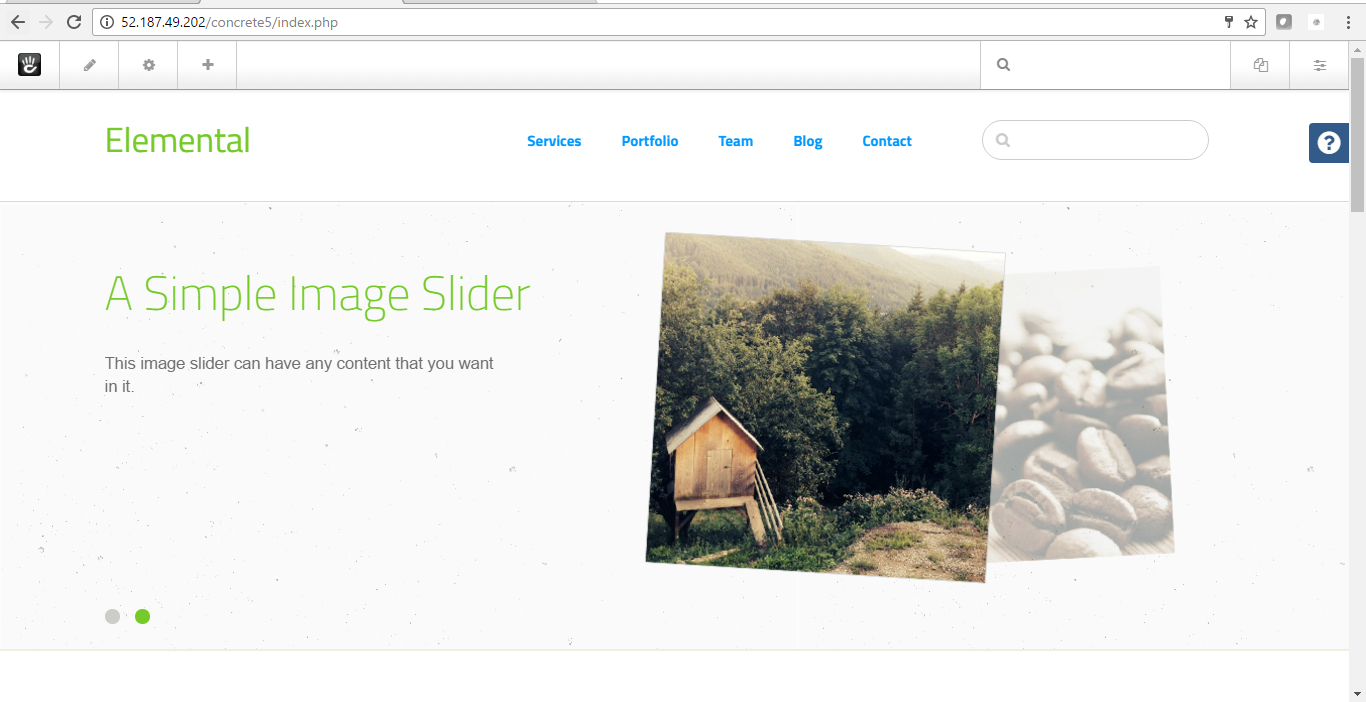
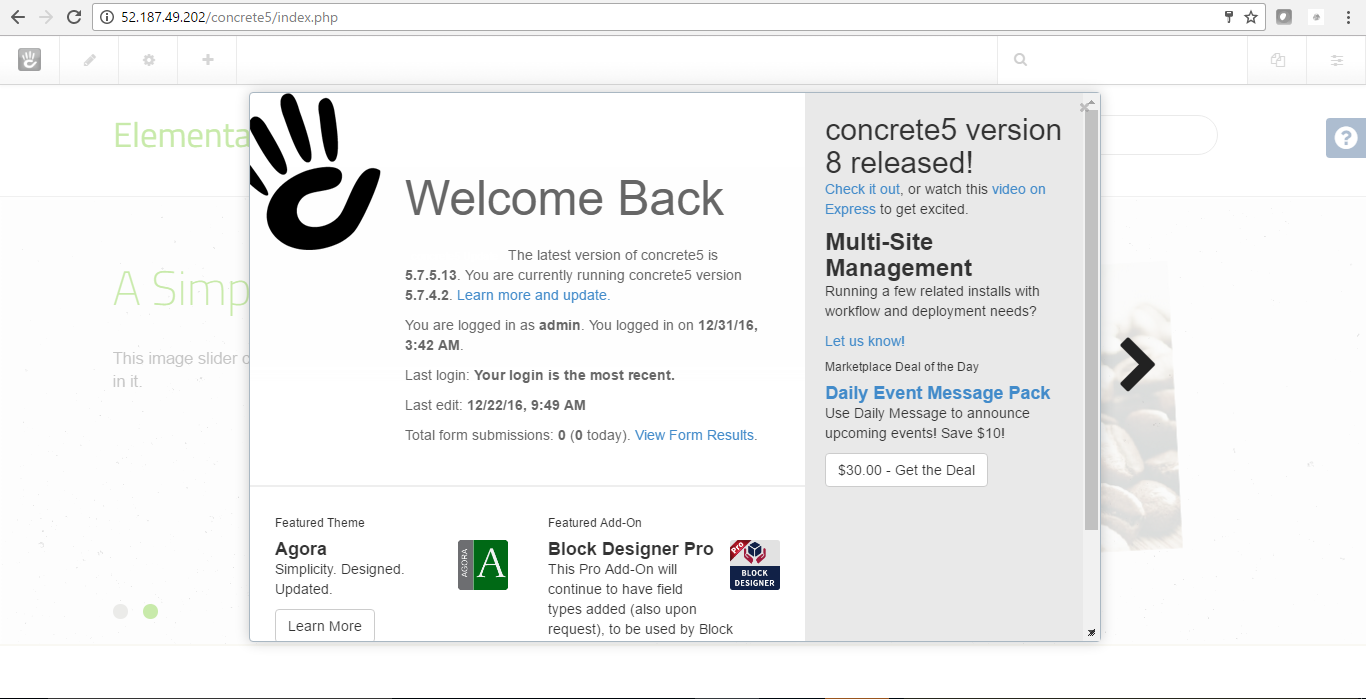
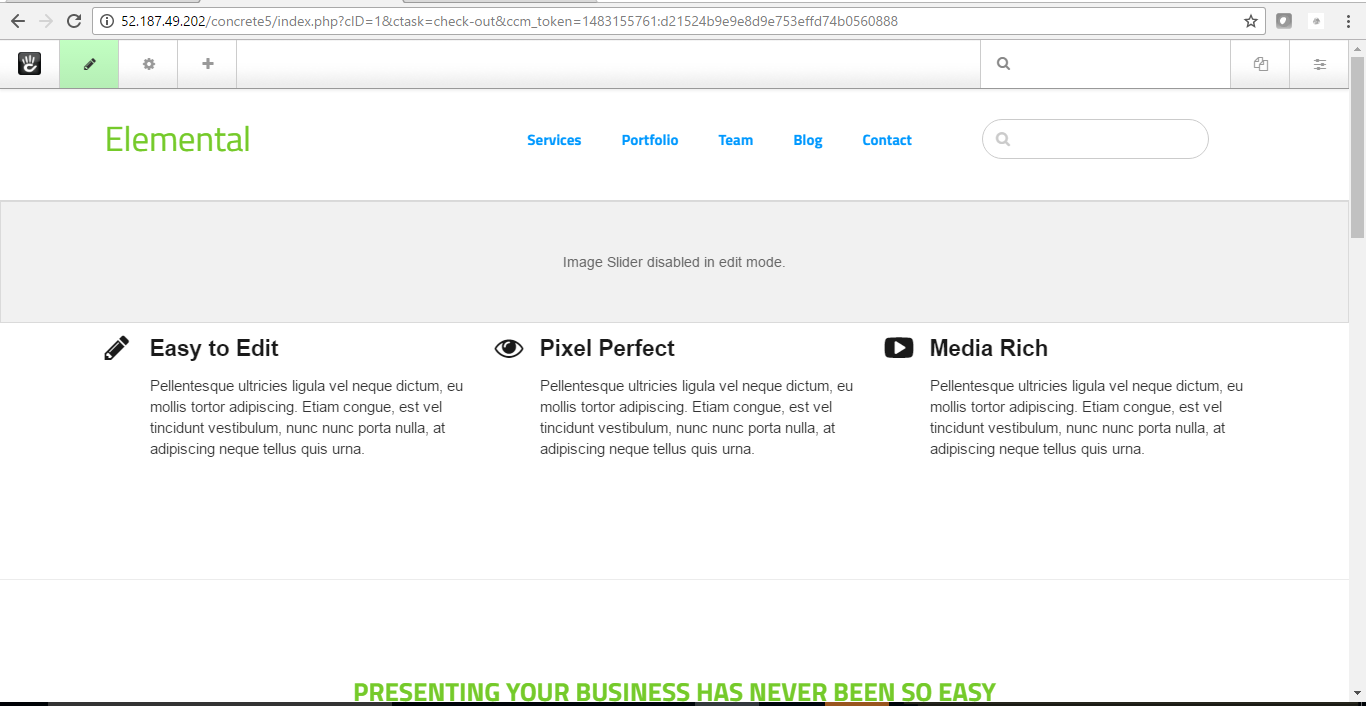

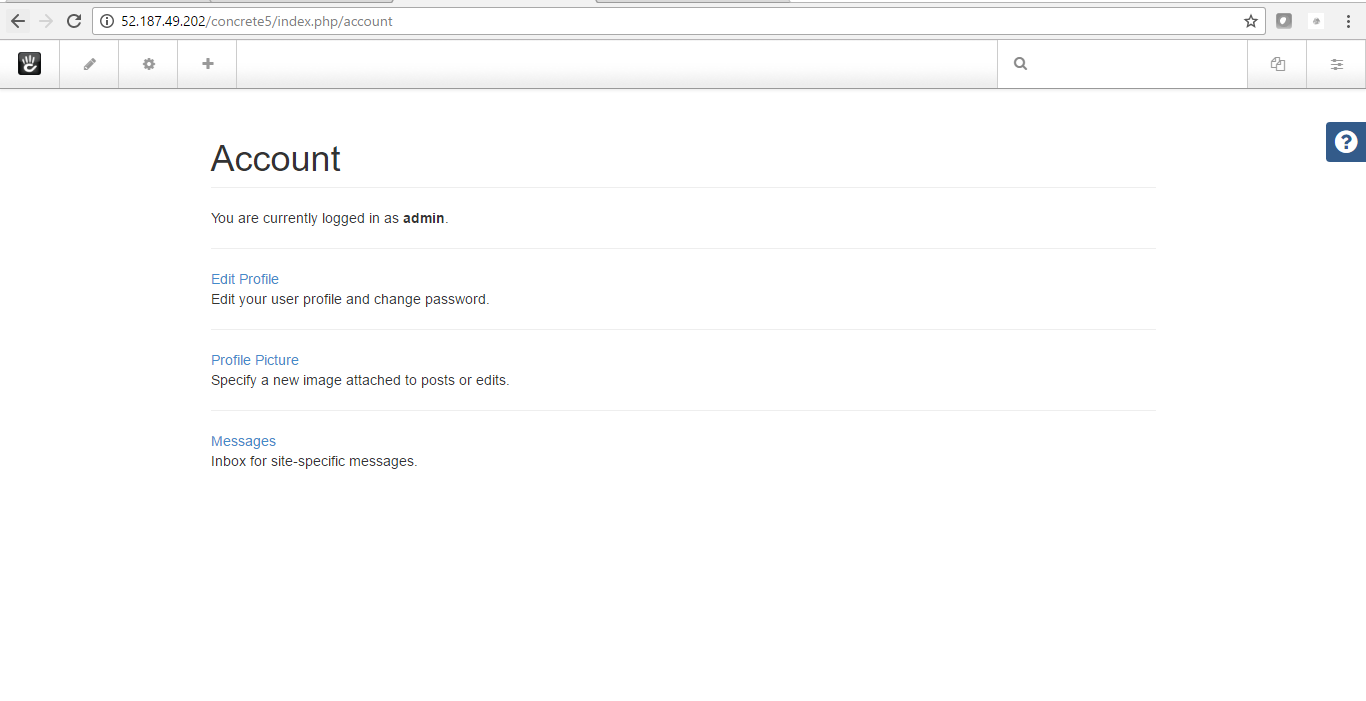


Installation Instructions For Ubuntu
Installation Instructions for Ubuntu
Step 1) VM Creation:
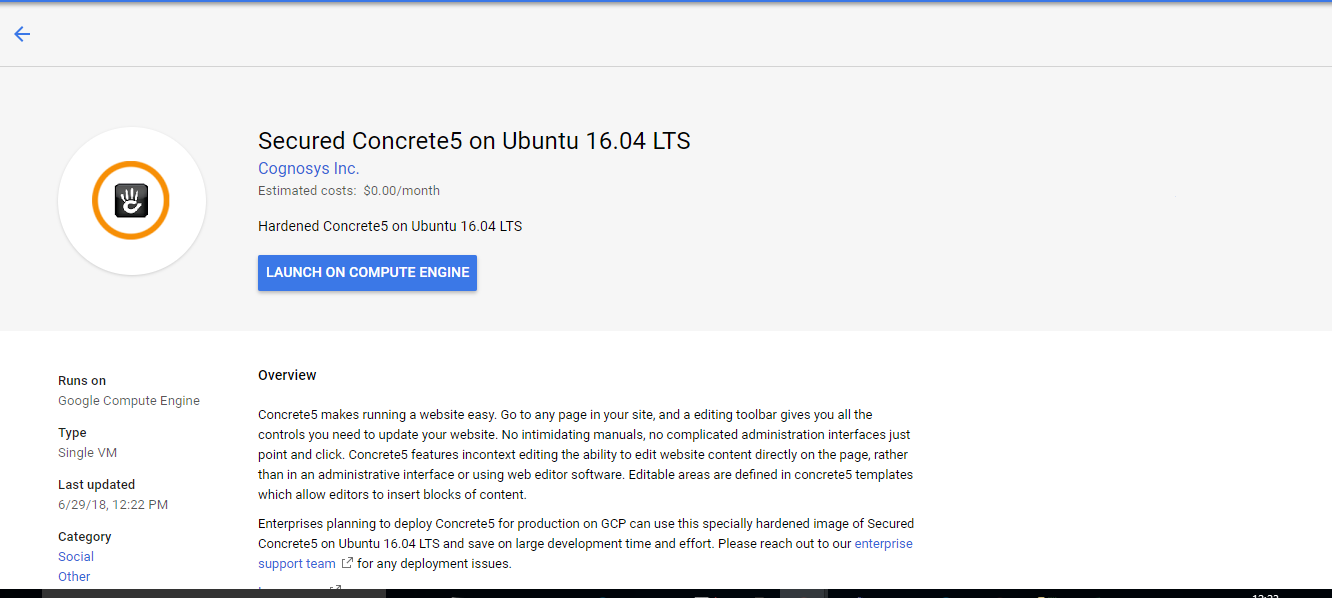
- Click the Launch on Compute Engine button to choose the hardware and network settings.

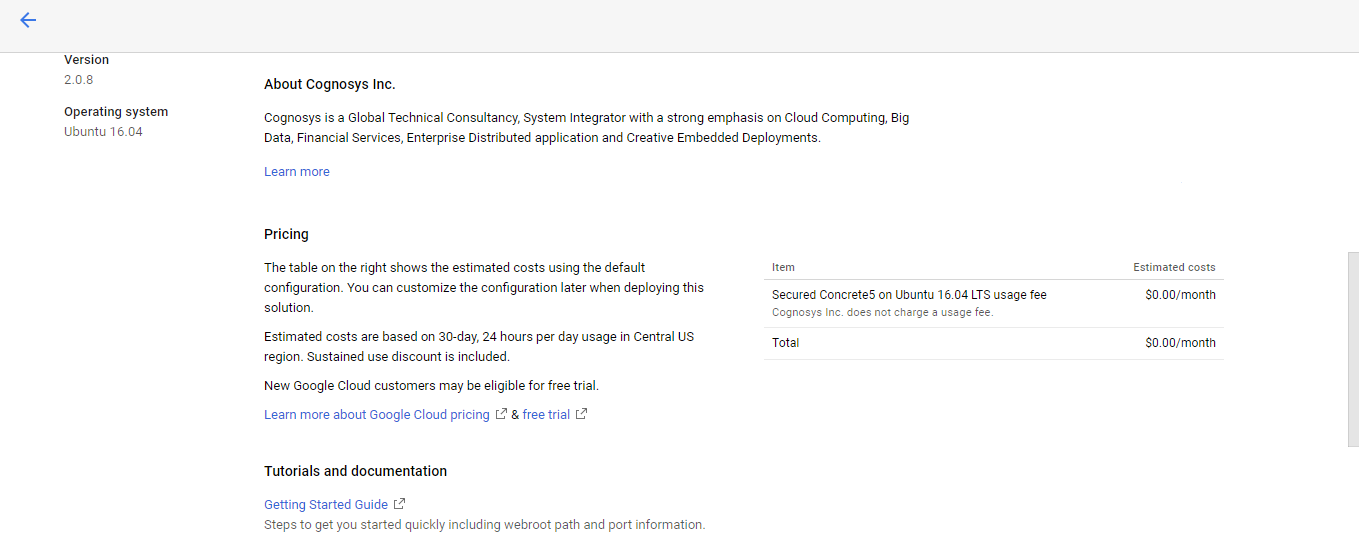
- You can see at this page, an overview of Cognosys Image as well as estimated cost of running the instance.

- In the settings page, you can choose the number of CPUs and amount of RAM, the disk size and type etc.
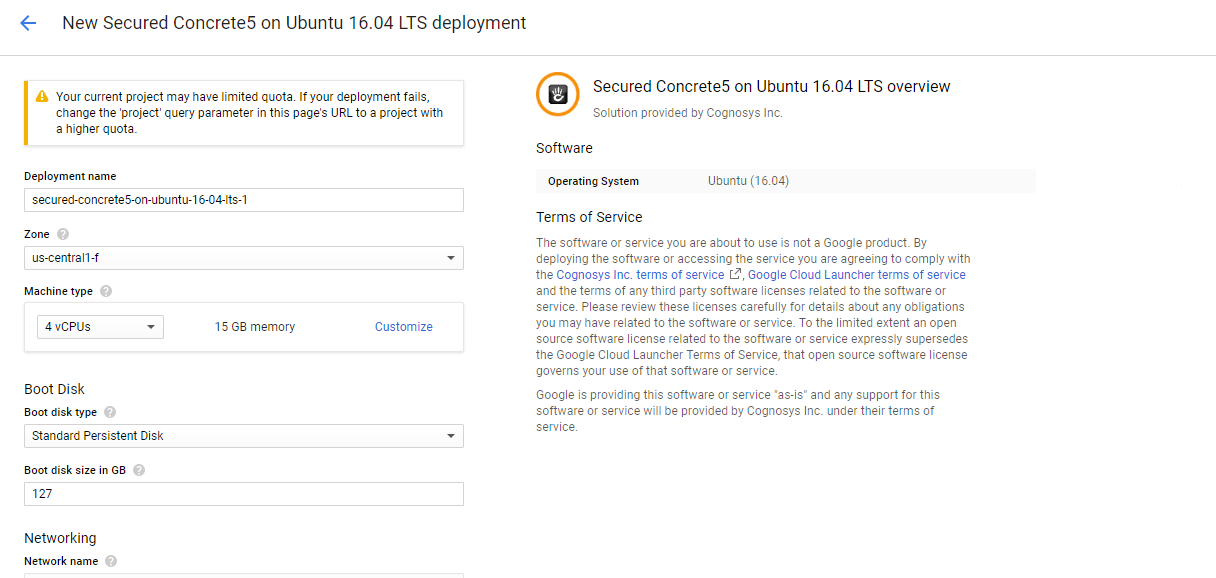 Step 2) SSH Connection:To initialize the DB Server connect to the deployed instance, Please follow Instructions to Connect to Ubuntu instance on Google Cloud
Step 3) Database Login Details:
The below screen appears after successful deployment of the image.

For local MySQL root password, please use the temporary password generated automatically during image creation as shown above.
i) Please connect to Remote Desktop as given in step 2 to ensure stack is properly configured and DB is initialized.
ii) You can use MySQL server instance as localhost, username root and password as shown above.
If you have closed the deployment page you can also get the MySQL root password from VM Details “Custom metadata” Section.
Step 4) Application URL: Access the application via a browser at http://PublicDNS/concrete5
Step 5) Other Information:
1.Default installation path: will be on your web root folder “/var/www/html/Concrete5”
2.Default ports:
- Linux Machines: SSH Port – 22 or 2222
- Http: 80 or 8080
- Https: 443
- Sql or Mysql ports: By default these are not open on Public Endpoints. Internally Sql server: 1433. Mysql :3306


