1-click AWS Deployment 1-click Azure Deployment
Overview
Team Foundation Server (commonly abbreviated to TFS) is a Microsoft product offering source control, data collection, reporting, and project tracking, and is intended for collaborative software development projects. It is available either as stand-alone software, or as the server side back end platform for Visual Studio Team System (VSTS).
Team Foundation Server (TFS) – The Service
Dunstan Thomas are experts in Microsoft Team Foundation Server (TFS) providing a full set of services from training through to consulting & implementation services. It is important to get an implementation of TFS right first time. Correct use and appropriate configuration to meet your development processes is critical to avoid costly failure. Dunstan Thomas are specialists in:
- TFS Installation and setup including Multi Server/Multi Location
- Migration of source code from 3rd party solutions
- TFS Deployment Automation
- Process and Template Customisation
- Management Reporting
- Post Deployment Support Services
Team Foundation Server (TFS) – The Technologies
TFS is an integrated solution designed to support software development best practices to support:
- Enterprise level version control
- Fully flexible work tracking system
- Build management
- Process guidance
- Management reporting

Team Foundation Server works in a three-tier architecture: the client tier, the application tier and the data tier. The client tier is used for creating and managing projects and accessing the items that are stored and managed for a project. TFS does not include any user interface for this tier, rather it exposes web services which client applications can use to integrate TFS functionality with themselves. These web services are used by applications like Visual Studio Team System to use TFS as data storage back end or dedicated TFS management applications like the included Team Foundation Client. The web services are in the application layer. The application layer also includes a web portal and a document repository facilitated by Windows SharePoint Services. The web portal, called the Team Project Portal, acts as the central point of communication for projects managed by TFS. The document repository is used for both project items and the revisions tracked, as well as for aggregated data and generated reports. The data layer, essentially an SQL Server Standard Edition installation, provides the persistent data storage services for the document repository. The data tier and application tier can exist on different physical or virtual servers as well, provided they are running Windows Server.
TFS For Automating Build, Test, And Deployment For .NET Projects
Setup a C# Application
Assuming TASK work items are created in TFS and is assigned to developer’s to work on the same. It has been always noticed that Traceability is very important from the point of view of tracking any work across the software lifecycle.
Before adding a .NET application to TFS source control repository, ensure whether a Collection and Team Project exists or not.
A Collection is created by the TFS Administrator. It consists of a group of Team Projects in any service organization, where projects for multiple customers are being executed. You can create individual collections for each customer projects in TFS.
Once a collection is created you can create multiple team projects within it. A single team project consists of all work items, source code, test artifacts, metrics for reports etc., Team project can be created using various inbuilt process templates like Scrum, Agile, CMMI etc.
- More on creating collections can be found @ Manage team project collections in Team Foundation Server
- We will be using the Default Collection which is created once TFS is installed
- To create team project within a collection, follow the steps as shown below.
Launch TFS Web interface using the URL http://<ServerName>:port/tfs and you can see the project created.
Click on the project and you will get on to the Team Dashboard
(Note: Click on any image for enlarged view)
Now we have a collection and a team project created. Let’s launch Visual Studio.NET and create a new C# Web application and share the project to TFS source control repository. This is the first step towards establishing Continuous Integration (CI) practice.
1) Launch Visual Studio.NET and set TFS as the default source control repository. Go to Tools => Options => Source Control. Then click OK.
2) Go to View => Team Explorer and connect to TFS server using the icon![]()
3) Create a C# ASP.NET Web project
4) Since we are creating a web application, Select the Web Forms template
Click OK to create the project.
5) The project created can be viewed in Solution Explorer. .NET uses the concept of .sln file or solution to contain all the projects. Once you open the solution all the associated projects will also open. We need to add the solution to the TFS source control repository
6) Modify the file Default.aspx as shown, Save it and then add the whole solution to the TFS source control repository
Select the Design view and you will be able to see the entire page
7) Add the solution to TFS source control. Right click on the solution and select ‘Add solution to Source Control’
8) Select the Team Project created earlier and then click OK
9) The solution is not yet checked-in to the TFS. In the Team Explorer click on the source control explorer and you can see the solution added to be checked in.
10) Check-in changes. Go to Team Explorer => Pending Changes
Enter a comment and drag-drop a TASK work item to ensure traceability. Click on the Check-in button.
11) To test the website running locally, Click on the Firefox icon in Visual Studio.NET. Remember it is not yet deployed to IIS on any particular environment.
Creating Build Definition with Code Analysis
A build definition consists of a series of Tasks which is executed during an automated build process. Examples of the tasks can consist of running a Visual Studio Build, MS Build, executing PowerShell or Shell scripts etc.
1) To create a Build Definition, login to TFS web interface and go to the Builds TAB. Click on + to create a build definition. Start with EMPTY definition and then click Next.
Select the Team Project and click on Create
Click on Edit, which is found next to the Empty definition
Save the build definition as something like ‘Main Build’
Since Sonarqube will be used for Code analysis, hence add the 2 Sonar steps ‘SonarQube Scanner for MSBuild – Begin Analysis’ and the ‘SonarQube Scanner for MSBuild – End Analysis’ tasks.Add the Begin Analysis step before any MS Build or Visual Studio Build. This step fetches details from Sonarqube server to configure the analysis.
Add End Analysis step later on.
The steps added will look like the following with MS Build step in between.
Start to define the details of Sonarqube server. Define Endpoint where the Sonarqube server and authentication details are added. Click on ‘Manage’ to add the Sonarqube server details.
Click on ‘New Service Endpoint => Generic’
Now go back to the main Build Definition screen and select the endpoint which was just created.
Completed configuration for Begin analysis, looks as shown below
Select the solution. In the Advanced => Additional Settings enter the following and save the Build Definition
/d:sonar.scm.enabled=true /d:sonar.scm.provider=tfvc /d:sonar.tfvc.username=niranjan /d:sonar.tfvc.password.secured=<password>
SonarQube – End Analysis. Finish the analysis and then upload the results to the SonarQube project.
Add a step to Publish Artifacts to the server. The artifacts will be stored in a drop folder in the server and will be used during deployment.
2) Install the agent on the Build and Deployment machine. You can refer to my previous tutorial to know how to install the agent. Now assuming that the agent is installed, ensure whether the agent is running or not.
3) Ensure the SonarQube SCM TFVC plugin is downloaded from here. and copied to the SonarQube installation\extensions\plugins directory. This plugin ensures that the source code is taken from the TFS source control repository and is made available to SonarQube for code analysis.
4) After the plugin is downloaded and copied, Launch the sonar server
5) Initiate a Build to check if the steps work fine. Open the Build Definition and click on ‘Queue Build’
Build Successful. All the steps ran fine.
Click on the Build number, in this case, it is Build 217 and go to Artifacts tab to look at the drop folder created at the server level.
Creating Release for Deployment
In the previous section, we saw about Build, followed by code analysis using SonarQube. We will now create a Release to deploy the artifacts from the ‘drop’ folder to IIS.
With the creation of Release, the entire Continuous Integration and Continuous Delivery is automated without any manual intervention.
Go to Release hub and Create a Release Definition.
Start with Empty definition and click OK.
Save the Release definition and rename the Default Environment to QA. Based on the projects, additional environments like Staging Pre-Prod etc. can also be added and deployment would be automated to the entire environments one after the other.
Link the Build definition to Release definition so as the deployment is automated. Click on ‘Link to a build definition’. Select the build definition created earlier.
Click on Link
Enable the Deployment Condition to initiate the deployment immediately after Release creation
Also, enable the Trigger for deployment after the build is successful. In the Release definition, go to the Trigger tab and enable ‘Continuous Deployment’, select the build definition.
Later Save the Release Definition.
Back in Environments tab of the release definition add the tasks to deploy the artifacts to the IIS server.
Add a task to copy files from ‘drop’ folder created during the build process to IIS wwwrootdirectory.
Source folder – Browse and select the Webapplication1 project in the drop folder
Target folder should be the inetpub\wwwroot directory – C:\inetpub\wwwroot\WebApplication1
Executing Release for Deployment
In the release hub, create a release to start the deployment
Select the last stable build and Click on Create to Start the Deployment.
Deployment is successful to QA environment
Run inetmgr which is the IIS manager, where you can manage all the web sites/applications installed to IIS. Browse to the web application deployed.
To conclude once you initiate the Build, the deployment will also get completed to all the environments defined, as the Release is linked to the build definition.
Continuous Integration and Continuous Deployment using TFS
Introduction
Continuous integration (CI) and continuous deployment (CD) help in reliably deliver quality apps to the customers at a faster rate. From code through build, test, and deployment is defined efficiently and fully managed pipelines that automate and control the entire process.
With Continuous Deployment, every change that is made is automatically deployed to production/dev/staging environment. This approach works well in enterprise environments where we plan to use the user as the actual tester and it can be quicker to release.
This blog post provides an idea about setting up the CI and CD pipeline for any project in Team Foundation Server and run the automated builds and deployment from that.
Continuous integration (CI) is a development practice that requires developers to integrate code into a shared repository several times a day. Each check-in is verified by automated build, allowing teams to detect problems early.

Continuous Delivery is the extension of CI: an approach in which each team ensure that every change to the system is releasable, and we can release any version at the push of a button.

Continuous Deployment (CD) is similar to Continuous Delivery. Here, once the developer commits the code it will go to production without any manual/human intervention.

CI/CD Pipeline – It is the backbone and one of most important part of DevOps. Here we create smooth and seamless pipeline/workflow right from Coding till deployed to production.

Team Foundation Server aka TFS is a Microsoft product which is serves as a SCM tool like Git. It also has features like reporting, project management, automated builds, testing and release management capabilities.It covers entire lifecycle, and enables DevOps capabilities. TFS can be used with numerous IDE including Visual Studio and Eclipse on all platforms.
It also provides the features of implementing both CI and CD. It has the feature of Build Management which includes build process management and automating build triggering. It supports good number of automated build triggers such as scheduled build, Continuous Integration trigger, etc.
Problem Statement
When the development is done and the testing team wants to check the functionality then build is released to the different test environments and this activity is handled manually for most of the projects. Manual build deployments takes lot of time and requires user interactions. Also manual build deployment have challenges such as handling the build version number, cost of the development is more because of maintenance, requires more team engagement and organization.
Solution
To overcome all the challenges and dependencies of manual build deployment process the Automated Build deployment is the best solution and the Build automation is the process of automating the creation of a software build and the associated processes including: compiling computer source code into binary code, packaging binary code, and running automated tests.
Now let us see how to set up the CI-CD pipeline using TFS.
Prerequisite for set up CI & CD using TFS
- Admin Permissions for the TFS
- Set up build agent for running the builds from the TFS build definition.
Set up Admin Permissions for TFS
When configuring a user in the Team Foundation Server administrator role, you must set permissions in Team Foundation Server groups.
1.From the team page on TFS, click the to go to the team administration page.
2. Add an administrator.

Set up the Build Agent
For the TFS navigate to the Agent Queues section and select the option to download agent.

Get the Agent based on the system pre-requisite.

Create and configure the Agent as specified in the above screenshot.
After downloading and creating the agent contents will be displayed in the folder structure like below:

Run the Agent in the Admin mode. For running the builds and release the agent should be running always.

Set up the Continuous Integration using TFS
Create a build definition
Login to Team Foundation Server as Admin and Create a Build Definition.
Go to Build & Release tab and navigate to Builds section.
Click on +New to create a new build definition.

Choose template for the new build definition
For the TFS there are multiple options present for creating a build definition such as Maven, Jenkins, Xamarian.Android etc. Based on your application select the template.
Select the Visual Studio template and for build and run tests from visual studio. For Visual Studio template Build Agent is required.

Select the repository settings for the build definition
Select the repository source and the default agent queue for running the build definition.
For the Build definition multiple options are present for build, variables, triggers, repository and History.
These options help the user to maintain the build definition.


Multiple build steps can be added to the build template selected.
Click at Build steps and a task catalogue is opened and from this select the options for Build, Utility, Test, Package and Deploy based on the application requirements.


Configure the variables for the build definition.
Variables section for the build contains the list of predefined variables and for this section more variables can be added.

Variables are accessed for the build as $(variableName)
See the screenshot below for reference:

Create the versioning for the build
For tracking the build, versioning is important and TFS has the option for creating a Build number format.
For the Build Definition, navigate to the General section and provide the Build Number Format based on the project need.
$(BuildMajorVersion).$(BuildMinorVersion).$(BuildNumber)$(rev:.r)
Rev.r is increment every time when the code is merged.

The build number after this specific definition is 1.0.0.30, 1.0.0.31 and so on.

Agent Queue
Agent Queues manages the list of agents configured and the request capabilities for the build agent.
 Build Summary
Click on the Build definition created and a complete summary of the build definition can be viewed.
Summary contains the recently completed builds details, edit options for the build definition, queue the new build option and history for the build definition.
Set up the test assemblies for running the tests
Add the test assembly for test execution with the builds.

Build definition execution
Whenever a code check-in is done, the build starts and all the steps are executed in specified order.

Navigate to the Tests Tab for the TFS and go to the Runs section, here the complete Automated tests execution results can be viewed. All the details for the build platform, environment can be viewed here and the .trx file for the current build execution can be downloaded from this section and this .trx file contains the complete execution details of the tests triggered along with the build with the Pass/Fail status , failure reason.
Change the TFS workflow
Getting started
To make changes to your TFS, you have to download, edit and then upload the xml configurations of the work item or process, you want to update. This can be done with the witadmin console application. Start witadmin as administrator under %programfiles(x86)%\Microsoft Visual Studio\2017\Professional\Common7\IDE\CommonExtensions\Microsoft\TeamFoundation\Team Explorer. Instead of TeamExplorer, your location might be, Professional, Enterprise or Community, depending on the version you’ve installed.
Adding new states and transitions to a TFS work item
As already mentioned, with witadmin you can download the configuration xml file for the work item you want to edit. The instruction to do that is witadmin exportwitd /collection:COLLECTION /p:PROJECT /f:FILENAME /n:TYPENAME. The type name is for example Bug for “Product Backlog Item”.
Adding a new state
After you downloaded the xml file, open it and find the <Workflow> section. Under the <States> section, you can add a new state.
The value of the state is the text you will see in the TFS.
Adding a new transition
The new state can’t be selected right now because there is no transition for it. Transitions tell the TFS which state can be followed by the current one. For example, it makes sense that after new comes approved, but it wouldn’t make much sense if after new came implemented.
Below the states, you will find the <Transitions> section. There you can add your transitions. A transition always has a from and to state. Note that the transition for New is from empty (from=””). Additionally, you can add a default reason which will be displayed when you select this state. For example when you transition from new to approved the default message could be something like “Customer approved PBI”.
Upload the type definition
With all changes made, you can upload the type definition with witadmin. Before you do that, you should validate your xml file with witadmin importwitd /collection:COLLECTIONNAME /f:XMLFILE /p:PROJECT /v. If everything is good, you can upload the xml file with the same instruction but without the /v.
Edit the process template
If you go to your TFS after uploading the type definition, you will see your new states and also the new transitions. But after selecting a new state, your TFS won’t be able to display the item anymore. Therefore, you have to add the new states to the process config template xml file.
Adding the new state
Download the config file with witadmin exportprocessconfig /collection:COLLECTIONNAME /p:PROJECT /f:FILENAME. Open the xml file and find the work item, you added the state to, for example, Bug or Backlog Item. Add the state in the States section.
Upload the process template
After adding the states to the work items, you can upload the xml file to your TFS. Before you do that, you should validate it with witadmin importprocessconfig /collection:COLLECTION /p:PROJECT /f:FILENAME /v. If the file is valid, you can upload it without the /v parameter.
–Team Foundation Server (TFS) is a Microsoft product that provides source code management (either via Team Foundation Version Control or Git), reporting, requirements management, project management (for both agile software development and waterfall teams), automated builds, lab management, testing and release management capabilities.
It covers the entire application lifecycle. TFS can be used as a back-end to numerous integrated development environments (IDEs) but is tailored for Microsoft Visual Studio and Eclipse on all platforms.
Team Foundation Server (TFS) on Cloud runs on Amazon Web Services (AWS) and Azure and is built to integrate with your existing IDE or editor thus enabling your cross-functional team to work effectively on software projects of all sizes.
Cognosys Provides Hardened images of TeamFoundation on the cloud ( AWS marketplace, Azure and Google Cloud Platform).
Deploy TeamFoundation securely on cloud i.e. AWS marketplace, Azure and Google Cloud Platform (GCP)
Team Foundation Server on cloud for AWS
Features
10 great features in Team Foundation Server
1. Associate Work Items in Git commits from any client
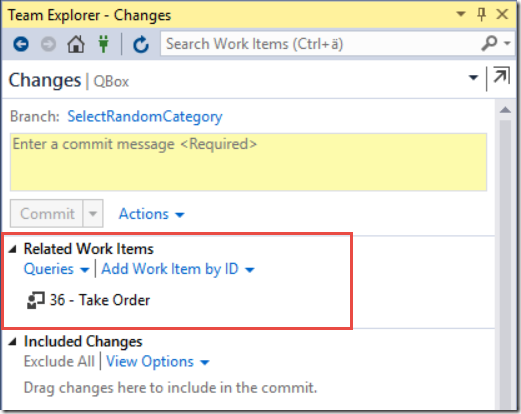
Associating work items to your changesets in TFS have always been one of the more powerful features. Not in itself, but in the traceability that this gives us.Without this, we would have to rely on check-in comments from the developers to understand the reason for a particular change, not always easy when you look at changes that were done a few years back!When using Git repos in TFS, and you use the Git integration in Visual Studio you have the same functionality that lets you associate a work item to a commit, either by using a work item query or by specifying a work item ID.
But a lot of developers like to use other Git tooling, such as Git Extensions, SourceTree or the command line. And then we have the teams that work on other platforms, perhaps developing iOS apps but store their source code in a Git repo in TFS. They obviously can’t use Visual Studio for committing their changes to TFS.To associate a commit with a work item in these scenarios, you can simply enter the ID of the work item with a # in front of it as part of the commit message:
GIT COMMIT –A –M “OPTIMIZED QUERY PROCESSING #4321”
Here we associate this commit with the work item with ID 4321. Note that since Git commits are local, the association won’t actually be done until the commit has been pushed to the server. TFS processes git commits for work item association asynchronously, so it could potentially take a short moment before the association is done.
2. Batch update work items from the Web Access
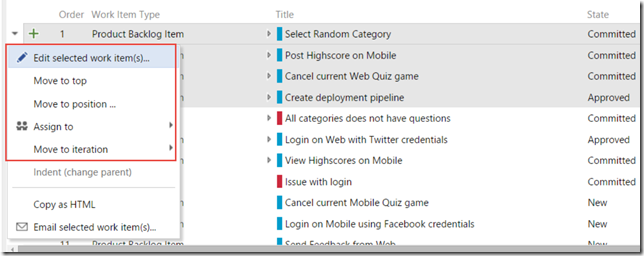
Excel has always been a great tool for updating multiple work items in TFS. But over the years the web access in TFS has become so much better so that most people do all their work related to work item management there. And unfortunately, it is not possible to export work item queries to Excel as easily from the web as it is from Visual Studio.But, we can update multiple work items in TFS web access as well. These features have gradually been added to Visual Studio Online and is now part of TFS 2015 as well.From the product backlog view, we can select multiple work items and the perform different operations on them, as shown below:
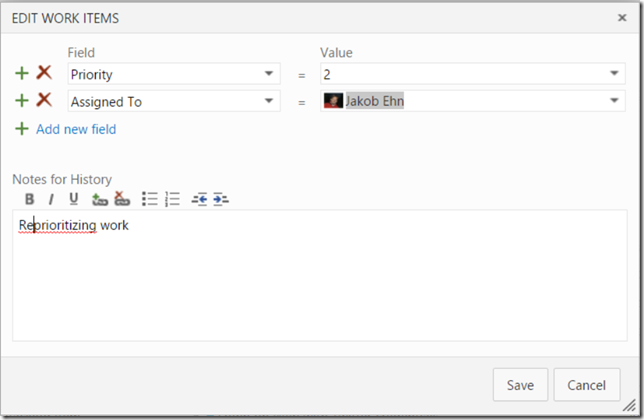
There are a few shortcut operations for very common tasks such as moving multiple backlog items to a iteration, or assigning them to a team member.But then you have the Edit selected work item(s) that allows us to set any fields to a new value in one operation.
You can also do this from the sprint backlog and from the result list of a work item query.
3. Edit and commit source files in your web browser
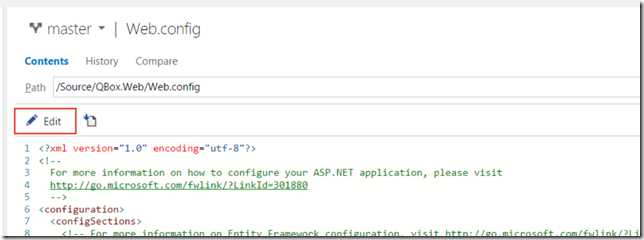
Working with source code is of course done best from a development IDE such as Visual Studio. But sometimes it can be very convenient to change a file straight from the web access, and you can! Maybe you find a configuration error when logged on a staging environment where you do not have access to Visual Studio. Then you can just browse to the file in source control and change it using the Edit button:
After making the changes, you can add a meaning commit message and commit the change back to TFS. When using Git, you can even commit it to a new branch.
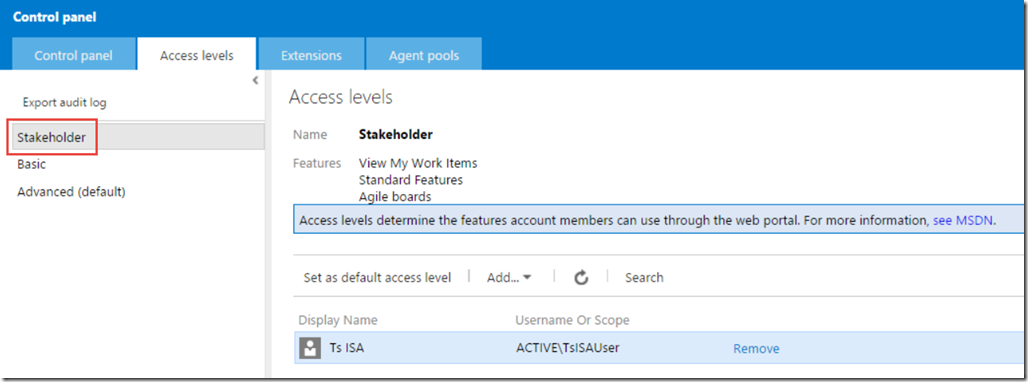
4. Bring in your stakeholders to the team using the free Stakeholder license
Normally, every team member that accesses TFS and reads or writes information to it (source code, work items etc) need to have a Client Access License (CAL). For the development team this is usually not a problem, often they already have a Visual Studio with MSDN subscription in which a TFS CAL is included. What often cause some friction is when the team try to involve the stakeholders. Stakeholders often include people who just want to track progress or file a bug or a suggestion occasionally. Buying a CAl for every person in this role usually ends up being way to expensive and not really worth it.
In TFS 2013 Update 4 this was changed, from that point people with a stakeholder license does not a CAL at all, they can access TFS for free. Buth they still have a limited experience, they can’t do everything that a normal team member can. Features that a stakeholder can use include:
- Full read/write/create on all work items
- Create, run and save (to “My Queries”) work item queries
- View project and team home pages
- Access to the backlog, including add and update (but no ability to reprioritize the work)
- Ability to receive work item alerts
5. Protect your Git branches using branch policies
When using Team Foundation Version Control (TFVC) we have from the first version of TFS had the ability to use check-in policies for enforcing standards and policies of everything that is checked in to source control. We also have the ability to use Gated Builds, which allows us to make sure that a changeset is not checked in unless an associated build definition is executed successfully.
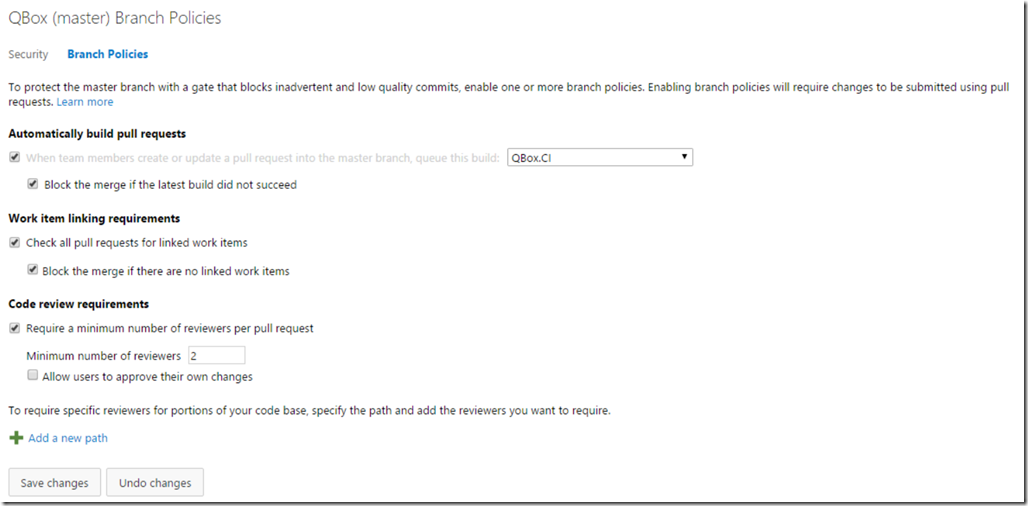
When Git was added to TFS back in 2013, there was no corresponding functionality available. But in TFS 2015 now, the team has added branch policies as a way to protect our branches from inadvertent or low quality commits. In the version control tab of the settings administration page you can select a branch from a Git repo and then apply branch policies. The image below shows the available branch policies.
Here we have enabled all three policies, which will enforce the following:
- All commits in the master branch must be made using a pull request
- The commits in the pull request must have associated work items
- The pull request must be reviewed by at least two separate reviewers
- The QBox.CI build must complete successfully before the pull request can be merged to the master branch
6. Using the @CurrentIteration in Work Item Queries
Work Item Queries are very useful for retrieving the status of your ongoing projects. The backlogs and boards are great in TFS for managing the sprints and requirements, but the ability to query on information across one ore more projects are pivotal. Work item queries are often used as reports and we can also create charts from them.
Very often, we are interested in information in the current sprint, for example how many open bug are there, how many requirements do we have that doesn’t have associated test cases and so on. Before TFS 2015, we had to write work item queries that referenced the current sprint directly, like so:
The problem with this was of course that as soon as the sprint ended and the next one started, we hade to update all these queries to reference the new iteration. Some people came up with smart work arounds, but it was still cumbersome.
Enter the @CurrentIteration token. This token will evaluate to the currently sprint which means we can define our queries once and they will continue to work for all upcoming sprints as well.
this token is unfortunately not yet available in Excel since it is not team-aware. Since iterations are configured per team, it is necessary to evaluate this token in the context of a team. Both the web access and Visual Studio have this context, but the Excel integration does not, yet.
7. Pin Important Information to the home page
The new homepage has been available since TFS 2012, and I still find that most teams does not use the possibility to pin important information to the homepage enough.
The homepage is perfect to show on a big screen in your team room, at least if you show relevant information on it.
We can pin the following items to the home page:
- Work Item Queries
The tile will show the number of work items returned by the query . Focus on pinning queries where the these numbers are important and can trigger some activity. E.g. not the total number of backlog items, but for example the number of active bugs. - Build Definition
This tile shows a bar graph with the history of the last 30 builds. Gives a good visualization of how stable the builds are, if you see that builds fails every now and then you have a problem that needs to be investigated. - Source control
Shows the number of recent commits or changesets. Will let you know how much activity that is going on in the different repos - Charts
Charts can be created from work item queries and can also be pinned to the home page. Very useful for quickly give an overview of the status for a particular area
Here is an example where we have added a few items of each type
8. Query on Work Item Tags
Support for tagging was first implemented back in TFS 2012 Update 2. This allowed us to add multiple tags to work items and then filter backlogs and query results on these tags.There was however a big thing missing and that was the ability to search for work items using tags.This has been fixed since TFS 2013 Update 2, which means we can now create queries like this.
It is also possible to work with tags using Excel, this was another big thing missing from the start.
9. Select how you want to handle bugs
One of the most common questions I get when talking to teams that use TFS is how they should handle bugs. Some teams want to have the bugs on the backlog and treat them like requirements. Other teams want to treat them more like tasks, that is adding them to the corresponding user story or backlog item and use the task board to keep track of the bug.The good think is that you can configure this per team now. On the team settings page, there is a section that lets you configure the behavior of bugs.
10. Integrate with external or internal services using Service Hooks
Extensibility and integration are very important to Microsoft these days, and this is very clear when looking at the investments for TFS 2015 that included a bunch of work in this area. First of all Microsoft has added a proper REST API for accessing and updating most of the available artifacts in TFS, such as work items and builds. It uses OAuth 2.0 for authentication, which means it is based on open modern web standards and can be used from any client on any platform.In addition to this, TFS 2015 also support Service Hooks. A service hook is basically a web endpoint that can be called when something happens, in this case in TFS. So for example, when a backlog item is created in TFS we might want to also create a card in Trello. Or when a new change is committed into source control, we might want to kick off a Jenkins build.
Here is a list of the services that are supported out of the box in TFS 2015:
And the list keeps growing, in Visual Studio Online there are already 7 more services offered, including AppVeyor, Bamboo and MyGet.
Remember that the list contains one entry called Web Hooks. This is a general service configuration in which you can configure a HTTP POST endpoint that will receive messages for the events that you configure. The messages can be sent using JSON, MarkDown, HTML or text. This mean that you can also integrate with internal services, if they expose HTTP REST endpoints.
Major Features of Team Foundation Server
- Version control, for managing source code and other deliverables that require versioning.
- Work item tracking, for keeping track of such things as defects, requirements, tasks and scenarios.
- Project management functions, which allow the shaping of a team project based on a user-specifiable software process and which enable planning and tracking using Microsoft Excel and Microsoft Project.
- Team build, for enabling a common process for building executable products.
- Data collection and reporting, which aid in the assessment of a team project’s state, based on information gleaned from Team Foundation Server tools.
- The Team Project Portal, which provides a central point of communication for a team project packaged as a Microsoft Windows SharePoint Services site.
- Team Foundation Shared Services, which provide a number of common infrastructure services that invisible to end users but that are important to toolsmiths and extenders.
AWS
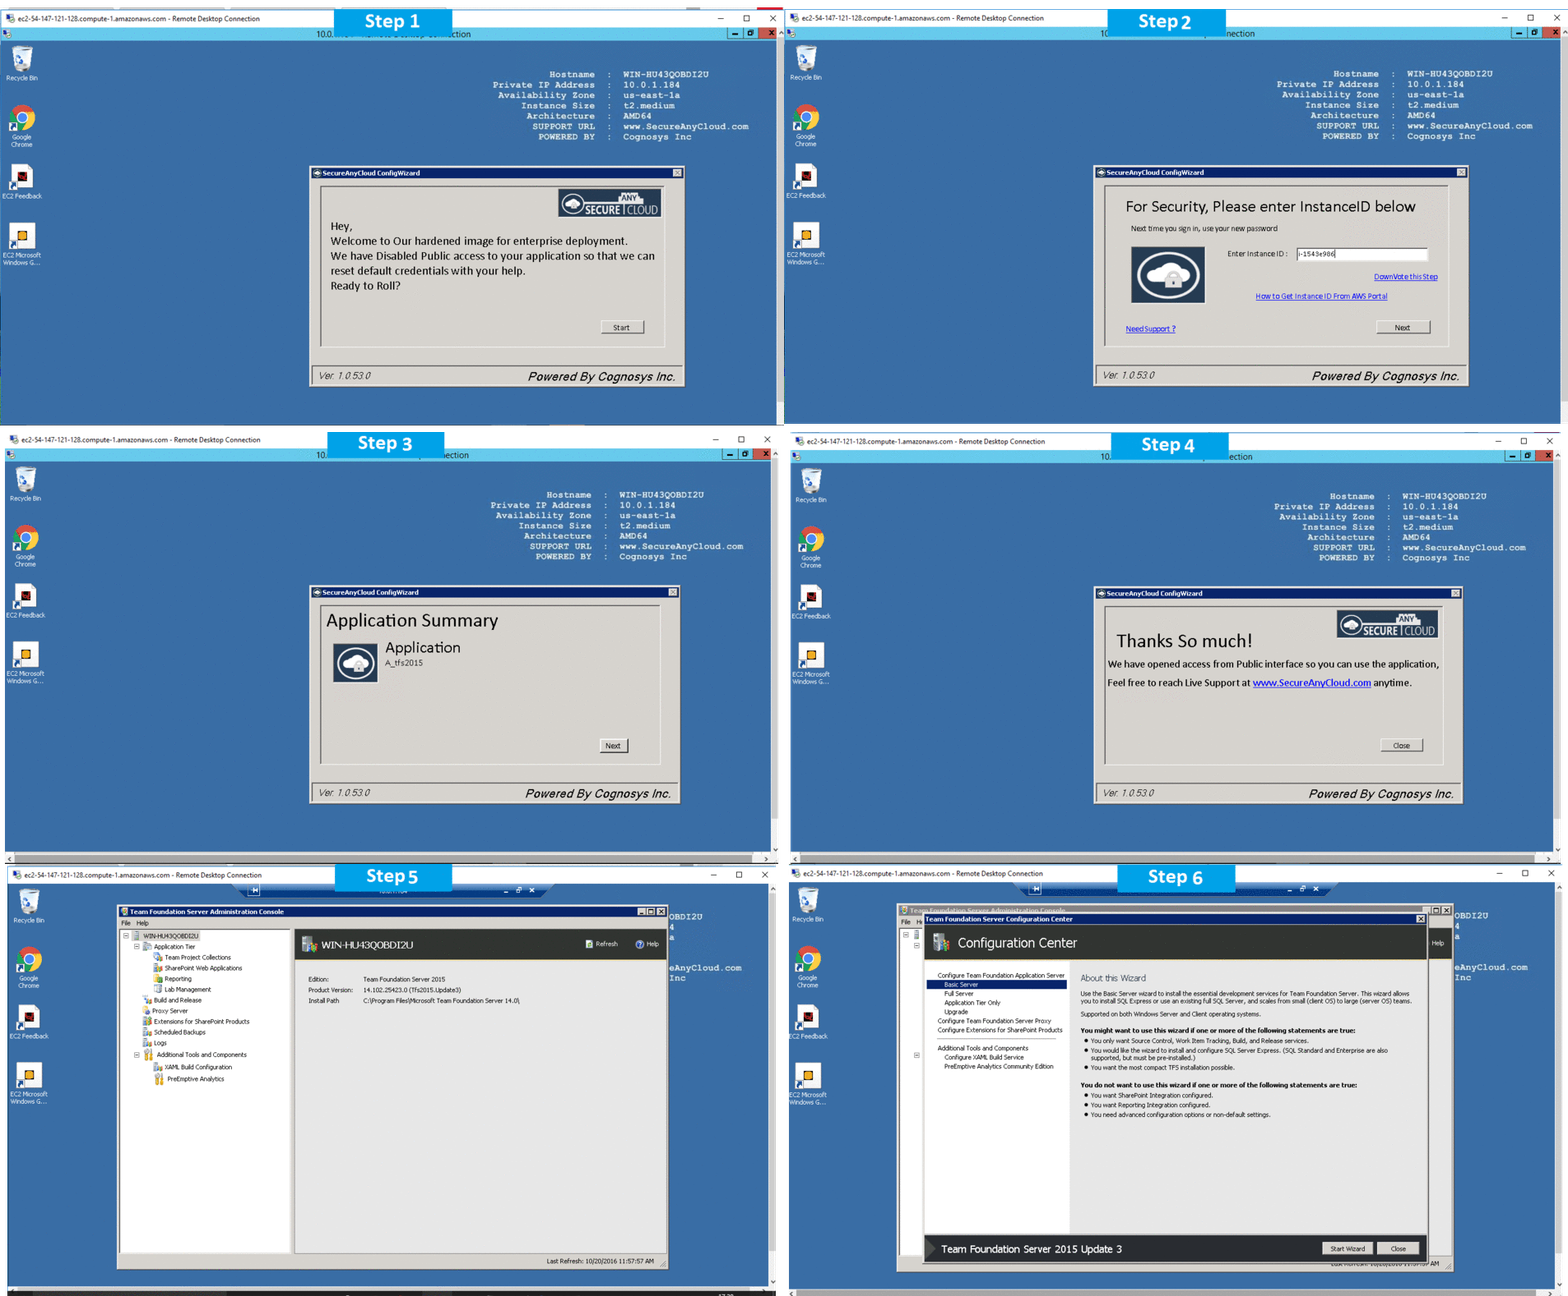
Installation Instructions for Windows
Note: How to find PublicDNS in AWS
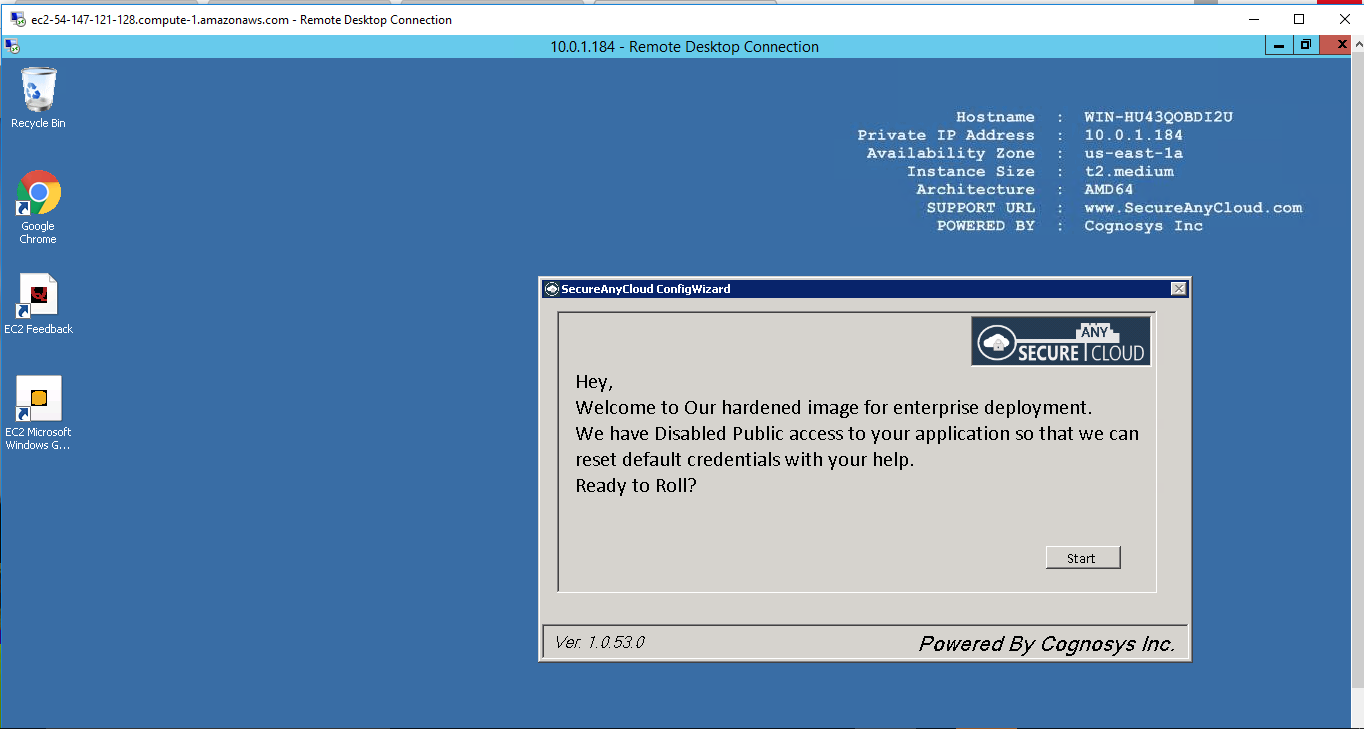
Step 1) RDP Connection: To connect to the deployed instance, Please follow Instructions to Connect to Windows instance on AWS Cloud
Connect to the virtual machine using following RDP credentials:
- Hostname: PublicDNS / IP of machine
- Port : 3389
Username: To connect to the operating system, use RDP and the username is Administrator.
Password: Please Click here to know how to get password
Step 2) On the Start page, type Team Foundation Server 2015 and then click on Team Foundation Server.
or Open from the Desktop Shortcut icon Team Foundation Server.
Step 3) Other Information:
1.Default installation path: will be in your root folder “C:\Program Files\Microsoft Team Foundation Server 14.0”
2.Default ports:
- Windows Machines: RDP Port – 3389
- Http: 80
- Https: 443
3. To activate Visual Studio use Product Key or Sign in from of Microsoft Account
Configure custom inbound and outbound rules using this link
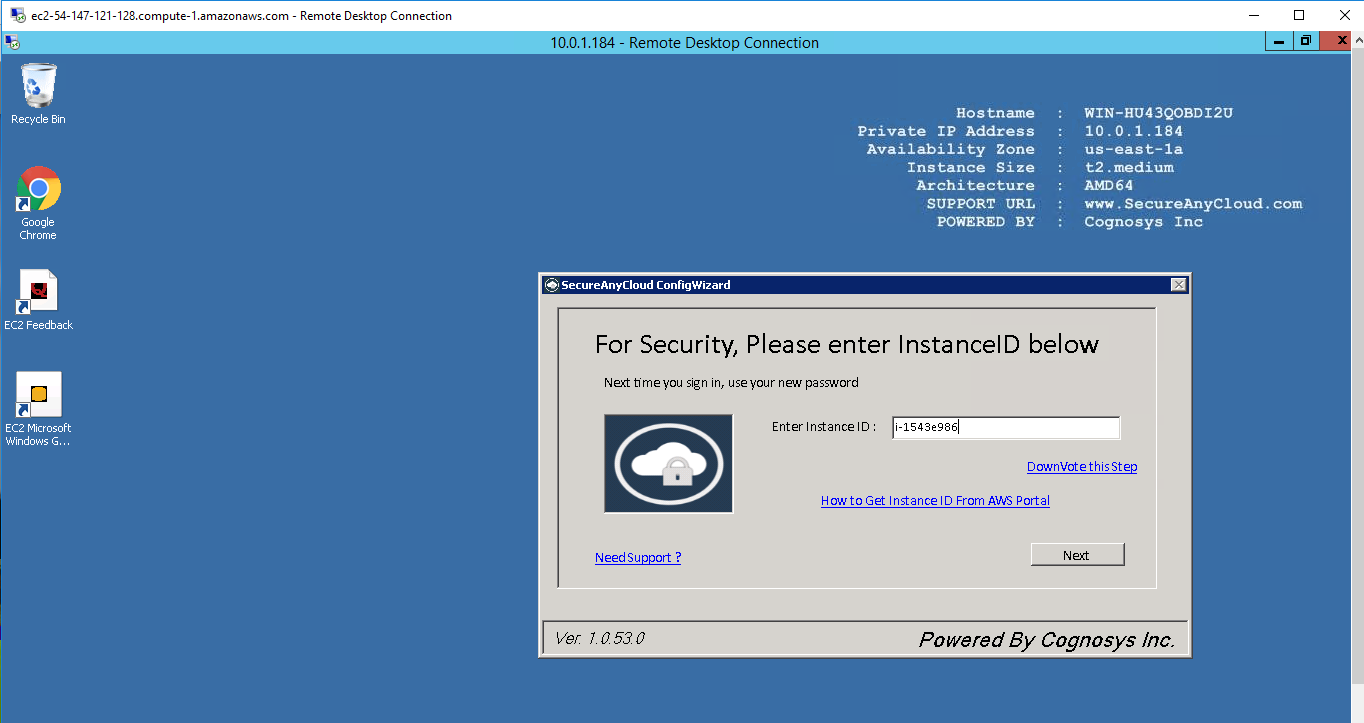
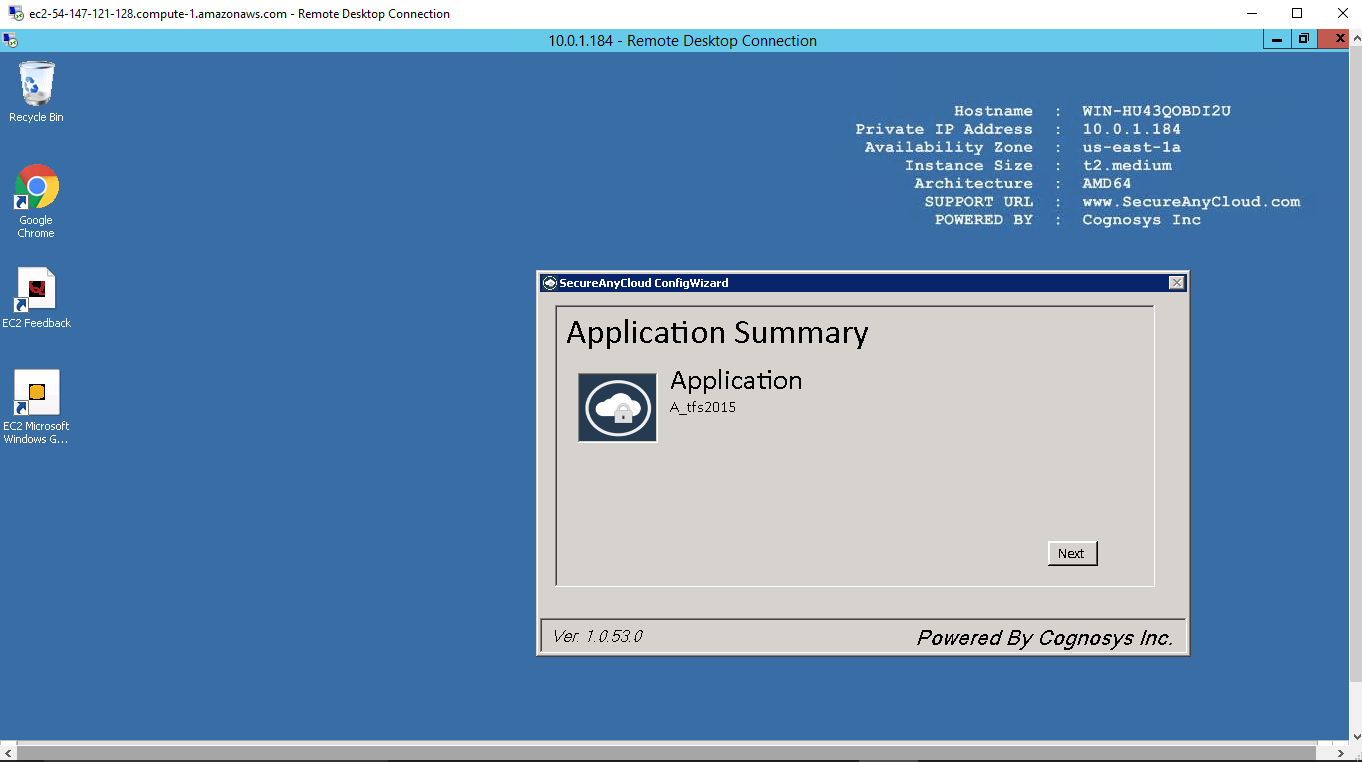
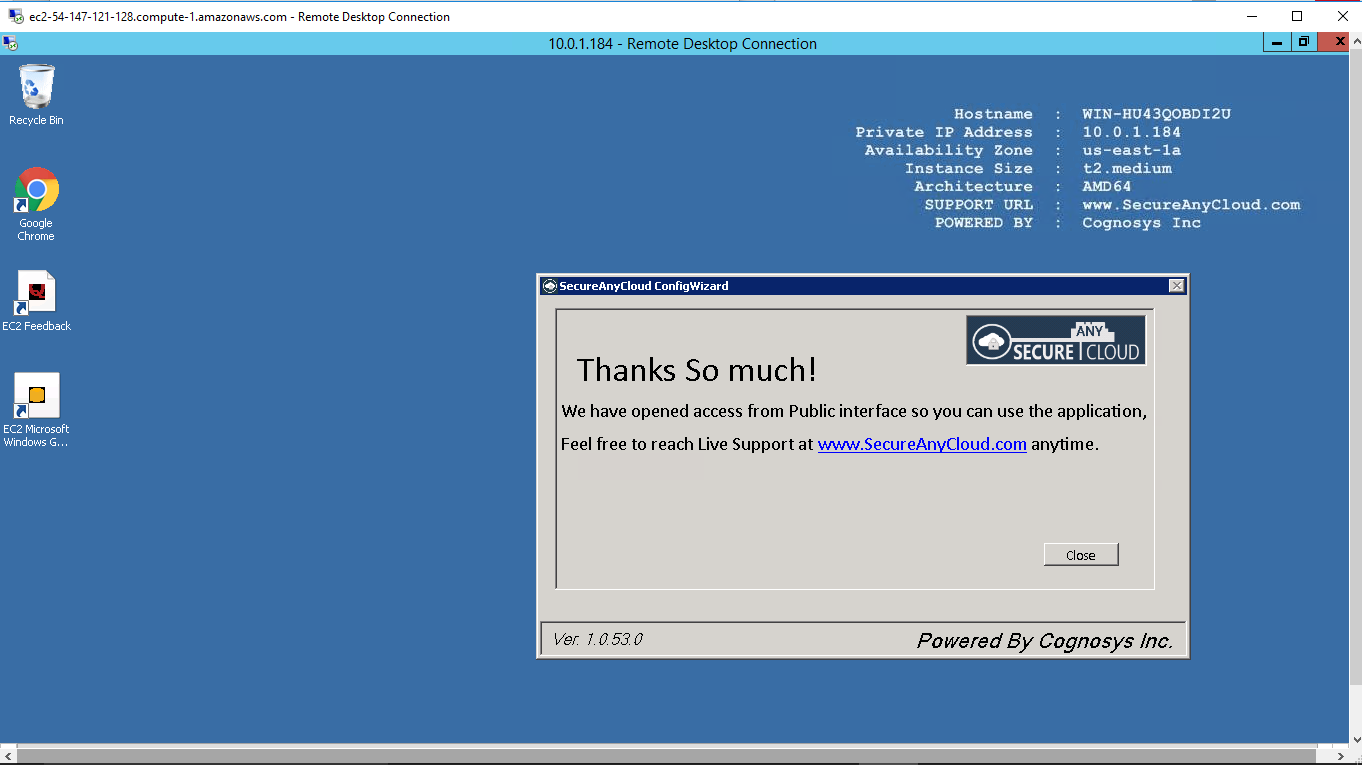
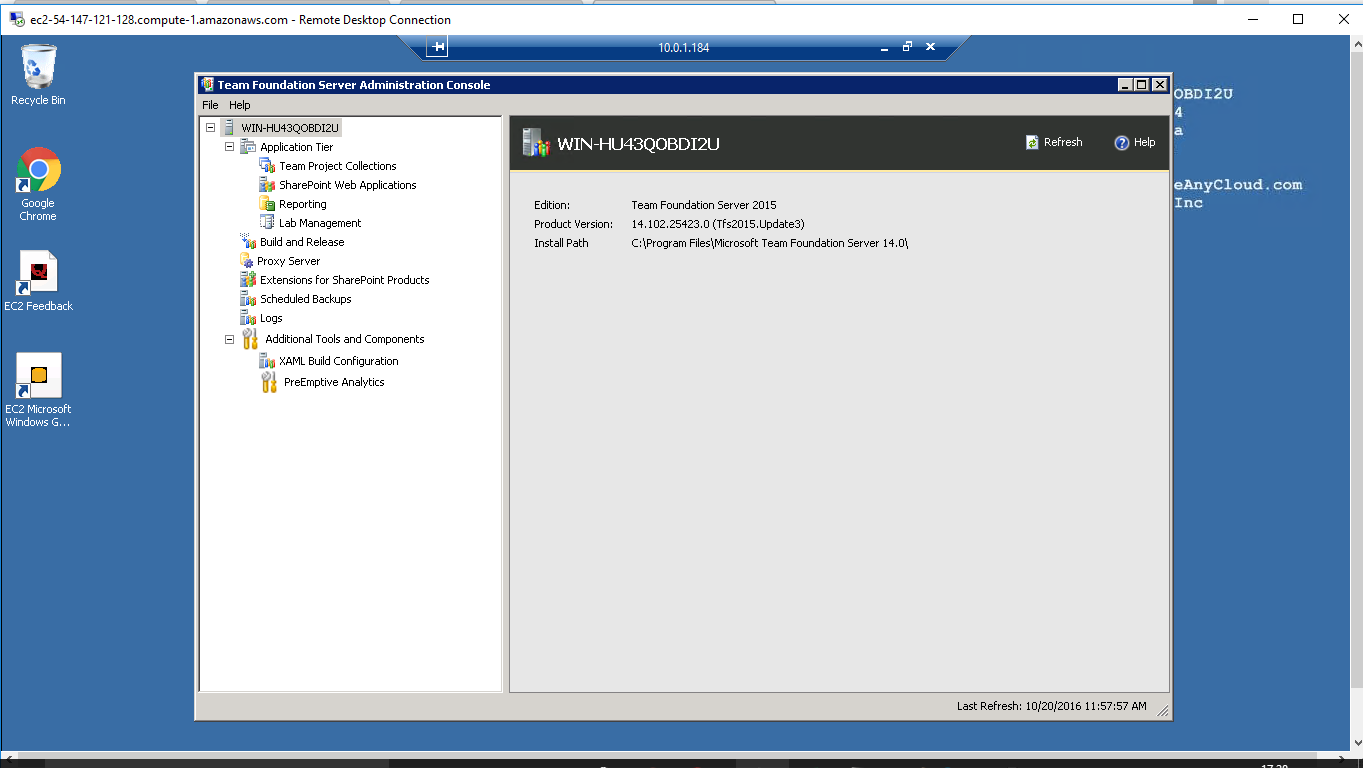
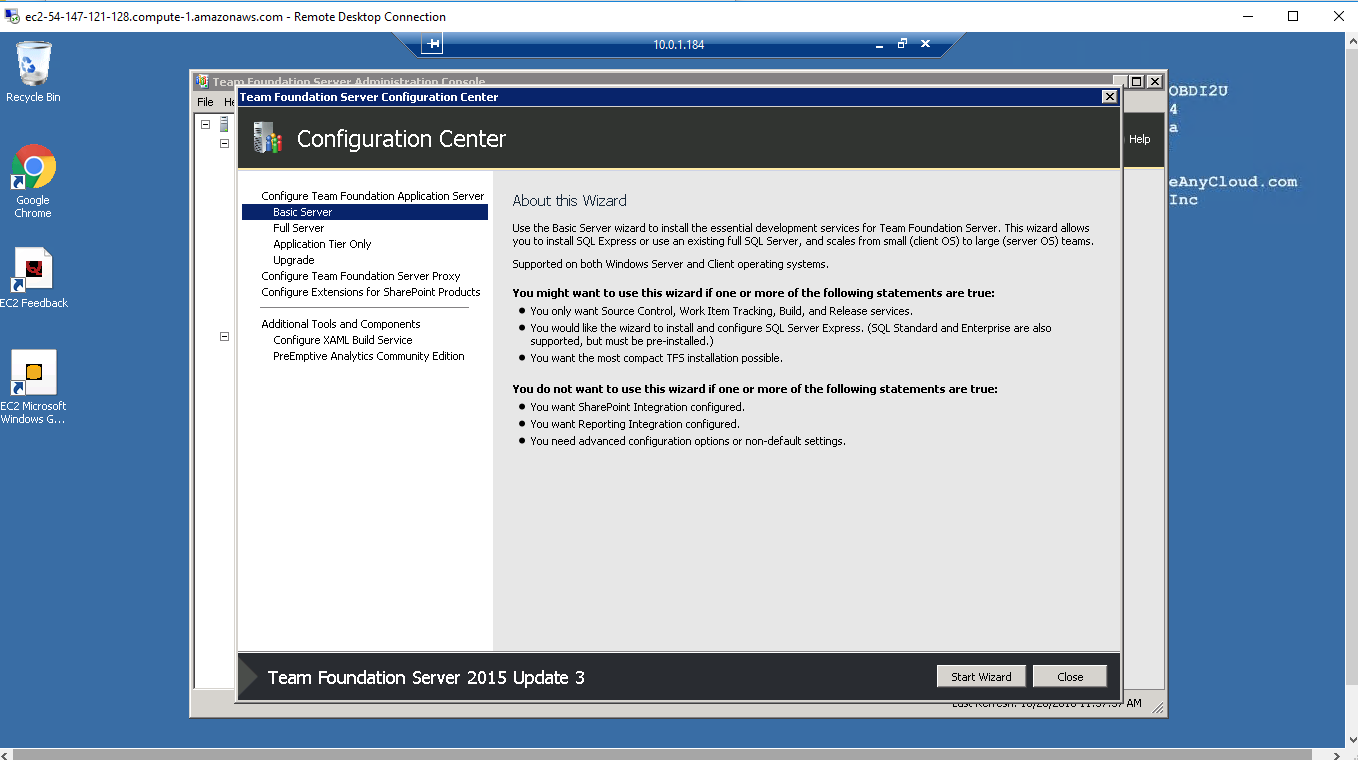
AWS Step By Step Screenshots
Videos
Introducing Team Foundation Server 2010 Basic
Deep Dive into Agile Planning for Team Foundation Server 2013 and Visual Studio Online



 Build Summary


