1-click AWS Deployment 1-click Azure Deployment
Overview
What Is the Security Ninjas Program?
Security Ninjas is an Application Security Training Program. It has really helped our developers write more secure code and henceforth reduced the problem on our security team, so we thought open sourcing it for the benefit of the community. The training program slide deck covers the OWASP Top 10 (2013) susceptibilities and some general security best practices. The hands-on training lab consists of 10 fun real worlds like hacking exercises, corresponding to each of the OWASP Top 10 vulnerabilities. Hints and solutions are provided along the way. Although the backend for this is written in PHP, vulnerabilities would remain the same across all web based languages, so the training would still be relevant even if you don’t actively code in PHP.
What WordPress Security Means For You
WordPress is a really awesome content management system. Though, its vast acceptance makes it a key goal for hackers. Any weakness they uncover in the core files can be used to potentially exploit an astonishing number of sites. This was perhaps most infamously demonstrated by the TimThumb debacle last year.
Today, you can still find plenty of WordPress sites that are vulnerable to exploit via outdated themes that still include the TimThumb security flaw. That in itself highlights one of the major reasons for security breaches on WordPress sites — outdated code.
The fact is that the WordPress development team do a great job of keeping the core code resilient. If you keep the WordPress core, themes and plugins up to date, and only use products developed by reputable developers, you will have done more than most to keep your site safe.
Moreover, if you take what is moderately infinitesimal amount of time to make your site more secure than the vast majority, you will no longer be classified as “low-hanging fruit” by hackers. And that is where Security Ninja comes in. It highlights the most important steps you should take in securing your WordPress site, and explains exactly what you need to do. For someone looking to make their WordPress site more secure, it is the perfect solution.
Using Security Ninja
Once you have installed the plugin, you can access it via the Tools link in your sidebar:

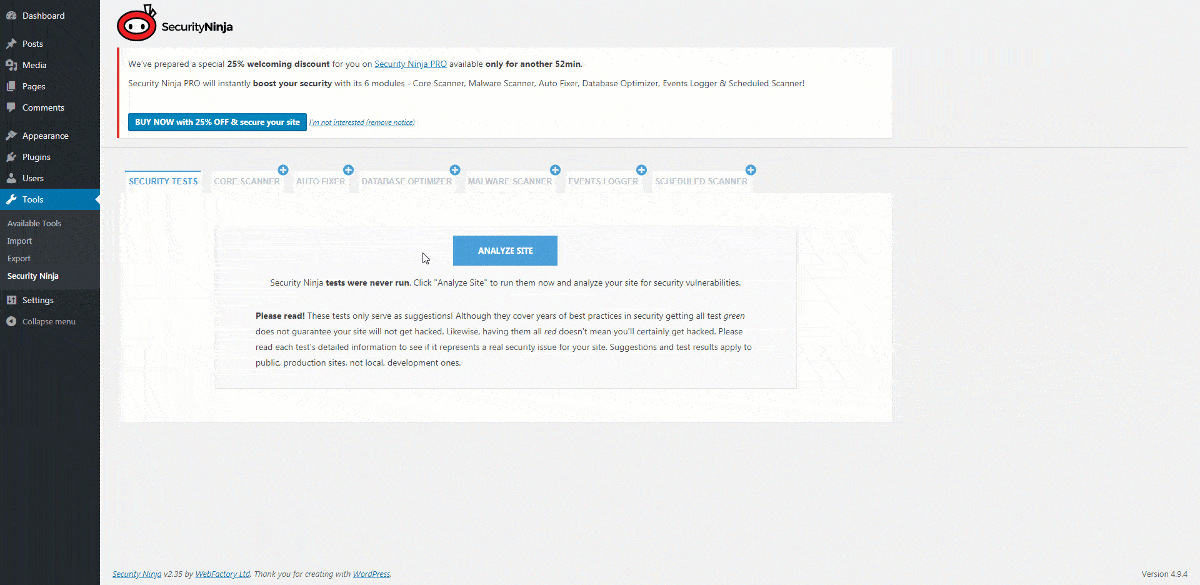
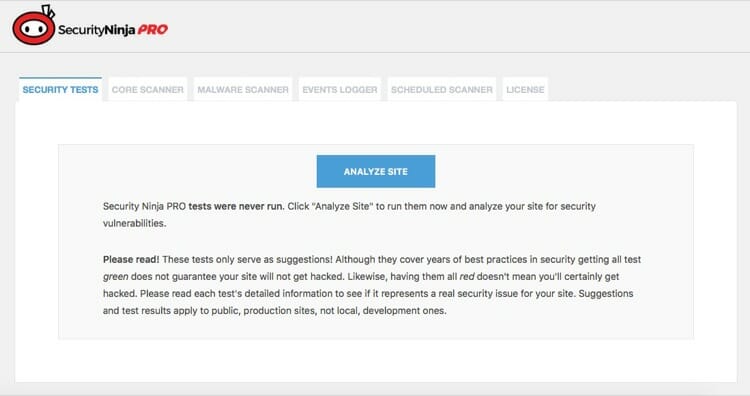
When you access the plugin for the first time, you will need to run a security test so that the plugin can analyze the strengths and weaknesses particular to your site:

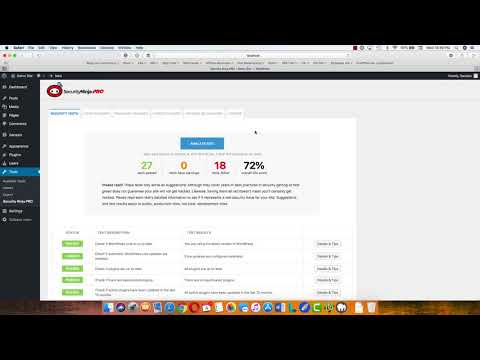
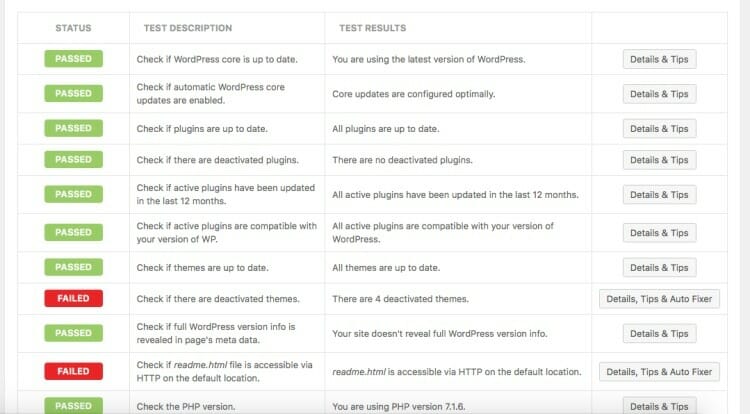
This process shouldn’t take any longer than a minute or so. Once the tests have been completed, you will be presented with its findings — based upon 27 different security considerations.
Here’s an example of a few test results :

As you can see, the status of each test is marked. The issues run from absolutely basic (keep your themes and plugins up to date), to more advanced (a check to see if the upgrade.php file is accessible via HTTP at the default location).
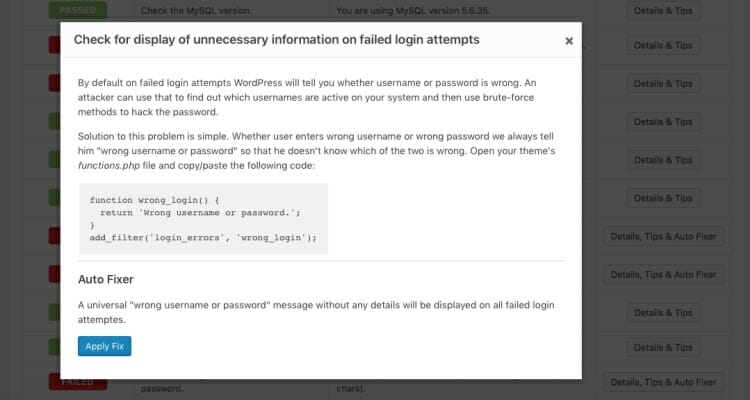
For each “Bad” result, you should click on the “Details, tips & help” button to the right. This will direct you to advice pertaining to the specific issue:
Carrying out the changes requires limited technical knowledge — for the most part, you will only need to add code snippets to your functions.php files, edit theme files (which you should do via a child theme), or make changes via FTP. As a WordPress blogger, these are simple tasks that you should be able to complete anyway.What I love about Security Ninja is that it doesn’t try to do too much. Its focus is on scanning for vulnerabilities and presenting solutions — it doesn’t include a bloated mess of security features. It leaves you to make the choice as to which security features you put in place. And because you do so via tiny code snippets and other similarly subtle changes, the security improvements you make are likely to have no discernible impact on your site’s load time.
In a nutshell, Security Ninja is like having a set of invaluable WordPress security tutorials, specific to your site’s unique weaknesses, at your fingertips.
Why Is Application Security Training Important?
1. It’s hard to scale the Security Engineering team with the Software Development teams. It’s practically impossible for the security team to review each line of code before it goes in production.
2. It’s best to train developers so that they are not only able to catch security bugs during peer reviews, but also avoid writing vulnerable code in the first place. This approach scales well with fast dev cycles.
3. This sort of proactive approach also reduces the amount of work that needs to be put in reactively—both by the security team during reviews and by the dev teams while fixing bugs. Meaning? Less friction and faster code deployment!
4. This knowledge also helps developers understand security issues, risks and consequences faster especially when security bugs are reported.
5. Last but not the least it makes developers unconsciously care/informed about security.
Making the Hands-on Lab Work:
1. Setting up and destroying the environment would be super easy and quick.
2. The docker container would be sandboxed which means that the vulnerable application wouldn’t be able to harm the host OS.
Setup:
1. Setup docker https://docs.docker.com/installation/. There are many ways to do this depending on the OS you use.
2. Make sure docker has been installed correctly by running ‘docker version’.
3. Start the Application Security Training container by running the following command (I chose port 8899 to avoid port allocation conflicts): ‘docker run -d -p 8899:80 opendns/security-ninjas’.
4. Get the IP address of your container. In my case the command was ‘boot2docker ip’ as I was running docker using boot2docker.
5. Go to your web browser and enter <IP address from step 4>:8899.
6. The training should be running now and you should see the home page in your browser window.
7. Kill the container after you are done.
1. Go back to the terminal and type ‘docker ps’. Get the container id of the training.
2. Then run ‘docker kill {container id}’.
Running it using a web server
If for some reason you are not able to run the training in a docker container, you may also run it using a web server.
1. Download a web server (like Apache) and PHP.
2. Download the source code from here and put it in the directory where the web server looks for files to serve.
3. In the Security Ninjas sub-directory, change text file permissions: ‘chmod 777 *.txt’
4. Make sure WHOIS is installed on the web server.
5. Start the web server and reach the application from your web browser.
The following steps are optional but recommended (for both Docker and web server):
1. Install Firefox.
2. Install the FoxyProxy plugin for Firefox
1. In select mode: Use proxy “Default” for all URLs.
2. Configure the Default proxy to use 127.0.0.1:8080.
3. You can delete or disable this plugin after the exercise.
3. Install Burp Suite free from http://portswigger.net/burp/download.html. You could use some other proxy tool as well.
4. You can get some basic Burp Suite tutorials from http://portswigger.net/burp/tutorials/.
5. You can turn the proxy off for most of the exercises but for some, having the intercept on would make it much easier to inspect and alter the HTTP requests.
6. Run the training in Firefox.
Security Ninja originally launched on CodeCanyon all the way back in 2011. The team moved it to WordPress.org in 2016 where it’s become active on over 9,000 websites. You can now get the free core version from WordPress.org and purchase a Pro version straight from the developer.Speaking of the developer, Security Ninja comes from a developer with a number of popular plugins at WordPress.org, including Under Construction, Maps Widget for Google Maps, and WP Reset.
So how does Security Ninja protect your site? Let’s start with the free core version and then I’ll cover the Pro features.The free core version doesn’t make any changes to your site. Instead, it runs 50+ security tests against your site’s current configuration and tells you what you’re doing well…and what you need to change. With the Pro version, you can fix many of the issues with a single click, but the free version just provides tips and code snippets to help you manually make the needed changes.
How does Security Ninja work?
If you are about to use Security Ninja for WordPress, you should also have a clear understanding about the functionality delivered by it. The base version of Security Ninja is being offered for free. Hence, you will be able to go ahead and download it just like you download any other plugin from the internet.
Security Ninja plugin is a lightweight one as well. Hence, you can quickly configure it on your WordPress website. On the other hand, it will not be in a position to create any negative impact on the loading speed of your website as well.
Once you configure Security Ninja properly, all you need to do is to go ahead and just hit on the “Run Tests” button. This is the initial scanning that you do along with the plugin. Through this scan, all issues that are available in your WordPress website can be detected. Then you can fix them accordingly. The scanning process is a quick one and you will not have to wait for hours. In fact, the scanning process is being completed within just a minute. During this scan, Security Ninja plugin will search for more than 40 different threats that are available in your website.
Some of the security tests offered along with Security Ninja are straightforward and simple. Hence, you will be able to go for them without keeping a doubt in your mind. However, there are some complicated security tests as well. Once you get familiar with them, you will not have to go through a difficult time while you are operating them.
One of the most prominent security tests offered by Security Ninja is its brute force test. This test is run on the passwords that you use to log into the WordPress website. Through this website, it will determine whether your passwords are strong enough to keep you away from potential threats that can take place.
Below mentioned are some other tests that are being offered by Security Ninja for WordPress. All these tests come to you along with the base version of the plugin.
- WordPress options testing
- Database configuration testing
- Auto update mode testing
- Debug mode testing
- Zero day exploit testing
- Version hiding
- File permissions
- Various installation parameter testing.
You are provided with the freedom to go ahead with any of these tests based on your preferences.
What can you get with Security Ninja Pro version?
As mentioned earlier, there is a Security Ninja PRO version, apart from the base version. You will need to make a payment and obtain the subscription for the pro version. But before you do, it is important to have a clear understanding about the features that come along with the pro version as well. Then you know what exactly you’ll be getting for the amount you pay.
Below mentioned are the most prominent features that you can get along with the pro version of Security Ninja Plugin.
-
Events logger
The Events logger can be considered as one of the most important and useful features that you will be able to get. That’s because it has the ability to keep track of every single event that is happening on your website. This will be the most convenient option available for you to keep an eye on all suspicious events that are taking place on the site.
-
Scheduled scanner
This is another useful feature that Security Ninja Plugin Pro version users can try out. It has the ability to automate the security scans. You can let the job run on regular intervals and keep an eye on the security of your website. This will keep you away from the hassle of running security scans manually on the site.
-
Malware scanner
The pro version of Security Ninja comes along with a comprehensive malware scanner as well. It will look for all malicious code found within core files of the WordPress website. If there are any, they will be cleaned up automatically, without creating a negative impact on your website.
-
Core scanner
The core scanner feature can keep an eye on all the core files of the WordPress website. It will get deep into the architecture of the WordPress website and look for threats. Therefore, you can receive complete protection against all sorts of security issues.
-
Cloud Firewall
The module gathers more than 600 known bad IP addresses and it makes sure that access from them gets banned before a bad guy gets to your site.
-
Database Optimizer
Optimize your database by clicking one button. Your database will be cleaner, the site will run faster, and Security Ninja will have less work to do when inspecting your site
Secure WordPress With Security Ninja
The first problem for the webmasters to know what steps are necessary to secure WordPress installation. There are lots of articles and information available on the internet but going through and learn will need a good amount of time. Also, this is not a one-time activity as you need to keep updated on newer threats.So how would you know that your security is enough or you have taken enough measures?How about taking some help and let someone else do it?
Security Ninja is a WordPress Plugin which can help in making sure that your WordPress site is secure. It scans the site and allows you to fill the security gaps.Just to be sure, it does not make any changes to your site. It just scans it and suggest the required modifications and also provide helping guidelines on how to do it.
There are two versions available of the Security Ninja plugin – Free and Pro. Pro version adds some monitoring capabilities to the plugin for protecting your site. Below are the additional functionalities in Pro version:
- Core Scanner
- Malware Scanner
- Auto Fixer
- Events Logger
- Scheduled Scanner
How To Get Security Ninja
Security Ninja is available as a free plugin in WordPress repository and can be installed like any other plugin. If you want to get the Pro version for the additional functionalities, you can get it from WpSecurityNinja.
Once installed you can just click a button to run 50+ tests to check the WordPress security.
The scan result will give you a detail report in terms of what tests have been done and what’s the result.
You can click on Detail & Tips to get the details about the result and tips on how to resolve it.
If you have Pro version, you will get Auto Fix along with Detail & Tips. This will fix most of the issues with a single click.
The benefit of using a plugin is that they will keep it updated for new vulnerabilities so that you can keep your site secure.
Core Scanner
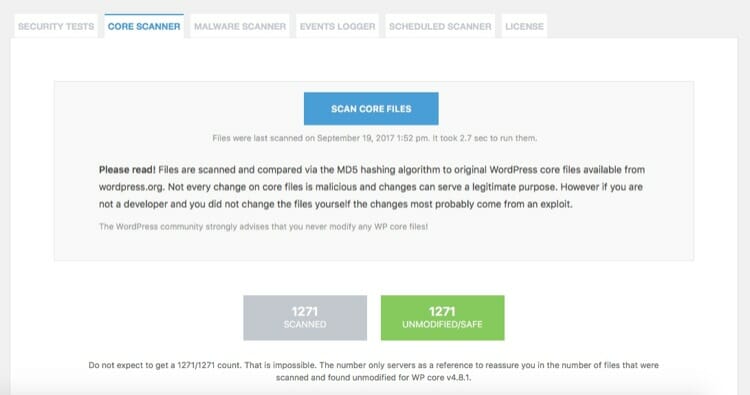
This is a pro feature which will allow you to scan WordPress core files and will report any exploit.
This feature will compare the WordPress core files with the core files in WordPress repository via the MD5 hashing algorithm. It will report all the compare results and you can check if the changes are intentional.
WordPress does not suggest to modify any core files, there are enough hooks and filter available to do your modifications. So if you see any files modified, you can restore those with a single click.
Malware Scanner
This is also a pro feature which will scan files for malicious code. It will run a heuristic analysis to compare the code pattern with the known patterns for malware.
This will scan your themes, plugins and all other files in WordPress installation to make sure all of them are safe. It can sometimes mark some bad code also as a malware, so check the result carefully before taking action.
Event Logger

Event Logger is another pro feature which will log all the events from your WordPress installation. You can check if there is any attempt for hacking and secure WordPress by taking appropriate actions.It can log more than 50 type of events in WordPress to provide information on the changes.
Scheduled Scanner
It allows you to schedule Security Ninja and Core Scanner to be scheduled at a regular interval. You have an option to receive emails once the scan is complete.You can schedule them together or only one of them to make sure that your site is always protected.
Installing Security Ninja
To install the free plugin from inside WordPress admin – the easiest way
- Visit ‘Plugins > Add New’
- Search for ‘Security Ninja’
- Activate Security Ninja from your Plugins page.
To install the free or premium plugin manually via FTP
- Download the latest version from WordPress.org – https://downloads.wordpress.org/plugin/security-ninja.zip
- Unpack the .zip file to a folder on your computer.
- Upload the `security-ninja` folder to the `/wp-content/plugins/` directory
- Activate the Security Ninja plugin through the ‘Plugins’ menu in WordPress
To install the free or premium plugin via “Upload plugin”
You can also install the plugin via upload from inside WordPress admin. It requires you have downloaded the free or premium plugin in .zip format locally to your computer.
- Visit ‘Plugins > Add New’
- Choose “Upload plugin” and find the .zip file containing the plugin.
- Active the Security Ninja plugin
Activate Pro Version

After you click activate, you will be asked to enter your license key.
The plugin will now ask you for permissions which you can of course skip. We would appreciate if you would allow the tracking since it helps us get a better idea of which WordPress and PHP versions we need to support.

Upgrading from the old system
If you already had an old version of Security Ninja installed, the plugin will try to detect the license from the old system and automatically create a new license for you, bypassing this screen.
If you do see the screen and you need to get a license, here is what you do:
1. Use the button in the bottom “Activate Free Version.”
This will create a license for you, and register your email in the system.
2. Contact us with a license upgrade request, and I can manually update or create a new license for you to use. Click here:
https://wpsecurityninja.com/help/
Activate License
If you already installed a Free version you can upgrade the License by going to Security Ninja -> Account and click the Activate License button.
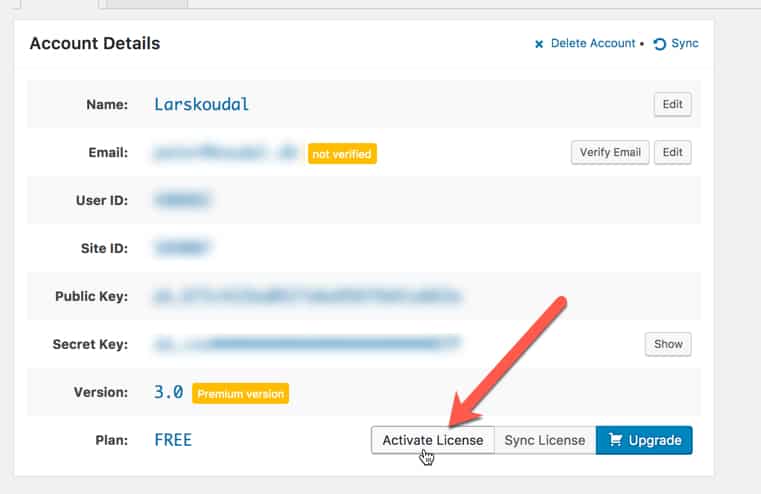
This will open a popup where you can enter the Pro license key.
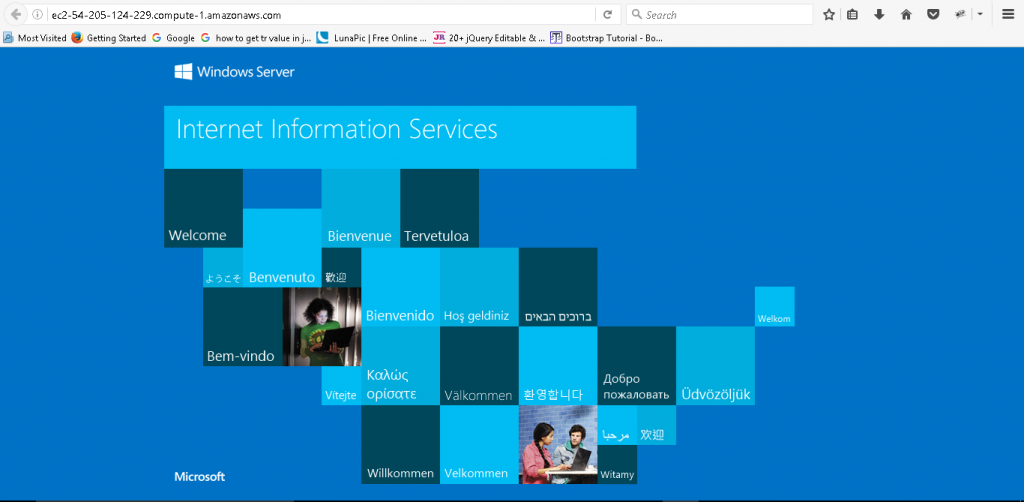
—Developers spend a large amount of time finding not only the right tool but also for configuring their machines. And more emphasis on Security .Cognosys being a product company faces this every day. Our Developers across Multiple different platforms have brought together the best of all stacks and prepared a machine for you to stop spending time in configuring each machine. This contains everything you need from Visual Studio to NetBeans to Android Studio to small utilities like Notepad++ or edit plus or Winscp or FileZilla. You need it not look any further for any stacks. The respective trademarks mentioned in the offering are owned by the respective companies
Ninja is owned by Ninja(https://ninjarmm.com/) and they own all related trademarks and IP rights for this software.
Security Ninja on Cloud runs on Amazon Web Services (AWS) and Azure. Security Ninja on cloud keep track of any security problems, and it’s a powerful tool. It runs a security scan in less than a minute and highlights any gaps that hackers might exploit. Best of all, it tells how to fix them.
Cognosys provides hardened images of Security Ninja on all public cloud i.e. AWS marketplace and Azure.
Application

NotePad++

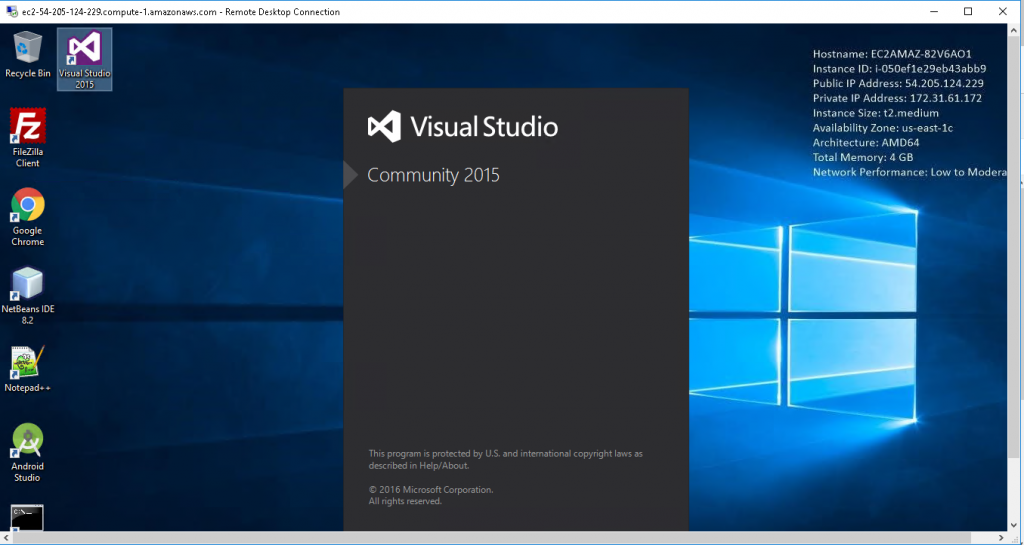
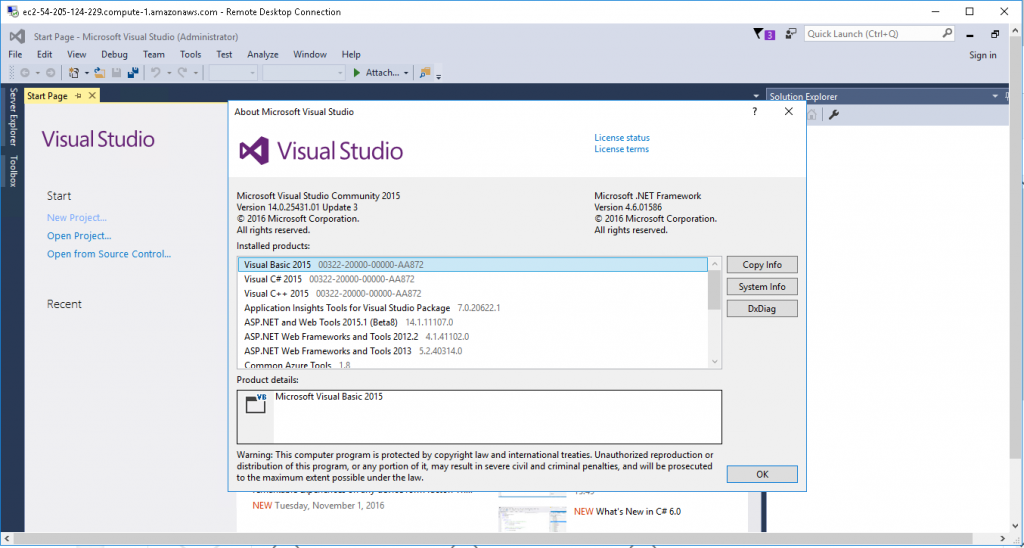
Visual Studio Community 2015

Just as your organization’s applications are unique, Secure Ninja’s approach to your applications is customized to the organization. Secure Ninja delivers a highly detailed report of findings that includes an executive summary, comparative analysis, technical findings matrix, risk statements and recommendations for re mediation.
Features
FEATURES OF SECURITY NINJA PRO
- Performs 50+ security tests at the click of a button
- Conducts daily checks to ascertain any vulnerabilities and loopholes
- Halts zero-day exploit and attacks
- Provides detailed information and solution
- Tracks and issues alerts for every potential threat
- Possesses powerful modules which monitor and harden the security system
- Has a remote access feature which allows for the management of multiple sites from one place
- Destroys vulnerable scripts which have the potential to cause hacking
- Security Ninja makes no changes to the systems
-Major Features of Security Ninja
Our tried and tested solution has only the features you really need;
- perform 30+ security tests including brute-force attacks
- check your site for security vulnerabilities and holes
- take preventive measures against attacks
- don’t let script kiddies hack your site
- prevent 0-day exploit attacks
- use included code snippets for quick fixes
- add-ons available for adding extra protection
- extensive help and descriptions of tests included
- fast and professional support
Continuously expanding list of tests includes;
- brute-force attack on user accounts to test password strength
- numerous installation parameters tests
- file permissions
- version hiding
- 0-day exploits tests
- debug and auto-update modes tests
- database configuration tests
- Apache and PHP related tests
- WP options tests
Azure
Installation Instructions for Windows
A) Click the Windows “Start” button and select “All Programs” and then point to Security Ninja
B) RDP Connection: To connect to the operating system,
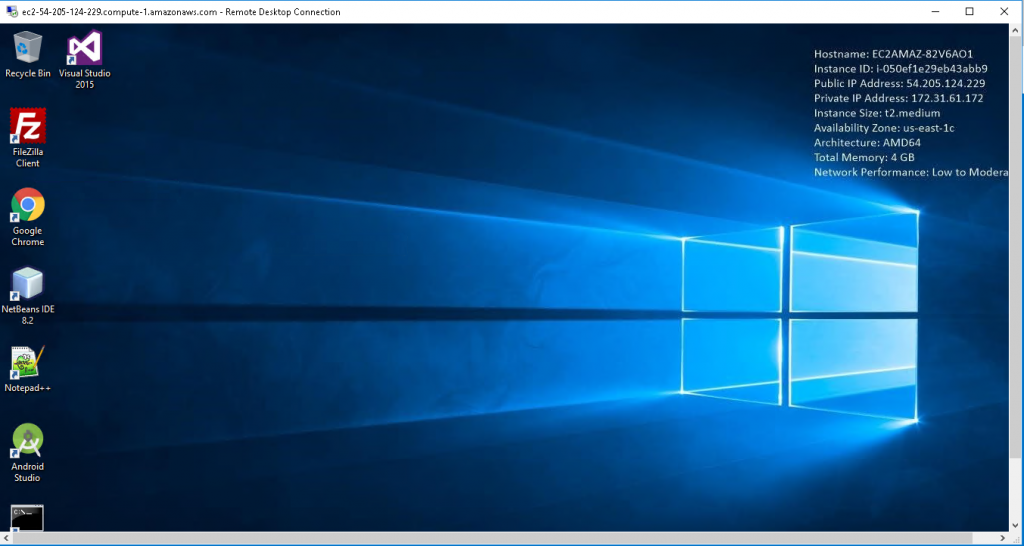
1) Connect to virtual machine using following RDP credentials :
- Hostname: PublicDNS / IP of machine
- Port : 3389
Username: Your chosen username when you created the machine ( For example: Azureuser)
Password : Your Chosen Password when you created the machine ( How to reset the password if you do not remember)
C) Other Information:
1.Default installation path: will be on your root folder
a) Visual Studio Community 2015 – ” C:\Program Files (x86)\Microsoft Visual Studio 14.0″
b) JDK Path – “C:\Program Files\Java”
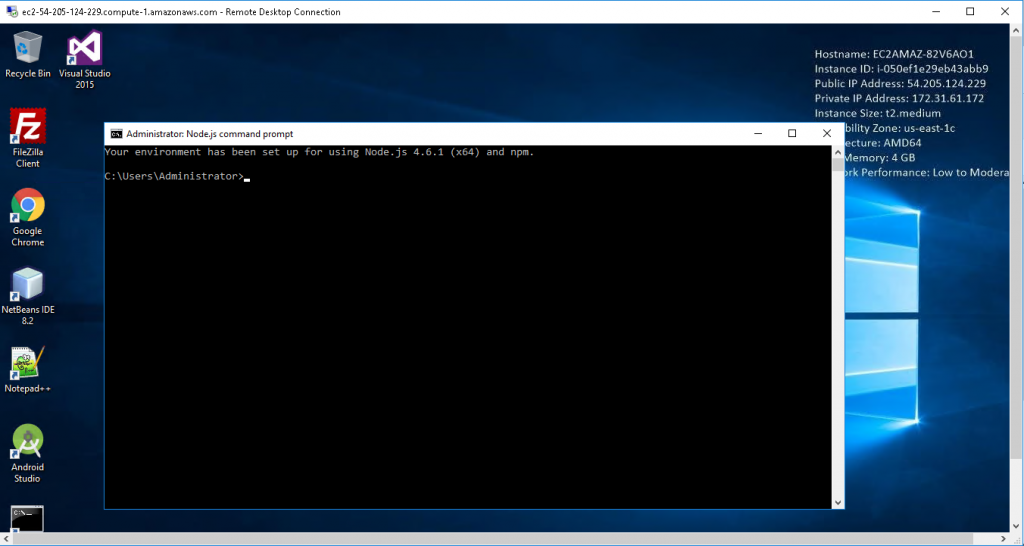
c) NodeJS path – “C:\Program Files\nodejs”
d) Android Studio Path – “C:\android-sdk\”
e) IIS Path – “C:\Windows\System32\inetsrv”
2.Default ports:
- Windows Machines: RDP Port – 3389
- Http: 80
- Https: 443
Configure custom inbound and outbound rules using this link
Azure Step By Step Screenshots