1-click AWS Deployment 1-click Azure Deployment
Overview
ProjectLibre is a freshly strengthened open source project proposed to update and invigorate a software tool projected as an alternative to commercial software like Microsoft Project. It is free software, just as the name suggests, but it is also compatible with any other project management software that can read and write .xml formatted documents. Obviously, that includes MS Project, as well as several other such projects and most other open source alternatives like Calligra Plan.
The feature set included in the current version of ProjectLibre is largely the one in Open Project, the predecessor open source program. Current features include: task management, work breakdown structure generation (a list and a graphical representation), resource allocation and tracking, and Gantt charts that provide a clear view of the critical path elements of the schedule. Obviously, this list of features is not intended to be comprehensive and there is nothing remarkably unique about this list. Certainly, it is suitable to carefully define some of the terminology frequently used in project management before further expanding on the abilities of ProjectLibre, since the use of these terms is not completely uniform, either in project management software nor in organizational usage.
1)How to create Project:
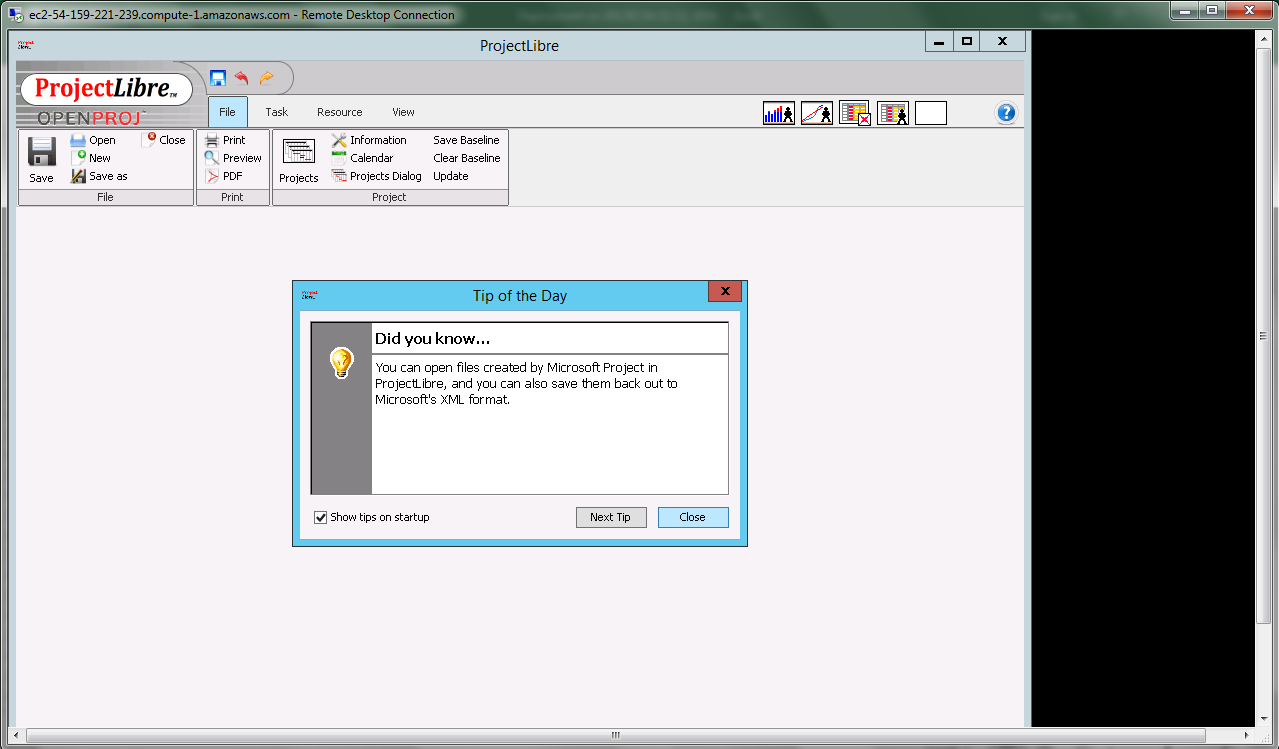
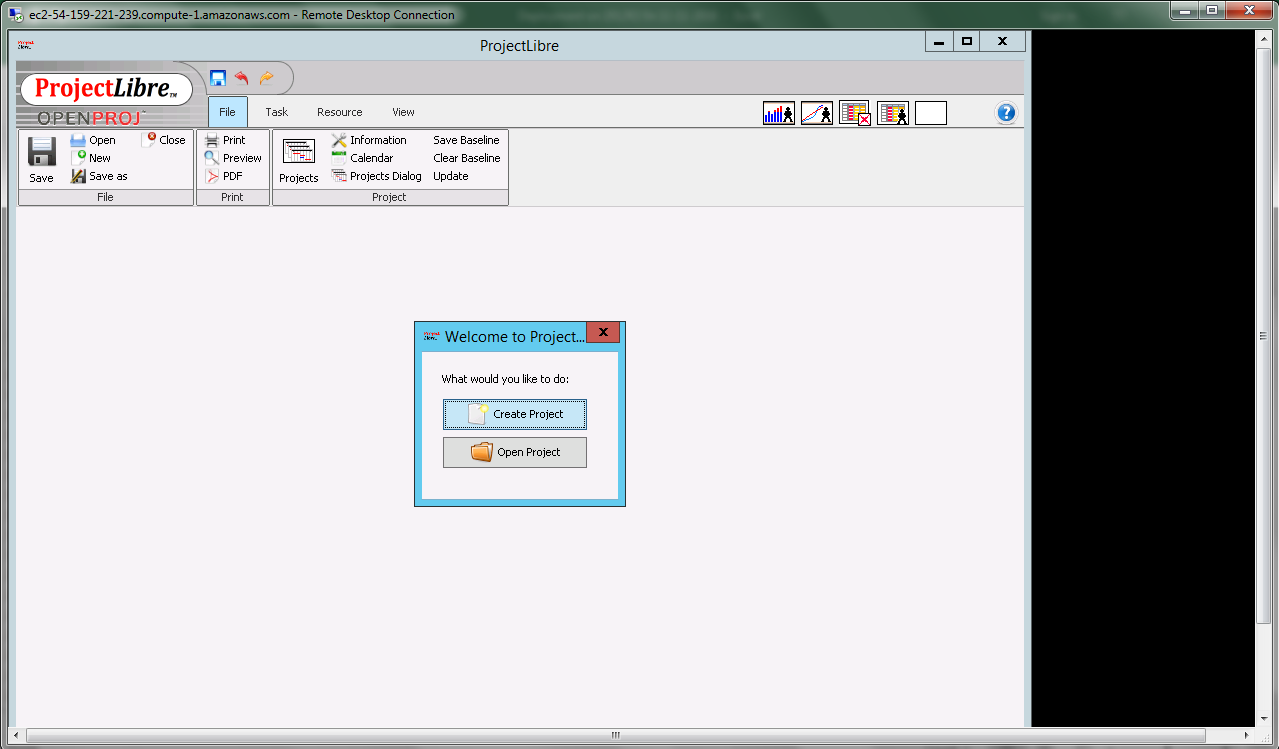
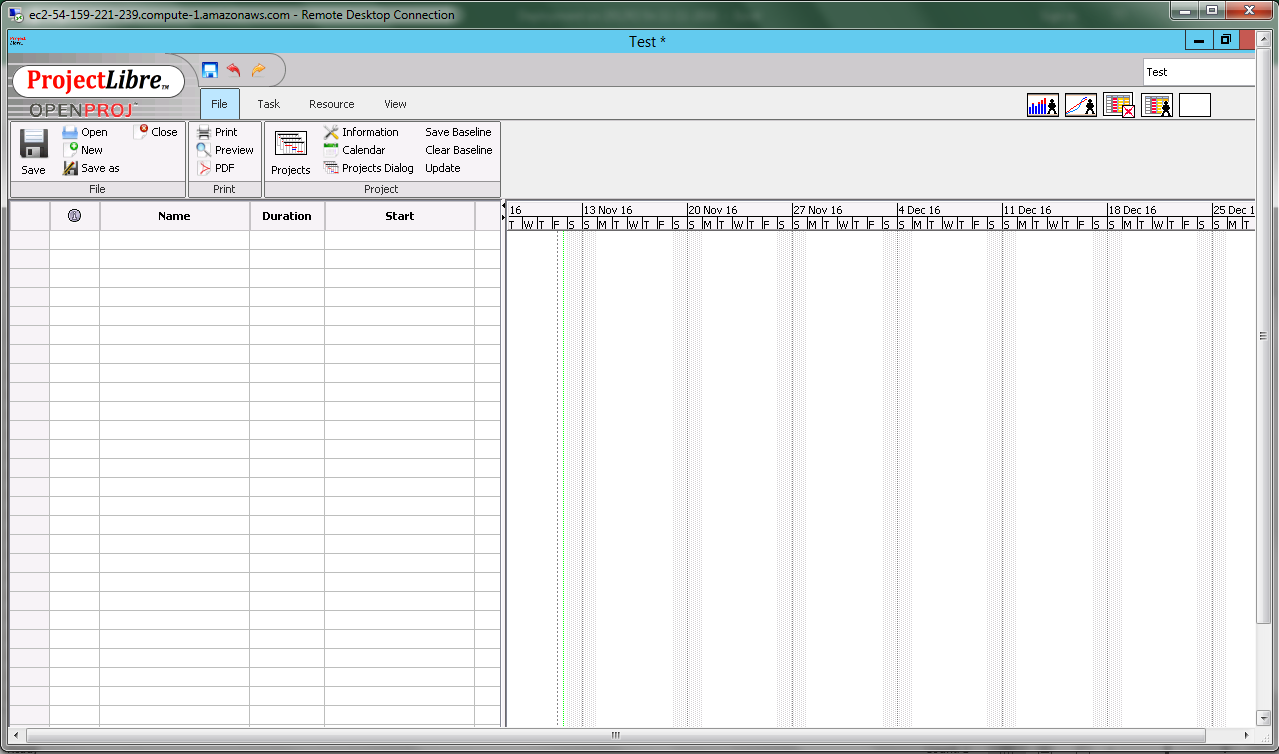
Once ProjectLibre, is downloaded and installed you should see a window like this one below.

Ready to Create Your First Project?
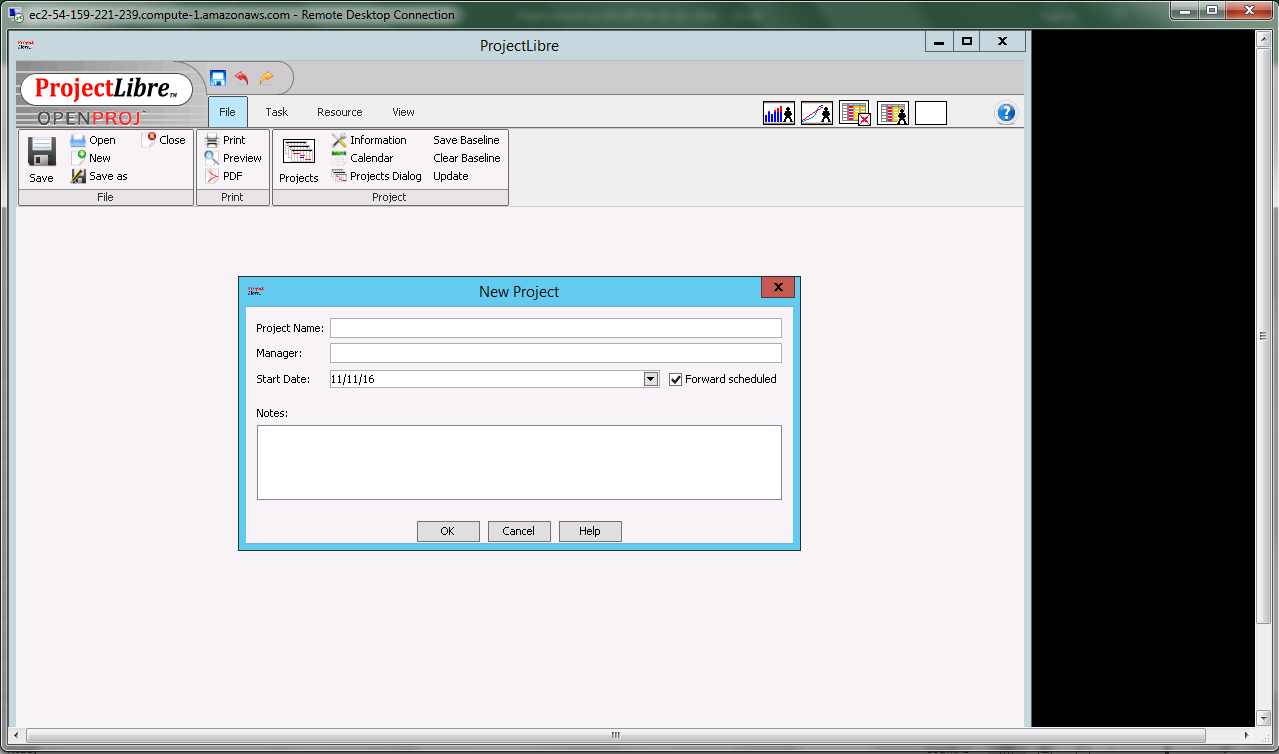
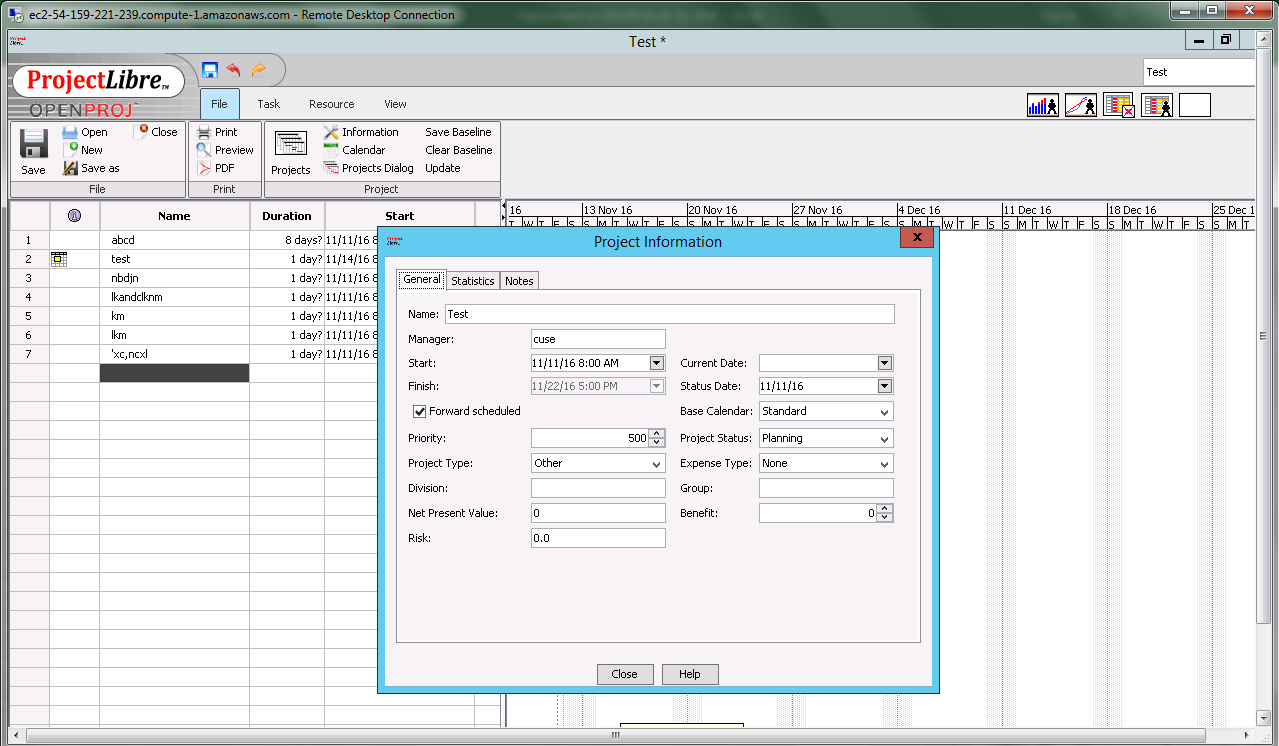
After clicking on ‘Create Project’ you must enter some basic project details as seen in the screen below.
 You will need to enter the following information about your project:
Project Name:
Manager:
Start Date:
Notes:
Forward Scheduled: If ‘Forward Scheduled‘ is checked, then the project’s end date changes according to the task finish dates you enter. If ‘Forward Scheduled’ is unchecked, then you indicate the project’s finish date/deadline. This means that the project has a mandatory, non-negotiable, end date. And for good reason, you may be managing a project involving a scheduled event at a hotel.
Adding Your First Task

After you enter your project details you are ready to create your first task. As seen in the table above, type in the appropriate field, the task’s ‘Name‘, ‘Duration‘ and ‘Start‘ – the finish date is then calculated automatically. Take a moment to change the ‘Duration’ from 1 day to 20 days and notice how the chart on the right changes.
On the right of this window, is where you will see the project’s Gantt diagram -we will come back to this.Referring to the image below, you may want to see how many hours it takes to complete a task. You can do this by right clicking on the column ‘Duration‘, click ‘Insert Column‘ and then choose ‘Work‘.

Now, you can see your task’s total hours. After showing the total project’s work hours, double-click on the tasks record for different viewing options. For example, double click on ‘Meeting with Client‘ text. As seen below, you can see some of the task’s options:

‘Duration‘ and ‘Work‘ represent the task’s duration. ‘Start‘ represents the task’s start and ‘Finish‘ is calculated automatically. You can click on ‘Estimated‘ if you are not sure about the task’s duration. You will see a question mark near ‘Duration’.
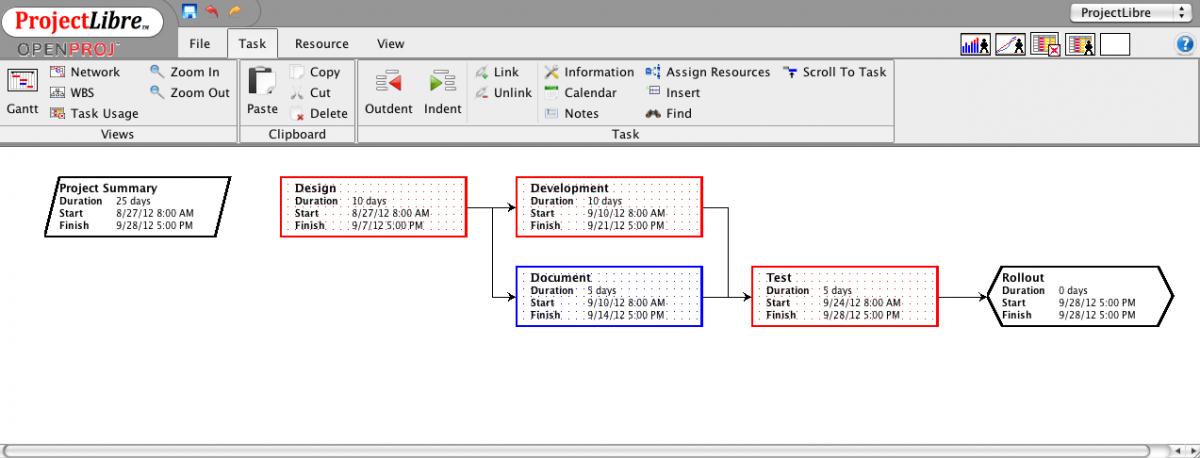
Connecting the Tasks
One of the most fundamental actions that you will do when planning a project is connecting tasks to one another as the start of some tasks are dependent on others completion. To do this, add tasks as shown in the image below (left) and then drag and drop the first task to the third task as shown on the right of the image. Your tasks are now dependent on one other. Red tasks mean task dependency. Blue tasks means no task dependency. As you can see in this image below, this is a great way to visualize your project’s critical path.

. Don’t forget to save your project regularly! In the next tutorial we are going to see how we can add resources and create sub-tasks. Bye for now!

2)Breaking down tasks
Let’s start by adding a master task. Add a task with a duration of 10 days as at the image below.

After adding the task lets breakdown this task to other tasks. Add another task called ‘Child task 1’ with a duration of 5 days and another task called ‘Child task 2’ with a duration of 7 days.

We now have three tasks independent from one another. As you have noticed, the first one is red. This is because it is the most critical one. Meaning that the project duration is dependent on that. Anyway, let’s connect ‘Child task 1’ and ‘Child task 2’ with ‘Master task’. If you right click on ‘Child task 1’ you will see some options. You can understand what New, Delete, Cut, Copy and Paste do. We are going to use the ‘Indent’ option for now. So, right click on ‘Child task 1’ and ‘Indent’. Do the same for ‘Child task 2’. You can see immediately the following:
- Both child tasks are ‘enclosed’ to Master task.
- Master task look has changed
- Master task duration has automatically changed.
Congratulations on making it possible to breakdown ‘Master task’!

Let’s make things a little bit more complicated now. Below ‘Child task 2’ add ‘Child for child 2’ and ‘Child for child 2b’. Add a duration of 2 days for the first, and 8 days for the second. Also, link the two tasks as we have shown at the previous ProjectLibre tutorial part (making the ‘Child for child 2’ completion a prerequisite for ‘Child for child 2b’. Then select both tasks (hold Ctrl key pressed and click on number 4 and 5) and then click ‘Indent’. The result should look like the following picture:

Also, instead of using the mouse to Link and Unlink tasks and right click in order to indent you can use the following buttons located on the top toolbar.

Using resources for a project
Since you got a pretty good idea about how you can handle tasks, break them down and connect them, we can now move on to the resources section of a project. Click on Resources at the top menu and you should see the following image:

Now go on and add the following resources as in the image, Mr Analyst (type=Work) and 1kg coffee (type=Material).

The important elements here are:
Type: It can be either material or work
Standard rate: Rate of use per hour
Overtime rate: If the resource is used at a time different than normal working hours (overtime). Then use this rate
Cost Per Use: This is for contract jobs or for materials. If you hire someone and you pay him a fixed amount to do the task, then you can use this item instead of standard rate. Also, if you consume some resources then you have to use this item too.
Accrue at: ‘Prorated’ means that costs are calculated when the task is planed, ‘Start’ means when the task starts and ‘End’ when the task ends.
Base calendar: We will get to this at a later part of the tutorial.
If you double-click on any resource row you can click on the ‘Costs’ tab and define different cost rules for different dates. If a resource charges a different amount for a specific job, you can take advantage of the ABCDE tabs, and define different rates. Also, at the ‘Resource Availability’ tab, you can define from when will this resource be available.

As in Task data entry, at resources, you can also have child resources. So, you can add a resource and ‘Indent’ it in order to show where it belongs. Notice however that the master’s rates are not auto calculated. You have to enter the rates yourself. It is up to you how you are going to handle resources break down.
3) ProjectLibre user interface reminder
After opening your project to switch between resources do the following:
To view tasks click on ‘Task’ at the top menu and ‘Gantt’ button on the left

To view resources click on ‘Resources’ at the top menu and then the ‘Resources’ button on the left

Assigning resources at tasks
Scenario
For this part of the tutorial we will have the following very simple scenario about a software project:
- Mr Salesman has to visit a client in order to sign the agreement by plane
- Mr Analyst has to visit the client in order to discuss requirements by plane
- Mr Developer A and Mr Developer B are going to develop the project
- Mr Tester is going to test if the project works ok
- Finally Mr Developer A and Mr Developer B are going to fix the project’s bugs
Create the tasks as shown at the following image

Now that we have created the project’s tasks, lets add some resources. For the purpose of the project we are going to use the following resources:
Material resources
- Tickets for airplane
- 0,5kg of coffee
Work (people)
- Mr Salesman
- Mr Analyst
- Mr Developer A
- Mr Developer B
- Mr Tester

Now we have 2 material resources and 4 work resources available for use!
Now, go at the tasks list, double-click on the first task and then click on the ‘Resources’ tab. Then, click on the blue button with the two people.

As you can see, you have the list of your project’s resources available. You can Control+click to select multiple resources for a task. Control+click at ‘Ticket for airplane’ and ‘Mr Salesman’ and then click on ‘Assign’.

You can close the windows and click on ‘Resources’ at the top menu and then ‘Resources usage’ on the left. Congratulations on your first resource assignment! As you can see on the left side of the project you can see where each resource is used and on the right side of the project you can see a detailed view of the resource usage per day.

Now, go on and assign the following resources to the following tasks:
- Analyze requirements: Ticket for airplane
- Develop project: Mr Developer A, Mr Developer B, 0,5Kg coffee
- Test project: Mr Tester
- Discuss additional requirements: Mr Analyst
- Fix bugs: Mr Developer A, Mr Developer B
Your final Resource usage table should look like this:

And yes you can go on and change the hours if you wish. Increase or decrease them.
Project costs calculation
Those were the basics about assigning resources at tasks. Since we are now confident about resources, we are going to estimate the total project costs. Some words about ProjectLibre costing features:
For each resource you can define:
- Effective date: From when do the following rates are valid
- Standard rate: Rate per hour for normal working hours
- Overtime rate: Rate per hour for overtime working hours
- Cost per use: Cost for resource usage independent of duration. You can combine Cost per use with Standard rate or Overtime rate.
Normally you would use standard and overtime rate for your employees and cost per use for materials or contract jobs.Also, for each resource you can define different rate tables (A to E). When assigning a resource to a task you can choose which rate table to use.
Click on the Resources table and add double-click each task to add the following:
- Ticket for Airplane: Cost per use: 200
- 0.5Kg of coffee: Cost per use: 8
- Mr Salesman: Standard Rate: 15/hour
- Mr Analyst: Standard Rate:20/hour
- Mr Developer A: Standard Rate:10/hour
- Mr Developer B: Standard Rate:10/hour
- Mr Tester: Standard Rate:5/hour

Now we want to see the estimated project cost. Go to Resource usage and Right click->Insert column and choose ‘Cost’

You should see the column with the cost per Resource-Task

In ProjectLibre you also have the following options
View cost per Task
Click on ‘Task’ on the top menu and then ‘Task Usage’ on the left and then right click on the columns to add ‘Cost’ column as we did before. You can know see how much each task costs.

View total project costs
Click on ‘View’ on the top menu and then ‘Reports’. Choose report ‘Project details’. You can see the Scheduled, Remaining and Actual costs if you scroll a little down

What is a Project Baseline
A project baseline is the initial project plan which will be used as a reference in the future. It is used mostly to measure the real performance of the project against the initial schedule.
Creating a Project Baseline with ProjectLibre
When you have finished planning your project and before it begins it is a good time to save this ‘snapshot’ as a baseline.Load up your project and click on File at the menu on the top and then on Save Baseline button

You will see a pop-up window with the following:

In a project you can have many baselines (up to 10). You can set the baselines at the most important project milestones or whenever there is a big change. Also, you can set the project baseline only for selected tasks of the project (you have to have some tasks selected for the option to be enabled). For the purposes of this tutorial you can go on and select ‘Baseline’.If you are careful enough, you will notice something like a shadow below each project task at the Gantt diagram. The ‘shadow’ is your baseline.

Even if you change a task, the shadow remains the same until you ‘Save Baseline’ again. You can go on and change a task to see what happens.

If you change a task after saving a baseline. You will notice that the ‘shadow’ remains intact.
ProjectLibre Calendar Options
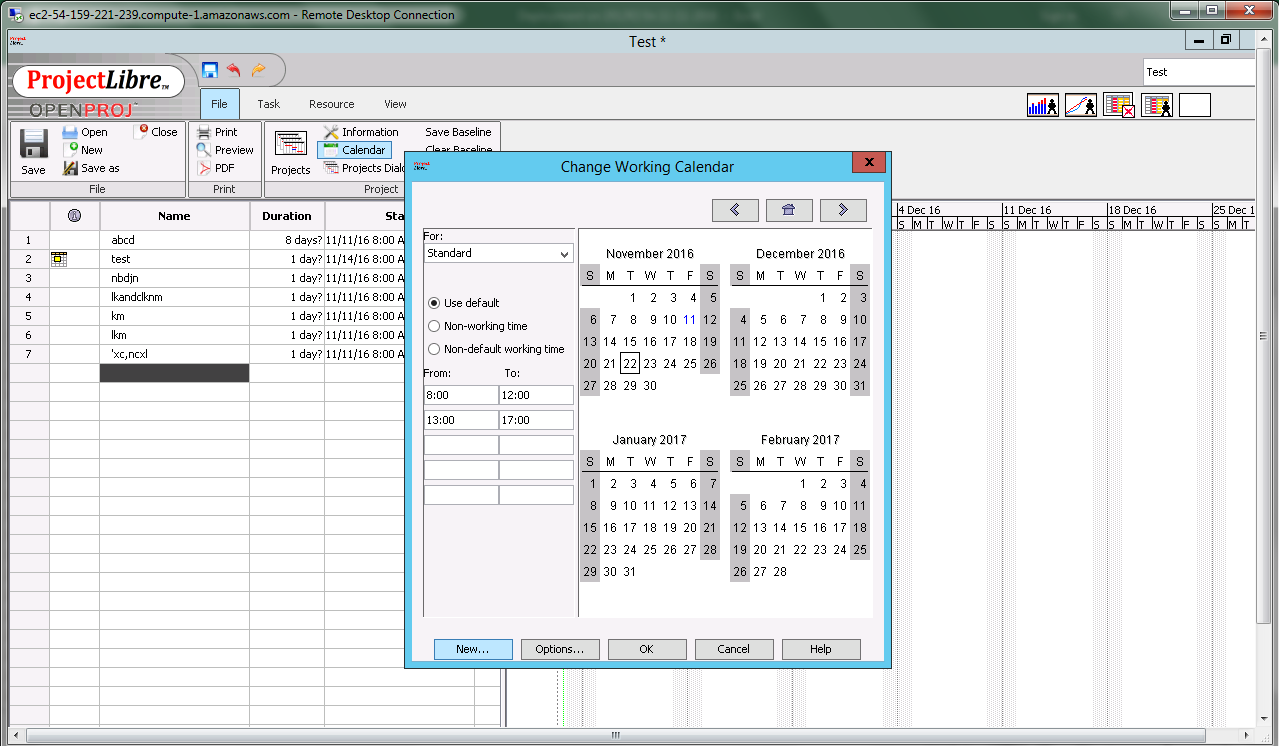
With ProjectLibre you have many calendar options. You can define your own working and non days, and different calendars for different resources. Let’s start with the basics and edit your standard calendar.
Click on the ‘Calendar’ button on top. It should be available whether you are at the File, Task and Resource section of ProjectLibre. You will see that the available days have white background while the non-available days have gray background. At the standard calendar the non-available days are the weekends (Saturday and Sunday).

Select For “Night Shift” on top left and see the changes. As you will notice, at Night Shift calendar the Saturdays are available for work.

You can try selecting ’24 Hours’ too to see what happens. Now, select ‘Standard’ again and lets make some changes. You will notice that below Calendar choice are three options:
Use default: Use the calendar’s default option for this day
Non-working time: Ignore the calendar’s default option for this day and make this a non-working day
Non-default working time: Ignore the calendar’s default option for this day and make
Excluding days at calendar
One of the most common changes that people want to apply at the calendar is to exclude National Holidays from the calendar. Click on a day (eg 25th of March) and then select ‘Non-working time’

You will see that the day is now red with a gray background. The red color means that there is a special rule for this day and the gray background means that this day is not a working day.
You might see that the Gantt diagram does not look ok now where there is task dependancy. If such a problem occurs click on the connection arrow and ok in order to fix the connection.

Something else that you must pay attention to is that sometimes days might not be correctly recalculated. You should close the project and reopen it if something looks strange to you.
Including days at Calendar
Similar to the previous instructions, by clicking on a weekend day (eg March 24th 2013) and selecting ‘Non-default working day’ you can set this day as a working day. Also, by selecting this option, you can set specific work hours for that day.

Defining your own Calendar
By clicking on ‘New’ at the bottom of the calendar window, you can create your own calendar that you can use. This might be useful if you have specific workhours for different teams, or resources. Your new calendar can be completely new or based on an existing calendar of yours.

Using the Calendar options
After defining your calendar options, you can set your new calendar or define the task’s calendar at the task’s details. Double-click on a task and then click ‘Advanced’. There is the option ‘Task Calendar’. You can choose the Calendar that this task will use there. Also, you can choose to ignore the Resource calendar or not (we will talk about this in a while)

Defining a calendar for each resource
Instead of defining a calendar for a task, you can define a calendar for a resource. Click on ‘Resources’ on the top menu and then on the ‘Resources’ button on the left to view your available resources. Double-click on a resource. At the ‘Resource Information’ dialogue you can see the ‘Base Calendar’ option. You can leave that option unchanged or change it to any other calendar (ProjectLibre’s or your own). After changing that option, if you click on the button on the right you can make further customizations.

If you have defined the 25th of March as a national holiday, then you will see it as gray here. For the purposes of the tutorial, we will make this resource available. You can go on and click on a non-working day and select ‘Non-default working time’. Now, for only this specific resource, the calendar is changed

5)Quick Reminder about resources
Since we are probably going to use data related to Gantt diagrams and resources. In order to remove a resource from a task, you cannot do it from the resource view. You must double click on the task, click on the resources tab, click on the icon for resources assignment and assign or remove resources as you wish.

Ok, enough for the reviews for now. Let’s start with the reports. There are four reports available in ProjectLibre:
- Project Details
- Resource Information
- Task Information
- Who Does What
Each of the reports, except “Project Details” have various versions available:
Resource Information
- Default
- Earned Value
- Earned Value – Cost
- Earned Value – Schedule
- Name
Task Information
- Baseline
- Constraint Dates
- Cost
- Default
- Earned Value
- Earned Value – Cost
- Earned Value – Schedule
- Name
- Schedule
- Schedule (CPM)
- Schedule Variance
- Summary
- Tracking
- Work
Who Does What
- Assigned Resources
- Basic Report
- Name and Id
- Resource Usage
- Tasks Assigned
The reports that are highlighted are the ones that we are going to describe later.
Project details report
The project details report, displays the following information:
Dates: Start, Finish, Actual Start and Actual Finish
Duration: Scheduled, Remaining, Actual and Percent Complete
Work: Scheduled, Remaining and Actual
Costs: Scheduled, Remaining, Actual and Variance
Along with notes.
In order to view the report click on View, then ‘Report’ and then Report: Project Details’

Some notes about ProjectLibre reports
While the functions of the reports are limited, and at some reports, some filtering and sorting options might not work. You can always click on the little disk icon and export the report at an Excel file and do whatever you like with that. Also, you can zoom in, zoom out and move pages with the toolbar options.

Resource Information – Default
The Resource Information – Default report displays in a simple list all your resources with the following columns:
Name, RBS, Type, E-mail Address, Material Label

Resource Information – Earned Value
The Resource Information – Earned Value report, displays your resources along with various columns related to Earned Value (BCWS, BCWP, ACWP, CV, SV, EAC…)
Task Information – Constraint Dates
The Task Information – Constraint Dates report is very useful to check all the constraint dates at once as a checklist. You can use this report as a checklist regularly to check that everything is going according to plan.

Task Information – Cost
The Task Information – Cost report might be one of your favorites. At this report, you can have a quick glance at every task cost, actual cost and remaining cost. It might be a useful report to export at Excel for extra filtering.

Task Information – Default
The Task Information – Default report displays all the tasks, along with the duration, start, finish, predecessors and resource names. Because of the format of this report, you can export it at Excel or CSV and import it maybe at your own company’s software.

Task Information – Earned Value
Similar to Resource Information – Earned Value report, with this report, you can check the Earned Value per task.
Task Information – Tracking
Very useful report, displaying all the tasks, along with the actual start, actual finish and percent complete. You can also filter the tasks to view Completed, Cost overbudget tasks, Critical tasks, In-progress tasks, Incomplete tasks, Late/overbudget tasks and Normal tasks.
![]()
![]()
Who Does What – Tasks Assigned
The Who Does What – Tasks Assigned report, is a checklist for your resources (either work or material) to check where they are allocated and how are they doing. You can also filter your resources by Material Resources, Work Resources, In-progress Assignments, Unstarted Assignments, Work Complete.

ProjectLibre is an open source alternative to Microsoft Project. It is also the new updated version of OpenProj. We were the developers of OpenProj wh A compliment to Apache OpenOffice and LibreOffice.
ProjectLibre has been rewritten and added key features:
1. Compatibility with Microsoft Project 2010
2. User Interface improvement
3. Printing (does not allow printing)
4. Bug fixes
Project Libre on cloud for AWS
Features
Features of ProjectLibre
- MS Project Compatibility– ProjectLibre is well-matched with Microsoft Project 2003, 2007, and 2010, so it will open these files. It also has import/export skills. A similar ribbon UI allows users familiar with MS Project to easily change to ProjectLibre. In creating a project plan, they can use a similar approach, such as listing and indenting a task list or work breakdown structure. They can set durations, links, predecessors, and resources in a similar manner. They can also create budgets and manage expenses with the software. The latest version is 1.8.0 modified in May 2018.
- Core PM Functionality– This open source substitute software includes features such as Gantt charts, network diagrams, work breakdown structure charts, resource breakdown structure charts, earned value costing, and resource histograms. These are also comparable to features in Microsoft Project. Users can set dependencies, create a project baseline, and use multiple calendar to define working and non-working days for different resources. It also has reporting functionality, such as for displaying project details, resource information, task information, and others.
- Enterprise Cloud– ProjectLibre is busy finalizing a cloud version. It will extend the open source desktop software to a cloud version that can be accessed anytime and anywhere. Unlike the single-user desktop version, the cloud version will be capable of handling multiple projects by multiple users. Thus, simple project portfolio management features will also be available. A team dashboard will allow project partnership from members in different locations. Pricing will be offered on a simple monthly subscription.
Major Features of Project Libre
- Microsoft Project replacement
- Gantt Chart
- New and updated version of OpenProj with hundreds of updates/bug fixes
- Earned Value Costing
- PERT Charts
- Project Management software
- RBS Chart
- New version of OpenProj
AWS
Installation Instructions For Windows
Note: How to find PublicDNS in AWS
Step 1) RDP Connection: To connect to the deployed instance, Please follow Instructions to Connect to Windows instance on AWS Cloud
1) Connect to the virtual machine using following RDP credentials:
- Hostname: PublicDNS / IP of machine
- Port : 3389
Username: To connect to the operating system, use RDP and the username is Administrator.
Password: Please Click here to know how to get password .
Step 2) Click the Windows “Start” button and select “All Programs” and then point to Project Libre.
Step 3) Other Information:
1.Default installation path: will be in your root folder “C:\Program Files (x86)\ProjectLibre”
2.Default ports:
- Windows Machines: RDP Port – 3389
- Http: 80
- Https: 443
Configure custom inbound and outbound rules using this link
Installation Step by Step Screenshots