1-click AWS Deployment 1-click Azure Deployment
Overview
MySQL is a fast, easy to use relational database. It is currently the most popular open-source database. It is very commonly used in conjunction with PHP scripts to create powerful and dynamic server-side applications.MySQL is used for many small and big businesses. It is developed, marketed and supported by MySQL AB, a Swedish company. It is written in C and C++.
MySQL is becoming so popular because of these following reasons:
- MySQL is an open-source database so you don’t have to pay a single penny to use it.
- MySQL is a very powerful program so it can handle a large set of functionality of the most expensive and powerful database packages.
- MySQL is customizable because it is an open source database and the open-source GPL license facilitates programmers to modify the SQL software according to their own specific environment.
- MySQL is quicker than other databases so it can work well even with the large data set.
- MySQL supports many operating systems with many languages like PHP, PERL, C, C++, JAVA, etc.
- MySQL uses a standard form of the well-known SQL data language.
- MySQL is very friendly with PHP, the most popular language for web development.
- MySQL supports large databases, up to 50 million rows or more in a table. The default file size limit for a table is 4GB, but you can increase this (if your operating system can handle it) to a theoretical limit of 8 million terabytes (TB).
MySQL’s Logical Architecture

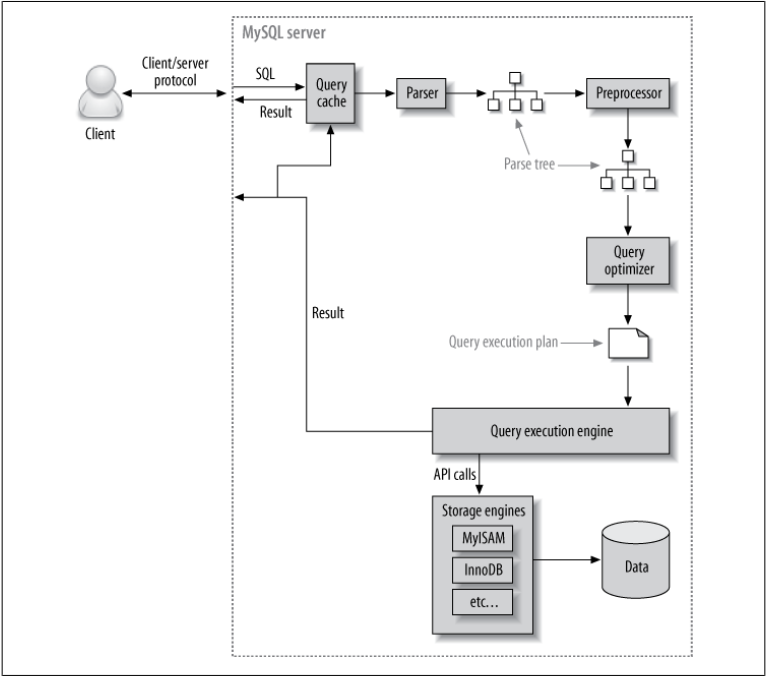
Top Layer i.e client are not unique to mysql. In client-server model we require connection handling, authentication, security which is provided by network based tools.
Second Layer i.e server is the brain of MYSQL it includes Query Parsing, analysis, optimisation, caching, and all the built-in functions (e.g., dates, times, math, and encryption). Any functionality provided across storage engines lives at this level: stored procedures, triggers, and views, for example.
Third Layer i.e storage engines, they are responsible of storing and retrieving all data stored in mysql. MyISAM and InnoDB are commonly used storage engines. MySql server communicates with storage engine through API’s.
What happens when you send MySQL a query?
- The client sends the SQL statement to the server.
- The server checks the query cache. If there’s a hit, it returns the stored result from the cache; otherwise, it passes the SQL statement to the next step.
- The server parses, preprocesses, and optimizes the SQL into a query execution plan.
- The query execution engine executes the plan by making calls to the storage engine API.
- The server sends the result to the client.
Connection Management and Security
Each client connection gets its own thread within the server process. The connection’s queries execute within that single thread, which in turn resides on one core or CPU. The server caches threads, so they don’t need to be created and destroyed for each new connection.MySQL 5.5 and newer versions support an API that can accept thread-pooling plugins, so a small pool of threads can service many connections.
Optimisation and Execution
MySQL parses queries to create an internal structure (the parse tree), and then applies a variety of optimizations. These can include rewriting the query, determining the order in which it will read tables, choosing which indexes to use, and so on. You can pass hints to the optimizer through special keywords in the query, affecting its decision making process. You can also ask the server to explain various aspects of optimization. This lets you know what decisions the server is making and gives you a reference point for reworking queries, schemas, and settings to make everything run as efficiently as
possible.The optimizer does not really care what storage engine a particular table uses, but the storage engine does affect how the server optimizes the query. The optimizer asks the storage engine about some of its capabilities and the cost of certain operations, and for statistics on the table data.
Before even parsing the query, MySQL server checks into the query cache, which can store only SELECT statements, along with their result sets. If a query is identical to one already in the cache, the server doesn’t need to parse, optimize, or execute the query at all — it can simply pass back the stored result set.
The MySQL Client/Server Protocol
The protocol is half duplex, that means at any given time the MySQL server can be either sending or receiving messages, but not both.The client sends a query to the server as a single packet of data. This is why the max_allowed_packet configuration variable is important if you have large queries. Once the client sends the query, it doesn’t have the ball anymore; it can only wait for results. (If the query is too large, the server will refuse to receive any more data and throw an error), On the other hand response from the server usually consists of many packets of data. When the server responds, the client has to receive the entire result set that is why LIMIT plays a important role. When a client fetches rows from the server, it thinks it’s pulling them. But the truth is, the MySQL server is pushing the rows as it generates them. The client is only receiving the pushed rows; there is no way for it to tell the server to stop sending rows.
The Query Cache
As discussed earlier, before even parsing query MySQL server checks into the query cache if result is found it is directly returned without even parsing, optimizing, or executing the query. MySQL allocates and initializes the specified amount of memory for the query cache all at once when the server starts from a value assigned to variable ‘query_cache_size’. If you update this variable (even if you set it to its current value), MySQL immediately deletes all cached queries, resizes the cache to the specified size, and reinitializes the cache’s memory. This can take a long time and stalls the server until it completes, because MySQL deletes all of the cached queries one by one, not instantaneously.

The Query Optimization Process
MySQL turns a SQL query into an execution plan for the query execution engine. It has several substeps: parsing, preprocessing, and optimization. Errors (for example, syntax errors) can be raised at any point in the process.
The parser and the preprocessor
MySQL’s parser breaks the query into tokens and builds a “parse tree” from them. The parser uses MySQL’s SQL grammar to interpret and validate the query. For instance, it ensures that the tokens in the query are valid and in the proper order, and it checks for mistakes such as quoted strings that aren’t terminated. The preprocessor then checks the resulting parse tree for additional semantics that the parser can’t resolve. For example, it checks that tables and columns exist, and it resolves names and aliases to ensure that column references aren’t ambiguous. Next, the preprocessor checks privileges. This is normally very fast unless your server has large numbers of privileges.
The query optimizer
The parse tree is now valid and ready for the optimizer to turn it into a query execution plan. A query can often be executed many different ways and produce the same result. The optimizer’s job is to find the best option.
MySQL uses a cost-based optimizer, which means it tries to predict the cost of various execution plans and choose the least expensive. The unit of cost was originally a single random 4 KB data page read, but it has become more sophisticated and now includes factors such as the estimated cost of executing a WHERE clause comparison. You can see how expensive the optimizer estimated a query to be by running the query, then inspecting the Last_query_cost session variable:
SHOW STATUS LIKE ‘Last_query_cost’;
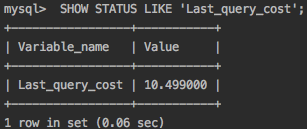
This result means that the optimizer estimated it would need to do about 10 random data page reads to execute the query. It is based on various factors such as number of pages per table or index the cardinality (number of distinct values) of the indexes, the length of the rows and keys, and the key distribution. The optimizer does not include the effects of any type of caching in its estimates — it assumes every read will result in a disk I/O operation.
The optimizer might not always choose the best plan, for many reasons:
• The statistics could be wrong. The server relies on storage engines to provide statistics, and they can range from exactly correct to wildly inaccurate. For example, the InnoDB storage engine doesn’t maintain accurate statistics about the number of rows in a table because of its MVCC architecture.
• The cost metric is not exactly equivalent to the true cost of running the query, so even when the statistics are accurate, the query might be more or less expensive than MySQL’s approximation. A plan that reads more pages might actually be cheaper in some cases, such as when the reads are sequential so the disk I/O is faster, or when the pages are already cached in memory. MySQL also doesn’t understand which pages are in memory and which pages are on disk, so it doesn’t really know how much I/O the query will cause.
• MySQL’s idea of “optimal” might not match yours. You probably want the fastest execution time, but MySQL doesn’t really try to make queries fast; it tries to minimize their cost, and as we’ve seen, determining cost is not an exact science.
•MySQL doesn’t consider other queries that are running concurrently, which can affect how quickly the query runs.
• MySQL doesn’t always do cost-based optimization. Sometimes it just follows the rules, such as “if there’s a full-text MATCH() clause, use a FULLTEXT index if one exists.” It will do this even when it would be faster to use a different index and a non-FULLTEXT query with a WHERE clause.
• The optimizer doesn’t take into account the cost of operations not under its control, such as executing stored functions or user-defined functions.
Concluding the optimizer — can’t always estimate every possible execution plan, so it might miss an optimal plan.
The execution plan
MySQL doesn’t generate byte-code to execute a query, as many other database products do. Instead, the query execution plan is actually a tree of instructions that the query execution engine follows to produce the query results.
The Query Execution Engine
MySQL simply follows the instructions given in the query execution plan. To execute the query, the server just repeats the instructions until there are no more rows to examine. Query execution engine communicates with storage engine through API call’s. Functions performed by the query execution are:
MySQL’s Storage Engines
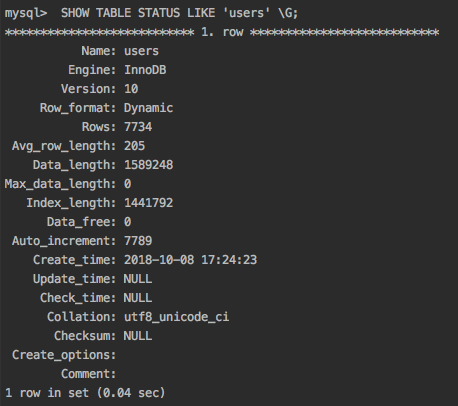
MySQL stores each database (also called a schema) as a subdirectory of its data directory in the underlying filesystem. When you create a table, MySQL stores the table definition in a .frm file with the same name as the table. Thus, when you create a table named MyTable, MySQL stores the table definition in MyTable.frm. Because MySQL uses the filesystem to store database names and table definitions, case sensitivity depends on the platform. You can use the SHOW TABLE STATUS command to display information about tables.
Returning Results to the Client
The final step in executing a query is to reply to the client. Even queries that don’t return a result set still reply to the client connection with information about the query, such as how many rows it affected.
If the query is cacheable, MySQL will also place the results into the query cache at this stage. The server generates and sends results incrementally. As soon as MySQL processes the last table and generates one row successfully, it can and should send that row to the client.This has two benefits: it lets the server avoid holding the row in memory, and it means the client starts getting the results as soon as possible.
Creating MySQL User and Database
How to create a MySQL user and database using the MySQL Database Wizard
By using the MySQL Database Wizard tool you can easily create a MySQL user and a database and then assign the user to the database. To access the tool, access your cPanel and click on the tool icon.

On the page that opens provide the desired MySQL database. Note that the database will always start with username_ prefix, where username is your cPanel user. Once ready, click the Next Step button.

On the next page you should provide the desired MySQL username and the password for it. Here the username is always prefixed with the cPanel username, similar to the database. When ready click the Create User button.

The user will be created for you and on the next page you are prompted to specify the desired permissions that the user has to the database. Choose the desired permissions and click the Next Step button.

That’s it! Once the page loads you will see a confirmation message informing you of the successful completion of the operations.

How to create a new MySQL Database
To create a MySQL database you can use the MySQL Databases tool in cPanel.

In the Create a New Database section add the desired name of the database and click the Create Database button.

On the page that loads you will see a confirmation message about the successful creation of the database.

How to create a new MySQL User
To create a new MySQL user you can again use the MySQL Databases tool in cPanel. In the Add a New User section provide the desired username and a password for it. Then click the Create a User button.

On the page that loads you will see a confirmation message about the successful creation of the user.

How to add an existing MySQL user to a database
In order for a MySQL user to be used to manage a certain database, the user permissions for that database must be set. You can manage the MySQL user privileges from the MySQL Databases tool in cPanel.
From the Add a User to a Database section choose the desired user from the User: drop-down and the database from the Database: drop-down. Then click the Add button.

On the page that opens, choose the desired privileges the user should have to the database and click the Make Changes button.

A new section will appear confirming the successful change.

Installing MySQL server
MySQL server is available in multiple variants depending on the database architecture and license preferences. The available variants are:
Free:
MySQL Community Server
Commercial:
MySQL Cloud service by Oracle
MySQL Cluster GCE server
MySQL Entreprise edition
Here we will be working with MySQL Community Server and its features. In order to install MySQL community server, head over to its download page.
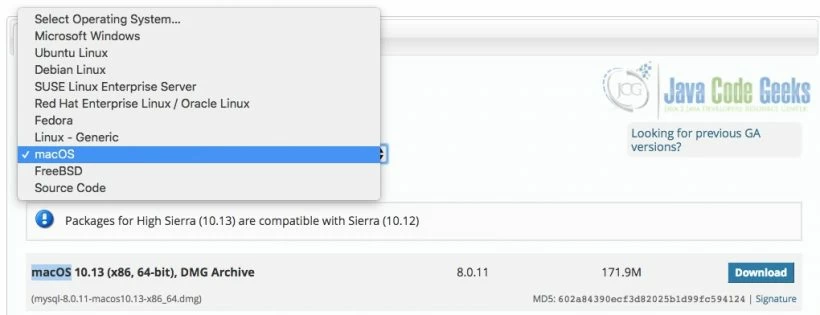
On scrolling to the bottom of the page, you would find a list of downloads and a select box to allow the OS selection. Select the OS as per your need.
After selecting the OS, these are the recommended setups to download:
MacOS: dmg archive
Linux variants: Corresponding DEB bundle as per your architecture. In Linux variants like Ubuntu and Debian, it is also possible to install using the apt repository nowadays.
Windows: exe executable file
After downloading the relevant setup, proceed with the installation as per the steps mentioned below:
2.1 Installing in MacOS
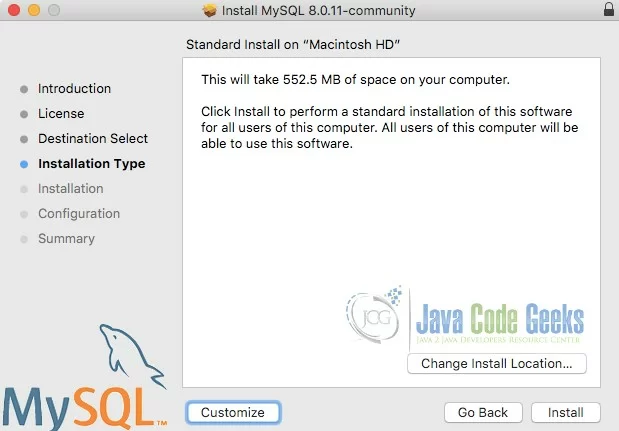
In MacOS, double click the downloaded .dmg file to start with the setup. It will show up a screen similar to the one shown below. Accept the license and select the installation location. Once the location is selected, it will show the amount of space that would be occupied by the installation as shown below.
On click of install, the install progresses and MySQL server is installed. The next step is to configure the MySQL Service and root user password. It is important to remember the password being entered as it is the administrator password required to create further users. Configure the service name and credentials and click finish.
2.2 Installing in Windows
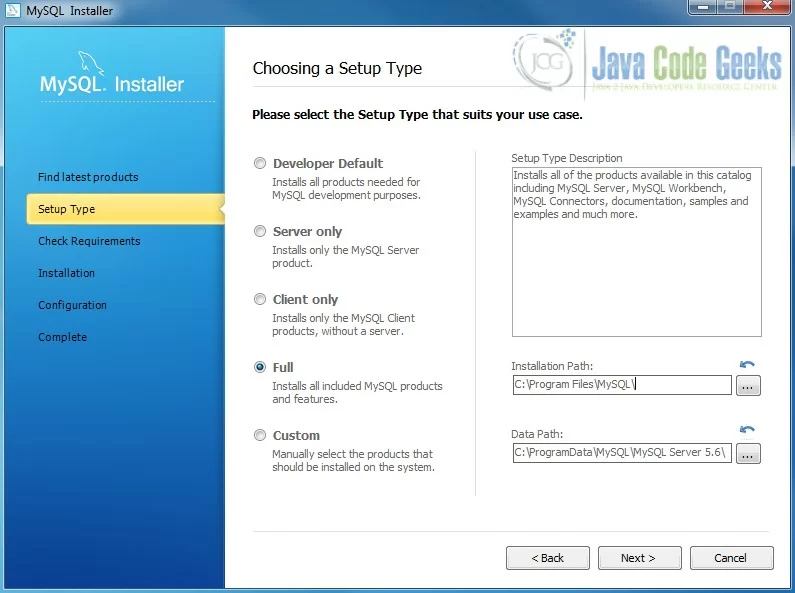
The process of installation in Windows OS is quite similar to MacOS. Execute the .exe file that you must have downloaded by now. As long as the exe is compatible with your system, the setup should start and proceed flawlessly.
A window similar to the one shown above will be displayed. Choose the installation location when prompted for it. You could choose to proceed with the installation of server only. Full installation basically installs a bunch of SQL utilities too which may not be necessary. Once the installation goes through, the next step would be configuration of the database server credentials. Configure the credentials and complete the installation process.
2.3 Installing in Linux variants
For Linux variants, MySQL server installer is available as a .deb file. The .deb file allows you to complete the process in quite similar fashion as shown above. However, for people who prefer command line, it is possible to install mysql server using command line too. MySQL server is available over apt, yum as well as zypper repository. Further, we will be discussing installation of MySQL server using apt repository.
In order to setup apt repository for the installation of MySQL server, follow the below steps and execute the necessary commands.
- Select the right apt package name from this link. The name format will be mysql-apt-config_x.x.xx-x_all.deb.
- Download the corresponding package
- Once downloaded, execute the below command.
1
$sudodpkg -i/PATH/version-specific-package-name.deb - During the installation of above package, enter the version to be installed when it prompts for installation
- Once the configuration is complete, run the below command to update the apt repository.
1
$sudoapt-get update - To finally install the MySQL server, execute the below command.
1
sudoapt-getinstallmysql-server - Once installed, the server is started automatically by starting the relevant service. You can check the status using the below command.
1
sudoservice mysql status
3. Connecting to MySQL database
Command line has its challenges for starting up every application. Even for MySQL, you might face challenges especially when it comes to MacOSX. To begin with, we will see how to connect to MySQL database using command line in Windows.
3.1 Connecting to MySQL database server using Windows command prompt
Before connecting to the MySQL server, you need to ensure that the relevant service is up and running. In order to check that, navigate to the list of services by searching Services in the start menu and checking the service list for MySQL56 service. The status of service indicates whether MySQL server is started or stopped. Once it is identified to be running, we could connect to the server using command prompt. Windows commands works mainly on the PATH environment variable. As long as the path environment variable has an entry of the bin location of MySQL installation, all the mysql commands could be used directly. In case there is no entry of the MySQL installation path, you could navigate to the MySQL Server installation folder. Go into the bin folder and open the terminal from the folder.
Once you are in the terminal, you need to type in the following command:
|
1
|
> mysql -u root -p |
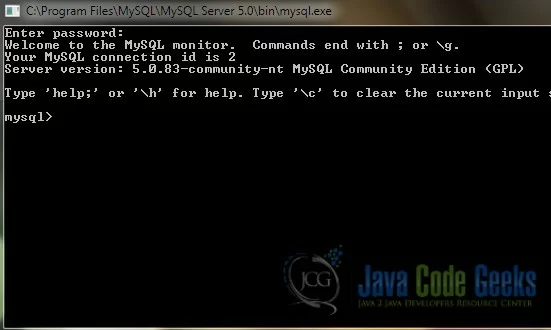
This should connect to the mysql server with the username root specified in the command above. It will ask for the password as indicated by the -p flag. Enter the password as configured in the beginning and you would be able to see the MySQL prompt as shown below.
This prompt allows you to interact with the MySQL database using simple SQL queries. We would see the same in the further sections.
You can also use the mysql command to connect to other remote databases and use the terminal to interact with the remote database. In order to do so, you need to use the below command. The attributes passed in the command are quite self-explanatory.
|
1
|
> mysql --host=localhost --user=myname --password=password mydb |
3.2 Connecting to MySQL database server using Linux Terminal
Connecting to MySQL server using Linux terminal is quite similar to connecting to it using Windows command prompt. To begin with, ensure that the MySQL server is up and running. In order to check that a process of MySQL server is indeed running, type the below command:
|
1
|
$ ps -eF|grep mysql |
The command gives list of running MySQL process. Look for the processes other than the grep process that just executed. If the MySQL server is not running, it could be started using the below command in most distros.
|
1
|
$ service mysqld start |
Once the server has started, type the below command to connect to the database with root user.
|
1
|
$ mysql -u root -p |
Enter the password and you should be able to see a prompt similar to the one shown above. You should be allowed to get in with a similar MySQL prompt in the window as shown above.
3.3 Connecting to MySQL database server using MacOS terminal
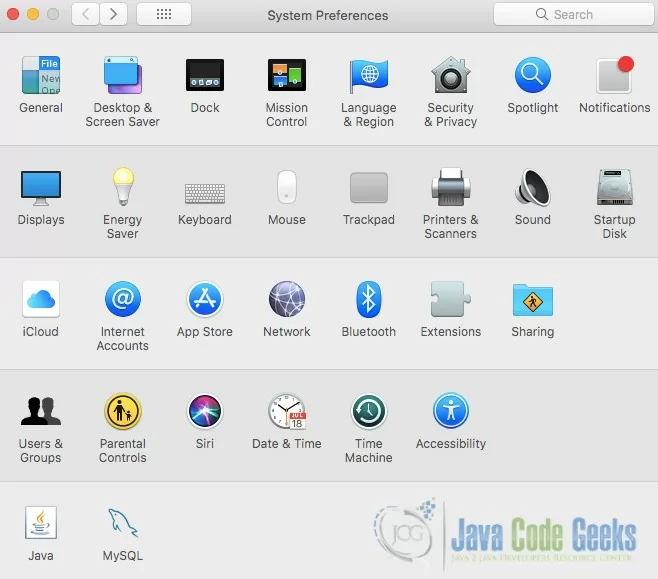
In the MacOS, the process of starting and stopping the server is quite different considering the UI perspective. In MacOS, in order to check the status or start or stop the server, you need to head over to the System Preferences. In the System preferences, you should be able to find the MySQL icon in the bottom area as shown below.
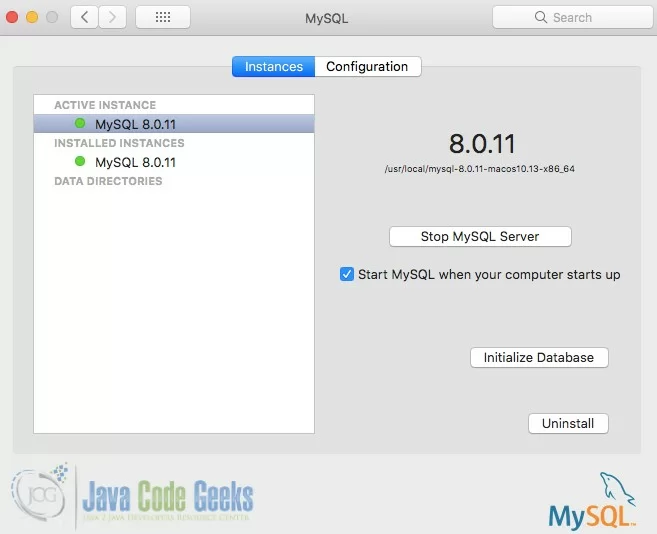
Click the MySQL icon, to view the service status. A window similar to the one shown below will be visible. The server could be stopped or started from here at the click of button quite easily.
As visible in the above image, it is also possible to re-initialise the database and set a new password for root directly from the above window. In order to reset the password and re-initialise the database, simply click the Initialise database button. It will ask for a new password and you would be all set to go.
Once the server is identified to be up and running, the next step is to connect to the database server using the same commands as above. Type in the command shown below to get connected to the database server.
|
1
|
$ mysql -u root -p |
4. Connecting to a schema and executing queries
Once you are connected to the database server, it is time to execute queries. Irrespective of the operating system, the process execution of query using command prompt is the same for all. This section would cover all the basic operations related to execution of SQL queries.
4.1 Creating and checking schema
The first step towards working with the MySQL database is to create a schema. A schema is created using the below command.
|
1
|
mysql> create schema tutorial; |
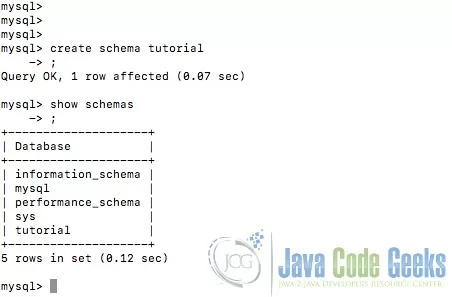
Here tutorial could be replaced by the name of schema that you wish to have. In order to execute the query, type it in the mysql prompt as shown above. Once typed, simply press enter. It would give a success message mentioning 1 row affected. In case it does not, ensure that you put a semicolon after the query. In case it was missed, there will be a prompt with a ‘>’ arrow. If such a prompt shows up, you need to put a semicolon and press enter.
Thus, a new schema will be created. In order to confirm the same, you could view the list of schemas using the below command.
|
1
|
mysql> show schemas; |
As it can be seen in the image above, the list of schemas are displayed in a formatted console output. You might see a slightly different output depending on the number of schemas that you have created. In case you followed the tutorial precisely, the list should display just one schema in the list.
4.2 Selecting schema and creating tables
Once the schema is created, the next step is to select the schema and create tables in it. To start with the selection of schema, execute the below command with the name of schema that you just created.
|
1
|
mysql> use tutorial |
Note that in this statement, the semicolon at the end of statement is not really necessary. On execution of the above command, you should be able to see the output Database Changed. Once the database schema is selected, verify the selection using the below command.
|
1
|
mysql> select database() from dual; |
The query will output the name of selected database in a similar format as shown above. The next step is a create first table in the schema. We would be considering a use-case of a blogging website to create the tables. Hence, create two tables, users and articles using the queries below.
|
1
2
3
4
|
mysql> CREATE TABLE `tutorial`.`users` (`userid` INT NOT NULL,`name` VARCHAR(45) NULL,`email` VARCHAR(100) NULL,`password` VARCHAR(24) NULL, PRIMARY KEY (`userid`));Table Createdmysql> CREATE TABLE `tutorial`.`articles`(`articleid` INT NOT NULL,`content` TEXT NULL,`userid` INT NULL,PRIMARY KEY (`articleid`), INDEX `user_fk_idx` (`userid` ASC),CONSTRAINT `user_fk` FOREIGN KEY (`userid`) REFERENCES `tutorial`.`users` (`userid`) ON DELETE NO ACTION ON UPDATE NO ACTION);Table Created |
Execute the queries, one after the other. The output Table Created should be available after the execution of each of the queries. The created table list could be checked using the below command.
|
01
02
03
04
05
06
07
08
09
10
|
mysql> show tables;+--------------------+| Tables_in_tutorial |+--------------------+| articles || users |+--------------------+2 rows in set (0.00 sec)mysql> |
Thus, it displays the list of tables with the name of schema in the heading.
4.3 Adding & Fetching data to the tables using MySQL command line
Adding the data to the tables is quite simple. We would add data to just the users table to keep it simple. Execute the below queries to add the data to the users table.
|
1
2
3
4
5
6
7
|
mysql> insert into users values (1,'Abhishek', 'abcd@javacodegeeks.com','mysql123');Query OK, 1 row affected (0.08 sec)mysql> insert into users values (2,'Dennis', 'denis@javacodegeeks.com','mysql123');Query OK, 1 row affected (0.04 sec)mysql> |
The queries above are shown with the relevant output as well. Once the records are inserted successfully, you could check the data in the table in the table using a select query for the same. Execute the below query to fetch the list of records from the users table.
|
1
2
3
4
5
6
7
8
|
mysql> select * from users;+--------+----------+-------------------------+----------+| userid | name | email | password |+--------+----------+-------------------------+----------+| 1 | Abhishek | abcd@javacodegeeks.com | mysql123 || 2 | Dennis | denis@javacodegeeks.com | mysql123 |+--------+----------+-------------------------+----------+2 rows in set (0.00 sec) |
As it could be seen here, the command line displays list of records in a console formatted output. The column names become the headers of the table and the rest of the rows are the records. Similarly, it is possible to execute almost every SQL query using the command prompt.
4.4 Update & Delete records
Once we have the records in the table, there might be need to update or delete the records as and when needed. This can be achieved by using the Update and Delete SQL queries as explained further. Consider the user Dennis in the above displayed records. As it can be seen, the email ID has a spell error for Dennis. Let us correct that using an update query.
|
1
2
3
|
mmysql> update users set email='dennis@javacodegeeks.com' where userid=2;Query OK, 1 rows affected (0.39 sec)Rows matched: 1 Changed: 1 Warnings: 0 |
Similarly to delete a record, use the delete query with the corresponding userid in the where clause.
|
1
2
|
mysql> delete from users where userid=2;Query OK, 1 rows affected (0.50 sec) |
4.5 Check the database table structure
There are chances that you might need to know the structure of a certain database table at certain moment during the development. Database structure is basically list of columns and data types of the columns. The structure of any table could be obtained using the command below.
|
1
|
mysql> desc articles; |
On execution of the command, an output similar to the one shown below will be obtained. As it can be seen, it provides details about datatype, primary key, default value as well as not null constraint if applied.
|
1
2
3
4
5
6
7
8
9
|
mysql> desc articles;+-----------+---------+------+-----+---------+-------+| Field | Type | Null | Key | Default | Extra |+-----------+---------+------+-----+---------+-------+| articleid | int(11) | NO | PRI | NULL | || content | text | YES | | NULL | || userid | int(11) | YES | MUL | NULL | |+-----------+---------+------+-----+---------+-------+3 rows in set (0.00 sec) |
4.6 Pre-Defined MySQL functions
At times, there are certain tasks that we prefer to get it done within the database. For instance, we wish to calculate the number of users or check the current date and time. MySQL database comes pre-packaged with these features. To check the count of users in the above table, just execute the below query.
|
1
|
mysql> select count(1) from users; |
It will return the count of user records in the table. Similarly one can check the current date and time using the below query.
|
1
2
3
4
5
6
7
|
mysql> select now();+---------------------+| now() |+---------------------+| 2018-05-18 11:59:03 |+---------------------+1 row in set (0.00 sec) |
Thus, it shows the current date and time in the above format. The now() function could be used for setting the value of creation time or update time of the record automatically. In addition to these functions, there are numerous other functions like min(), max(), avg(), sum() and few others.
5. MySQL administration
MySQL database administration involves several tasks. However, herein we will discuss three simple tasks namely – Create user, assigning grant to the user and dropping the user. In order to create a user, select the mysql database in the beginning. Once the database is selected, execute the below queries to received the output as shown below.
|
1
2
|
mysql> create user 'newuser'@'localhost' identified by 'newpassword';Query OK, 0 rows affected (0.06 sec) |
The rights to the user could be assigned selectively as per the requirements. In order to assign all the rights to the newly created user, execute the below query and verify the output.
|
1
2
|
mysql> grant all on tutorial.* to 'newuser'@'localhost';Query OK, 0 rows affected (0.04 sec) |
Once the grant is provided, you can exit the prompt and try to connect using the new user. In order to exit and reconnect using the new user, execute the below queries.
|
01
02
03
04
05
06
07
08
09
10
11
12
13
14
15
16
17
|
mysql> exitByeMacBook-Air:bin abhishekkothari$ ./mysql -u newuser -pEnter password: Welcome to the MySQL monitor. Commands end with ; or \g.Your MySQL connection id is 14Server version: 8.0.11 MySQL Community Server - GPLCopyright (c) 2000, 2018, Oracle and/or its affiliates. All rights reserved.Oracle is a registered trademark of Oracle Corporation and/or itsaffiliates. Other names may be trademarks of their respectiveowners.Type 'help;' or '\h' for help. Type '\c' to clear the current input statement.mysql> |
Once logged in successfully, try to check the list of schemas. If you had other schemas in the database previously like I did, you would notice that the list of schemas does not show all of them. The output would be similar to the one shown below. The first schema information_schema is a general MySQL schema for every user. The second schema being displayed is the schema for which the user has been provided the necessary grants to view it.
|
1
2
3
4
5
6
7
8
|
mysql> show schemas;+--------------------+| Database |+--------------------+| information_schema || tutorial |+--------------------+2 rows in set (0.00 sec) |
In order to drop the user, exit the command prompt and re-login using the root user. To drop the user that was recently created, execute the below query.
|
1
2
3
|
mysql> drop user 'newuser'@'localhost' -> ;Query OK, 0 rows affected (0.07 sec) |
In order to confirm the deletion of the user, you could exit and try to login again using the same user. You would be denied the permission. Thus, we can create & delete users as well as manage the permissions provided to the users.
A Few MySQL Cons
1. MySQL is not as mature as other relational database management systems.
MySQL did not start out as an RDBMS (relational database management system), but later changed direction to encompass more functionality. Some more mature RDBMS, like PostgreSQL, are considered more feature-rich. Close source options, like Oracle or Microsoft SQL Server, are also alternatives to consider.
2. MySQL is open source
Technically, MySQL is an open-source database, but in practice, it no longer feels like it. Under Oracle’s umbrella, MySQL now has proprietary, closed-source modules. Oracle’s alleged foot-dragging on development and refusal to release test cases for bugs and security patches is causing many open source developers to head for the hills. (One of these hills is MariaDB, where all code is released under GPL, LPGL or BSD.)
3. MySQL is Oracle-owned instead of community driven
MySQL hasn’t changed direction dramatically since it was acquired by Oracle, but Oracle still owns it, which makes some developers nervous. Why? Oracle does not accept patches or provide a public roadmap.
4. Big names are jumping ship
Red Hat Enterprise Linux, Fedora, Slackware Linux, openSUSE, and the Wikimedia Foundation have all migrated to MariaDB.That’s a pretty compelling argument to ditch MySQL, Rikki. To be fair, though, MySQL still has some great things going for it. Let’s look at a few of them in more detail.
A Few Pros
1. There is more MySQL investment and innovation than ever before.
Since the acquisition, Oracle has increased the MySQL staff and given it a more mature engineering process where engineering and planning is driven from Oracle instead of people scattered across the world. MYSQL uses InnDB as its major storage engine. InnoDB is also part of the Oracle family, which makes development teams even more integrated.The company is also making code more modular. For example, in MySQL 5.6, they split one of the crucial locks in the MySQL Server, the LOCK_open, which could improve top performance by more than 100%.
2. MySQL products remain solid.
Open-source advocates complain that new code in MySQL 5.5 doesn’t have test cases and that some of the enterprise features in version 5.5 are closed source. Still, MySQL 5.6 was well-received as a solid, well-performing product with a number of new features. One of the most notable changes? Going from 4 CPU threads to 64 CPU threads, which nearly tripled the number of concurrent connections from prior versions. Oracle also spent two years releasing Development Milestone Releases (DMR) to the MySQL Community for testing and feedback.
3. MySQL is designed with a focus on the Web, Cloud and Big Data
“This focus was on both MySQL and MySQL cluster to provide improvements in scale-up and scale-out performance, high availability, self-healing and data integrity, provisioning, monitoring and resource management, developer agility, and security.” This included introducing Global Transaction Identifiers (GTIDs) make it simple to track and compare replication progress between the master and slave servers, as well as the MySQL Applier for Hadoop.
4. There are more MySQL projects than before.
A MySQL Architect at Oracle said in his blog that Oracle has new teams working on special projects for MySQL. There are groups working on the clustering software, manageability, database algorithm optimization, replication and scalability.
10 Best MySQL GUI Tools
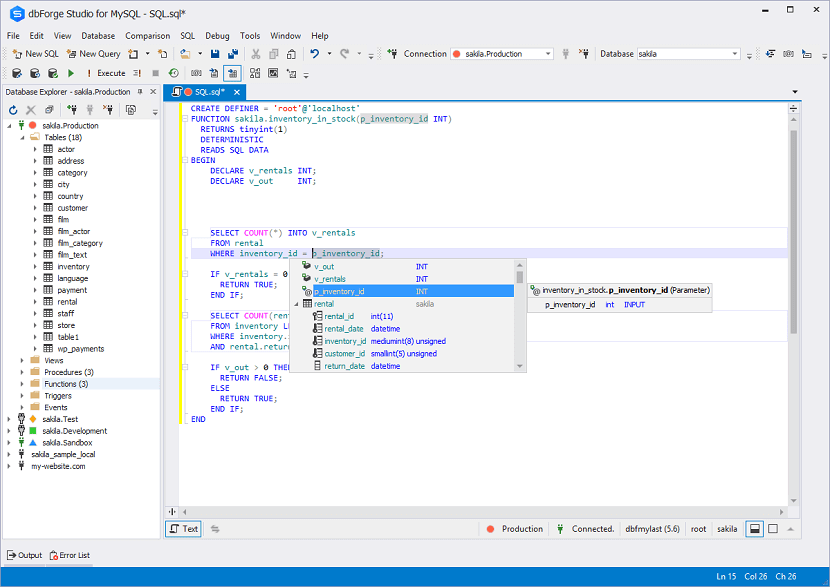
1.dbForge Studio for MySQL
This multi-purpose GUI tool is an IDE that comprises a wide range of features and functionality necessary for MySQL database development and maintenance. It allows you to create and execute queries, develop and debug stored routines, automate database object management, analyze table data via an intuitive interface, and much more.
Pros:
• Rich code formatting functionality that allows to create and modify code profiles to standardize your code and make it as clean as possible
• MariaDB databases are supported
• Ability to create result scripts for SELECT, INSERT, UPDATE, and DELETE statements to a SQL file with the help of the CRUD Generator
2.MySQL Workbench
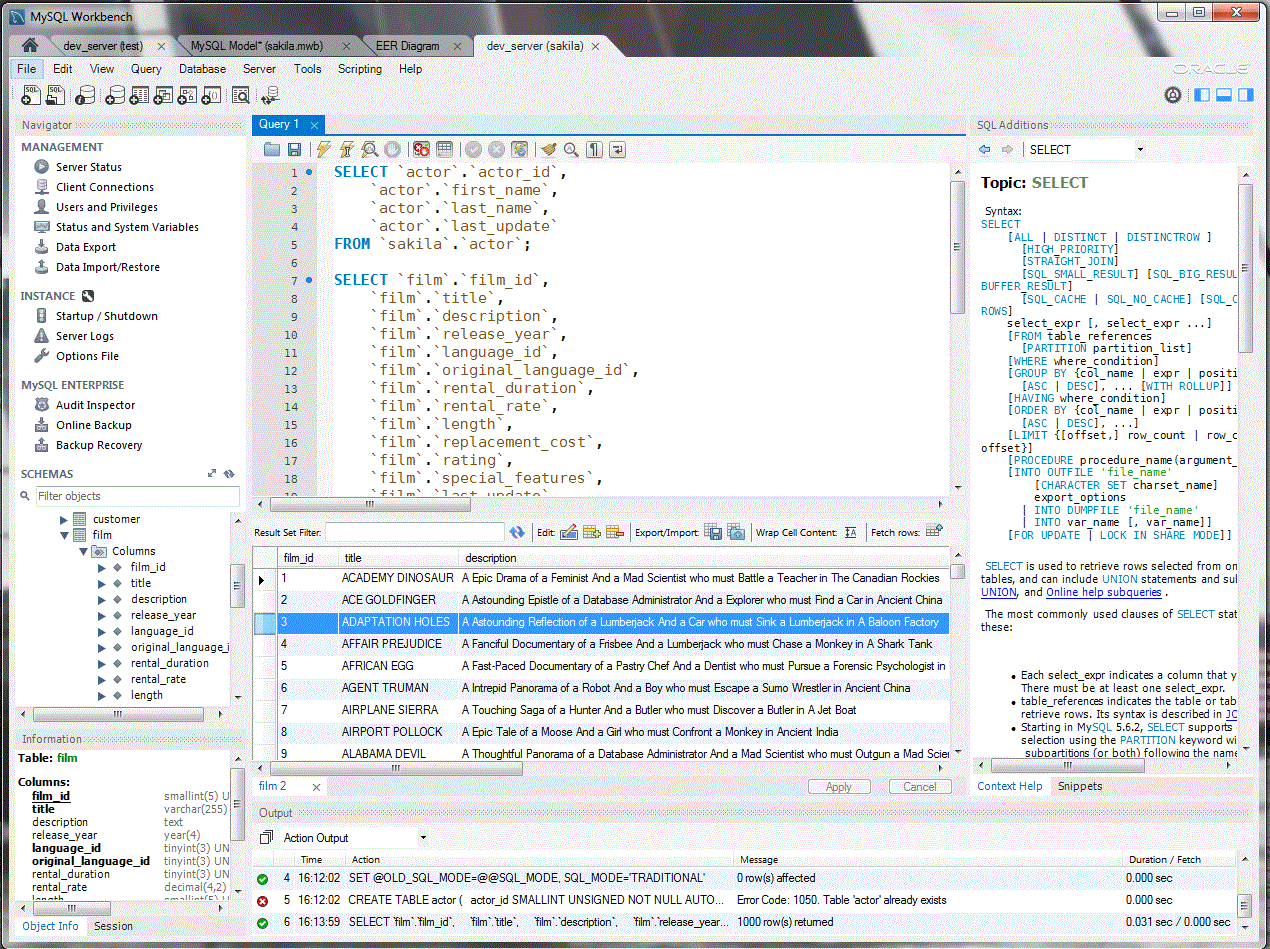
MySQL Workbench is a unified visual tool for database architects, developers, and DBAs. It provides various functionality for designing, developing, and administering databases. It’s available in 3 editions – Community, Standard, and Enterprise. Community is a free open-source edition offering a basic set of features, and the remaining two are commercial editions with extended functionality.
Pros:
• Allows to see server status and health, as well as server logs
• Developed by Oracle, the company behind MySQL itself, so you can be sure MySQL Workbench will be compatible with all recent features of MySQL
• Available for Windows, Linux, and Mac OS X
3.phpMyAdmin
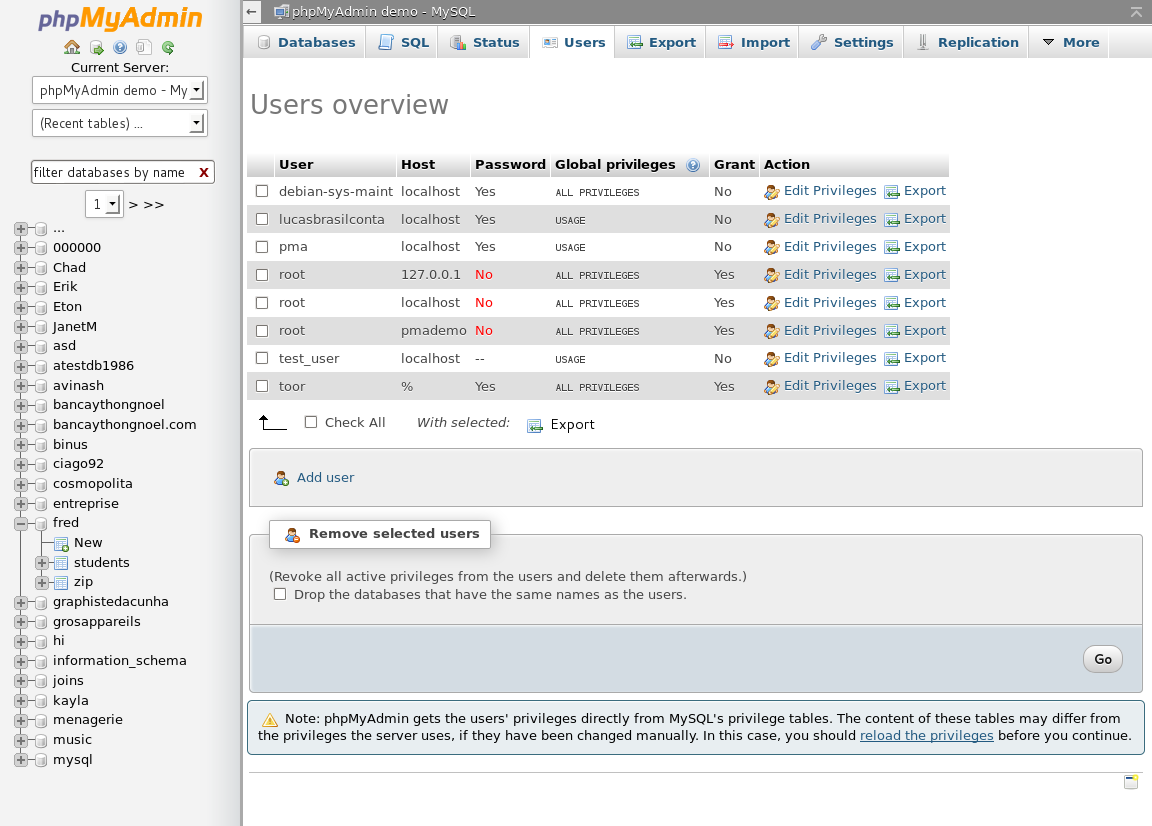
phpMyAdmin is a web-based MySQL administration tool written in PHP. It’s one of the most popular tools of its kind, mainly due to how easy it is to use and the fact that it’s completely free. It may lack some advanced features other tools provide, but its basic functionality is enough to help you create functioning websites without advanced knowledge of MySQL.
Pros:
• Can be easily accessed from most computers because it’s web-based
• Simple to install and use
• Available in 80 languages – both left-to-right and right-to-left ones
4.HeidiSQL
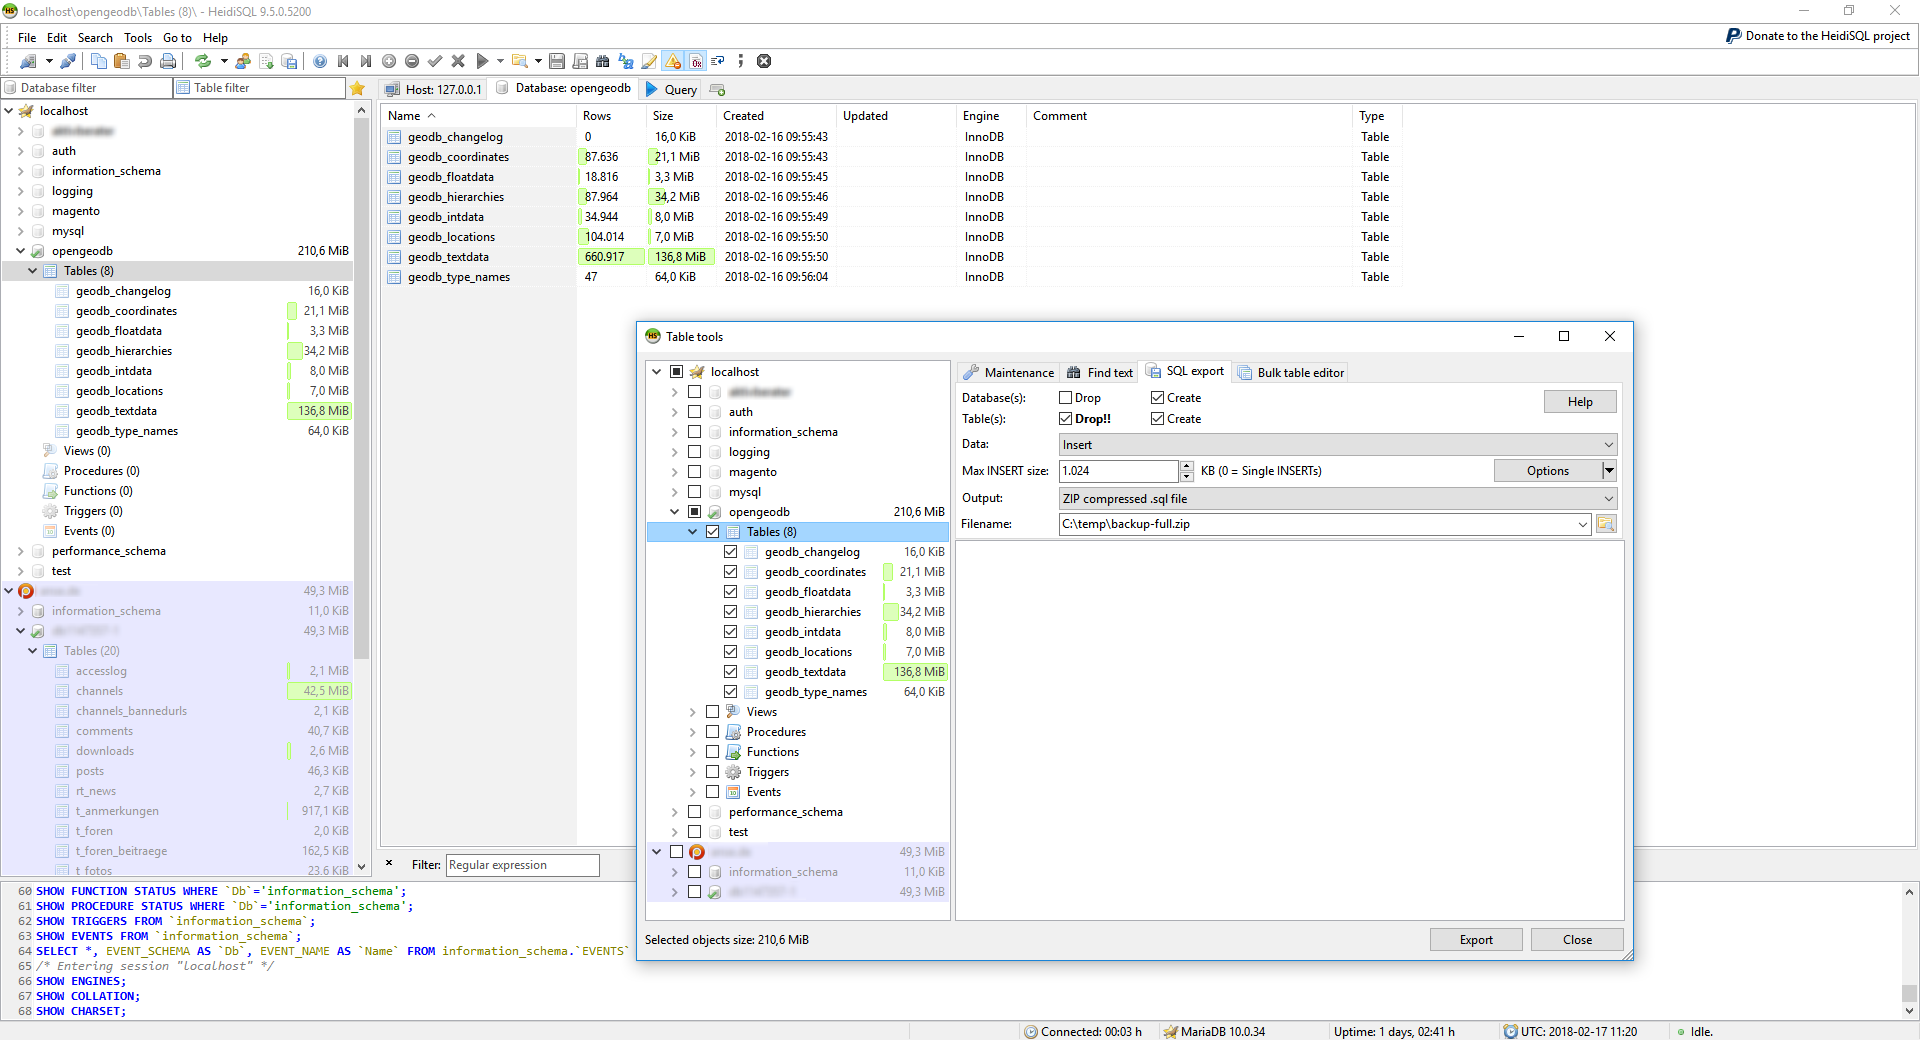
HeidiSQL is a lightweight freeware tool for working with databases, be it browsing or editing data, creating and modifying tables, managing user privileges, or other tasks. In addition to Windows, it works with Linux distributions but will require the Wine platform in this case.
Pros:
• Can connect to MySQL databases through an SSH tunnel.
• Allows to batch-insert ASCII and binary files into tables
• Available in a portable version which doesn’t require installation or administrative privileges
5.Toad Edge for MySQL
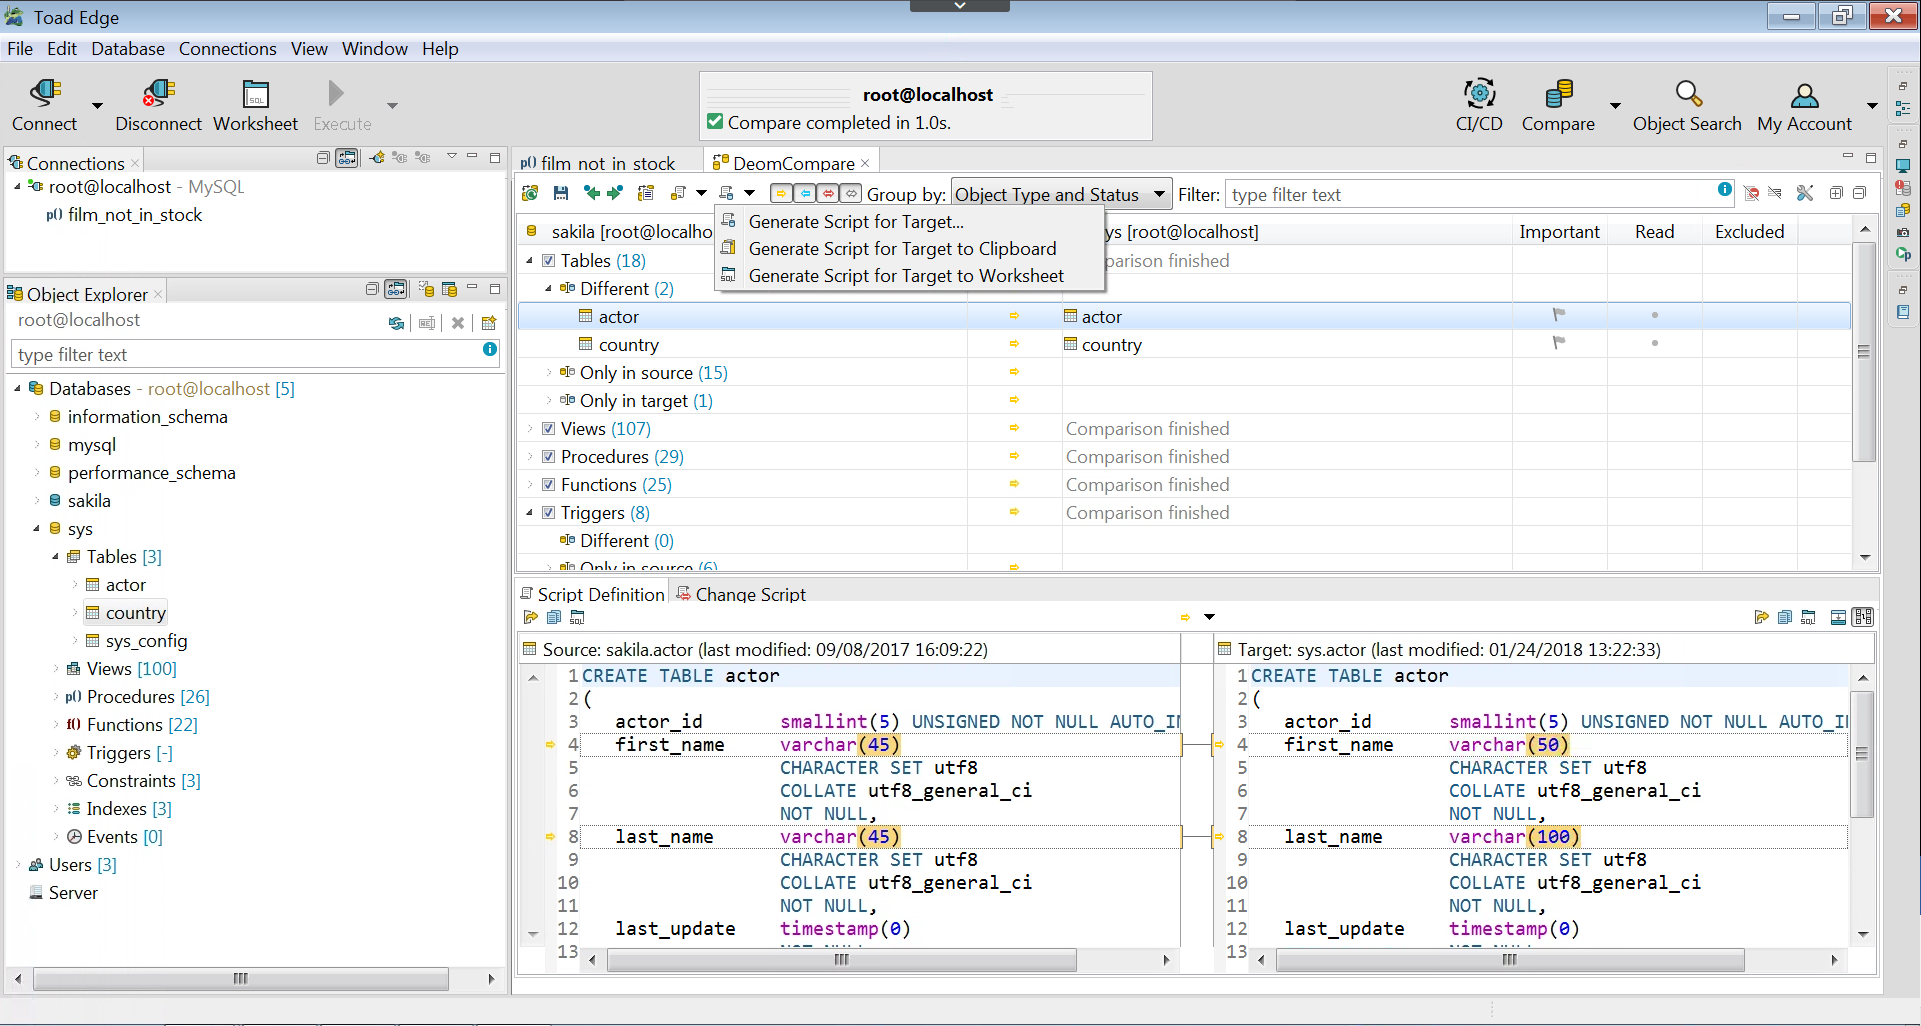
Toad Edge for MySQL provides a toolset for database development and administration with features such as schema comparison and synchronization, SQL query monitor, robust data import and export, database snapshot creation, advanced JSON editor, and more. Toad Edge is available for Windows and Mac OS X.
Pros:
• Powerful JSON data browser/editor functionality
• Session viewer that allows to track current sessions, terminate them, or cancel queries
• Round-the-clock user support
6.SQLyog
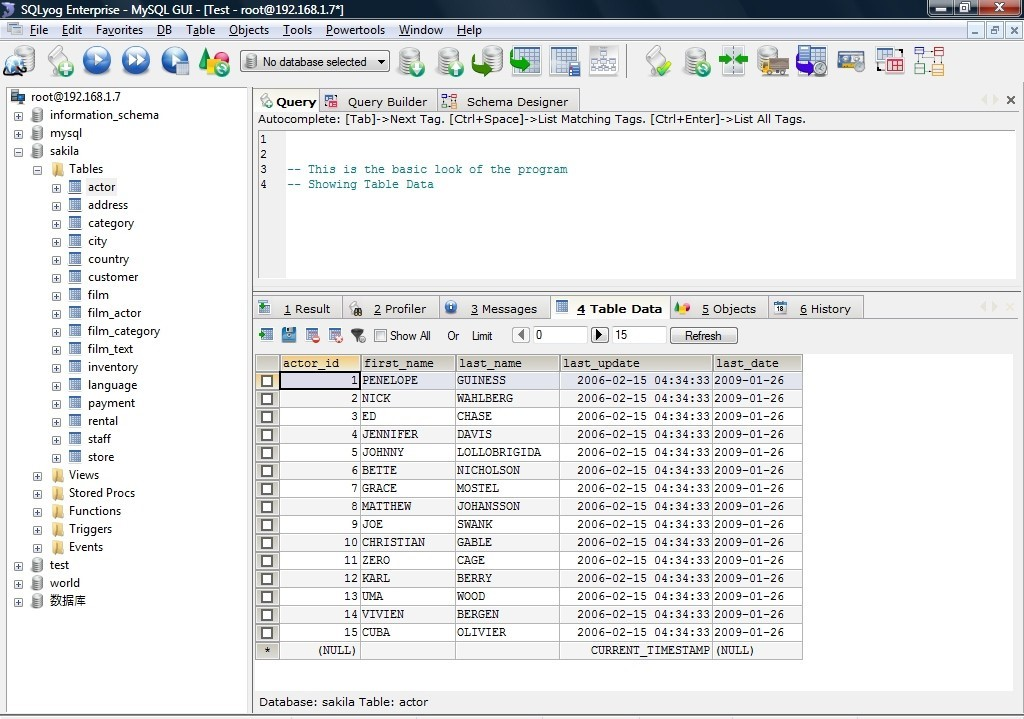
SQLyog is a MySQL management solution for Windows available in three paid editions. It also has a free trial which allows you to test the software before purchasing a license. Its extensive feature list makes up for the fact that it’s not accessible for free – you can synchronize data and schemas, perform scheduled backups, import external data, and much more.
Pros:
• Customizable user interface with various themes
• Multi-threaded query execution
• Shortcuts which allow generating SQL DML statements from the schema definition
7.Navicat for MySQL
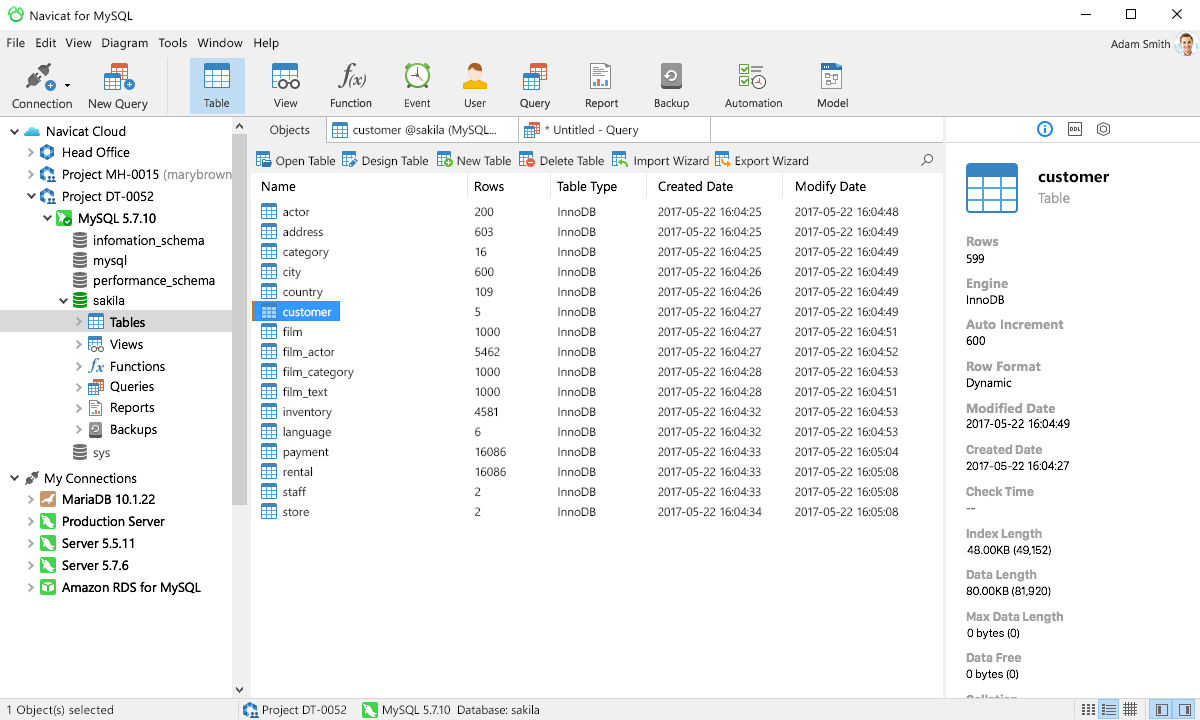
Navicat for MySQL is a set of tools for database developers and administrators which is compatible with MySQL, MariaDB, and cloud databases. A wide range of features provides the ability to simplify the database development process and increase your productivity when working on various management and administration tasks. This tool comes in three paid editions and has a 14-day fully functional free trial to help you evaluate its functionality.
Pros:
• Available for Windows, Mac OS X, and Linux
• Allows synchronizing your connection settings, models, queries, and virtual groups to the Navicat Cloud so you can share them with your coworkers at any time, from any place.
• Ability to print schedule reports in the Windows edition
8.Aqua Data Studio
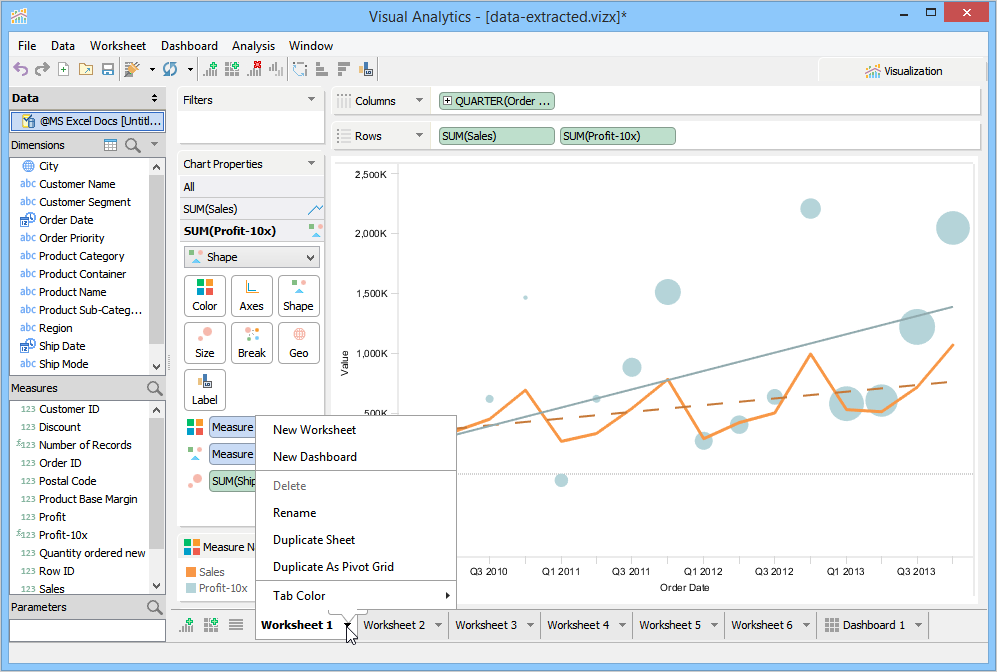
Aqua Data Studio is a versatile IDE for relational, cloud, and NoSQL databases with powerful visual data analysis functionality. It allows you to visually build queries, model entity relationship diagrams, edit data in an Excel-style grid, and perform other database development and administration tasks.
Pros:
• Create engaging visualizations of data and share them with colleagues and customers with the help of the tool’s robust visual analytics capabilities
• Develop and debug scripts in a scripting development environment with a set of open APIs
• View query execution plans and their statistics to understand how to increase overall server performance
9.Valentina Studio
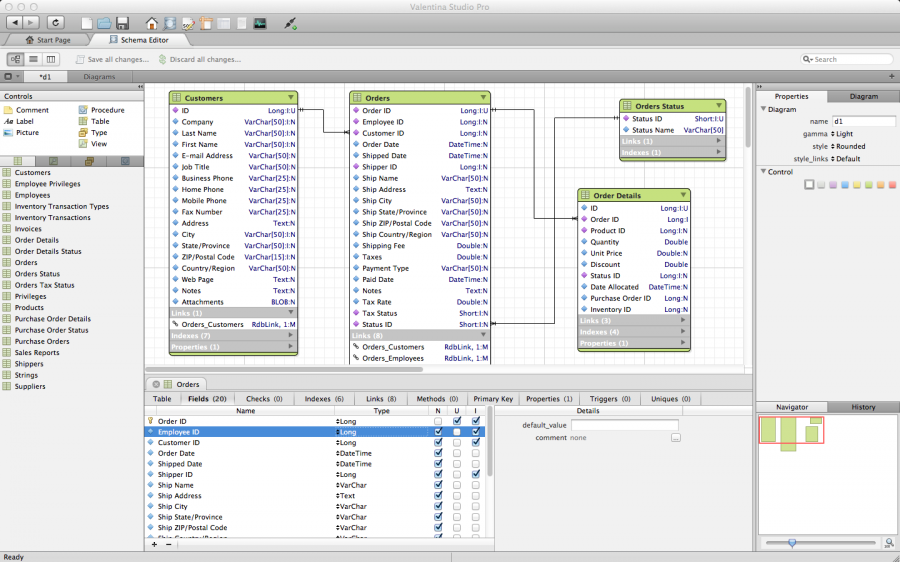
This GUI tool allows you to create and maintain databases, queries, object relations, and more. The free edition comprises basic functionality such as editing schemas and creating diagrams for them, server administration, code completion, etc. The paid Pro version provides additional features such as the report designer, query builder, and others.
Pros:
• Provides various database continuous integration tools
• Supports Valentina databases which feature the unique Abstraction Links – they allow developers to use both API and SQL commands to create, delete and modify links between tables, link and unlink records, and more.
• Has a free iOS version
10.Sequel Pro
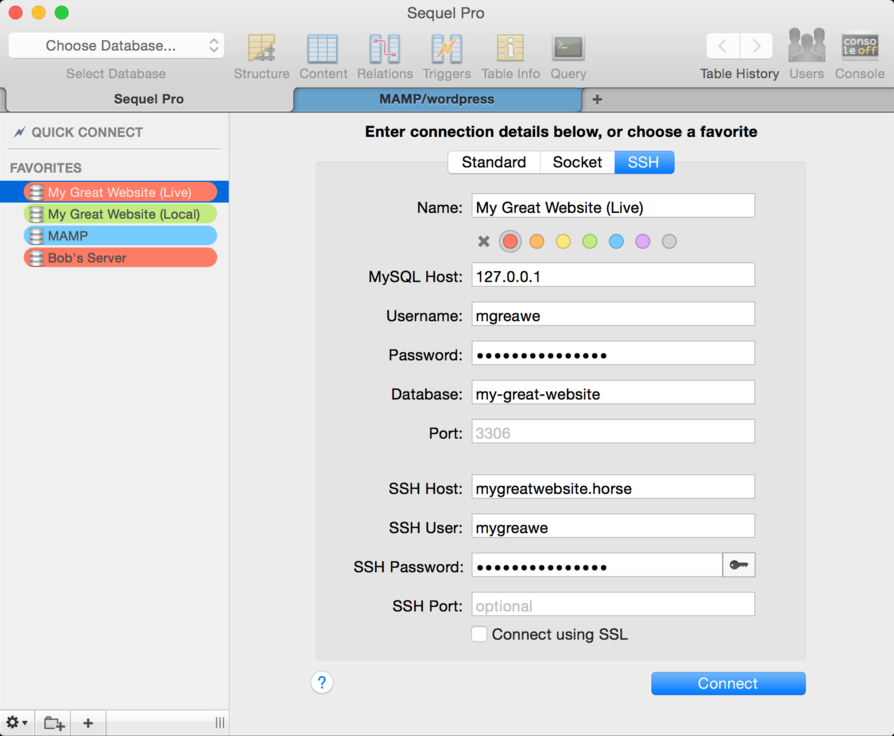
Sequel Pro is a free MySQL database management tool which allows performing all basic tasks such as adding, modifying, removing, browsing, and filtering databases, tables, and records, running queries, and more. While other MySQL tools we looked at are available for Windows and other OS, Sequel Pro will only work on Mac OS X. This tool is the successor of the CocoaMySQL database management application.
Pros:
• Easily connects to databases through the TCP/IP protocol
• Supports all MySQL versions starting from 3.x
• Lightweight and easy to use
–MySQL is an open-source relational database management system(RDBMS).In July 2013, it was the world’s second most widely used RDBMS, and the most widely used open-sourceclient–server model RDBMS.It is named after Michael Widenius’ (who is a co-founder of MySQL) daughter, My, while “SQL” stands as the abbreviation for Structured Query Language. The MySQL development project has made its source code available under the terms of the GNU General Public License, as well as under a variety of proprietary agreements. MySQL was owned and sponsored by a single for-profit firm, the Swedish company MySQL AB, now owned by Oracle Corporation. For proprietary use, several paid editions are available, and offer additional functionality.
MySQL is a popular choice of database for use in web applications, and is a central component of the widely used LAMPopen-source web application software stack (and other “AMP” stacks). LAMP is an acronym for “Linux, Apache, MySQL,Perl/PHP/Python”. Free-software open-source projects that require a full-featured database management system often use MySQL. Applications that use the MySQL database include: TYPO3, MODx, Joomla, WordPress, phpBB, MyBB, Drupal and other software. MySQL is also used in many high-profile, large-scale websites, including Google (though not for searches), Facebook,Twitter,Flickr,and YouTube.
On all platforms except Windows, MySQL ships with no GUI tools to administer MySQL databases or manage data contained within the databases. Users may use the included command line tools, or install MySQL Workbench via a separate download. Many third party GUI tools are also available.
MySQL on Cloud for AWS
Features
MySQL is a free-to-use, open-source database that facilitates effective management of databases by connecting them to the software. It is a stable, reliable and powerful solution with advanced features like the following:
1. Data Security
MySQL is globally renowned for being the most secure and reliable database management system used in popular web applications like WordPress, Drupal, Joomla, Facebook and Twitter. The data security and support for transactional processing that accompany the recent version of MySQL, can greatly benefit any business especially if it is an eCommerce business that involves frequent money transfers.
2. On-Demand Scalability
MySQL offers unmatched scalability to facilitate the management of deeply embedded apps using a smaller footprint even in massive warehouses that stack terabytes of data. On-demand flexibility is the star feature of MySQL. This open source solution allows complete customization to eCommerce businesses with unique database server requirements.
3. High Performance
MySQL features a distinct storage-engine framework that facilitates system administrators to configure the MySQL database server for a flawless performance. Whether it is an eCommerce website that receives a million queries every single day or a high-speed transactional processing system, MySQL is designed to meet even the most demanding applications while ensuring optimum speed, full-text indexes and unique memory caches for enhanced performance.
4. Round-the-clock Uptime
MySQL comes with the assurance of 24X7 uptime and offers a wide range of high availability solutions like specialized cluster servers and master/slave replication configurations.
5. Comprehensive Transactional Support
MySQL tops the list of robust transactional database engines available on the market. With features like complete atomic, consistent, isolated, durable transaction support, multi-version transaction support, and unrestricted row-level locking, it is the go-to solution for full data integrity. It guarantees instant deadlock identification through server-enforced referential integrity.
6. Complete Workflow Control
With the average download and installation time being less than 30 minutes, MySQL means usability from day one. Whether your platform is Linux, Microsoft, Macintosh or UNIX, MySQL is a comprehensive solution with self-management features that automate everything from space expansion and configuration to data design and database administration.
7. Reduced Total Cost of Ownership
By migrating current database apps to MySQL, enterprises are enjoying significant cost savings on new projects. The dependability and ease of management that accompany MySQL save your troubleshooting time which is otherwise wasted in fixing downtime issues and performance problems.
8. The Flexibility of Open Source
All the fears and worries that arise in an open source solution can be brought to an end with My SQL’s round-the-clock support and enterprise indemnification. The secure processing and trusted software of MySQL combine to provide effective transactions for large volume projects. It makes maintenance, debugging and upgrades fast and easy while enhancing the end-user experience.
-The Major Features Of MySQL
MySQL is offered under two different editions: the open source MySQL Community Server and the proprietary Enterprise Server.[72] MySQL Enterprise Server is differentiated by a series of proprietary extensions which install as server plugins, but otherwise shares the version numbering system and is built from the same code base.
Major features as available in MySQL 5.6:
- A broad subset of ANSI SQL 99, as well as extensions
- Cross-platform support
- Stored procedures, using a procedural language that closely adheres to SQL/PSM[73]
- Triggers
- Cursors
- Updatable views
- Online DDL when using the InnoDB Storage Engine.
- Information schema
- Performance Schema that collects and aggregates statistics about server execution and query performance for monitoring purposes.[74]
- A set of SQL Mode options to control runtime behavior, including a strict mode to better adhere to SQL standards.
- X/Open XA distributed transaction processing (DTP) support; two phase commit as part of this, using the default InnoDB storage engine
- Transactions with savepoints when using the default InnoDB Storage Engine. The NDB Cluster Storage Engine also supports transactions.
- ACID compliance when using InnoDB and NDB Cluster Storage Engines[75]
- SSL support
- Query caching
- Sub-SELECTs (i.e. nested SELECTs)
- Built-in Replication support (i.e. Master-Master Replication & Master-Slave Replication) with one master per slave, many slaves per master.[76] Multi-master replication is provided in MySQL Cluster,[77] and multi-master support can be added to unclustered configurations using Galera Cluster.[78]
- Full-text indexing and searching[b]
- Embedded database library
- Unicode support[c]
- Partitioned tables with pruning of partitions in optimizer
- Shared-nothing clustering through MySQL Cluster
- Multiple storage engines, allowing one to choose the one that is most effective for each table in the application.[d]
- Native storage engines InnoDB, MyISAM, Merge, Memory (heap), Federated, Archive, CSV, Blackhole, NDB Cluster.
- Commit grouping, gathering multiple transactions from multiple connections together to increase the number of commits per second.
AWS
Installation Instructions for Windows
Step 1) RDP Connection: To connect to the deployed instance, Please follow Instructions to Connect to Windows instance on AWS Cloud
1) Connect to the virtual machine using following RDP credentials:
- Hostname: PublicDNS / IP of machine
- Port : 3389
Username: To connect to the operating system, use RDP and the username is Administrator.
Password: Please Click here to know how to get password .
Step 2) Database Credentials:
You can Login by below SQL Database credentials
SQL UserName : root || Password : Passw@rd123
Note: Please change the password after the first login.
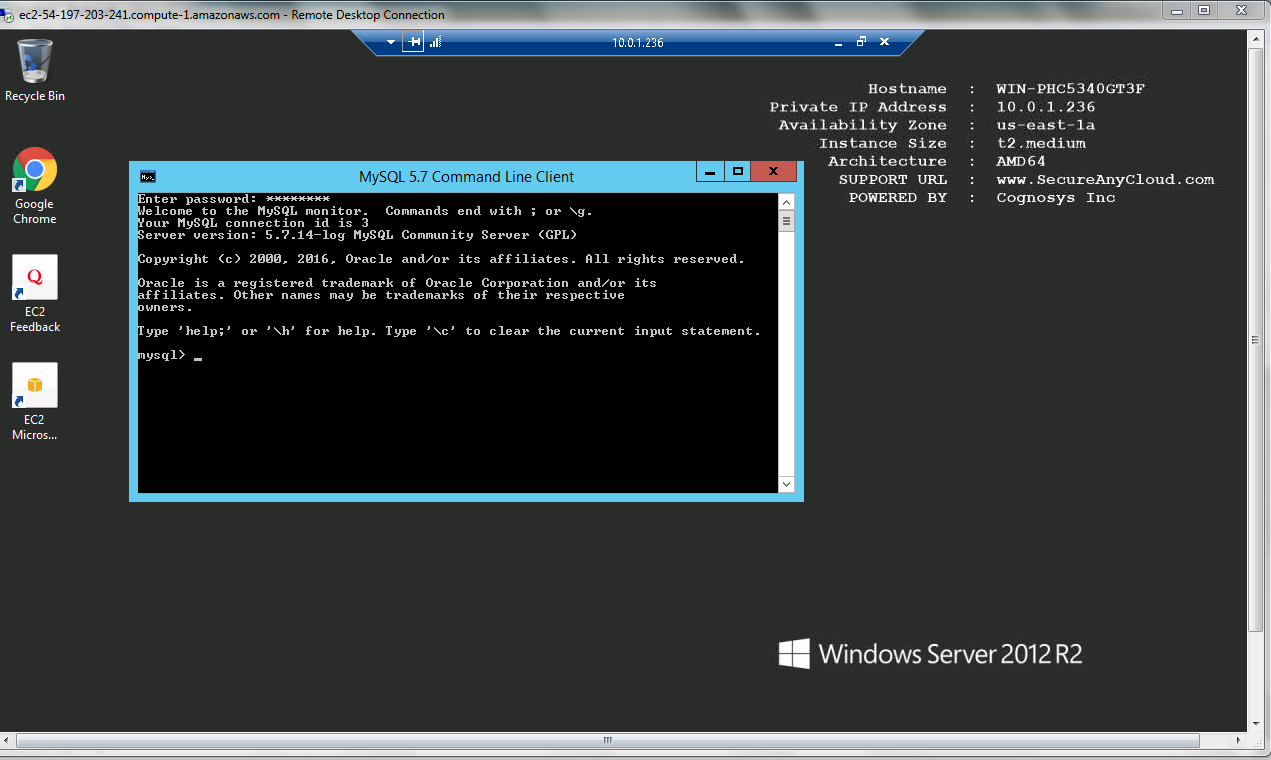
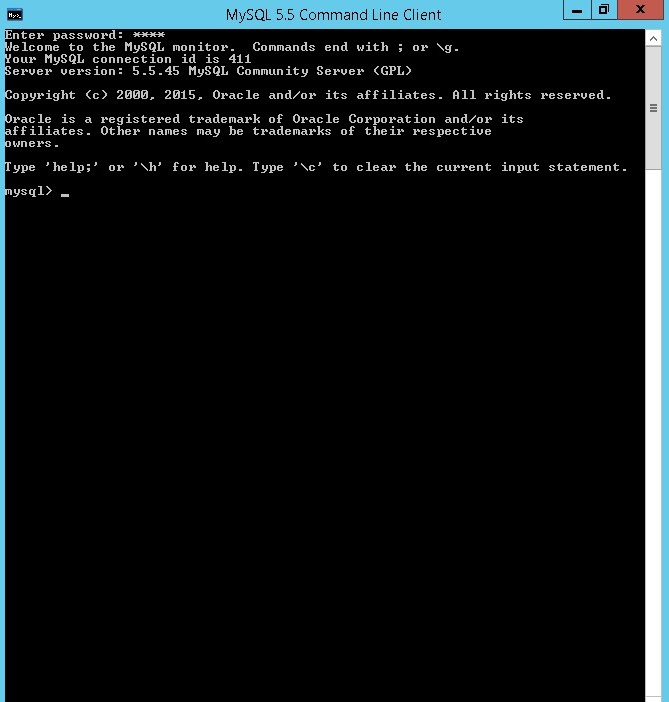
Step 3) Choose Start, expand All Programs, and then expand MySQL Command Line Client
Step 4) Other Information:
1.Default installation path: will be in your root folder “C:\Program Files\MySQL”
2.Default ports:
- Windows Machines: RDP Port – 3389
- Http: 80
- Https: 443
- Mysql ports: By default these are not open on Public Endpoints. Internally Mysql server: 3306.
Configure custom inbound and outbound rules using this link
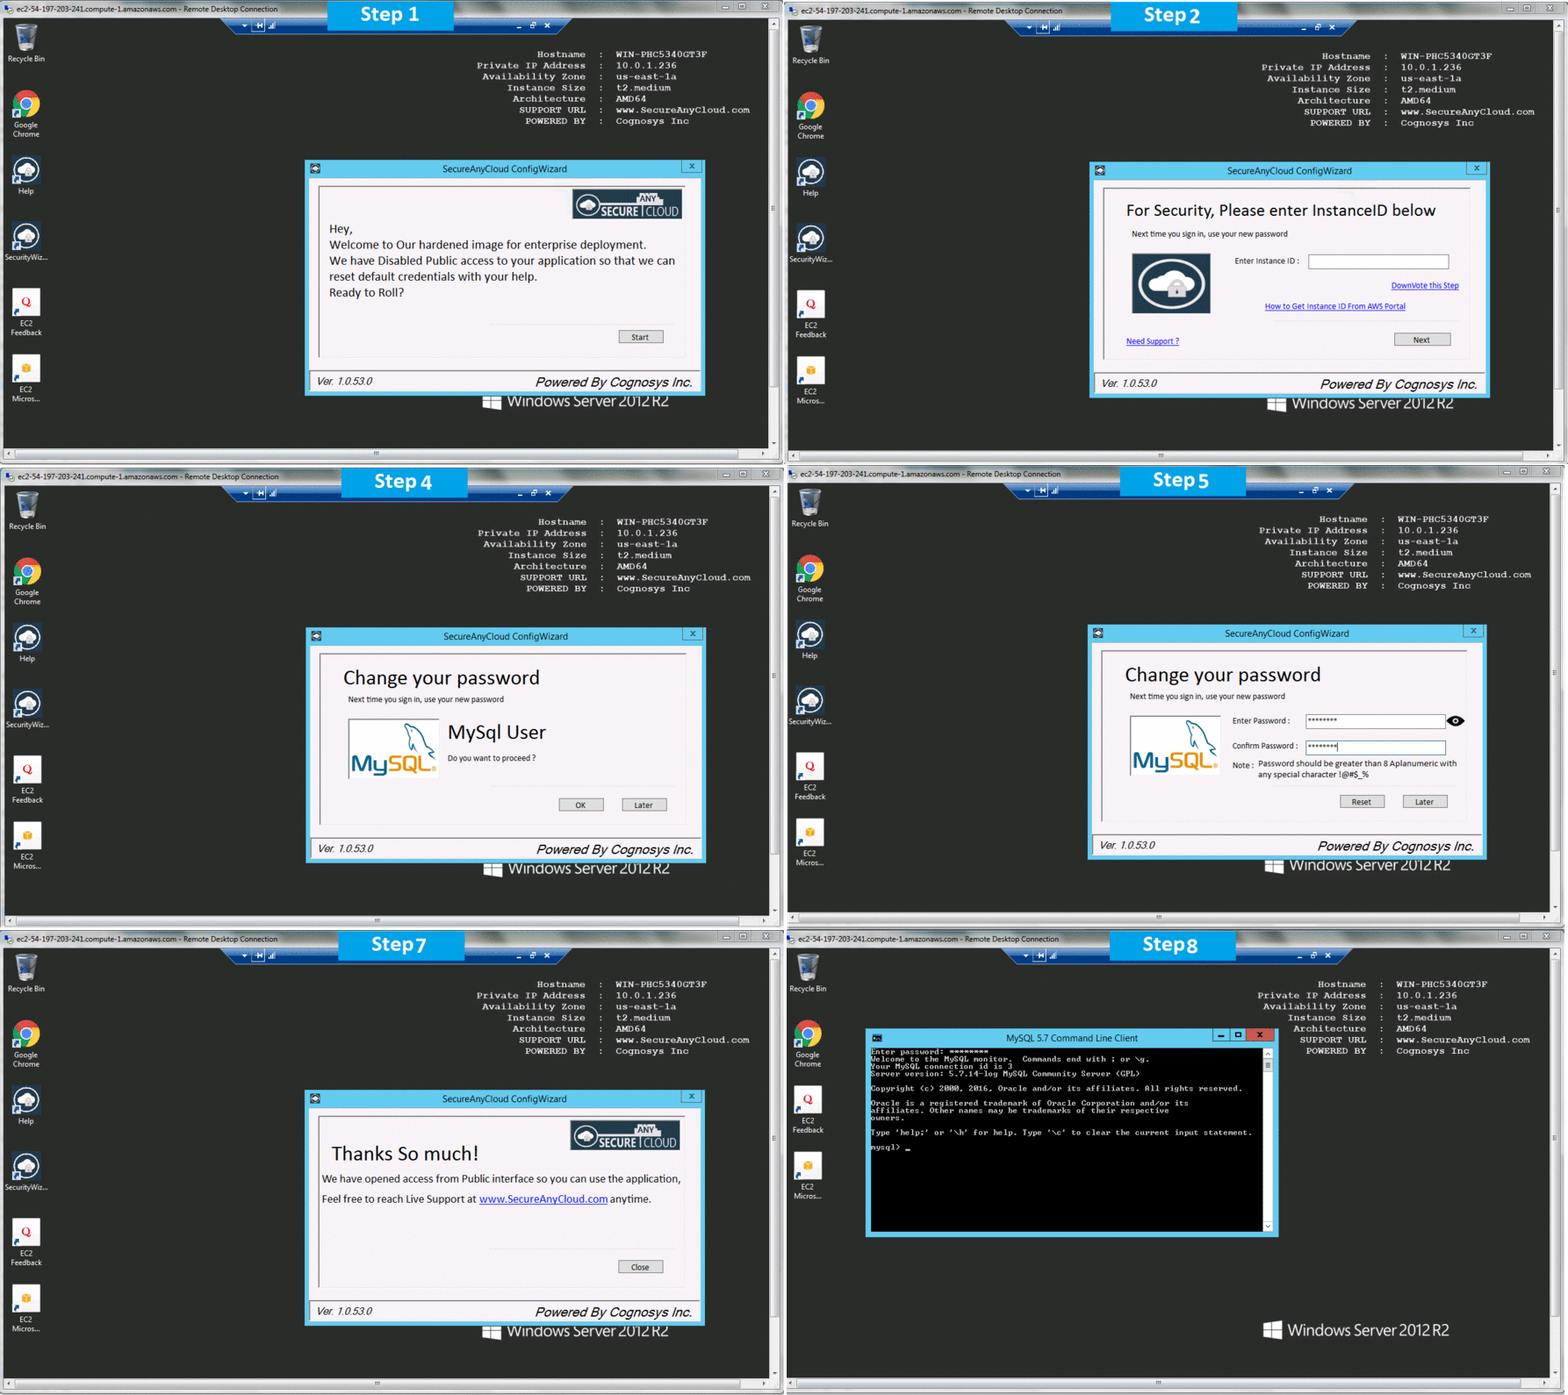
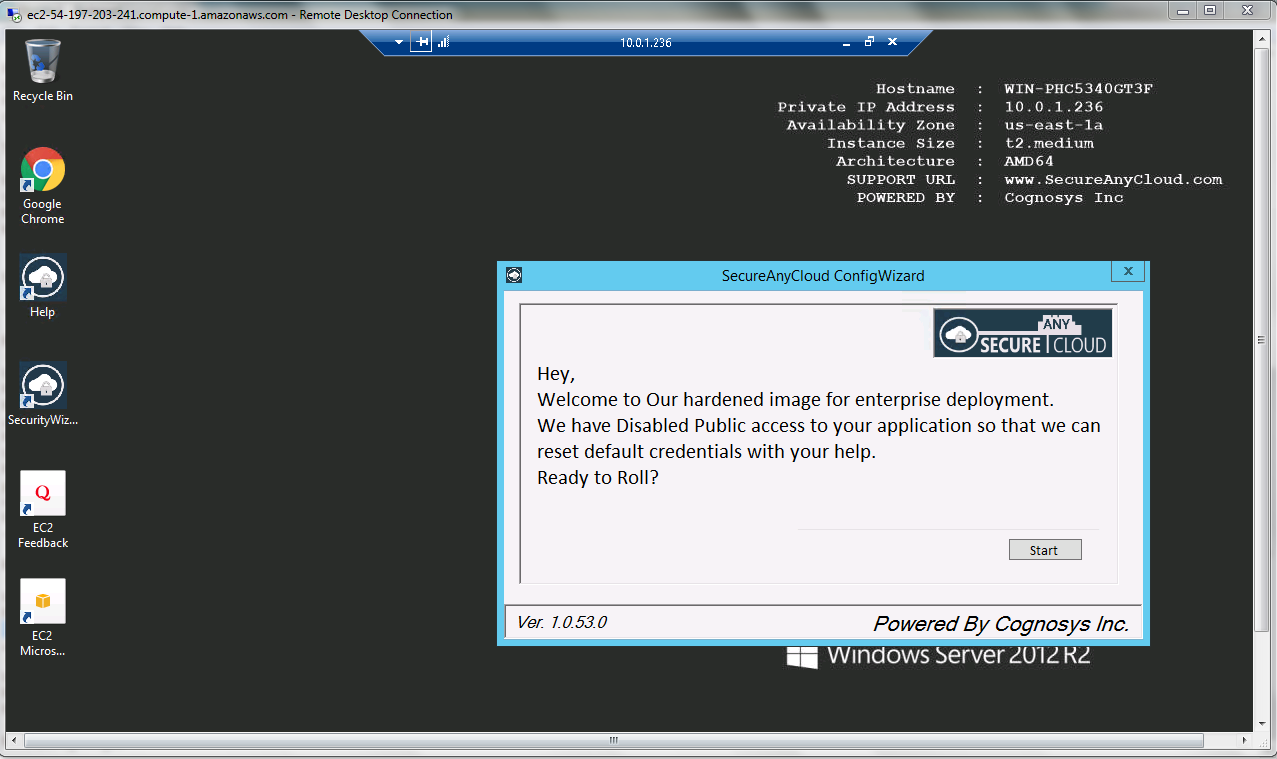
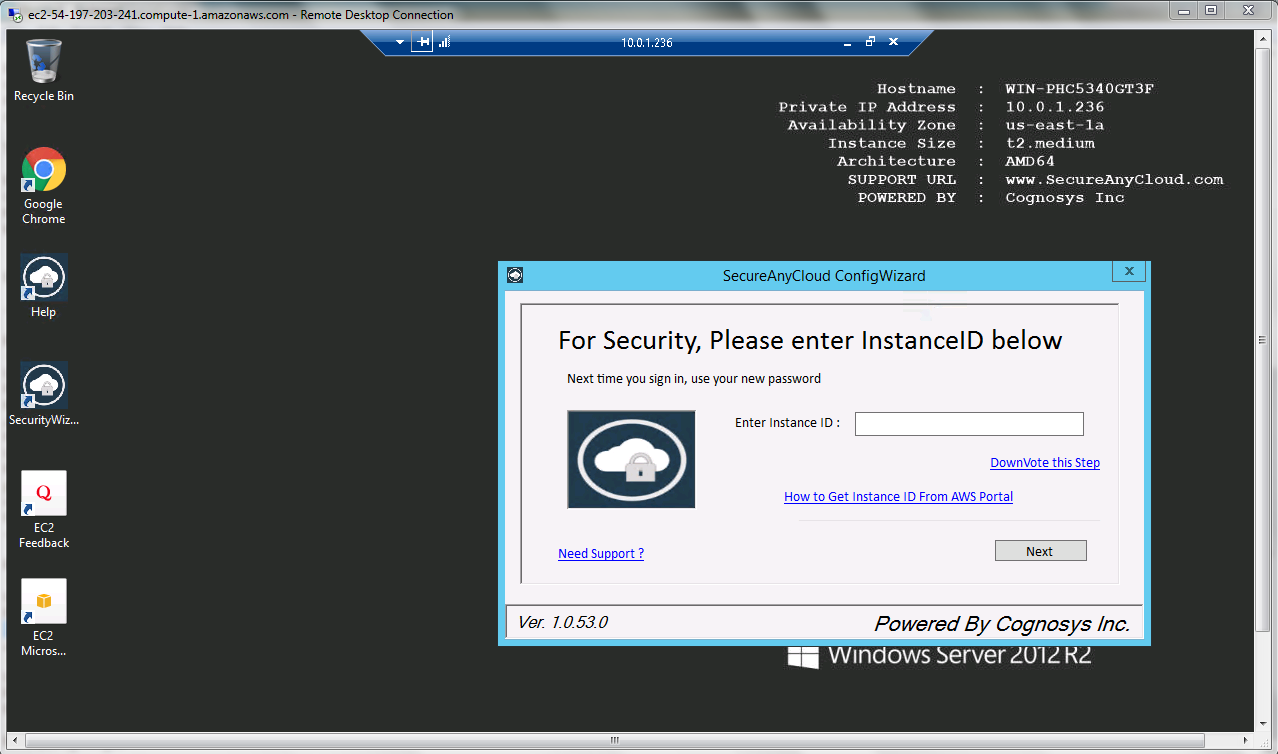
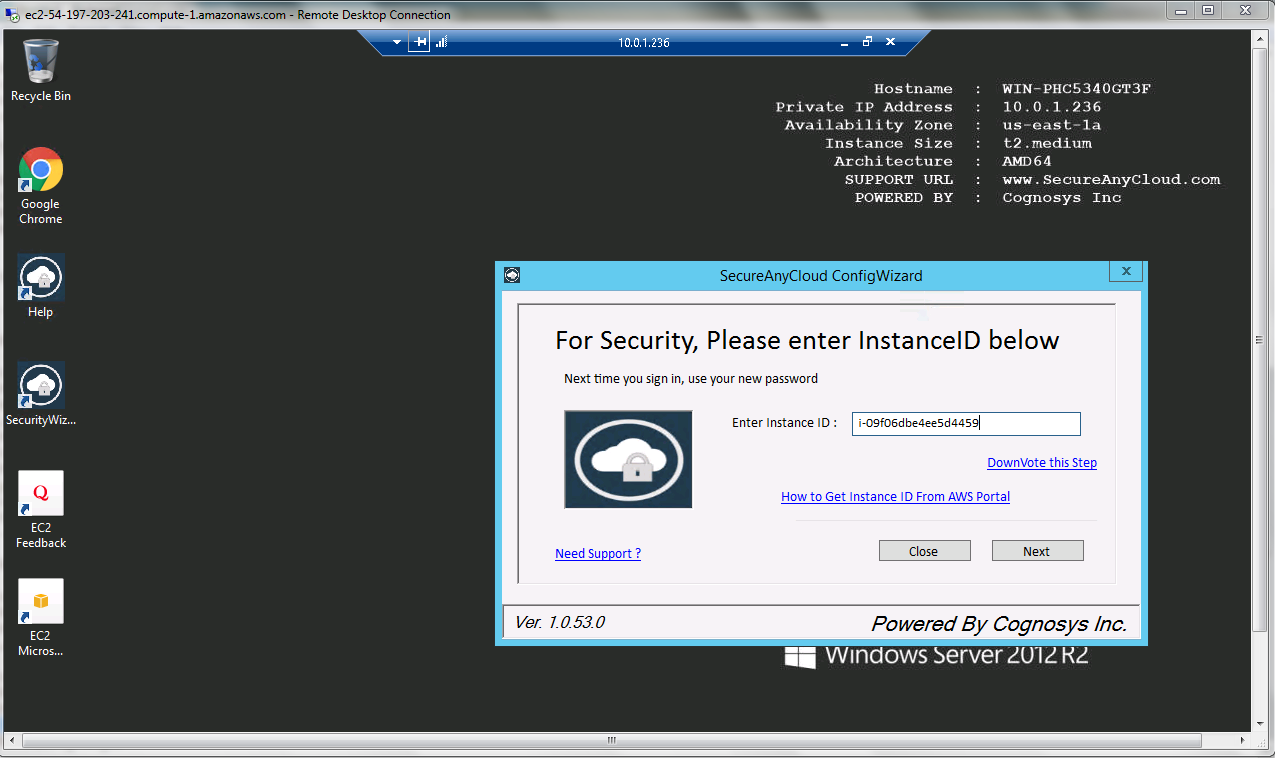
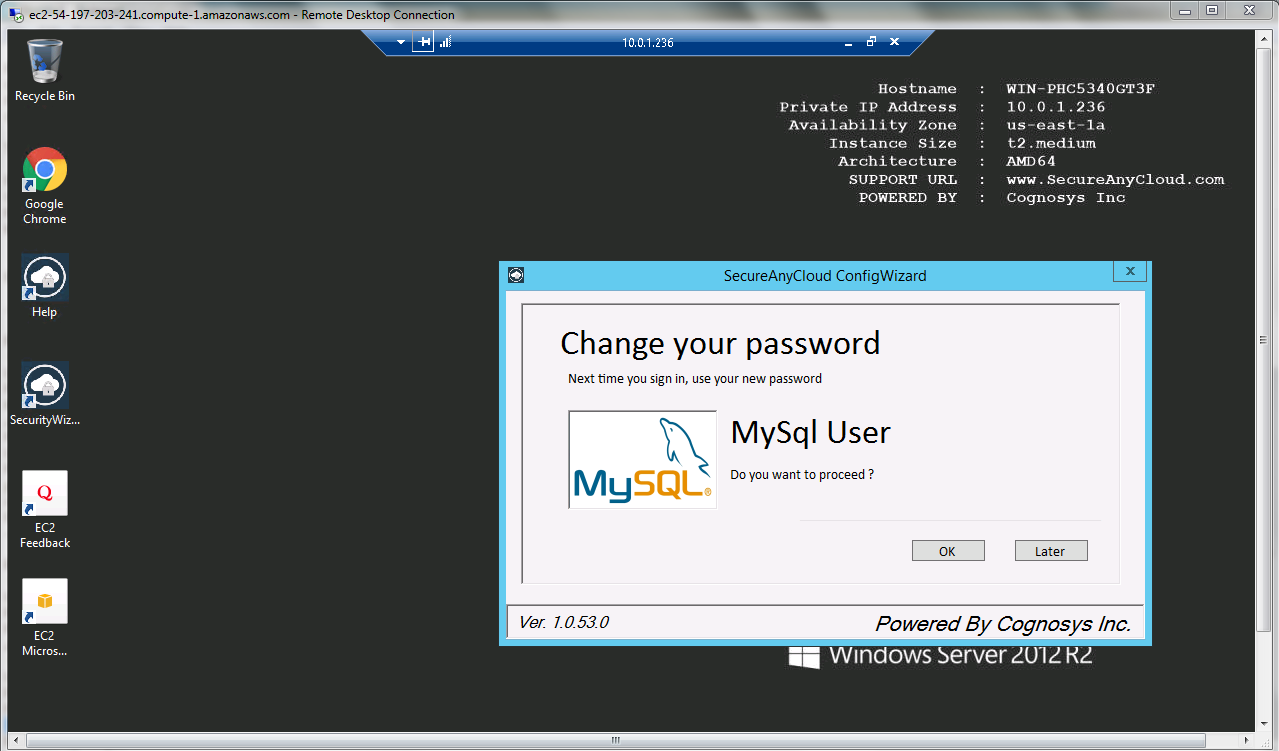
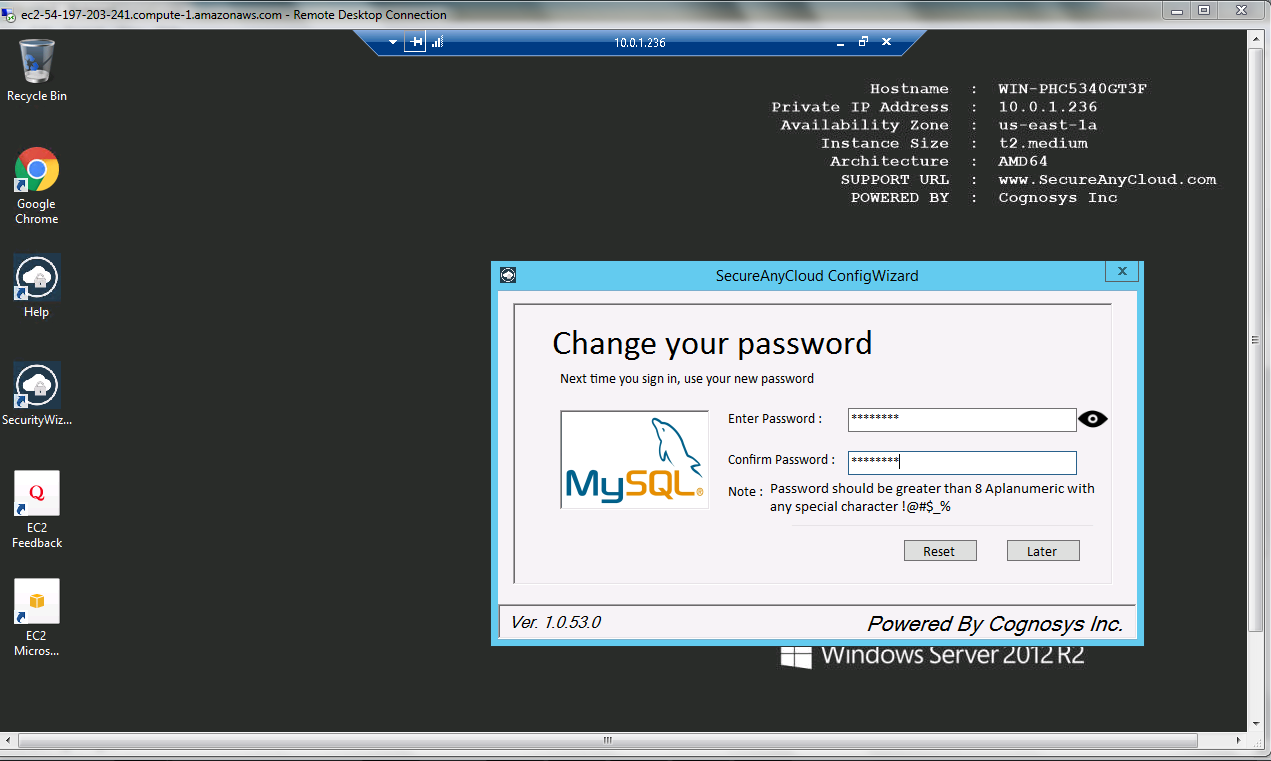
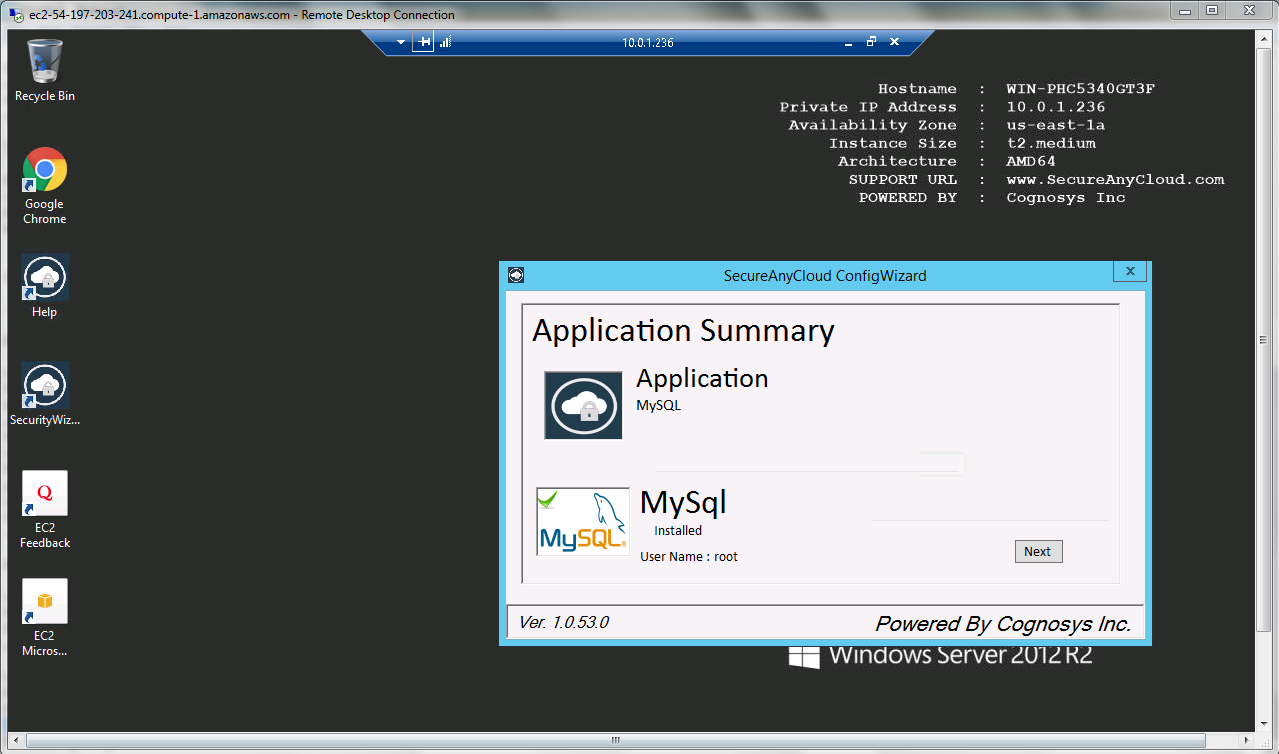
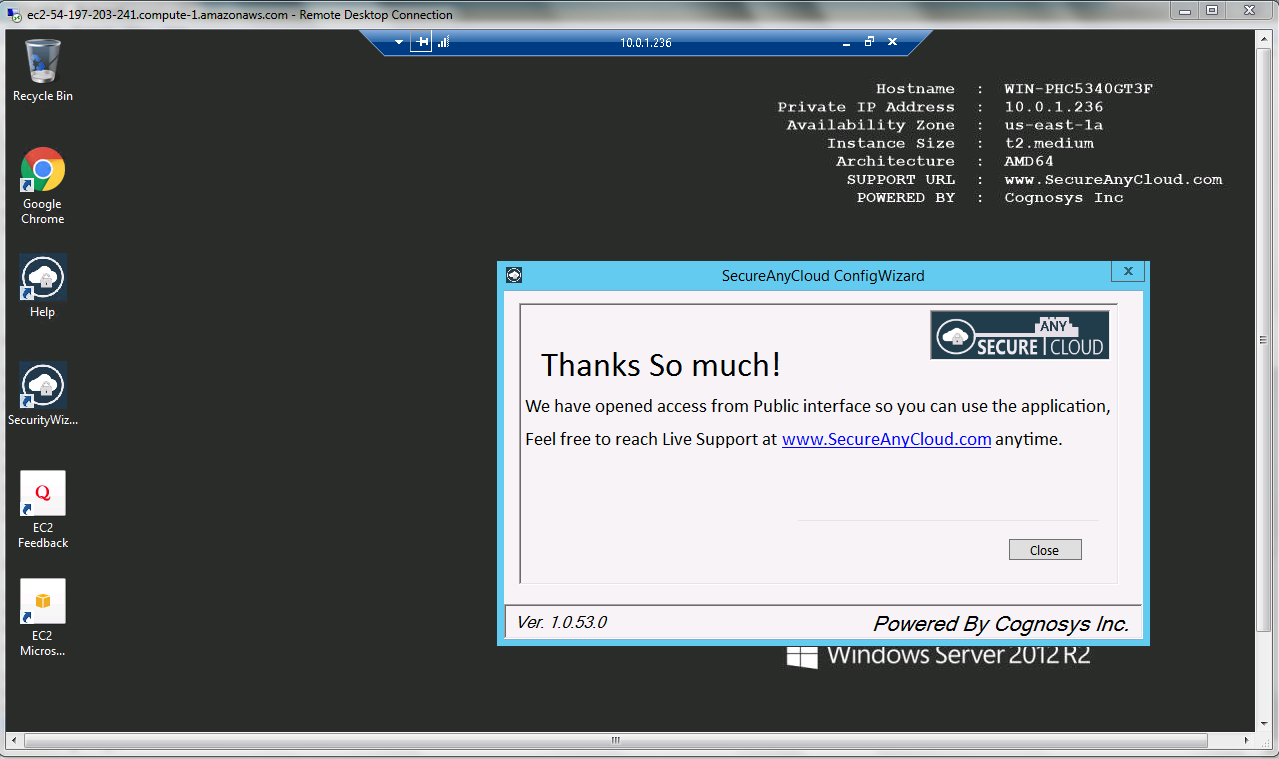
AWS Step by Step Screenshots
Azure
Installation Instructions for Windows
Installation Instructions For Windows
Note: How to find PublicDNS in Azure
Step1 ) RDP Connection: To connect to the deployed instance, Please follow Instructions to Connect to Windows instance on Azure Cloud
Connect to virtual machine using following RDP credentials:
- Hostname: PublicDNS / IP of machine
- Port : 3389
Username: Your chosen username when you created the machine ( For example Azureuser)
Password : Your Chosen Password when you created the machine ( How to reset the password if you do not remember)
Step 2) Click the Windows “Start” button and select “All Programs” and then point to MySQL
Step 3) Other Information:
1.Default installation path: will be in your root folder “C:\Program Files\MySQL”
2.Default ports:
- Windows Machines: RDP Port – 3389
- Http: 80
- Https: 443
Configure custom inbound and outbound rules using this link
Azure Step By Step Screenshots
Videos
Introduction to the MySQL

