1-click AWS Deployment 1-click Azure Deployment 1-click Google Deployment
Overview
MySQL is free and open–source software under the terms of the GNU General Public License, and is also available under a variety of proprietary licenses.MySQL is a fast, easy to use relational database. It is currently the most popular open-source database. It is very commonly used in conjunction with PHP scripts to create powerful and dynamic server-side applications.MySQL is used for many small and big businesses. It is developed, marketed and supported by MySQL AB, a Swedish company. It is written in C and C++.
Reasons of popularity
MySQL is becoming so popular because of these following reasons:
- MySQL is an open-source database so you don’t have to pay a single penny to use it.
- MySQL is a very powerful program so it can handle a large set of functionality of the most expensive and powerful database packages.
- MySQL is customizable because it is an open source database and the open-source GPL license facilitates programmers to modify the SQL software according to their own specific environment.
- MySQL is quicker than other databases so it can work well even with the large data set.
- MySQL supports many operating systems with many languages like PHP, PERL, C, C++, JAVA, etc.
- MySQL uses a standard form of the well-known SQL data language.
- MySQL is very friendly with PHP, the most popular language for web development.
- MySQL supports large databases, up to 50 million rows or more in a table. The default file size limit for a table is 4GB, but you can increase this (if your operating system can handle it) to a theoretical limit of 8 million terabytes (TB).
What is MySQL Workbench?
MySQL WORKBENCH is a Visual database designing and modeling access tool for MySQL server relational database. It facilitates creation of new physical data models and modification of existing MySQL databases with reverse/forward engineering and change management functions. The purpose of MySQL workbench is to provide the interface to work with databases more easily and in a more structured way.
Getting Started MySQL workbench- Modeling and Design tool
- Models are at the core of most valid and high performance databases. MySQLworkbench has tools that allow developers and database administrators visually create physical database design models that can be easily translated into MySQL databases using forward engineering.
- MySQL workbench supports creation of multiple models in the same environment.
- It supports all objects such as tables, views, stored procedures, triggers, etc. that make up a database.
- MySQL workbench has a built in model validating utility that reports any issues that might be found to the data modeler.
- It also allows for different modeling notations and can be extended by using LUA a scripting language.
The figure shown below shows the modeling window for MySQLWorkbench.
MySQL workbench – SQL development tool
Structured Query Language (SQL) allows us to manipulate our relational databases. SQL is at the heart of all relational databases.
- MySQLworkbench, has built in SQL visual editor.
- The Visual SQL editor allows developers to build, edit and run queries against MySQL server databases. It has utilities for viewing data and exporting it.
- Its syntax color highlighters help developers easily write and debug SQL statements.
- Multiple queries can be run and results automatically displayed in different tabs.
- The queries are also saved in the history panel for later retrieval and running.
The figure shown below shows the SQL development window for MySQL Workbench.
MySQL workbench – Administration tool
Server administration plays a critical role in securing the data of the company. The major issues concerning server administration are users’ management, server configuration, server logs and many more. Workbench MySQL has the following features that simplify the process of MySQL server administration;
- User administration – visual utility for managing users that lets database administrators easily add new and remove existing users if need arises, grant and drop privileges and view user profiles.
- Server configuration – allows for advanced configuration of the server and fine tuning for optimal performance.
- Database backup and restorations – visual tool for exporting/importing MySQL dump files. MySQL dump files contain SQL scripts for creating databases, tables, views, stored procedures and insertion of data.
- Server logs – visual tool for viewing MySQL server logs. The logs include error logs, binary logs and InnodDB logs. These logs come in handy when performing diagnosis on the server. The figure shown below shows the modeling window for MySQL Workbench.
The figure shown below shows the Admin panel for Workbench MySQL .
Some key enhancements in MySQL 5.7 include:
- Performance & Scalability: Improved InnoDB scalability and temporary table performance, enabling faster online and bulk load operations, and more.
- JSON Support: With the newly added JSON support in MySQL, you can now combine the flexibility of NoSQL with the strength of a relational database.
- Replication improvements for increased availability and performance. They include multi-source replication, multi-threaded slave enhancements, online GTIDs, and enhanced semi-sync replication.
- Performance Schema delivering much better insights. We’ve added numerous new monitoring capabilities, reduced the footprint and overhead, and significantly improved ease of use with the new SYS Schema.
- Security: We are fulfilling “secure by default” requirements and many new MySQL 5.7 features will help users keep their database secure.
- Optimizer: We have rewritten large parts of the parser, optimizer, and cost model. This has improved maintainability, extendability, and performance.
- GIS: Completely new in MySQL 5.7 and including InnoDB spatial indexes, use of Boost.Geometry, along with increased completeness and standard compliance.
MySQL limitations in big data
We will discuss the major limitations of MySQL in the area of big data below:
1. Delivery of hot data
Considering the need for the larger application, we can see that the cache data in the RAM storage may grow huge over time, given that there are hundreds of thousands of requests generated every second. One disadvantage of MySQL here is that it is not a memory-centered search engine. IT is not designed with a higher concurrency in mind so that users may experience bottlenecks in terms of performance. MySQL may saddle in such situations with high overhead and also may not be able to deliver good speed.Solutions for this problem is to use any applications like Redis or Memcached as external solutions for hot data needs to eliminate any overhead in terms of SQL parsing. Caching is somewhat difficult, and you are at risk of reading the data which is not current. You may also use the scope of internal scalability in order to enhance MySQL-like thread pools as like an enterprise feature of MySQL. Such add-on features will help run multiple queries concurrently.
2. Capacity to deal with volatile data
Simultaneously handling many updates in a single row of database like a flash sale of a new model cell phone etc., it is important to maintain the exact values at each second. MySQL DB is designed around the transactional semantics to support the tasks with disk-based log durability. So, MySQL is suited for the tasks with highly volatile data but has some limitations in it.
An ideal solution for this issue is that, up to an extent, to do proper data design in MySQL. Splitting the counter into multiple rows will help to attain optimal configuration during MySQL installation, and it will ensure better performance than the primary configuration of stock MySQL. Another big problem with MySQL is parallel replication, which is however addressed in the MySQL 5.7 version. If you still face it, try solutions like the Percona XtraDB Cluster. Many users may tend to move their data to Redis or Memcached and then synchronize periodically to RDBMS.
3. Handling huge data volume
MySQL is a single-node database system, which is not compliant with the modern cloud data center concepts. Even the biggest MySQL installations today cannot scale up to that level with MySQL alone and may have to rely on further applications to ensure sharding, data split across multiple nodes, etc. However, most of the sharding solutions are manual, and it makes coding of application very complex. Any advantage in terms of performance gain will be lost when the queries access the data across multiple shards.The solution for this problem as suggested by RemoteDBA.com is the tools like Vitess, which is a framework released by YouTube for MySQL sharding. ProxySQL is also used to implement better sharding. Redis and Memcached are other front-end solutions for this issue, and MongoDB and Cassandra are the alternatives to consider for MySQL.
4. Analytical capabilities
MySQL is not designed to handle complicated queries in massive data volumes which require to crunch through large scale data loads. MySQL optimizer has limitations in executing one single query at a time with the use of a single threat. The MySQL queries cannot scale across multiple machine cores in a system and also cannot execute the distributed queries at multiple nodes.
As a solution, even though MySQL is offering no comprehensive solution for any robust data processing solution at large-scale DB management environment, you can try many third-party solutions like Hadoop or Apache Spark, etc. Click House and Vertica etc. have also emerged lately as analytical solutions to be used over MySQL. Apache Ignite can also integrate with Spark and Hadoop to use the in-memory technology which completes well to these technologies and ensure better performance at scale.
5. Enabling full-text search
Even though MySQL can handle the basic text searches, with its inability in parallel processing, searches a scale will not be handled properly when the data volume multiplies. One solution to try out for small-scale searches is InnoDB, which was made available with the version MySQL 5.6. When a particular go beyond a few GB, you have to use better search solutions like Apache Solr, Elasticsearch, Sphinx Search, or Crate.io to manage it better.
The convergence of database trends
Even though MySQL is deemed to be an excellent choice for database, the top trends which converge now to change the data processing landscape now are:
- The in-memory computing and cache concept has been there around for long, but it has lately come to the forefront, and the need for real-time data processing has now become a standard procedure in all sizes of enterprises. In-memory computing remains as the primary pointer to speed, and the advancement in memory technology will lead to a better world for in-memory storage, making disks just historical backups.
- The memory prices are largely dropping over time. You may get a terabyte RSM at the cost of nearly $20,000, which makes storage more affordable to all size of enterprises to meet their real-time data management and analytical needs at a scale.
This further change the large-scale data processing landscape. Above trends come together to force a big change in the database world and database management systems approach.
The reassuring thing is that these as these trends converge; the existing in-memory platforms will deliver more sophisticated distributed systems which are more efficient and architected to provide greater scalability and higher performance.
MySQL 5.7: Installation on Windows
1. Go on to mySQL website to download.
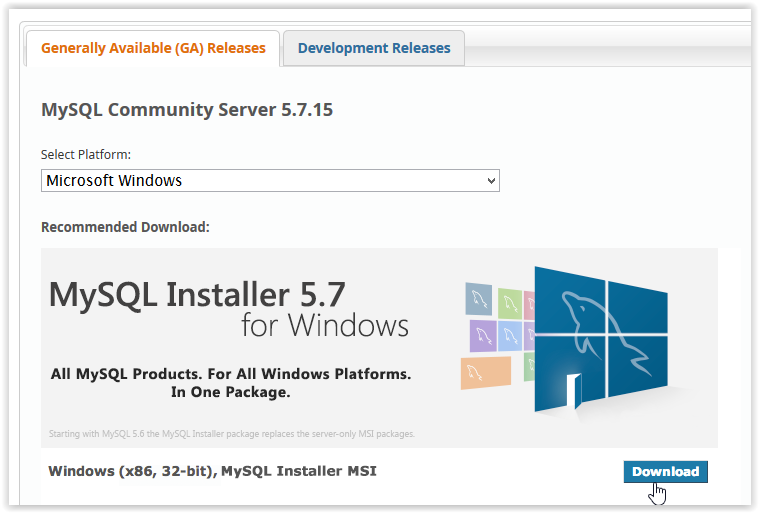
2. Click Download button under MySQL Installer 5.7 for Windows.
3. After clicking Download, choose which Installer to use by clicking Download.
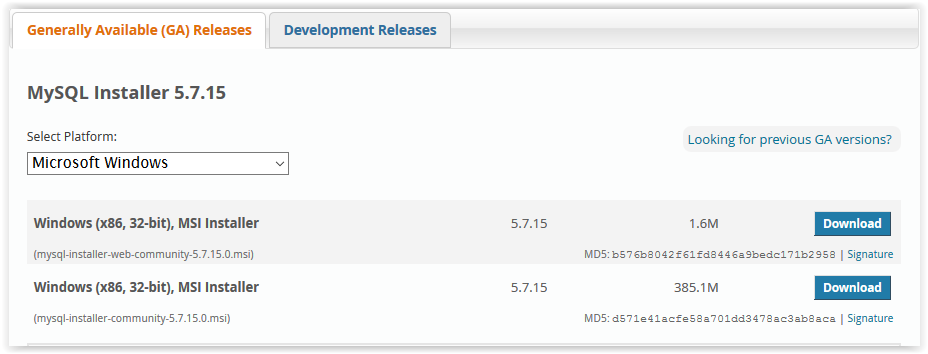
4. In order to download, you must click Login,Sign Up, or click No thanks, just start my download.

5. If prompted, select Yes to allow changes to computer.
6. After downloading, check the I accept box under the License Agreement and click Next.

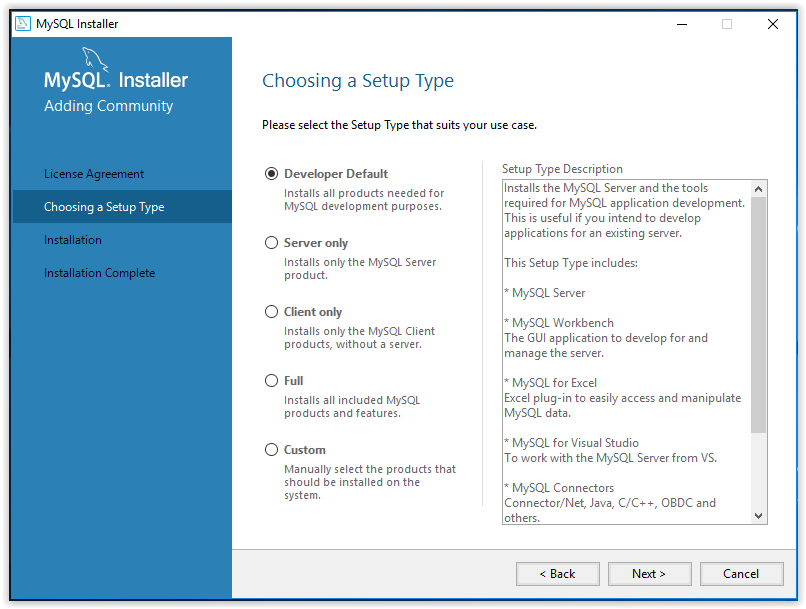
7. Select the Setup Type then click Next.
8. To begin installation, press Execute.
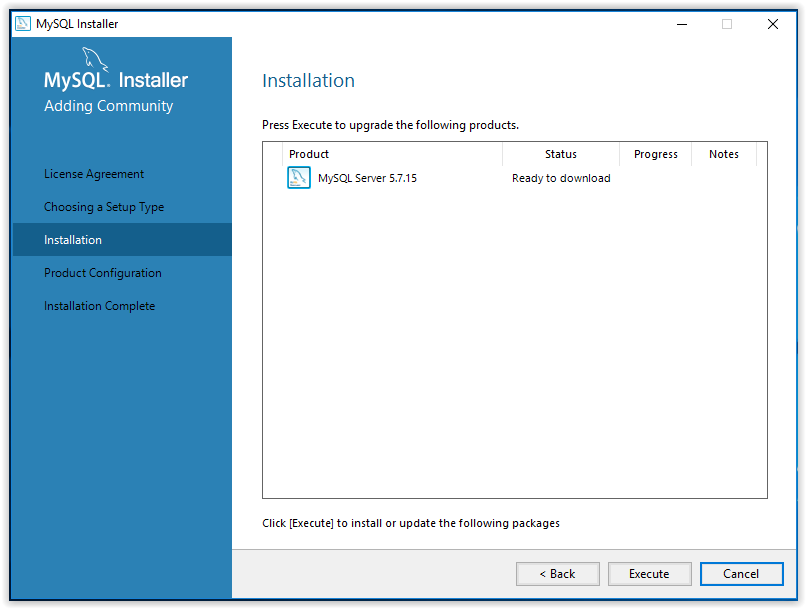
9. When installation is complete, click Next.
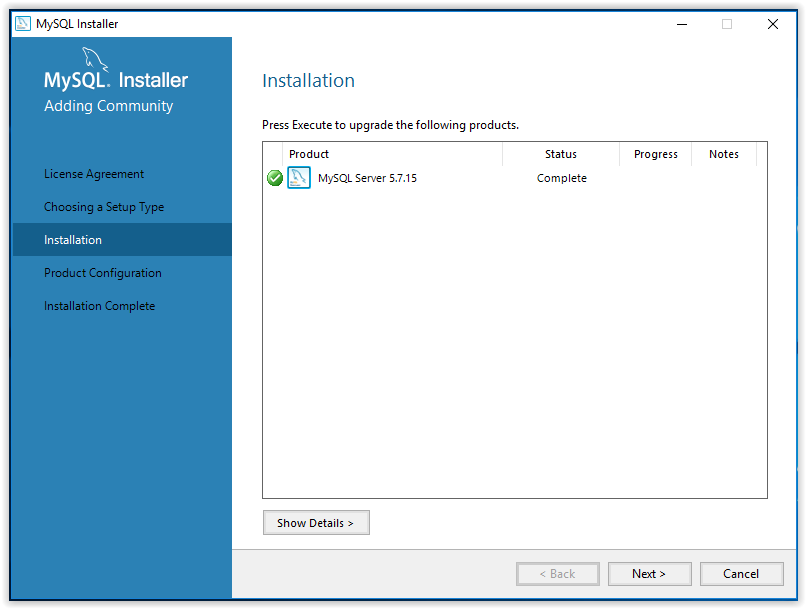
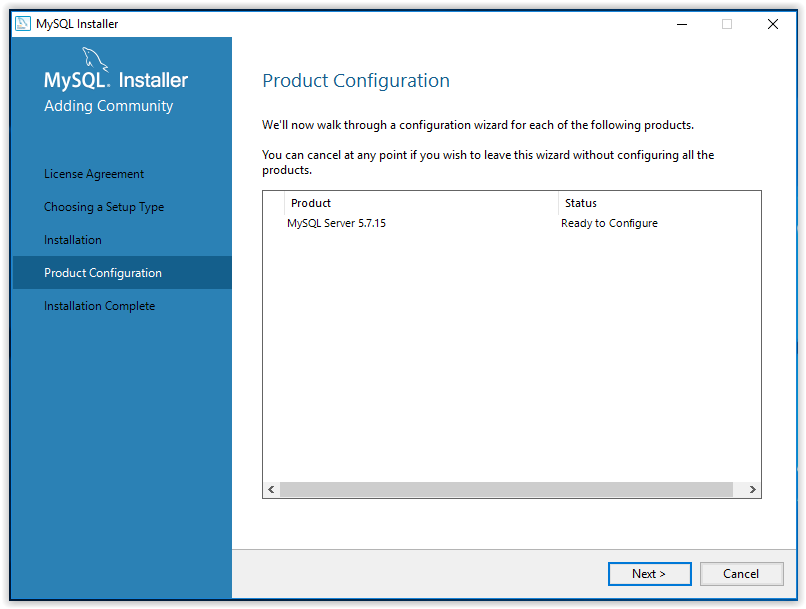
10. A walk through product configuration will then appear. Click Next to begin.
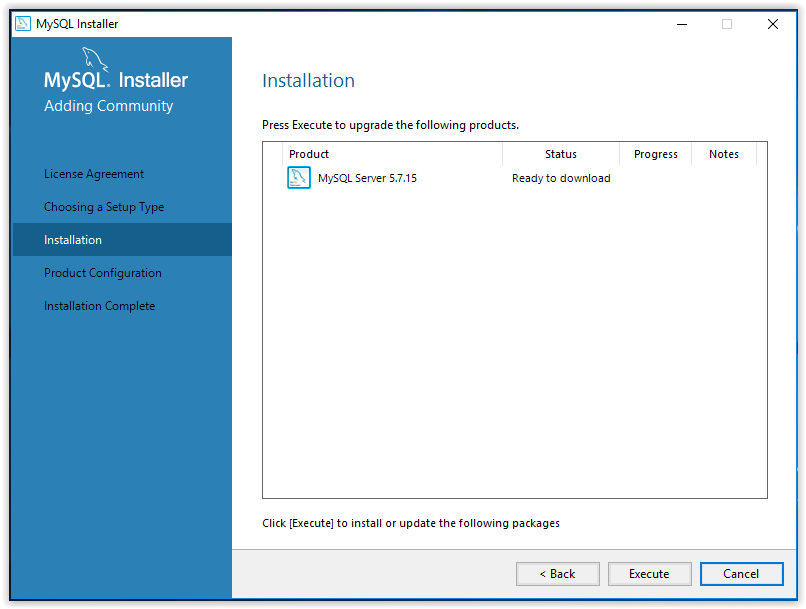
11. First, select the Server Configuration Type then click Next.
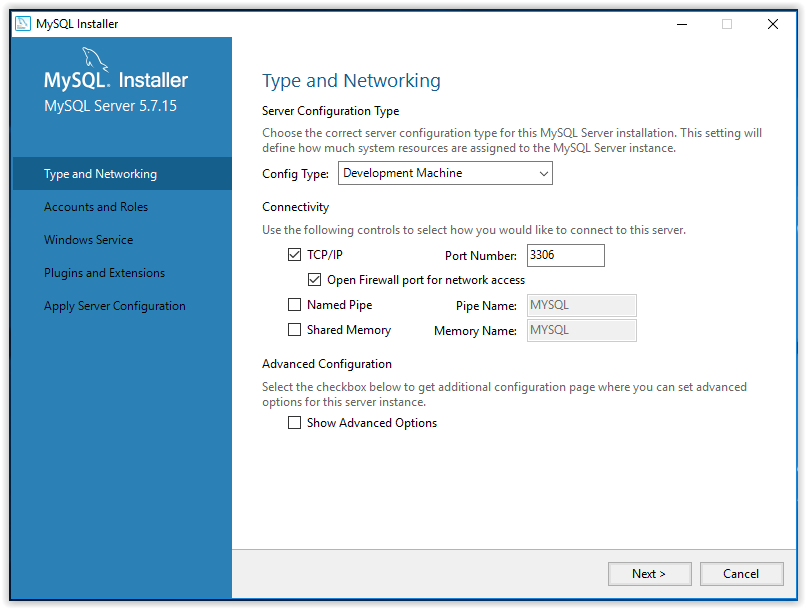
12. Set an account password, then click Next.
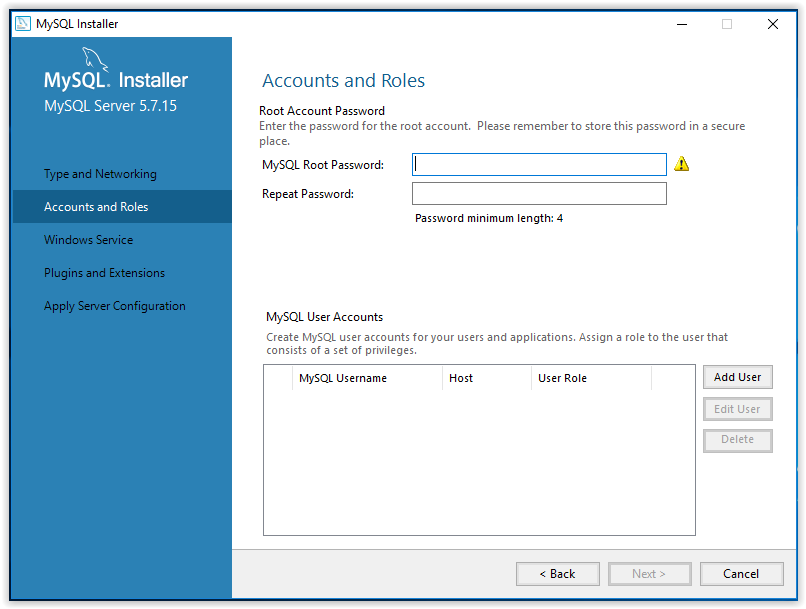
13. Choose a name for the installed program, choose a user account under which the program will be used, then click Next.
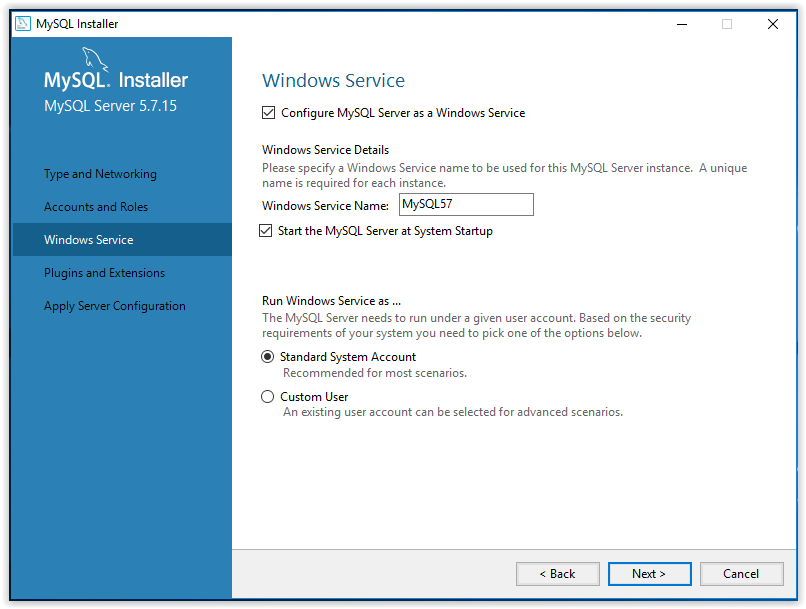
14. Use the Plugins and Extensions window to choose how the program will connect to the server, then click Next.
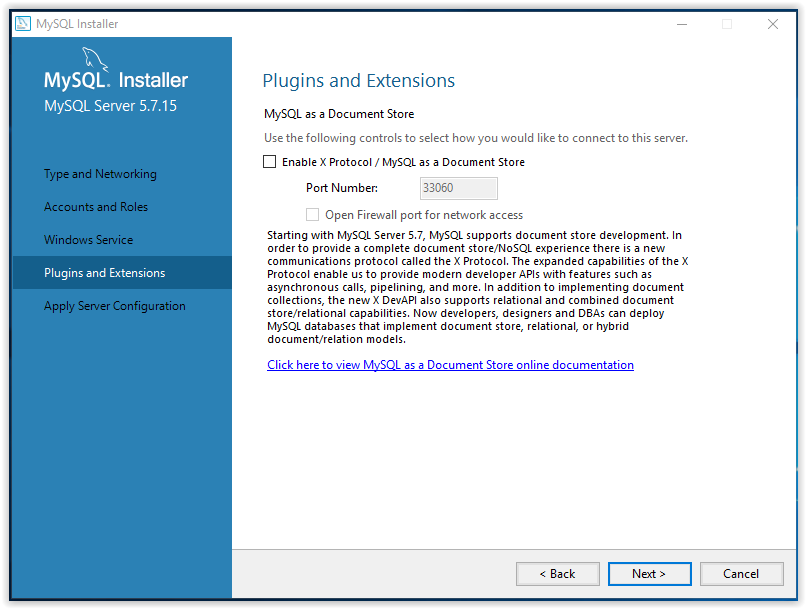
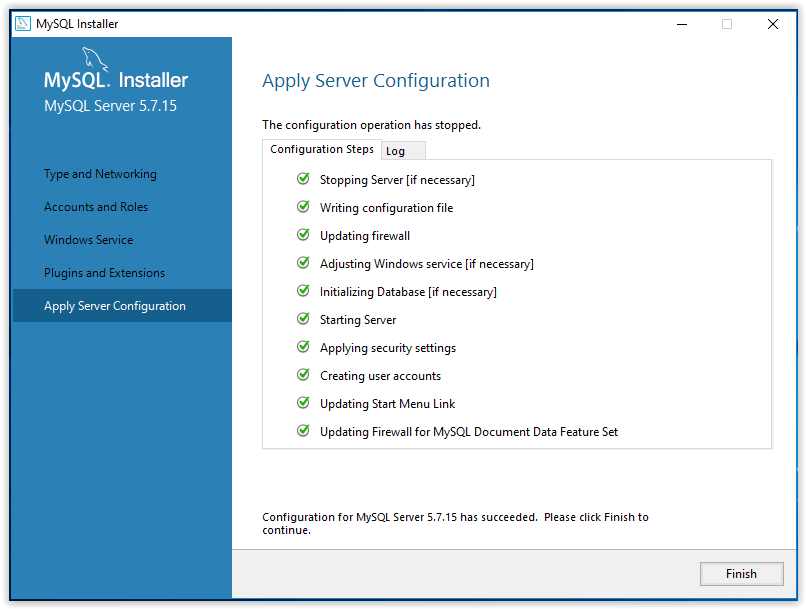
15. To apply the chosen settings, click Execute in the Apply Server Configuration window.
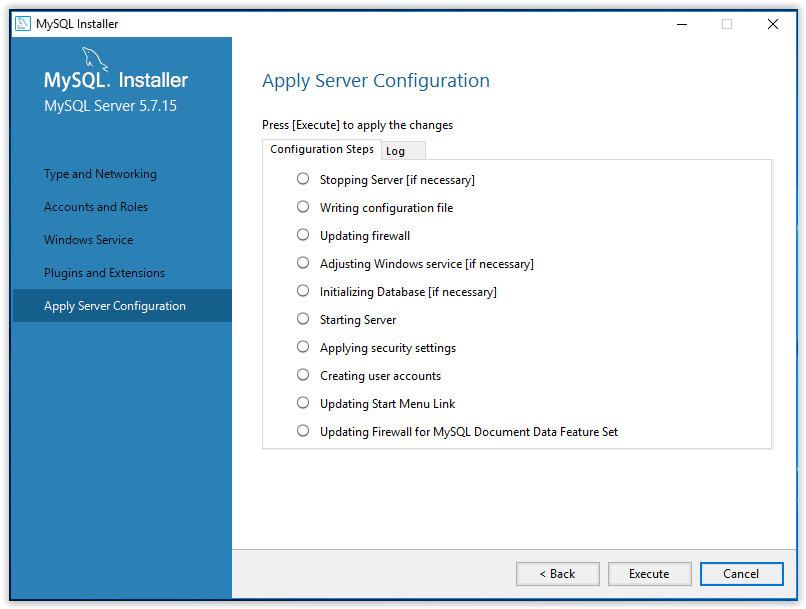
16. When configuration is complete, click Finish.
17. The program will then go back to the Product Configuration screen. Click Next.
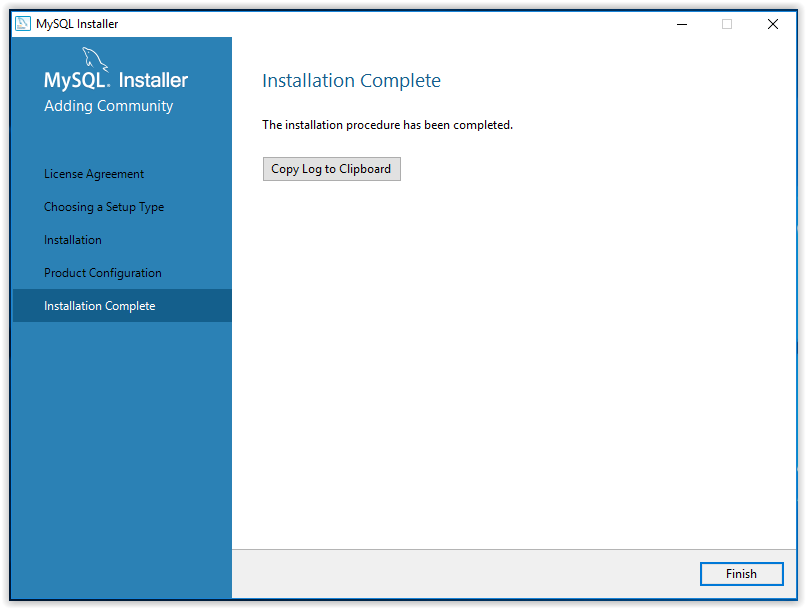
18. Installation is now complete. Click Copy Log to Clipboard to see ReadMe file, or click Finish.
Java connect to MySQL database with JDBC
1. Download JDBC driver for MySQL
First, in order to have Java program working with MySQL, we need a JDBC driver for MySQL. Browse this URL:http://dev.mysql.com/downloads/connector/j/to download the latest version of the JDBC driver for MySQL called Connector/J. MySQL Connector/J comes into 2 major versions: 5.1 and 8.0. The latest version 8.0 supports JDBC 4.2 and JDK 8 or higher.Click the Download button next to Platform Independent (Architecture Independent), ZIP Archive to download a zip archive. Extract the ZIP file to a desired location on your computer.
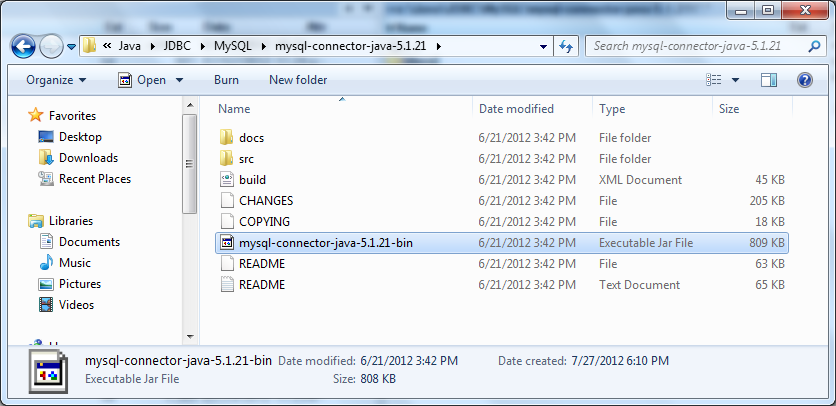

The distribution includes a binary JAR file, source code, documentation and license files. But only one file we need is the JAR file mysql-connector-java-VERSION.jar. Copy this file into your project and make it available in your program’s classpath. You can use newer version of JDBC driver for MySQL.If your Java project based on Maven, you just need to declare the following dependency in the pom.xml file:
|
1
2
3
4
5
|
<dependency> <groupId>mysql</groupId> <artifactId>mysql-connector-java</artifactId> <version>8.0.19</version></dependency> |
2. No need to load MySQL driver class explicitly
The Connector/J version 8.0 library comes with a JDBC driver class: com.mysql.cj.jdbc.Driver. Before Java 6, we have to load the driver explicitly by this statement:
Class.forName(“com.mysql.cj.jdbc.Driver”);
However that statement is no longer needed, thanks to new update in JDBC 4.0 comes from Java 6. As long as you put the MySQL JDBC driver JAR file file into your program’s classpath, the driver manager can find and load the driver.
3. Understand the getConnection() method of DriverManager class
It’s quite easy to make a connection to a database server in general, as well as to a MySQL server in particular. Just using the method getConnection()of the class DriverManager which is available in the package java.sql.There are three different signatures of the method getConnection()which we can use:
-
- static Connection getConnection(String url)
- static Connection getConnection(String url, Properties info)
- static Connection getConnection(String url, String user, String password)
All three versions have a parameter called url which is the database URL string in the following format: jdbc:mysql://[host][:port]/[database] [?propertyName1][=propertyValue1][&propertyName2][=propertyValue2]…where:
-
- host: host name or IP address of the MySQL server.
- port: port number of the server, default is 3306.
- database: name of the database on the server.
- propertyName1=propertyValue1: a key=value pair for an additional property which will be sent to the server. For example, to send a username and password, write: ?user=root&password=secret
If a connection was made successfully with the database, the getConnection() method returns an instance of Connection class which will be used to make queries and perform other database operations.
4. Java code example connect to MySQL database
The following example program makes three connections to three MySQL database in three different ways:
|
1
2
3
4
5
6
7
8
9
10
11
12
13
14
15
16
17
18
19
20
21
22
23
24
25
26
27
28
29
30
31
32
33
34
35
36
37
38
39
40
41
42
43
44
45
46
47
|
import java.sql.Connection;import java.sql.DriverManager;import java.sql.SQLException;import java.util.Properties;public class MySQLConnectExample { public static void main(String[] args) { // creates three different Connection objects Connection conn1 = null; Connection conn2 = null; Connection conn3 = null; try { // connect way #1 String url1 = "jdbc:mysql://localhost:3306/test1"; String user = "root"; String password = "secret"; conn1 = DriverManager.getConnection(url1, user, password); if (conn1 != null) { System.out.println("Connected to the database test1"); } // connect way #2 String url2 = "jdbc:mysql://localhost:3306/test2?user=root&password=secret"; conn2 = DriverManager.getConnection(url2); if (conn2 != null) { System.out.println("Connected to the database test2"); } // connect way #3 String url3 = "jdbc:mysql://localhost:3306/test3"; Properties info = new Properties(); info.put("user", "root"); info.put("password", "secret"); conn3 = DriverManager.getConnection(url3, info); if (conn3 != null) { System.out.println("Connected to the database test3"); } } catch (SQLException ex) { System.out.println("An error occurred. Maybe user/password is invalid"); ex.printStackTrace(); } }} |
NOTES: You should close the database connection in the finally clause like this:
|
1
2
3
4
5
6
7
8
9
|
finally { if (conn != null) { try { conn.close(); } catch (SQLException ex) { ex.printStackTrace(); } }} |
And since Java 1.7, you can use the try-with-resource syntax that closes the connection automatically, for example:
|
1
2
3
4
5
6
7
8
9
|
try (Connection conn = DriverManager.getConnection(url, user, password)) { if (conn != null) { System.out.println("Connected to the database"); }} catch (SQLException ex) { System.out.println("An error occurred. Maybe user/password is invalid"); ex.printStackTrace();} |
Type the following command to compile the example program:
javac MySQLConnectExample.java
Suppose the Connect/J library is placed in the same directory as the MySQLConnectExample.java file. Type the following command to run:
java -cp mysql-connector-java-5.1.21-bin.jar;. MySQLConnectExample
And here is the result when running the example program:
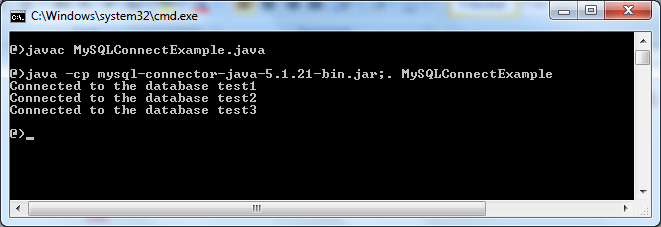
That means the program has successfully connected to the MySQL database server.
—MySQL is the most popular Open Source Relational SQL database management system. MySQL is one of the best RDBMS being used for developing web-based software applications.
MySQL is a fast, easy-to-use RDBMS being used for many small and big businesses. MySQL is developed, marketed and supported by MySQL AB, which is a Swedish company. MySQL is becoming so popular because of many good reasons:
- MySQL is released under an open-source license. So you have nothing to pay to use it.
- MySQL is a very powerful program in its own right. It handles a large subset of the functionality of the most expensive and powerful database packages.
- MySQL uses a standard form of the well-known SQL data language.
- MySQL works on many operating systems and with many languages including PHP, PERL, C, C++, JAVA etc.
- MySQL works very quickly and works well even with large data sets.
- MySQL is very friendly to PHP, the most appreciated language for web development.
- MySQL supports large databases, up to 50 million rows or more in a table. The default file size limit for a table is 4GB, but you can increase this (if your operating system can handle it) to a theoretical limit of 8 million terabytes (TB).
- MySQL is customizable. The open-source GPL license allows programmers to modify the MySQL software to fit their own specific environments.
Cognosys provides hardened images of MySQL 5.7 on all public cloud ( AWS marketplace, Azure and Google Cloud Platform).
Deploy MySQL 5.7 securely on cloud i.e. AWS marketplace and Azure and Google Cloud Platform (GCP)
Secured MySQL 5.7 on Ubuntu 14.04 LTS
Features
Here’s a list of some MySQL 5.7 key features:
1.Replication Enhancements:
- One of the top features in MySQL 5.7 is multi-source replication. With multi-source replication you can point multiple master server’s to slave so limitation of slave having only one master is lift off.
- SHOW SLAVE STATUS is non-blocking since MySQL 5.7. SHOW SLAVE STATUS returns immediately without waiting for STOP SLAVE to finish which can be blocked by long running SQL query from replication SQL_THREAD.
- Now you can have all the information about SHOW SLAVE STATUS from performance schema database tables.
- With the new CHANGE REPLICATION FILTER command now you can modify replication filters rules without bouncing MySQL servers.
- Since MySQL 5.7 you can perform CHANGE MASTER TO without stopping the slave via the STOP SLAVE command.
- There is now a different method for parallel replication. With new implementation the slave can apply transaction in parallel with single database/schema too. Check slave_parallel_type for details.
- Global Transaction Identifiers (GTID) is a feature that automatically tracks the replication position in replication stream, and since MySQL 5.7 gtid_mode is dynamic variables, which means you can enable/disable GTID in replication topology without synchronizing and restarting entire set of MySQL servers. As a side note, online GTID deployment feature is added in Percona Server 5.6. With this feature you can deploy GTID on existing replication setups without marking master read_only and stopping all slaves in replication chain.
2.InnoDB Enhancements:
- Now you can resize InnoDB buffer pool online. Since MySQL 5.7 innodb_buffer_pool_size is a dynamic variable which provides the ability to resize buffer pool without restarting MySQL server.
- From MySQL 5.7, online ALTER TABLE also supports RENAME INDEX clause to rename an index. This change will take in place without table copy operation.
- InnoDB supports Transportable Tablespace feature for partitioned InnoDB tables.
- Innochecksum utility is enhanced with new options. .
- As of MySQL 5.7, InnoDB supports “spatial indexes” and it also supports online DDL operation to add spatial indexes i.e. ALTER TABLE .. ALGORITHM=INPLACE.
- Improved InnoDB buffer pool dump/reload operations. A new system variable, innodb_buffer_pool_dump_pct allows you to specify percentage of most recently used pages in each buffer pool to read out and dump.
3.Triggers:
- As per SQL standard, MySQL 5.7 now supports multiple triggers per table for trigger event (DML) and timing (BEFORE,AFTER) i.e. multiple triggers are permitted now for each event e.g. multiple triggers on INSERT action.
4.Performance Improvements:
- Bulk data load is improved on InnoDB in MySQL 5.7. InnoDB performs a bulk load when creating or rebuilding indexes. This method known as sorted index build and enhance create index operation and it also impacts FULLTEXT indexes.
- Currently there is a single page cleaner thread responsible for flushing dirty pages from the buffer pool(s). In MySQL 5.7 InnoDB parallel flushing was implemented to improve flushing where separate background thread for each buffer pool instance for flush list, LRU list.
5.Optimizer Improvements:
- EXPLAIN FOR CONNECTION will let you run explain statements for already running queries. This may yield important information towards query optimization.
- In MySQL 5.7 the optimizer avoids the creatation temporary table for result of UNION ALL queries and this will help to reduce disk I/O and disk space when UNION yields large result set.
- JSON format for EXPLAIN first introduced in MySQL 5.6 which produces extended information. JSON format for EXPLAIN is enhanced in version 5.7 by printing total query cost which makes it easier to see the difference between the good and bad execution plans.
- MySQL 5.7 now supports generated columns also known as virtual columns as new feature.
MySQL Test Suite Enhancements:
- The MySQL test suite now uses InnoDB as its default storage engine. Along with that many new tests added and existing tests enhanced including test suite for replication with GTID.
Security Enhancements:
- Since MySQL 5.7 there is a password expiration policy in place. Any user that connects to a MySQL server goes through a password expiration life cycle and must change the password.
- Database administrators can nowo lock/unlock user accounts.
- As of MySQL 5.7, installation only creates only one ‘root@localhost’ user account with random password and marks the password expiration cycle. So, installation no longer creates anonymous-user accounts and along with that there is no test database. For root user account password, MySQL generates it during data directory initialization and marks it as expired and will write a message to stdout displaying the password.
–Major Features of MYSQL on cloud
- Partitioning to improve performance and management of very large database environments
- Row-based/Hybrid Replication for improved replication security
- Event Scheduler to create and schedule jobs that perform various database tasks
- XPath Support
- Dynamic General/Slow Query Log
- Performance/Load Testing Utility (mysqlslap)
- Improved! Full Text Search (faster, new dev templates)
- Improved! Archive engine (better compression, more features)
- Improved! User session and problem SQL identification
- Improved! MySQL embedded library (libmysqld)
- Additional INFORMATION_SCHEMA objects
- Faster data import operations (parallel file load)
- ACID Transactions to build reliable and secure business critical applications
- Stored Procedures to improve developer productivity
- Triggers to enforce complex business rules at the database level
- Views to ensure sensitive information is not compromised
- Information Schema to provide easy access to metadata
- Pluggable Storage Engine Architecture for maximum flexibility
- Archive Storage Engine for historical and audit data
AWS
- Installation Instructions For Ubuntu 14.04
- Installation Instructions For CentOS
- Installation Instructions For Ubuntu 16.04
Installation Instructions For Ubuntu 14.04 LTS
Note: How to find PublicDNS in AWS
Step 1) SSH Connection: To connect to the deployed instance, Please follow Instructions to Connect to Ubuntu instance on AWS Cloud
1) Download Putty.
2) Connect to the virtual machine using SSH key Refer this link:
- Hostname: PublicDNS / IP of machine
- Port : 22
Step 2) Database Login Details:
Please use MySQL root password Passw@rd123 for the MySQL configuration.
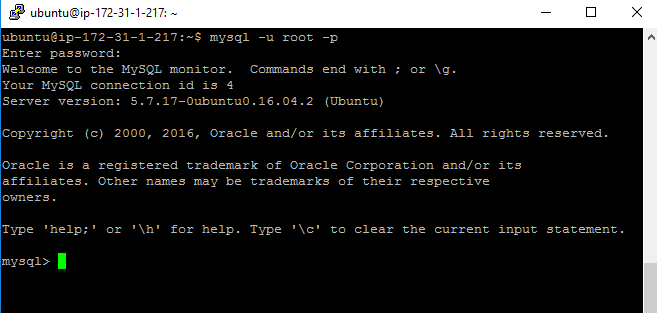
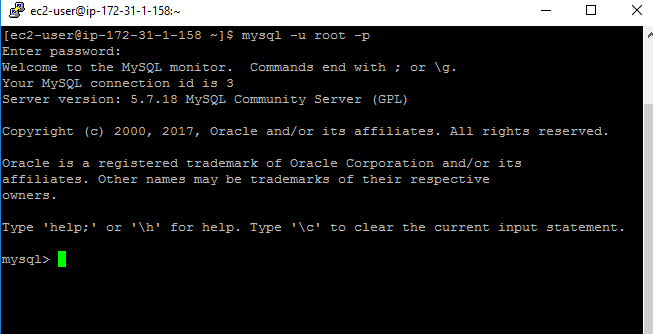
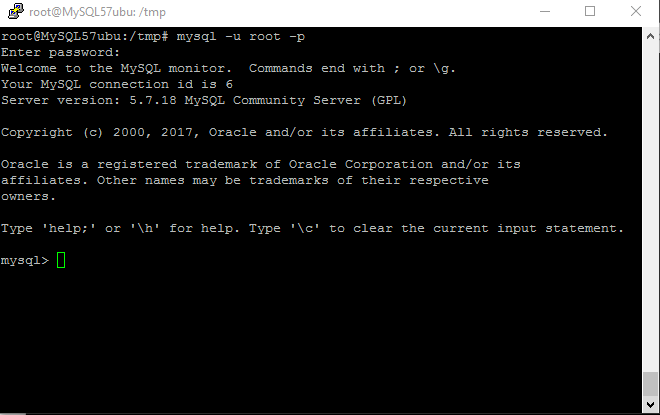
After your login with SSH you can login to MySQL using
SSH shell> mysql -u root -p
You shall be prompted for password where you can enter the password: Passw@rd123
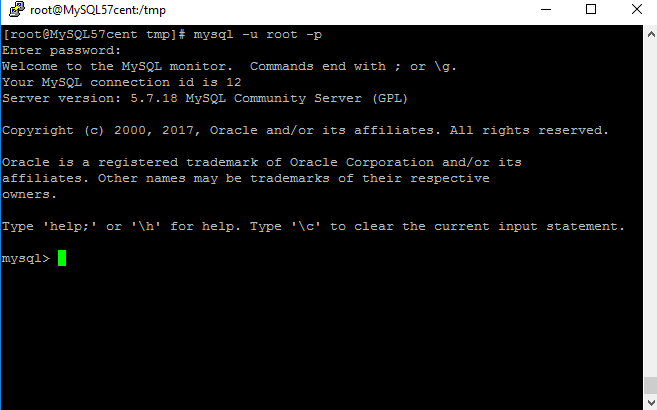
Once you are connected to the MySQL server, a welcome message is displayed and the mysql> prompt appears
Note : Please change password immediately after first login.
You can reset your root password with the following statement:
mysql> ALTER USER ‘root’@’localhost’ IDENTIFIED BY ‘new_password’;
You can come out of mysql Prompt with “exit” command.
Step 3) MySQL Information:
Server version: 5.7.18 MySQL Community Server
MySQL Services:
Using your Unix Login you can perform below actions on MySQL service
- To start MySQL Service: sudo service mysql start
- To stop MySQL Service: sudo service mysql stop
- To restart MySQL Service: sudo service mysql restart
- To get status of MySQL Service: sudo service mysql status
Step 4) Other Information:
1.Default ports:
- MYSQL: 3306
Default ports: MySQL Port: 3306 this is by default not allowed on cloud firewall for security.
Configure custom inbound and outbound rules using this link
2. To access Webmin interface for management please follow this link
Installation Instructions For Ubuntu 16.04 LTS
Note: How to find PublicDNS in AWS
Step 1) SSH Connection: To connect to the deployed instance, Please follow Instructions to Connect to Ubuntu instance on AWS Cloud
1) Download Putty.
2) Connect to the virtual machine using SSH key Refer this link:
- Hostname: PublicDNS / IP of machine
- Port : 22
Step 2) Database Login Details:
Please use MySQL root password Passw@rd123 for the MySQL configuration.
After your login with SSH you can login to MySQL using
SSH shell> mysql -u root -p
You shall be prompted for password where you can enter the password: Passw@rd123
Once you are connected to the MySQL server, a welcome message is displayed and the mysql> prompt appears
Note : Please change password immediately after first login.
You can reset your root password with the following statement:
mysql> ALTER USER ‘root’@’localhost’ IDENTIFIED BY ‘new_password’;
You can come out of mysql Prompt with “exit” command.
Step 3) MySQL Information:
Server version: 5.7.17 MySQL Community Server
MySQL Services:
Using your Unix Login you can perform below actions on MySQL service
- To start MySQL Service: sudo service mysql start
- To stop MySQL Service: sudo service mysql stop
- To restart MySQL Service: sudo service mysql restart
- To get status of MySQL Service: sudo service mysql status
Step 4) Other Information:
1.Default ports:
- MYSQL: 3306
Default ports: MySQL Port: 3306 this is by default not allowed on cloud firewall for security.
Configure custom inbound and outbound rules using this link
2. To access Webmin interface for management please follow this link
Installation Instructions For CentOS
Note: How to find PublicDNS in AWS
Step 1) SSH Connection: To connect to the deployed instance, Please follow Instructions to Connect to Centos instance on AWS Cloud
1) Download Putty.
2) Connect to the virtual machine using SSH key Refer this link:
- Hostname: PublicDNS / IP of machine
- Port : 22
1) Download Putty.
2) Connect to the virtual machine using SSH key Refer this link:
- Hostname: PublicDNS / IP of machine
- Port : 22
Step 2) Database Login Details:
Please use MySQL root password Passw@rd123 for the MySQL configuration.
After your login with SSH you can login to MySQL using
SSH shell> mysql -u root -p
You shall be prompted for password where you can enter the password: Passw@rd123
Once you are connected to the MySQL server, a welcome message is displayed and the mysql> prompt appears
Note : Please change password immediately after first login.
You can reset your root password with the following statement:
mysql> ALTER USER ‘root’@’localhost’ IDENTIFIED BY ‘new_password’;
You can come out of mysql Prompt with “exit” command.
Step 3) MySQL Information:
Server version: 5.7.18 MySQL Community Server
MySQL Services:
Using your Unix Login you can perform below actions on MySQL service
- To start MySQL Service: sudo systemctl start mysqld
- To stop MySQL Service: sudo systemctl stop mysqld
- To restart MySQL Service: sudo systemctl restart mysqld
- To get status of MySQL Service: sudo systemctl status mysqld
Step 4) Other Information:
1.Default ports:
- MYSQL: 3306
Default ports: MySQL Port: 3306 this is by default not allowed on cloud firewall for security.
Configure custom inbound and outbound rules using this link
2. To access Webmin interface for management please follow this link
Azure
Installation Instructions For Ubuntu
Note: How to find PublicDNS in Azure
Step 1) SSH Connection: To connect to the deployed instance, Please follow Instructions to Connect to Ubuntu instance on Azure Cloud
1) Download Putty.
2) Connect to the virtual machine using following SSH credentials:
- Hostname: PublicDNS / IP of machine
- Port : 22
Username: Your chosen username when you created the machine ( For example: Azureuser)
Password: Your Chosen Password when you created the machine ( How to reset the password if you do not remember)
Step 2) Database Login Details:
Please use MySQL root password Passw@rd123 for the MySQL configuration.
After your login with SSH you can login to MySQL using
SSH shell> mysql -u root -p
You shall be prompted for password where you can enter the password: Passw@rd123
Once you are connected to the MySQL server, a welcome message is displayed and the mysql> prompt appears
Note : Please change password immediately after first login.
You can reset your root password with the following statement:
mysql> ALTER USER ‘root’@’localhost’ IDENTIFIED BY ‘new_password’;
You can come out of mysql Prompt with “exit” command.
Step 3) MySQL Information:
Server version: 5.7.18 MySQL Community Server
MySQL Services:
Using your Unix Login you can perform below actions on MySQL service
To start MySQL Service: sudo service mysql start
To stop MySQL Service: sudo service mysql stop
To restart MySQL Service: sudo service mysql restart
To get status of MySQL Service: sudo service mysql status
Step 4) Other Information:
1.Default ports:
- MYSQL: 3306
Default ports: MySQL Port : 3306 this is by default not allowed on cloud firewall for security.
Configure custom inbound and outbound rules using this link
2. To access Webmin interface for management please follow this link
Installation Instructions For Centos
Note : How to find PublicDNS in Azure
Step 1) SSH Connection: To connect to the deployed instance, Please follow Instructions to Connect to Centos instance on Azure Cloud
1) Download Putty.
2) Connect to the virtual machine using following SSH credentials:
- Hostname: PublicDNS / IP of machine
- Port : 22
Username: Your chosen username when you created the machine ( For example: Azureuser)
Password: Your Chosen Password when you created the machine ( How to reset the password if you do not remember)
Step 2) Database Login Details:
Please use MySQL root password Passw@rd123 for the MySQL configuration.
After your login with SSH you can login to MySQL using
SSH shell> mysql -u root -p
You shall be prompted for password where you can enter the password: Passw@rd123
Once you are connected to the MySQL server, a welcome message is displayed and the mysql> prompt appears
Note : Please change password immediately after first login.
You can reset your root password with the following statement:
mysql> ALTER USER ‘root’@’localhost’ IDENTIFIED BY ‘new_password’;
You can come out of mysql Prompt with “exit” command.
Step 3) MySQL Information:
Server version: 5.7.18 MySQL Community Server
MySQL Services:
Using your Unix Login you can perform below actions on MySQL service
- To start MySQL Service: sudo systemctl start mysqld
- To stop MySQL Service: sudo systemctl stop mysqld
- To restart MySQL Service: sudo systemctl restart mysqld
- To get status of MySQL Service: sudo systemctl status mysqld
Step 4) Other Information:
1.Default ports:
- MYSQL: 3306
Default ports: MySQL Port : 3306 this is by default not allowed on cloud firewall for security.
Configure custom inbound and outbound rules using this link
2. To access Webmin interface for management please follow this link
- Installation Instructions For Windows
- Installation Instructions For Ubuntu
- Installation Instructions For Redhat
- Installation Instructions For CentOS
Installation Instructions For Windows
Step 1) VM Creation:
1.Click the Launch on Compute Engine button to choose the hardware and network settings.
2.You can see at this page, an overview of Cognosys Image as well as some estimated costs of VM.
3.In the settings page, you can choose the number of CPUs and amount of RAM, the disk size and type etc.
Step 2) RDP Connection: To initialize the DB Server connect to the deployed instance, Please follow Instructions to Connect to Windows instance on Google Cloud
Step 3) Database Login Details:
The below screen appears after successful deployment of the image.

For local MySQL root password, please use the temporary password generated automatically during image creation as shown above.
i) Please connect to Remote Desktop as given in step 2 to ensure stack is properly configured and DB is initialized.
ii) You can use MySQL server instance as localhost, username root and password as shown above.
If you have closed the deployment page you can also get the MySQL root password from VM Details “Custom metadata” Section
Installation Instructions For Ubuntu
Step 1) SSH Connection: To connect to the deployed instance, Please follow Instructions to Connect to Ubuntu instance on Google Cloud
1) Download Putty.
2) Connect to the virtual machine using SSH key
-
- Hostname: PublicDNS / IP of machine
- Port : 22
Step 2) Database Login Details:
The below screen appears after successful deployment of the image.
For local MySQL root password, please use the temporary password generated automatically during image creation as shown above.
i) Please connect to Remote Desktop as given in step 2 to ensure stack is properly configured and DB is initialized.
ii) You can use MySQL server instance as localhost, username root and password as shown above.
If you have closed the deployment page you can also get the MySQL root password from VM Details “Custom metadata” Section
Step 3) MySQL Information:
Server version: 5.7.18 MySQL Community Server
MySQL Services:
Using your Unix Login you can perform below actions on MySQL service
- To start MySQL Service: sudo service mysql start
- To stop MySQL Service: sudo service mysql stop
- To restart MySQL Service: sudo service mysql restart
- To get status of MySQL Service: sudo service mysql status
Step 4) Other Information:
1.Default ports:
- Linux Machines: SSH Port – 22
- MYSQL: 3306
2. To access Webmin interface for management please follow this link
Installation Instructions For Redhat
Step 1) VM Creation:
1.Click the Launch on Compute Engine button to choose the hardware and network settings.
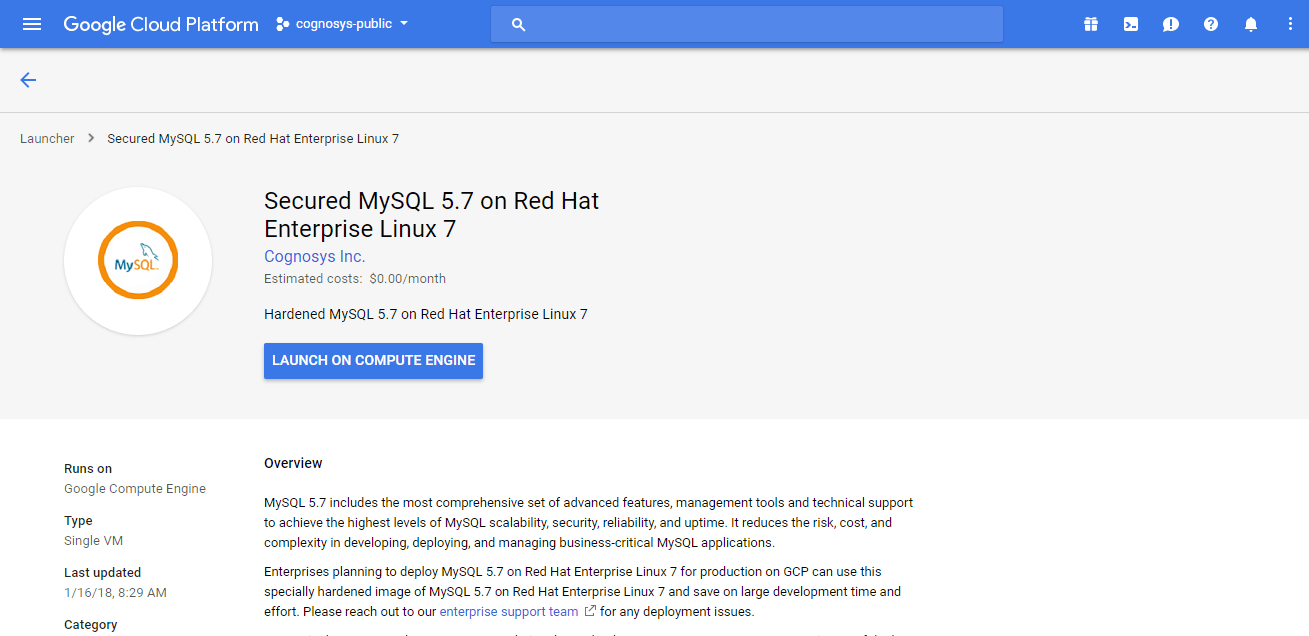 2.You can see at this page, an overview of Cognosys Image as well as some estimated costs of VM.
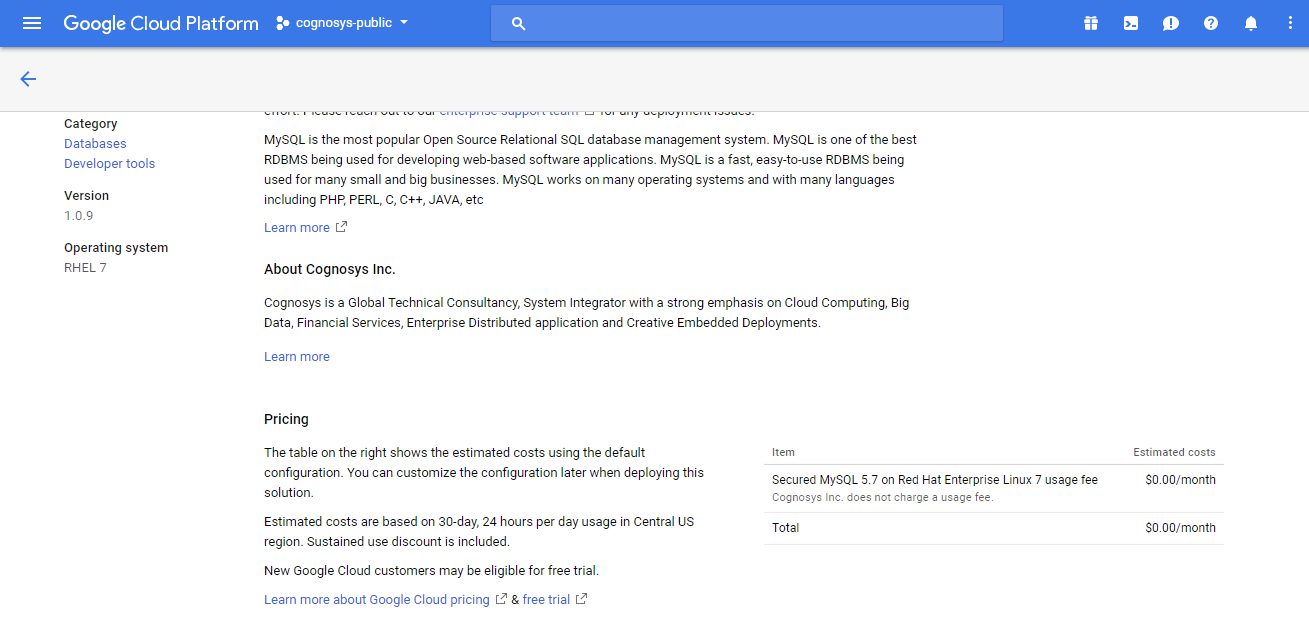 3.In the settings page, you can choose the number of CPUs and amount of RAM, the disk size and type etc.
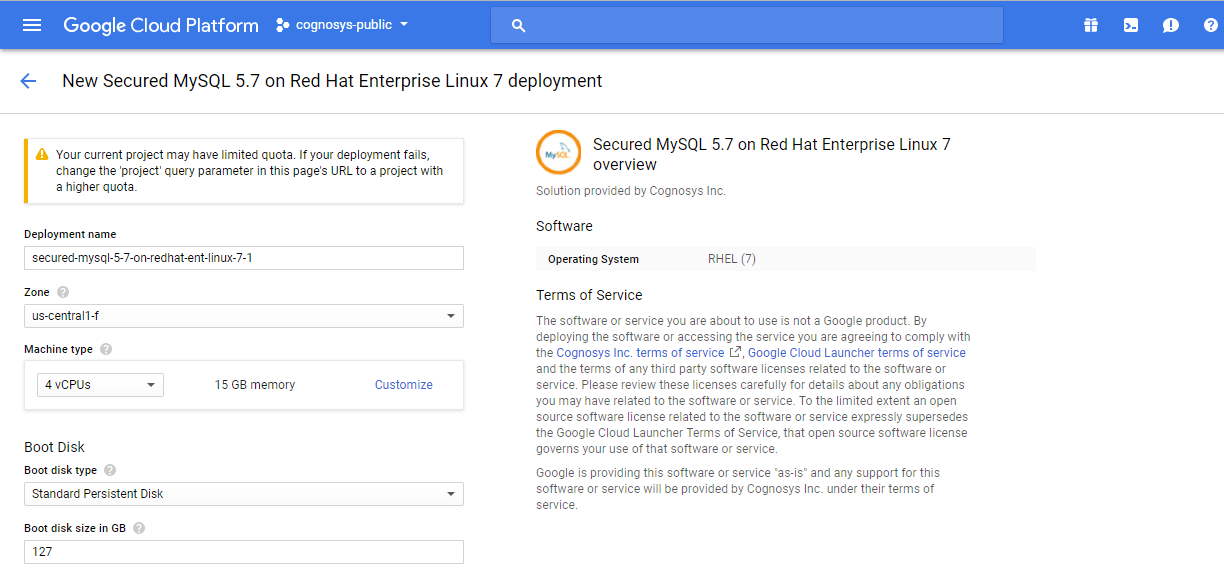 Step 2) SSH Connection: To connect to the deployed instance, Please follow Instructions to Connect to Redhat instance on Google Cloud
1) Download Putty.
2) Connect to the virtual machine using SSH key
- Hostname: PublicDNS / IP of machine
- Port : 22
Step 3) Database Login Details:
The below screen appears after successful deployment of the image.
For local MySQL root password, please use the temporary password generated automatically during image creation as shown above.
i) Please connect to Remote Desktop as given in step 2 to ensure stack is properly configured and DB is initialized.
ii) You can use MySQL server instance as localhost, username root and password as shown above.
If you have closed the deployment page you can also get the MySQL root password from VM Details “Custom metadata” Section
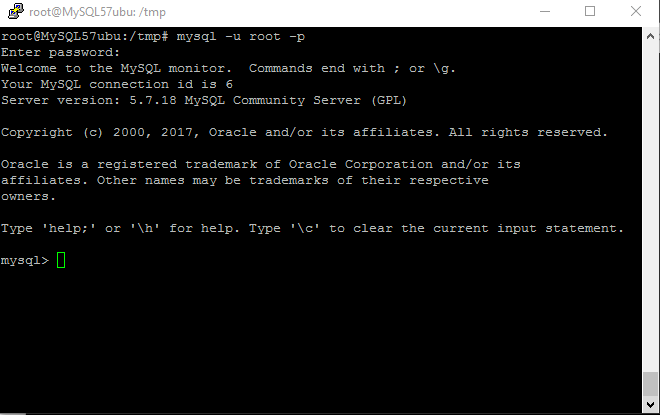
Step 4) MySQL Information:
Server version: 5.7.18 MySQL Community Server
MySQL Services:
Using your Unix Login you can perform below actions on MySQL service
- To start MySQL Service: sudo systemctl start mysqld
- To stop MySQL Service: sudo systemctl stop mysqld
- To restart MySQL Service: sudo systemctl restart mysqld
- To get status of MySQL Service: sudo systemctl status mysqld
Step 5) Other Information:
1.Default ports:
- Linux Machines: SSH Port – 22
- MYSQL: 3306
2. To access Webmin interface for management please follow this link
Installation Instructions For CentOS
Step 1) SSH Connection: To connect to the deployed instance, Please follow Instructions to Connect to CentOS instance on Google Cloud
1) Download Putty.
2) Connect to virtual machine using following SSH credentials:
- Hostname: PublicDNS / IP of machine
- Port : 22
Username: Your chosen username when you created the machine
Password : Your Chosen Password when you created the machine ( How to reset the password if you do not remember)
Step 2) Other Information:
1.Default ports:
- Linux Machines: SSH Port – 22
2. To access Webmin interface for management please follow this link

