1-click AWS Deployment 1-click Azure Deployment
Overview
ApexSQL Trigger is an auditing tool for SQL Server databases which captures DML/DDL changes that have occurred including information on who made the change, which objects were affected by it, when it was made, as well as information on the SQL login, application, and host used to make the change.
Visual themes in ApexSQL tools:
The 2018 versions of ApexSQL DBA and Developer tools now support new UI themes, with ApexSQL add-ins additionally supporting both SQL Server Management Studio and Visual Studio color themes by automatically adapting to the host theme.
Stand-alone tools
GUI themes including Light, Blue and Dark, let you modify the complete appearance of ApexSQL tools which makes them suitable for different work environments and personal preferences.
Light
Blue
Dark
Visual Studio
Themes are supported for our Visual Studio add-ins as well, to insure a consistent implementation into the host environment aka host aware theming. The theme of the ApexSQL add-in will automatically detect and adapt to the host theme
To select the desired GUI theme in Visual Studio, follow these instructions:
- Click the Tools dropdown menu and choose Options.
- In the Options window, choose the General tab under Environmental options.
- In the Color theme dropdown list, select the preferred theme.
Here are examples of supported themes
Light
Blue
Dark
SQL Server Management Studio:
SSMS Add-ins are also host aware like Visual Studio Add-ins but by default only Light and Blue themes are available for use in SSMS theme settings.
The Dark theme is not officially supported by Microsoft, at the time this blog post was written, but our Add-ins offer complete support for this theme if enabled. Complete instructions on how to enable the dark SSMS theme for use can be seen in our article Setting up the dark theme in SQL Server management studio.
Here are examples of theme implementation of ApexSQL add-ins in SSMS
Light
Blue
Dark
Web tools
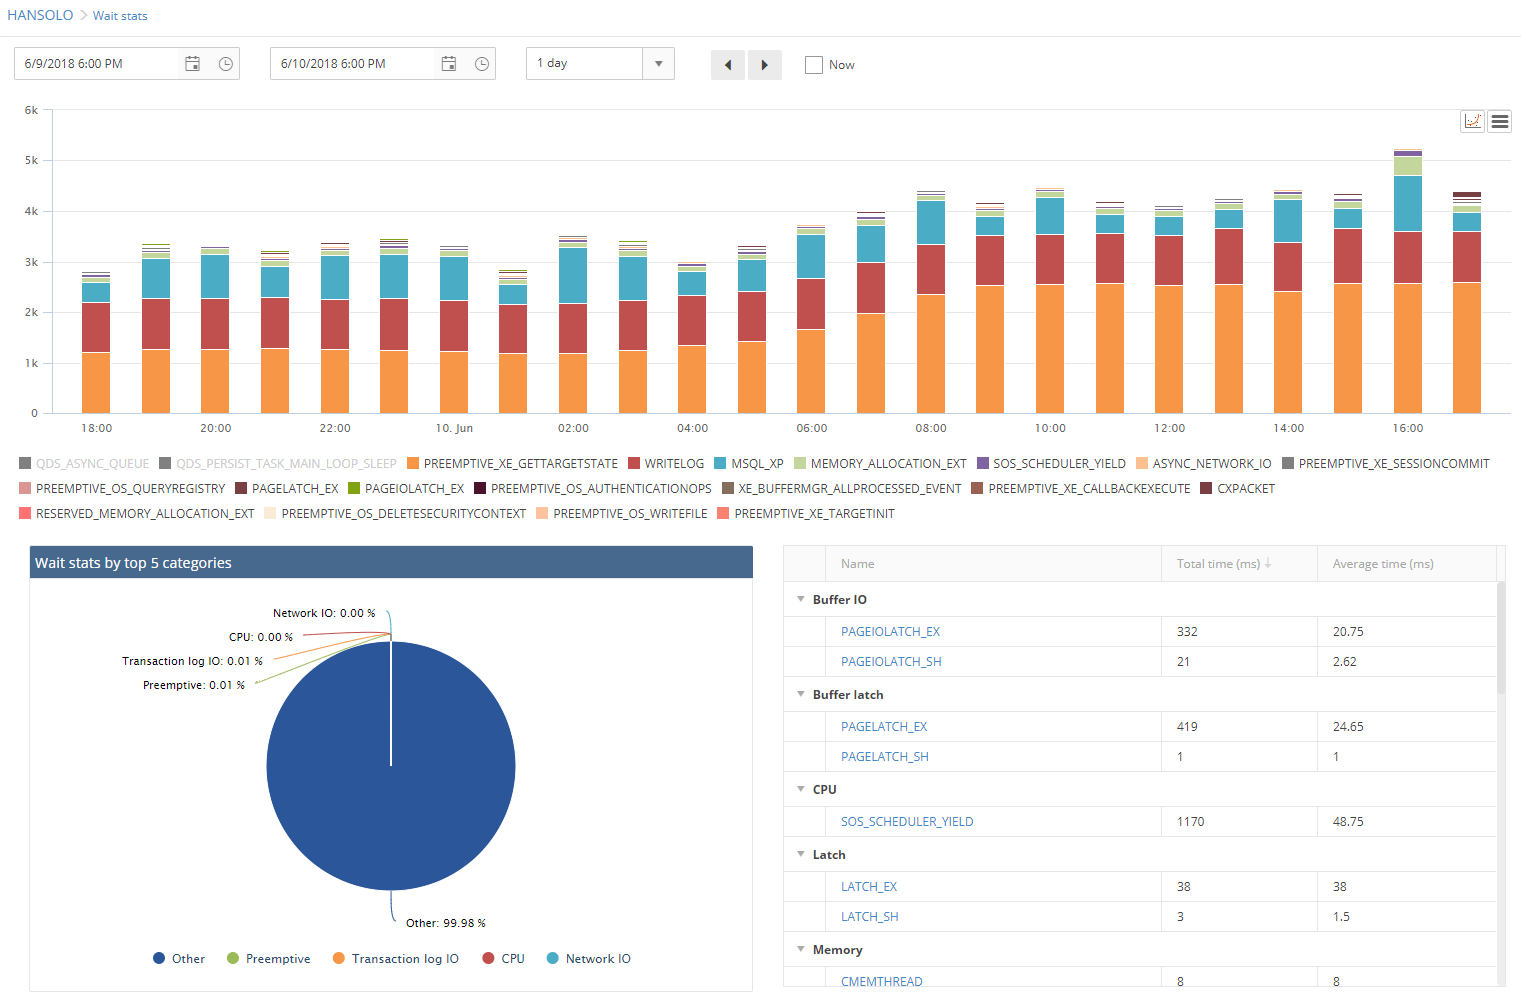
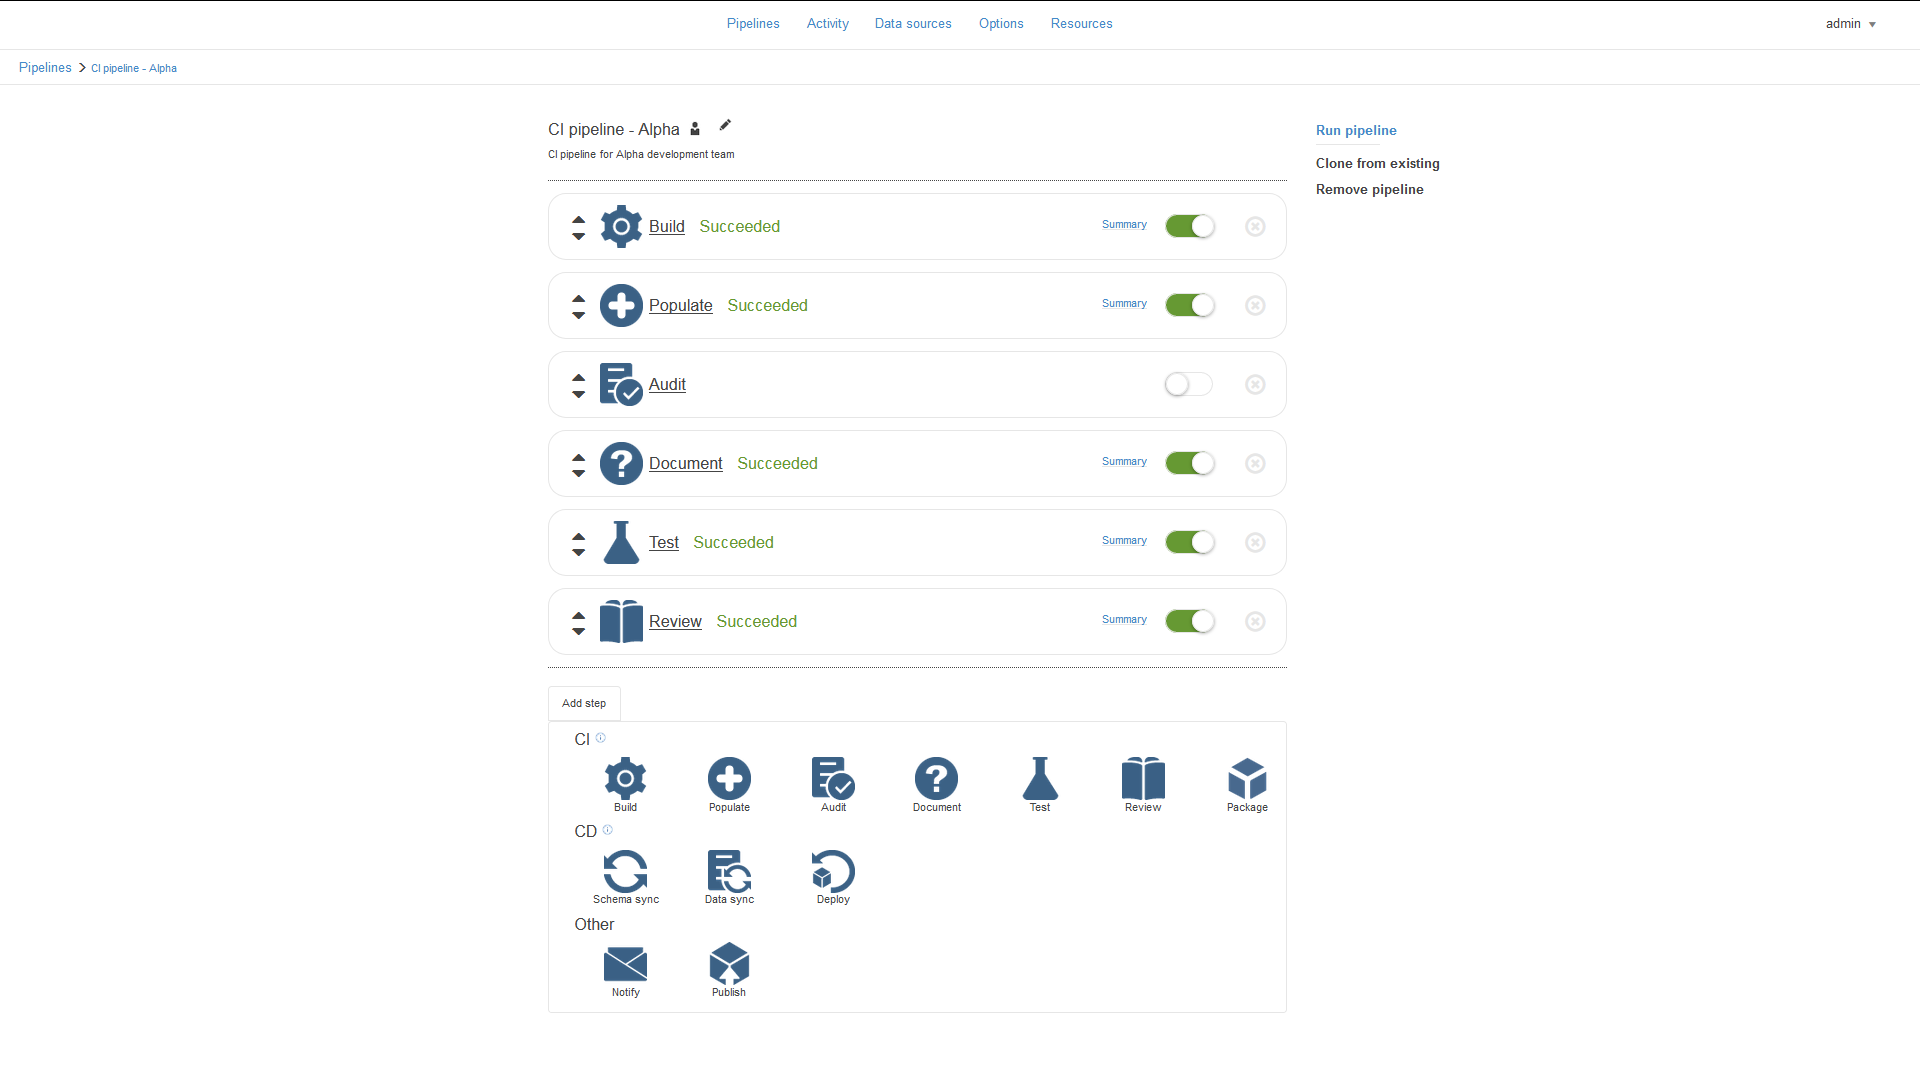
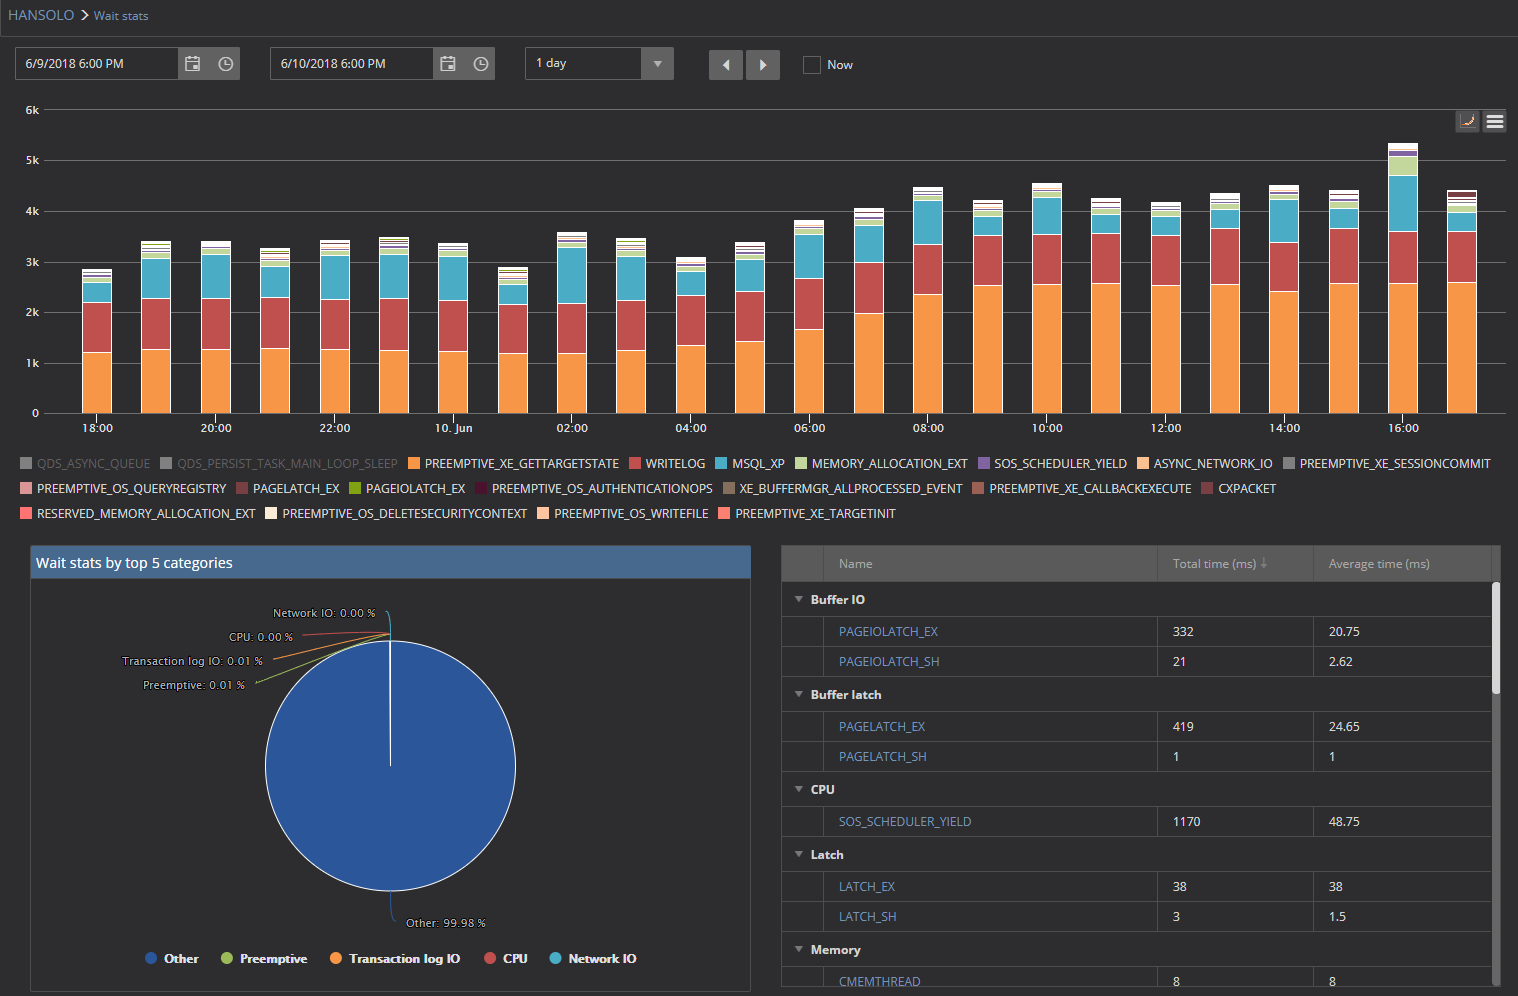
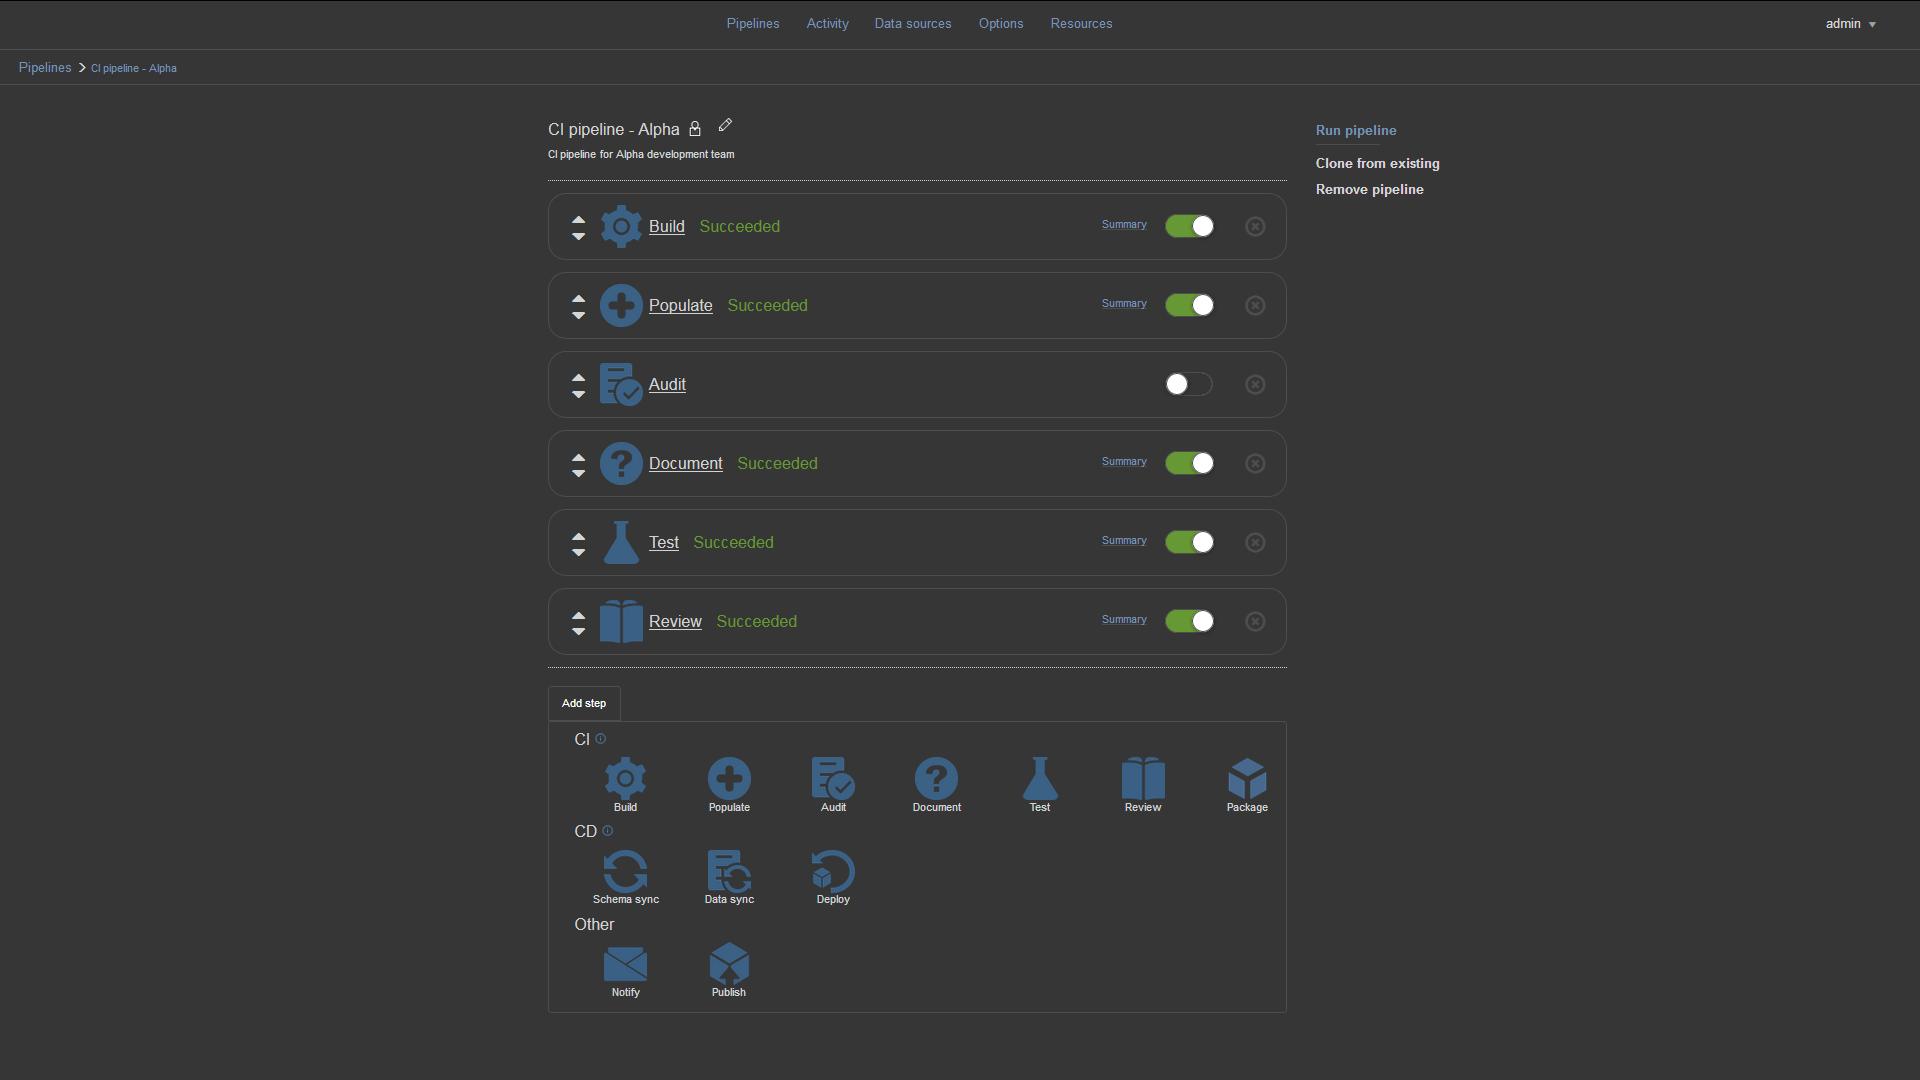
We also offer themes for our web based tools including ApexSQL Monitor, ApexSQL BI Monitor, ApexSQL VM Monitor and the Web dashboard for the ApexSQL CI/CD toolkit
Light
Dark
How to install ApexSQL add-ins and integrate into host environments e.g. SSMS, Visual Studio:
Description:
ApexSQL Refactor is the add-in which formats and refactors SQL code using nearly 15 code refactors and over 200 formatting options. It expands wildcard, fully qualifies object names, renames SQL database objects and parameters without breaking dependencies and much more.
ApexSQL Complete is add-in that helps to speed up the process of coding using features such as auto-complete, SQL code snippets, auto-insert statements, auto–replacement and more.
ApexSQL Search offers text search in SQL database objects and data, allows safe renaming of SQL objects and graphical visualization of object interdependencies.
To install the add-in:
- Download the add-in
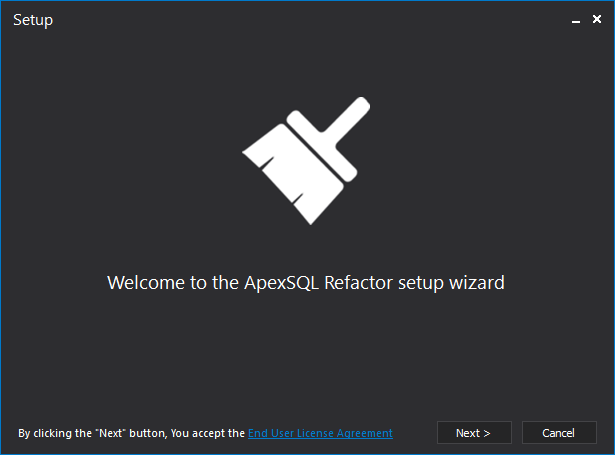
- Run the downloaded exe file and the welcome screen will appear. Click the Next button to start with the installation:

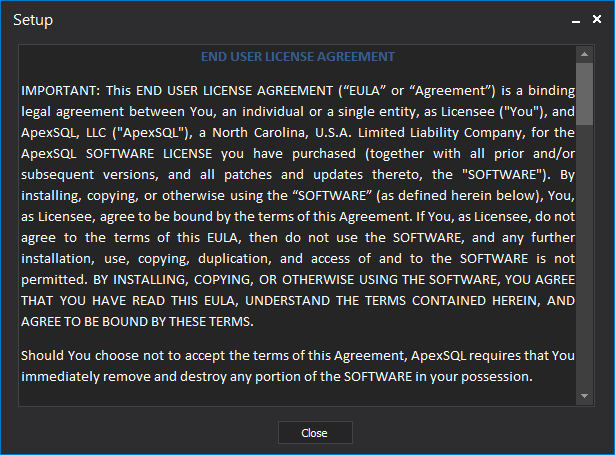
- With a click on the Next button, the End User License Agreement is accepted. Read the EULA with a click on its hyperlink, and once reviewed and agreed with, click the Close button, and Next button to continue with the installation:

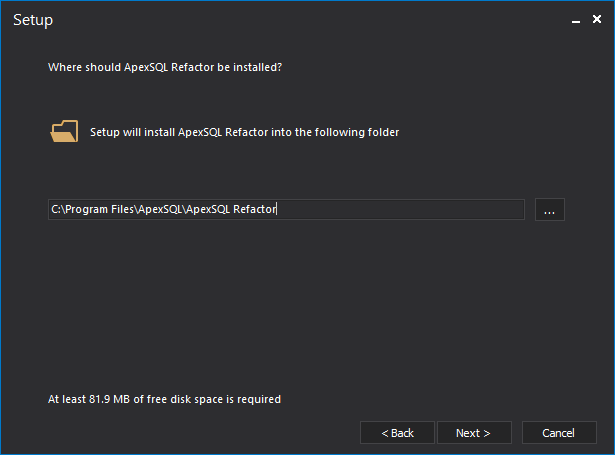
- Choose a default location for the add-in installation or specify custom one. When the location is set, click the Next button:

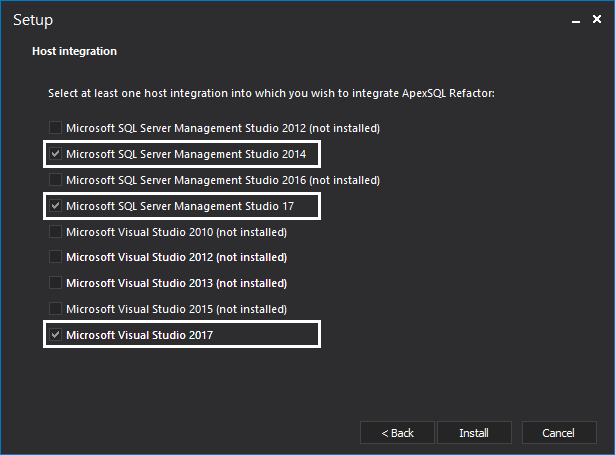
- Select SQL Server Management Studio and/or Visual Studio versions to integrate the add-in into and press the Install button to initiate the installation process:

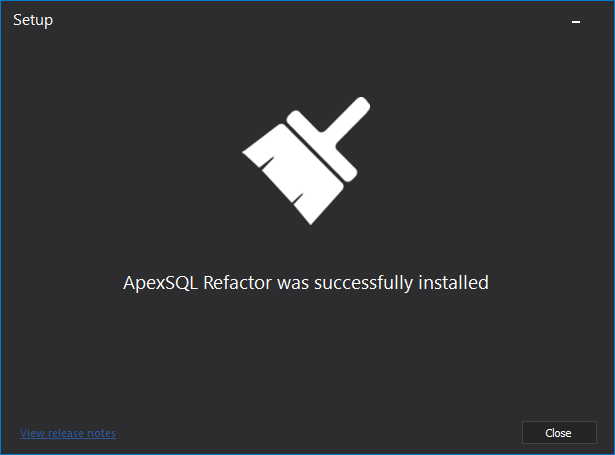
If the installation process succeeds, the last step below will appear:
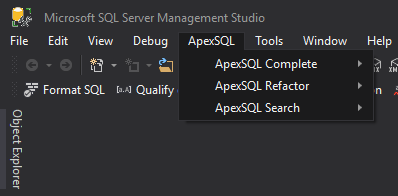
Start Microsoft SQL Server Management Studio, and the ApexSQL menu should be available from the main menu, along with the installed add-in:
Audit SQL databases using a SQL Server trigger tool
In this article, we will show how to use the ApexSQL Trigger 3rd party tool to audit your SQL Server Database DML and DDL changes, by creating SQL Server Triggers on the audited tables.
SQL Server Audit Overview
In this rapidly changing IT world, auditing the SQL Server database becomes a vital task of each database related project, to make sure that the data is stored and maintained securely. In this way, the customers will be happy to deal with such a secured company that stores their sensitive data securely.
There are different methods to audit databases in SQL Server, as shown below:
- Writing the events to the SQL Error Logs and C2 Trace files
- Taking advantage of events stored in the system objects and review it using the Ad Hoc Queries
- Auditing the database DML and DDL changes using the deprecated SQL Profiler
- Auditing the database using SQL Trace deprecated feature
- Auditing the database level events using Extended Events
- Auditing the DDL changes, DML changes and server Logons using SQL Server Triggers
- Auditing database changes by reading the SQL Server Transaction Log file
- Auditing table data changes using Change Data Capture
- Auditing table data changes using SQL Server Change Tracking
- Auditing events at the SQL Server and database levels using the SQL Server Audit feature
- Auditing table data changes using System-Versioned Temporal Tables
- Auditing SQL Server and database level changes using 3rd party tools, such as ApexSQL Audit
SQL Server Trigger Overview
SQL Server trigger is a special type of stored procedure that is automatically fired and executed when a specific event occurs at the SQL Server instance, database, or table level. SQL Server provides us with three types of triggers: The SQL Server Logon trigger that fires a stored procedure in response to a LOGON event, the DML trigger that is fired as a response for a data insertion or modification action, such as INSERT, UPDATE or DELETE action, and the DDL trigger that is fired as a response to a schema changes actions, such as CREATE, ALTER, DROP, GRANT, DENY, and REVOKE statements.
The SQL Server Trigger response to these actions can be in different ways. For example, the trigger can be used to execute a script after executing the statement that fires that trigger. On the other hand, the trigger can be used to prevent executing the statement that fired it and execute a different statement instead of the firing statement.
SQL Server triggers can be used as a database auditing solution, to track and log different types of Logon, DML, and DDL operations to a custom auditing table, or proactively prevent the users from performing a specific action on the database table and log the prevented action. This is due to the fact, SQL Server provides us with a special type of virtual tables called Inserted and Deleted that can be used to keep the column values before and after the modification. In the end, the complexity of the auditing solution here depends on your SQL development skills.
In general, it is not highly recommended to use the SQL Server triggers as an auditing solution, especially for the heavy transaction production tables, as executing the trigger after or instead of each statement will cause an additional overhead on the SQL Server resources that may lead to a real performance problem.
Audit Using ApexSQL Trigger
ApexSQL Audit is a 3rd party tool that can be used to track and audit different types of DML and DDL change at a specific SQL Server database and show what changes performed, who performed it, and when this action is performed. It can also be used to translate data into meaningful information using the lookups and add extra data to the audit trail using the watches. Also, the ApexSQL Trigger provides us with the ability to generate different types of filtered and exportable audit reports that contain the data values before and after the audited change.
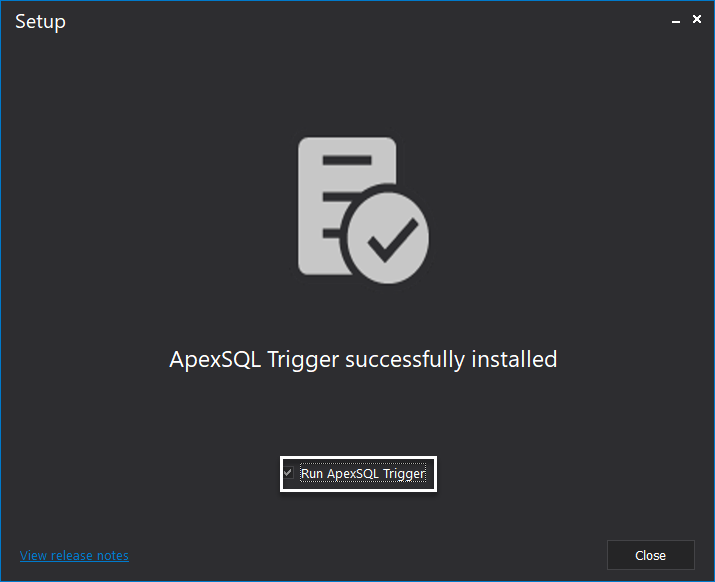
ApexSQL Trigger can be downloaded from the ApexSQl Download page, and installed to your server or machine easily, using the straight-forward installation wizard. During the ApexSQL Trigger installation wizard, you will be asked to agree on the license agreement, specify the path where to install the ApexSQL Trigger tool, then it will be installed in a few seconds without any complexity, as shown below:
Getting started
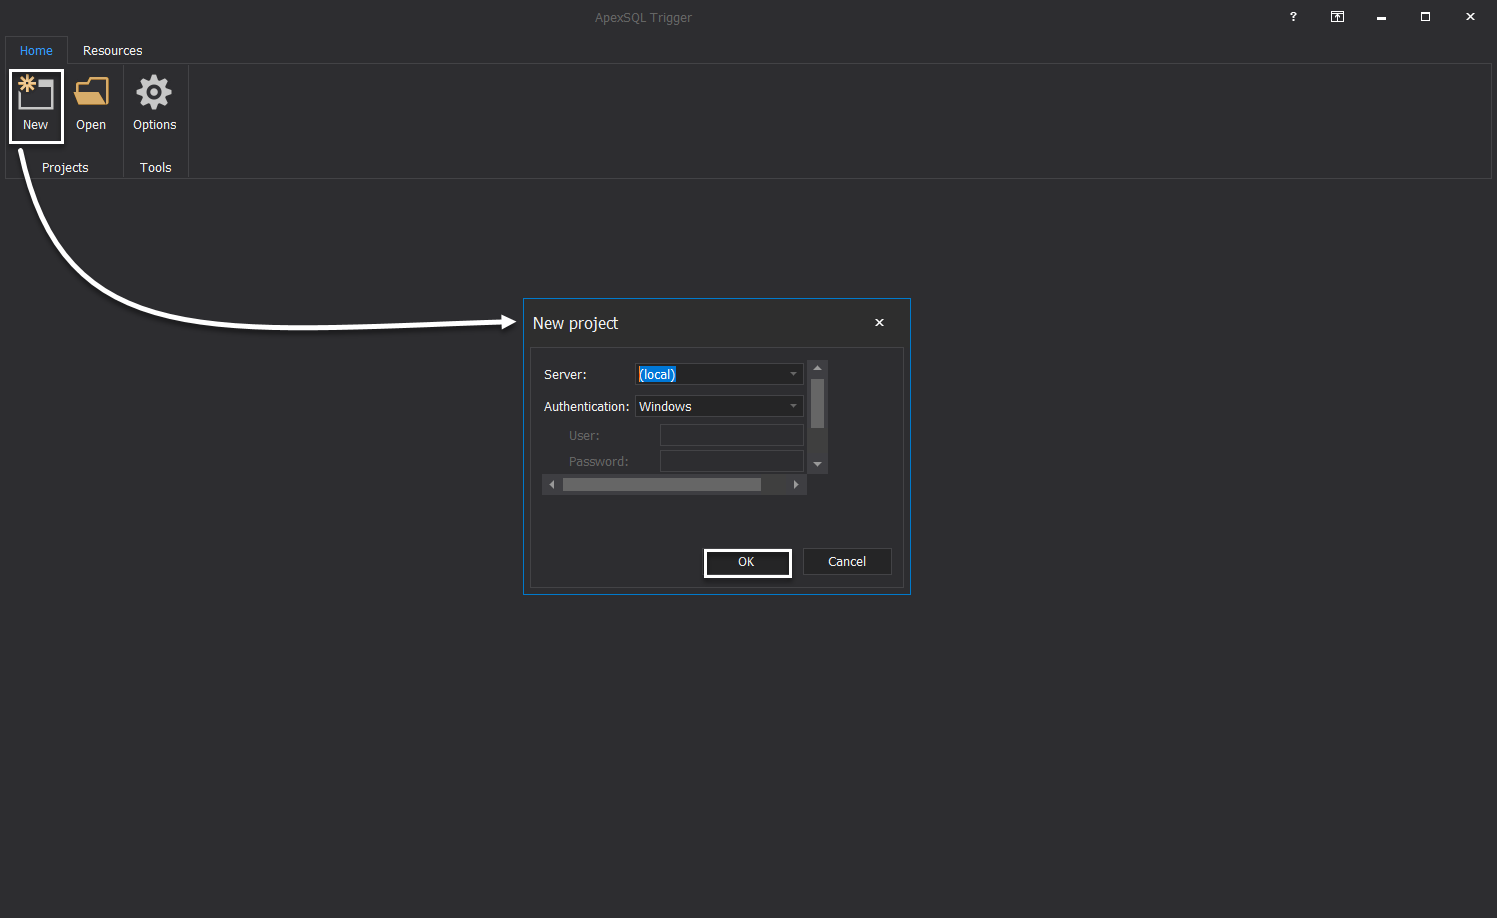
When the ApexSQL Trigger tool is installed completely to your machine, you can start a new project by clicking on the New icon, at the top left part of the tool, that will ask you to provide the name of the SQL server that hosts the database to be audited, and the credentials that will be used to connect to that SQL Server instance, as shown below:
If you are using ApexSQL Trigger for the first time, the tool will notify you to manage the structure of the ApexSQL Trigger tool, by specifying the repository where the audit data will be stored, connect to the database that you will audit, rather than connecting to the default master database, and finally specify the architecture components that will be used to audit that database, as shown below:
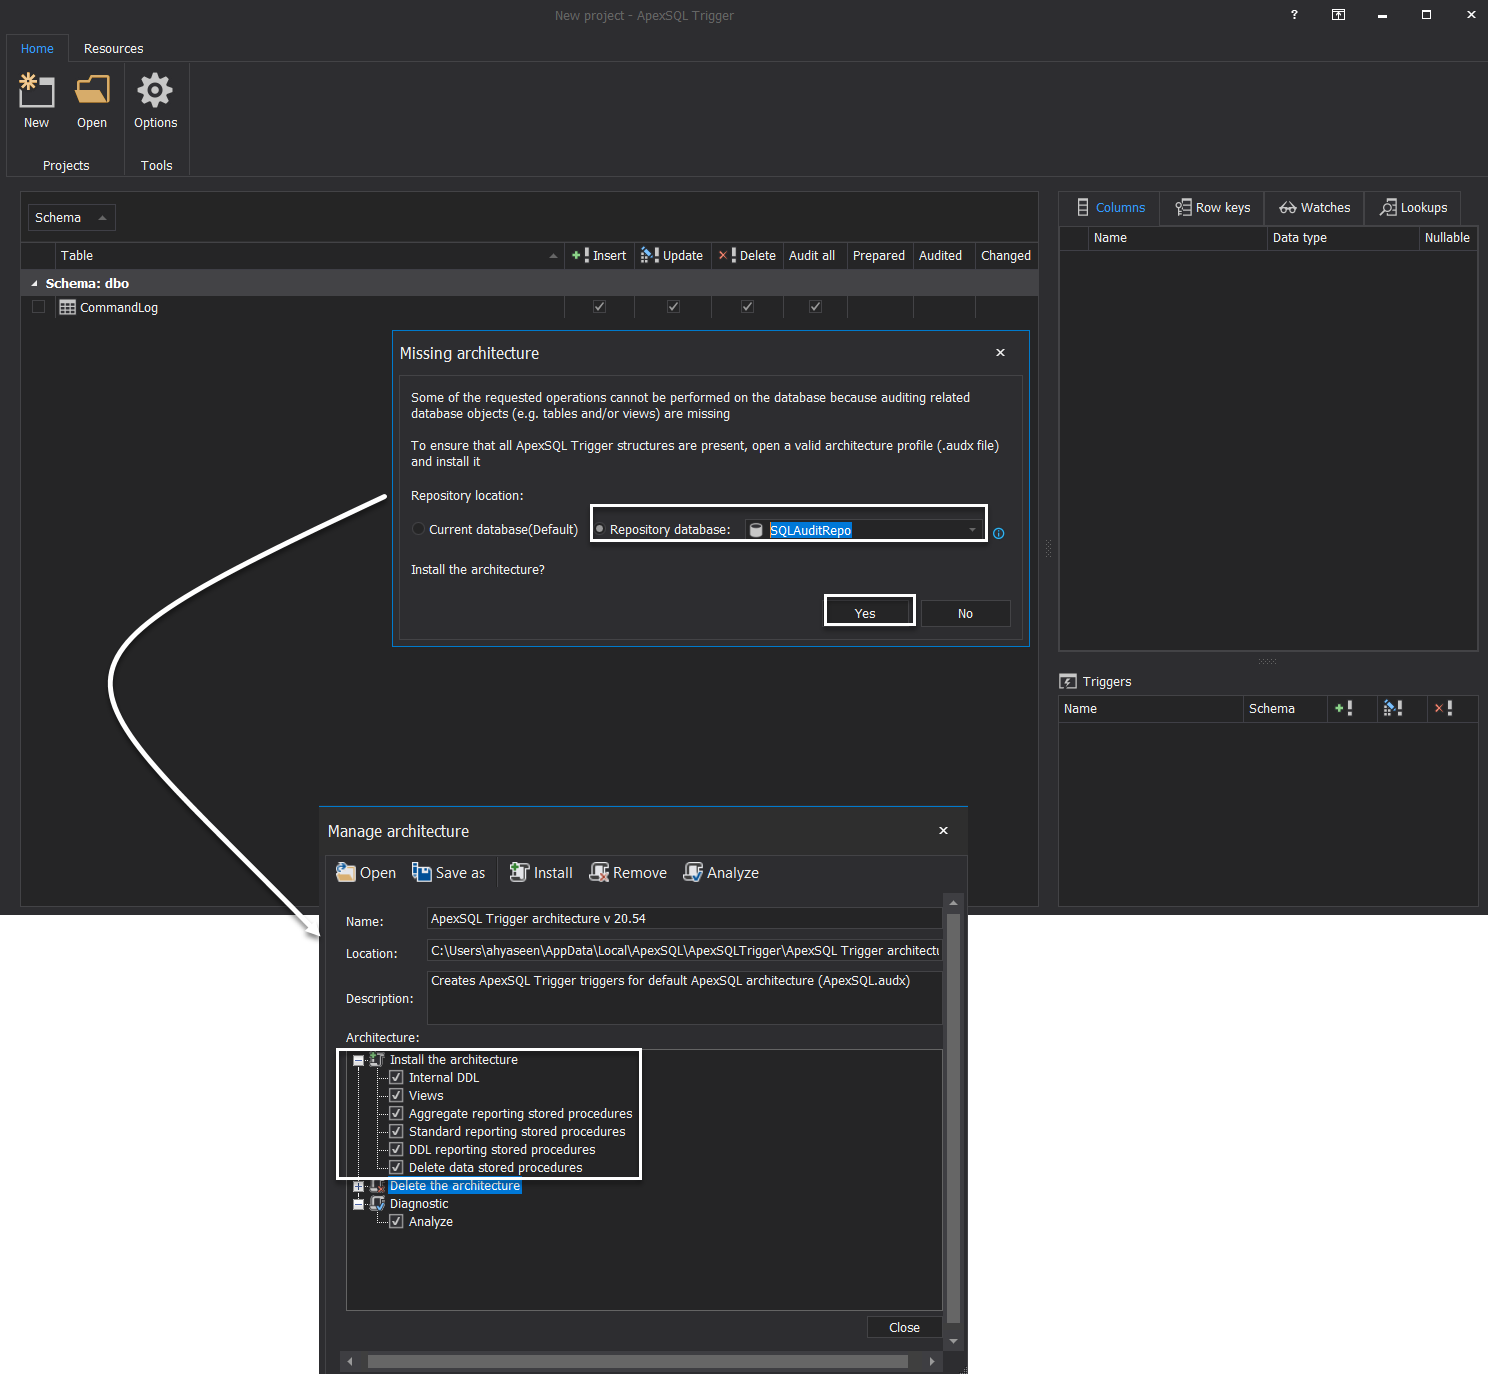
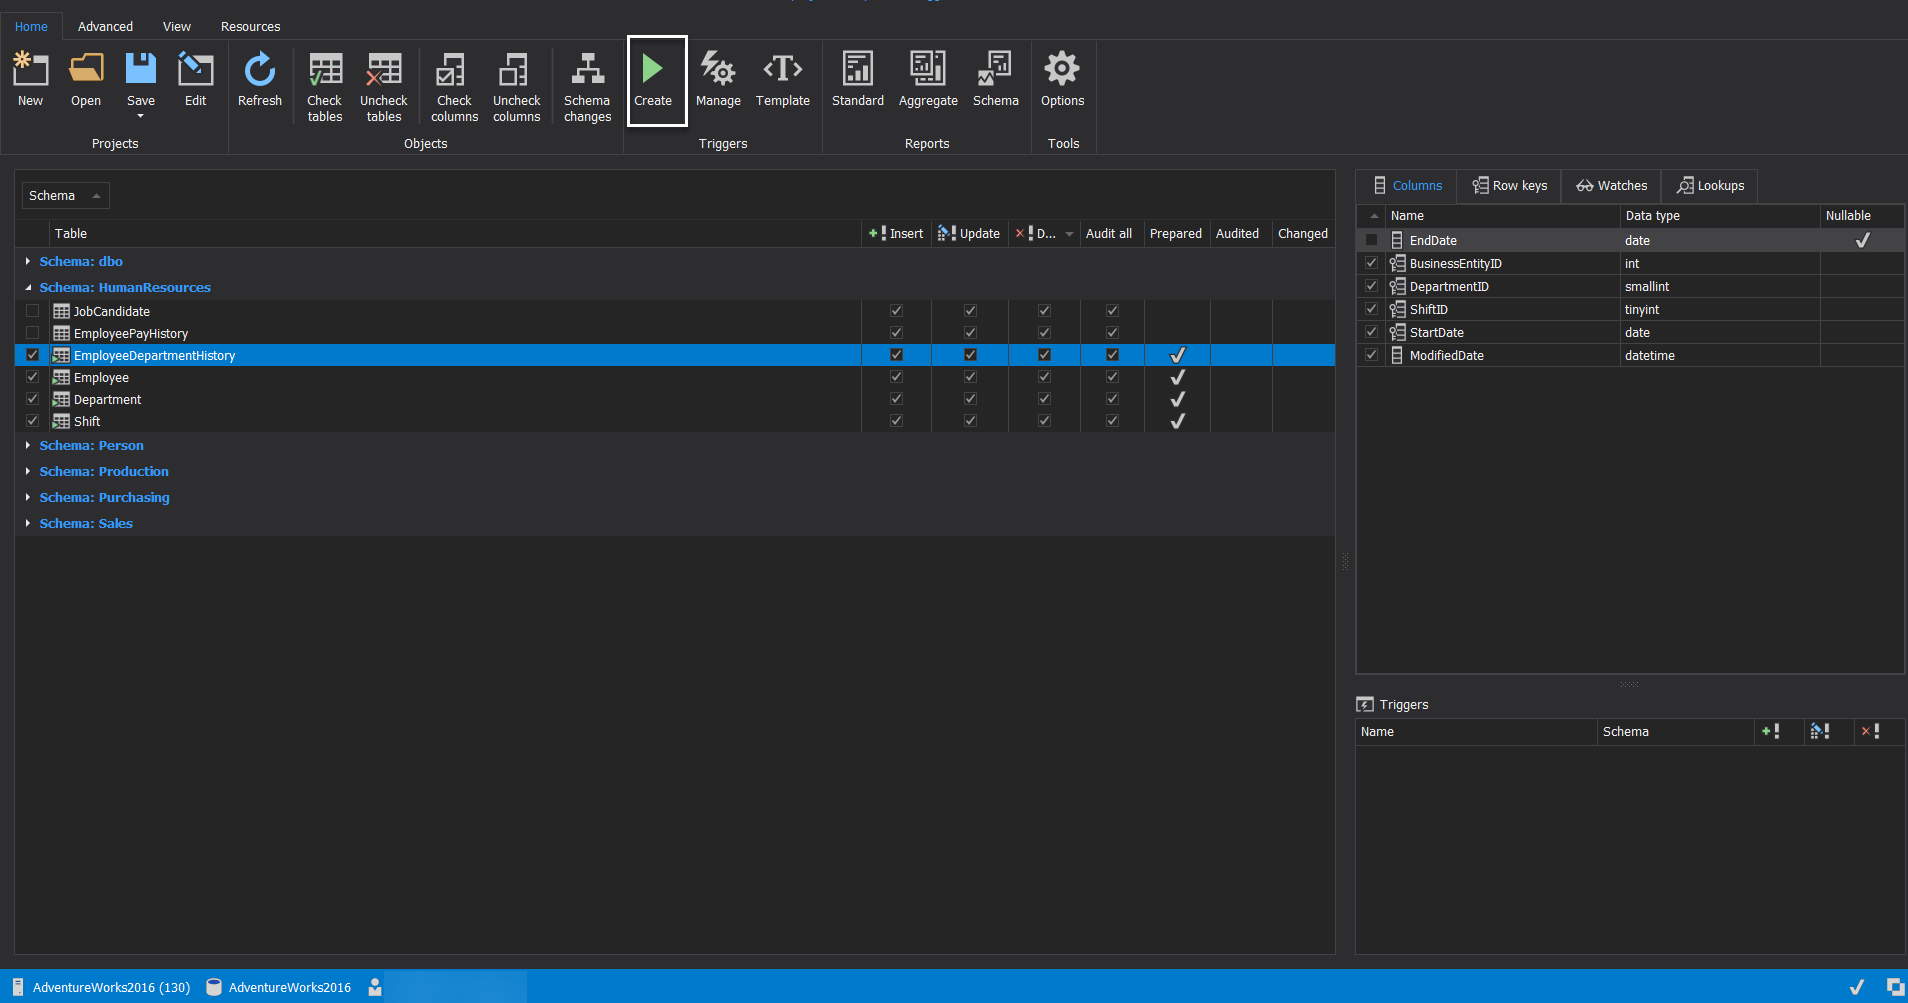
When the ApexSQL Trigger architecture is configured completely, it will connect to the database to be audited and show all the database tables grouped by the database schema name.
To audit a list of database tables, check the name of these tables to be audited under the schema name, select the columns that will be audited under that table and whether to audit the INSERT, UPDATE or DELETE operations executed on these tables.
After making and reviewing your choices, click on the Create button, under the Triggers options group, to generate a script for the SQL Server Triggers that will be used to audit these tables, as below:
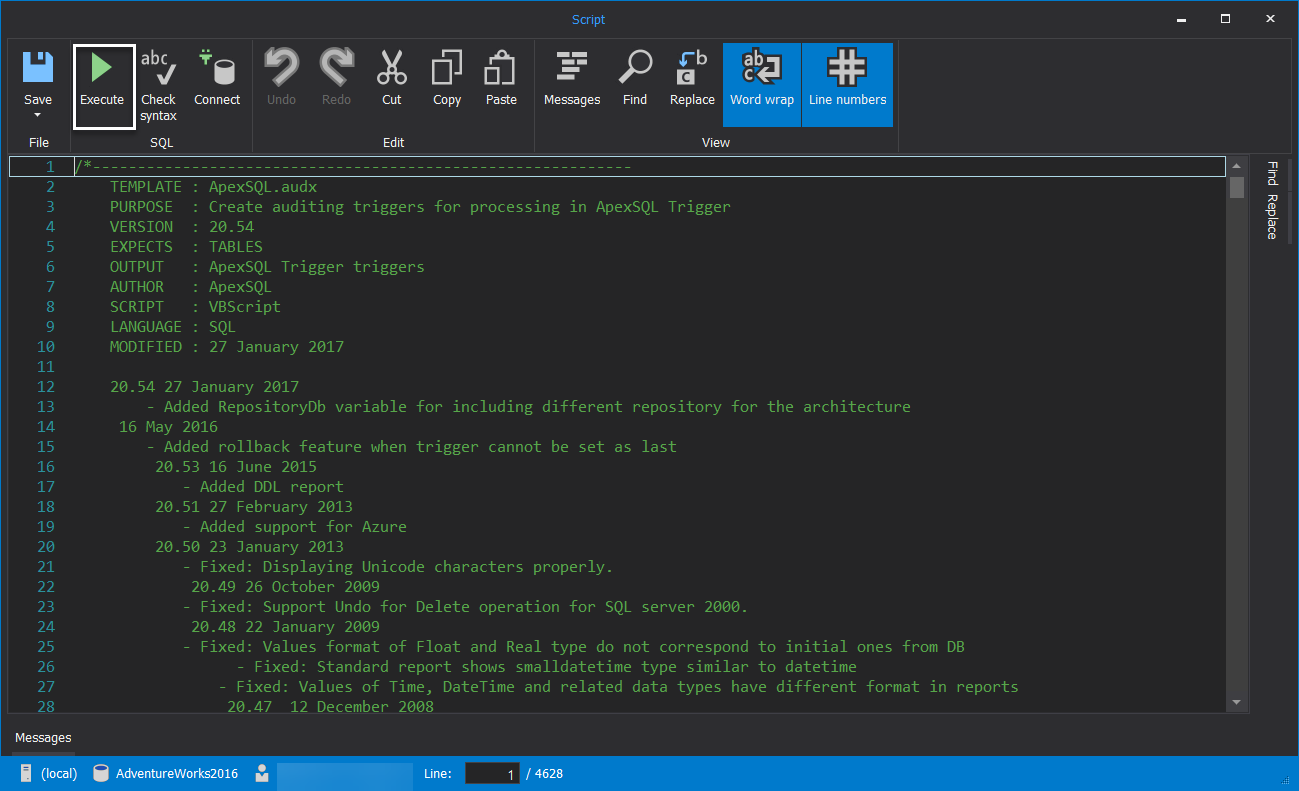
In the displayed Script window, review the T-SQL script for creating the SQL Server Triggers that will be used to audit the selected database tables, then click on the Execute option, under the SQL options group, to run the script and create the SQL Server Triggers, as shown below:
Now, the SQL Server Triggers that will be used to audit the database tables are created successfully. This means that any INSERT, UPDATE, or DELETE statement executed on these tables will be caught and logged to the audit repository.
Let us perform some data changes on these tables, by adding new records, deleting an existing record and modify some columns values and see how these actions are audited.
ApexSQL Trigger Viewer
To view the audit logs for the performed changes, you can use the list of reports provided by the ApexSQL Trigger tool, such as Standard and Aggregate reports, or use the ApexSQL Trigger Viewer free tool to browse the audit data.
ApexSQL Trigger Viewer is a free reporting interface that provides you with the ability to connect to a specific ApexSQL Trigger repository and query the audit data by grouping, sorting, and filtering the data and export it to multiple files types such as Excel, CSV or PDF.
ApexSQL Trigger Viewer can be downloaded from the ApexSQL Download page, and installed to your machine easily, using a straight-forward installation wizard, in which you only requested to accept the license agreement and specify the path for installing that tool.
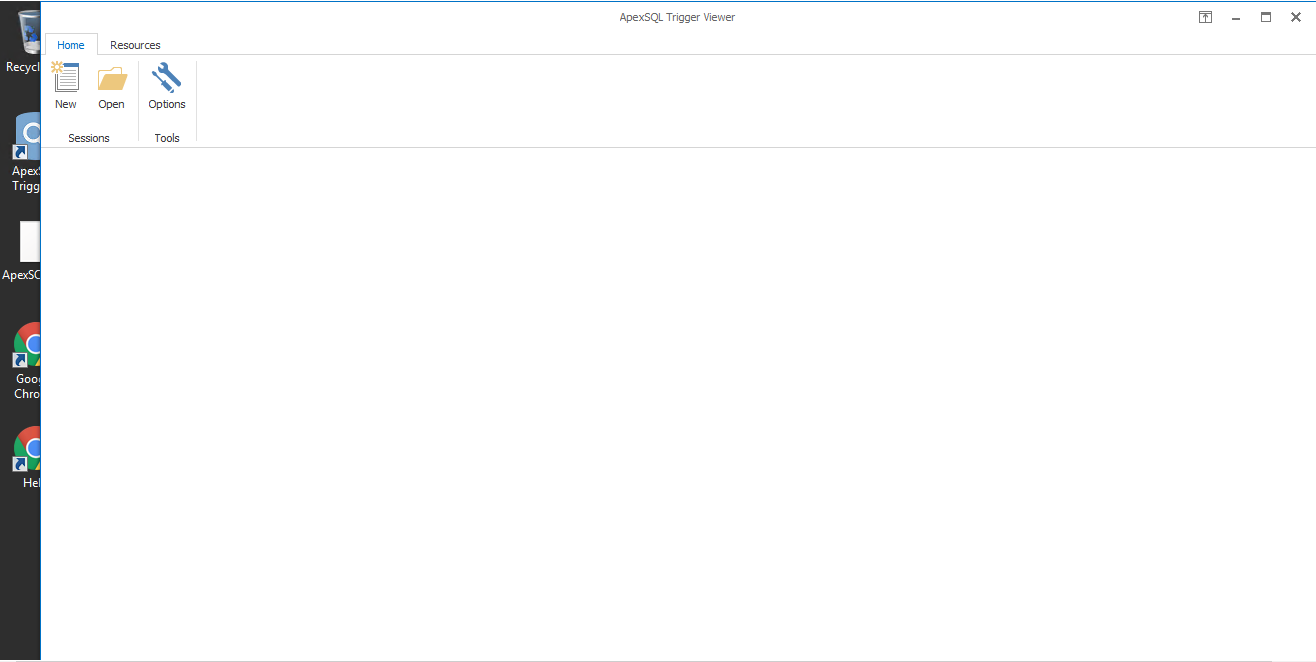
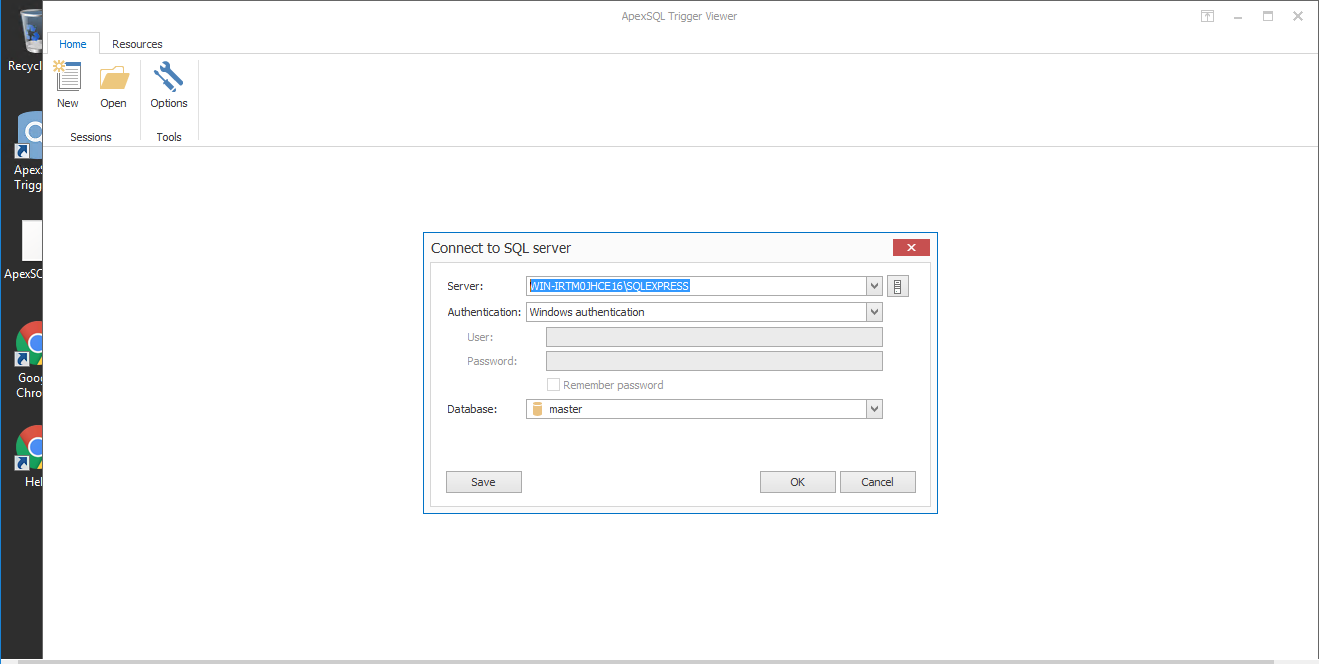
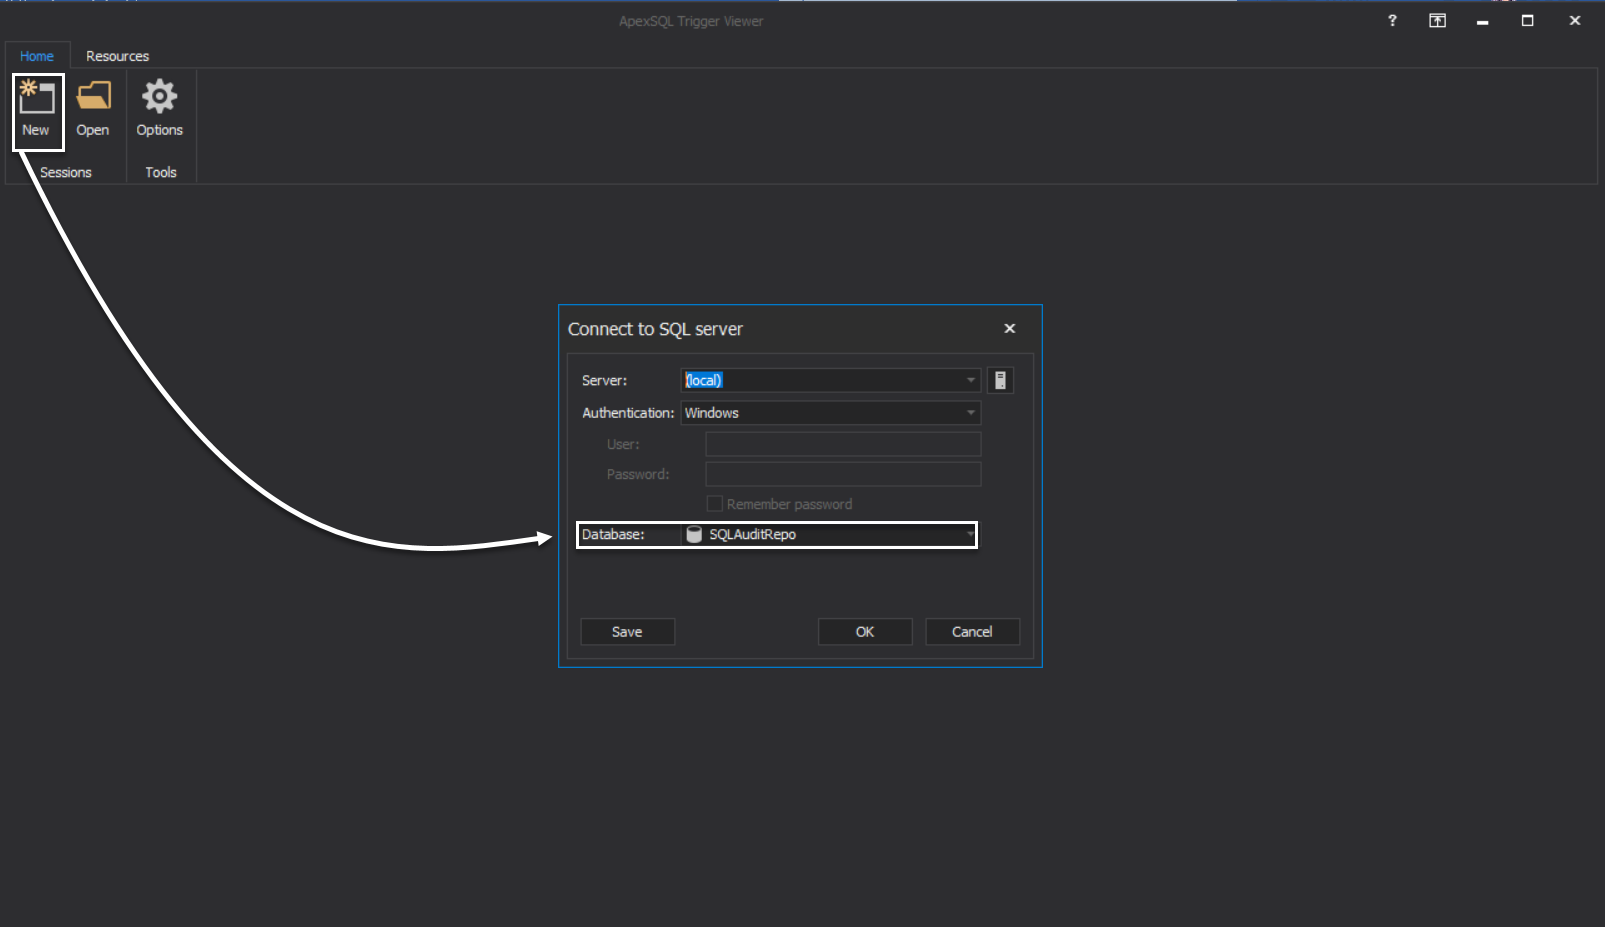
To query the audit data using ApexSQL Trigger Viewer, you need to connect to the audit repository, where the ApexSQL Trigger tool keeps the audit data, by clicking on the New button and provide the name of the SQL Server instance where the repository database hosted, the name of the repository database and the credentials that will be used to connect to that instance, as shown below:
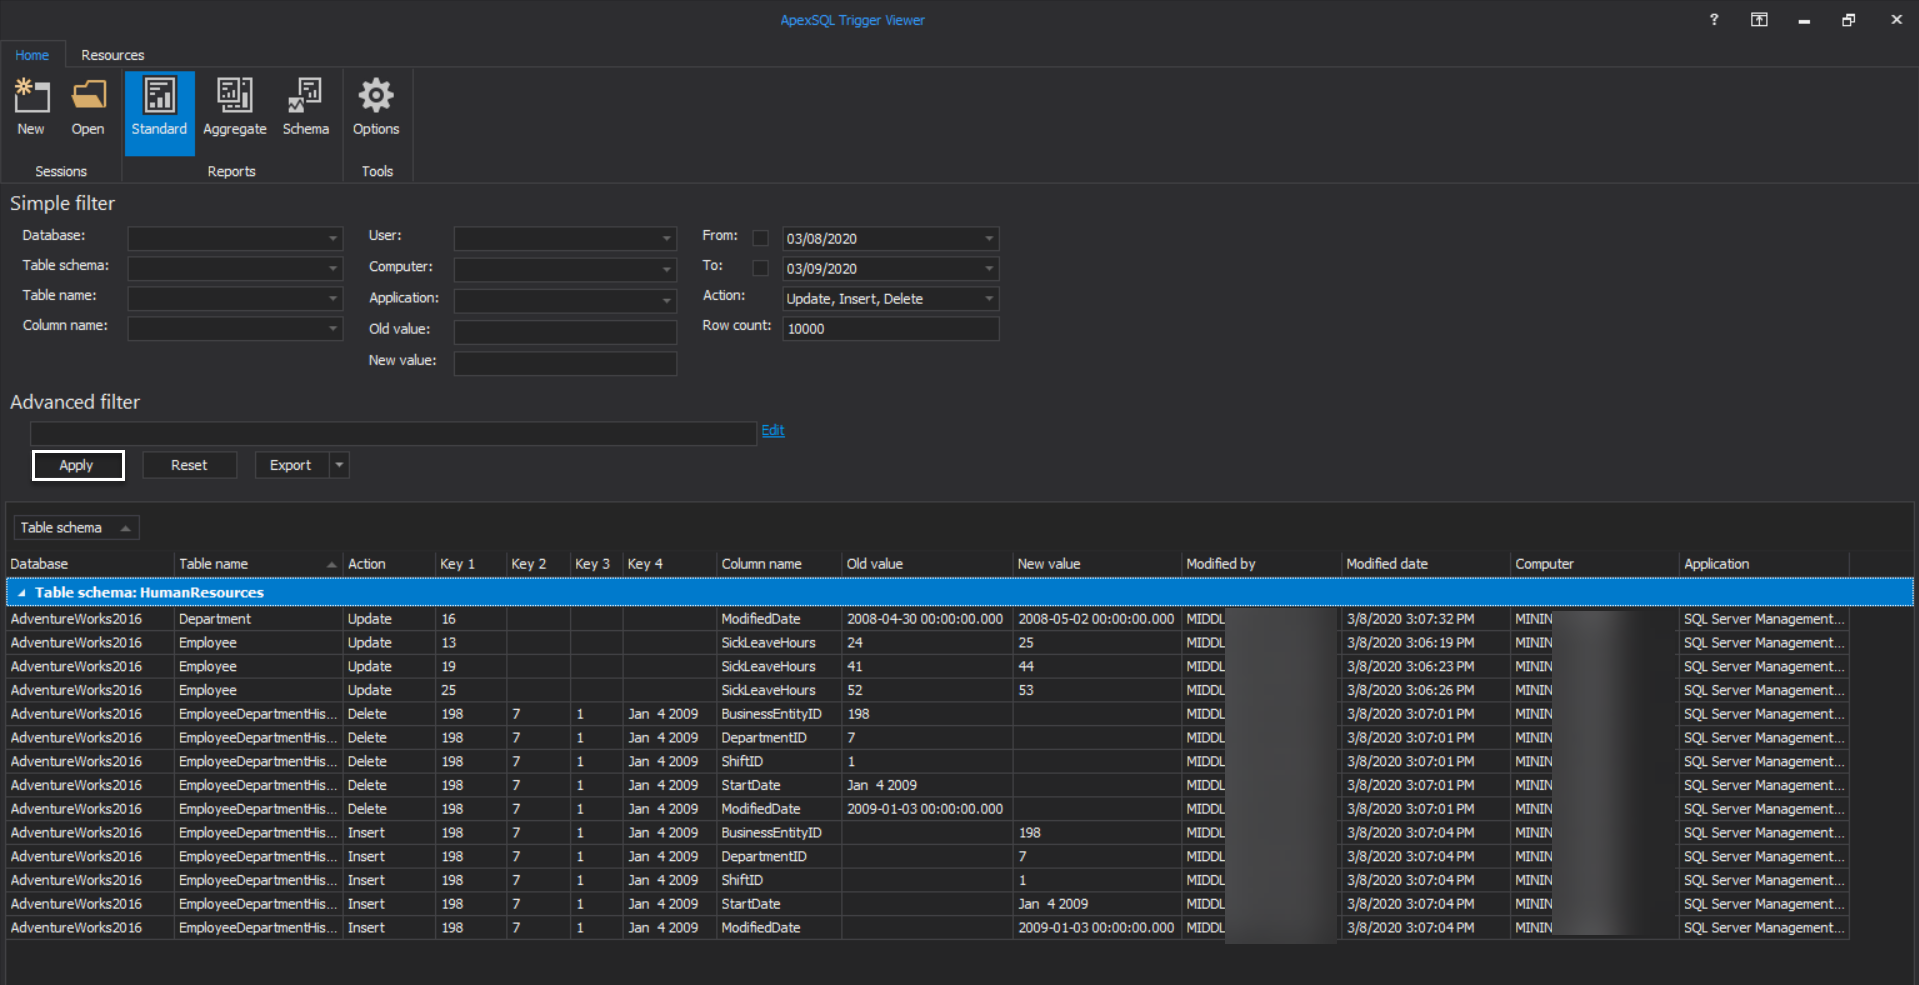
After connecting to the repository database, define the filter by filling the simple filter values, or draw your own advanced filter by providing a WHERE clause, then click on Apply to retrieve the list of audit records that meet your filter criteria, as shown below:
If you plan to review the audit data later or provide it to the security team, you can easily export the audit data by clicking on the Export option and choose the type of the generated file, from the available list, as shown below:
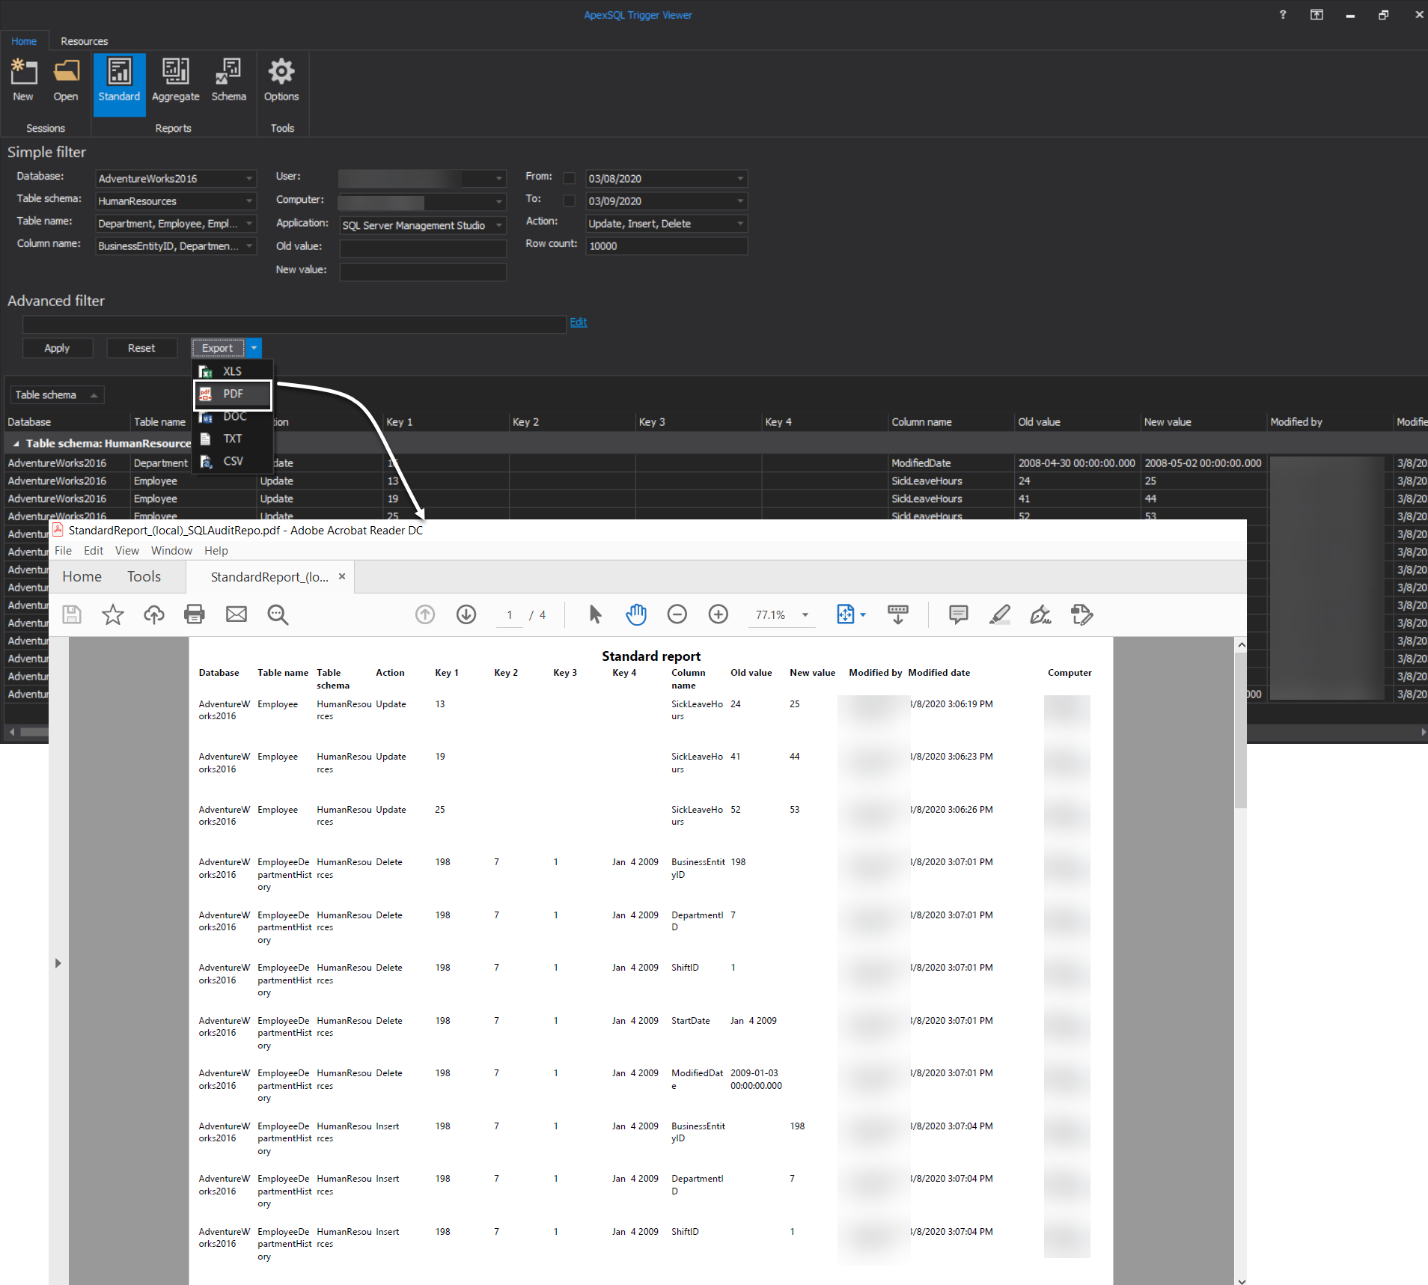
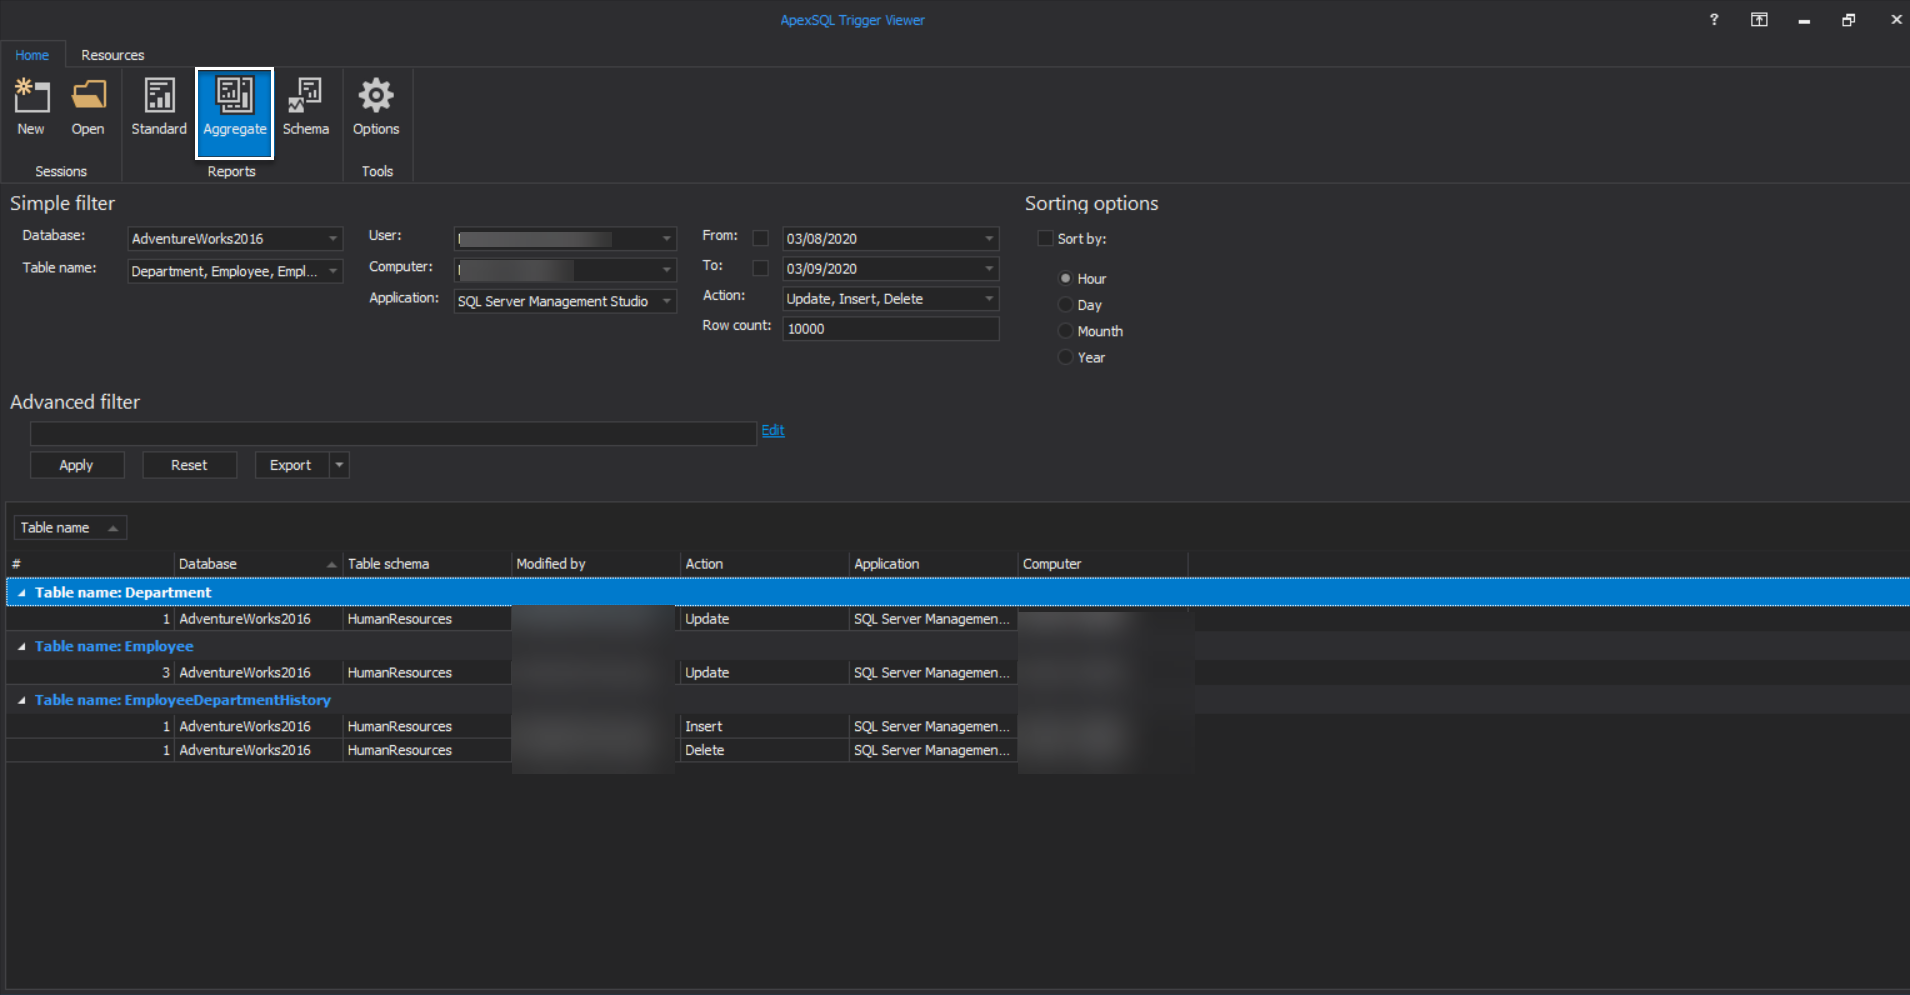
In addition to the detailed display for the audit data, ApexSQL Trigger Viewer provides you with an Aggregate report, that groups the audit data by tables and show the number of actions per each table, as shown below:
Audit Schema Changes
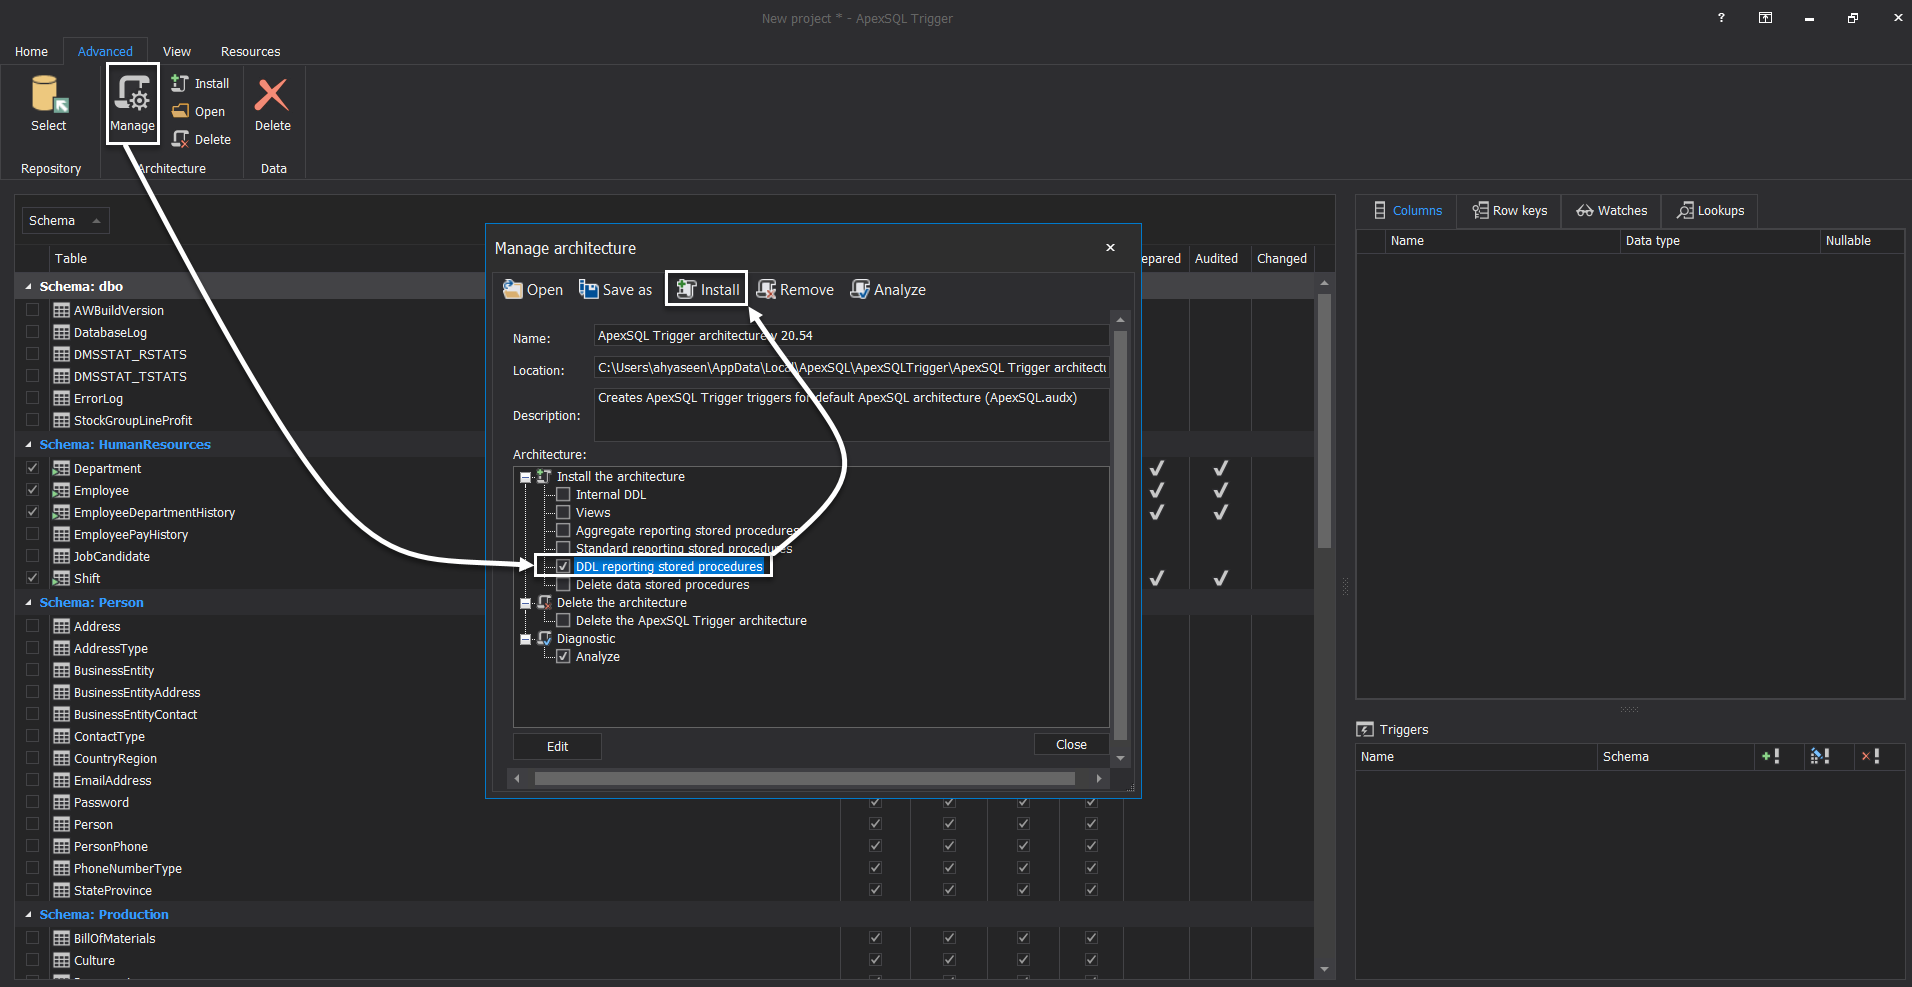
ApexSQL Trigger provides us with the ability to audit the DDL changes on the audited database. To enable the DDL audit, click on the Manage option, under the Architecture options group from the Advanced tab, then choose to include the DDL reporting stored procedures and click Install to install and enable it, as shown below:
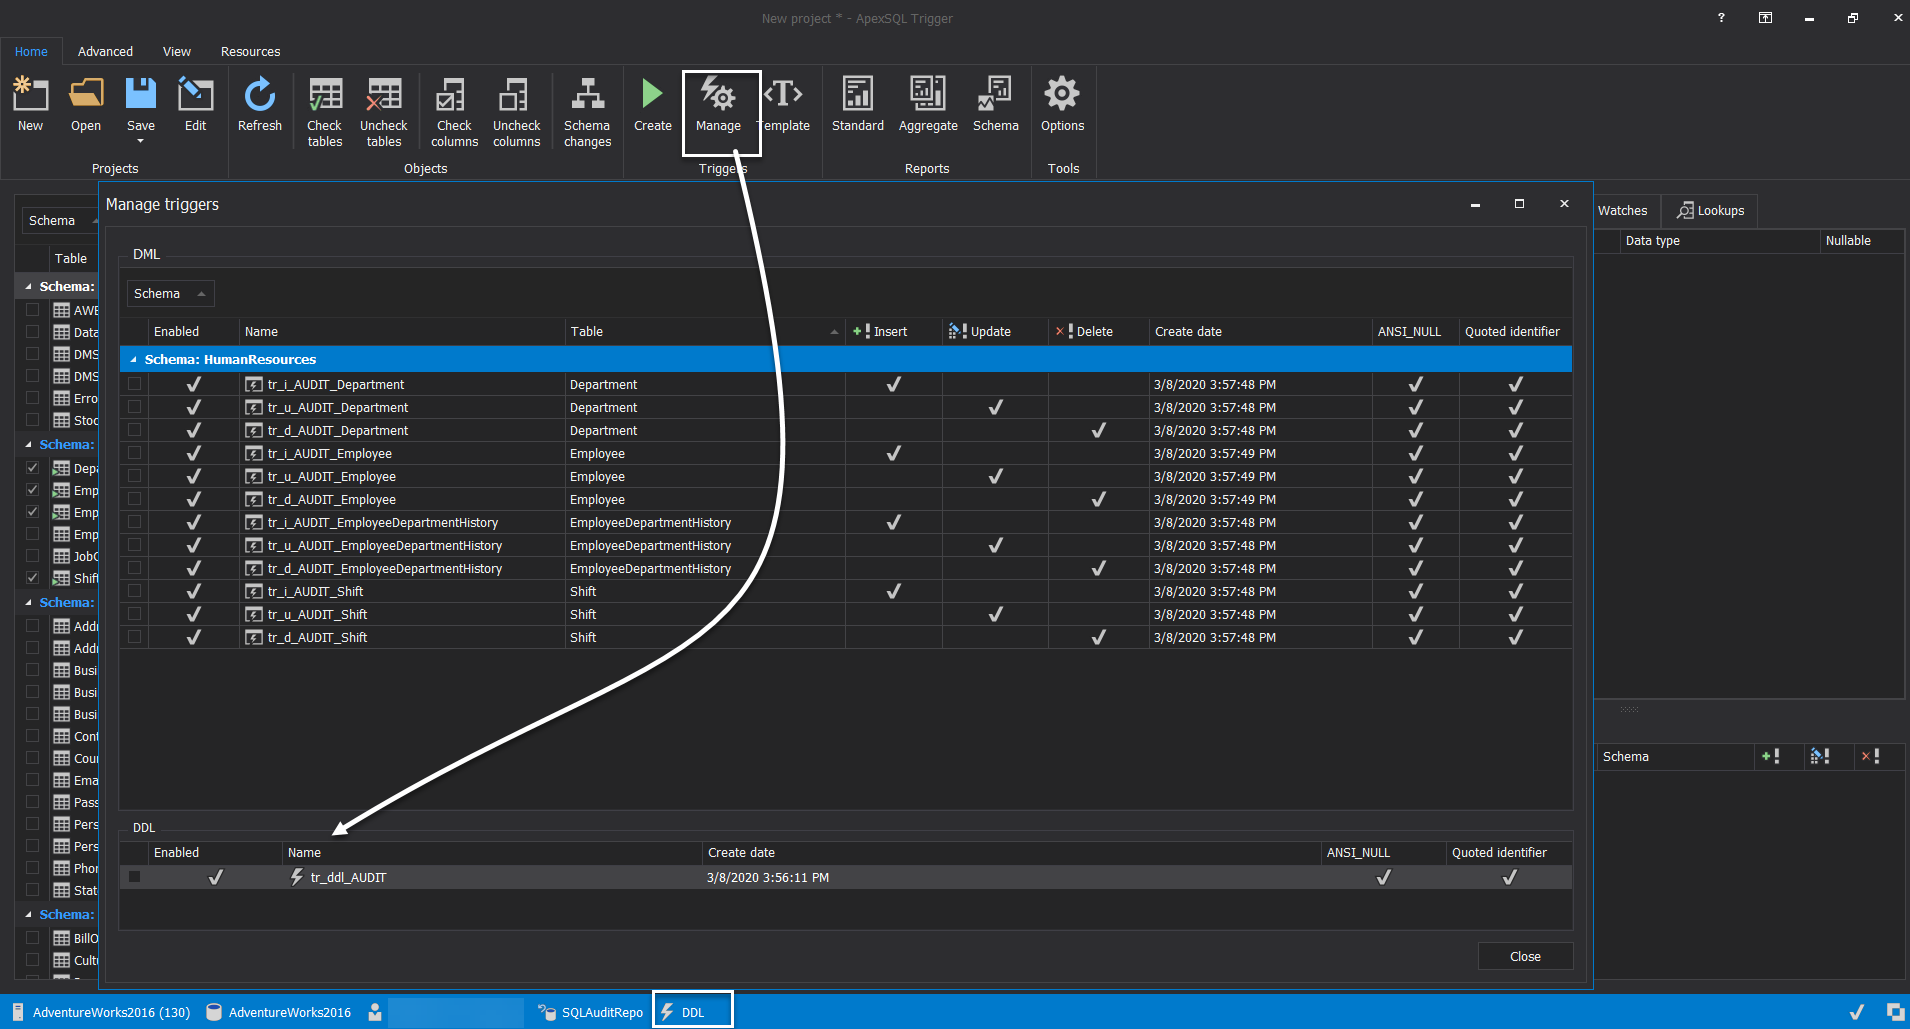
To verify that the DDL audit is enabled, click on the Manage option under the Triggers options group of the Home tab, and check from the DDL section at the bottom of the window that the DDL audit is enabled. Also, you can check it from the status bar beside the connection information, where the DDL icon will be displayed, as shown below:
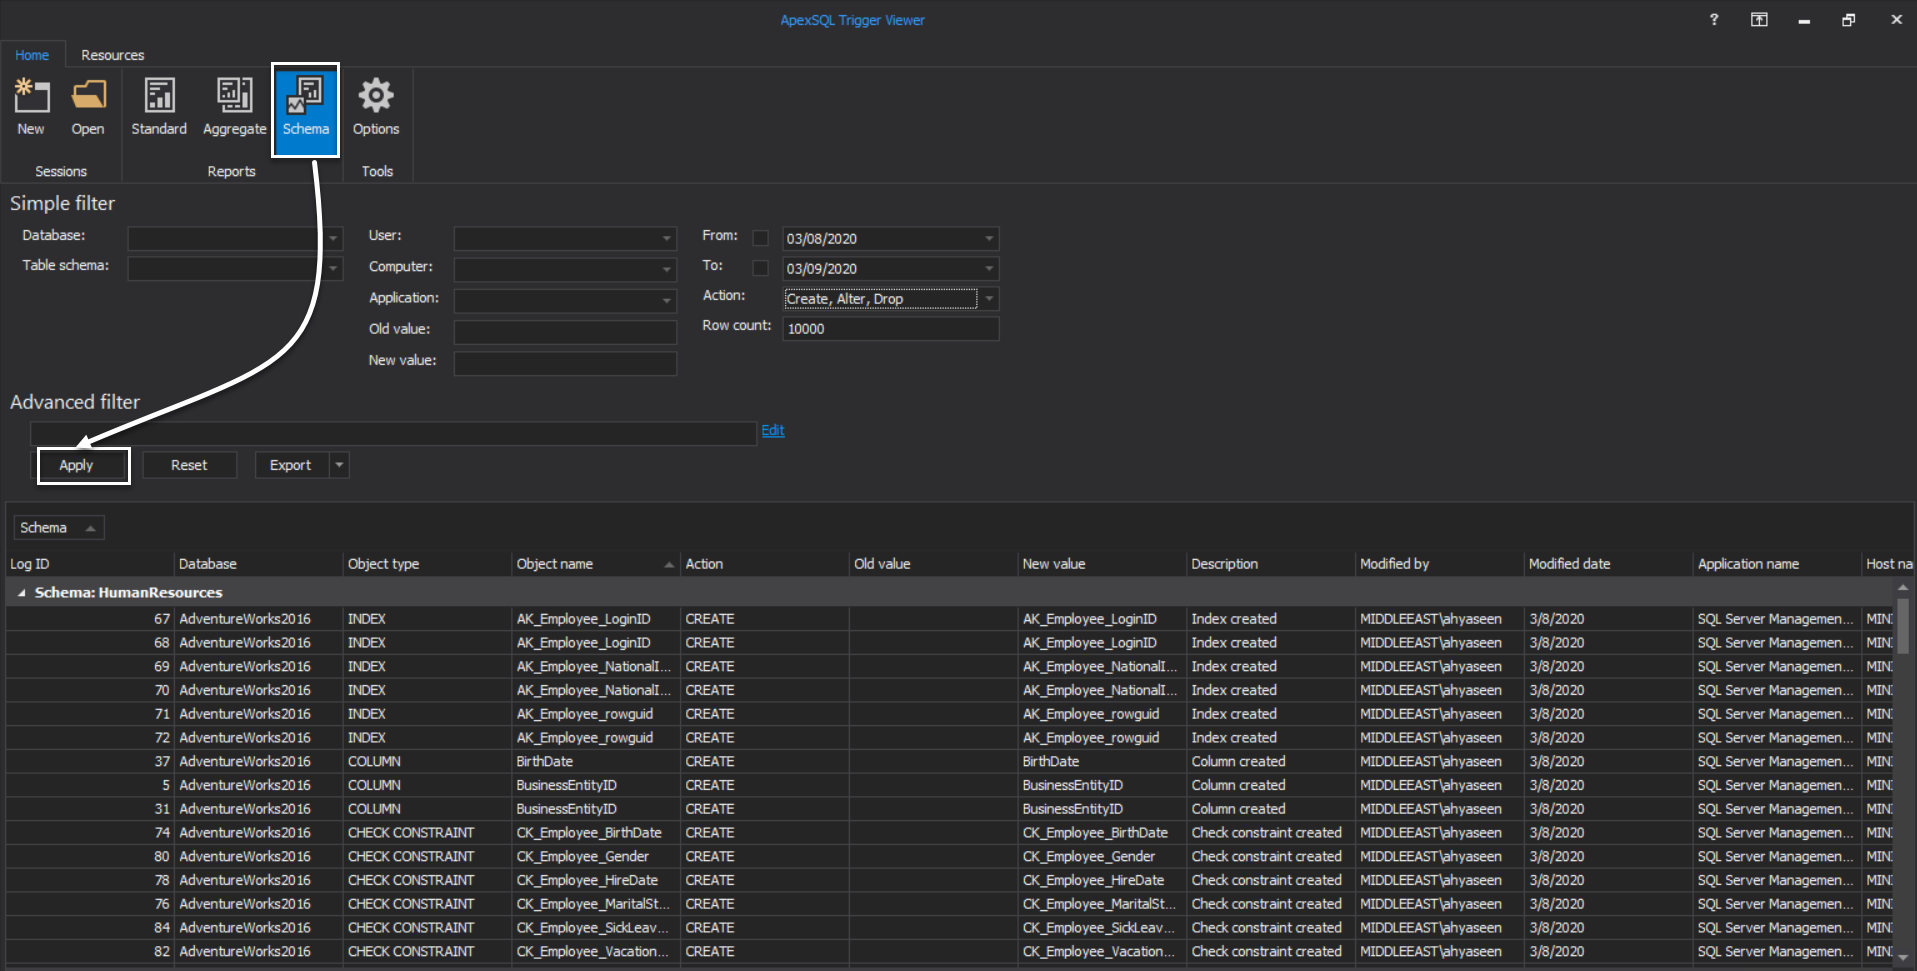
After performing a number of DDL changes on the database tables, we can use the ApexSQL Triggers Viewer tool again to review the DDL audit data, by clicking on the Schema option, under the Reports options group, fill the simple filter values or write your own WHERE clause in the advanced filter, then click on the Apply option to view the DDL audit data, with the ability to export it to different files types from the Export option, as shown below:
ApexSQL TriggerViewer on Cloud for AWS
Features
Major Features of ApexSQL TriggerViewer with sql server 2016 on cloud
- View details about data / DML change on each audited operation
- Include any additional, relevant data to the auditing results for a particular table
- Transform values e.g. 100 to easy to understand literals e.g. Chicago
- Fully customize trigger templates with a dedicated IDE
- Show full audit trail including data as it existed before and after a change
- Visualize your audit plan directly via the main interface for easy editing
- Find out the name of the login, host, and application used to make audited changes
- View all historical modifications to a specific row
- Be automatically notified about changes made to the table structure
- View which database object was changed including the DDL action used to make the change
- Maintain auditing data in the central repository
- Export auditing data to plain text, Microsoft Excel, or PDF
- Export audited data to batch script format
AWS
Installation Instructions For Windows
Installation Instructions For Windows
Note: How to find PublicDNS in AWS
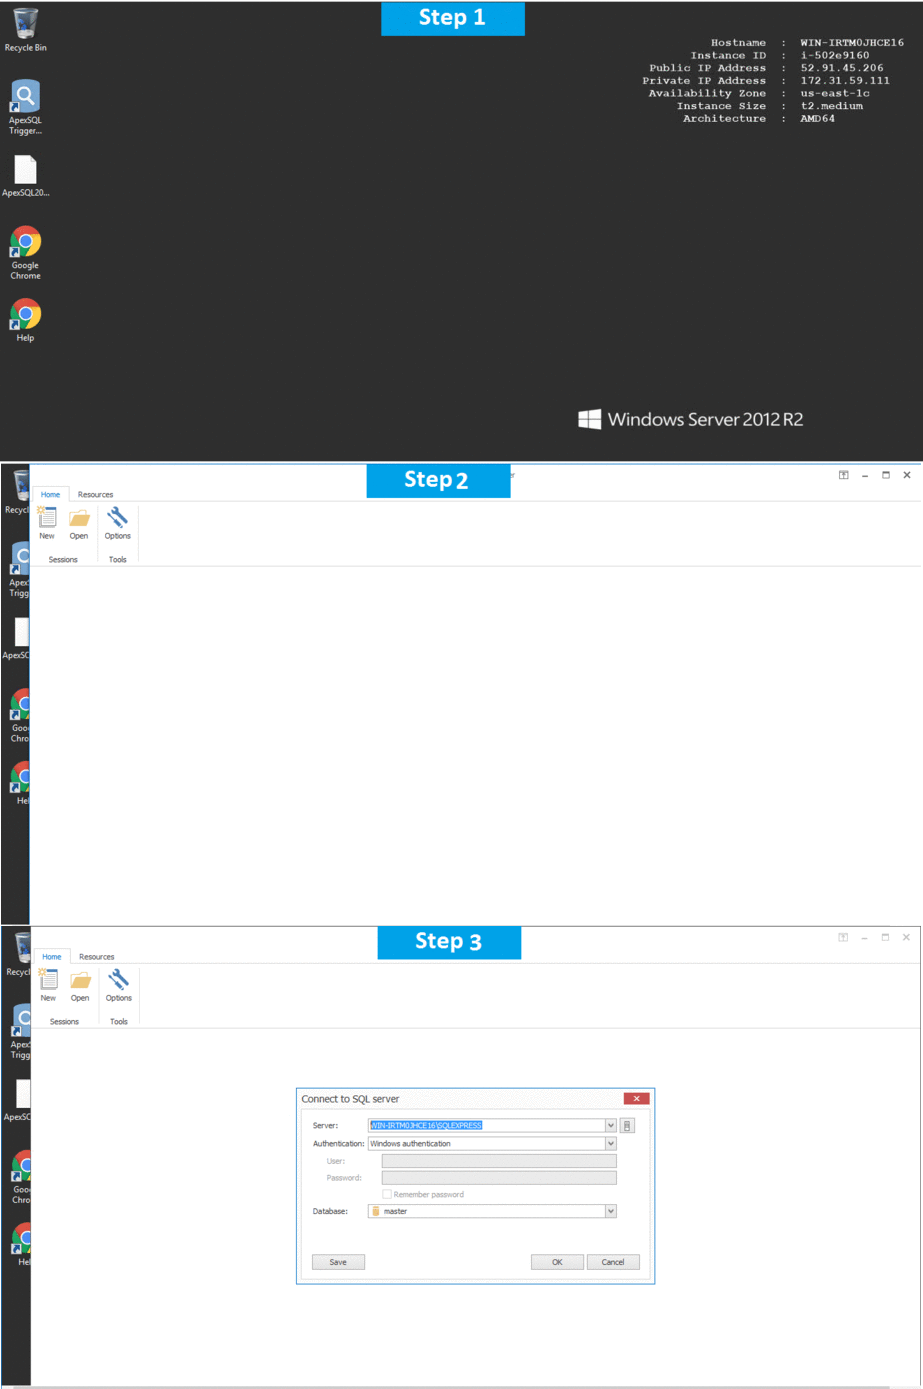
Step 1) RDP Connection: To connect to the deployed instance, Please follow Instructions to Connect to Windows instance on AWS Cloud
Connect to the virtual machine using following RDP credentials:
- Hostname: PublicDNS / IP of machine
- Port : 3389
Username: To connect to the operating system, use RDP and the username is Administrator.
Password: Please Click here to know how to get password .
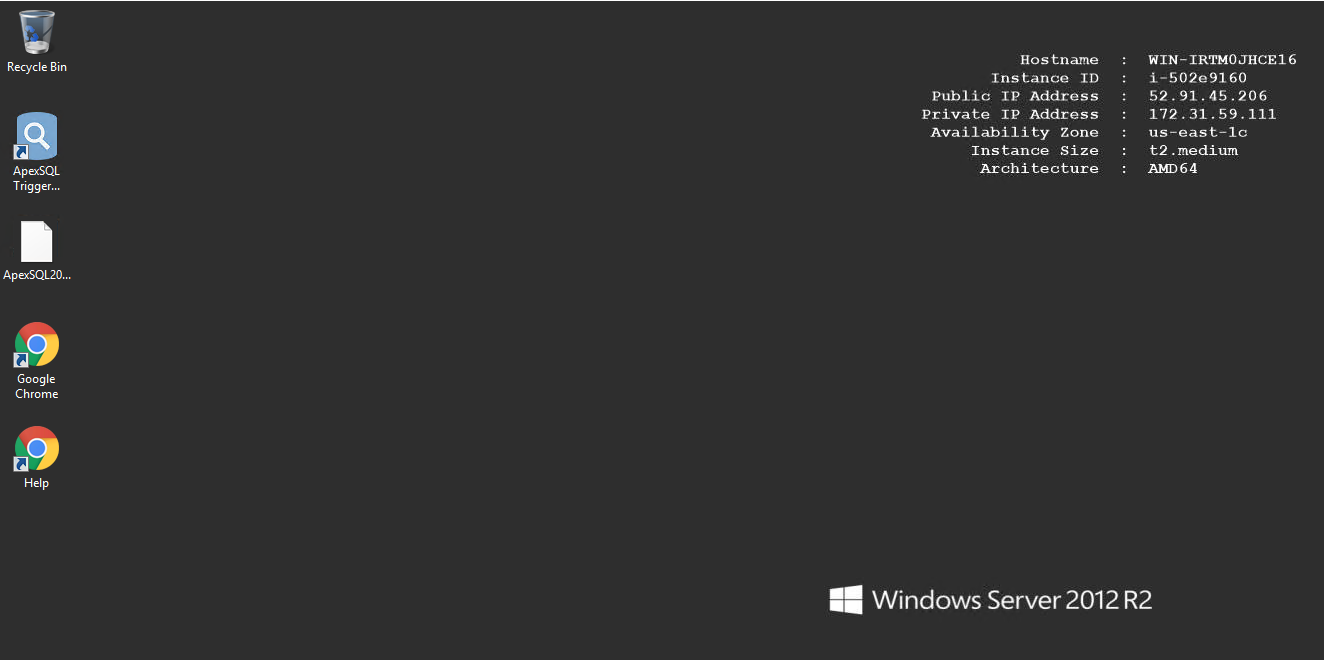
Step 2) On the Start page, typeApexSQL TriggerViewer with sql server 2016 on cloud and then click on ApexSQL TriggerViewer with sql server 2016 on cloud
Step 3) Other Information:
1.Default ports:
- Windows Machines: RDP Port – 3389
- Http: 80
- Https: 443
Configure custom inbound and outbound rules using this link
Installation Step by Step Screenshots
