
1-click AWS Deployment 1-click Azure Deployment
Overview
Automate and schedule database migrations, version your database and rollback changes to any point. Add source control into SSMS and Visual Studio, ApexSQL Change Management Studio has native support for the most popular source control providers including Visual Source Safe, Subversion, Team Foundation Server and SourceGear Vault.
ApexSQL Change Management Studio supports Microsoft SQL Server 2012, 2008 and 2005. Build SQL databases from scripts, snapshots and source control. Compare and synchronize SQL database data and perform row level recovery from backups. Automate and schedule database migrations, version your database and rollback changes to any point. Add source control into SSMS and Visual Studio, ApexSQL Change Management Studio has native support for the most popular source control providers including Visual Source Safe, Subversion, Team Foundation Server and SourceGear Vault. Perform source control operations on multiple objects simultaneously and pinpoint discrepancies between live and versioned objects.
How to link a SQL Server database to a source control system :
Description
Using , a SQL Server Management Studio add-in, developers can link a database to the source control repository directly from SQL Server Management Studio.
Linking process
- Right-click on the database in the Object Explorer pane, and from the context menu, select the Link database to source control option:

- The Source control setup window will be displayed:
The Source control setup window consists of five steps (tabs):
Connection type tab
Development model tab
Object filtering tab
Script Options tab
System login tab
Connection type tab
ApexSQL Source Control supports the two types of connection to the source control repository:
- Native
- Working folder
If the Native option is chosen, then the source control system must be chosen as well. ApexSQL Source Control natively supports five source control systems:
- Git
- Mercurial
- Perforce
- Subversion
- Team Foundation Server
The Working folder feature can also be used to link a database to any folder in the file system. This feature is convenient, e.g., evaluating purposes or linking the database to the local repository folder created by third-party source control clients.
Development Model tab
One of the two standard development models must be specified for working with the source control systems:
- Dedicated
- Shared
Object filtering tab
This step provides a possibility to exclude objects not to be linked to source control. It is possible to exclude specific objects, exclude objects by owner or type.
Script options tab
This step of the Source control setup window is about setting the Ignore comparison and the Synchronization options for the selected database.
System login
Connecting to a source control repository requires appropriate login information to be provided as well as some additional information specific to the chosen source control system.
Here’s how login forms and the repository string specific to each source control system look like:
Git
The Repository path form:
<protocol>://<hostname>:<portnumber>/<Git server name>/<repository>
- <protocol> – can be HTTP, HTTPS or SSH
- <hostname> – the machine hostname, a NetBIOS name or a name that hosts the Git Server
- <portnumber> – port 8443 is used by default
- Using <Git server name> in the repository path is mandatory
- <repository> – the name of the Git repository to connect to
Mercurial
The Repository path form:
<protocol>://<hostname>:<portnumber>/<repository>
- <protocol> – can be HTTP, HTTPS or SSH
- <hostname> – host machine, NetBIOS, or DNS name
- <portnumber> – port 8443 is used by default
- <repository> – the name of the Mercurial repository to connect to
Perforce
The Repository path form:
<protocol>://<hostname>:<portnumber>
- <protocol> – can be TCP which is the default, or SSL
- <hostname> – the machine hostname, a NetBIOS name or a DNS machine name that hosts the Perforce server
- <portnumber> – port 1666 is used by default
Subversion :
The Repository path form:
<protocol>://<hostname>:<portnumber>/svn/<repository>/
- <protocol> – can be HTTP, HTTPS, SVN or SSH
- <hostname> – host machine, NetBIOS, or DNS name
- <portnumber> – port 8443 is used by default
- <repository> – the name of the Subversion repository to connect to
Team Foundation Server (Azure DevOps Server/Services)
The meaning of the fields:
- TFS server – the path to the selected source control repository. It requires to be entered in the following form: <protocol>://<hostname>:<portname>/tfs:
- <protocol> – can be HTTP or HTTPS
- <hostname> – host machine, NetBIOS, or DNS name
- <portname> – port 8080 is used by default
- Using /tfs in the repository path is mandatory
- Project – the folder in the Team Foundation Server (Azure DevOps Server/Services) that stores the source control files
Installing ApexSQL monitoring tools :
Applies to
ApexSQL Monitor, ApexSQL BI Monitor, ApexSQL VM Monitor
Description
Permissions and requirements
All ApexSQL monitoring tools require Windows administrator permissions and SQL Server CREATE ANY DATABASE permission for installation.
Configuration
In the Configuration step, provide credentials sufficient to create a database on the selected local SQL Server instance.
If repository database name should be changed or repository database data files should be stored on a drive different than the default SQL Server drive:
Press the Change button to open the Database configuration dialog
Optionally, type the new repository database name in the Name field if a new name should be used and/or select the new paths for the Data file and Log file by clicking on the “…” buttons Select new paths for Data file and Log file and press OK
Web server configuration
The Web server configuration dialog allows configuring the regular http web server as well as the secure https web server. By default, the HTTP web server is selected
Default HTTP server port for ApexSQL Monitor is 5000. ApexSQL BI Monitor uses port 5005 and ApexSQL VM Monitor port 5010. These port numbers can be changed according to specific needs. If left selected, the Create firewall exception for the specified port option will create a new inbound TCP firewall rule to allow communication through the specified port number.
To use HTTPS web server, select the checkbox that will display the secure web server configuration
- Default HTTPS server port for ApexSQL Monitor is 4443, while ApexSQL BI Monitor and ApexSQL VM Monitor use ports 4444 and 4445, respectively. The same as HTTP server ports, these port numbers can be changed as well
- Enter the name of the host server that will be used for the HTTPS access, i.e. nikola.apexsql.com
- Select the available SSL certificate from the SSL dropdown menu. Installer will browse and list all available certificates. If no certificates are listed, please install the CA certificate and then try again
- Use Test button to confirm that HTTPS web server is configured properly
Finally, enter the password for the built-in admin used. This is the required step.
Press the install button to complete the installation. Afterwards, the application will be able to successfully collect and store the metrics
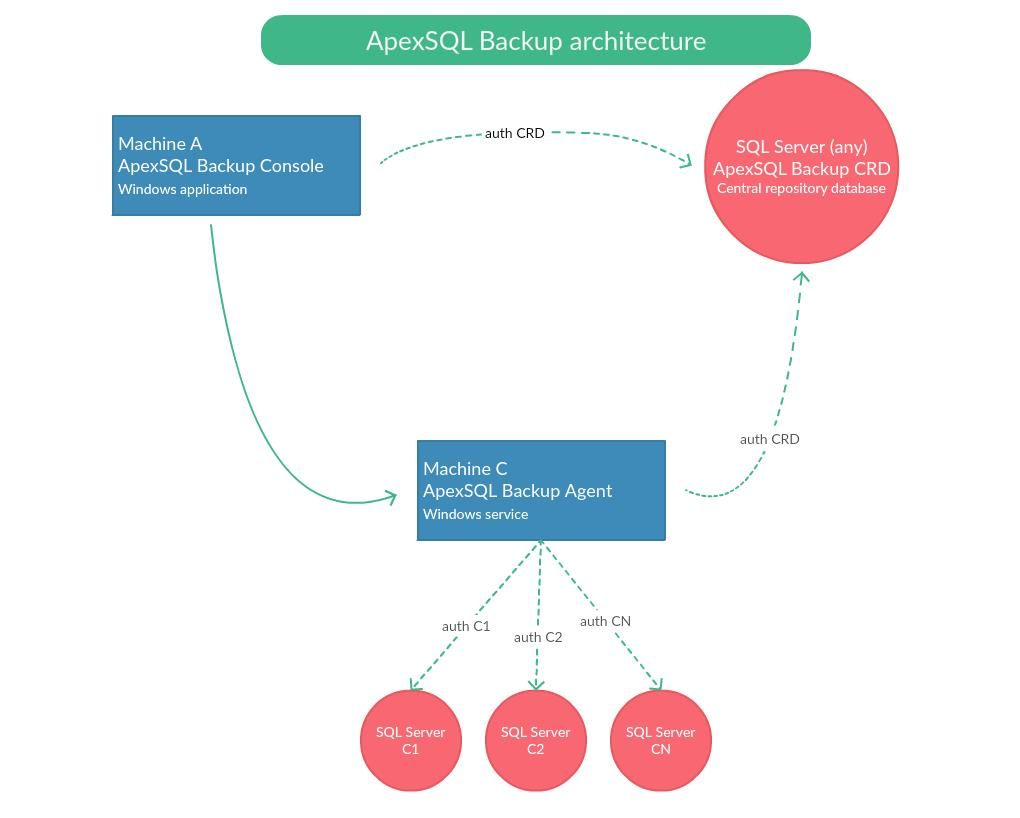
ApexSQL Backup application components:
ApexSQL Backup is a powerful tool used for managing SQL Server database backup and restore jobs across multiple servers. The application consists of three main components:
- User interface – This is the main part of the application, that allows the user to create, schedule and execute various backup and restore jobs. The user interface is also used for job monitoring. One user interface is needed for the application to function properly, but should the need arise, more can be installed on multiple machines
- Central Repository Database – This is the database that is created on the specified instance of SQL Server. Its main purpose is to store the information that is necessary for communication between user interface and one or more agent services. Schedule information, various backup and restore jobs are stored in the Central repository database. In it are also login credentials for the managed servers stored, in encrypted form, to avoid repetitive logging in to every server which is added to the application upon application startup. One central repository database is needed to manage any number of servers
- ApexSQL Backup Agent Service – This is a windows service that allows auditing of SQL Server instances. Not to be confused with SQL Server Agent. ApexSQL Backup Agent needs to be installed on the machine where the user interface is installed
All of the components need to be installed properly in order for the application to work as intended. Depending on user’s needs and environment, there could be multiple setup scenarios. The entire setup can be installed on the local machine, and used as such, with no components needed on the server side
Installation of ApexSQL Backup user interface
To install ApexSQL Backup user interface on a local machine, perform the following steps:
- Download the installer for the latest version
- Run the downloaded .exe file to start the installation process
- Select the Install ApexSQL Backup radio button, and read the End User License Agreement. By clicking on Next you agree to the End User License Agreement and start the installation of the ApexSQL Backup user interface
- Choose the installation path for ApexSQL Backup, optionally select check the box to create a Desktop icon and click Install. The installation process should be completed in a couple of moments
- Close the installation wizard when done. The installation of the user interface component is complete
Installation of ApexSQL Backup central repository database and ApexSQL Backup Agent upon first application startup
When first starting the application, it will prompt the user to install the ApexSQL Backup central repository database and afterwards, ApexSQL Backup agent
- Running the application for the first time will automatically start the installation wizard for the central repository database. The SQL Server instance that will host the central repository database needs to be selected. Choose the SQL Server instance, authentication type, and SQL Server login, if SQL Server authentication is selected, for the respective server. The login that is used for this purpose must have sysadmin privileges for the SQL Server instance.
- Click OK to finish the installation of central repository database. From now on, the entered credentials will be used automatically by the application and ApexSQL Backup agent to connect to the central repository database
- After the installation of the central repository database, the ApexSQL Backup agent installation wizard will start. Select the account to be used in the dropdown menu. For the purpose of this article, User will be used, and in the text boxes below, appropriate username with domain name and password are entered. Click OK to complete the installation of the ApexSQL Backup agent
- Should there come a need to change the login that is used to access the central repository database, click on the Central repository button in Configuration tab, and enter credentials for another login (the new login must be defined on SQL Server, and must have sysadmin privileges for respective server).

ApexSQL Backup Agent manual installation
- ApexSQL Backup Agent can alternatively be installed even before ApexSQL Backup is started. That can be done by double clicking on the installation file used to install the ApexSQL Backup user interface and then selecting the Install ApexSQL Backup Agent radio button
- Pressing the Next button opens the installation wizard for the ApexSQL Backup Agent
- Once there, click on Next, and in the following page, enter the account to be used, domain name, username and password
- Clicking on Next advances to the next page where the location for the ApexSQL Backup agent installation should be specified. Default location can be used, as well as custom, which can be defined by manually entering the location or browsing to it using the ellipsis button (…). Clicking on the Install button starts the installation of ApexSQL Backup agent
- After the installation wizard completed, press Close to finish the installation of ApexSQL Backup wizard
Troubleshooting
There are several problems that might occur due to improper installation, or inadequate permission settings:
- Problem: A red X is displayed on the icon for SQL server instance when trying to connect to a remote server
This problem usually occurs when the communication between the components does not function properly. There are multiple solutions for this problem, depending on the circumstances
Solution 1: The ApexSQL Backup Agent service is not running. It did not start properly after the reboot, or it stopped running for some other reason. To fix this, go to Control Panel/Administrative Tools/Local Services, and locate ApexSQL Backup Agent Service. Check the status of the service, and make sure it is set to started (click on Start the service). To prevent this from happening in the future, set the startup type of the service to Automatic. If the ApexSQL Backup Agent Service is not on the list, install it again. As soon as the agent service is running, click the refresh button, and the SQL Server instance(s) should be available again
Solution 2: The ApexSQL Backup Agent service is running, and has the automatic startup type set, but the problem still occurs. In this case, the account that is running the ApexSQL Backup Agent Service does not have full permissions over ProgramData folder. Go to Control Panel/Administrative Tools/Local Services, locate the agent service, and check the account that is running the service. Change the permissions over ProgramData folder for this account (see FAQ for the instructions), or select another account that has full permissions over ProgramData folder. Restart the agent service to save the changes
Solution 3: This error could also occur when trying to connect with the agents on the remote servers, and Windows authentication is used for the central repository connection on the local server. This way, agents that are running under different accounts on remote servers try to connect with the central repository using these same (remote server) Windows accounts
The best way to solve this problem is to use SQL Server authentication type when setting the connection to central repository. Just make sure that the SQL Server login that is used for this purpose has sysadmin privileges on the SQL Server instance that is hosting the central repository database. To do this, see the step 3 in “Installation of central repository database” chapter
- Problem: Getting the error “Sysadmin credentials required” when trying to install Central repository database
- Solution: Username and password that are provided belong to the SQL Server login that does not own Sysadmin credentials. In order to install central repository database, the login with sysadmin permissions must be used. Either grant sysadmin permissions to the respective login, or choose another login that owns the required permissions


ApexSQL Change Management Studio supports Microsoft SQL Server 2012, 2008 and 2005. Build SQL databases from scripts, snapshots and source control. Compare and synchronize SQL database data and perform row level recovery from backups. Automate and schedule database migrations, version your database and rollback changes to any point. Add source control into SSMS and Visual Studio, ApexSQL Change Management Studio has native support for the most popular source control providers including Visual Source Safe, Subversion, Team Foundation Server and SourceGear Vault. Perform source control operations on multiple objects simultaneously and pinpoint discrepancies between live and versioned objects.
ApexSQL Change Management on cloud for AWS
Features
Major Features of ApexSQL Change Management:
1. Cross-environment migration
2. Migration pre-impact analysis
3. Reverse any changes
4. Deploy as .NET package
5. Git, Subversion, TFS, Perforce
6. Compare SC labels
7. Compare schema changes
AWS
Installation Instructions For Windows
Note: How to find PublicDNS in AWS
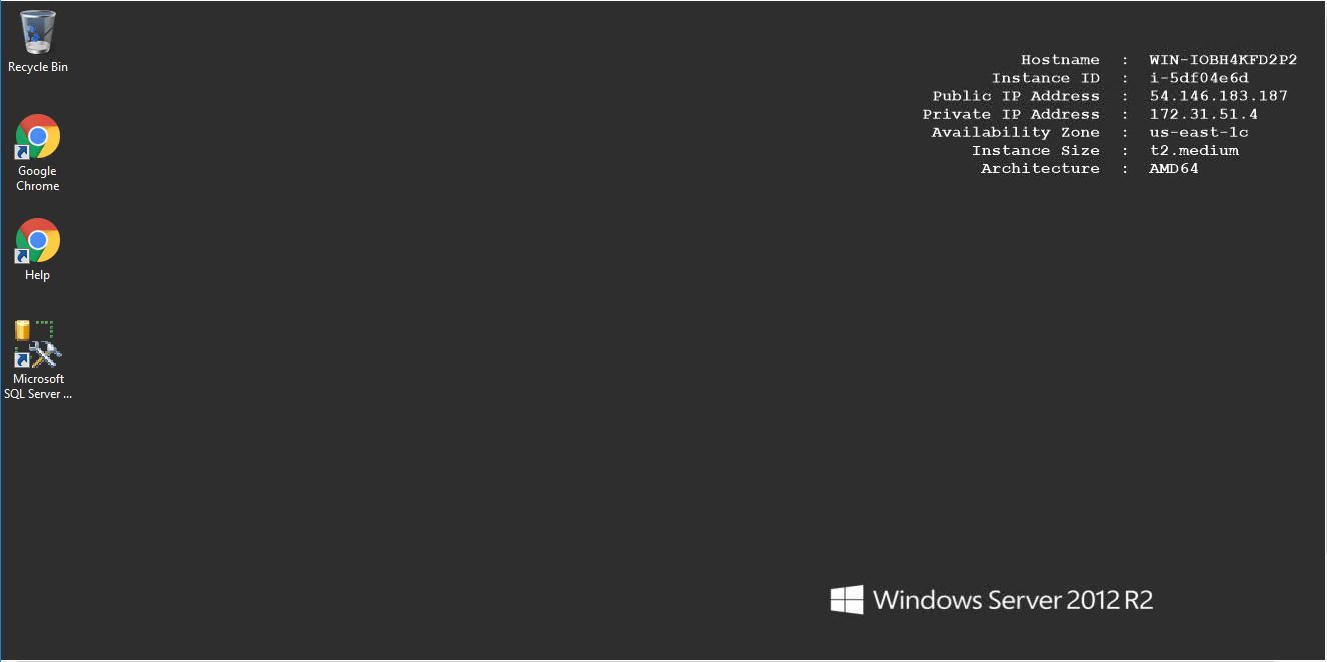
Step 1) RDP Connection: To connect to the deployed instance, Please follow Instructions to Connect to Windows instance on AWS Cloud
Connect to the virtual machine using following RDP credentials:
- Hostname: PublicDNS / IP of machine
- Port : 3389
Username: To connect to the operating system, use RDP and the username is Administrator.
Password: Please Click here to know how to get password .
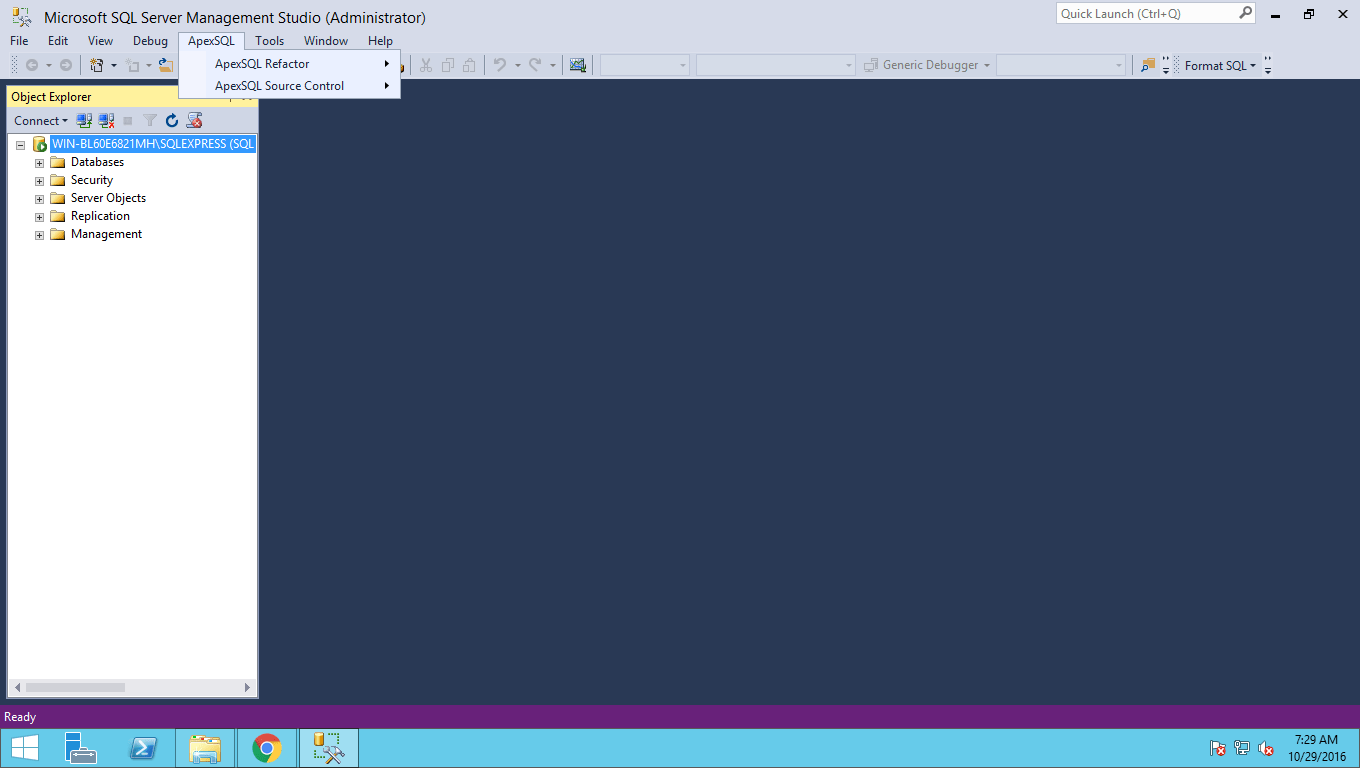
Step 2) On the Start page, type ApexSQL Change Management and then click on ApexSQL Change Management
Step 3) Other Information:
1.Default installation path: will be in your root folder “C:\Program Files\ApexSQL”
2.Default ports:
- Windows Machines: RDP Port – 3389
- Http: 80
- Https: 443
Configure custom inbound and outbound rules using this link
Installation Step by Step Screenshots

Videos
Embedded media removed during static cleanup.
