1-click AWS Deployment 1-click Azure Deployment 1-click Google Deployment
Overview
Orchard is a CMS application that requires a robust ASP.NET hosting platform. Everleap provides reliable, scalable and affordable modern cloud hosting for Orchard that is superior to traditional shared, VPS or Dedicated hosting. Windows cloud hosting with flat, fixed pricing
It natively integrates with Orchard CMS and extends its features by allowing its users to collaboratively work on the content or by simplifying communication with the customers. Cognosys Provides Hardened images of Orchard Collaboration on the cloud ( AWS marketplace, Azure and Google Cloud Platform). Orchard Collaboration is owned by Orchard Collaboration
(http://orchardcollaboration.com/) and they own all related trademarks and IP rights for this software.
Orchard Core
Orchard Core consists of two different targets:
- Orchard Core Framework: An application framework for building modular, multi-tenant applications on ASP.NET Core.
- Orchard Core CMS: A Web Content Management System (CMS) built on top of the Orchard Core Framework.
It’s important to note the differences between the framework and the CMS. Some developers who want to develop SaaS applications will only be interested in the modular framework. Others who want to build administrable websites will focus on the CMS and build modules to enhance their sites or the whole ecosystem.
Building Software as a Service (SaaS) solutions with the Orchard Core Framework
It’s very important to understand the Orchard Core Framework is distributed independently from the CMS on nuget.org. We’ve made some sample applications on s that will guide you on how to build modular and multi-tenant applications using just Orchard Core Framework without any of the CMS specific features.
One of our goals is to enable community-based ecosystems of hosted applications which can be extended with modules, like e-commerce systems, blog engines and more. The Orchard Core Framework enables a modular environment that allows different teams to work on separate parts of an application and make components reusable across projects.
Building Website with Orchard Core CMS
Orchard Core CMS is a complete rewrite of Orchard CMS on ASP.NET Core. It’s not just a port as we wanted to improve the performance drastically and align as close as possible to the development models of ASP.NET Core.
- Performance. This might the most obvious change when you start using Orchard Core CMS. It’s extremely fast for a CMS. So fast that we haven’t even cared about working on an output cache module. To give you an idea, without caching Orchard Core CMS is around 20 times faster than the previous version.
- Portable. You can now develop and deploy Orchard Core CMS on Windows, Linux and macOS. We also have Docker images ready for use.
- Document database abstraction. Orchard Core CMS still requires a relational database, and is compatible with SQL Server, MySQL, PostgreSQL and SQLite, but it’s now using a document abstraction (YesSql) that provides a document database API to store and query documents. This is a much better approach for CMS systems and helps performance significantly.
- NuGet Packages. Modules and themes are now shared as NuGet packages. Creating a new website with Orchard Core CMS is actually as simple as referencing a single meta package from the NuGet gallery. It also means that updating to a newer version only involves updating the version number of this package.
- Live preview. When editing a content item, you can now see live how it will look like on your site, even before saving your content. And it also works for templates, where you can browse any page to inspect the impact of a change on templates as you type it.
- Liquid templates support. Editors can safely change the HTML templates with the Liquid template language. It was chosen as it’s both very well documented (Jekyll, Shopify, …) and secure.
- Custom queries. We wanted to provide a way for developers to access all their data as simply as possible. We created a module that lets you create custom ad-hoc SQL and Lucene queries that can be re-used to display custom content, or exposed as API endpoints. You can use it to create efficient queries, or expose your data to SPA applications.
- Deployment plans. Deployment plans are scripts that can contain content and metadata to build a website. You can now include binary files, and even use them to deploy your sites remotely from a staging to a production environment for instance. They can also be part of NuGet Packages, allowing you to ship predefined websites.
- Scalability. Because Orchard Core is a multi-tenant system, you can host as many websites as you want with a single deployment. A typical cloud machine can then host thousands of sites in parallel, with database, content, theme and user isolation.
- Workflows. Create content approval workflows, react to webhooks, take actions when forms are submitted, and any other process you’d like to implement with a user friendly UI.
- GraphQL. We provide a very flexible GraphQL API, such that any authorized external application can reuse your content, like SPA applications or static site generators.
Different website building strategies
Orchard Core CMS supports all major site building strategies:
- Full CMS. In this mode, the website uses a theme and templates to render your content, aiming for little to no custom development at all.
- Decoupled CMS. The site starts off blank, apart from the content management back-end. You create all the templates you need with Razor Pages or MVC actions and access your content via the content services.Headless CMS. The site only manages the content, and you create a separate application that will fetch the managed content using GraphQL or REST APIs. Status
The latest released version of Orchard Core is 1.0.0-rc1. The release notes can be found The software is almost ready for final release. No feature development or enhancement of the software is undertaken; tightly scoped bug fixes are the only code you’re allowed to write in this phase, and even then only for the most heinous and debilitating of bugs.
Getting Started
- Clone the repository using the command git clone and checkout the master branch for the latest release, or the dev branch for the cutting-edge version.
- Watch the ASP.NET Community Standup video where Orchard Core was demonstrated hat will guide you on how to build modular and multi-tenant applications
- Follow the tutorial inside the to learn how to develop Orchard Core modules.
Command line
- Install the latest version of the .NET Core SDK from this Next, navigate to D:\OrchardCore\src\OrchardCore.Cms.Web or wherever your folder is on the commandline in Administrator mode.
- Call dotnet run.
- Then open the URL in your browser.
You can also read to create new applications from predefined templates.
- Download Visual Studio 2019 (any edition)
- Open OrchardCore.sln and wait for Visual Studio to restore all Nuget packages.
- Ensure OrchardCore.Cms.Web is the startup project and run it.
- Optionally install the to add some useful utilities to your Visual Studio such as an error log watcher or a dependency injector.
Different Ways To Install Orchard
There are four ways you can install Orchard. You can:
- Install it using the Microsoft Web Platform Installer.
- Install it from Microsoft WebMatrix Download the Orchard and install it as described
- Orchard source code and build Orchard from the command line or in Visual Studio.
This topic shows how to install Orchard using the Microsoft Web Platform Installer.
Requirements
The minimum requirements for running Orchard are the following:
- ASP.NET 4.5
- A web server such as IIS Express 8, 7.5 or IIS 7.x.
When installing IIS, make sure you enable the ASP.NET IIS modules. Also make sure that you run Orchard in an integrated pipeline ASP.NET 4 application pool.
Important: If you previously installed any pre-release versions of WebMatrix, ASP.NET Web Pages, or ASP.NET MVC 4, you should uninstall those products before Orchard will run correctly on your computer. To develop Orchard sites, many developers will want to use a database such as SQL Server, and a web page programming environment such as WebMatrix or Visual Studio 2013. The following installation was tested with a clean installation of Windows 8.1. It uses the Web Platform Installer and it includes Orchard, IIS 8.0 Express, and optional applications for Orchard development like WebMatrix and SQL Server Compact 4.0.
Installing Orchard
To begin, download and install the Web Platform Installer. When you’re done, run it.
Find Orchard CMS and then click Add to include Orchard as an item to install.
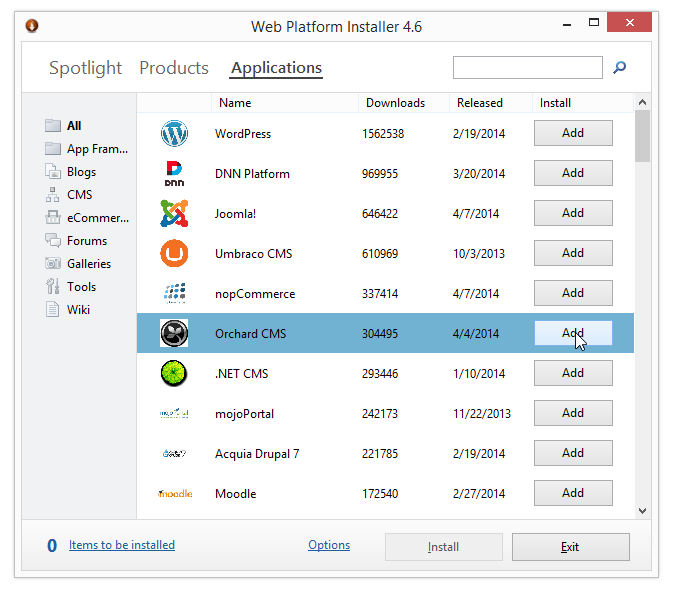
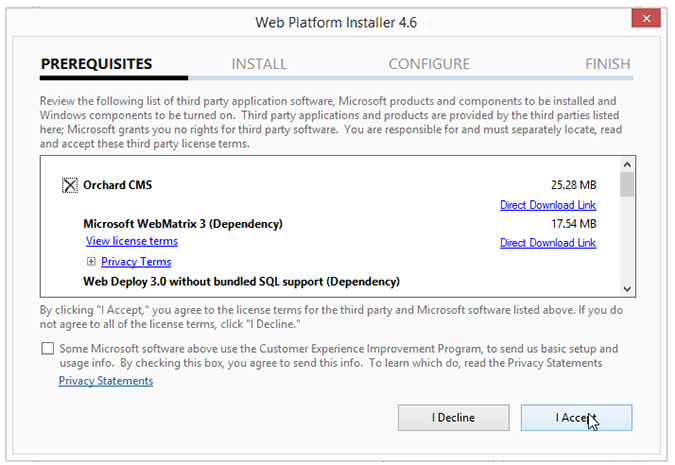
Click Install. Accept the license terms in order to continue.
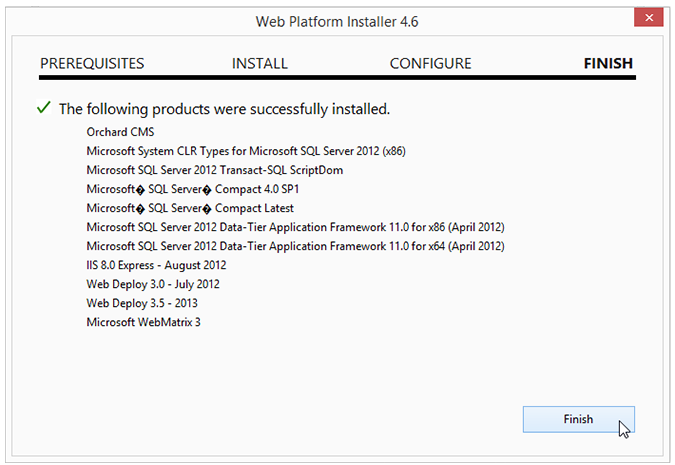
When the installation is complete, the dialog shows the list of installed tools in addition to Orchard. Click the Launch link to open the site in WebMatrix.
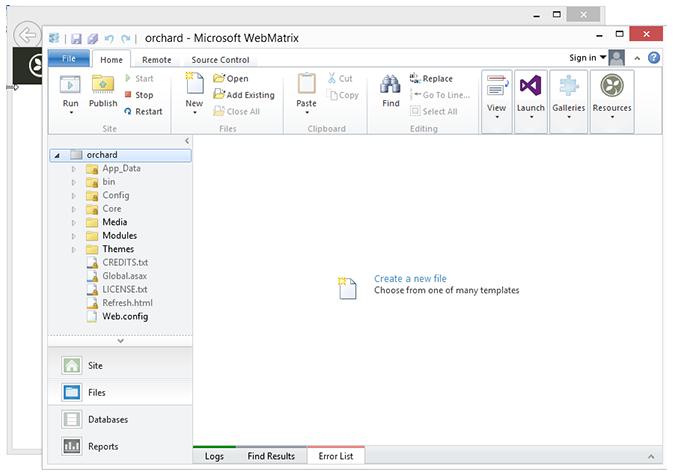
Running Orchard in WebMatrix
After WebMatrix starts, it should inmediately launch Orchard in the default browser. If not, you can launch Orchard by clicking the Run drop-down button, and selecting which browser to use. In WebMatrix you can click the Files workspace to see the contents of the Orchard site.
The first time Orchard is launched, you see in your browser the Orchard setup screen.
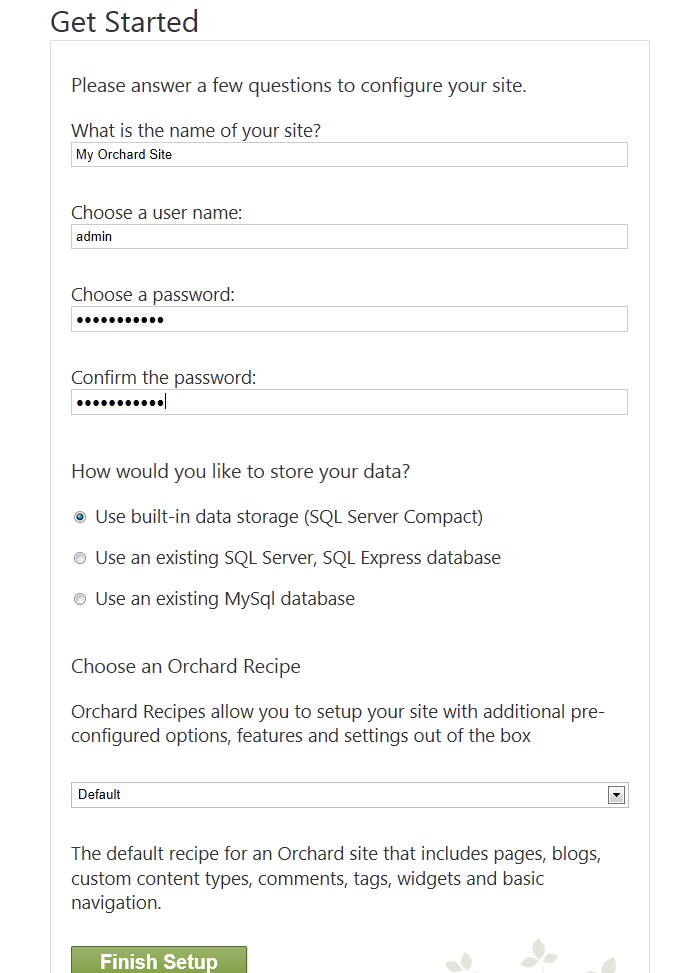
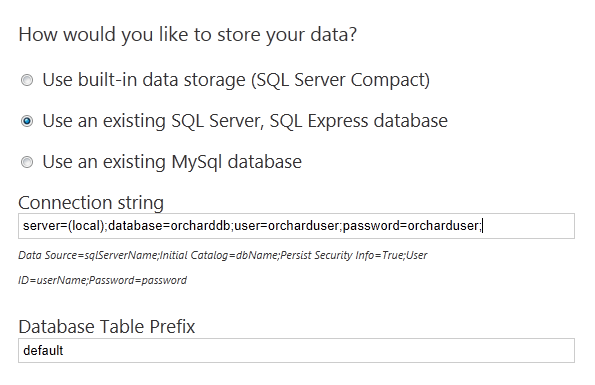
By default, Orchard includes a built-in database that you can use without installing a separate database server. However, if you are running SQL Server or SQL Server Express, you can configure Orchard to use either of those products instead by specifying a connection string. Optionally, you can enter a table prefix so that multiple Orchard installations can share the same database but keep their data separate.
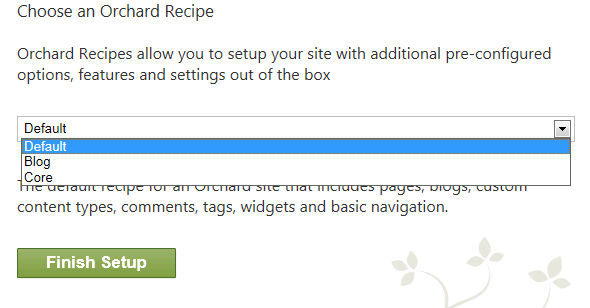
The setup screen also includes a section where you can choose an Orchard recipe to set up your site. You can choose from the following Orchard recipes:
- Default. Sets up a site with frequently used Orchard features.
- Blog. Sets up a site as a personal blog.
- Core. Sets up a site that has only the Orchard framework for development use.
For information about recipes and how to make a custom recipe, see Making a Web Site Recipe.
After you’ve entered the required information on the setup screen, click Finish Setup. When the setup process is complete, your new site’s home page is displayed.
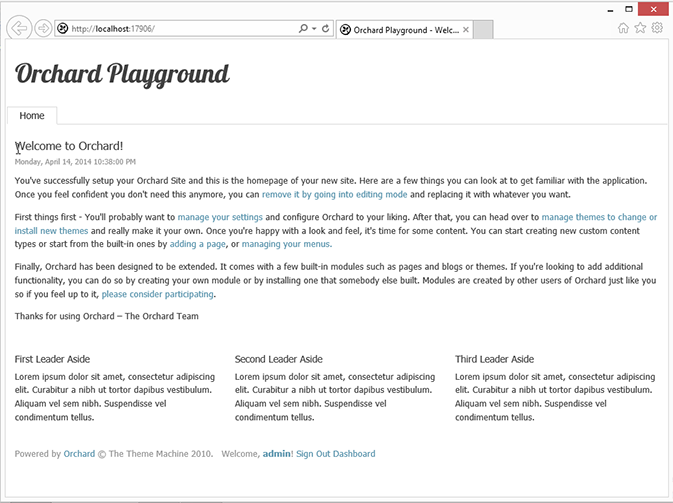
You can now begin configuring your site.
Orchard is a free, open source, community-focused Content Management System built on the ASP.NET MVC platform. Orchard is built on a modern architecture that puts extensibility up-front, as its number one concern. All components in Orchard can be replaced or extended.
Content is built from easily composable building blocks. Modules extend the system in a very decoupled fashion, where a commenting module for example can as easily apply to pages, blog posts, photos or products. A rich UI composition system completes the picture and ensures that you can get the exact presentation that you need for your content.
Secureanycloud Provides Hardened images of Orchard on the cloud ( AWS marketplace, Azure and Google Cloud Platform).
Orchard is owned by Orchard (https://orchardproject.net/) and they own all related trademarks and IP rights for this software.
Deploy Orchard securely on cloud i.e. AWS marketplace, Azure and Google Cloud Platform (GCP)
Secured Orchard CMS on Windows 2012 R2
Orchard CMS on Cloud for AWS
Orchard CMS on Cloud for Azure
Features
Major Features of Orchard:
- Widget Control Wrapper: The widget control wrapper is installed by default. Once activated, it will render “Edit” Buttons for all the content sections on the front page.
- Shape Tracing: The shape tracing feature creates a menu on the web site that allows you to look at the layout structure of the page. Once activated, it displays a small icon at the bottom of the page: The icon opens a menu that lets you analyze all the content element and look at their configuration in terms of Shape, Model, Placement, Template and HTML.
- TinyMCEDeluxe: TinyMCEDeluxe extends the built-in WYSIWYG HTML Editor with more functionality, such as table editing features.TinyMCEDeuluxe is a module that needs to be installed from the gallery. In order to do this, navigate to Modules –> Gallery. Search for TinyMCEDeluxe and install the module.
What’s New in Orchard CMS 1.7
The best way to learn about the new features in Orchard 1.7 is to read all my Orchard tutorials on Orchard CMS 1.7. Here is a list and there will be more to follow:
- Orchard SSL Module – New in Orchard CMS 1.7.2, the SSL Module in Orchard allows Orchard Website owners to secure various parts of their website using secure sockets layer.
- Developing Custom Workflow Activities for Orchard CMS – I am converting a lot of Orchard Rules for the Orchard Rules Engine to the new Orchard Workflow Module now that Orchard Rules has been depricated in Orchard 1.7. Many of them are client-specific workflow activities, but I thought I would share a couple more general Orchard Workflow Activities: Change Password and Update Profile Workflow Activities for Orchard CMS.
- Orchard 1.7 Upgrade Handles Taxonomies, Content Picker, and Media Library – I upgraded this website to Orchard 1.7 to better understand the upgrade process. The new Orchard 1.7 Upgrade Module will help you migrate your taxonomy module, content picker, and media library to Orchard 1.7.
- Developing Custom Image Filters for Media Processing in Orchard CMS – In-between breaks of converting Rules from the Orchard Rules Engine to the new Workflow Module I have been creating numerous Image Filters for portfolios and photo galleries.
- Custom Grayscale Image Filter to Convert Color Photos to Black and White in Orchard CMS – Add the Grayscale Image Filter to Media Profiles as part of the Orchard Media Processing Module to convert color photos to black and white in your Orchard CMS portfolios and photo galleries.
- Image Filters and Media Profiles in the Orchard Media Processing Module – In this tutorial I mention how I created a custom Image Filter in Orchard and how to add the filter to Media Profiles as part of the Media Processing Module. I also mention how one can create Media Shapes that can be added to Orchard Views to activate Image Filters without using Media Profiles.
- New Content Definition Menu to Manage Content Types and Content Parts in Orchard CMS – A new Content Definition Menu helps you add, edit, and delete Content Parts and Content Types faster in Orchard as well as makes it easier to manage permissions on that functionality.
- Output Cache Module in Orchard for Better Orchard Performance and Scalability – The old Contrib.Cache Module in the Orchard Gallery has been renamed as the Output Cache Module and added to the Orchard Source Code. The Output Cache Module for Orchard CMS is a must for deployment to help improve the performance and scalability of your Orchard Website.
- Orchard Workflow Module and Creating Custom Workflow Activities – The Orchard Workflow Module is new to Orchard CMS and replaces the Orchard Rules Engine. I mention how to extend and create new workflow activities in the Orchard Workflow Module. In this case, I create a custom Login Activity that allows you to start an Orchard Workflow when a user of a particular role logs into Orchard CMS.
- Run Orchard Recipes from Orchard Dashboard For Productivity and Automation – Orchard Recipes can now be run from the Orchard Dashboard, which should provide a huge productivity and automation benefit for running common tasks. Orchard Recipes in the past were only used during Orchard installation and set-up.
- Media Library and Image Editor in Orchard CMS – The new media library will make it much easier to manage audio, video, and images in an Orchard Website. The built-in Image Editor in Orchard will make it easier to do common image editing tasks like resizing, crop, and execute other image filters.
- Orchard Workflow Module – An introductory look at the new Orchard Workflow Module. The Orchard Workflow Module replaces the Orchard Rules Engine. There is a toolbox of various Workflow Activities and Events that you can drag and connect on the Orchard Workflow Surface. As mentioned, you can extend the Orchard Workflow Module by creating your own Workflow Events and Activities.
- Content Picker Has Content Type Filtering in Orchard CMS – The Content Picker in Orchard CMS is extremely useful for relating content types. Unfortunately when it first came out you could not filter what it picked by Content Types. This caused me to develop a custom Content Picker with Content Type Filtering in Orchard. In Orchard CMS 1.7, the Content Picker now has Content Type Filtering!!!
- Add Custom Shapes to Orchard CMS Menus and Navigation – I have used this Orchard 1.7 feature on several Orchard Websites. Sometimes you just want to inject a Razor Shape into the Orchard Navigation. The new shape link in Orchard CMS 1.7 allows you to do it!
- Content Type Layer Rule in Orchard CMS – Often you want to add a widget to a layer if the Content Type displayed is of a particular type. For example, you may want to add a Related Blog Post Widget when the Content Type being displayed is an Orchard Blog Post. Or maybe you run an Orchard E-Commerce Website and you want to display a sales campaign widget when the Content Type being displayed is a Product. This new Content Type Layer Rule in Orchard 1.7 will allow you to do it.
AWS
Installation Instructions For Windows
Note: How to find PublicDNS in AWS
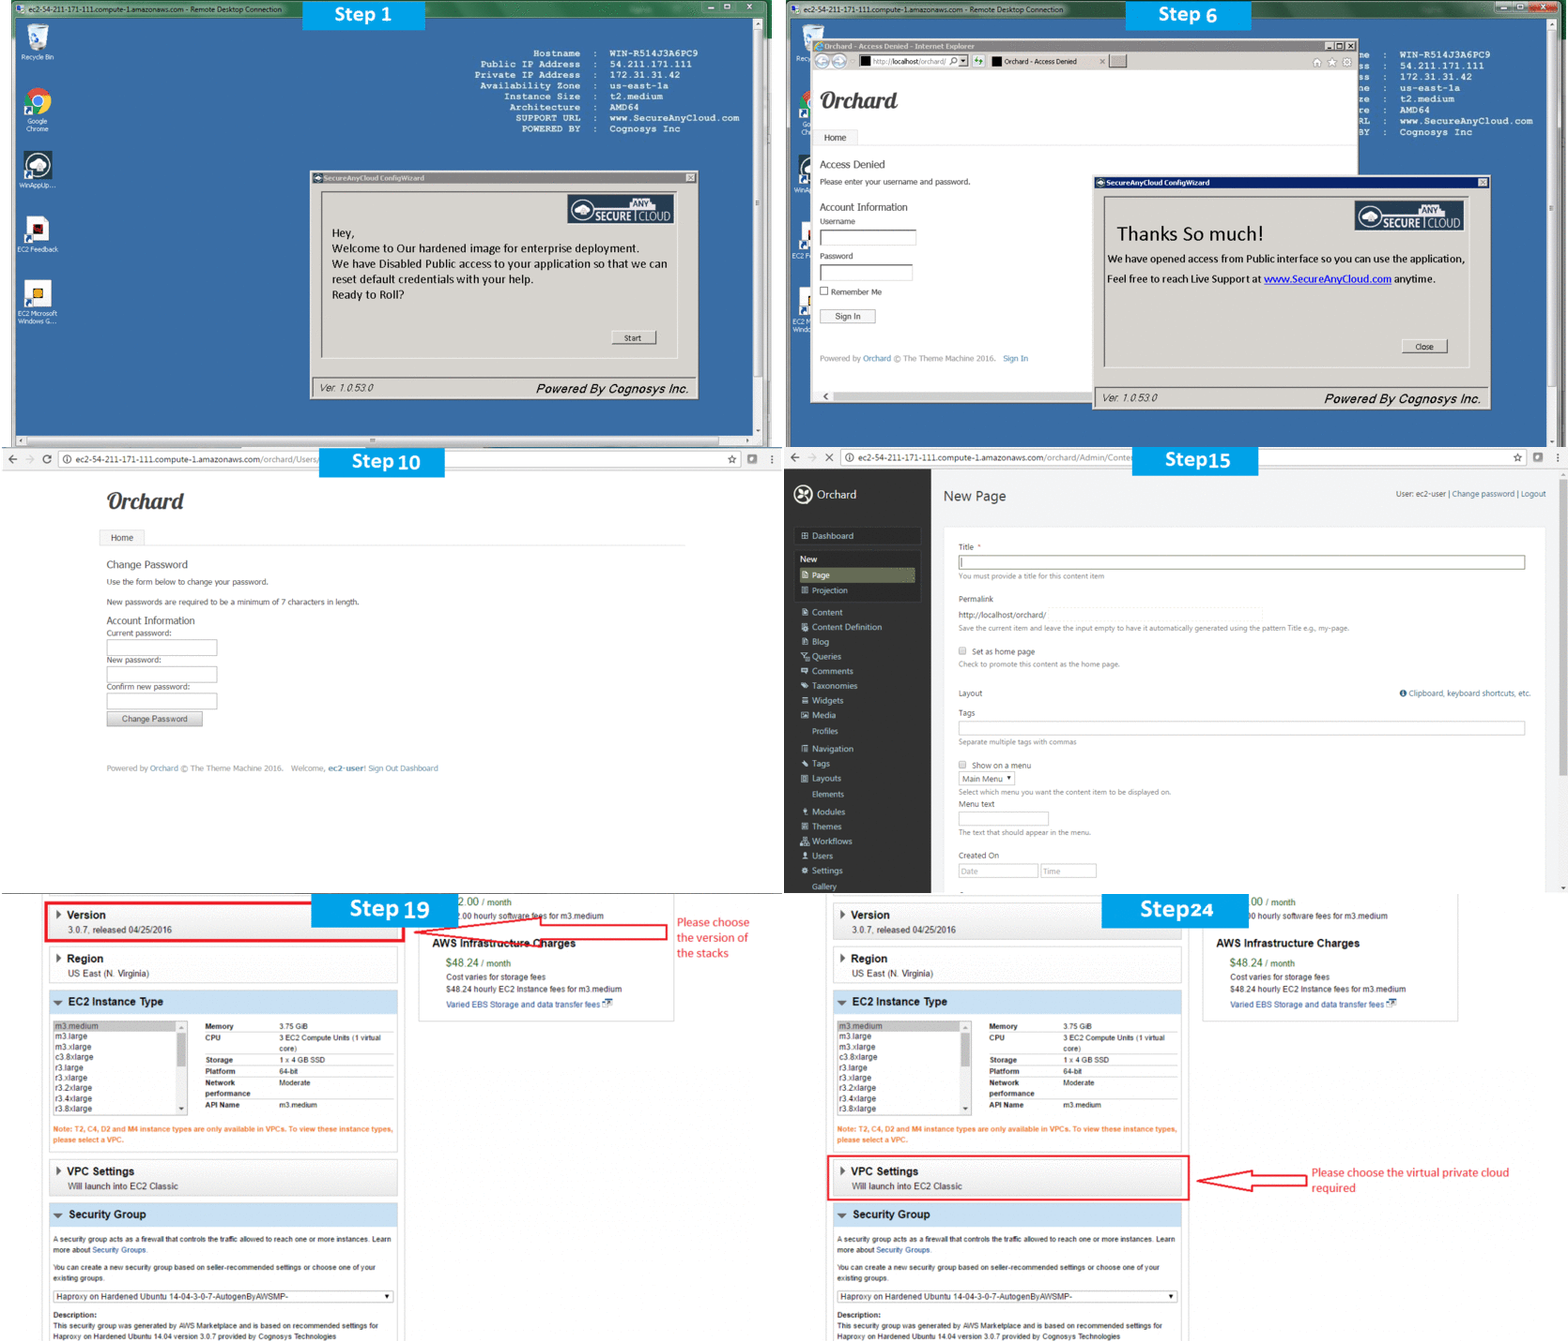
Step 1) RDP Connection: To connect to the deployed instance, Please follow Instructions to Connect to Windows instance on AWS Cloud
Connect to the virtual machine using following RDP credentials:
- Hostname: PublicDNS / IP of machine
- Port : 3389
Username: To connect to the operating system, use RDP and the username is Administrator.
Password: Please Click here to know how to get the password.
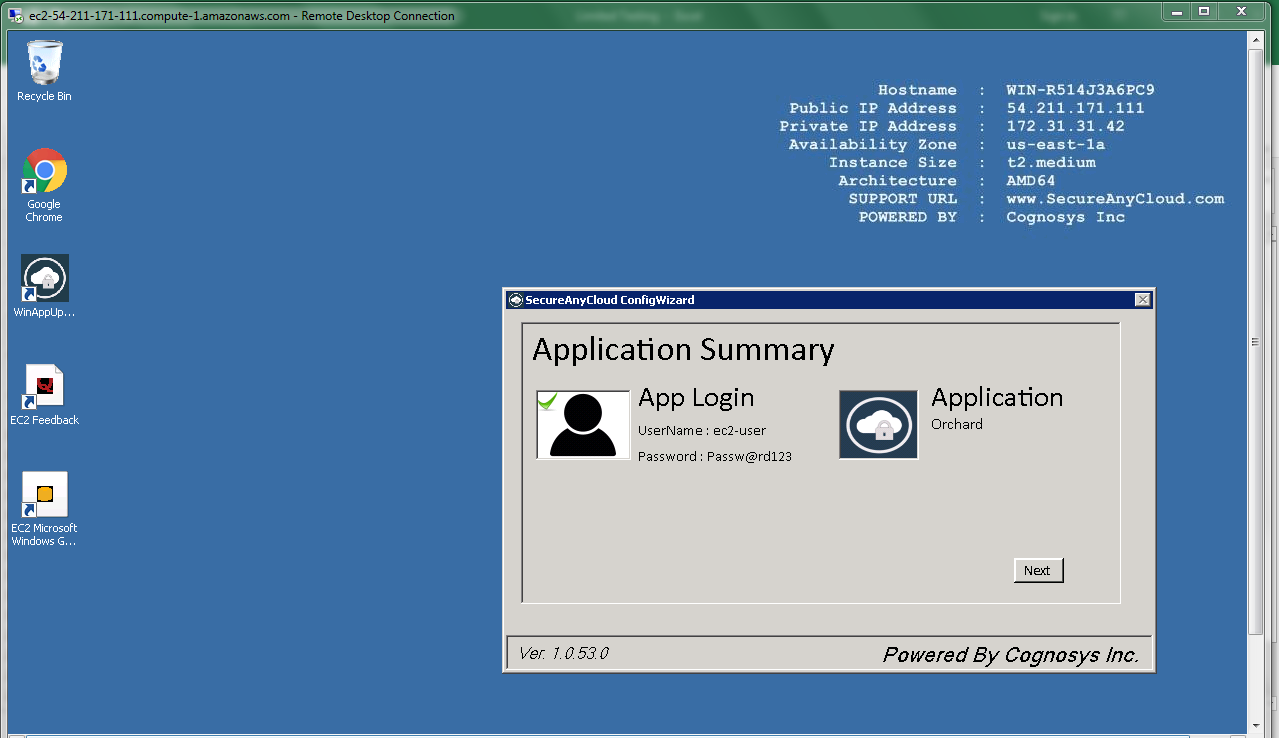
Step 2) Application URL: Access the application via a browser at http://PublicDNS/orchardcms
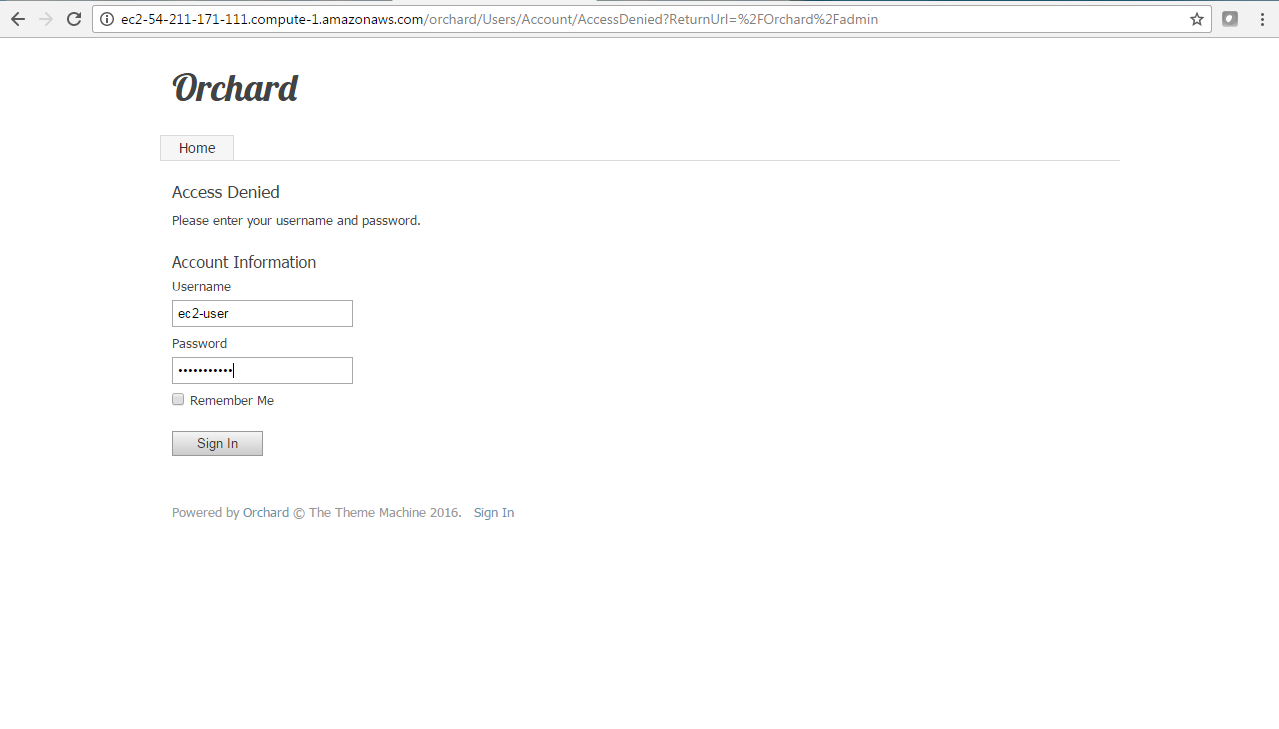
- User Name: ec2-user
- Password: Passw@rd123
Step 3) Steps to access the Admin Panel:
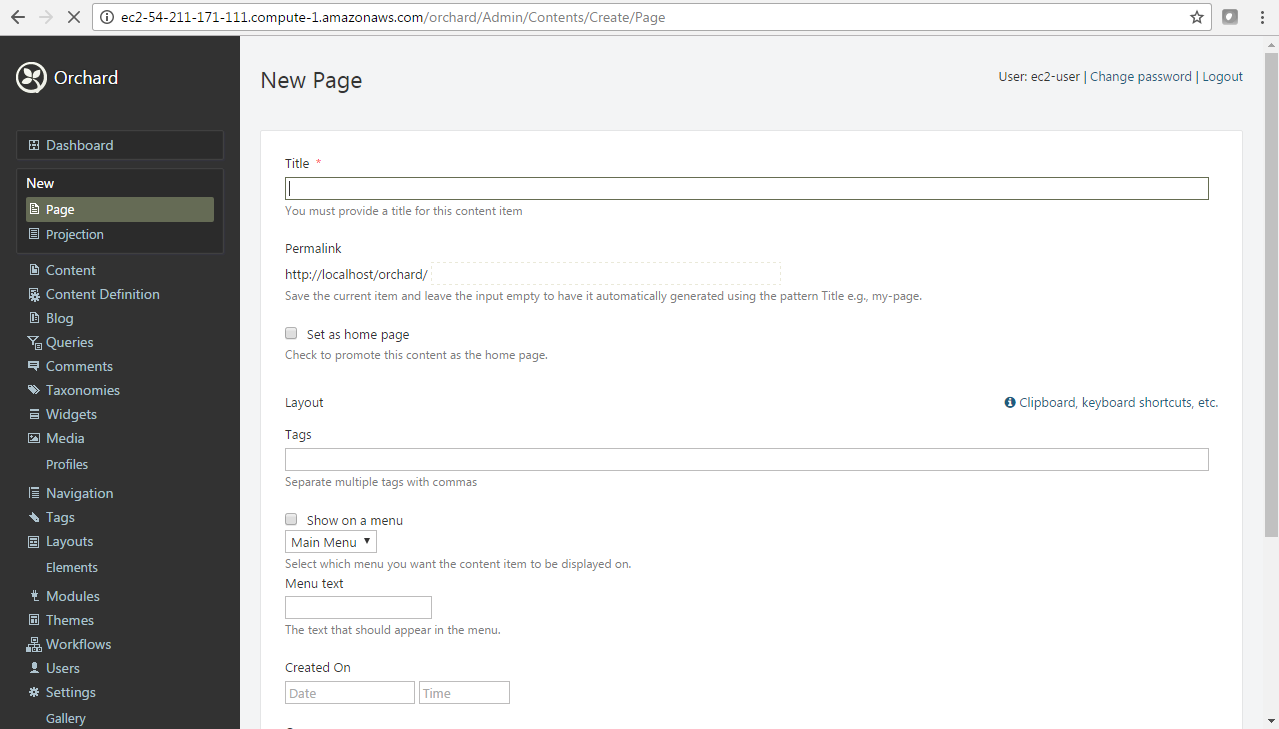
- To log in to Orchard CMS Administrative Panel, you need
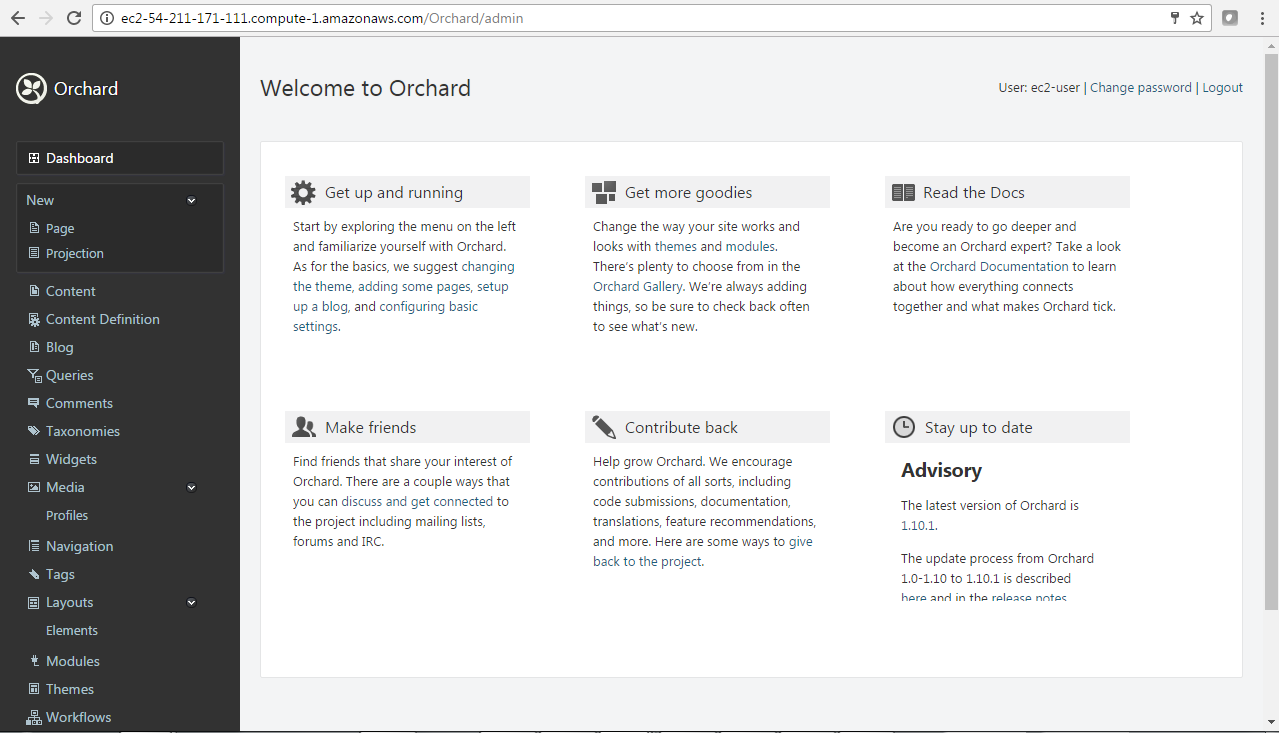
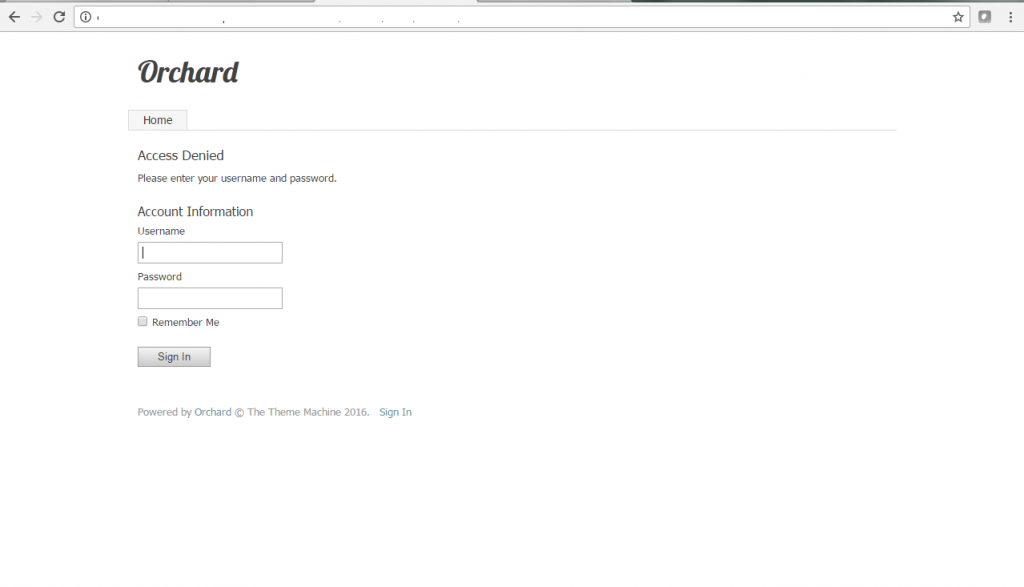
to open your browser and navigate to http://PublicDNS/orchardcms/admin - Enter username and password in the given fields and click on the“Login” button to access the Admin Panel.
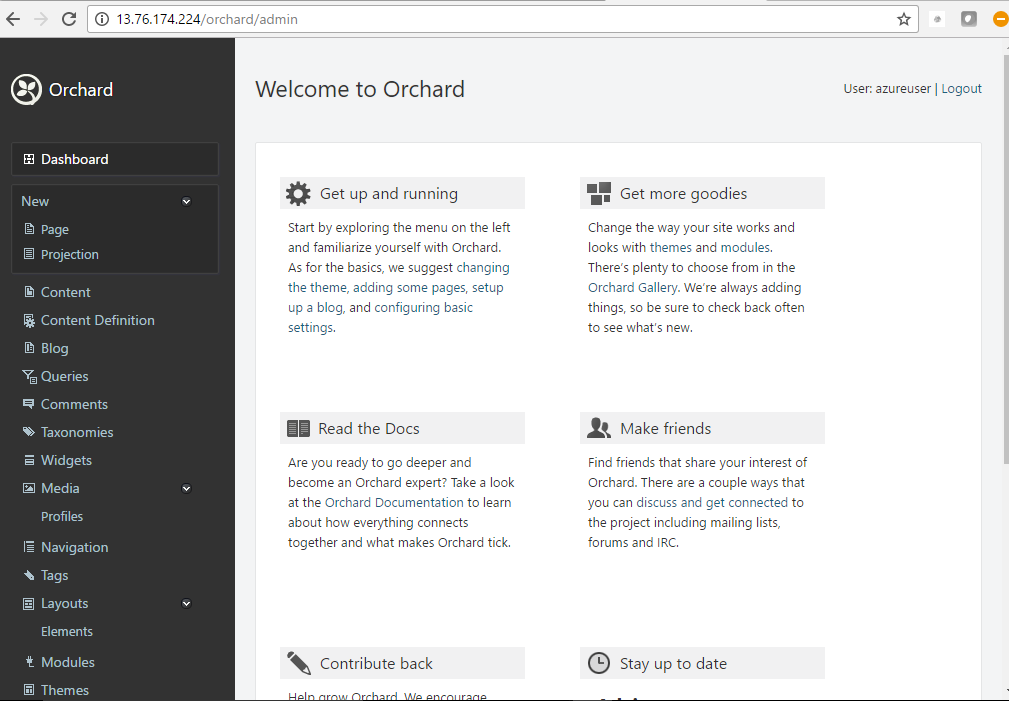
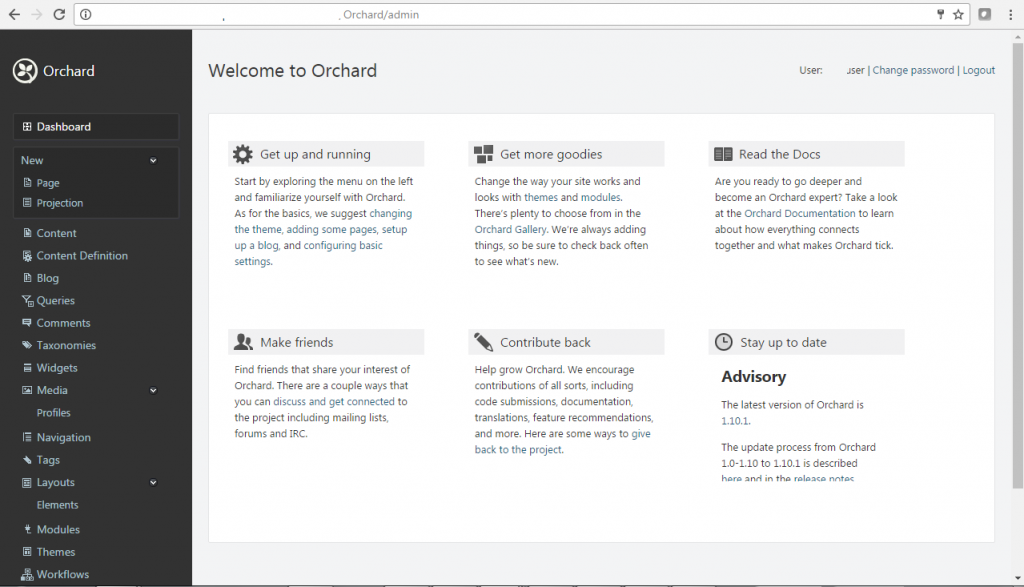
- After successful login to the Admin Panel, you will get access to Orchard CMS Application.
Step 4) Other Information:
1.Default installation path: will be in your web root folder “C:\inetpub\wwwroot\orchardcms”
2.Default ports:
- Windows Machines: RDP Port – 3389
- Http: 80
- Https: 443
Configure custom inbound and outbound rules using this link.
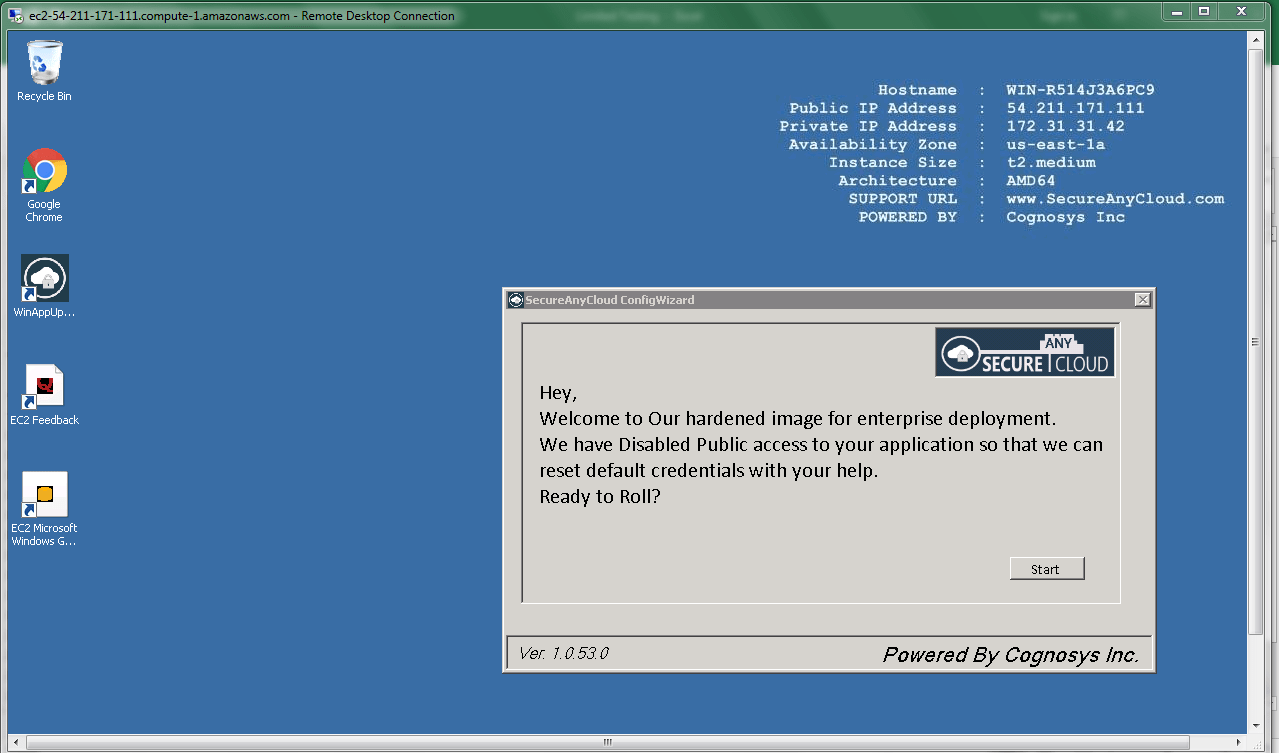
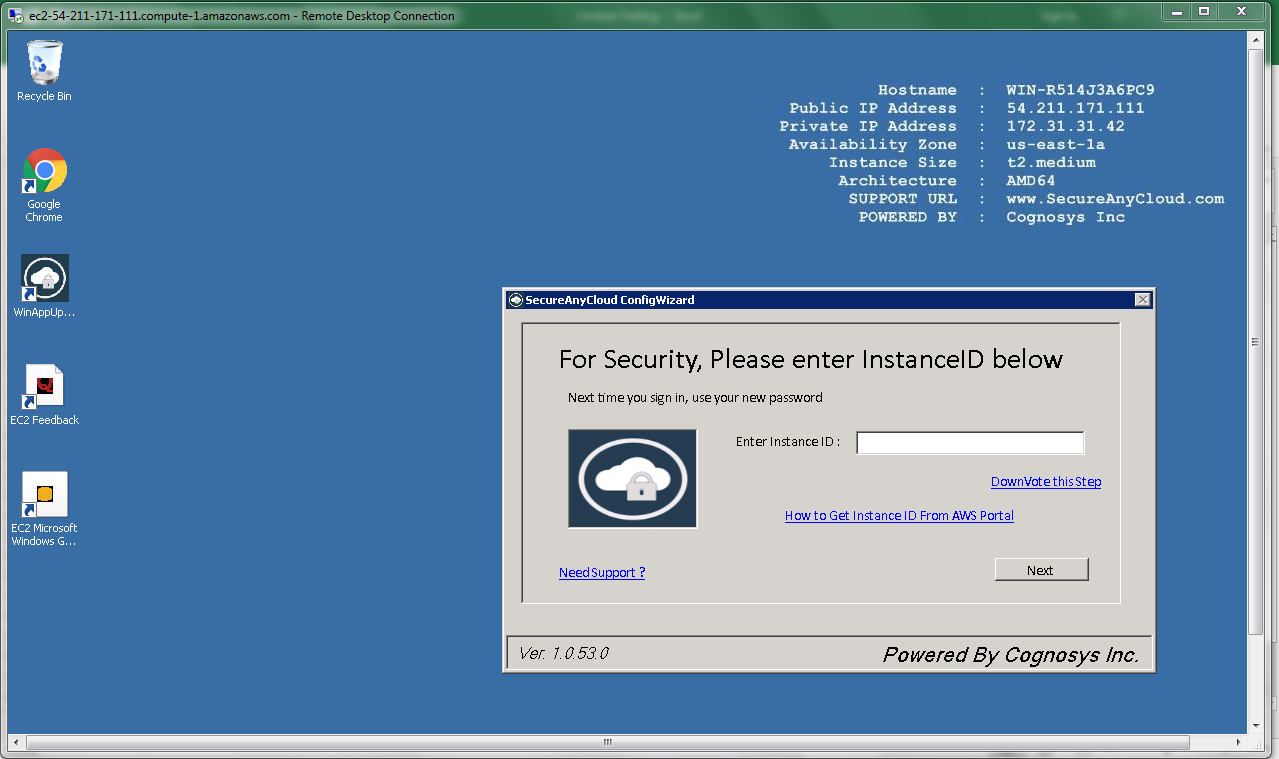
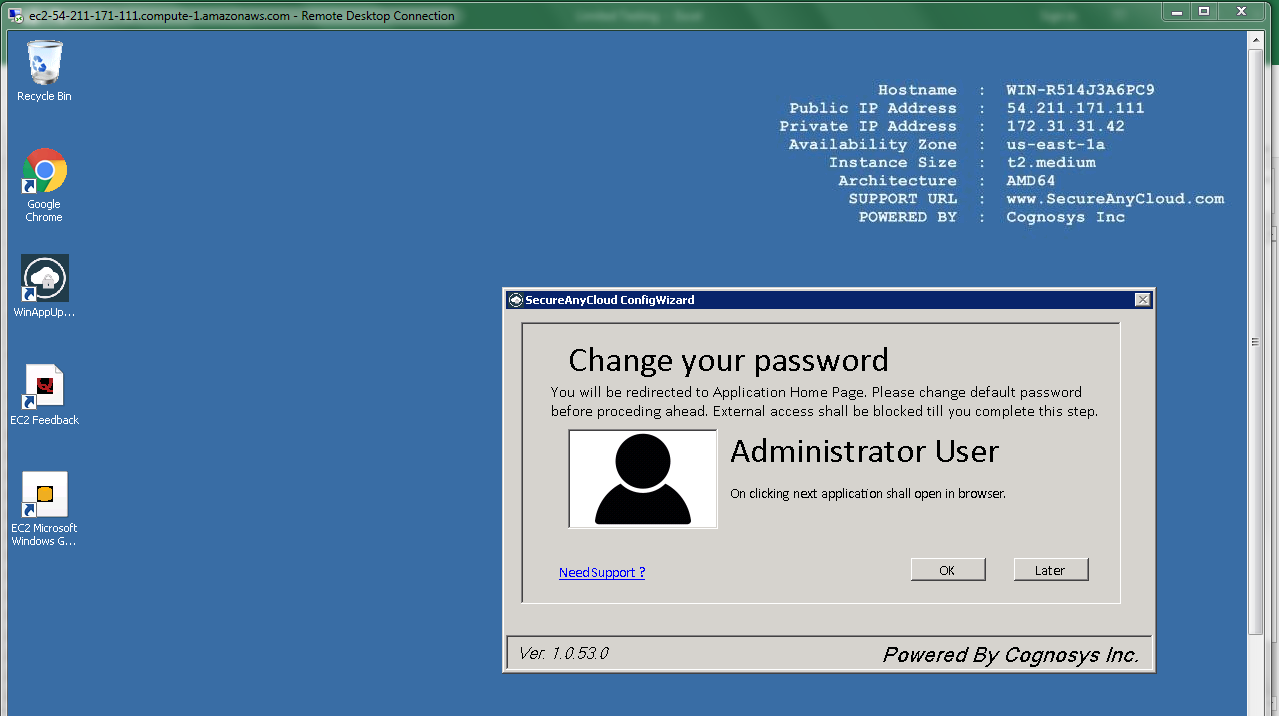
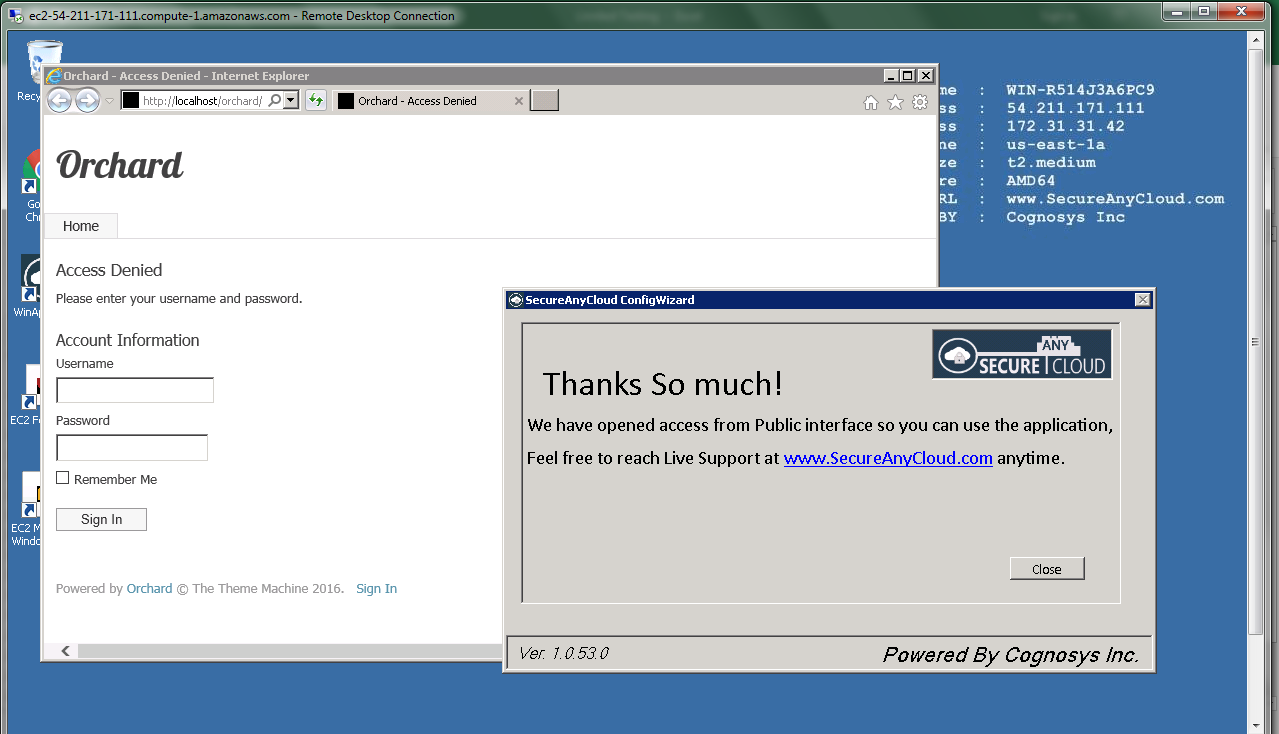
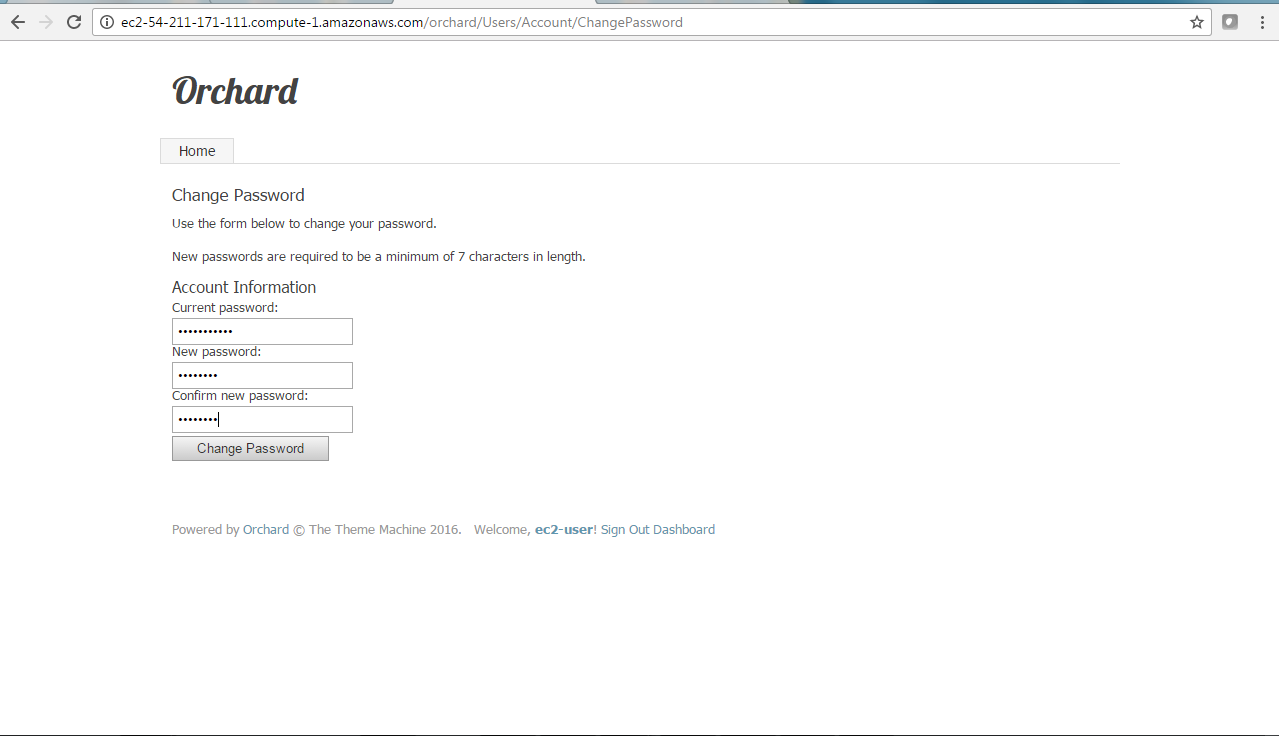
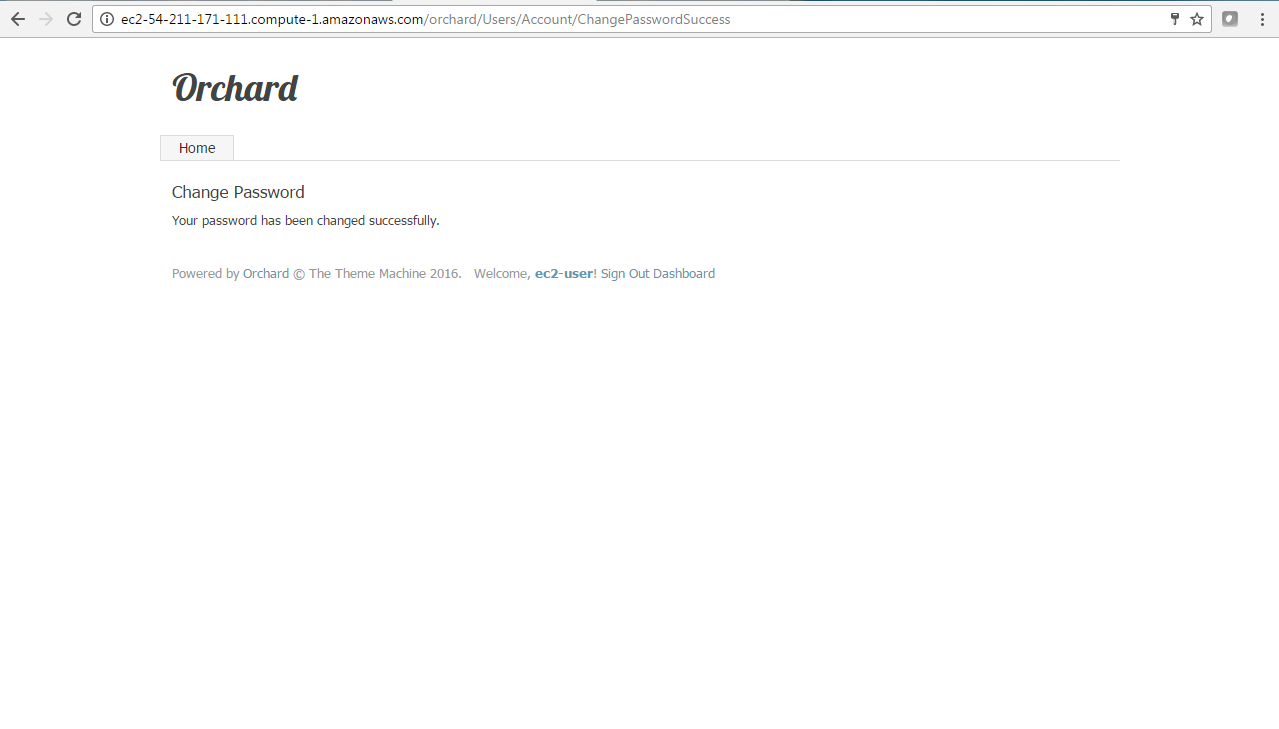
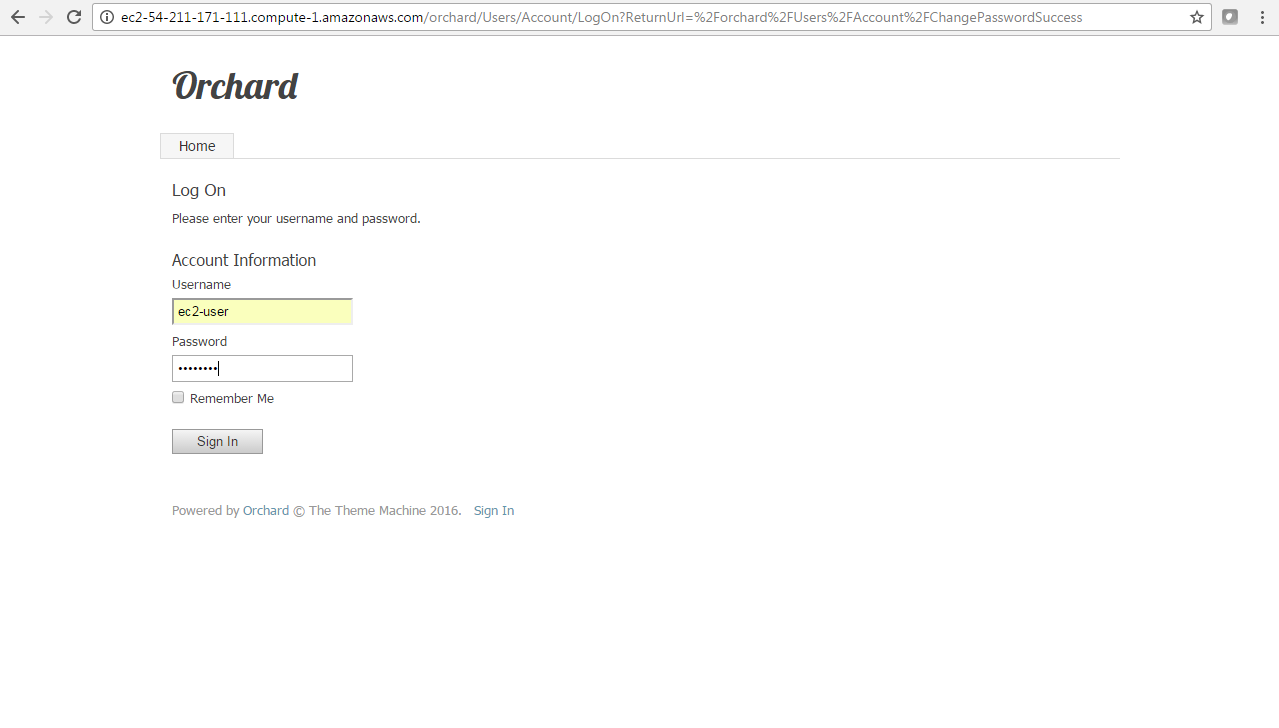
AWS Step by Step Screenshots
Azure
Installation Instructions for Windows
Note : How to find PublicDNS in Azure
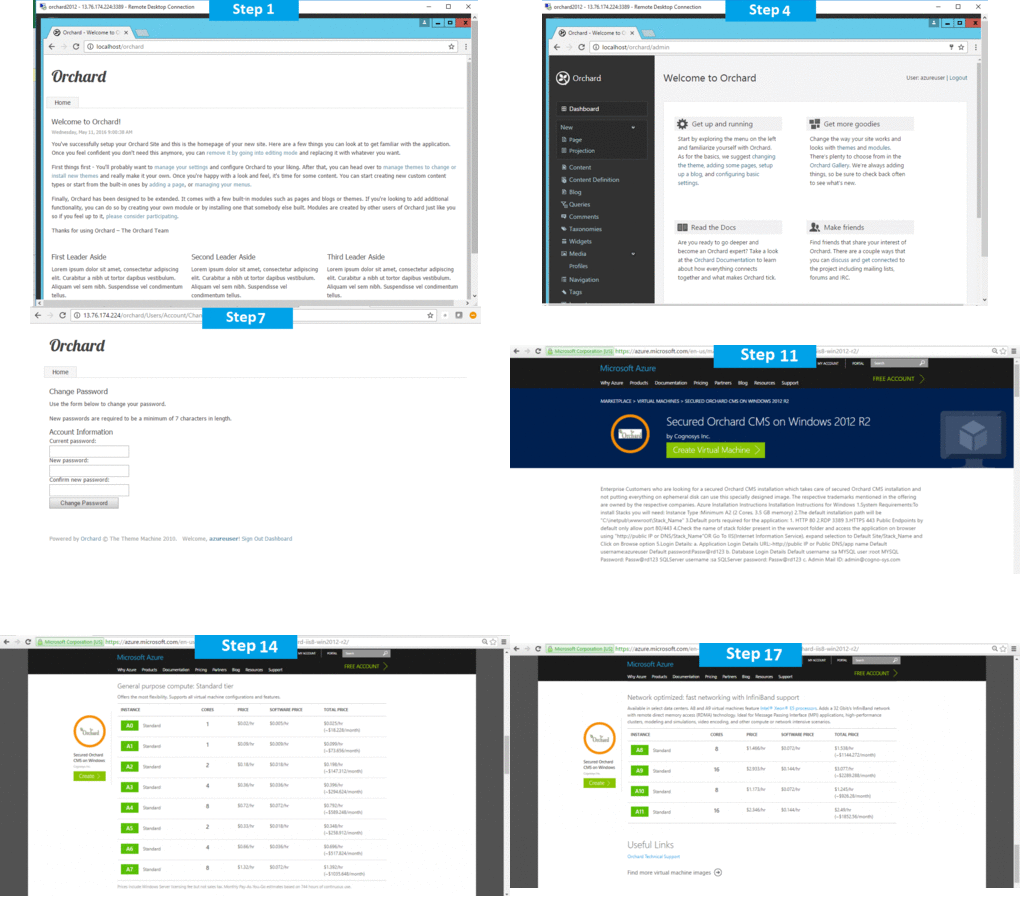
Step 1) RDP Connection: To connect to the deployed instance, Please follow Instructions to Connect to Windows instance on Azure Cloud
Connect to the virtual machine using following RDP credentials:
- Hostname: PublicDNS / IP of machine
- Port : 3389
Username: Your chosen username when you created the machine ( For example: Azureuser)
Password : Your Chosen Password when you created the machine ( How to reset the password if you do not remember)
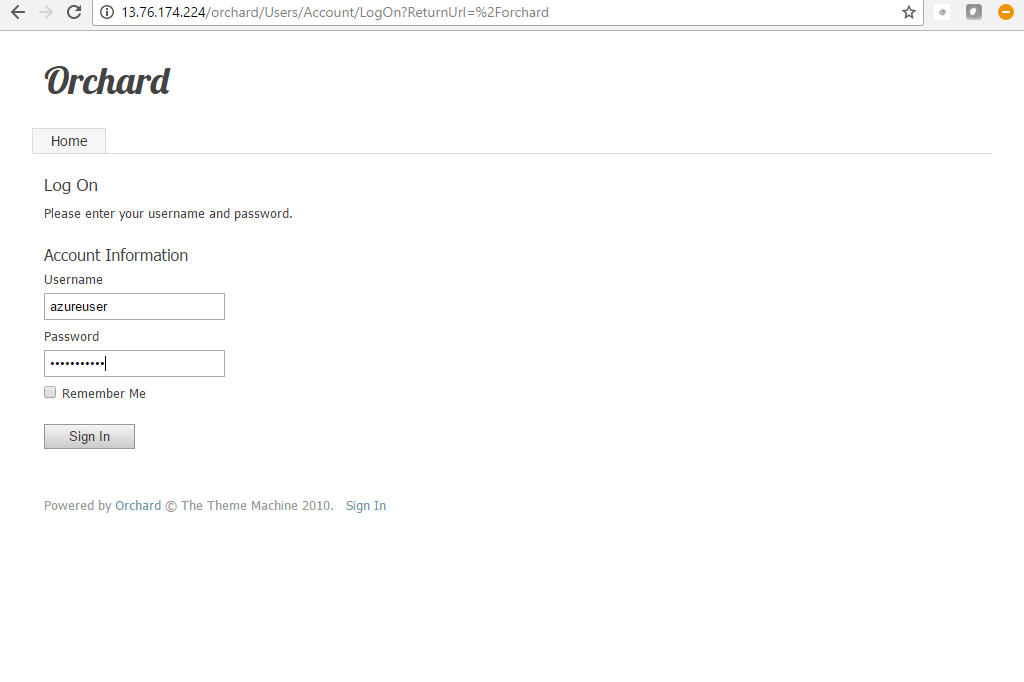
Step 2) Application URL: Access the application via a browser at http://PublicDNS/orchard
- User Name: azureuser
- Password: Passw@rd123
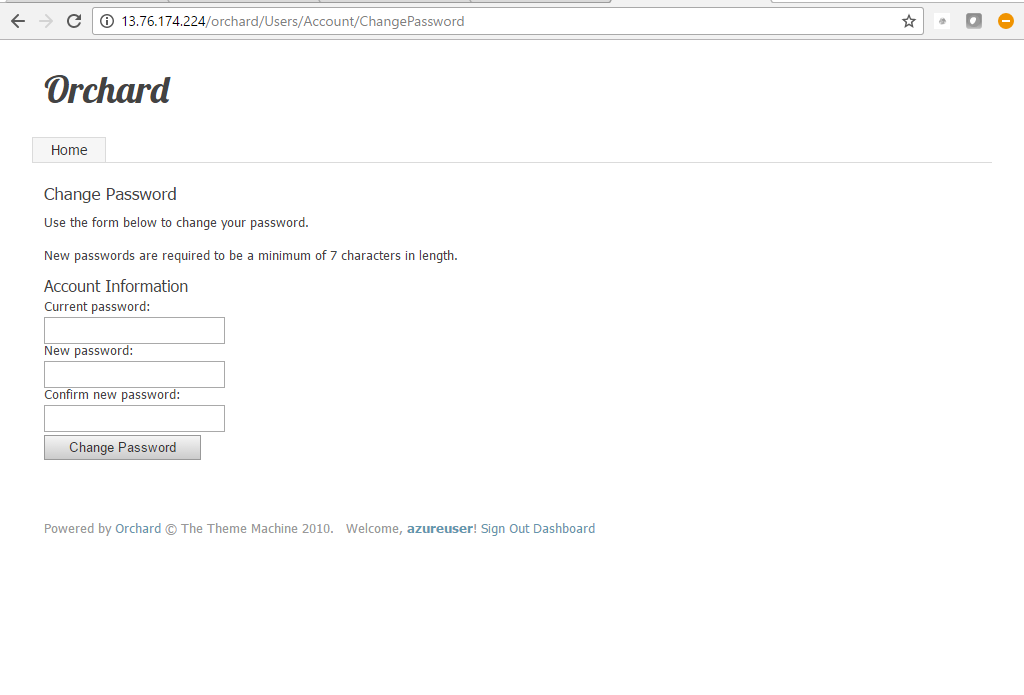
Note: Please change the password immediately after the first login.
Step 3) Other Information:
1.Default installation path: will be in your web root folder “C:\inetpub\wwwroot\orchard”
2.Default ports:
- Windows Machines: RDP Port – 3389
- Http: 80
- Https: 443
Configure custom inbound and outbound rules using this link
Azure Step by Step Screenshots
Installation Instructions For Windows
Step 1) VM Creation:
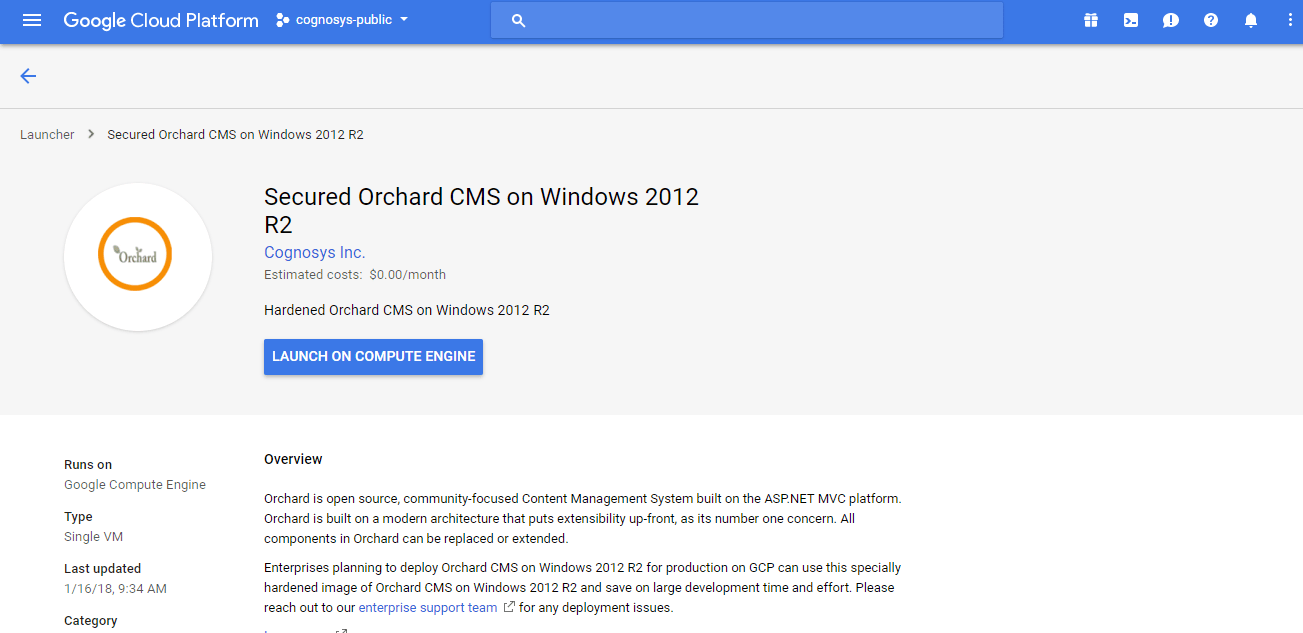
1.Click the Launch on Compute Engine button to choose the hardware and network settings.
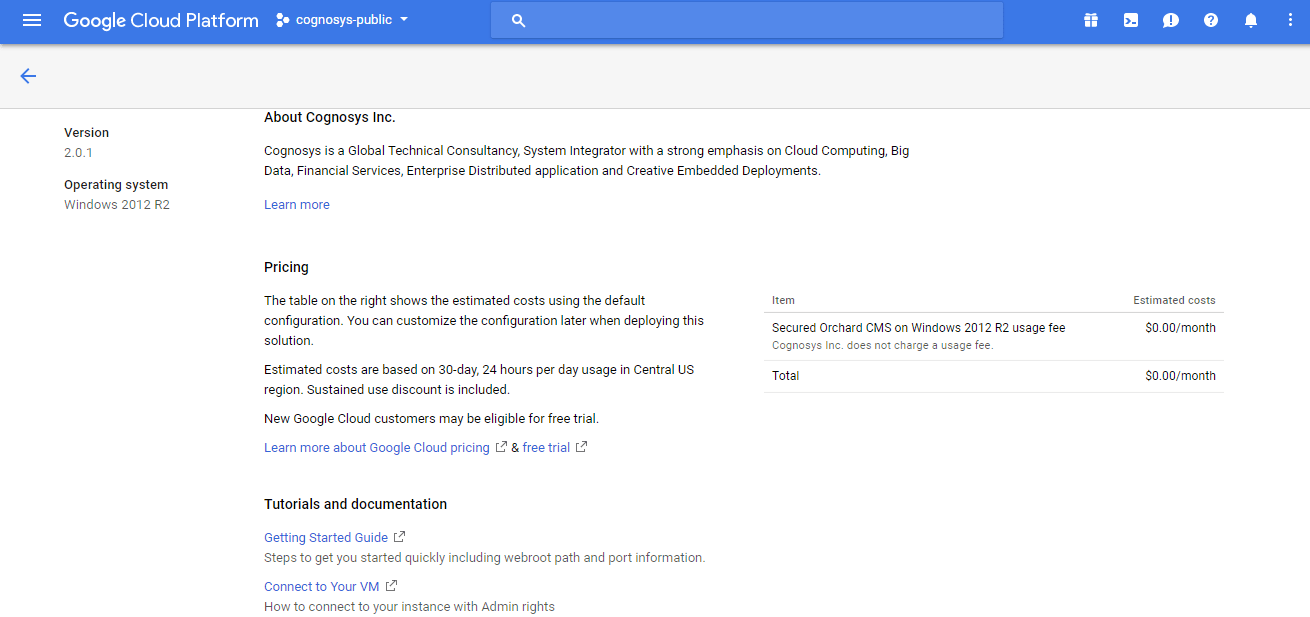
2.You can see at this page, an overview of Cognosys Image as well as some estimated costs of VM.
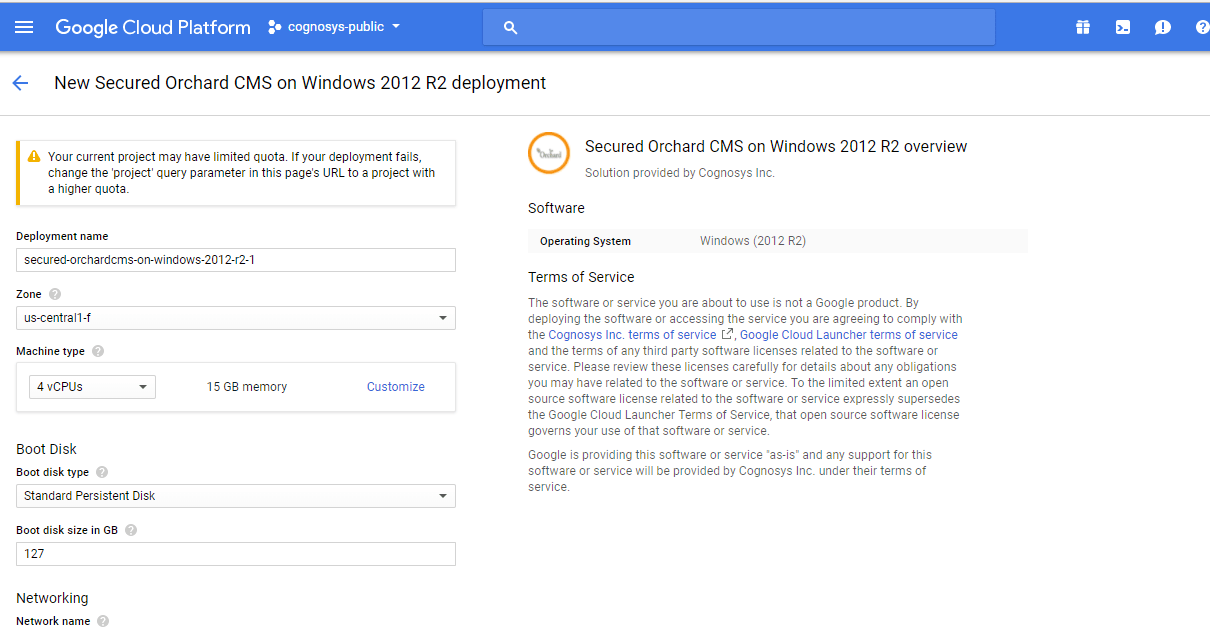
3.In the settings page, you can choose the number of CPUs and amount of RAM, the disk size and type etc.
Step 2) RDP Connection: To initialize the DB Server connect to the deployed instance, Please follow Instructions to Connect to Windows instance on Google Cloud
Step 3) Application URL: Access the application via a browser at http://PublicDNS/orchardcms
Step 4) Steps to access the Admin Panel:
- To log in to Orchard CMS Administrative Panel, you need
to open your browser and navigate to http://PublicDNS/orchardcms/admin - Enter username and password in the given fields and click on the“Login” button to access the Admin Panel.
- After successful login to the Admin Panel, you will get access to Orchard CMS Application.
Step 4) Other Information:
1.Default installation path: will be in your web root folder “C:\inetpub\wwwroot\orchardcms”
2.Default ports:
- Windows Machines: RDP Port – 3389
- Http: 80
- Https: 443
Videos
Secured Orchard CMS on Windows 2012 R2
Orchard CMS Tutorial Week 1 : Installation

