1-click AWS Deployment 1-click Azure Deployment 1-click Google Deployment
Overview
YouTrack is an optimistic, easy-to-use issue tracking and project management tool for software development teams. Maximize your team’s efficiency with smart issue filtering, handy shortcuts, live Dashboard, Scrum and Kanban boards, and flexible customization skills. Use powerful reporting and analytical tools to effectively monitor progress and visualize project status. YouTrack integrates with many version control systems like GitHub; popular IDEs from JetBrains such as IntelliJ IDEA, PhpStorm, and WebStorm; as well as with the CI server TeamCity.YouTrack is a web-based issue tracking and project management platform. YouTrack is optimized for developers and agile teams.
• Manage issues from creation to completion and track anything you and your team work on.
• Organize your efforts and set up your projects to track issues on your own terms.
• Write workflows to adapt the application to match your business logic, not the other way around.
• Use time tracking to monitor and report time spent on different projects and types of activity.
• Find issues fast with search queries that use the same code completion features found in JetBrains IDEs.
• Update issues wherever you work with commands that you apply directly in YouTrack or add to commit messages in a connected version control system.
• Plan and prioritize your product development on an agile board.
• Generate reports that let you collect and summarize meaningful bits of information.
• Build dashboards to monitor activity in all of your projects
.Main Navigation
When you first log in to YouTrack, you’ll find the main navigation at the top of the page.

These links and icons help you access different pages in the application. The visibility of links and icons are based on the permissions that are available to your user account. For example, if your account does not have the Read Project permission, you do not see the Projects link in the main navigation. The visibility of options in the Administration menu is also based on the permissions that are available to your user account
Search Bar
The next thing you’ll notice is the search bar
![]()
Use this feature to find issues in YouTrack. The search bar has two controls: the Search Context list and the Search Box. These controls help you locate just the issues you want to find.
Issues List
Under the search bar, you see a list of issues.

All of the issues that match the search criteria are shown in this list. When you enter a search query, the list is updated.The Issues list has a toolbar that lets you apply specific actions to one or more issues. For example, you can select the checkbox for multiple issues in the list and click the Add tag button to add a tag to all of the selected issues at once.

The toolbar also has a control that lets you set the level of detail for issues in the list. To expand the level of detail for a single issue, click the Expand issue arrow to the right of the issue.

Sidebar
To the left of the Issues list, you have a sidebar.

The sidebar gives you quick access to issues in your favorite projects, and shows issues that match your favorite saved searches and tags. Use the sidebar to store shortcuts for frequently used search criteria and tags that are most relevant to you.
Single Issue View
YouTrack provides a view for single issues that shows all of the information related to an issue. To show an issue in this view:
• Click the ID or summary link in the Issues list.
• Select the checkbox for an issue and press Enter
Create and Edit Issues
If your project team uses YouTrack, the first thing you’ll probably do is create an issue or two. If you’ve read the quick start guide, you already know how easy it is. On this page, you’ll find a little more information about how to create an issue, add an attachment, and update existing issues.
Create an Issue
Whenever you need to report a problem or define a task for yourself or another member of your project team, create an issue for it.
To create an issue:
Requires permissions: Create Issue, Update Issue, Add Attachment
1. Press Alt + Insert (Control + N for macOS), or click the New Issue button in the header.
o The New Issue page opens:

2. YouTrack normally sets the value for the project field to the project where you reported your last issue. If you are currently using a project as a search context, this project is used instead. To report the issue in another project, select another value from the project list in the header. Projects that you have marked as your favorites are shown at the top of the list.

3. Enter an issue summary and description in the corresponding input fields. When you enter the description, you can use Markdown to format your text. You can also format text in YouTrack Wiki syntax, but Markdown is preferred.
The text below the Description field gives you a few hints for using Markdown syntax. To see a complete list of formatting options, click the Markdown link to open the syntax list, then click the help icon to open the YouTrack Markup Reference page. For more information, see Markdown Syntax.
4. Assign values to the custom fields. Default custom fields include the issue type, priority, and subsystem. The following options are available:
o Select values for each field in the fields panel.
o Open the Apply Command dialog and set the values for multiple custom fields in a single command. To open the Apply Command dialog, press Ctrl + Alt + J.
5. To attach files to the issue:
o Click the attachment panel to select one or more files from your local directory.
o Drag files from your computer and drop them in the attachment panel.
o Press Ctrl + V to paste an image from your clipboard.
For additional options, click the Show more button in the issue toolbar. For details, see Create and Edit Issues below.
6. Do one of the following:
o To report the new issue, press Ctrl + Enter or click the Create button.
o To close the New Issue page without reporting the issue, press Esc or click the Close. The current issue is saved as a draft. The next time you create an issue, you can reload the draft from the Drafts list toolbar.
Attach a File or Screenshot
Sometimes, words are not enough. To describe an issue in more detail, you can attach resources such as log files and screenshots to the issue.
To attach a file or screenshot to an issue:
Requires permissions: Read Issue, Update Issue, Add Attachment
1. Click the Show more button in the toolbar.
2. Select one of the following options:
Option Description
Attach file Select one or more files from your local directory and attach them to the issue.
Attach files privately Select one or more files from your local directory and set the visibility of the attachments. Use this option when the attachments contain information that should be restricted to specific users or groups.
Attach and edit image Select, drop, or paste an image and open it in the image editor.
Edit an Existing Issue
If someone need to rewrite the issue summary or description, they can change these at any time. All changes are recorded and displayed in the issue history. There are a few properties that you cannot update, like the issue ID, reporter, and creation date. These properties are saved by YouTrack and cannot be overwritten.
To edit an existing issue:
Requires permissions: Read Issue, Update Issue
1. Select an issue in the list and press F2 or click the Edit issue button in the toolbar.
o The issue opens in editing mode.
2. Update the project, summary, or description. You can also set new values for the custom fields.
3. When finished, click the Apply changes button.
You can also apply changes to multiple issues with commands.
Delete Issues
Deleting issues in YouTrack is not to be taken lightly. Each issue has the potential to contain a wealth of information that, when lost, cannot be recovered easily. In general, we recommend that you avoid deleting issues whenever possible. Here are a few alternatives to deleting issues:
If the issue duplicates an existing issue, link it to the existing issue as a duplicate. In this case, the value for the State field is set to Duplicate, which is a resolved state. The issue is excluded from search results for unresolved issues, but any information contained in the issue is retained.
If the issue is no longer relevant and you don’t want anyone to waste time working on it, select an appropriate value for the State field to resolve the issue. Default states like Can’t Reproduce, Won’t fix, Incomplete, and Obsolete indicate that the issue does not require additional effort. This helps to explain why an issue should not fixed without deleting it from the system.
If you created an issue in the wrong project, don’t delete it and create another. Simply update the value in the Project field.
The best reason that you might have for deleting an issue is because you created it by mistake. If you’re confident that an issue that you created is unnecessary, you should be able to delete it without disrupting anyone else’s work. Just don’t assume that this rule applies to issues that were created by other users.


Click the Delete button in the dialog to confirm the action.
The issue is deleted from YouTrack.
The action cannot be undone.
To restore the issue, you have to restore a backup copy that contains the issue and import the issue from the backup to your YouTrack database. For more information, see Restoring Deleted Issues.
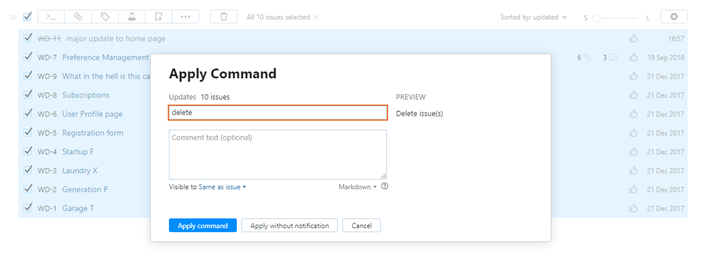
You also have the ability to delete multiple issues at once with commands. You should be very careful when performing this action, as you can select more issues than can be displayed on the Issues list and delete them in one go. Proceed with caution!
To delete multiple issues:
Requires permissions: Read Issue, Delete Issue
1.Select one or more issues in the Issues list.
2.Click the Delete issues button in the toolbar.
A confirmation dialog opens.

3.Click the Delete button to confirm this action.
- The issues are deleted from YouTrack.
- The action cannot be undone.
- To restore these issues, you have to restore a backup copy that contains the issues and import them from the backup to your YouTrack database. For more information, see Restoring Deleted Issues.
You can also perform this action by applying the delete command to a batch of issues.
Restoring Deleted Issues
Once an issue has been deleted, it can only be restored from a database backup.Even when you locate a backup that contains the deleted issues, you cannot guarantee that the restored issues contain all of the data that was lost. There may be updates that were applied after the backup was created that cannot be recovered.
To restore deleted issues:
Requires permissions: Low-level Admin Write
Install a copy of YouTrack on another server using a recent backup as the data source. For instructions, see the page that is relevant to your distribution type:
Restore a Docker Installation
Restore a JAR Installation
Restore an MSI Installation
Restore a ZIP Installation
Use an import script to import issues from the backup copy to your current YouTrack installation. For detailed instructions, see Import Issues from Another YouTrack Server.
Deleting Issues Permanently
To maintain the integrity of your database, issues that are deleted from YouTrack are preserved in the database. If you want to delete a batch of issues, you can delete them permanently and reduce the size of your database.
To delete issues permanently, you need to remove the project that they belong to from YouTrack. This action is mostly used to delete old projects that you no longer use. For instructions, see Remove a Project.
If you want to delete older issues, but still want to keep the project open, use this workaround:
1.Create a new project.
2.Use a search query that returns all of the issues that you want to delete. For example, search for issues in your project that were resolved six months ago or earlier.
3.Use a command to move all of these issues to the new project. For example, move to <new project name>.
4.Remove the new project from YouTrack.
Restricting Delete Issue Permissions
In many issue trackers, the ability to delete issues is restricted to system and project administrators. In YouTrack, this permission is granted to the default Developer role. This means that any member of the project team can delete any issue in the project.
For some organizations, this scheme can be too permissive. If you find that users are deleting issues when they shouldn’t be doing so and a stern warning or two doesn’t discourage this behavior, consider one or more of the following alternatives. These modifications can be made by a system administrator or another user with the Create Role or Update Role permission.
- Remove the Delete Issue permission from the default Developer role. In this case, the ability to delete issues is restricted to system and project administrators.
- Create a custom role that does not include the Delete Issue permission and assign this role to project teams on a per-project basis. This gives project administrators the ability to decide whether the members of their project teams can be trusted with issue deletion or not.
- Create a custom role that includes only the Delete Issue permission. You can then grant this permission on a per-user basis to delete issues in specific projects.
Attach Files
You can attach files directly to an issue or in a comment. You can upload and attach images and other file types. The option to attach a file to an issue is displayed in the issue toolbar in the list view and single issue view.When you attach a file from the Issues list, the attachment is added to the currently highlighted issue in the list.Files can be attached directly to the issue or added with a comment.When attached to the issue, the files only appear in the Attachments section of the page.Files that are attached to comments are shown in the Attachments section of the issue and are also displayed as thumbnails directly under the comment text.
Attach files privately
Opens a dialog where you can select one or more files and restrict the visibility of the attachments to a specific group. Use this option when the files contain sensitive information like user accounts or log files.
Attach and edit image
Opens a dialog where you can select, drop, or paste an image from the clipboard. The file opens in the Image Editor. The Image Editor lets you apply various effects and add comments to the image. You can also set the visibility group directly in the dialog. For more information, see Edit Images.
Keyboard Shortcuts
You can use keyboard shortcuts to attach files to an issue. These shortcuts are available in the list view and single issue view.
Windows Shortcut
Mac Shortcut
Description
Ctrl + Alt + A
Control + Option + A
Opens a dialog where you can locate and upload a file from your local directory. The attachment inherits the visibility setting from the issue.
Ctrl + V
⌘ + V
Attach an image from the clipboard to the issue or comment.
Ctrl + Alt + Shift + V
Control + Option + Shift + V
Opens a dialog to attach and set visibility for files.
Drag and Drop
You can attach a file simply by dragging it to an issue.
This method works in any view mode. You can drag and drop multiple files at once.
In the Issues list, drag one or more files to the target issue in the list.

Links to Issue Attachments
Every file that is attached to an issue is assigned a web address. If this address is accessible from outside your local network, it can be shared with people who wouldn’t otherwise have access to files that are stored in your YouTrack installation. If authorized users generate and share these links, anyone who follows this link has unrestricted access to the information that is stored in the attachment.
Direct links to issue attachments in YouTrack are generated in these situations:
Any user who has access to view attachments in an issue can copy the link address for a file attachment and share this URL online.
In notifications, attachment references are converted into links automatically. These notifications and the links they contain can be shared with a broader audience.
In projects that use the Mailbox integration, attachment links are generated when files are attached to comments that are converted into email replies. Unregistered users who receive links to files in these email messages can post the URL that points to the attachment wherever they want or forward the email that contains the links.
To simplify access, direct links to file attachments contain a signature. This signature grants access to the file based on the permissions that are available to the user who attached the file to the issue. This gives users direct access to these files without having to log in to YouTrack. YouTrack supports this behavior for the following reasons:
In projects that use the Mailbox integration, this lets email recipients open links to files even when they don’t have a registered account in YouTrack.
For notifications, users can conveniently view attachments even when they don’t have an active YouTrack session in the browser. It also means that image attachments can be reliably embedded into email messages.
To reduce the accidental oversharing of sensitive information through attachment links, the signatures are generated in the following ways:
URL signing involves two secrets, one user-specific and one file-specific. This means that a URL signature will only work for a particular file.
The signed URL contains information about the user who created it. YouTrack checks the current permissions for this user every time the data is accessed, no matter who requests to access the file.
When the user who attached the files loses permission to access the issue or comment, the generated links become invalid and no longer work.
Signatures in links that are generated online expire after three days.
Signatures in links that are generated for notifications and workflow messages expire after two weeks.
If you encounter a situation where a user has attached a file that contains sensitive information, and you believe that the link may be accessible to unauthorized users, you can invalidate the link as follows:
Restrict the visibility of the issue or comment to exclude the user who attached the file or files.
Delete the files from the issue.
 YouTrack is a proprietary, commercial browser-based bug tracker, issue tracking system and project management software developed by JetBrains. It focuses on query-based issue search with auto-completion, manipulating issues in batches,customizing the set of issue attributes, and creating custom workflows.
YouTrack is an intelligent, easy-to-use issue tracking and project management tool for software development teams. Maximize your team’s productivity with smart issue filtering, handy shortcuts, live Dashboard, Scrum and Kanban boards, and flexible customization capabilities. Use powerful reporting and analytical tools to effectively monitor progress and visualize project status. YouTrack integrates with many version control systems like GitHub; popular IDEs from JetBrains such as IntelliJ IDEA, PhpStorm, and WebStorm; as well as with the CI server TeamCity.
Features
Youtrack Special features:
1)Bug & Issue Tracking
YouTrack permits to track and manage issues from the time they’re reported to the moment they’re fixed. Effortlessly create issues, add tags, watchers, modify custom fields, set the priority, and edit added attachments with a built-in image editor. Configure your personal notifications. Not ever care about closing the tab while creating an issue – YouTrack keeps drafts.

2)Agile Boards
Agile boards in YouTrack are designed to help teams follow a wide range of agile project management processes. You can create Scrum, Kanban, or Scrumban boards.If you don’t follow any methodology, you can still create and configure a board that gives you an alternative view of the issues your team is responsible for, or even a personal board to track your personal responsibilities.

3)Reporting
A variety of reports are available to help you analyze and manage projects and teams activities. Create private reports or configure reports that you share with your team.Get insights into how your team is performing and how the issues are distributed over a project. Use dashboards for an overview of your personal and team processes. Add reports as widgets, or create your own personal widgets if you need more data.

4)Time Management
The Time Tracking features let you and your team report the amount of time spent working on issues in your project. Estimate how much time you expect to spend to resolve each issue, add work items to the issues along with the spent time, and create summary reports to see the total amount of time spent on the different types of work.Use the pre-configured workflows to automatically track time when you start working on issues, or create your own if you prefer a specific method of tracking.

5)Planning
Use a Gantt Chart for an overview of the flow of your project plan. Follow the progress of your projects, estimate time, and track the results. Configure the chart to show issues from multiple projects, limit the amount of work in progress, and control how many levels of subtasks are included in the report.

6)Customization

7)Integrations
Connect external tools with YouTrack to enhance your productivity and improve your working process! Integrate with TeamCity to automatically set the value for the ‘Fixed in build’ field in YouTrack when an issue is closed in a successful build.Connect YouTrack to a repository in GitHub, Bitbucket, or GitLab to access VCS commits directly from an issue in YouTrack. Use Zendesk Integration to sync tickets between YouTrack and Zendesk.

8YouTrack Mobile
Stay connected with your team anywhere and anytime using YouTrack Mobile! Use agile boards, create new and update existing issues, work with attachments, and get notifications right on your phone. YouTrack Mobile is available for iOS and Android.
Experimental Features
Experimental features in YouTrack let you try the new functionality before the official release. This strategy lets us get feedback for a feature as we work on it, learning more about what you want to see in the final product. If you are an administrator, you can enable the features you want to try on the Feature Configuration page.
Major Features of YouTrack :
- Bug and Issue Tracking
- Instant Issue Reporting
- Innovative Concept of Managing Issues
- Agile Boards
- Reporting and Analysis
- Time Management
- Time Management and the Agile Board
- Time Report
- Use Custom Workflows to Reflect Your Process
- Let YouTrack Speak Your Language
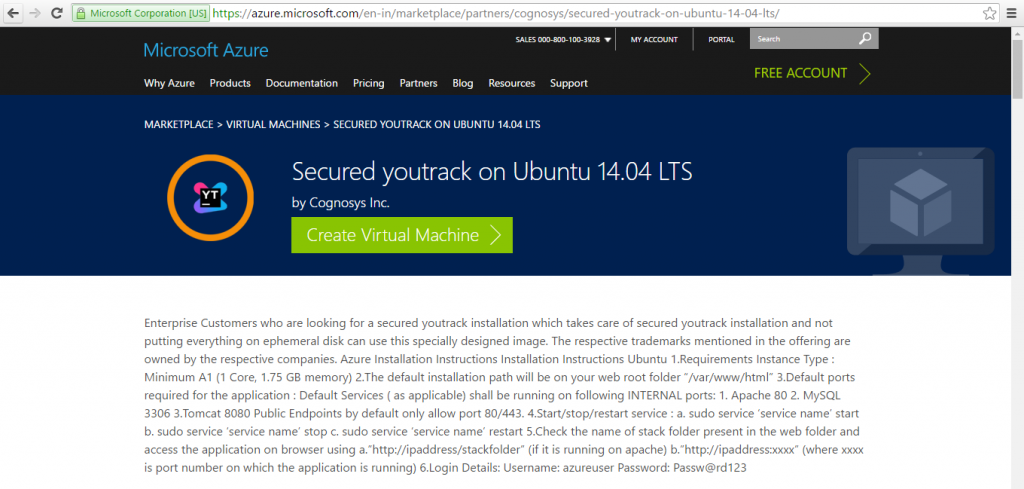
Azure
Installation Instructions For Ubuntu
Note : 1. Please use “youtrack” in the place of “stack_name”
2. How to find PublicDNS in Azure
A) Application URL: Access the application via a browser at http://PublicDNS/youtrack.
B) SSH Connection: To connect to the operating system,
1) Download Putty.
2) Connect to virtual machine using following SSH credentials :
- Hostname: PublicDNS / IP of machine
- Port : 22
Username: Your chosen username when you created the machine ( For example: Azureuser)
Password : Your Chosen Password when you created the machine ( How to reset the password if you do not remember)
C) Other Information:
Default installation path: will be on your web root folder “/opt/youtrack” ( Please see above Note for stack name)
2.Default ports:
- Linux Machines: SSH Port – 22 or 2222
- Http: 80 or 8080
- Https: 443
- Sql or Mysql ports: By default these are not open on Public Endpoints. Internally Sql server: 1433. Mysql :3306
Configure custom inbound and outbound rules using this link
To see detailed installation instruction of YOU Track Please click here.
Azure Step by Step Screenshots
Product name
Installation Instructions For Windows
Installation Instructions for Windows
Step 1) VM Creation:
- Click the Launch on Compute Engine button to choose the hardware and network settings.
- You can see at this page, an overview of Cognosys Image as well as estimated cost of running the instance.
- In the settings page, you can choose the number of CPUs and amount of RAM, the disk size and type etc.
Step 2) RDP Connection: To initialize the DB Server connect to the deployed instance, Please follow Instructions to Connect to Windows instance on Google Cloud
Step 3) Database Login Details:
The below screen appears after successful deployment of the image.

For local MySQL root password, please use the temporary password generated automatically during image creation as shown above.
i) Please connect to Remote Desktop as given in step 2 to ensure stack is properly configured and DB is initialized.
ii) You can use MySQL server instance as localhost, username root and password as shown above.
If you have closed the deployment page you can also get the MySQL root password from VM Details “Custom metadata” Section.
Step 4) Application URL:
1.Default installation path: will be in your root folder “C:\iometer-1.1.0-win64.x86_64-bin”
2.Default ports:
- Windows Machines: RDP Port – 3389
- Http: 80
- Https: 443
Configure custom inbound and outbound rules using this link
Step 5) Other Information:
1.Default ports:
- Linux Machines: SSH Port – 22
2. To access Webmin interface for management please follow this link
Videos
YouTrack Overview
Introducing Advanced Full-Text Search in YouTrack 3.3
YouTrack Workflow

