

Overview
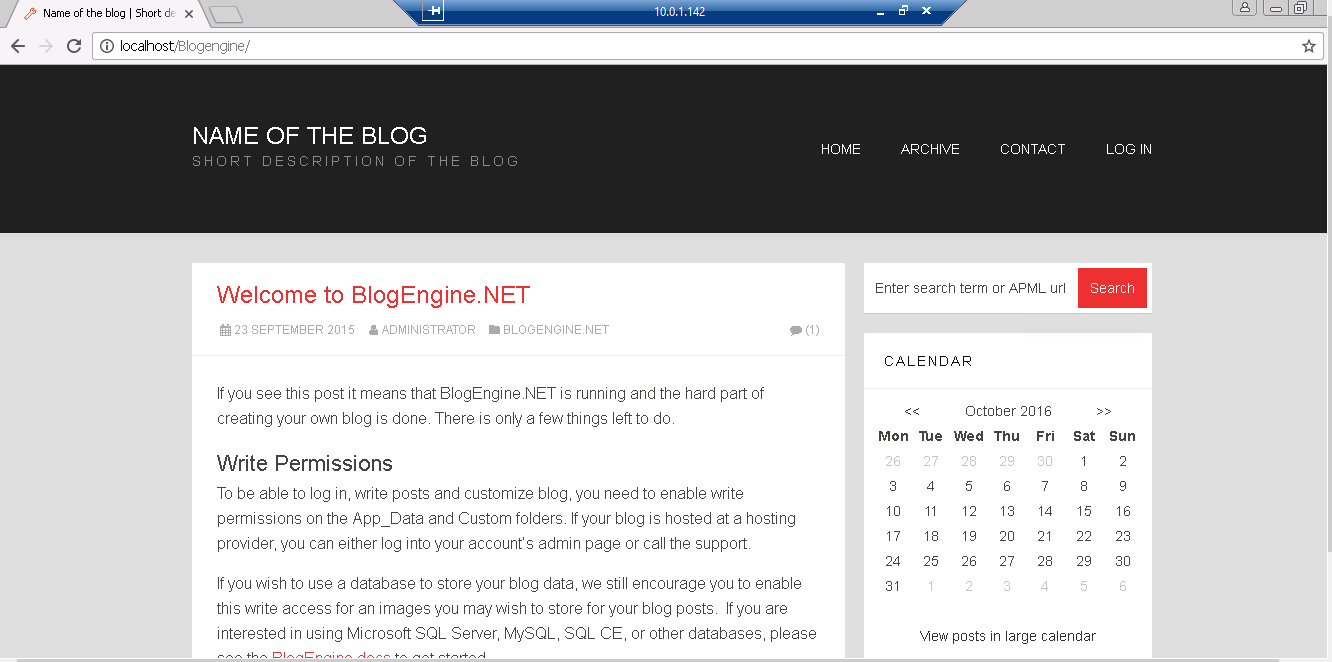
BlogEngine.NET is an open source ASP.NET project that was born out of desire for a better blogging platform. We focused on simplicity, ease of use, extendibility and innovative design while taking advantage of the latest .NET features.
BlogEngine.NET is easily customizable. We have many downloadable themes, widgets, and extensions or you can make your own with some basic .NET skills. With BlogEngine.NET, it is easy to make your blog look and function exactly how you would like.
BlogEngine.NET is owned by BlogEngine.NET (https://blogengine.io/) and they own all related trademarks and IP rights for this software.
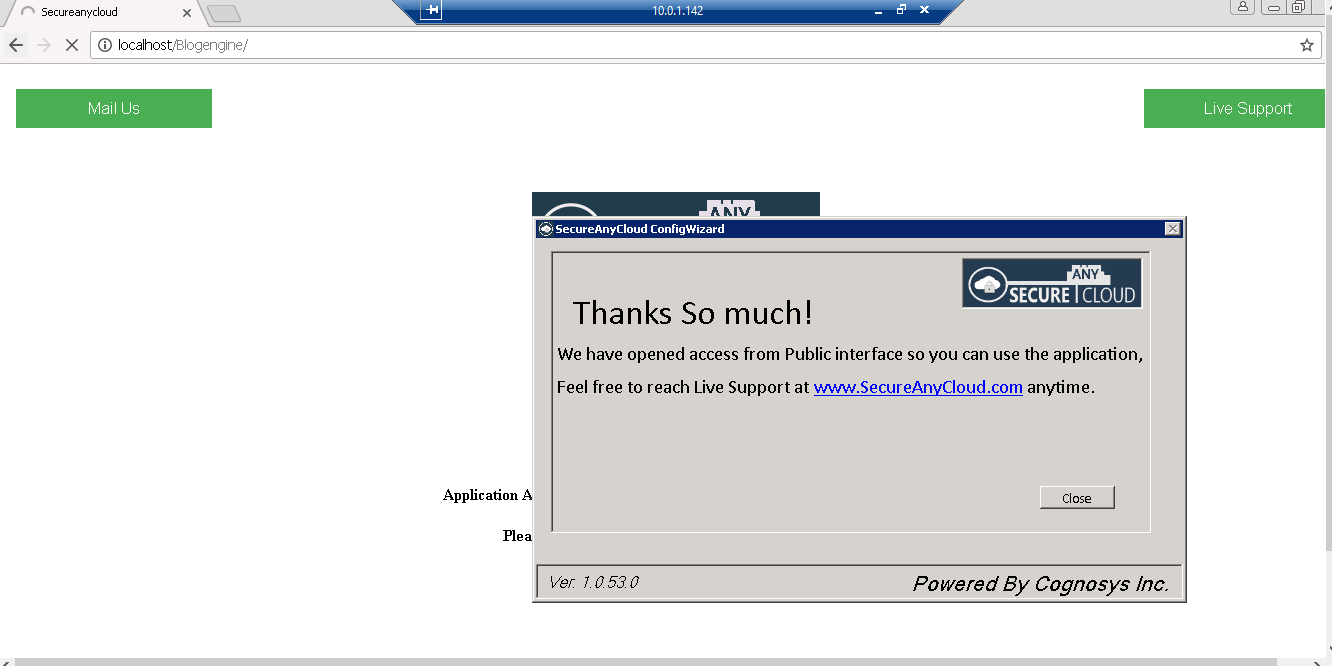
Cognosys provides hardened and ready to run images of BlogEngine.NET platform on all public cloud ( AWS marketplace and Azure).
Deploy your BlogEngine.NET platform securely on cloud i.e. AWS marketplace and Azure with Reliable Services offered by Cognosys at one-click with easy written and video tutorials.
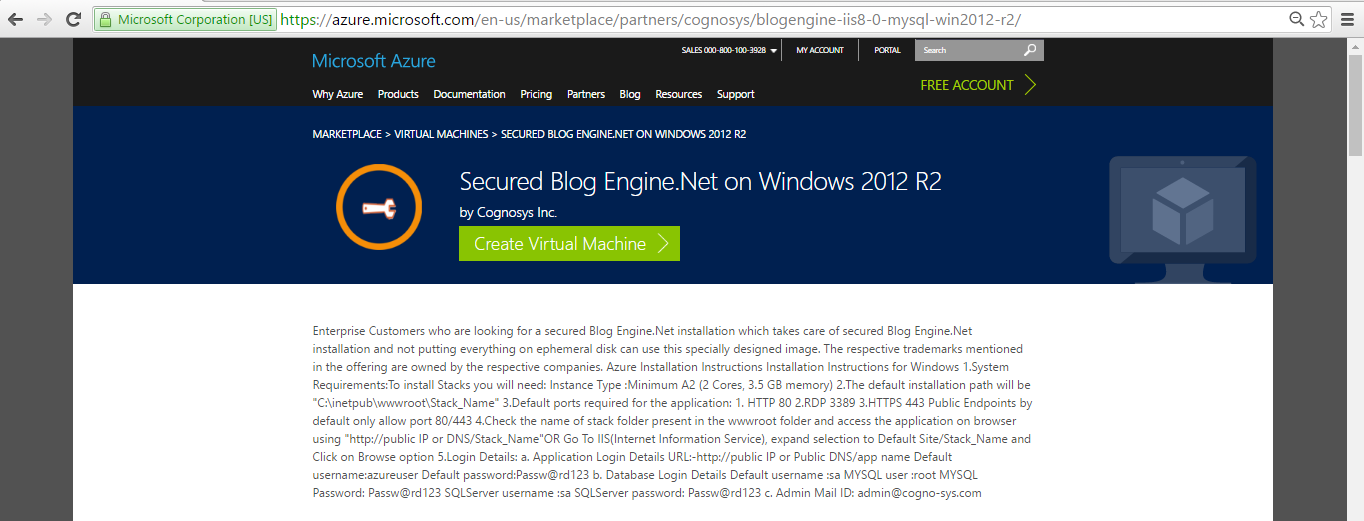
Secured Blog Engine Net on Windows 2012 R2
External embedded media removed for production hardening.
BlogEngine.NET on cloud for AWS

Features
Major Features of BlogEngine.NET
- Plug ’n play- BlogEngine.NET is very easy to setup and customize. To make it work, just upload the files to an ASP.NET 4.0 webserver and you’re ready to start writing. No database configuration, just plug ‘n play.
- Full featured- BlogEngine.NET comes with all the features you would expect from a modern blog engine as well as new unique features such as AJAX comments and screenshot trackbacks.
Web 2.0- BlogEngine.NET features social bookmarks, OpenSearch support, XFN tags, AJAX, FOAF, SIOC, APML, Gravatars, coComments, tag cloud, Google sitemap and other so called Web 2.0 features. - Referrer stats- The referrer statistics enables you to see which websites link to you, so you can follow up with comments or just to have fun. This feature is a real time killer that you cannot live without.
Cool widgets- There is a variety of cool widgets that such as an AJAX post calendar or a blogroll that automatically retrieves the latest posts from each blog and displays the title beneath the blog. Most of the controls are configurable from the admin section. - Advanced comment system- Comments are a very important part of a blog, so BlogEngine.NET features a very advanced commenting system in AJAX that supports country flags, live preview, Gravatars, coComments – all of which can easily be modified in the admin section.
- Full syndication suite- BlogEngine.NET supports syndication feeds in any possible location. You can find feeds on comments, categories, authors and a main feed. Both RSS 2.0 and ATOM 1.0 are fully supported.
Trackbacks and pingbacks- All outgoing links from the posts is tracked- and pinged back, so your blog will get listed in the comments on the linked website if it supports it. When a new post is created, BlogEngine.NET automatically pings Technorati, Feedburner, Ping-o-Matic etc.
AWS
Installation Instructions For Windows
Note: How to find PublicDNS in AWS
Step 1) RDP Connection: To connect to the deployed instance, Please follow Instructions to Connect to Windows instance on AWS Cloud
1) Connect to the virtual machine using following RDP credentials:
- Hostname: PublicDNS / IP of machine
- Port : 3389
Username: To connect to the operating system, use RDP and the username is Administrator.
Password: Please Click here to know how to get password .
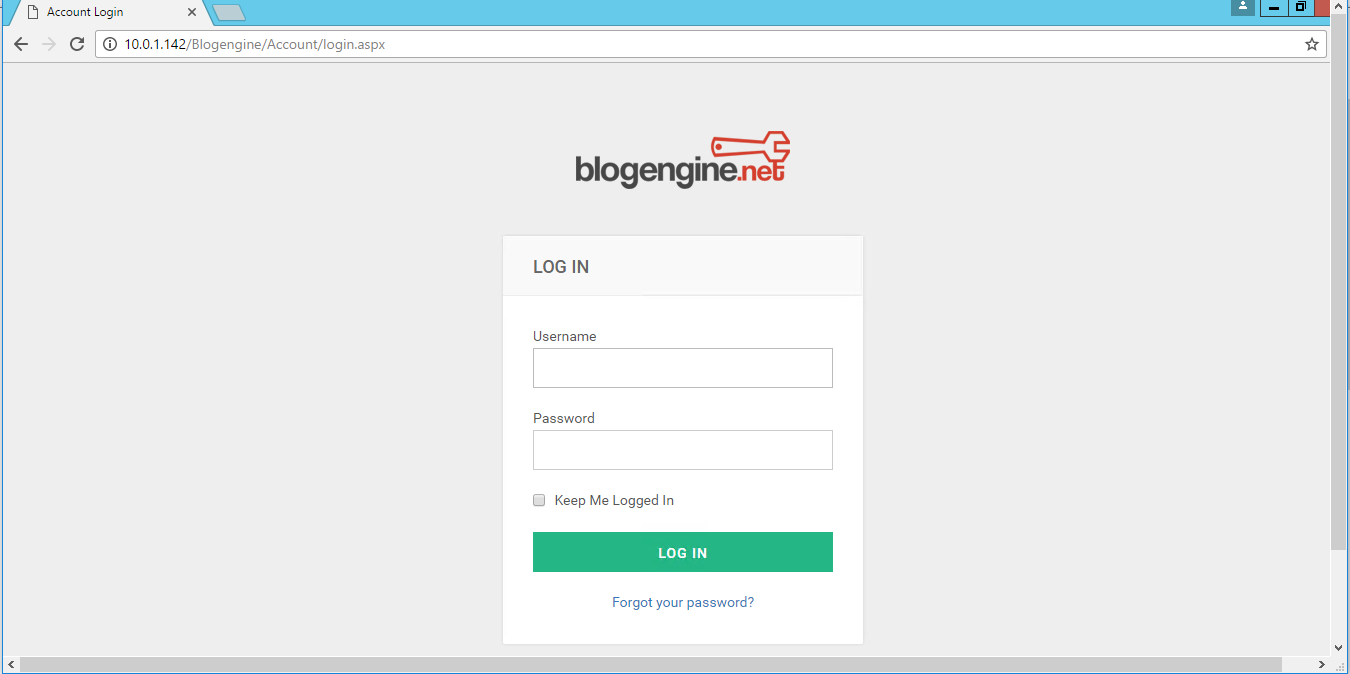
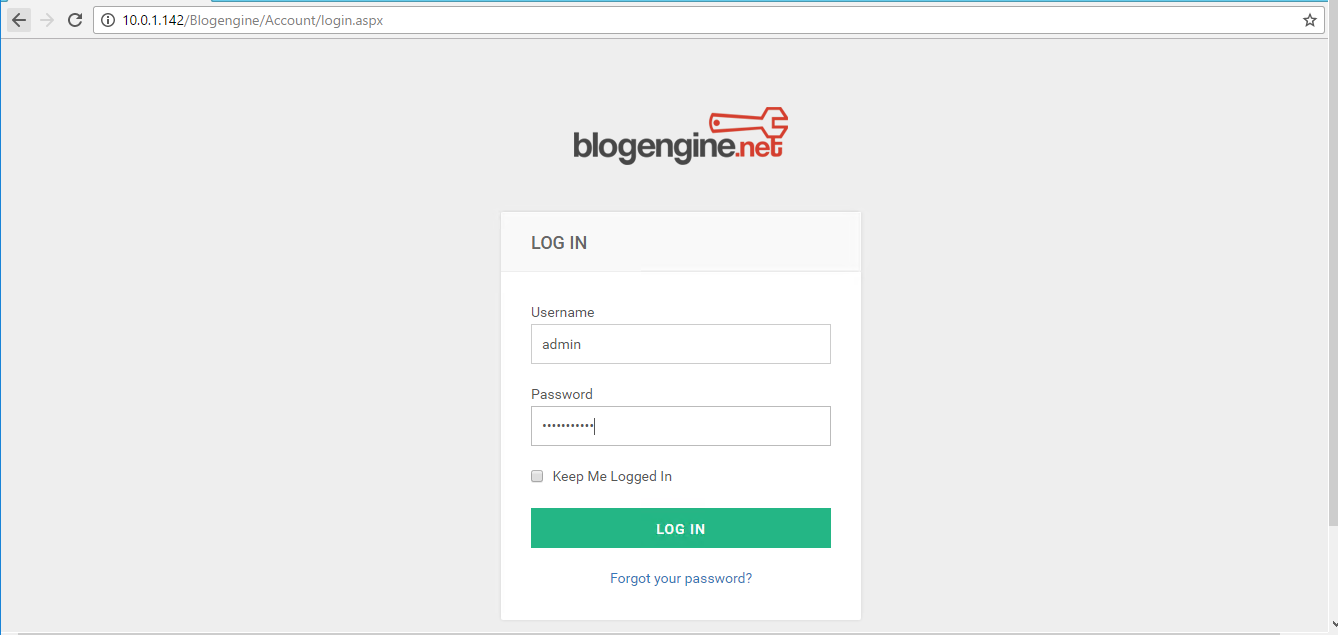
Step 2) Application URL: Access the application via a browser at http://PublicDNS/Blogengine
- User Name: admin
- Password: Passw@rd123
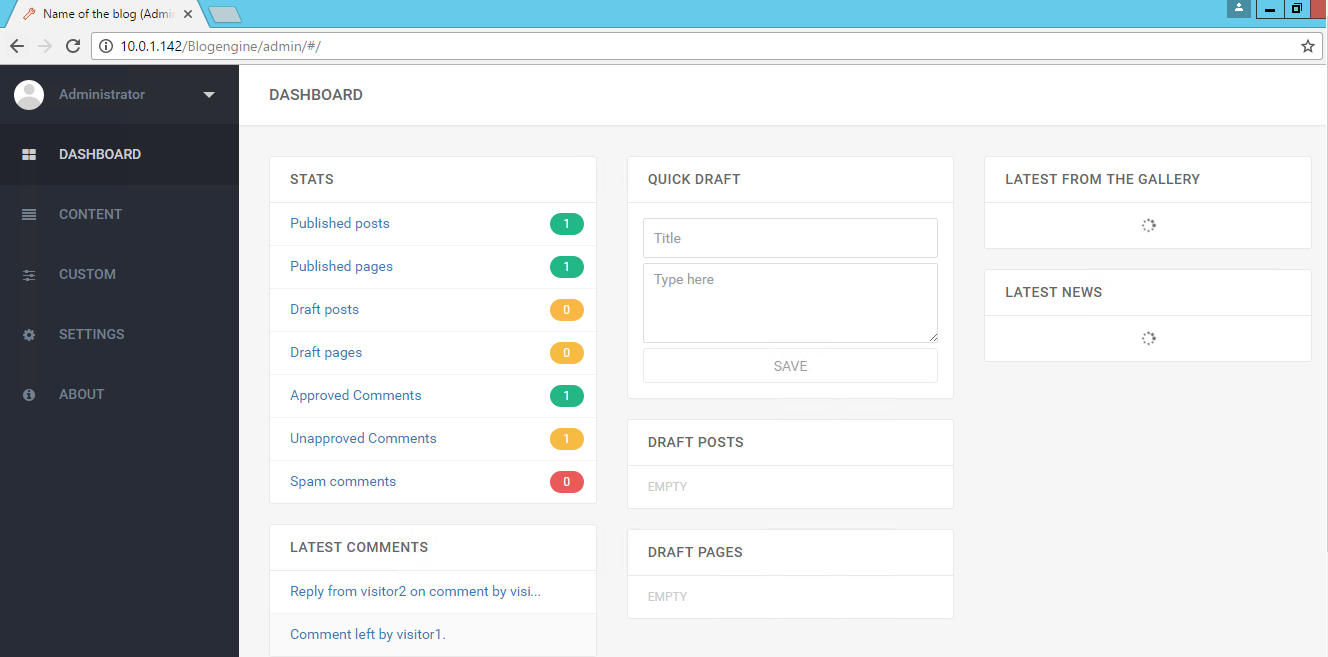
Steps to access the Admin Panel:
- To login to Blogengine Administrative Panel, you need
to open your browser and navigate to http://PublicDNS/Blogengine/admin - Enter username and password in the given fields and click on the“Login”button to access the Admin Panel.
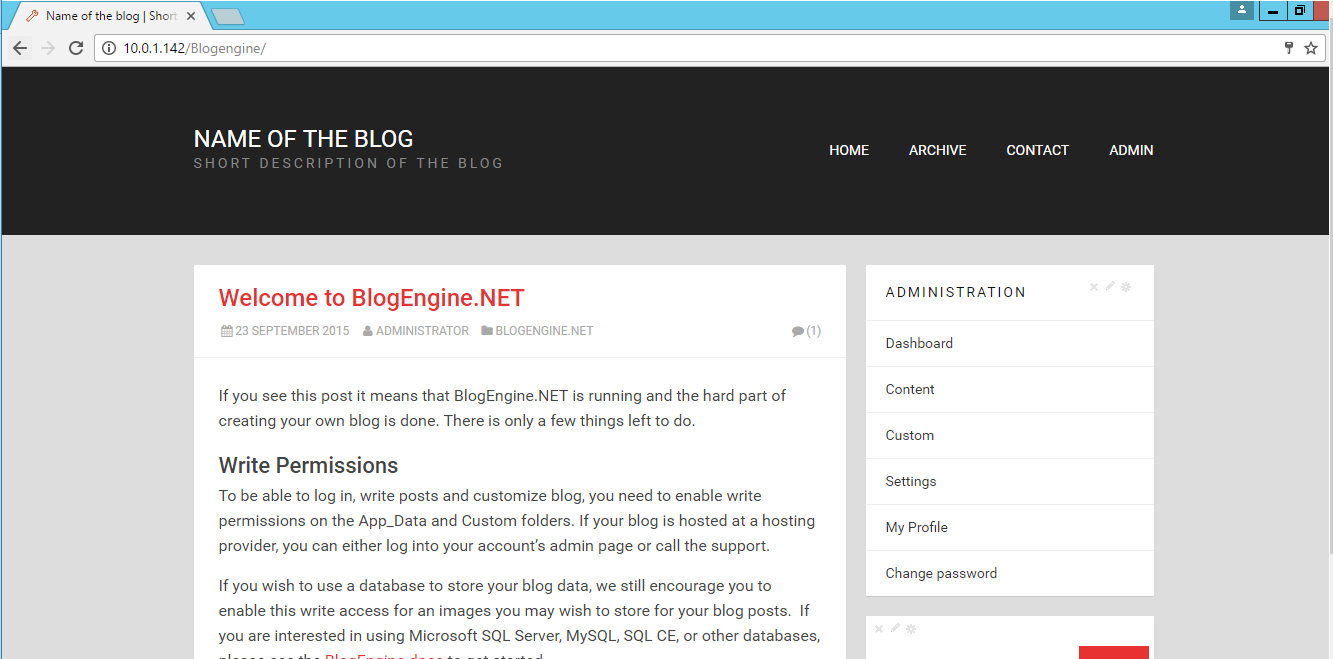
- After successful login to the Admin Panel, you will get access to Blogengine .
Step 3) Other Information:
1.Default installation path: will be in your web root folder “C:\inetpub\wwwroot\blogengine”
2.Default ports:
- Windows Machines: RDP Port – 3389
- Http: 80
- Https: 443
Configure custom inbound and outbound rules using this link
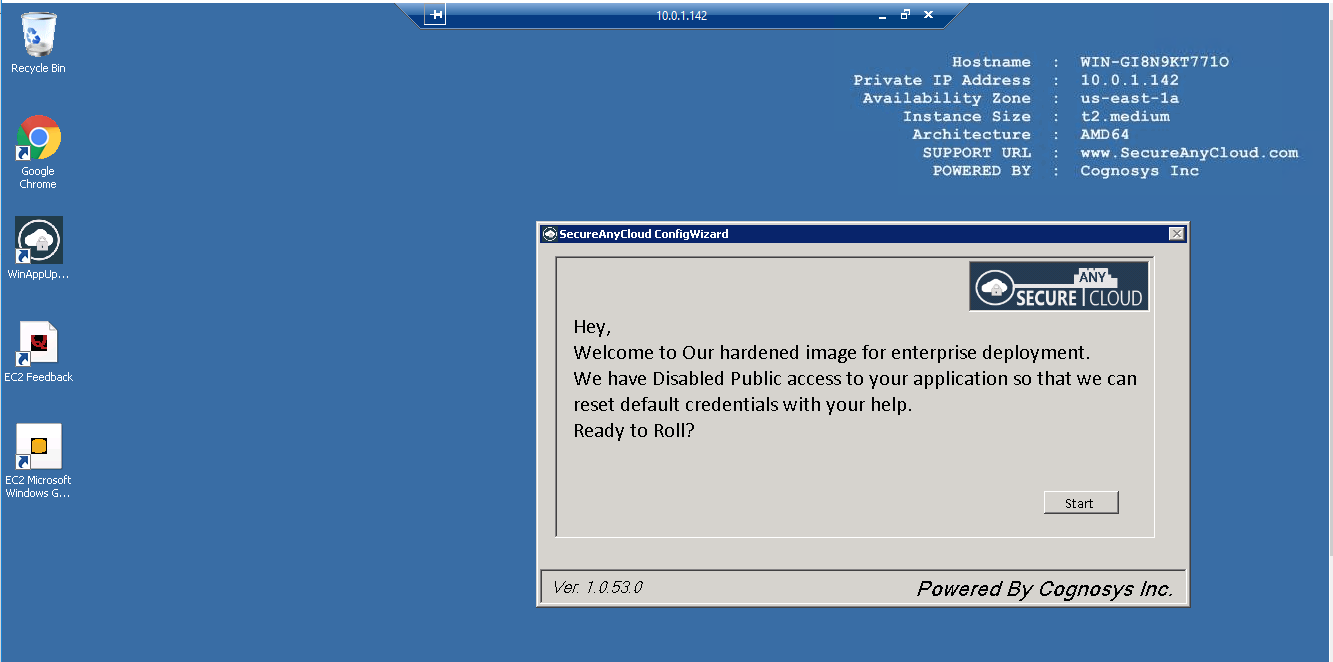
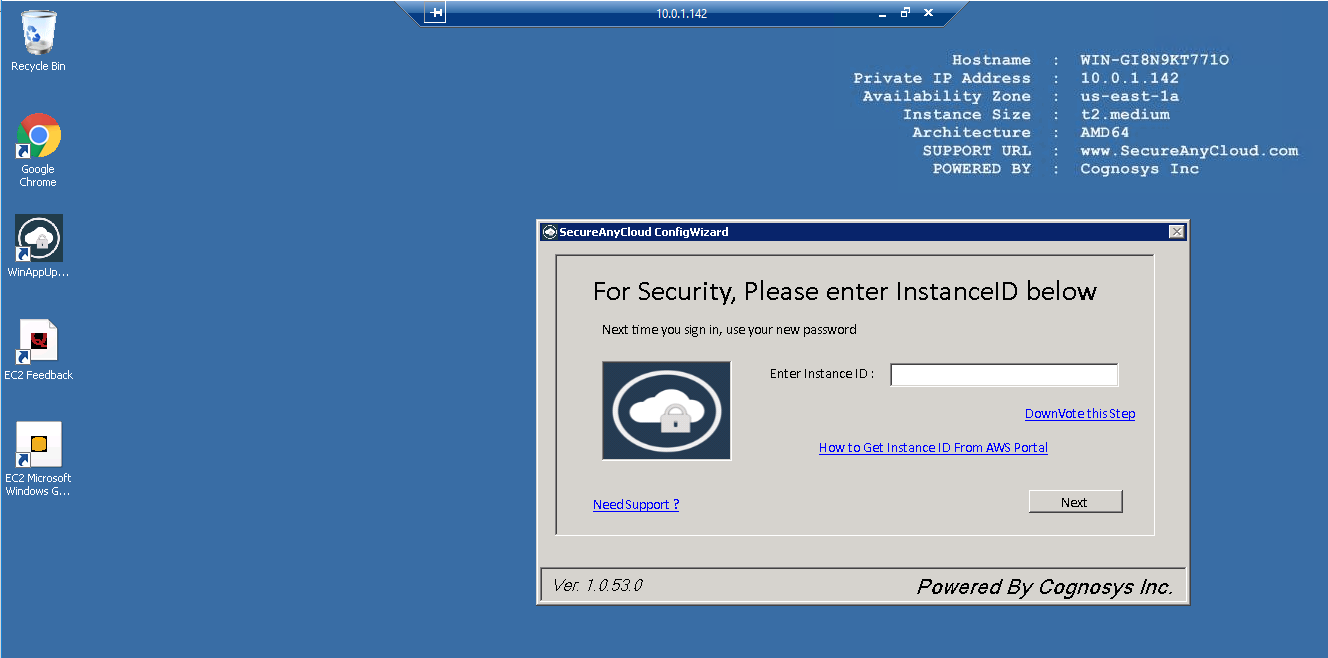
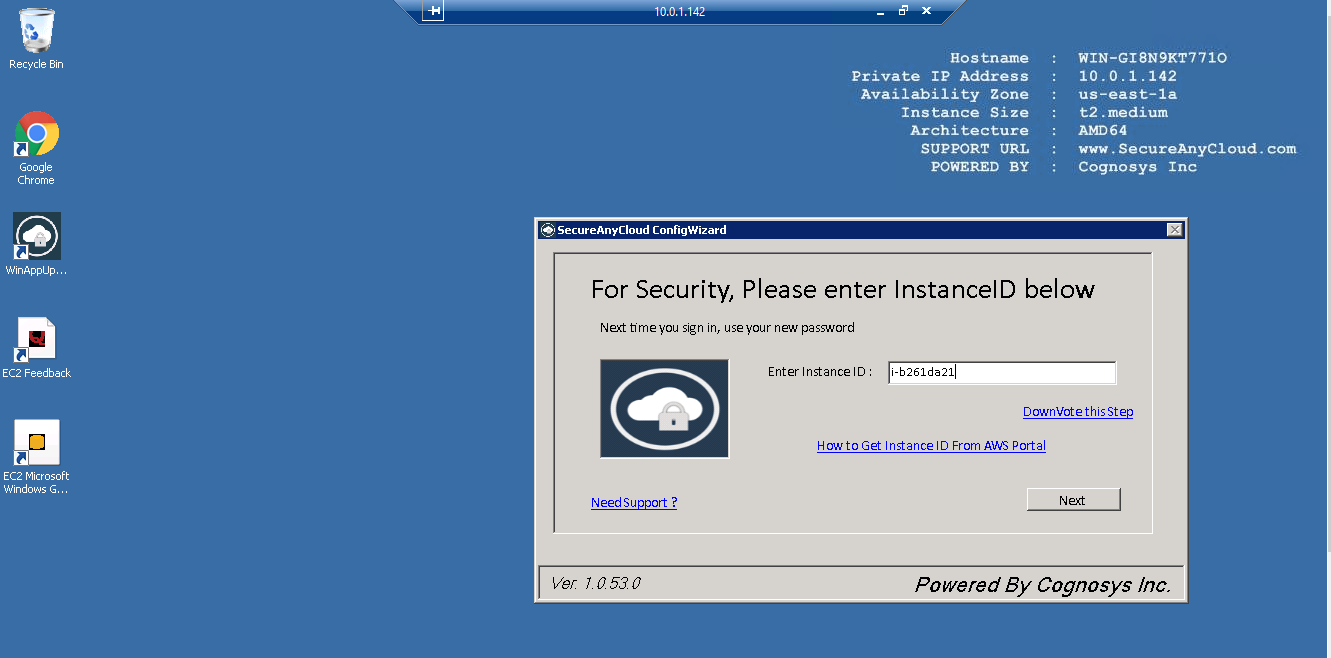
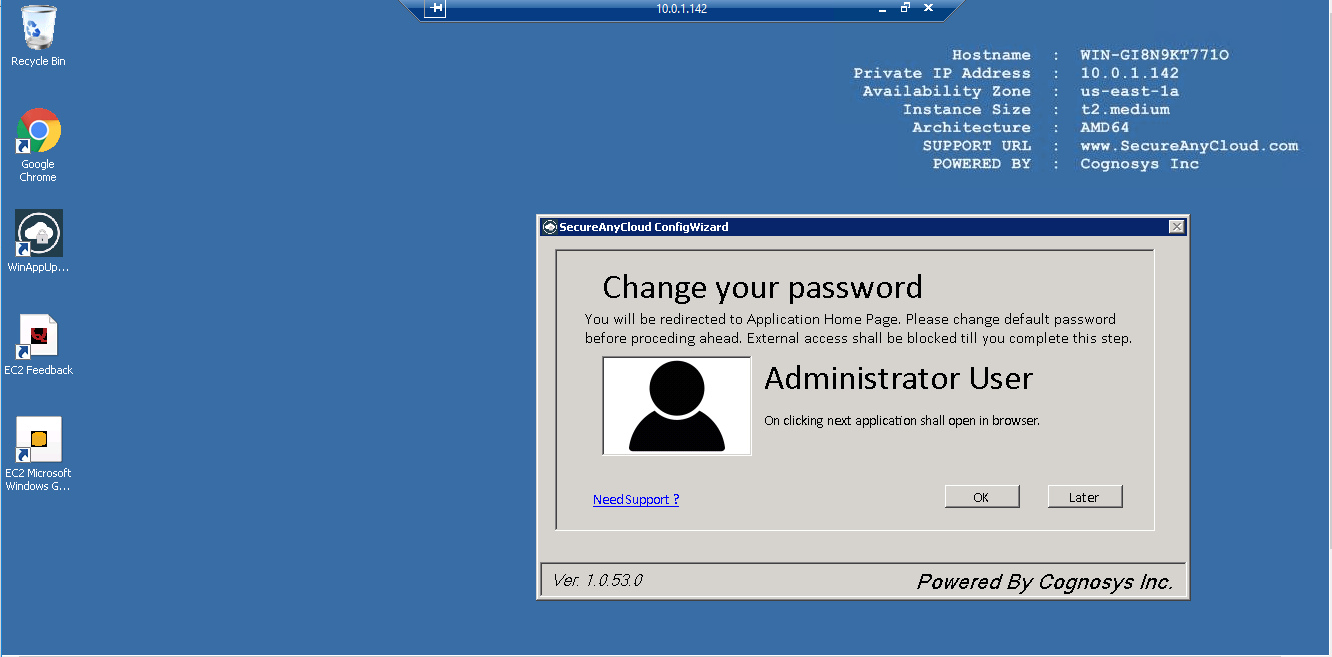
AWS Step by Step Screenshots
Azure
Installation Instructions for Windows
Note : How to find PublicDNS in Azure
A) RDP Connection: To connect to the operating system,
1) Connect to virtual machine using following RDP credentials :
- Hostname: PublicDNS / IP of machine
- Port : 3389
Username: Your chosen username when you created the machine ( For example: Azureuser)
Password : Your Chosen Password when you created the machine ( How to reset the password if you do not remember)
B) Application URL: Access the application via a browser at http://PublicDNS/Blogengine
- User Name: admin
- Password: Passw@rd123
C) Other Information:
1.Default installation path: will be on your web root folder “C:\inetpub\wwwroot\blogengine”
2.Default ports:
- Windows Machines: RDP Port – 3389
- Http: 80
- Https: 443
- Sql or Mysql ports: By default these are not open on Public Endpoints. Internally Sql server: 1433. Mysql :3306
Configure custom inbound and outbound rules using this link
Azure Step by Step Screenshots
Product name
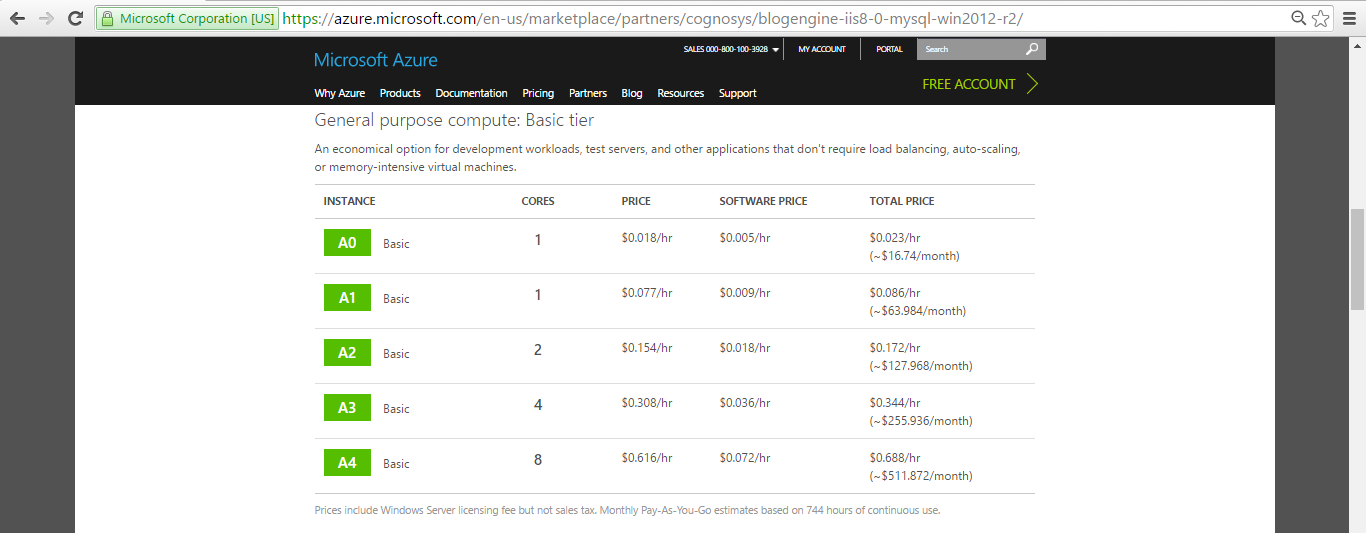
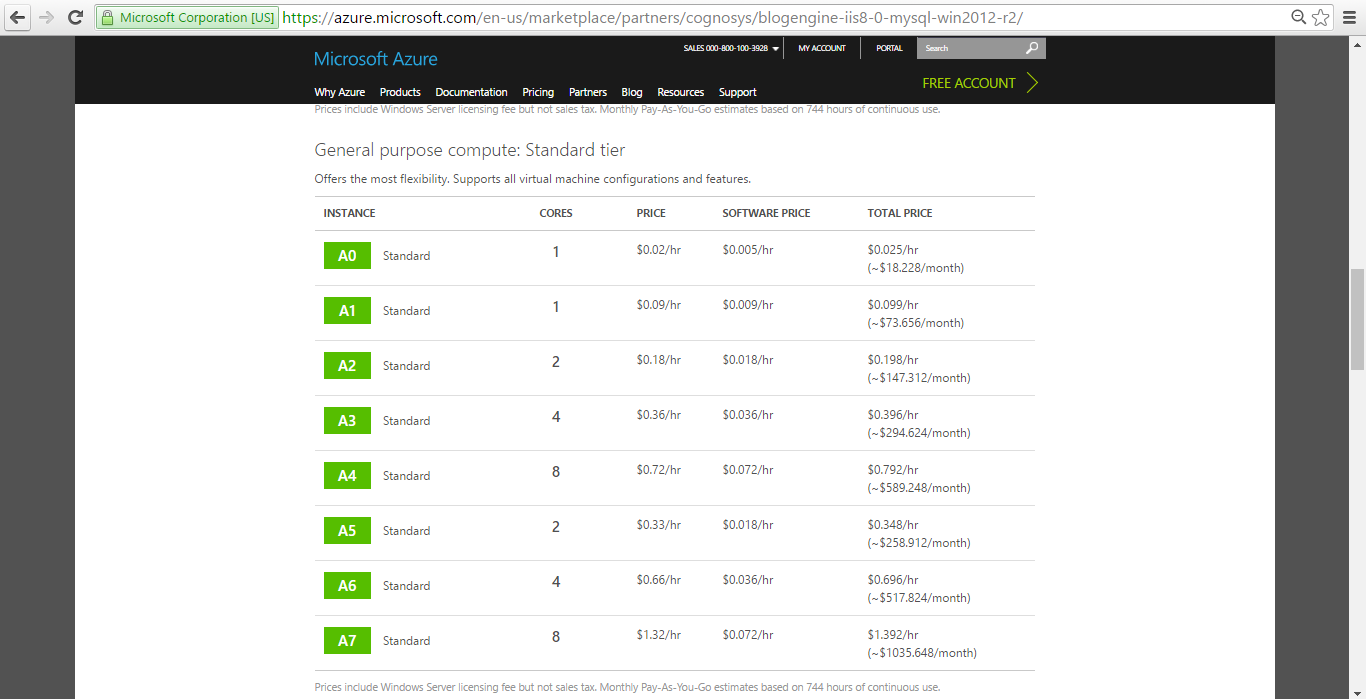
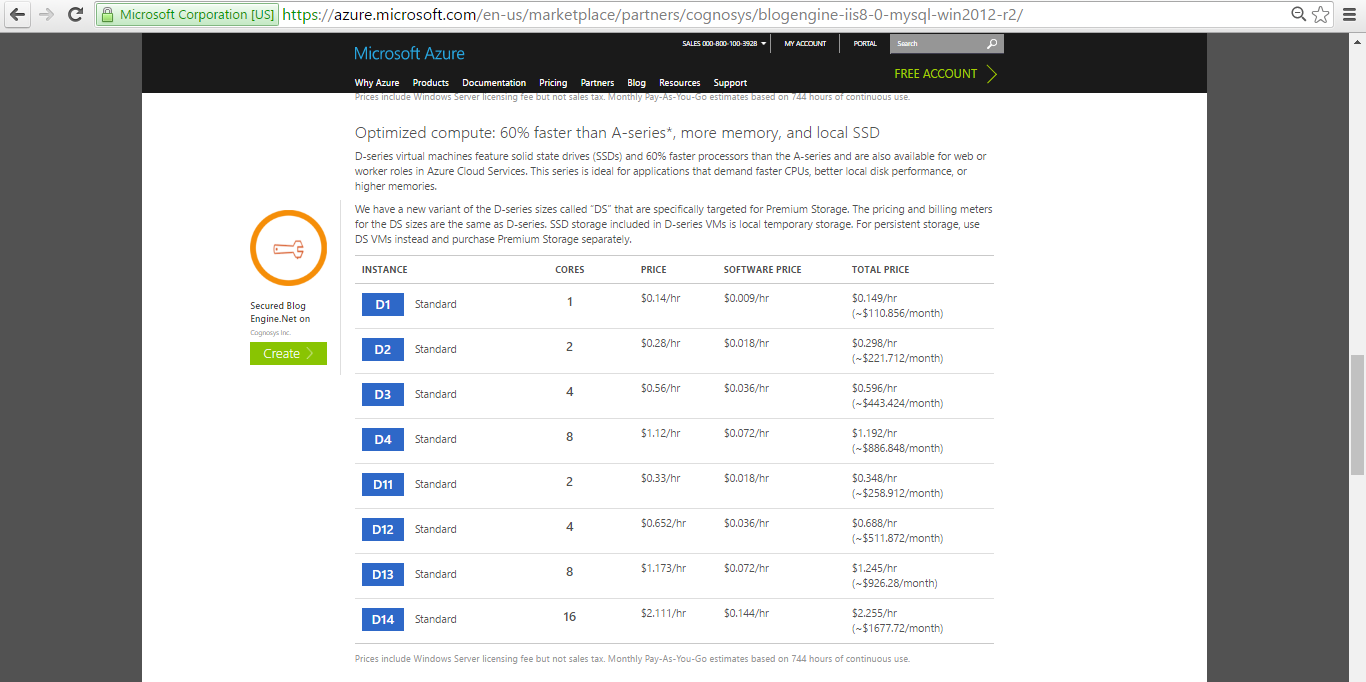
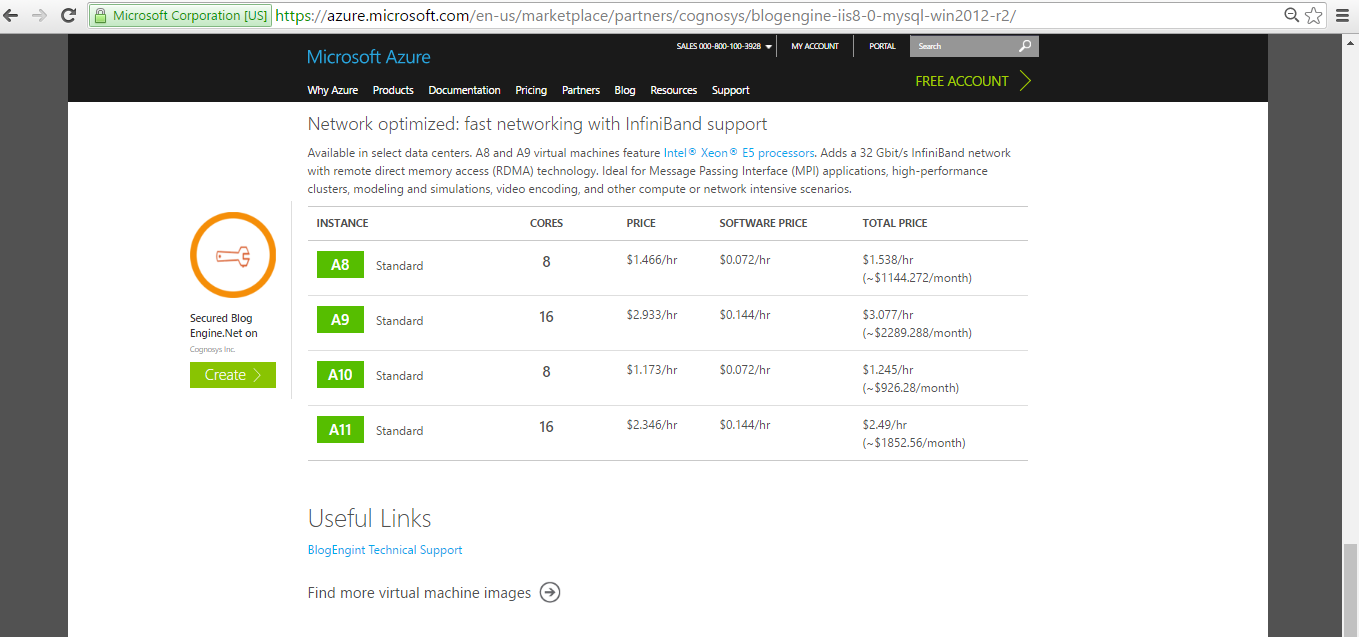
Pricing Details


videos
Secured Blog Engine Net on Windows 2012 R2
External embedded media removed for production hardening.
Install BlogEngine.NET with MS SQL Server 2012
External embedded media removed for production hardening.
External embedded media removed for production hardening.
