1-click AWS Deployment 1-click Azure Deployment
Overview
Xoops stands for “eXtensible Object Oriented Portal System”. The script started as a portal system, but later on it evolved into a more reliable and stable content management system that can be used for creating small or large community websites, corporate portals, blogs and many more.XOOPS, powered by you” is the slogan of this Web application system. This literally means that, through the power of modular architecture, you customize your site by installing and activating administrative modules when and if a particular element of your site requires them. For example, when installing XOOPS as a blog it can be expanded on and customized via modules to store content in news, forums, downloads, etc. Although, XOOPS stands for “eXtensible Object Oriented Portal System” and is written in PHP for the MySQL database, it serves more as a dynamic web framework.
XOOPS at a Glance
The heavy lifting in XOOPS happens in the admin interface, where you add blocks or pieces of code to areas on the page. For instance, you could add a news block and place it on the top of your page. There are presently about 600 modules to play with, allowing you to add everything from file management to gaming statistics to your site. And XOOPS works with thousands of templates and themes so you can go crazy changing the look and feel of your pages. XOOPS was also nice and easy to install and modify, making it an extremely responsive Web application system!
Product Details
XOOPS has several features that make it one of the best content management systems (CMS) around. For example:
- Database-driven—XOOPS store data using a relational database (MySQL).
- Fully modularized—Install, uninstall, activate, and deactivate modules with just a click of a button using the XOOPS administration system.
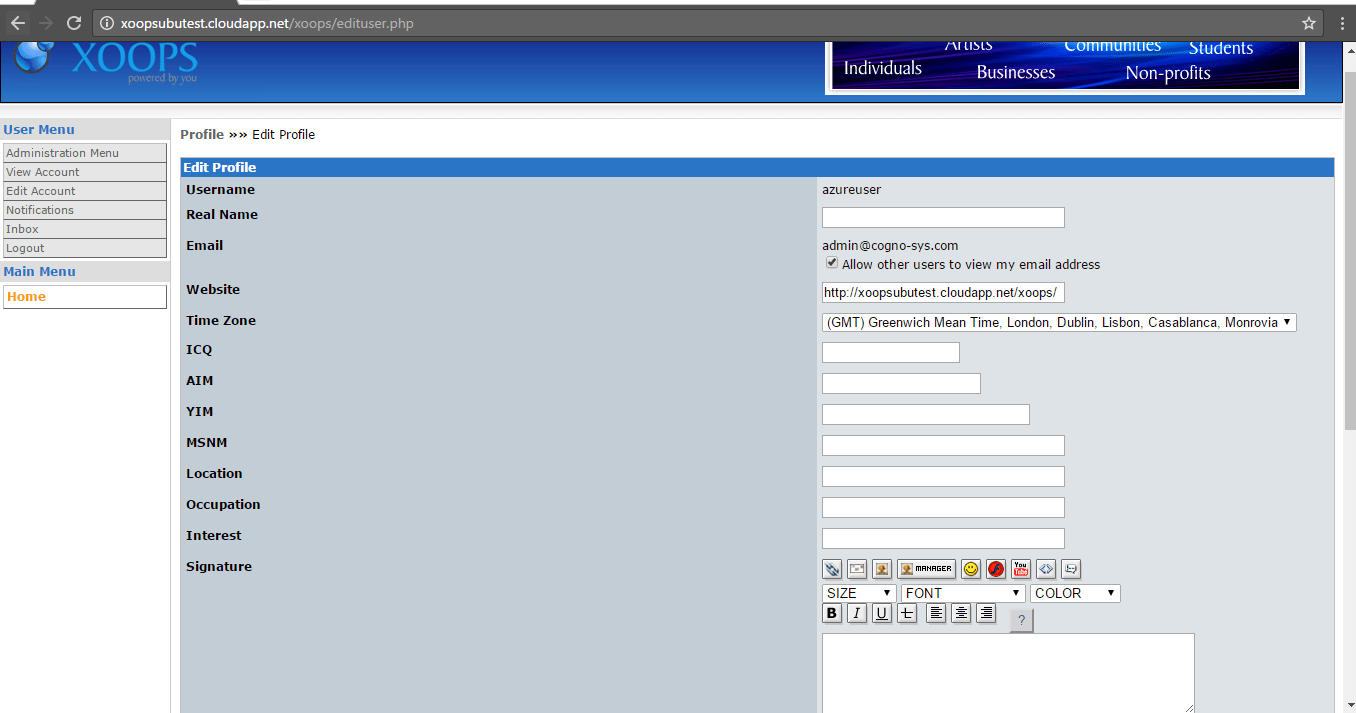
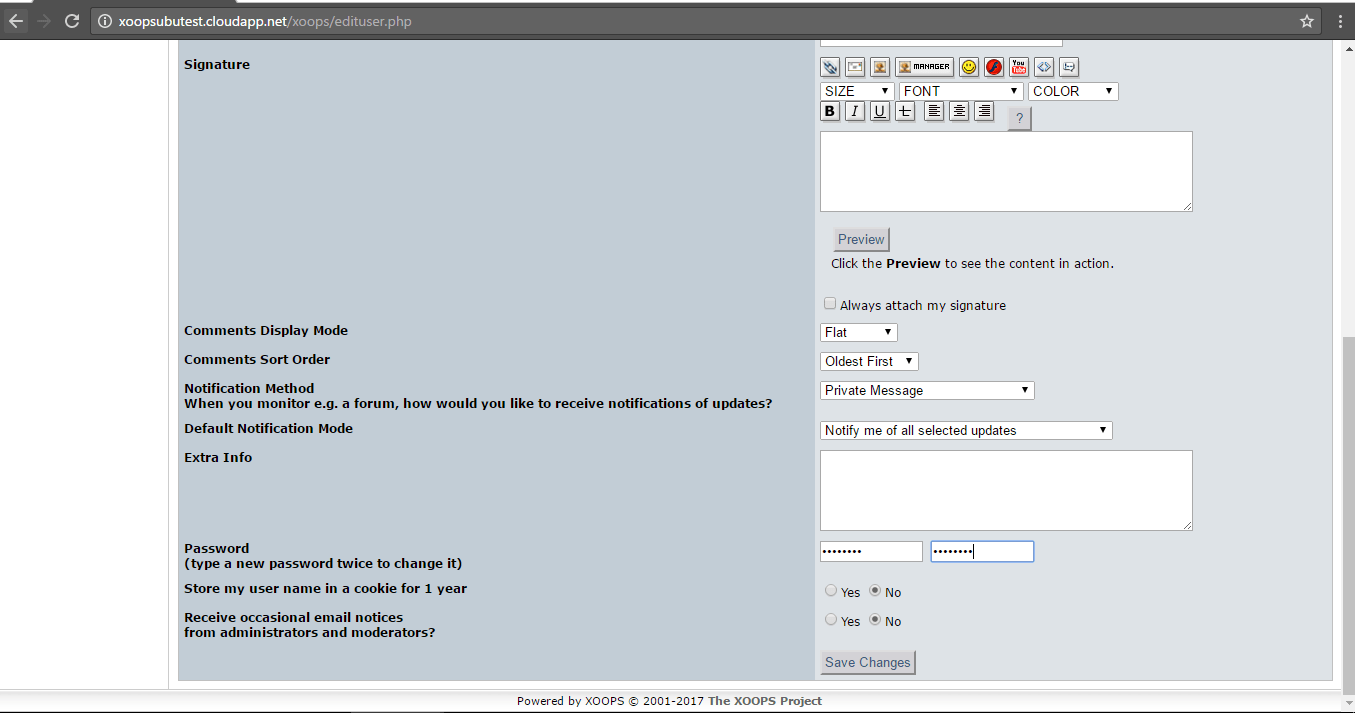
- Personalization—Edit your profiles, select site themes, upload custom avatars, and much more!
- User management—Search by various criteria, send email and private messages through a template-based messaging system.
- Supported worldwide—Enjoy multi-byte language support, including Japanese, Simplified and Traditional Chinese, Korean, etc.
- Multi-byte Language Support—Enjoy multi-byte language support, including Japanese, Simplified and Traditional Chinese, Korean, etc.
- Versatile Group Permissions System—Set group permissions via a user-friendly administration system.
- Theme-based Interface Skins—Change the entire Web site look in a click of a mouse with over 1000 available themes for download!
XOOPS is a content management system that allows administrators to easily create dynamic websites. It is a tool for developing small to large dynamic community websites. It is written in PHP and interfaces with a database such as MySQL.”What this means is that you can share your information with other employees, friends, and prospective buyers. The medium for sharing this information is the Internet.
XOOPS is released under the GNU General Public License (GPL), which gives you the right to use it freely, to modify it to suit your needs and then to redistribute it under the terms of the GPL. XOOPS is pronounced as “zoo’ps”.
The name XOOPS is an acronym of “eXtensible Object-Oriented Portal System”. The word “portal” hints at the original intent of the software as a portal system, but XOOPS is striving to meet the ideals of a true content management system.
The XOOPS Foundation is the umbrella group under which XOOPS is developed and maintained, and under which a number of teams are managed. Some of these teams are the following:
- Core Development Team, responsible for the maintenance and further development of the XOOPS core code.
- Module Development Team, responsible for the maintenance and further development of the XOOPS official modules that come with the full package.
- Theme Design Team, responsible for running and supporting Theme Design and development for the XOOPS system.
- QA (Quality Assurance) Team, responsible for quality-assurance testing of modules.
- Documentation Team, responsible for the preparation and addition of introductory manuals, reference guides, tutorials, and technical documents.
- Marketing and Communications Team, responsible for external marketing, communications, and visibility of XOOPS.
- Support-Forum Moderation Team, responsible for helping the XOOPS community and new users solve common problems by ensuring that each issue reaches the appropriate team.
- XOOPS Core Team, comprising team leaders of all the other teams, which is responsible for the “Big Picture”, ensuring that the work of all the teams comes together to make XOOPS a more cohesive product.
XOOPS Manual Installation
Here we will show you how to install Xoops manually. Before you start, there are a few things that you will need to prepare. First create a new MySQL database logins. Those will be used by Xoops to access the MySQL server. You can easily create a new MySQL database using cPanel > MySQL Database Wizard. You can see detailed instructions how to create new MySQL database here:https://www.tmdhosting.com/tutorials/video/cpanel/cpanel-x3-createmysql.htmlThe second thing you will need to do is download the Xoops installation files. You can download the files from their official website at http://xoops.org/When you download the Xoops archive, extract in your local computer. You will have a new folder called xoops 2.x.x depending on which version you have downloaded. In that folder you will find a folder named “htdocs”:
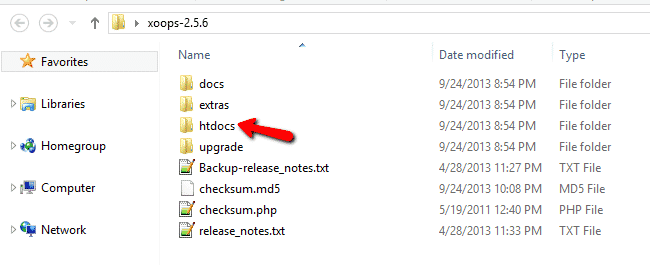
You will need to upload the content of that folder to the directory in your hosting, where you wish to install Xoops. If you want to access the site using https://yourdomain.com , you should upload the files in /public_html/, if you want to access the site using https://yourdomain.com/cms/ , upload the files in: /public_html/cms/. For the purpose of this tutorial, we assume that you have uploaded the Xoops files in the /public_html/ directory. To start the installation process simply go to:https://yourdomain.com/install/
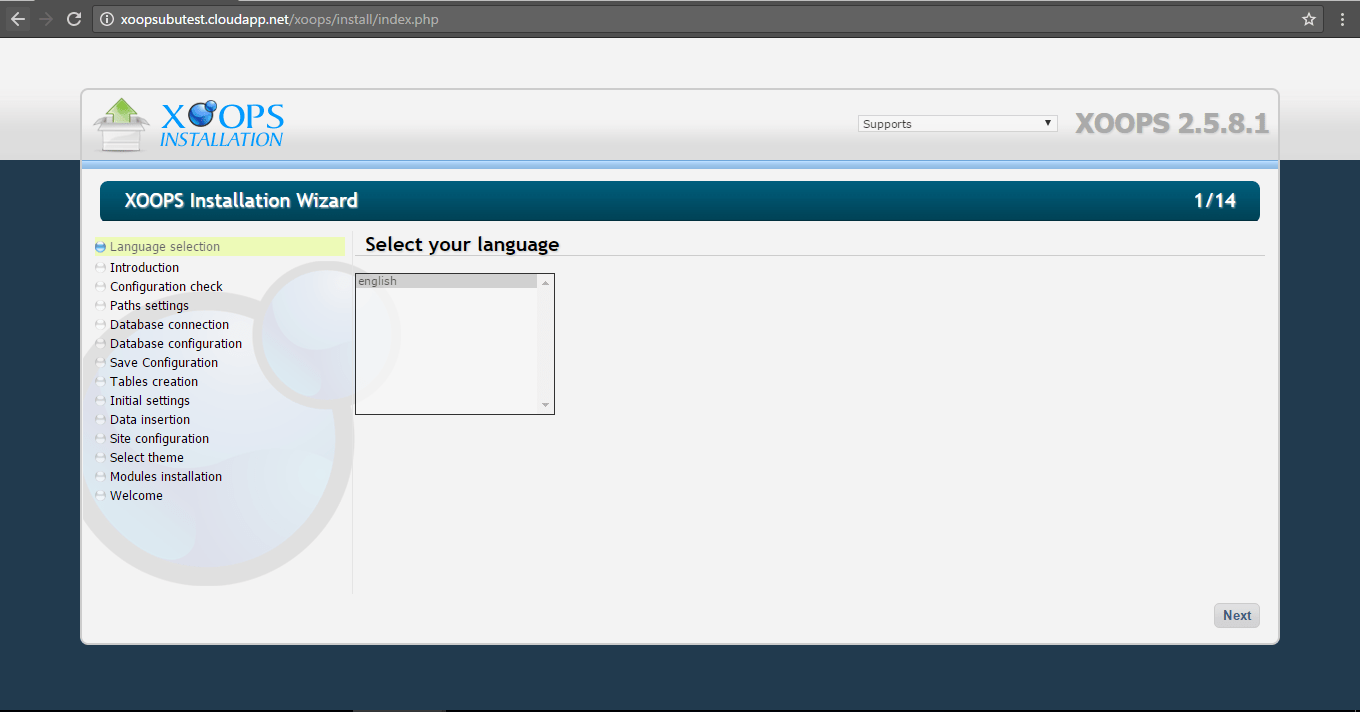
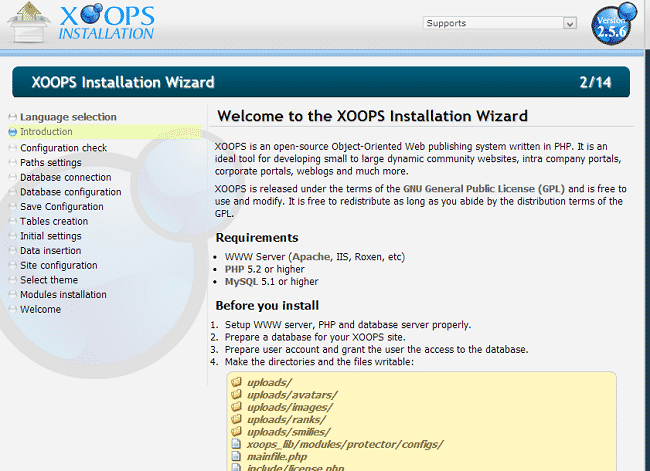
This will bring the installation screen for Xoops:
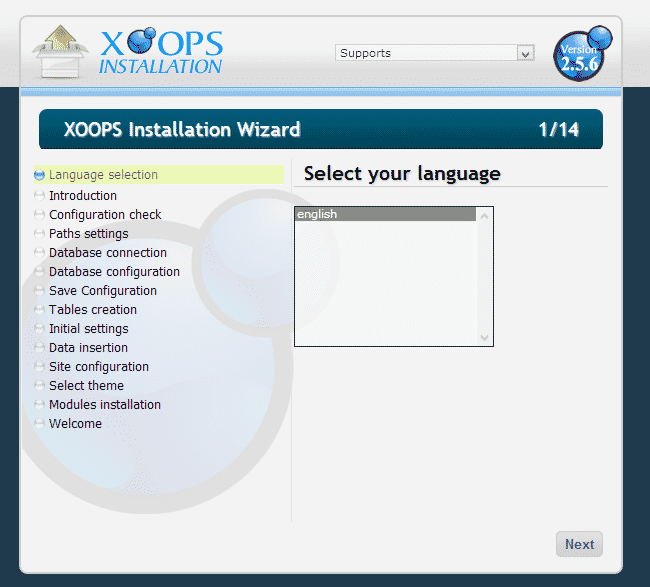
Click on the “Next” button on that page. Now on the next page Xoops will ask you to create a MySQL database and setup the folders for your Xoops installation. You have already done so in the beginning of this tutorial. The only thing you may consider is moving the xoops_lib and xoops_data directories outside of your web root directory. This measure is required for security reasons:
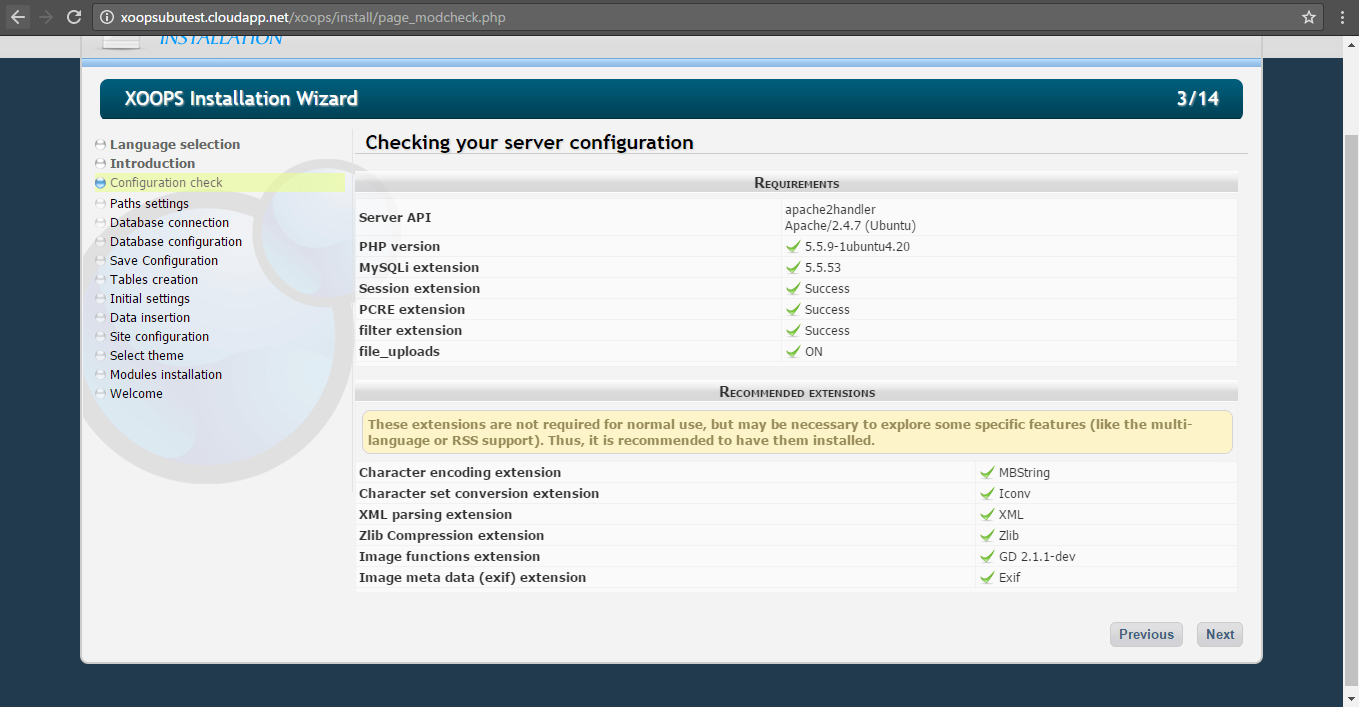
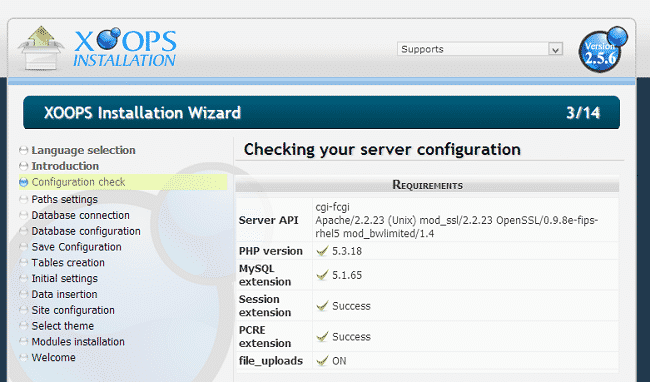
Proceed to the next page. Xoops will check the server configuration. Everything should be OK in here:
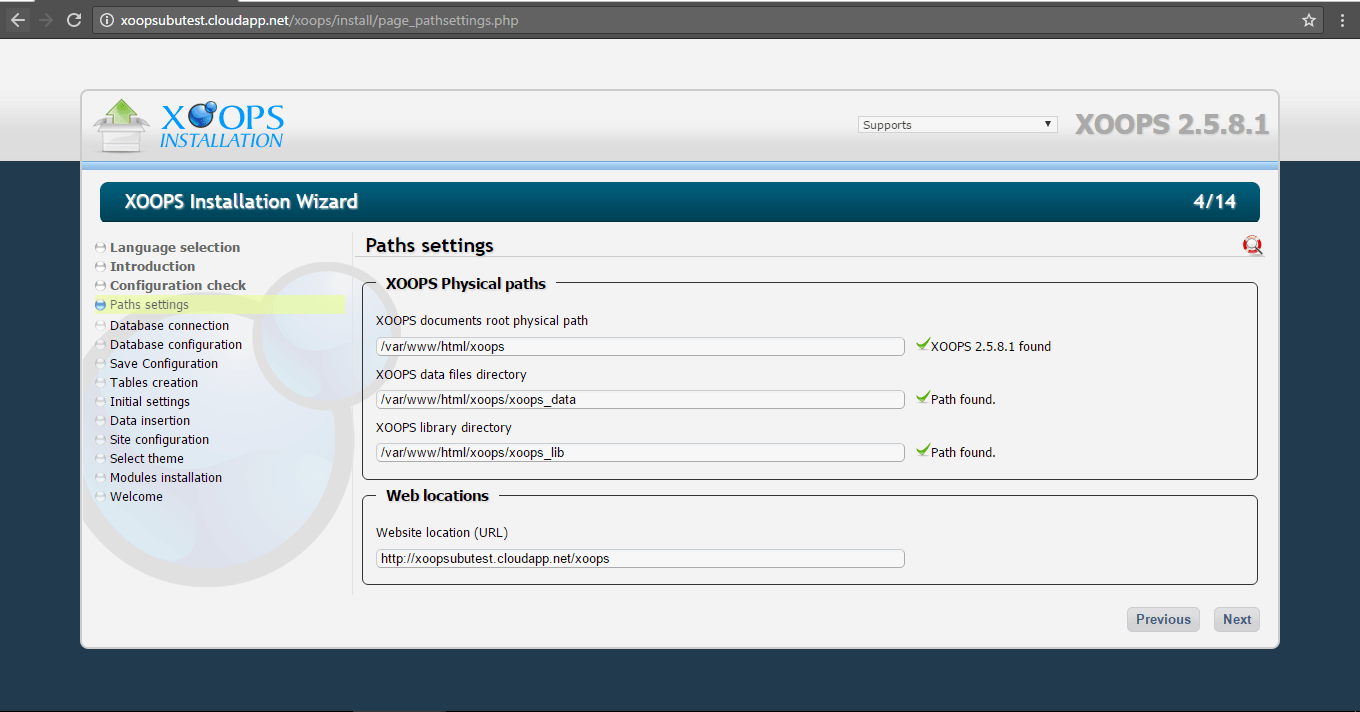
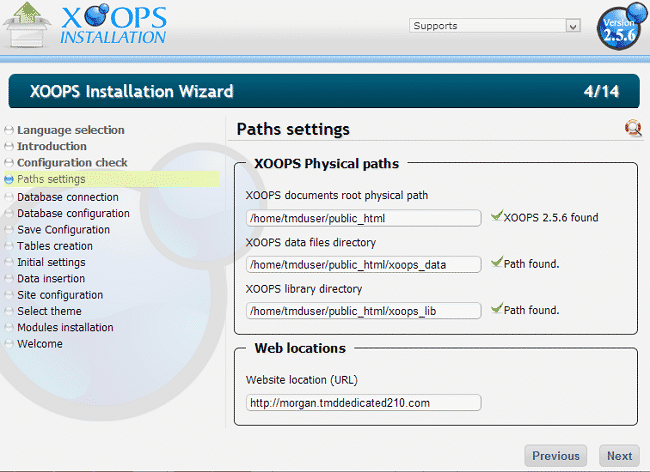
You can proceed to the next page. The script will find the path to your website as well as your site URL. Check if they are detected correctly and fix them only if needed:
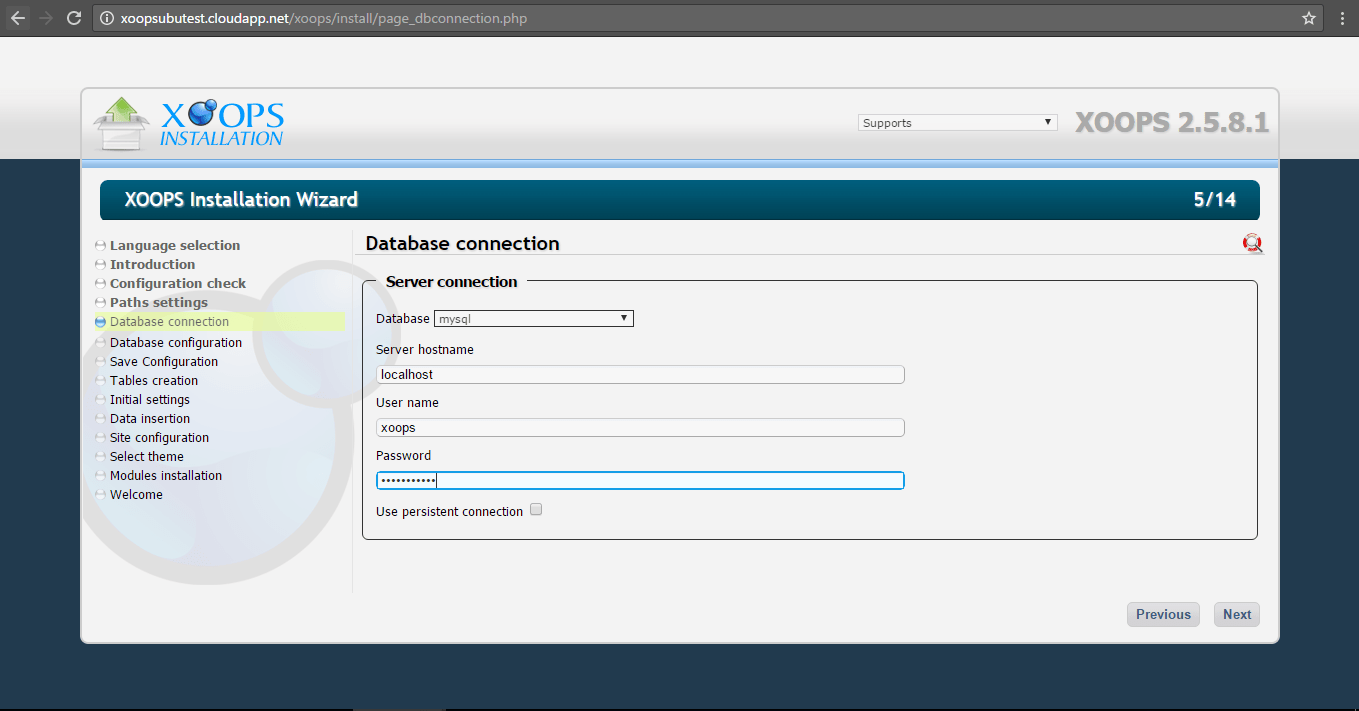
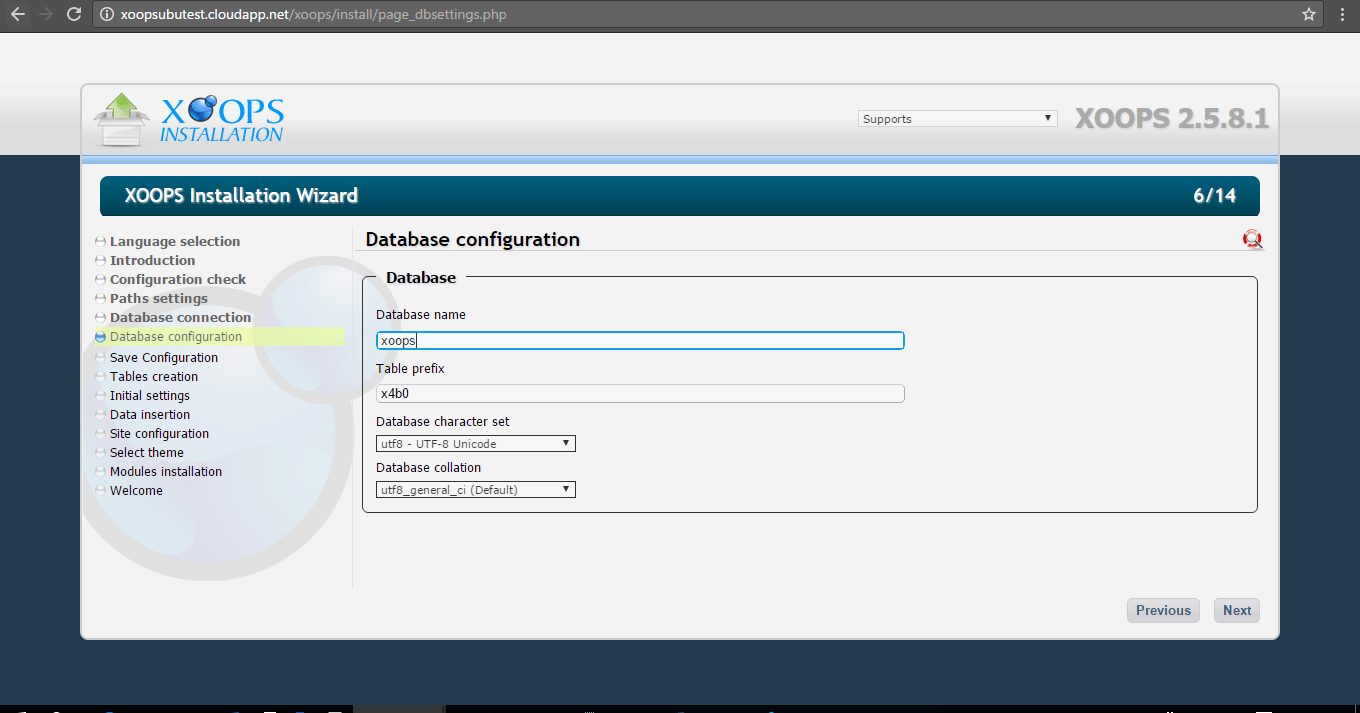
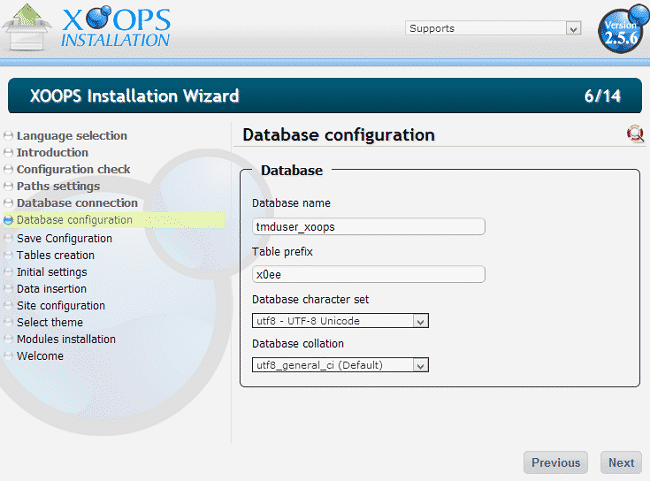
The next thing you will need to do is enter your database details. Use the ones that you created in the beginning of this tutorial:
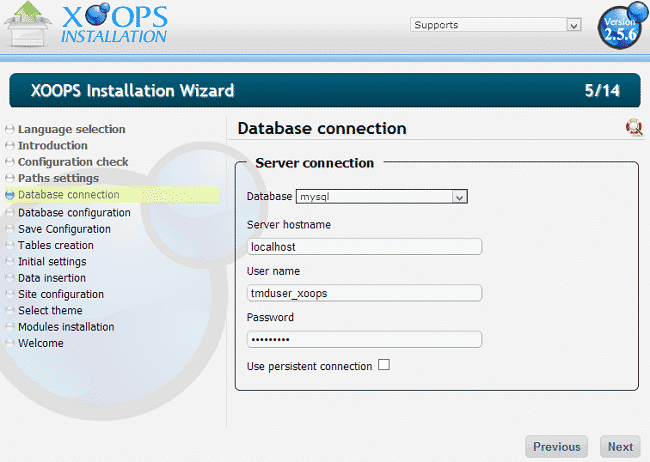
Proceed further and enter the name of the database that you created:
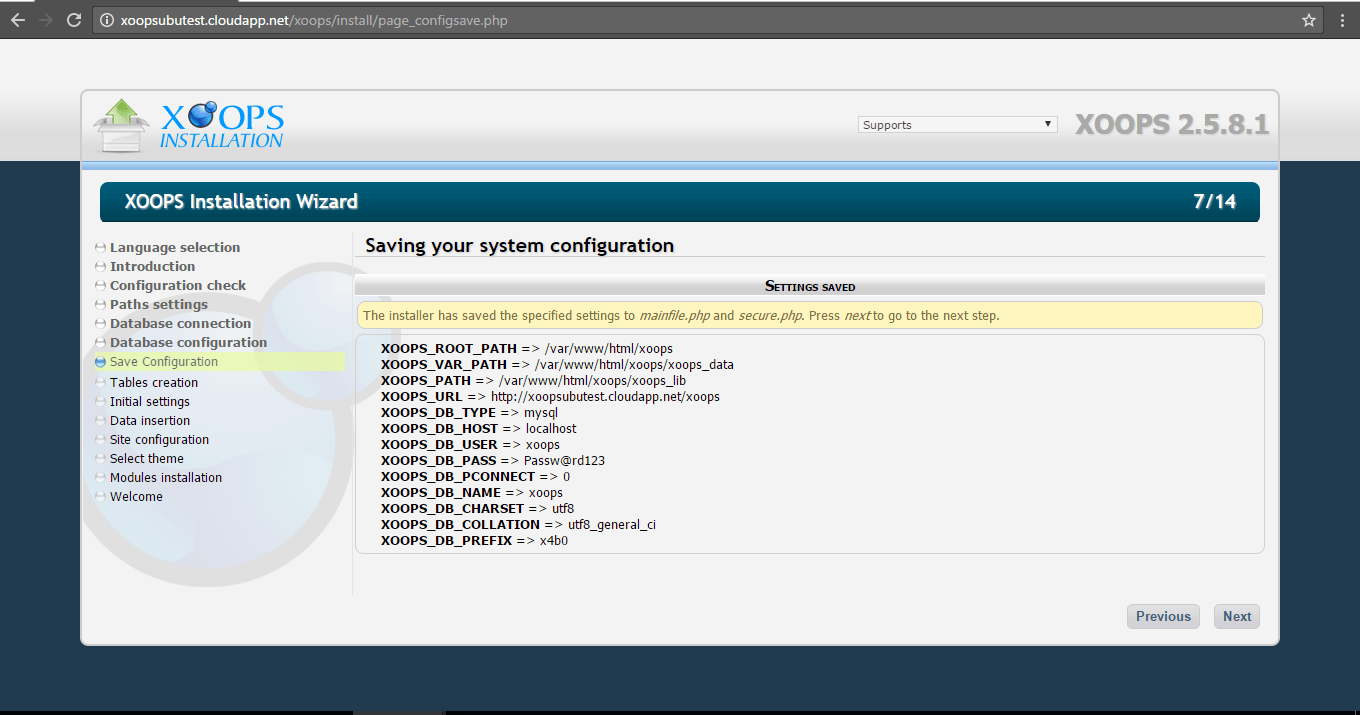
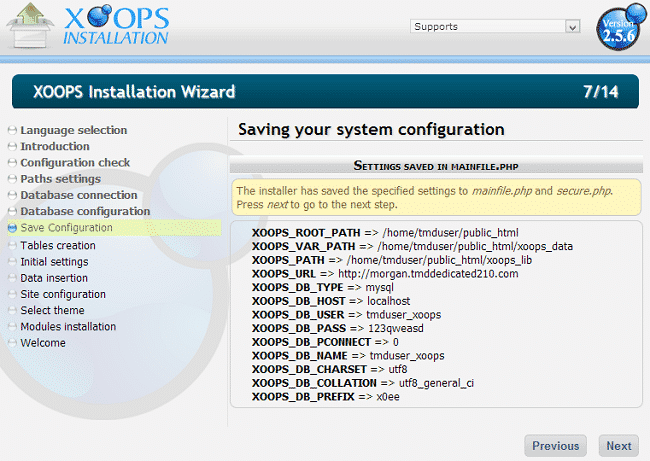
Xoops will inform you that the changes have been saved in the mainfile.php and secure.php file:
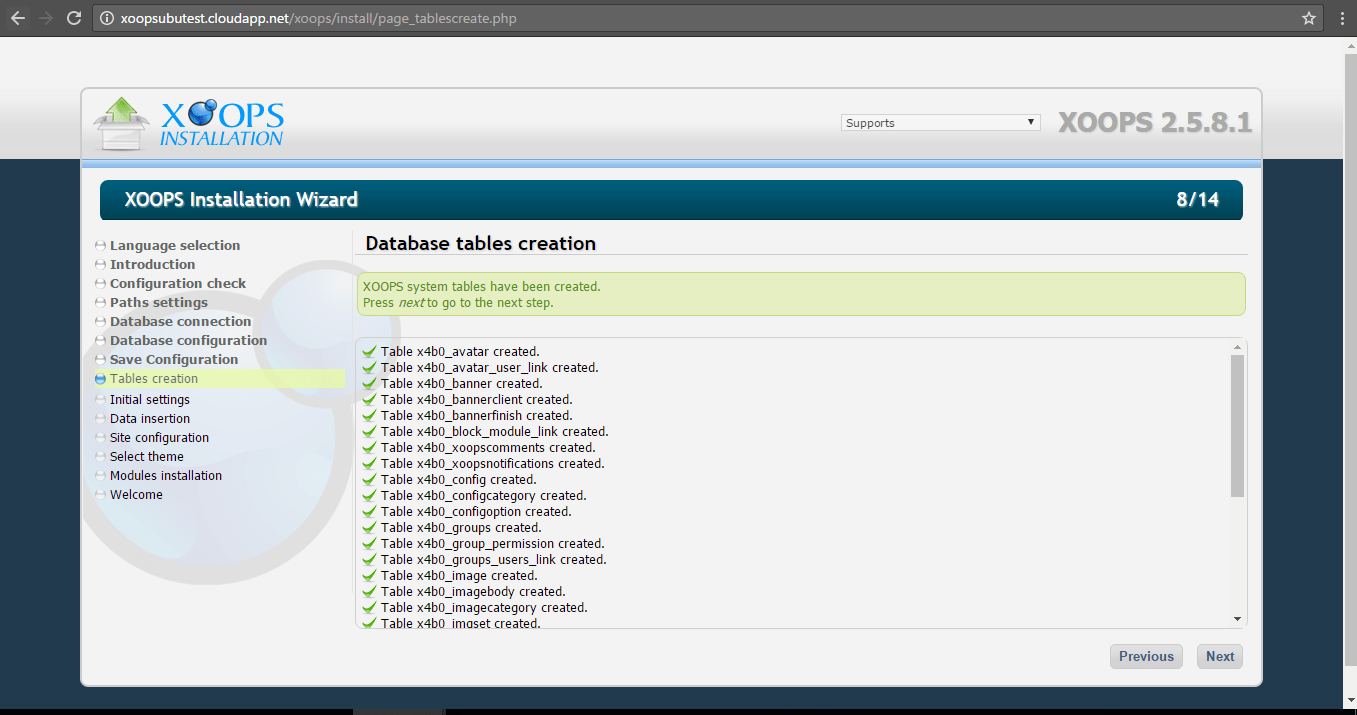
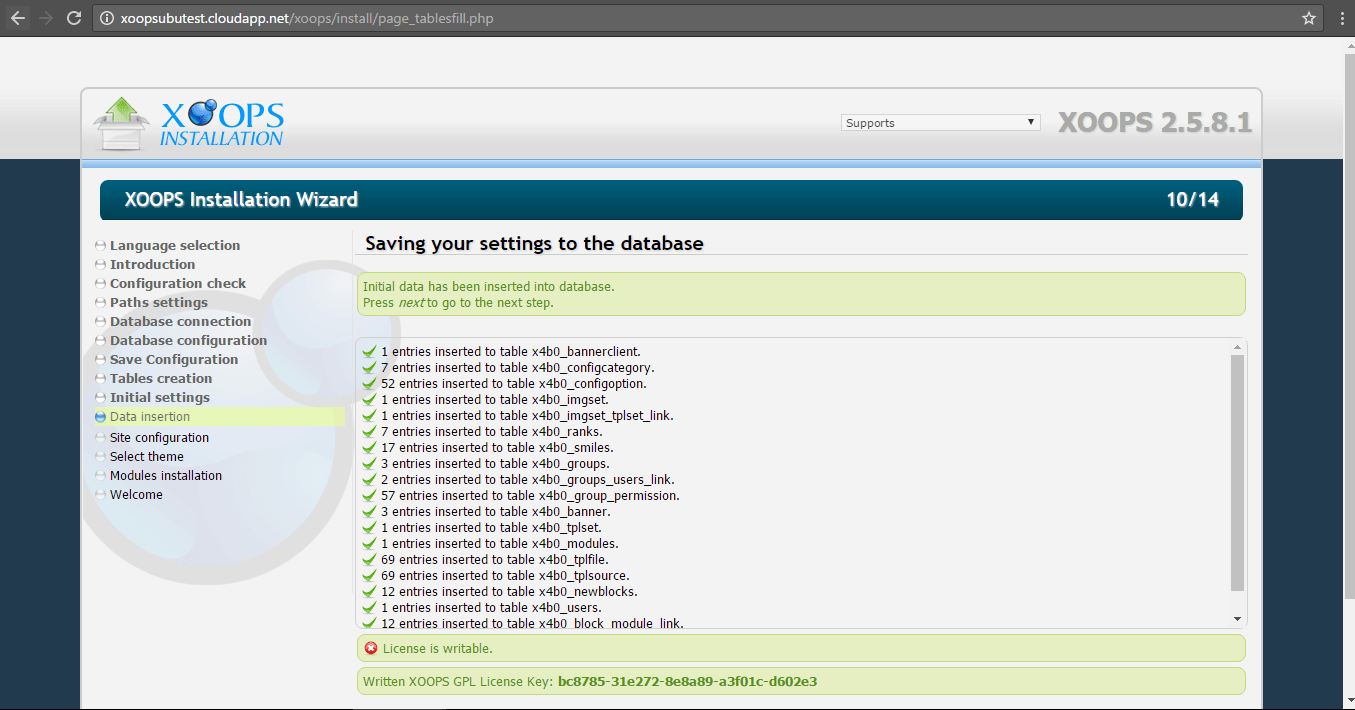
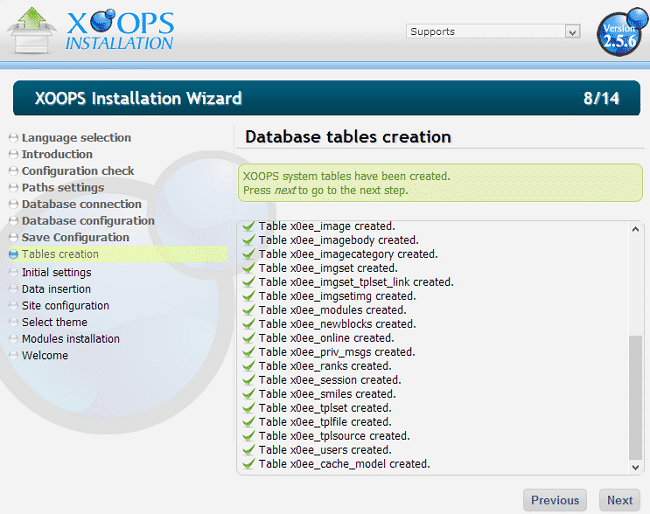
Go to the next step. Xoops will create the MySQL database tables:
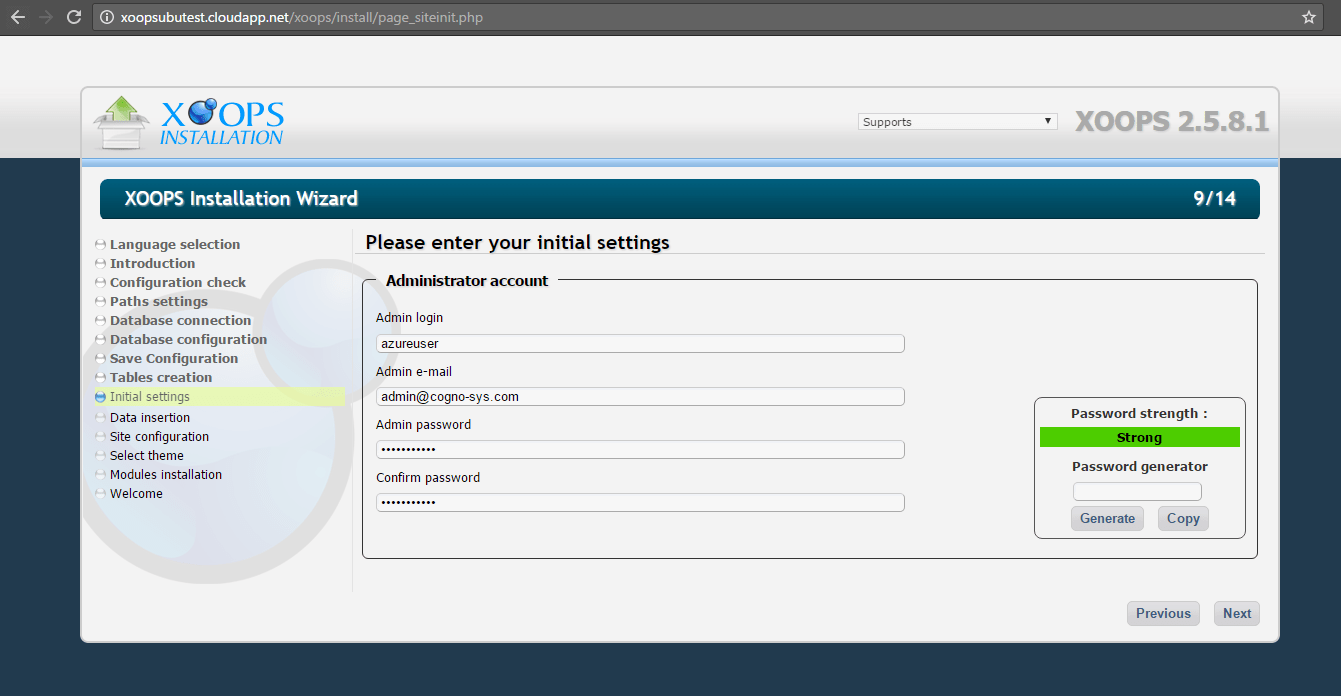
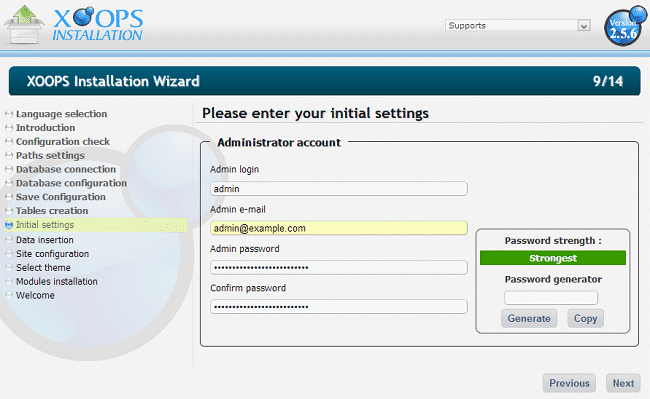
After that you can create your administrative user details:
Admin Login – choose your administrative username
Admin e-mail – make sure to use a valid email address as you may need it in the future
Admin password
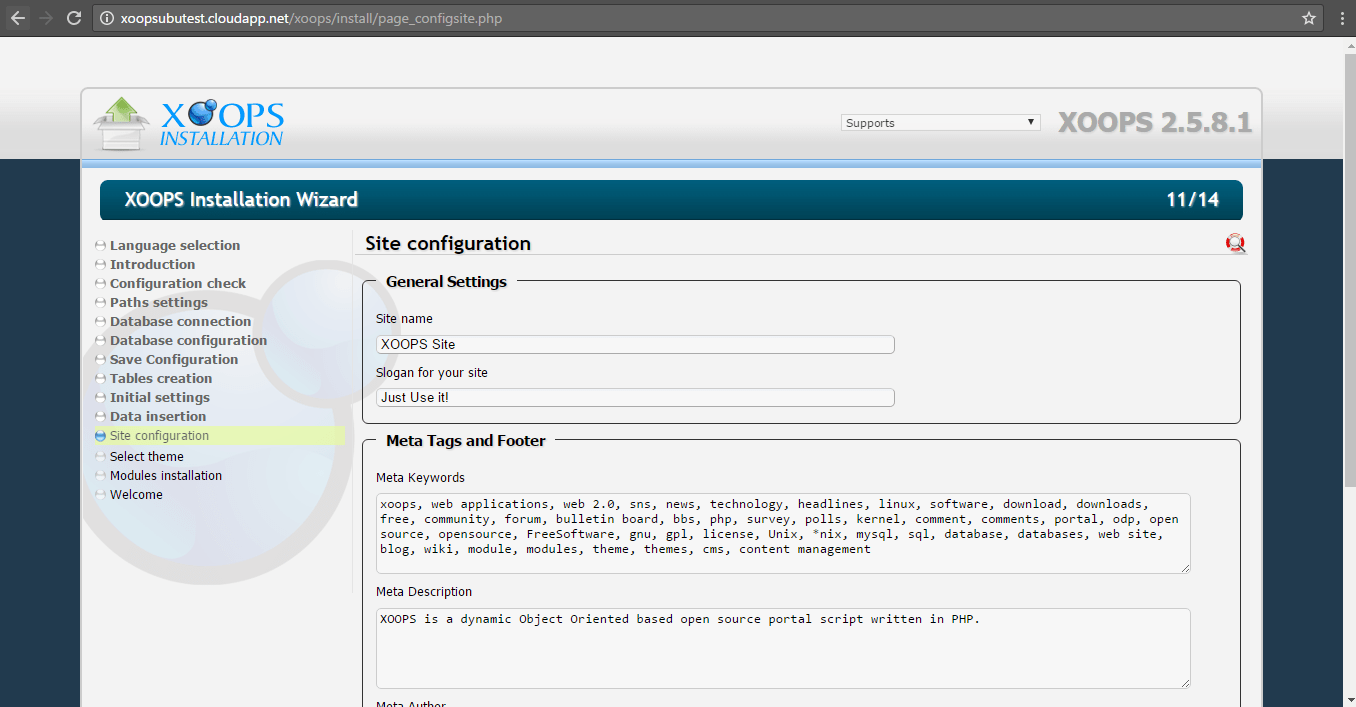
Proceed to the next step where you can configure your site details:
Site Name
Slogan For your site
Meta Keywords – these words are used for SEO purposes
Meta description
Meta Author
Allow new user registrations

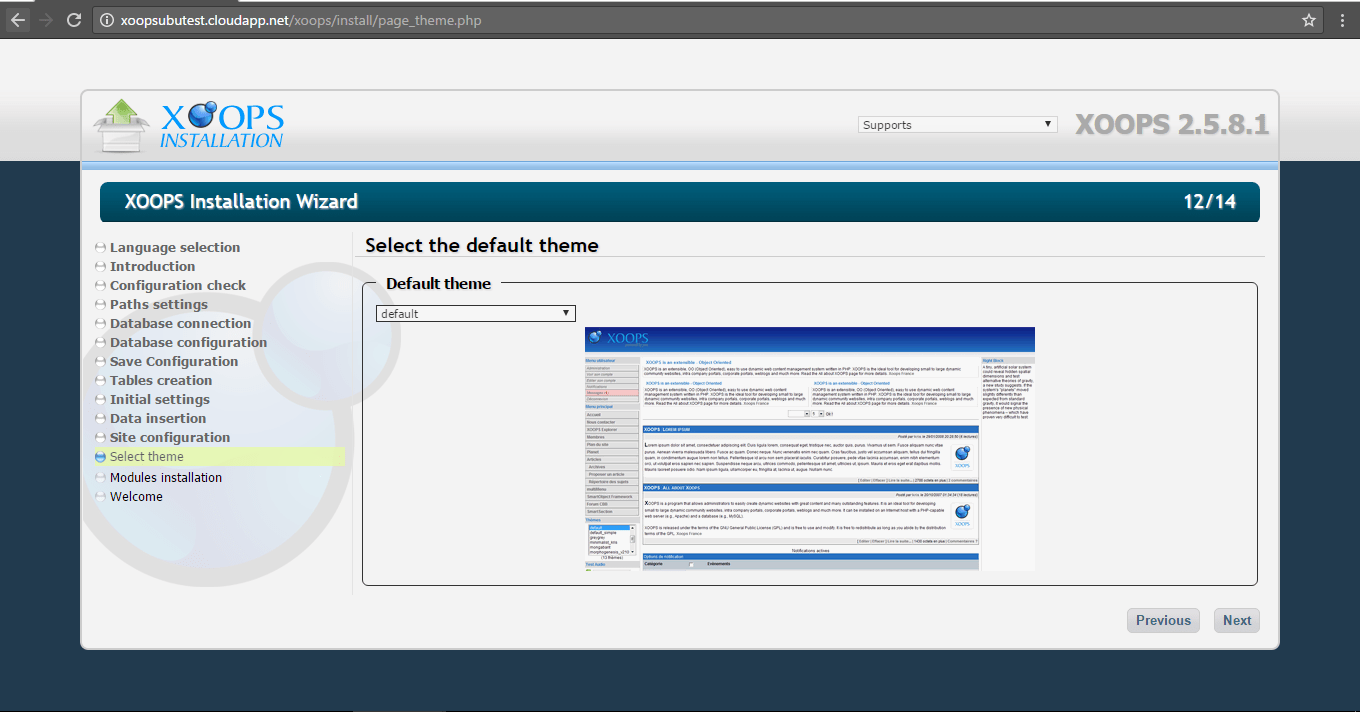
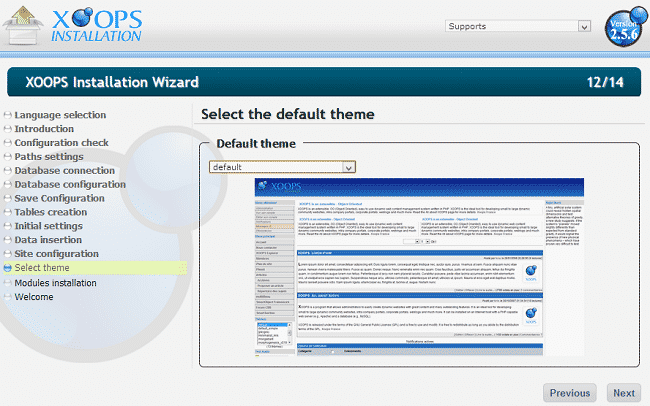
Now select your site theme:
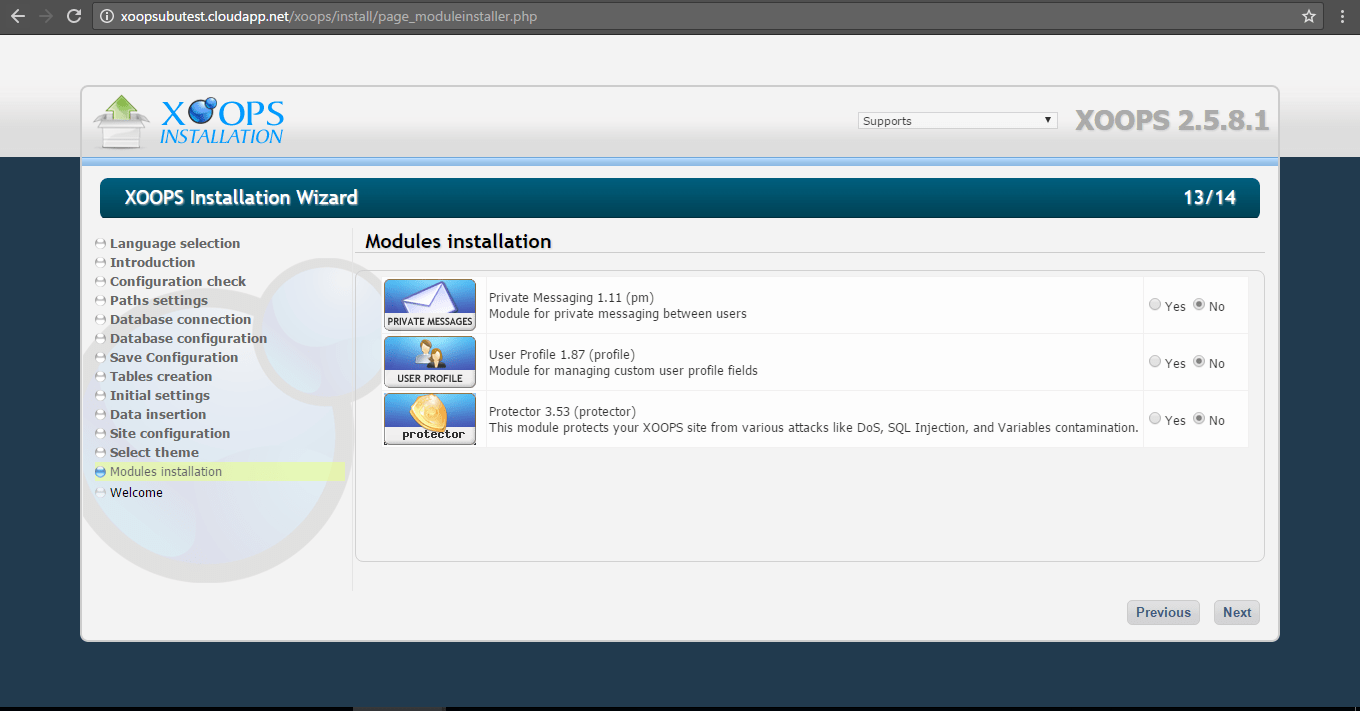
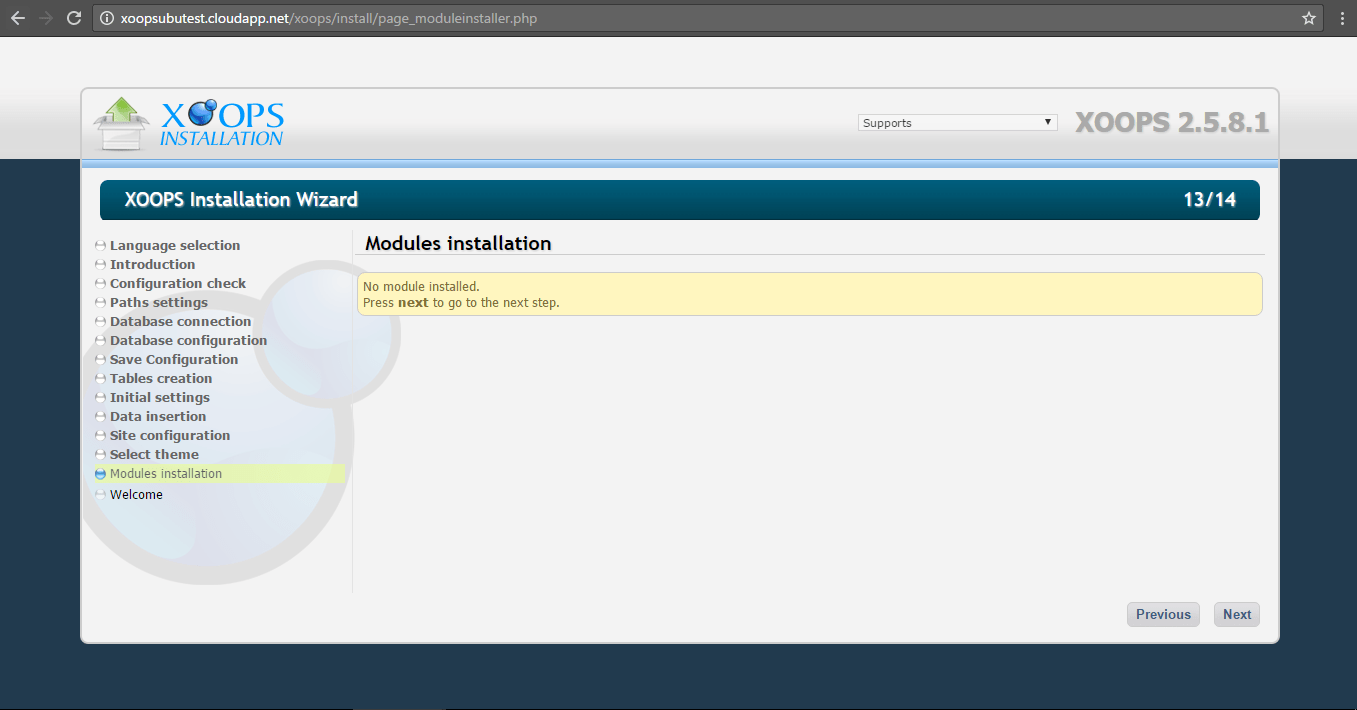
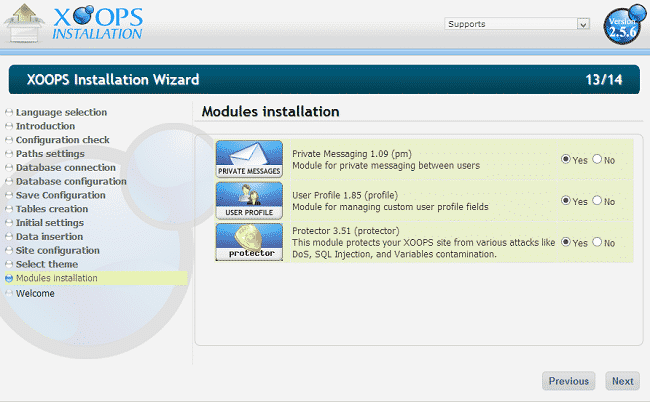
After that you can select the modules that you wish to have pre-installed:
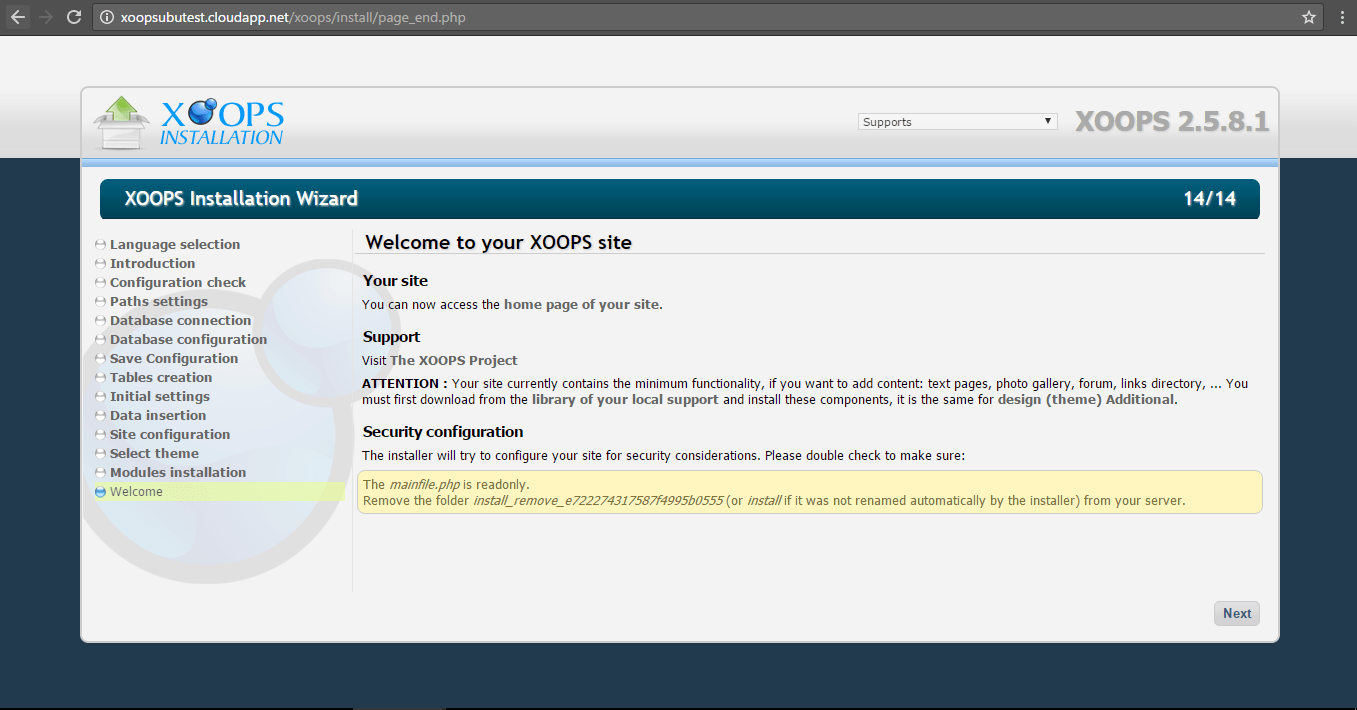
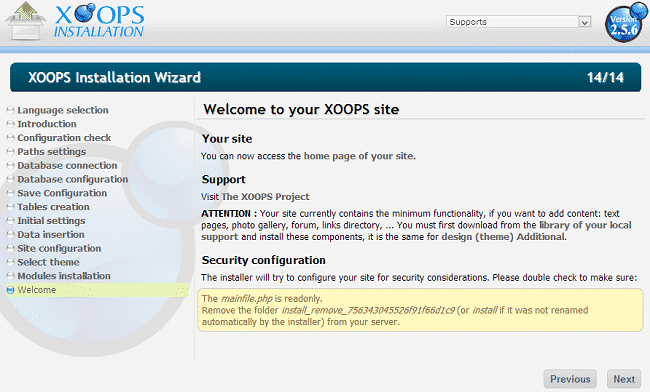
That’s it! You have successfully installed Xoops:
How to Create a Xoops website
Here we will provide you with detailed information on how to install Xoops on your hosting account and create a fully functional website with it.
- How to start a Xoops site?
- Logging into the Xoops Admin Area
- How to create new content?
- Manage Xoops
How to start a Xoops site?
All you need to do is open a hosting account, where you can have the Xoops application installed. FastWebHost offers a FREE Xoops installation! If you already have a hosting account, you can check here how to install Xoops.
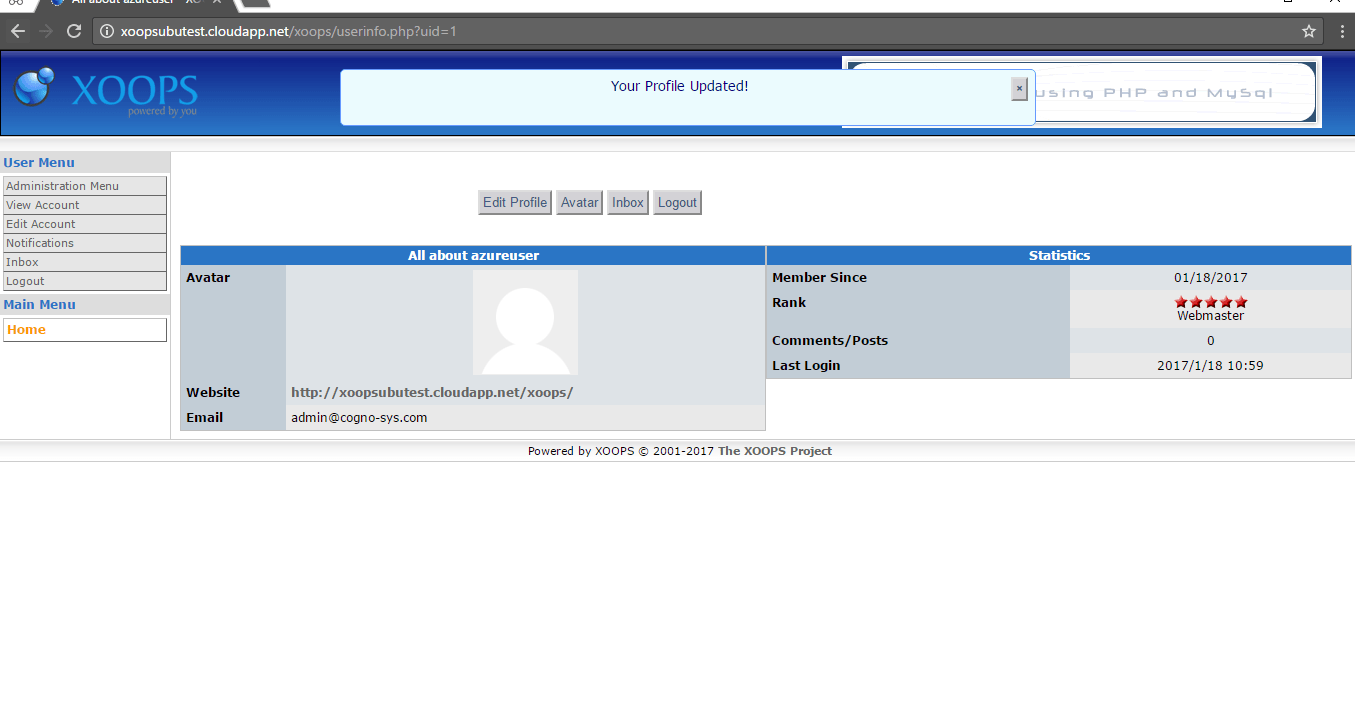
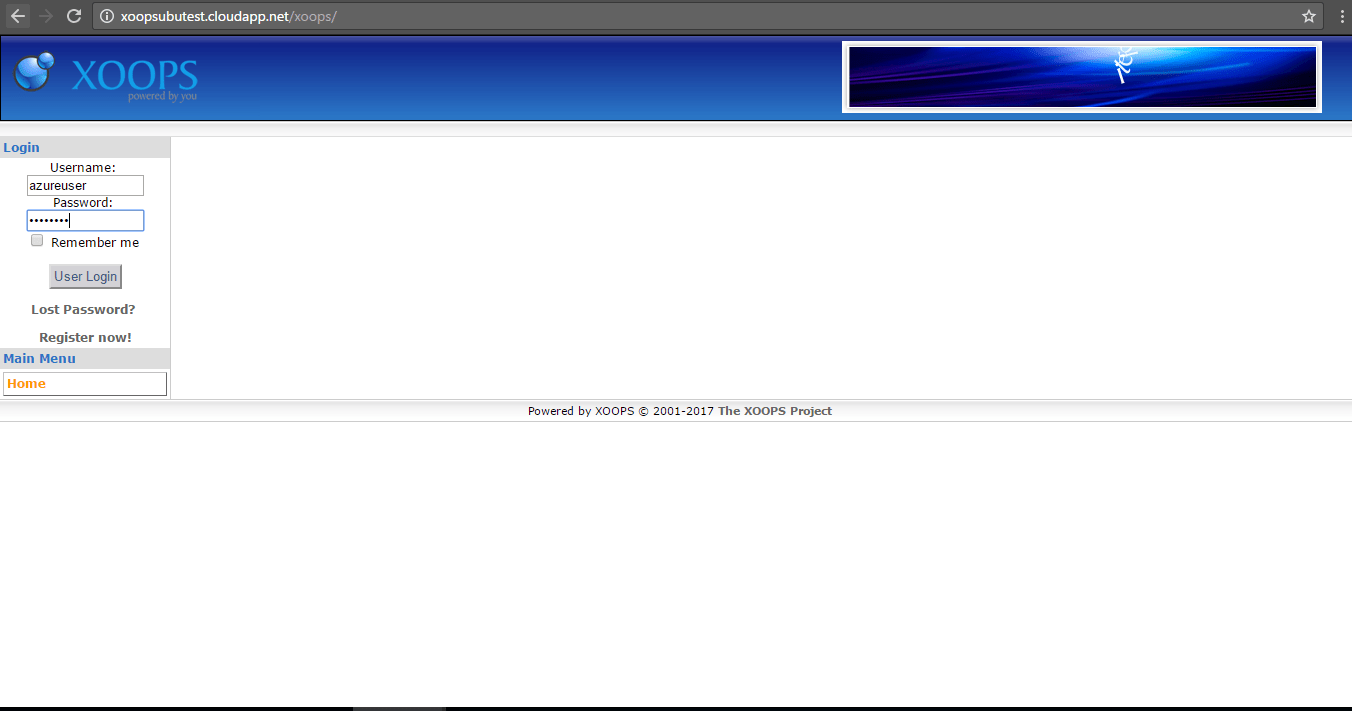
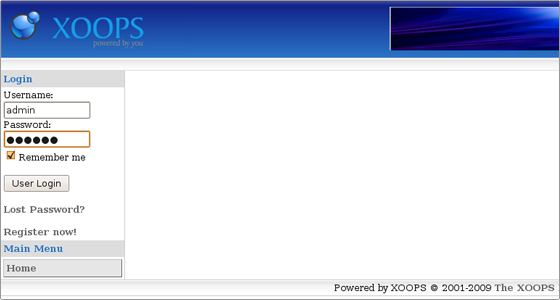
Logging into Xoops Admin Area
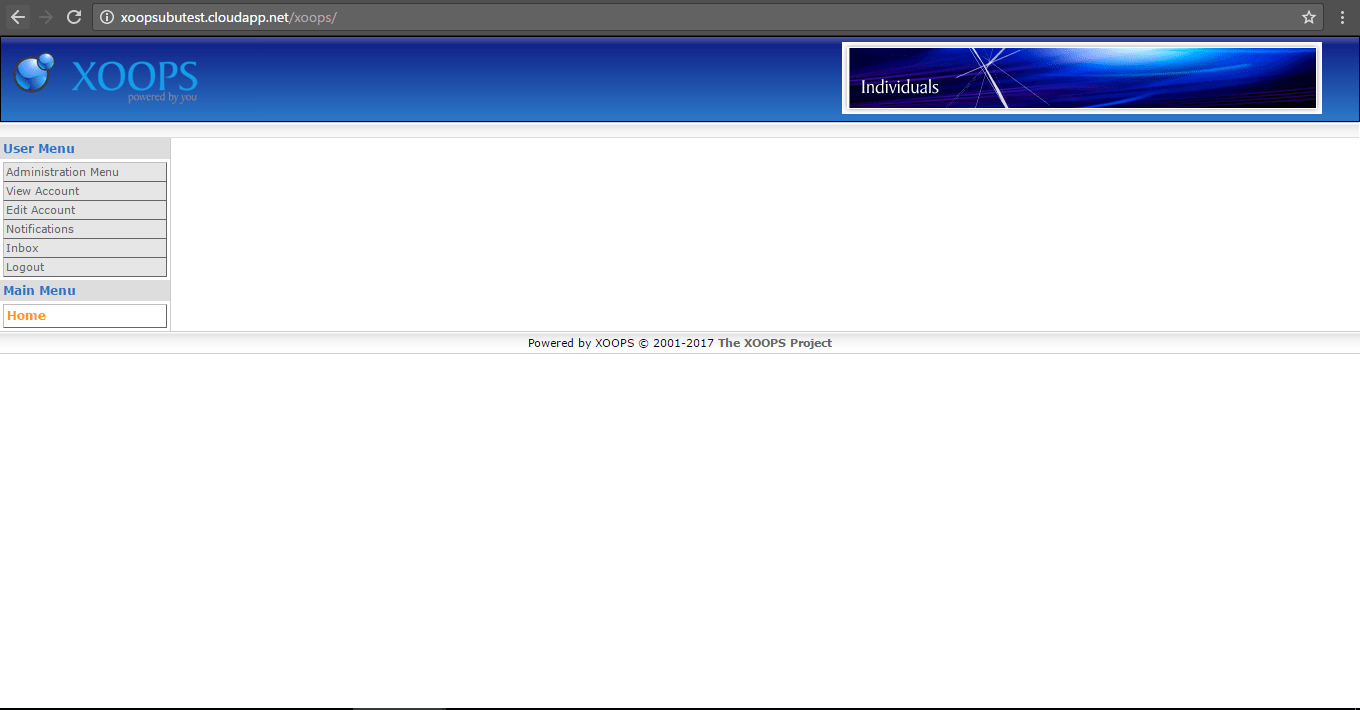
To log in your Xoops Admin area, after installing the Xoops application, you simply need to enter your administrator’s credentials into the Login form on your main Xoops page:
How to create new content?
You can create new content on your web site from the Xoops main page -> Administration Menu -> System -> Blocks.
At the bottom of the page you will find the option to add a new block.
There you can enter the content which will be visualized in it along with its location:
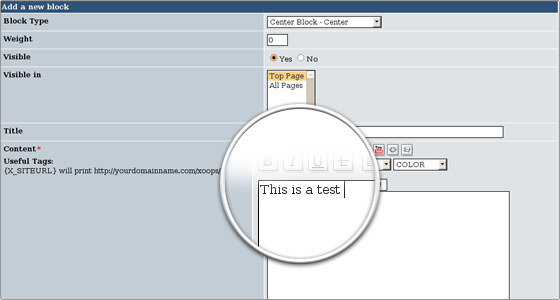
The new block fields are as follows:
Block Type – You can pick between a side and a center block. Also, you can define its position. Weight – Here you define the order of the block. The 0 value will put it on the top and the higher value will push it towards the bottom.
Visible – Set the value to yes if you want the block to be visible.Visible In – Defines whether the block to be seen on the homepage (Top Page) or on all of the pages. Title – Enter the title of your block.Content – Enter your content. You can change the color, font, size, include pictures and external media.Content Type – Select the type of the content. It can be PHP, HTML or Auto formatted text.Cache Lifetime – Here you choose how long you want the block to be visible.
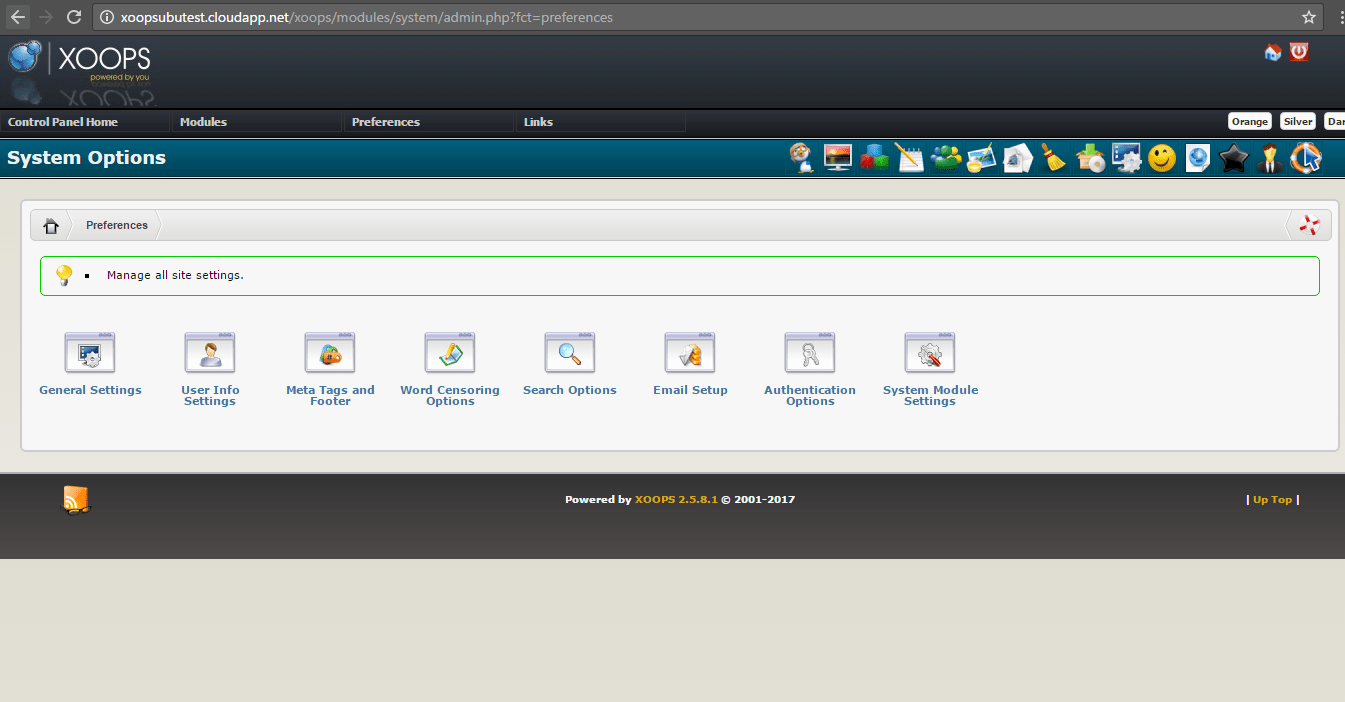
How to manage Xoops?
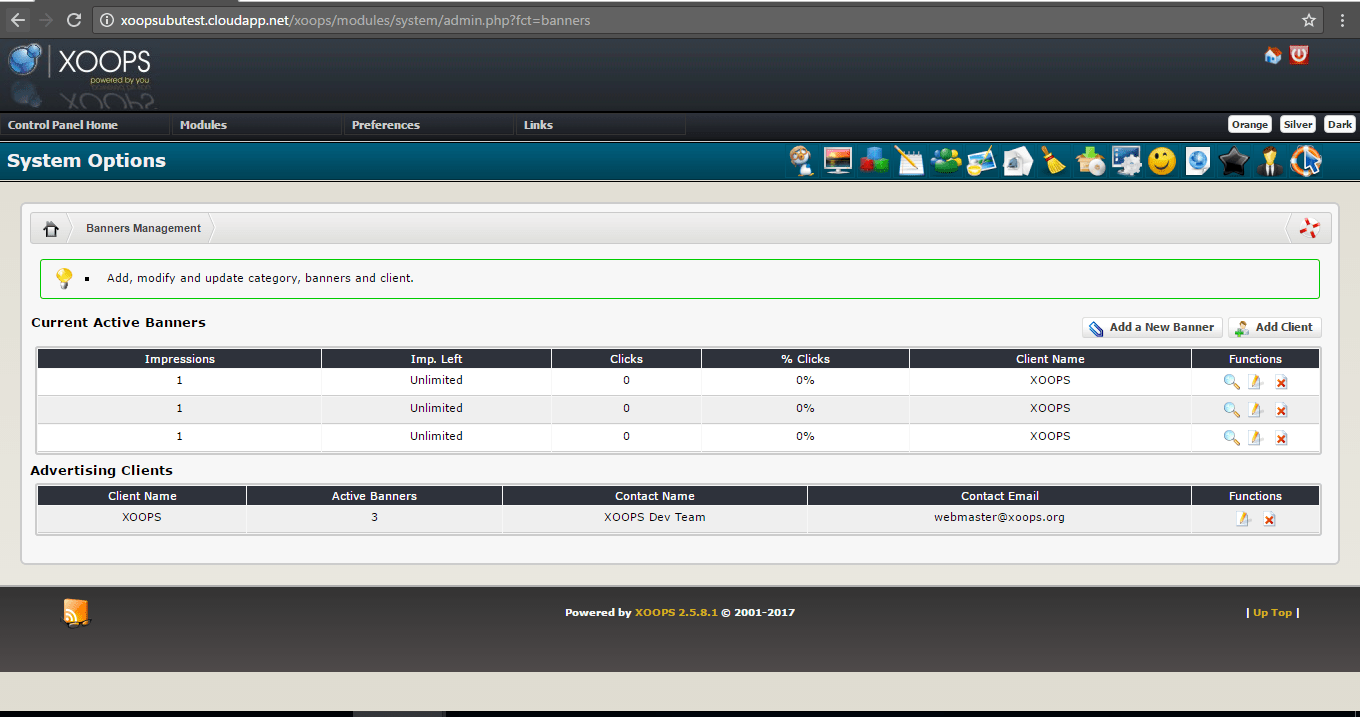
You can manage your Xoops CMS installation from the admin area:
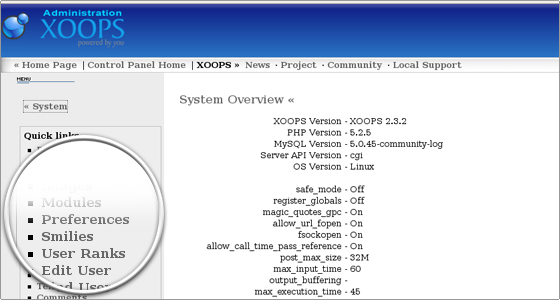
There you can add new banners and blocks, manage groups and users, smilies, templates and avatars, adjust the preferences.
How to upgrade XOOPS website?
Here, we are going to show you how to upgrade your existing Xoops website. Before you start, we recommend that you create a backup of your website. Once you have created the backup head to Xoops official website and download the upgrade files for Xoops. It is important that you download the upgrade files for your exact version of Xoops: http://xoops.org/
Extract the archive and upload the files from the “htdocs” folder on top of your existing Xoops installation. Once you have uploaded the files go to your website’s admin area and navigate to Modules > System > Modules. Click the “Update” icon for any modules that may need an upgrade.
How to reset XOOPS admin password?
This is meant for people who have lost their Xoops administrator password and do not have access to the email account associated with the admin user. To reset the password, we will show you how to edit the database records for your administrator user. First, login to your cPanel and navigate to phpMyAdmin:
Click on the database that your Xoops website uses. Then find the table called “x0ee_users”.
Note: The prefix might be different if you have not used the default one
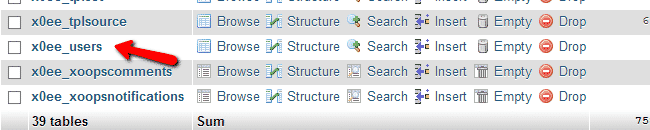
On the next page find your administrator user and click the “Edit” button:

Find the field called “pass” and for “function” select “MD5” in the field “Value” enter the password which you wish to use for your site:

Click the “Go” button to update the records. Now you can login to your site administrator area with the new password you have set.
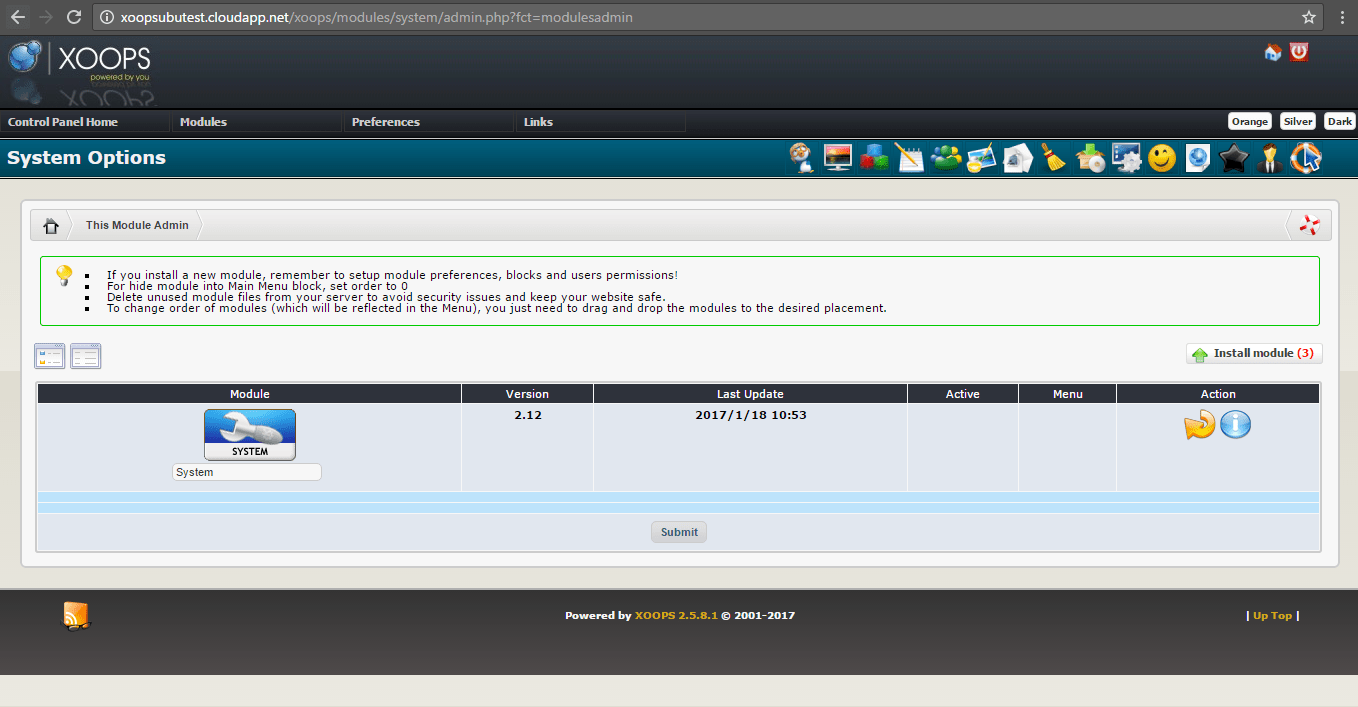
How to install Xoops modules
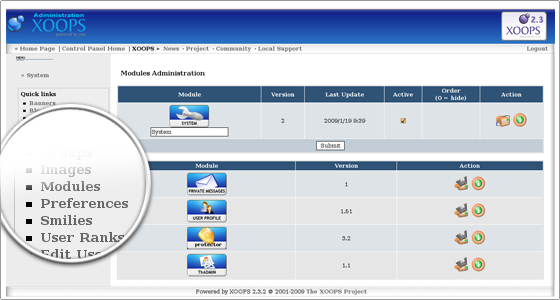
With Xoops you can easily extend the functionality of your website by adding Xoops modules. In the following section you will learn about the different types of Xoops modules.To enable or disable Modules simply go to the Xoops Administration area -> Modules section as shown below:
Types of Xoops Modules
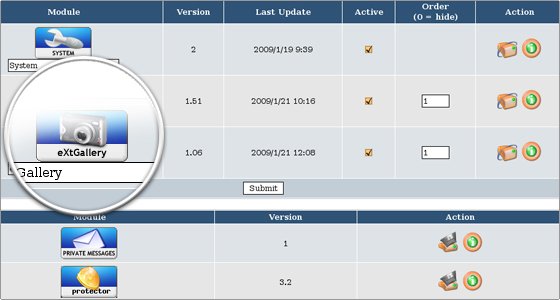
Core ModulesCore modules are included in the default installer package of Xoops. After the initial installation you can find them in the Xoops Administration Menu->System->Modules. At the bottom of the page you will see a table of Xoops modules that are not yet installed. Click on the Install icon besides the module which you want to be installed and follow the instructions:
Extra ModulesExtra (non-core) Xoops modules can be downloaded as compressed files (zip, tar). Usually there are installation instructions included in the Xoops module package. You need to unzip the files on your local computer and upload them through an FTP client in the correct folders under the Xoops directory. Usually they should be places under the modules folder. However, there are modules which need some files to be uploaded in different folders. Thus we will recommend you to read carefully the installation instructions. After the upload, go to your Modules Administration Page and find the new modules which are visualized in the uninstalled modules table. Click on the Install button besides the chosen module and complete its installation.
Installation of a gallery module for Xoops
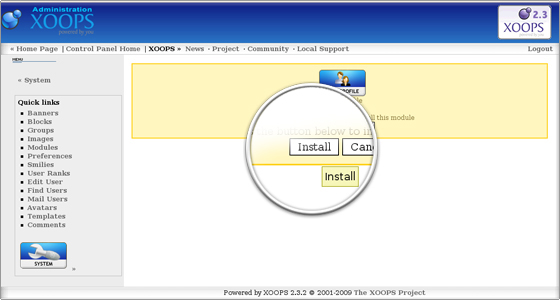
For the purpose of this tutorial we will complete a sample installation of the extGallery module.First you need to download the Xoops module, extract it on your local computer and upload the module folder under the modules directory, located in your Xoops space. Then you should navigate to the Xoops Administration Menu->System->Modules area and click on the Install button. The installation will be completed and you will be able to use extGallery, listed under your modules list:
How to install XOOPS Themes
Xoops come with several pre-install themes that you can use by default. However there are a lot more themes developed for Xoops, which you can use on your site. You can find some free Xoops themes here:http://xoops.org/modules/extgallery/Once you have found the theme which you wish to use on your Xoops website, download its archive on your local computer and extract it. You will have a new folder with the same name as the theme you have downloaded. Upload that archive in the “themes” folder of your Xoops website. The “themes” folder is located in your Xoops root directory. You can upload the theme using FTP.
To activate the theme, go to your site’s admin panel. Click on “Templates”: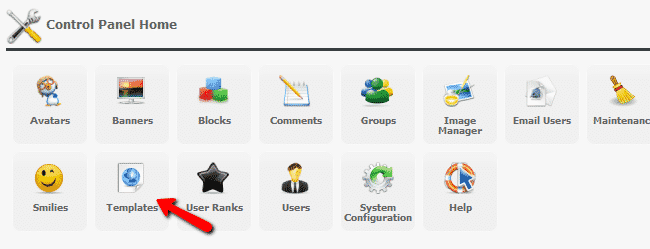
Now you can select a new theme:
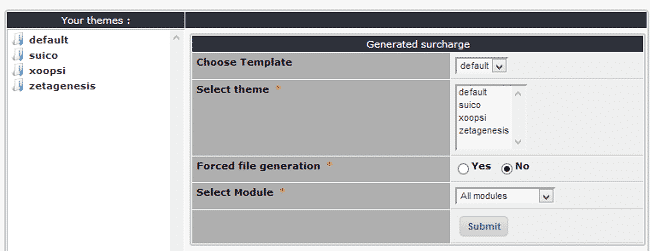
Click the “Submit” button when you have selected theme.You have successfully installed and activated your Xoops theme.
XOOPS on Cloud runs on Amazon Web Services (AWS) and Azure and is built for developing small to large dynamic community websites, intra company portals, corporate portals, weblogs and much more.
Cognosys provides hardened images of XOOPS on all public cloud i.e. AWS marketplace and Azure.
Secured XOOPS on Ubuntu 14.04 LTS
Secured XOOPS on Centos 7.4
Xoops on cloud for Azure -Ubuntu

XOOPS is released under the terms of the GNU/GPL license and is free to use and modify.
Features
XOOPS Features include:
- Advanced access control layer – grant specific groups of users specific access rights to content and features such as edit, delete, upload, add attachments, publish content etc.
- Modularized.
- Core features usable by modules .
- Personalization – set specific permissions for user access and control of individual elements of their websites.
- User Management.
- Theme-based skinnable interface.
- Templates – uses the Smarty templating engine.
- Built-in LDAP authentication.
- SEO add-ons.
- International language support.
-Major features of XOOPS
- Database-driven- XOOPS uses a relational database (currently MySQL) to store data required for running a web-based content management system.
- Fully Modularized- Modules can be installed/uninstalled/ativated/deactivated with a click using the XOOPS module administration system.
- Personalization- Registered users can edit their profiles, select site themes, upload custom avatars and much more!
- User Management- The ability to search for users by various criteria, send email and private messages to users through a template-based messaging system.
- Supported World-wide- XOOPS was created and is maintained by a team of several hard-working volunteers working from all over the world. The XOOPS community has more than dozen official support sites around the world for support of non-English speaking users.
- Multi-byte Language Support- Fully supports multi-byte languages, including Japanese, Simplified and Traditional Chinese, Korean etc.
- Versatile Group Permissions System- Powerful and user-friendly permissions system which enables administrators to set permissions by group.
- Theme-based skinnable interface- XOOPS is driven by a powerful theme system. Both admins and users can change the look of the entire web site with just a click of a mouse. There are also over 1000 themesavailable for download!
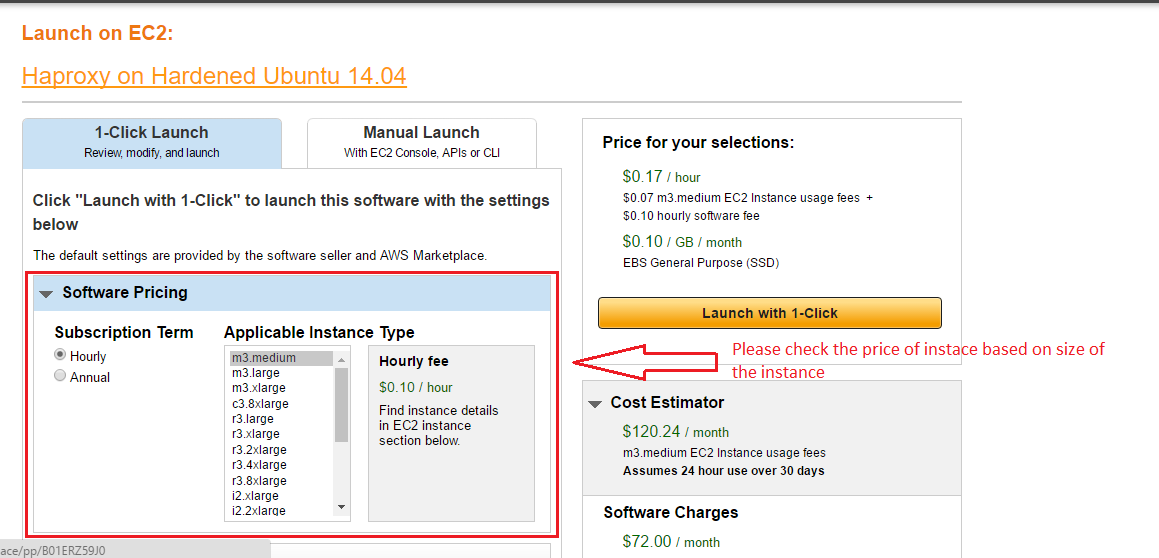
AWS Step by Step Screenshots
Stack Name-This will be your Current stack.

Choose Software Pricing
Choose your Version
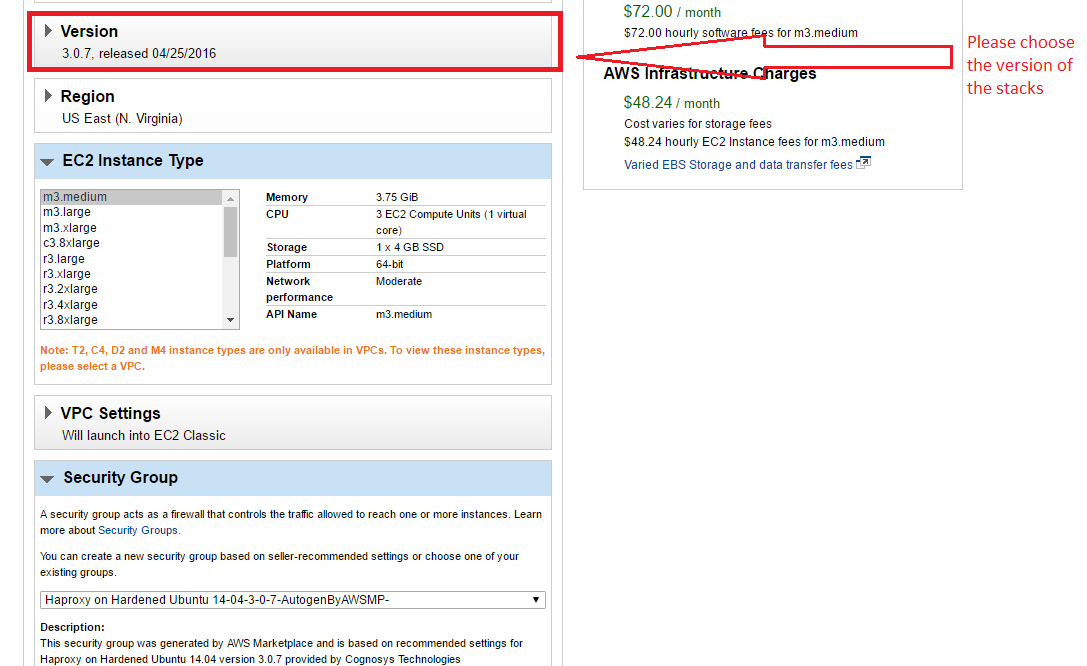
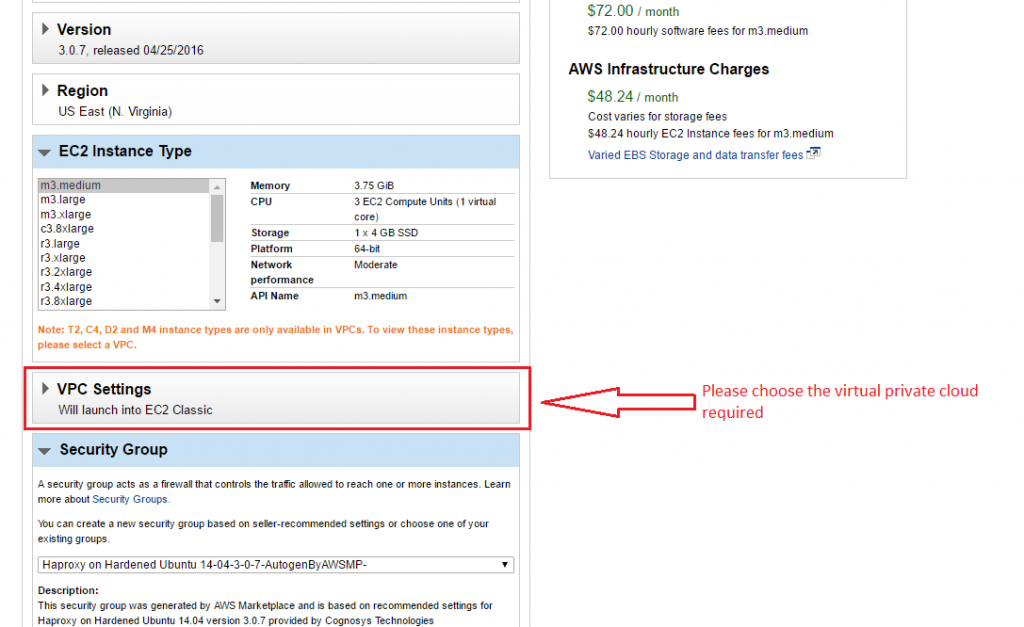
Choose your EC2 Instance Type

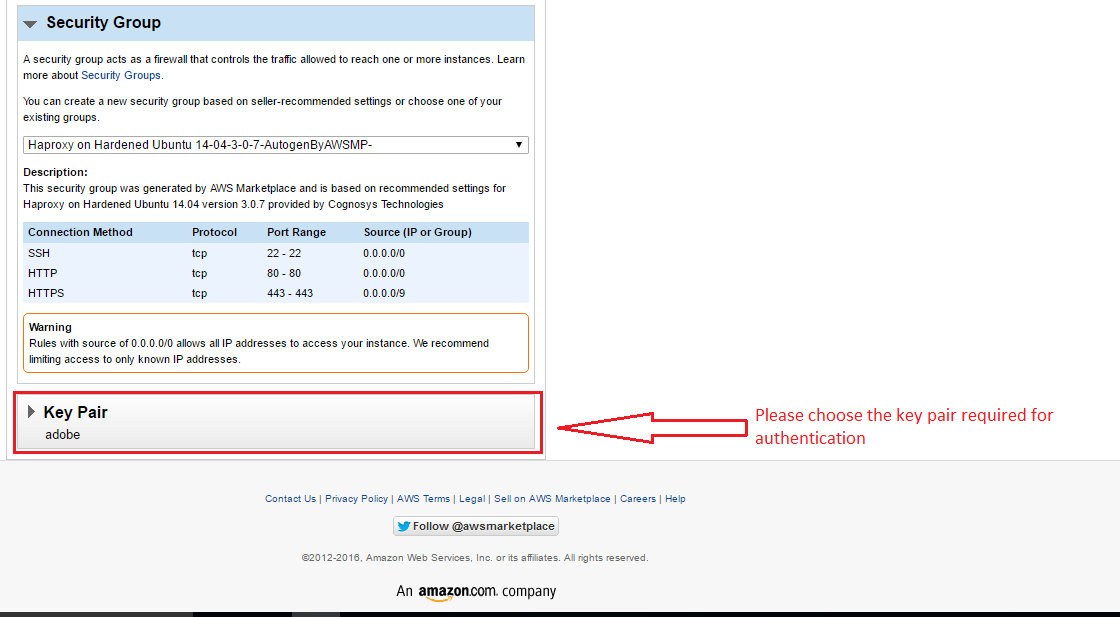
Choose Your Key Pair
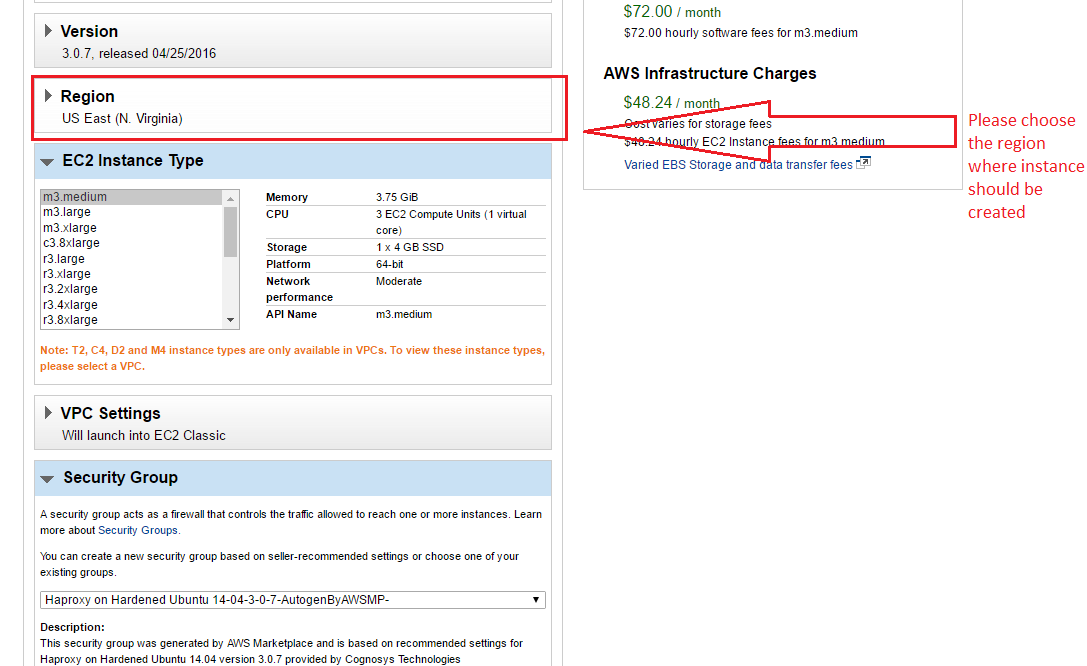
Choose your Region
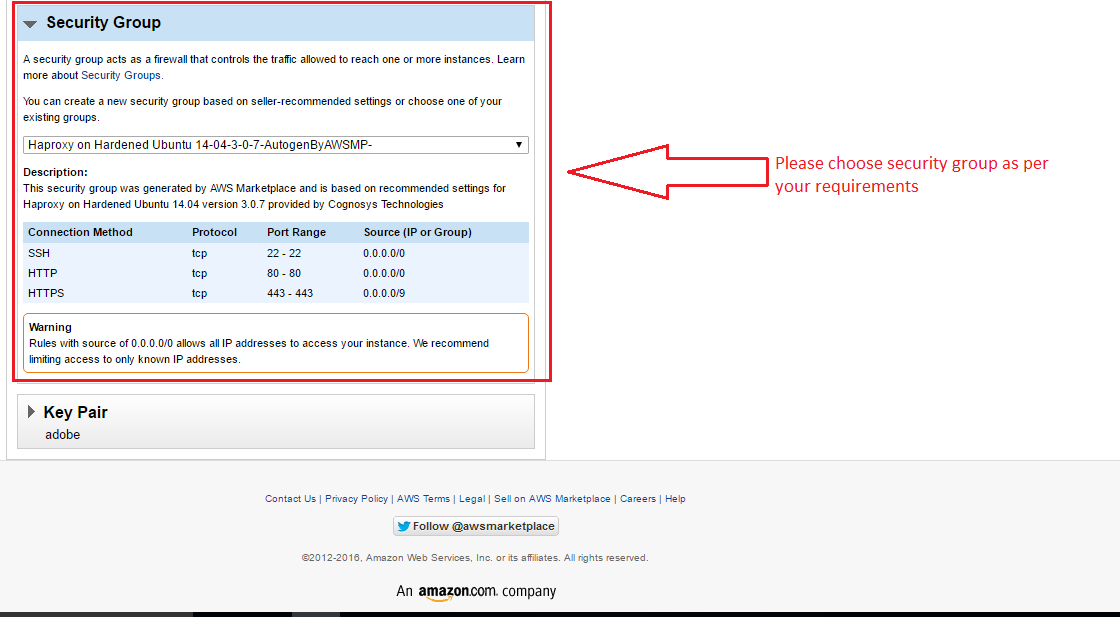
Choose your Security Group
Change VPC Settings
Azure
Installation Instructions For Ubuntu
Note : How to find PublicDNS in Azure
Step 1) SSH Connection: To connect to the deployed instance, Please follow Instructions to Connect to Ubuntu instance on Azure Cloud
1) Download Putty.
2) Connect to virtual machine using following SSH credentials:
- Hostname: PublicDNS / IP of machine
- Port : 22
Username: Your chosen username when you created the machine ( For example: Azureuser)
Password : Your Chosen Password when you created the machine ( How to reset the password if you do not remember)
Step 2) Database Login Details:
Username : root || Password : Passw@rd123
Step 3).
1. Application URL: Access the application via a browser at http:/PublicDNS/xoops
2. Admin URL : http:/PublicDNS/xoops/admin
Step 4). Other Information:
1.Default installation path: will be on your web root folder “/var/www/html/xoops”.
2.Default ports:
-
- Linux Machines: SSH Port – 22 or 2222
- Http: 80 or 8080
- Https: 443
- Mysql ports: By default these are not open on Public Endpoints. Internally Mysql :3306.
Configure custom inbound and outbound rules using this link
Installation Instructions For Centos
Note : How to find PublicDNS in Azure
Step 1) SSH Connection: To connect to the deployed instance, Please follow Instructions to Connect to Centos instance on Azure Cloud
1) Download Putty.
2) Connect to virtual machine using following SSH credentials:
- Hostname: PublicDNS / IP of machine
- Port : 22
Username: Your chosen username when you created the machine ( For example: Azureuser)
Password : Your Chosen Password when you created the machine ( How to reset the password if you do not remember)
Step 2 ) Database Login Details:
Username : root || Password : Passw@rd123
Step 3 )
1. Application URL: Access the application via a browser at http:/PublicDNS/xoops.
2. Admin URL : http:/PublicDNS/xoops/admin
Step 4 )Other Information:
1.Default installation path: will be in your web root folder “/var/www/html/xoops”.
2.Default ports:
- Linux Machines: SSH Port – 22 or 2222
- Http: 80 or 8080
- Https: 443
- Mysql ports: By default these are not open on Public Endpoints. Internally Mysql :3306
Please change the password immediately after the first login.
Configure custom inbound and outbound rules using this link
Azure Step by Step Screenshots-