

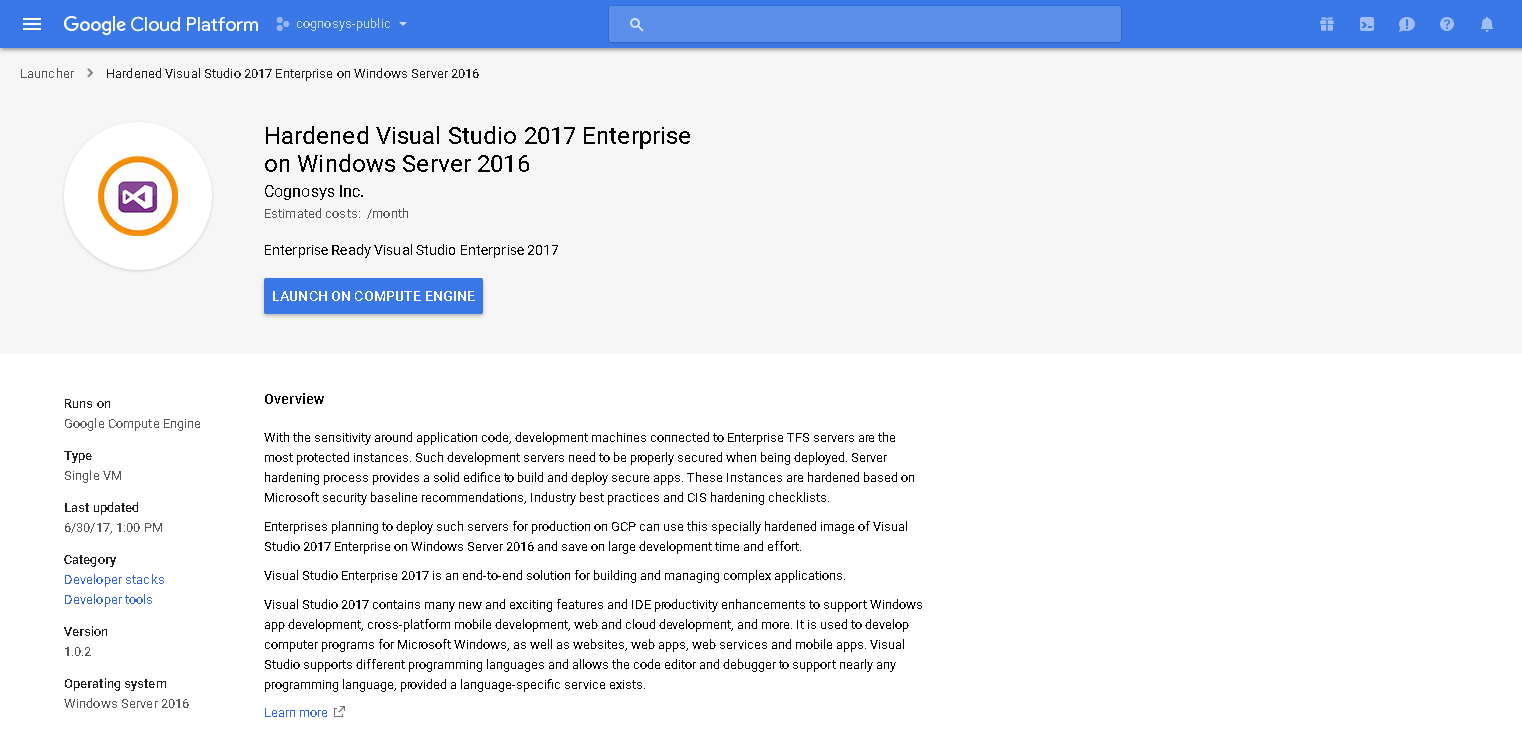
Overview
Visual Studio Enterprise with MSDN is an integrated, end-to-end solution for teams of any size with demanding quality and scale needs that require comprehensive tools and services for defining, building and managing complex Enterprise applications targeting the Microsoft Enterprise platform as well as cross-platform technologies. Visual Studio Enterprise is an integrated development environment (IDE) for enterprise teams. It includes advanced tools for architecture and modeling.
Visual Studio Enterprise with MSDN replaces Visual Studio Ultimate with MSDN and Visual Studio Premium with MSDN. All active Visual Studio Ultimate and Premium MSDN subscriptions were migrated to Visual Studio Enterprise with MSDN subscription in July 2015(RTM).
Visual Studio Enterprise 2015 IDE as well as Visual Studio Ultimate 2013 and Visual Studio Premium 2013 IDEs are available through the Visual Studio Enterprise with MSDN subscription.
Cognosys Provides Hardened images of Visual Studio Enterprise on the cloud ( AWS marketplace, Azure and Google Cloud Platform).
Deploy Visual Studio Enterprise securely on cloud i.e. AWS marketplace, Azure and Google Cloud Platform (GCP)
Visual Studio Enterprise on cloud for AWS

Features
Major Features of Visual Studio Enterprise
- New Installation Experience – A reduced minimum footprint for faster and more customizable installations, as well as support for offline installs.
- Visual Studio IDE – A broad range of enhancements in Visual Studio 2017, including reduction in startup and solution load times, sign in and identity improvements, improved code navigation, open folder view, and connected services enable connections between your app and any service on-premises or in the cloud.
- Debugging and Diagnostics – Overhaul of the Exception Helper and faster code navigation with Run to Click. Plus, a new summary of your application events in the Diagnostic Tools window and several improvements to the CPU Tool.
- Live Unit Testing – Visualize unit testing results and code coverage live in the editor.
- Testing Tools – Associate automation with test case work items using the Test Explorer.
- Collaborate – Use version control, be agile, and collaborate efficiently
AWS
Installation Instructions for Windows
Note: How to find PublicDNS in AWS
Step 1) RDP Connection: To connect to the deployed instance, Please follow Instructions to Connect to Windows instance on AWS Cloud
Connect to the virtual machine using following RDP credentials:
- Hostname: PublicDNS / IP of machine
- Port : 3389
Username: To connect to the operating system, use RDP and the username is Administrator.
Password: Please Click here to know how to get password
Step 2) Visual studio Connection: To Connect Visual studio in windows server, Please follow Instructions to Connect Microsoft Visual Studio
Note : Please use a Microsoft account to unlock the VS2017 IDE by signing in with your MS account.
Note that you may need to sign out and then sign in again.
You can sign up for MS account here if you do not have one.
Step 3) Other Information:
1.Default installation path: “C:\Program Files (x86)\Microsoft Visual Studio\2017\Enterprise\Common7\IDE”
2.Default ports:
- Windows Machines: RDP Port – 3389
- Http: 80
- Https: 443
3.Note:
1. Default password for user cloudvs1@outlook.com is – Passw@rd12345
2. To add New user and delete existing user go to Account settings ->Click on ‘Remove’ to delete Existing User (cloudVS1@outlook.com)
3. Click on ‘Add an Account’ to add New User.
2. If you face any issue for licensing please send email to support@secureanycloud.com
Note: To add a new account, the user must have Microsoft account or an organizational account that is associated with an MSDN subscription or a Visual Studio Online subscription.
Configure custom inbound and outbound rules using this link
Installation Instructions for Windows
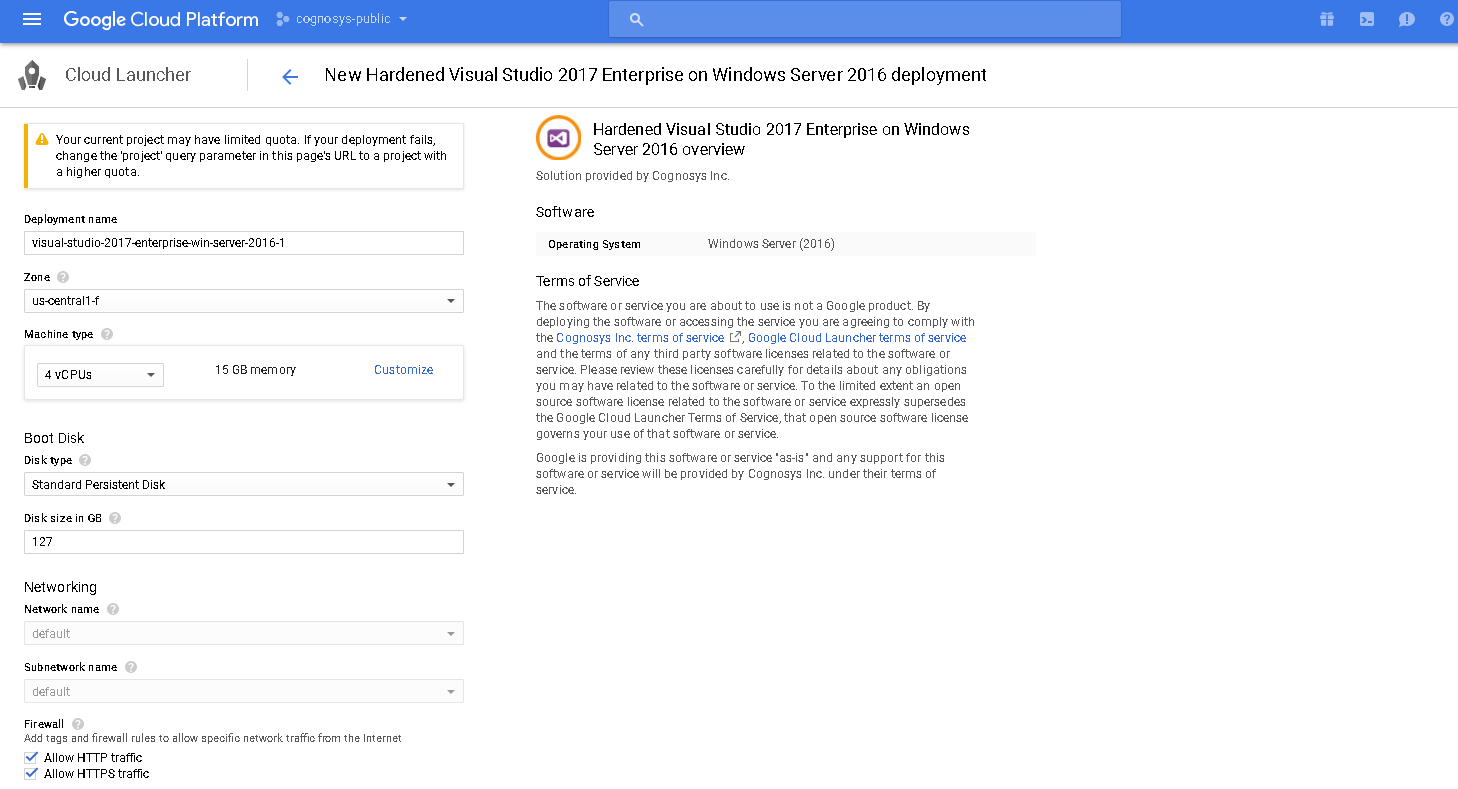
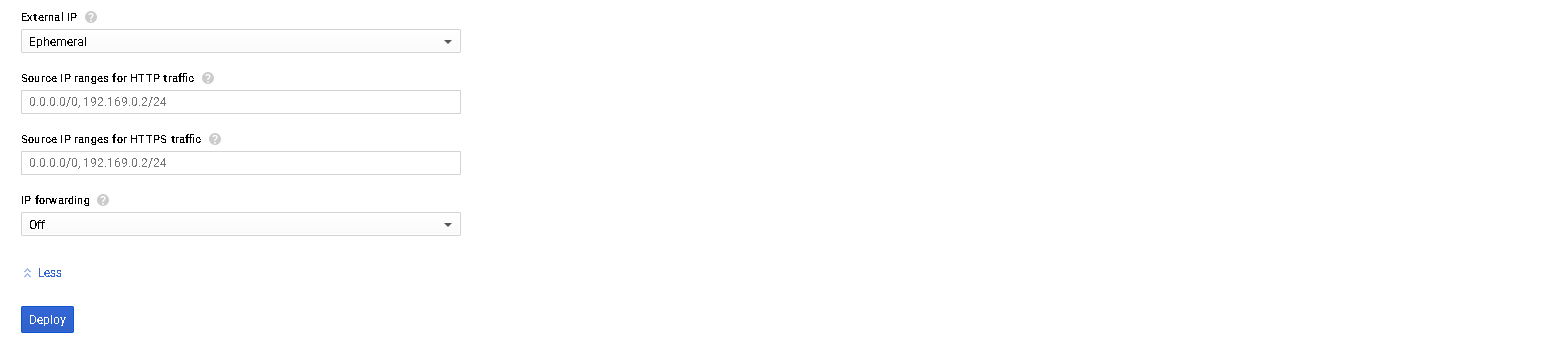
Step 1) VM Creation:
- Click the Launch on Compute Engine button to choose the hardware and network settings.
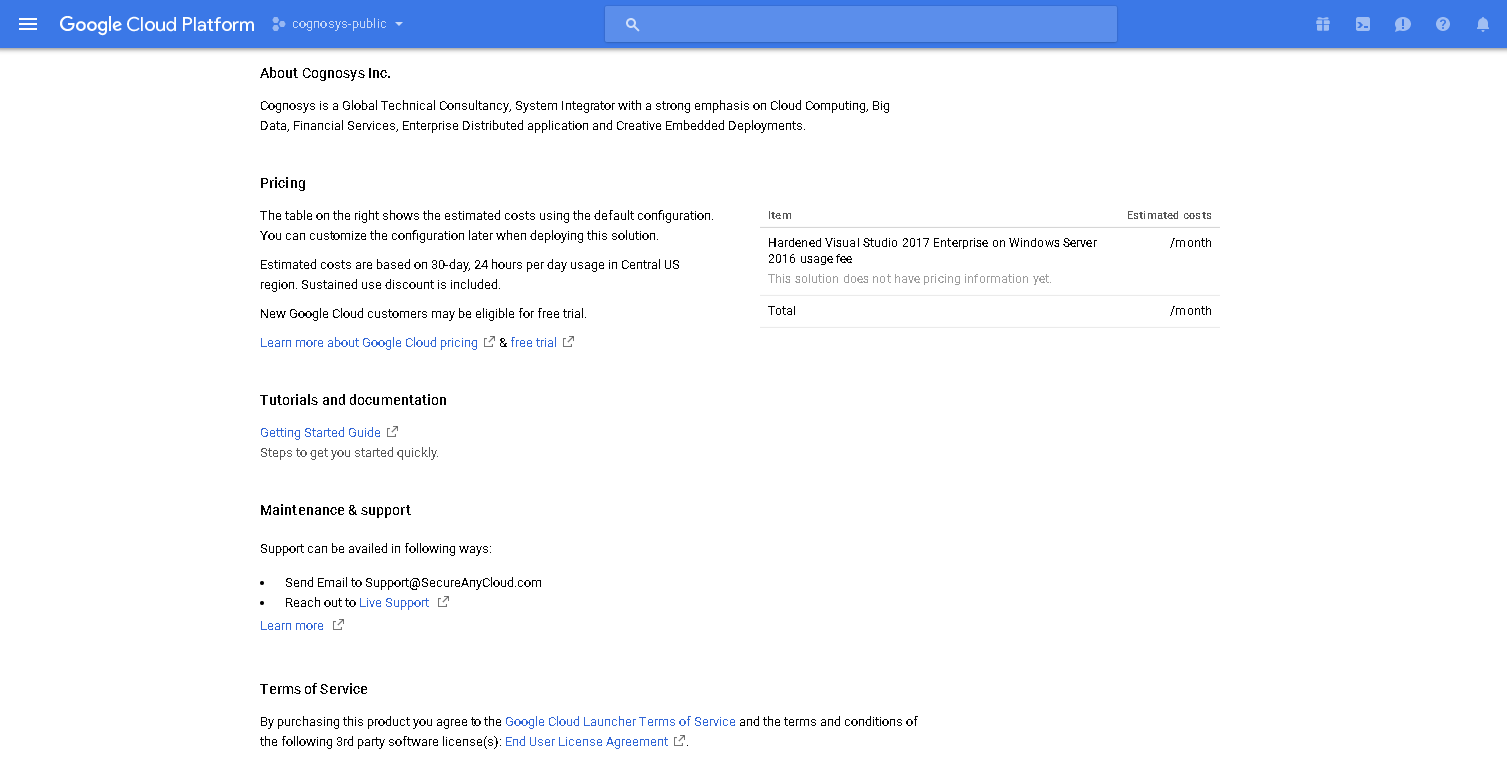
2.You can see at this page, overview of Cognosys Image as well as some estimated costs of VM.
3.In the settings page, you can choose the number of CPUs and amount of RAM, the disk size and type, etc.
Step 2) RDP Connection: To connect to the deployed instance, Please follow Instructions to Connect to Windows instance on Google Cloud
Step 3) Visual studio Connection: To Connect visual studio in windows server, Please follow Instructions to Connect Microsoft Visual Studio
Step 4) Other Information:
1.Default installation path: “C:\Program Files (x86)\Microsoft Visual Studio\2017\Enterprise\Common7\IDE”
2.Default ports:
- Windows Machines: RDP Port – 3389
- Http: 80
- Https: 443
Note: To add new account, User must have a Microsoft account.
Videos
Visual Studio Enterprise 2017
