1-click AWS Deployment 1-click Azure Deployment 1-click Google Deployment
Overview
Tiny Tiny RSS is a DIY platform for building an RSS feed reader where you are in charge. It has some nice features that were never part of Google Reader, but performance issues mar the experience. If you want a simple Google Reader replacement, Tiny Tiny RSS isn’t it.
It is not an RSS feed reader that you just import all your feeds from Google Reader and be up in a matter of minutes. Tiny Tiny RSS lets you build your own RSS reader and customize the platform your way. It can easily take a couple hours to get everything set up and to tweak the UI, but if you like a little control over your RSS destiny, you will be fine. For everyone else not used to looking at code, all this may sound a little intimidating, and we recommend using G2Reader as our Editors’ Choice for RSS jean- feed readers and in particular, a replacement to Google Reader. But using Tiny Tiny RSS to build your own feed reader is still possible with a little patience.
Tiny Tiny RSS is a Web application, so you need a Web server that supports PHP and either a MySQL or PostgreSQL database. Your desktop won’t do. If you happen to have a Linux server lying around, you are set. Or you can use a Web host which supports PHP and lets you install a database, such as Dreamhost or even Amazon Web Services. You will also need a domain name so that you can type www.thisismysite.com in your Web browser to load your very own Tiny Tiny RSS. If you already have a domain name, create a subdomain, such as myrss.thisismysite.com, and you are good to go.
Before you can get started, you need to have PHP installed on your Web server and create the database. If you need help, you need to ask your Web host or Google because Tiny Tiny RSS assumes you know how to set up and manage a server. Once you are ready, you can grab the install archive (tarball, a .tar.gz file) from the Tiny Tiny RSS Wiki, which contains all the files you need to set up the application and the database schema. The wiki actually has a decent set of instructions for an open-source project, so you should be able to get up and running although some Googling may be required.
TT has many ways to organize and present news. You can browse its tag cloud (Figure A) assign labels at will (Figure B) or request email digests.
Figure A
Figure B
You can even use your TV if it’s connected, as in Figure C, to an XBMC Free Software Media Center configured in this way. Users can assign scores to each article, and then set up filters to sort by score, or see only news over a certain threshold.
Figure C
The plugin configuration panel (Figure D) will let you simplify how certain feeds are displayed. Other plugins handle feed redirectors, or add buttons to share news via email or services like Flattr, Google+, Pinterest or Identi.ca. There even is a bookmarklet to add to your TT list the RSS feeds you find embedded in Web pages.
Figure D
Going multiuser
We saw in the first post how to set up TT for personal use. Here is the minimum set of other variables you need to change in the configuration file, to share your installation with others:
- SINGLE_USER_MODE: this must obviously be false.
- ENABLE_REGISTRATION: set this to true to let people create their own account, if you can’t create them manually, which would be safer.
- REG_MAX_USERS: a zero here means “unlimited users”, otherwise the system won’t accept more than REG_MAX_USERS accounts.
- REG_NOTIFY_ADDRESS: the email address that will receive notifications of new registrations.
- SMTP_FROM_NAME and SMTP_FROM_ADDRESS: these are the sender name and email address that people will see in email messages from TT, for example when they ask for a password reset.
Sharing
Perhaps the biggest, or most interesting feature of Tiny Tiny RSS is about sharing. Figure E shows that you (or others) can read news collected from a TT account… even withot using TT at all! When you click on the small RSS icon in the top right corner, TT pops up a small window with a URL. Any RSS reader can then use that URL (as I did in Figure E with Akregator) as a normal RSS feed! Please note that you only need an account with password to see what the URL is. By default, there is no need for a password to use that URL in other programs. You may control which of your feeds become accessible by others by sorting them, since TT provides a different URL for each category.
Figure E
Click to enlarge.
To share or migrate your personal feed list, and other settings, go to Preferences |Feeds | OPML and click on “Export OPML”. The resulting file can be imported by another TT account (or any other OPML-compliant software) as I did from Firefox to Chrome in Figure F. In this way the receiving user will get all the feeds in the OPML file, without configuring them manually.
Figure F
We saved the coolest sharing feature of Tiny Tiny RSS for last. Open the config.php file in an editor, and change this line:
define('PLUGINS', 'auth_remote, auth_internal, note');
to define('PLUGINS', 'auth_remote, auth_internal, note, instances');
This will add to the Preferences panel of the administrator a “Linked” tab. In that tab, you will be able to tell TT to automatically add to all the other feeds, the popular (not private!) feeds of other, independent, TT installations!
Installation :
Download from the TT website the ZIP archive with the last stable version of the software (1.7.2 when this post was written), and unpack it in your Web space. You will obtain a folder called Tiny-Tiny-RSS-X.Y.Z. I suggest that you move it to something with a shorter name, as I did:
#> cd /var/www/html
#> mkdir tiny
#> cd tiny
#> wget TT.zip
#> unzip TT.zip
#> mv Tiny-Tiny-RSS-1.7.2 tt
#> cd tt
#> chown -R apache:apache cache/ lock/ feed-icons/
Wechanged the name of the unpacked directory from Tiny-Tiny-RSS-1.7.2 to tt to make its URL shorter.We then changed the owner of some subfolders to be the same as my Web server user. This made those folders writeable, as requested by the official instructions. If you install TT on a hosting account, check with your provider on how to perform the same operations.
The database
Here are the exact steps to create and prepare a Tiny Tiny RSS database with MySql, which is by far the most common option on economic Web hosting accounts. I am showing the command line version, but the same basic operations are available in any MySql administration GUI:
#> mysqladmin create my_tt
#> mysql -u root
mysql> use mysql;
mysql> CREATE USER 'tt_user'@'localhost' IDENTIFIED BY 'helloRSS';
mysql> grant all privileges on my_tt.* to 'tt_user'@'localhost';
mysql> exit;
#> mysql -u tt_user -p my_tt
mysql> source schema/ttrss_schema_mysql.sql;
mysql> exit
In plain English, the first six lines above create a MySql database (my_tt), and a MySql user (tt_user, with “helloRSS” as password) with full access rights to it. The last three lines mean that that user will have to execute, in any MySql client, the commands in the file schema/ttrss_schema_mysql.sql included in the TT distribution. This action will populate the database with all the tables it needs to work.
Basic configuration
Once the database is ready, you must go inside the TT folder, copy the config.php-dist file to another one, called config.php, and edit to suit your needs. For a basic, single-user installation, you should need to change only these six parameters:
define('DB_TYPE', "mysql");
define('DB_USER', "tt_user");
define('DB_NAME', "my_tt");
define('DB_PASS', "helloRSS");
define('SELF_URL_PATH', 'http://localhost/tiny/tt/');
define('PHP_EXECUTABLE', '/bin/php');
The first four ones are self-explaining. SELF_URL_PATH is the root URL of your TT installation. The right value of PHP_EXECUTABLE varies from system to system. If the Web server is a Linux or Unix box, you should type which php at a command prompt to know what to use.
In addition to these steps, please make sure that the mb-strings and xml extentions for PHP are installed and enabled. Otherwise you’ll get more or less cryptic errors instead of the login page of Figure A:
Your feeds, finally:
After doing everything explained in the previous paragraphs, you’ll be finally ready to point your browser to http://localhost/tiny/tt (or whatever your URL will be, of course) and start configuring the software. Log in as “admin” with password “password” (and change it immediately, of course). You’ll find an intuitive environment, accessible from any browser (there is also an Android client!). Tiny Tiny RSS lets you easily define as many feeds as you wish (Figure B):
Organize feeds in categories (Figure C):
TT can display all your feeds in one chronological stream, sort them in several other ways, or limit the view to some categories. To give you an idea of what the result may look like, I shamelessly loaded the feeds of the TechRepublic Open Source blog and those of some of my own blogs, and got the view of Figure D.
How to Build Your Own Syncing RSS Reader with Tiny Tiny RSS:
Tiny Tiny RSS also has an Android app ,a mobile-friendly web interface, a Chrome extension, and more third-party supported apps. There’s even an XBMC client if you want to read your feeds on the big screen.
There are some things you won’t get with Tiny Tiny RSS that Google Reader offers, though. For example, you won’t get such a broad array of third party apps and clients. Sadly, Tiny Tiny RSS can’t be used with your favorite desktop or mobile feed reader like Reeder or NewsRob. Plus, it’s definitely harder to set up than just importing all of your feeds to Feedly. Even so, if you want ultimate control over your news reading, and you want something that’ll never shut down on you, Tiny Tiny RSS Is worth setting up.
What You’ll Need
Installing Tiny Tiny RSS isn’t difficult, but you’ll definitely need a few things before you begin:
- A web host that supports PHP and MySQL. We used Dreamhost, since they have Linux web servers, they support PHP and have it installed already, and make setting up MySQL databases a one-click affair. Alternatively, if you don’t want to use a web host, you can install Tiny Tiny RSS on a Linux computer you have at home. It’s a bit more complicated, and you’ll need to install PHP and MySQL on your own, but it’s not too hard.
A URL for remote access. You may want to buy a domain name so you can just type “www.myrssreader.com” in your browser to get to your Tiny Tiny RSS instance. If you already own a domain (and most of you do), it’s easier (and cheaper) to just use a sub-domain of a URL you already own.
- The latest version of Tiny Tiny RSS to install. The archive you download will include all of the files you need to install the application and set up the database.
- Your exported Google Reader subscriptions. You’ll need the
subscriptions.xmlfile that you get after using Google Takeout.
Tiny Tiny RSS was meant to be installed on Linux computers that you have complete control over, like a Linux box in your house. Since most people don’t have their own Linux web server, we’re going to walk you through installing it on a web hosting company’s servers—which we won’t have complete control over. The developer behind TTRSS says that using this kind of hosting isn’t supported. I think that’s silly, and I’m willing to bet that this is a matter of support and personal preference, not functionality. Basically, if you use something like Dreamhost, you won’t be able to get any help from the developer if something goes wrong. If you want that support and control, you’ll need to use a dedicated Linux server as described above.
Step One: Prep Your Web Server and Create Your Database
Via the web interface: Check with your hosting provider to make sure that they meet the prerequisites. Odds are they’ll make it easy for you and you can skip forward to step two. In most cases, once you’ve logged in to your host’s management page, there’s a wizard that will help you create a MySQL database and create its first user at the same time. Name the database and user whatever you want. Give the user a strong password to keep it secure. You can see how I did it with Dreamhost (using some example names) in the image to the right.
Via the command line: If your host doesn’t offer one-click tools or a GUI to create a MySQL database (or you prefer the command line), it’s not too difficult to do at the command line. Use your favorite terminal app to connect to your web host (Open the tool and type slogin yourusername@mydomain.com. You’ll be prompted for your password. Your username and password here are created through your web host, so check with them if you’re not sure how to connect.) To create the database, type:
mysql -u root -p -h <em>mysqlhost.mydomain.com</em> CREATE DATABASE <em>ttrssdb</em>
In this example, your database is called “ttrssdb,” and you should replace mysqlhost.mydomain.com in the above command for the name of the host where your SQL database will live Here we had a separate hostname for my SQL database, but if you’re running everything on the same system, you can omit -h mysqlhost.mydomain.com from the command to create the database on your local host.
To create the database user, type:
mysql -u root -p -h <em>mysqlhost.mydomain.com</em> GRANT alter,create,delete,drop,insert,update,select ON <em>ttrssdb</em>.* TO <em>ttrssdbusername</em> IDENTIFIED BY <em>strongpassword</em>
Again, change the fields in italics to what you want them to be, and omit the -h mysqlhost.mydomain.com if you’re setting this all up on the same computer.
Step Two: Install Tiny Tiny RSS and Set Up the Database
Once your server is prepped, now all we have to do is install and configure Tiny Tiny RSS on it. First, download the latest version of TTRSS from the developer’s site. It’ll come as a tarball (a .tar.gz file), so make sure you have an app like 7-Zip (Windows, Free), The Unarchiver (OS X, Free), or PeaZip (Linux, Free) ready if you want to use an app to unpack it.

Once you’ve unpacked the archive, look in the “schema” folder for the database schema (that is, the file that will build and organize TTRSS’s database) that corresponds to the database software you’re using. The ttrss_schema_pgsql.sql file is for PostgreSQL, and the ttrss_schema_mysql.sql file is for MySQL. You can import the schema either via command line or using the GUI for your database software. My host offers both command line access and PHPMyAdmin to manage my database.

Via the web interface: First, go to the URL for your database. In this case, it’s “mysqlhost.mydomain.com,” and log in with the username and password you created earlier. Click the “import” tab at the top of the page, and then browse to the schema file you want to import (ttrss_schema_mysql.sql). PHPMyAdmin should detect the file format automatically. Click “Go,” and wait for the import to complete.
Via the command line: The first time I imported the schema, it timed out on me, so I was worried it didn’t import correctly. I decided to double-check by re-importing it via the command line. To do this, type:
mysql -u ttrssdbusername -D ttrssdb -p -h mysqlhost.mydomain.com < schema/ttrss_schema_mysql.sql
You’ll be prompted for the password for that user account, but assuming you’re in the directory you’ve created for Tiny Tiny RSS, the schema will be imported after a moment or two.
At this point, Tiny Tiny RSS is installed, your database is up and running, and you’ve imported your schema. The only thing left to do now is to connect Tiny Tiny RSS to your database and tweak some of the application settings.
Step Three: Connect Tiny Tiny RSS to Your Database

Go back to your Tiny Tiny RSS folder and find the config.php-dist file in the root directory. Make a copy of it, rename it config.php, and open it with your favorite text editor, whether in the command line (pico, vi, emacs, whatever) or by downloading it and opening it with something like Notepad++. If you edit it on the desktop, just make sure to re-upload it with the proper name so your changes take effect.
The fields at the top of the file are the most important, and the ones you need to change in order for TTRSS to find and log in to your database server. Review the entire file though, just to make sure none of the options are things you want to toggle. We’ll tweak some of the additional settings later, but here are the basics, using the example names we’ve been using so far:
define(‘DB_TYPE’, “mysql”); // or mysql
define(‘DB_HOST’, “mysqlhost.mydomain.com”);
define(‘DB_USER’, “ttrssdbusername”);
define(‘DB_NAME’, “ttrssdb”);
define(‘DB_PASS’, “strongpassword”);
//define(‘DB_PORT’, ‘5432’); // when neeeded, PG-only
Unless your SQL database is on a server using a non-standard port, you probably won’t need to define the DB_PORT. If you’re running everything on the same system, leave DB_HOST blank or as “localhost.” Of course, you should have your own usernames, domain names, and passwords to fill in here, but you get the gist.
Next, scroll down to the basic settings:
define(‘SELF_URL_PATH’, ‘http://yourserver/tt-rss/’);
The SELF_URL_PATH is the domain where TTRSS is currently installed. If you installed it at http://yourdomain.com/ttrss, fill that in. If you set up a domain and installed TTRSS at its root, just type in the name of the domain, like http://myttrssdomainname.com/. If you’re installing everything on the a server at home, this is where you’ll put in your Dynamic DNS URL. There are more to set up, but these are the ones required to connect TTRSS to your database successfully. Now we’re ready to log in for the first time.
Step Four: Log In and Import Your Feeds

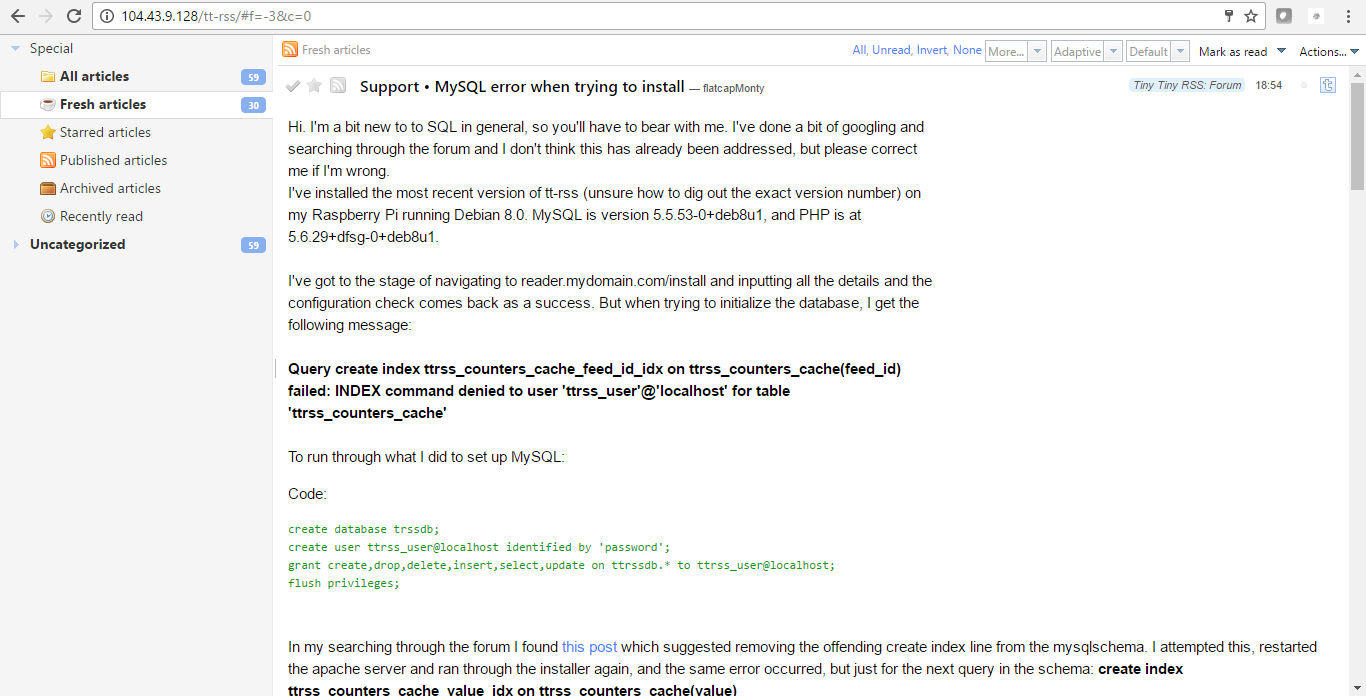
If you’ve set everything up correctly, you should be able to go to http://yourdomain.com/ttrss or http://myttrssdomainname.com/ and see a login screen. Congratulations! The default credentials are “admin” and “password,” so once you’re logged in, the first thing you should do is change the password. Click the Actions menu at the top-right corner of the screen and select Preferences. You should see Personal Data/Authentication near the top of the screen. Click that and you’ll see the password change screen. Give yourself a nice strong password and save it.
Next, let’s import your feeds. If you haven’t exported your subscriptions from Google Reader, now’s the time to do it. Check out our step-by-step to get your data out of Google Reader, and once you have your subscriptions.xml file, here’s how to import it to TTRSS:
- Click the Actions menu at the top right corner of the screen and select Preferences.
- Click the Feeds tab, and look for the “OPML” option near the bottom of the screen. Click it to open that frame.
- Click Choose File to browse your hard drive for your
subscriptions.xmlfile. Select it, and click OK. - Click the Import My OPML button to begin your feed import. If you have a lot of subscriptions (especially if some of them are defunct or now dead) this may take a while. Grab some coffee.
When your import is complete, click the Exit Preferences button in the upper right to go back to the main view. Even if your import seems like it’s errored out (this happened to me a couple of times,) it probably imported your feeds okay anyway. You should see all of the subscriptions TTRSS imported in the sidebar, organized the same way they were at Google Reader—if you had folders, they should have come over with you. If you want to edit, rename, color-code, or re-categorize a feed, it’s easy—just click to select it in the sidebar, and click the Actions menu to see all available options for it.
To add new feeds, click the Actions menu and select Subscribe to Feed. If the feed you want to subscribe to requires a login and password, check the “This feed requires authentication” box and you’ll see fields to enter your credentials. If some of your feeds were imported with errors, or they’re dead and TTRSS can’t resolve them, highlight them on the left sidebar, then click Actions and Unsubscribe to remove them from your list.
Step Five: Tell Tiny Tiny RSS to Update Feeds and Update Itself Automatically

Now its time for a few advanced tweaks that will make your experience a little better. Here’s how to make TTRSS update your feeds without doing it manually and how to get automatic updates to the application when the developer releases them:
Make TTRSS Update Your Feeds Without Help
By default, Tiny Tiny RSS only updates feeds when you double-click on them. If you want them to update automatically, you have a few options. You can either tell Tiny Tiny RSS to update quietly in the background while you’re using the site and reading other feeds (and you can always update manually by double-clicking a feed name,) or you can run a background process on your linux server that will keep your database up to date even when you’re not using the webapp.
The latter is the most foolproof method, but most web hosts aren’t about to let you run a background process all the time, even when you’re not logged in. However, if you’re running TTRSS on your own linux box, check out the Updating Feeds page in the Tiny Tiny RSS Wiki for more information on how to set this up.
I opted for the former method, partially because I’m using a shared host, but also because it’s just easier to set up. Open up your config.php file in a text editor, and scroll down “SIMPLE_UPDATE_MODE” and change its flag from “false” to “true.” This will make TTRSS update your feeds for you every 30 minutes (by default, you can change this in the Preferences) as long as you’re logged in. Set it as a pinned tab, and you’ll never have a problem.
Get Application Updates Automatically

When I started playing with Tiny Tiny RSS, I was using version 1.7.3. The night after I got everything set up the way I wanted it, the developer released version 1.7.5. There is a built-in updater in TTRSS, but you have to turn it on first. Go back to your config.php file, and look for this field near the bottom of the file:
define(‘PLUGINS’, ‘auth_remote, auth_internal, note’);
Change it to look like this:
define(‘PLUGINS’, ‘auth_remote, auth_internal, note, updater’);
This enables the updater plugin and opens up a new option in the Preferences menu called “Update Tiny Tiny RSS.” Click it to check for updates, or to download and install an update if one is available. Again, this tweak works best if you’re running TTRSS on your own server or an instance you control.
Highly customizable via plugins
The main way to customize Tiny Tiny RSS is via functionality plugins. Some come with the basic installation, but many additional ones are available from third parties. Users can also change the way information is shown, create themes or skins using CSS or download ones created by the community. All this is possible because Tiny Tiny RSS is open-source–anyone can create modifications for it and publicly share them. You just have to look out for possible bugs and security issues with user-made content.
PROS of Tiny Tiny RSS :
Full control of the service
Since this reader is open-source and self-hosted, users can have full control of the service and its data when used on a private server. This means they don’t need to rely on a third party service that can be discontinued anytime. It also ensures the cost for using the reader will not increase and it protects user privacy by not giving up personal data.
Multiple users per installation
One instance of Tiny Tiny RSS can be used by as many people as necessary.
Browse and organize feeds and posts by tags and labels.
An Android app is available on the Google Play store.
Integrates with a media center
Feeds can be viewed on a TV or dedicated media box.
E-mail digest
Users can request an e-mail to be sent at a set interval with news posts.
CONS of Tiny Tiny RSS :
Has to be set up manually, tech-savviness and patience required
Using Tiny Tiny RSS is not as simple as creating an account on another service. Merely completing the installation procedure will take at least a few hours.Main requirements include a physical server or a web host supporting PHP and MySQL. The know-how’s also needed, but there are several guides online that explain all the steps quite well. Anyone familiar with computers, even not being an expert, who is willing to spend some hours reading and learning should be able to set up this software.
-Tiny Tiny RSS is an open source web-based news feed (RSS/Atom) reader and aggregator, designed to allow you to read news from any location, while feeling as close to a real desktop application as possible.Tiny Tiny RSS is owned by Tiny Tiny RSS (https://tt-rss.org/) and they own all related trademarks and IP rights for this software.Tiny Tiny RSS is licensed under GNU GPL.
Cognosys provides hardened and ready to run images of Tiny Tiny RSS on all public cloud ( AWS marketplace and Azure).
Deploy Tiny Tiny RSS securely on cloud i.e. AWS marketplace and Azure with reliable services offered by Cognosys at one-click with easy written and video tutorials.
Secured TinyTinyRSS on Ubuntu 14.04 LTS
Secured TinyTinyRSS on centos 7.4
Tiny Tiny RSS On Cloud For Azure
Features
Tiny Tiny RSS Features:
- Server-side application, user only needs a web browser
- Client side SSL certificate based login
- Supports RSS, RDF and Atom feeds using Magpie and SimplePie libraries
- Easy setup and configuration
- Streamlined interface using AJAX Free software, licensed under GNU GPL
- Authentication for reading protected feeds (e.g. LiveJournal friend-only posts)
- Feed aggregation
- Keyboard shortcuts
- OPML import/export
- Multiple and single user operation
- Mobile devices
- Internationalization
- Detecting and filtering duplicate articles
- Podcasts
- Article scoring
- Content filtering
- JSON-based API
- Twitter feeds
- Feed sharing between instances
-Major Features of Tiny Tiny RSS :
Server-side application, user only needs a web browser
Supports RSS, RDF, Atom feeds using SimplePie\
Easy setup and configuration
Streamlined interface using AJAX
Authentication for reading protected feeds (e.g. LiveJournal friend-only posts)
Supports :
- feed aggregation,
- keyboard shortcuts,
- OPML import/export,
- multiple and single user operation,
- mobile devices,
- internationalization,
- detecting and filtering duplicate articles, podcasts,
- article scoring,
- content filtering,
- JSON-based API,
- feed sharing between instances,
Integration into Desktop Software and Mobile Apps.
Azure
Installation Instructions For Ubuntu
Note : How to find PublicDNS in Azure
Step 1) SSH Connection: To connect to the deployed instance, Please follow Instructions to Connect to Ubuntu instance on Azure Cloud
1) Download Putty.
2) Connect to virtual machine using following SSH credentials:
- Hostname: PublicDNS / IP of machine
- Port : 22
Username: Your chosen username when you created the machine ( For example: Azureuser)
Password : Your Chosen Password when you created the machine ( How to reset the password if you do not remember)
Step 2) Database Login Details:
Username : root || Password : Passw@rd123
Please change password immediately after first login.
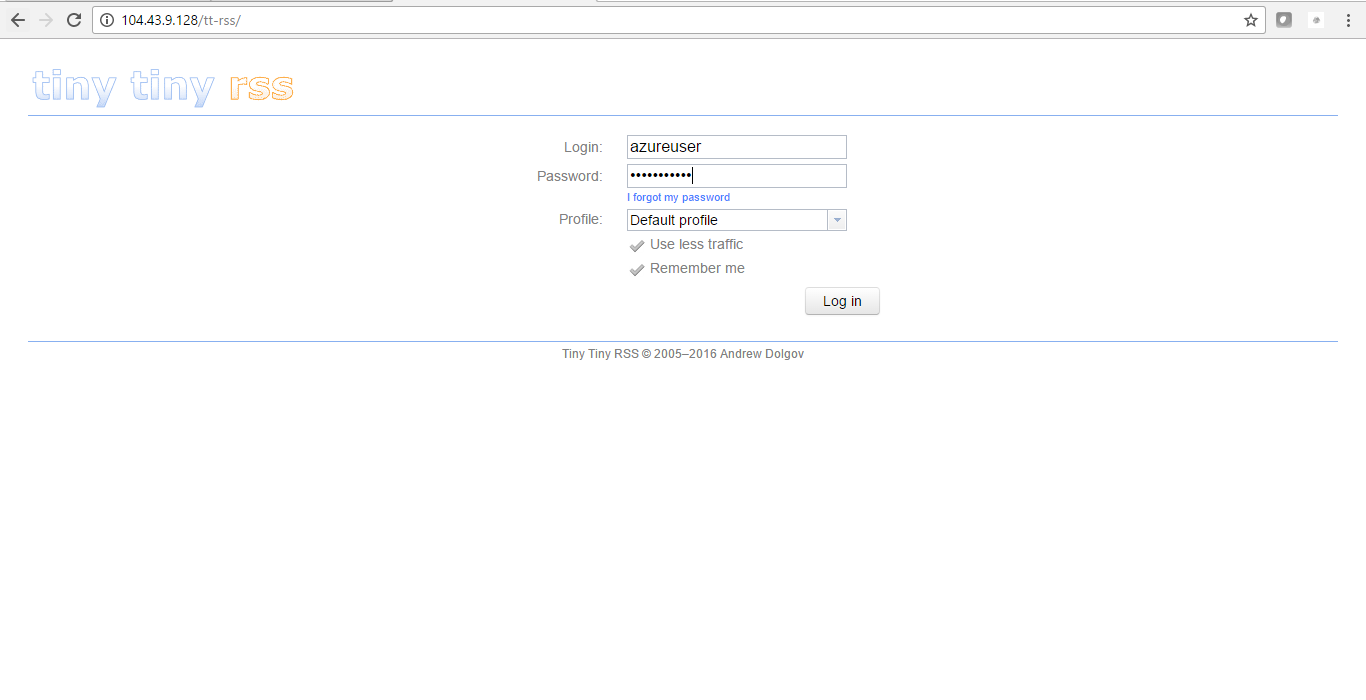
Step 3) Application URL: Access the application via a browser at http://PublicDNS.
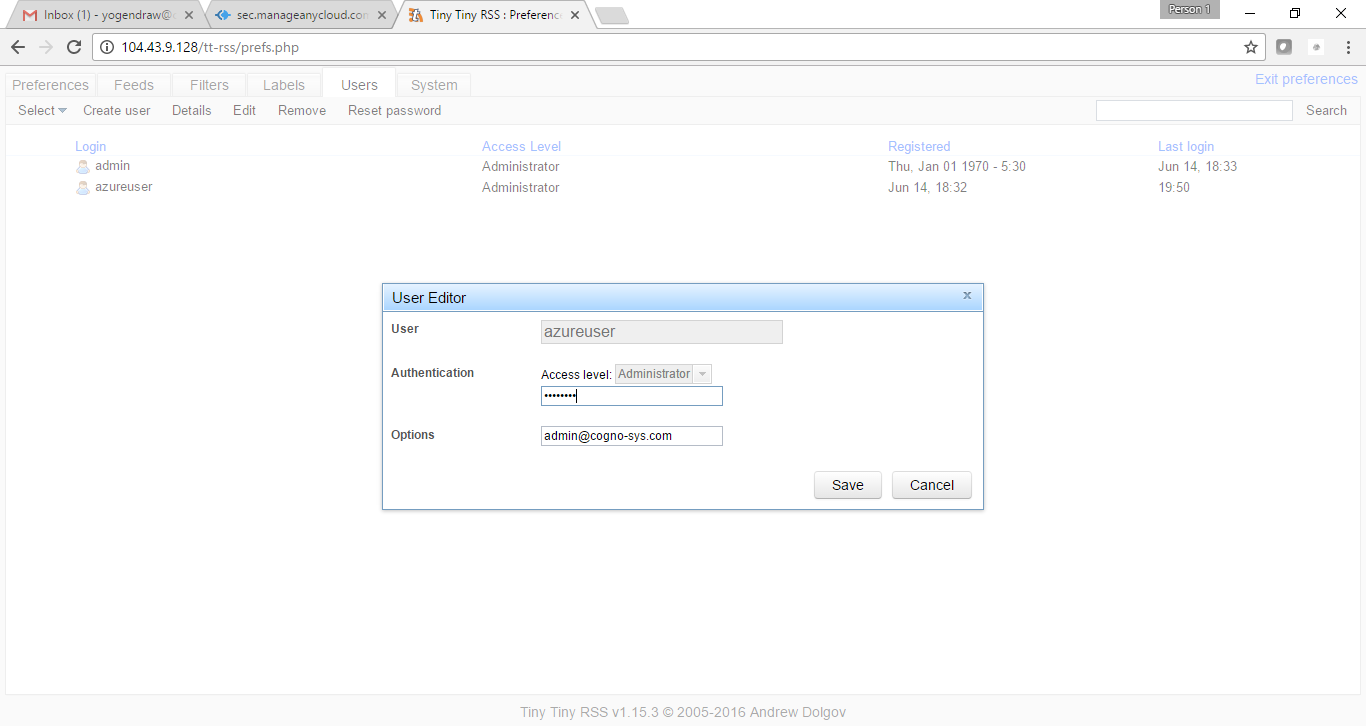
- Username : azureuser (Please create new user and delete this user)
- Password : Passw@rd123
Step 4) Other Information:
1. Default installation path: will be on your web root folder “/etc/tt-rss”
2. Default ports:
-
-
- Linux Machines: SSH Port – 22
- Http: 80
- https: 443
- MySQL ports: By default these are not open on Public Endpoints. MySQL :3306
-
Configure custom inbound and outbound rules using this link
Installation Instructions For Centos
Note : How to find PublicDNS in Azure
Step 1) SSH Connection: To connect to the deployed instance, Please follow Instructions to Connect to Centos instance on Azure Cloud
1) Download Putty.
2) Connect to virtual machine using following SSH credentials:
- Hostname: PublicDNS / IP of machine
- Port : 22
Username: Your chosen username when you created the machine ( For example: Azureuser)
Password : Your Chosen Password when you created the machine ( How to reset the password if you do not remember)
Step 2) Database Login Details:
Username : root || Password : Passw@rd123
Please change password immediately after first login.
Step 3) Application URL: Access the application via a browser at http://PublicDNS/
- Username : azureuser (Please create new user and delete this user)
- Password : Passw@rd123
Step 4) Other Information:
1. Default installation path: will be in your web root folder “etc/tt-rss”
2. Default ports:
- Linux Machines: SSH Port – 22
- Http: 80
- Https: 443
- MySQL ports: By default these are not open on Public Endpoints. MySQL :3306
Configure custom inbound and outbound rules using this link
3. To access Webmin interface for management please follow this link
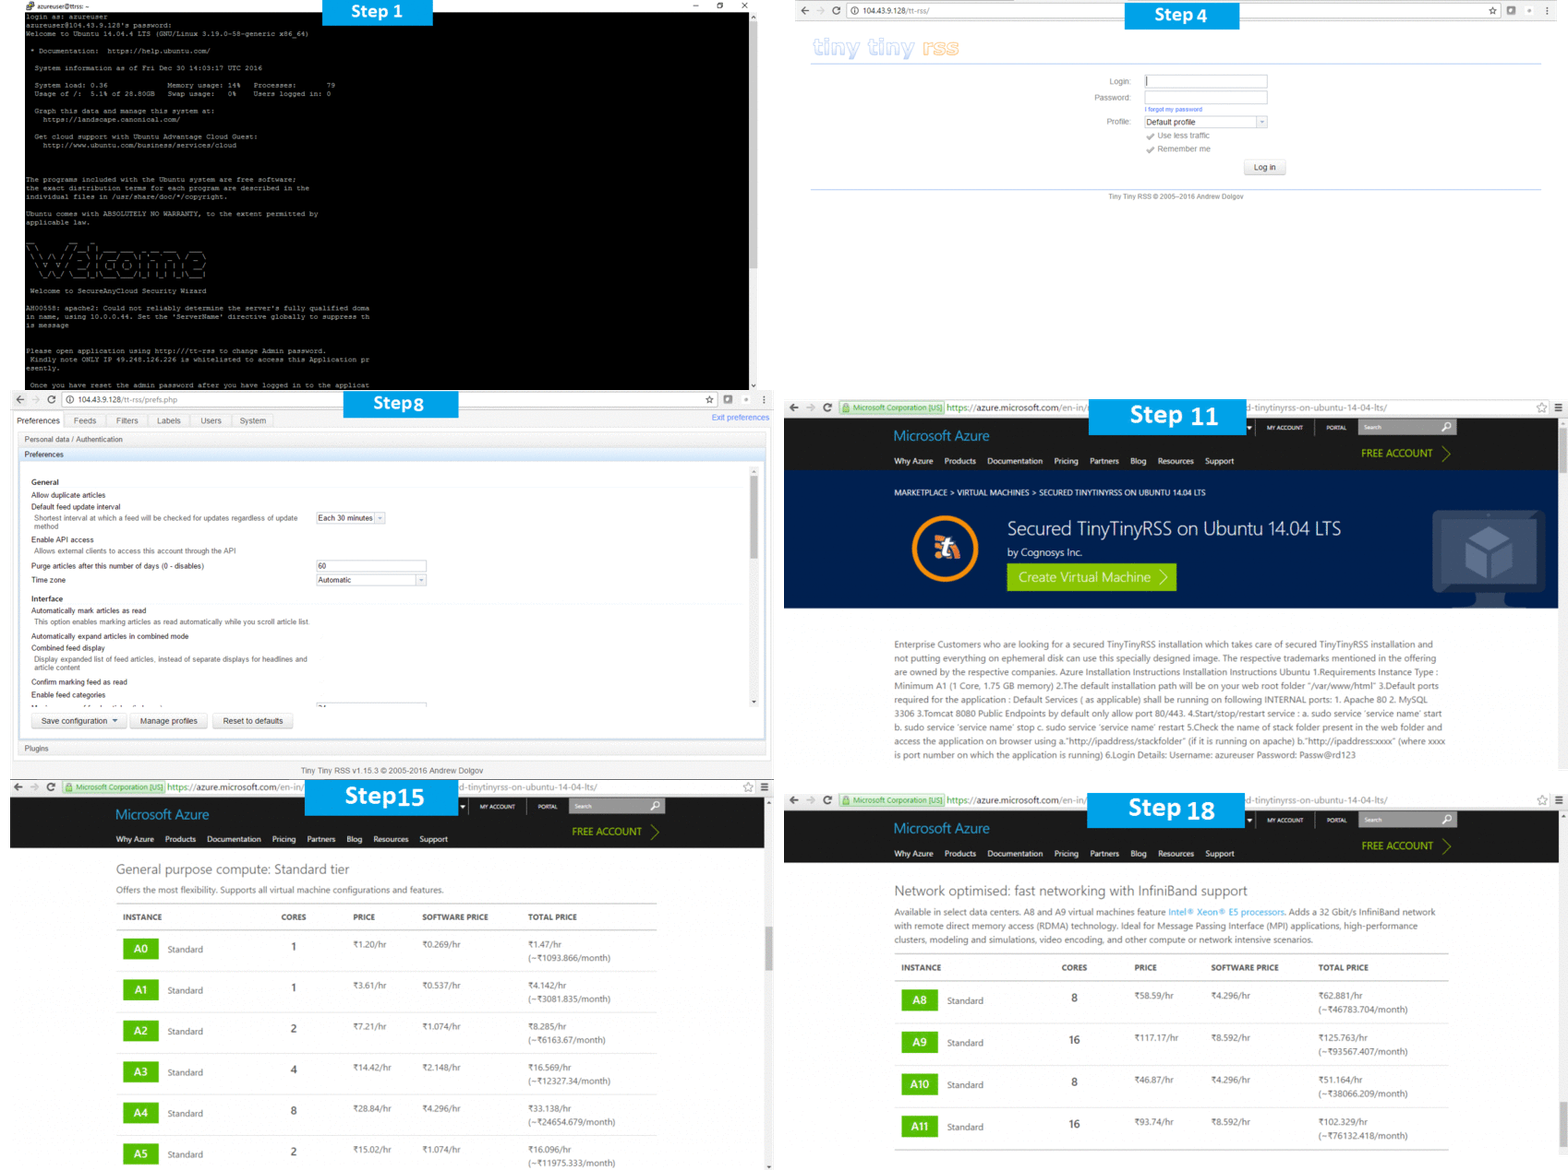
Azure Step by Step Screenshots for Ubuntu 14.04 LTS
Installation Instructions For Ubuntu
Installation Instructions for Ubuntu
Step 1) VM Creation:
- Click the Launch on Compute Engine button to choose the hardware and network settings.
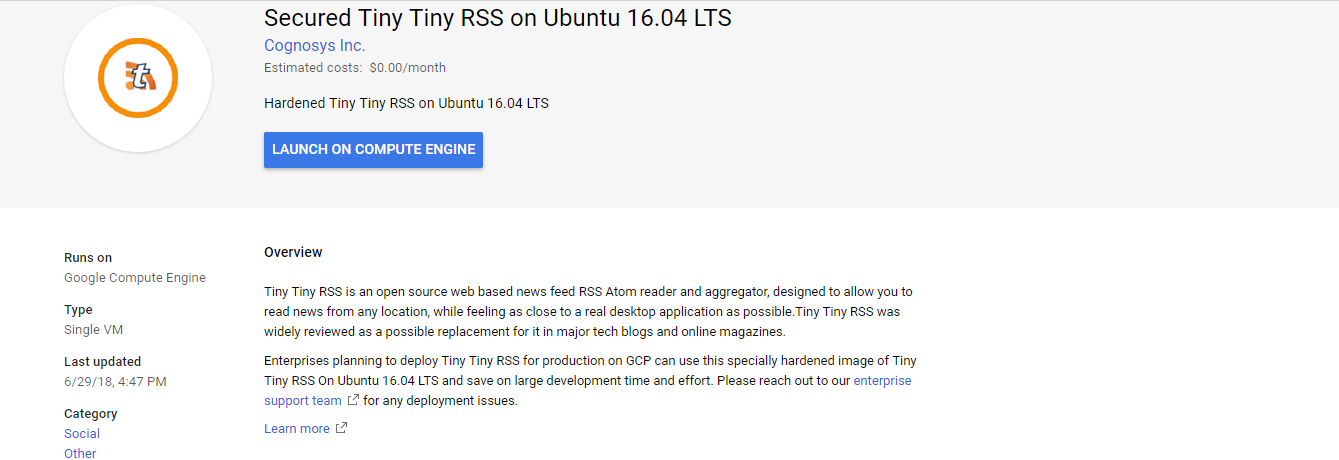
2. You can see at this page, an overview of Cognosys Image as well as estimated cost of running the instance.
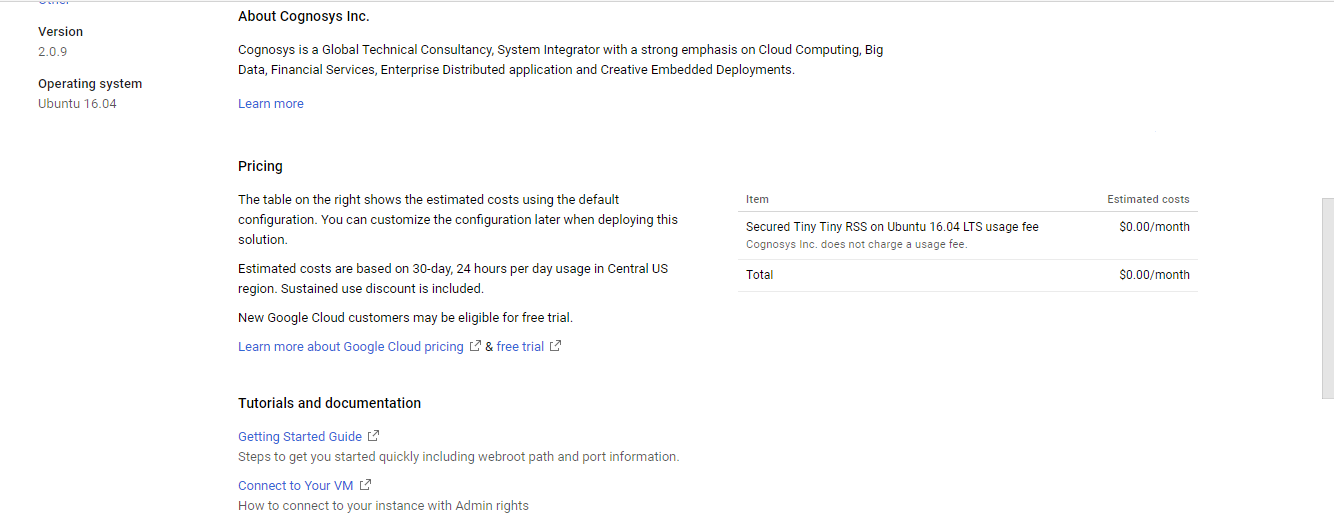
3. In the settings page, you can choose the number of CPUs and amount of RAM, the disk size and type etc.
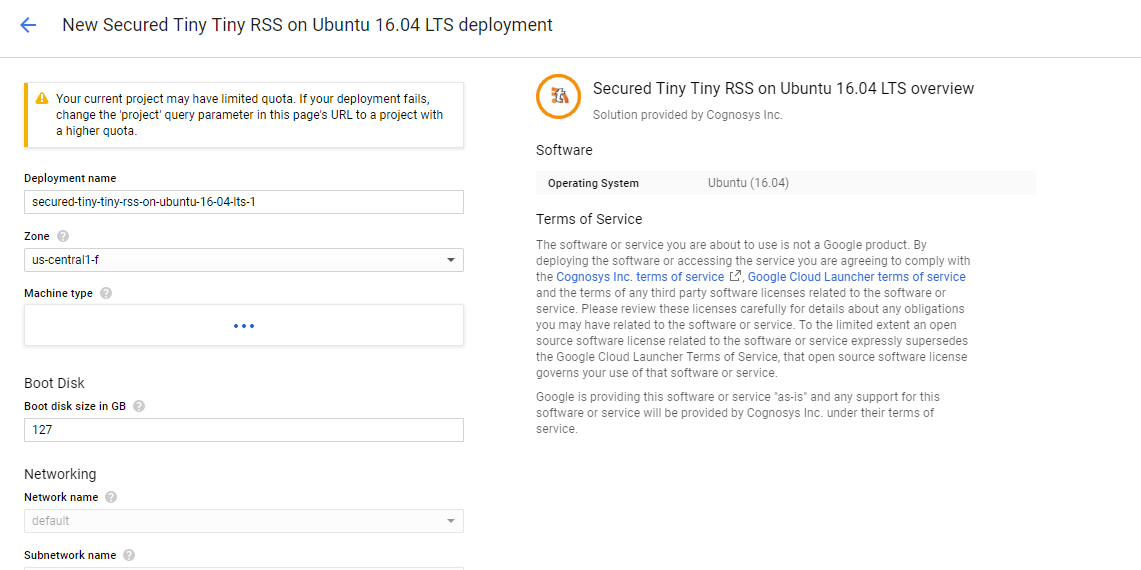
Step 2) SSH Connection:To initialize the DB Server connect to the deployed instance, Please follow Instructions to Connect to Ubuntu instance on Google Cloud
Step 3) Database Login Details:
The below screen appears after successful deployment of the image.

For local MySQL root password, please use the temporary password generated automatically during image creation as shown above.
i) Please connect to Remote Desktop as given in step 2 to ensure stack is properly configured and DB is initialized.
ii) You can use MySQL server instance as localhost, username root and password as shown above.
If you have closed the deployment page you can also get the MySQL root password from VM Details “Custom metadata” Section.
Step 3) Application URL: Access the application via a browser at http://PublicDNS.
Step 4) Other Information:
1. Default installation path: will be on your web root folder “/etc/tt-rss”
2. Default ports:
-
-
- Linux Machines: SSH Port – 22
- Http: 80
- https: 443
- MySQL ports: By default these are not open on Public Endpoints. MySQL :3306
-


