1-click AWS Deployment 1-click Azure Deployment
Overview
Thunderbird is a free application from the creators of Mozilla. Thunderbird permits the control of multiple e-mail accounts. It also lets users to search all of the gathered e-mail in the user’s account. Thunderbird has been gaining in popularity as viruses continue to target its competitors. Thunderbird is the most popular e-mail clients for outmoded non-Web-based e-mail. This is not a wide-ranging list, and there is always the likelihood that your mark is using a different e-mail client. Subsequently e-mail is standards based and all clients must stick to to these standards in order to function, the techniques.
Now a days many people manage their email on the web using services such as Gmail or Hotmail. These services offer access to email accounts through any web browser. It is convenient because you can get your email from almost any computer. If you live in New York and you are backpacking in Thailand, just find an Internet cafe, log on to a computer, and check your email. Another way to handle your email is to use an email client program installed on your own computer. A program like this offers many advantages over using a web email client. It lets you organize your email exactly the way we want, it allows us to check email when you are not connected to the Internet, and we can manage multiple email accounts in one place. That said, desktop email clients and web email clients can coexist side-by-side. Using an email client at home doesn’t impede you from using web email when you want to check your account while you are on the road. Mozilla Thunderbird is a feature-rich, steadfast, and safe tool for managing your email. It’s free and open source and it comes from the folks at Mozilla, the people who created the Firefox web browser. Thunderbird has been around since 2004, and is used by many people around the world. Best of all, it runs on Windows, Mac OS X, and Linux. You can connect to many email services with it, including Gmail, Hotmail, and GMX. Lastly, Mozilla regularly releases new versions of the software that keep Thunderbird secure and up to date.
Automatically configure Thunderbird
We can easily configure your email accounts in Mozilla Thunderbird with the Mail Autoconfig tool in cPanel.

Open the tool and click on the Thunderbird button.

A pop-up will appear in which you should select your domain name from the Domain: drop-down menu. When you click Submit a configuration file will automatically be created on the server for you.

Now you only need to open Mozilla Thunderbird, go to Tools -> Account Settings -> Account Actions button -> Add Mail Account and fill in your name, email address and password. When you click Continue Thunderbird will automatically detect all settings for you and you can simply click the Done button to add the email account in the application.
Manually configure Thunderbird
To configure manually your email accounts with Mozilla Thunderbird first open the program on your computer. Then click the Tools tab -> Account Settings.

From the new window press the Account Actions button, then Add Mail Account account.

Enter your name as you would like it to appear in the Your name: field for all outgoing messages and the email address which the others will use to send email messages to you. Also provide the password for the email account. Click Continue.

Set the incoming and outgoing options to be of type IMAP. The server hostname option is mail.yourdomainname.com where yourdomainname.com is your actual domain. Leave the port option to Auto. For SSL and Authentication select Autodetect. Then set Username to your full email address (i.e email@domain.com) for both incoming and outgoing. When ready, click the Re-test button so that Thunderbird can test if the settings are correct.

If you have configured everything correctly, the Done button should be come available. Click it and your email address will be added to your Thunderbird and you can start managing your emails.

How to set up Thunderbird email
lt provide steps to set it up with the Hostinger mailbox.
Collecting IMAP, POP3, and SMTP Details
While the latest version of Thunderbird automatically configures mail protocols and ports on the first setup, you can tweak the settings manually to improve email exchange security.
To find the necessary information for the manual setup, and create a new account, follow these steps:
- Click on Email Accounts under the Email section on your hPanel.
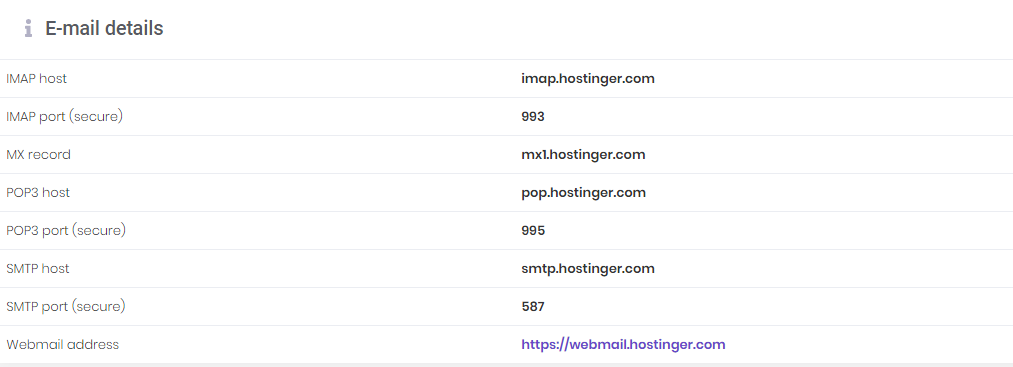
- Inside, you will see E-mail details containing the information you need. Hostinger mail uses IMAP for incoming mails and SMTP for outgoing mails. You can replace IMAP with POP3 if you prefer.
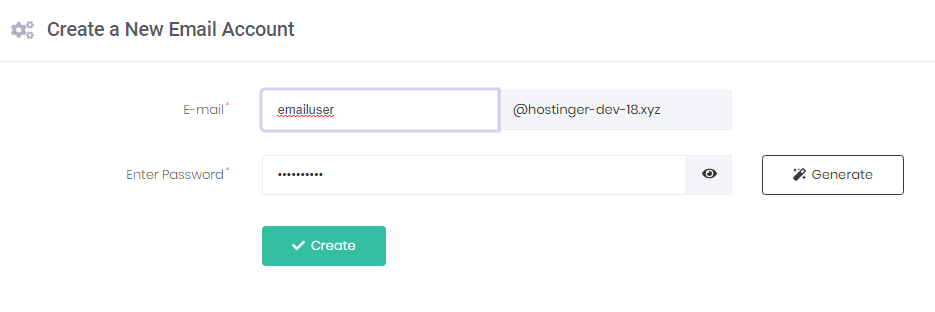
- Scroll down to create a new Hostinger email account, if you haven’t made one. Fill in the details and press Create.
Setting up Email in Mozilla Thunderbird
Once done, proceed with the following:
- Download and install the Mozilla Thunderbird software.
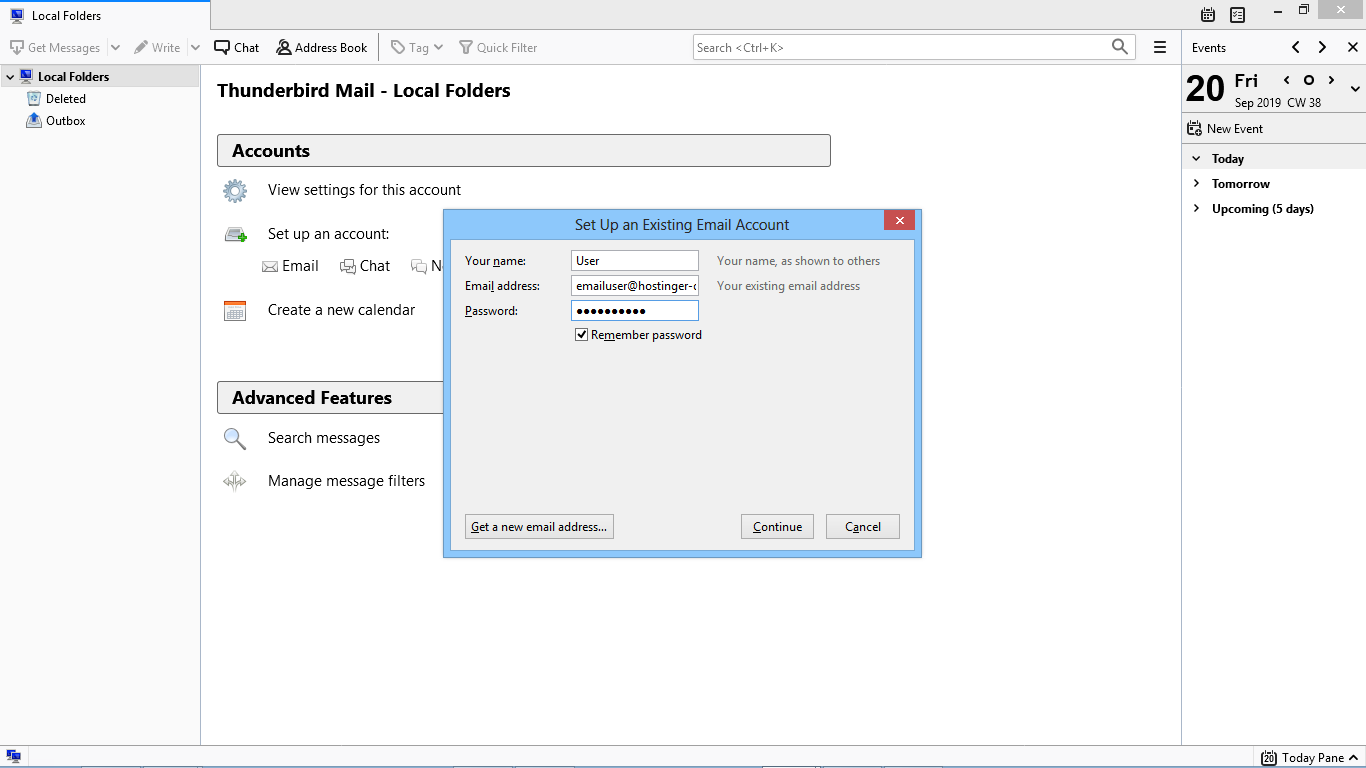
- Open the email client. Then, click Email under the Set up an account section.
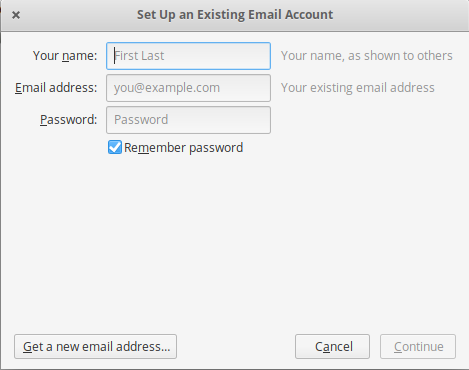
- On the prompted window, fill in Your name, Email address, and Password, then press Continue. You can also select Get a new email address if you don’t want to use an existing one.
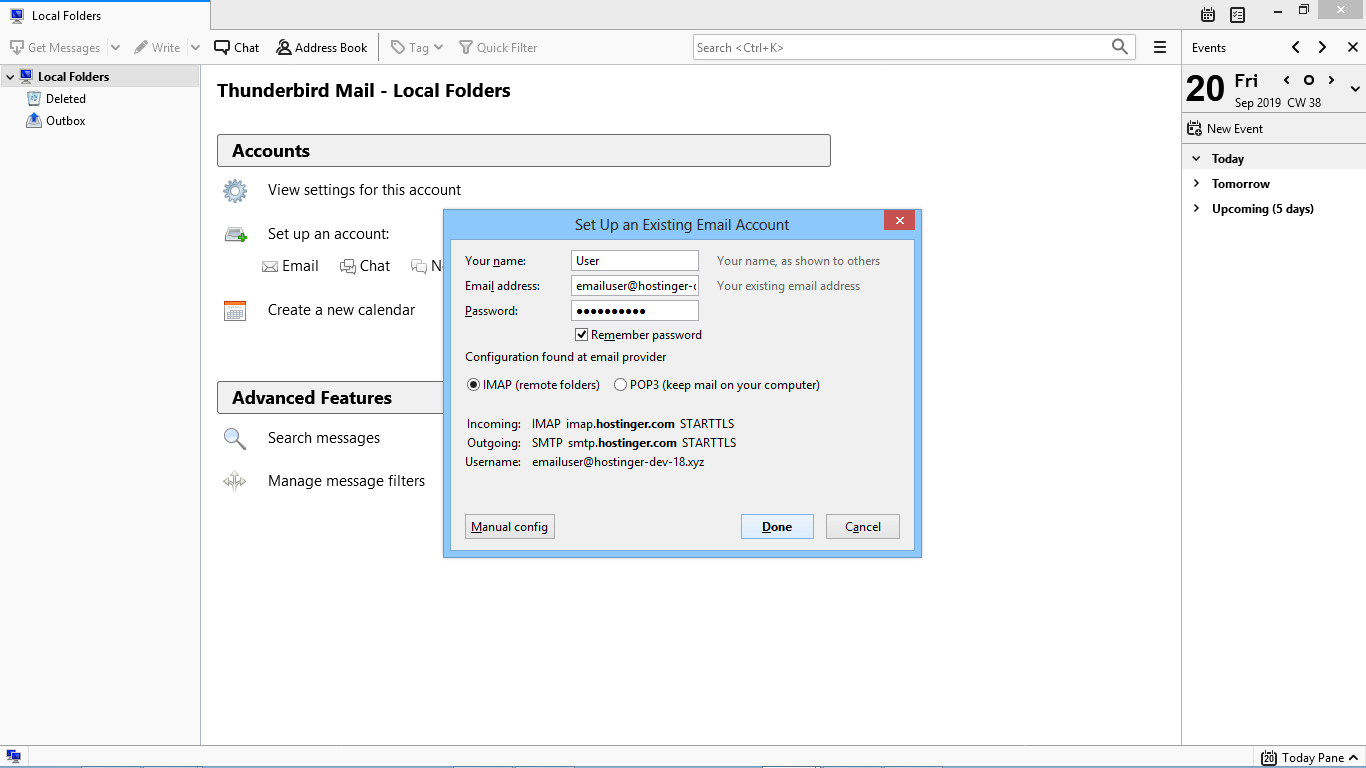
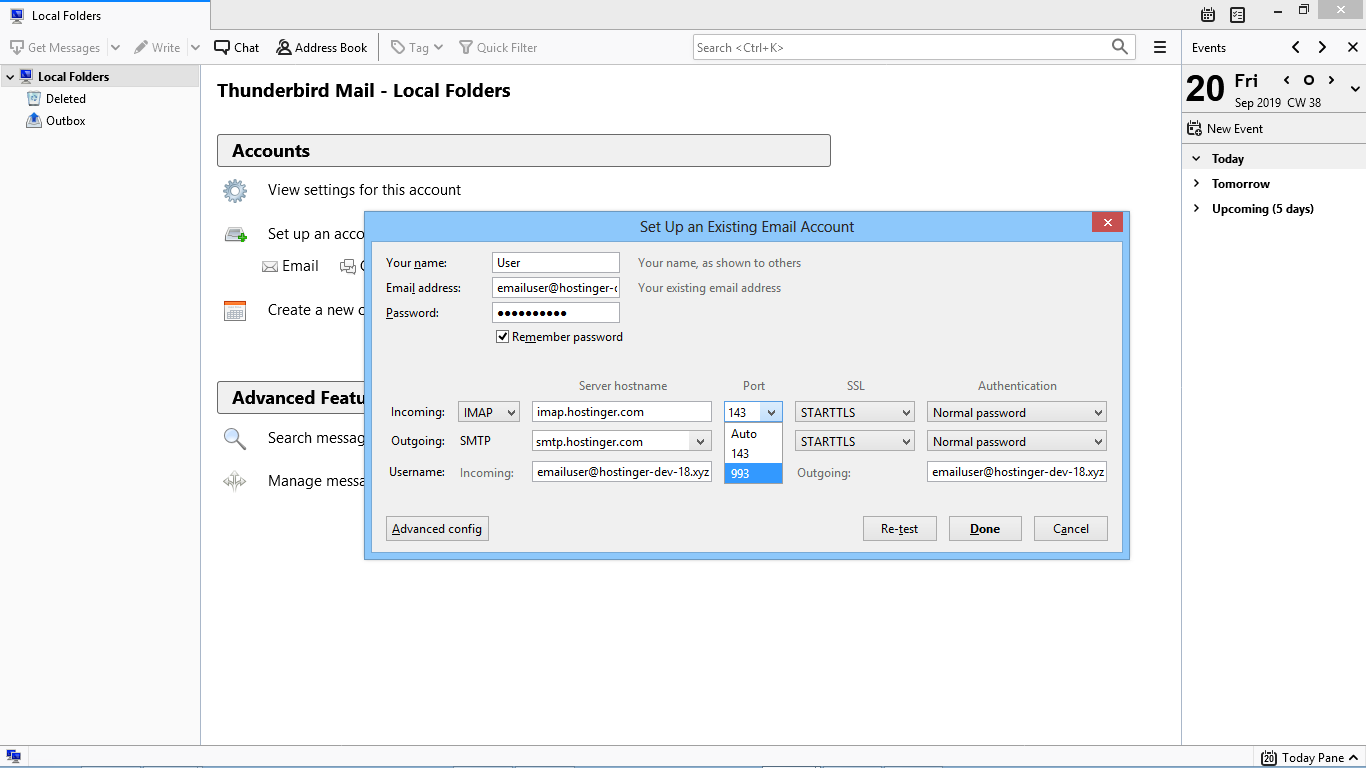
- The system will connect your Hostinger email account to the application. Once it returns a positive response, click Done to finish or press Manual Config to change the settings using the details collected previously.
- If you select the latter, it will bring you to this pop-up window. After manually changing the ports to improve security, choose the Re-test button, then click Done.
Features
Features of Thunderbird:
1)Mail Account Setup Wizard
We need to provide our name, email address, and password and the email account set up magically will check our database and find the email settings for us.
Major Features of Thunderbird
- Tabbed email.
- An Archive feature similar to the one found in GMail.
- Lightning fast search.
- Smart folders.
- Auto Update working
- Fully Functional
- Portable
- Stealth
Thunderbird has junk mail tools that have been updated to stay ahead of spam and features anti-phishing protection.
AWS
Installation Instructions For Windows
A) Click the Windows “Start” button and select “All Programs” and then point to Thunderbird .
B) RDP Connection: To connect to the operating system,
1) Connect to virtual machine using following RDP credentials :
- Hostname: PublicDNS / IP of machine
- Port : 3389
Username: To connect to the operating system, use RDP and the username is Administrator.
Password : Please Click here to know how to get password .
C) Other Information:
1.Default installation path: will be on your root folder “C:\Program Files (x86)\Mozilla Thunderbird”
2.Default ports:
- Windows Machines: RDP Port – 3389
- Http: 80
- Https: 443
D) Notes : You need to install Any Database Software Listed in Window.
Configure custom inbound and outbound rules using this link
Installation Step by Step Screenshots
Videos


