1-click AWS Deployment 1-click Azure Deployment
Overview
Textpattern is a lightweight CMS. It is mostly popular due to its low system requirements and possibility to modify it in any way you like. Certain web site design knowledge is required in order to build successful web sites with Texpattern. Mostly you need to be familiar with CSS, PHP basics and HTML code. In this tutorial we will show how you can perform a Textpattern installation and further manage your web site as well as install additional plugins and custom designed templates.Textpattern is a remarkably versatile content management system, suitable for use in anything from a basic blog to a complex database website, but it has two problems:
- Some of Textpattern’s important inner workings are not obvious. If you come to it without a background in programming, you are likely to be baffled.
- The documentation is mostly terrible, written by programmers for other programmers.
By trial and error, and with a lot of patience, it is possible for a non–programmer to figure out how it all works. Once you have got your head around how Textpattern works, you will then be able to make sense of the documentation. Unfortunately, this is not the ideal sequence of events.
Textpattern’s Versatility
Textpattern was developed for use in blogs, and comes with all the HTML code that makes a blog work. If you just want to use it for this purpose, or if you have only a limited knowledge of HTML, the default installation will allow you to set up a functioning website very quickly. You may perhaps want to make a few minor alterations to the HTML and the CSS, but this isn’t essential.Although Textpattern includes plenty of HTML code for you to use if you wish, it has the advantage over some content management systems of not requiring you to use any particular HTML code. The database functionality works independently of the HTML.This versatility is what makes Textpattern a fine content management system. But once you try to get much beyond the default settings, you will find that the official instructions are inadequate.
TextPattern Installation
Requirements:
Here are the server requirements needed to run Textpattern.
- PHP 4.3+
- MySQL 3.23+
- The PHP mysql extensions
- The PHP XML Extension
And here are the recommended settings,
- PHP 4.4.1+ or 5.0.2+, in mod_php or fastcgi mode
- MySQL 4.1.7+
- PHP extensions: mbstring, XML, Zlib
- Apache 1.3+ with mod_rewrite
- A Unix server OS with locale support
To start the installation, you should access the directory where you have uploaded the installation package via your web browser. A blank page with only one link pointing to the installation setup will load.

Alternatively you can access the setup directly via:
http://yourdomainname.com/textpattern_install_dir/textpattern/setup/
Where ‘yourdomainname.com’ is your actual domain name and ‘textpattern_install_dir’ is the sub-directory of public_html where you have uploaded the installation files.On the next page you can choose the default Language for the installation. Note that the language pack will be applied to the whole administrator backend as well as to the front end.

Choose the desired language from the drop down menu and click submit. For the purpose of this tutorial, we’ll choose English.
On the next page you should enter the database details for the new installation. Use the details for the database and the user you have already set up. Here is the data you need to enter:
- MySQL login – This is the MySQL username you have added with full privileges to the database.
- MySQL password – The password for the user you have created
- MySQL server – this should remain localhost
- MySQL database – The name of the database you have created for the installation.
- Table prefix – this field can remain empty (considering you are using a new database)
- Site URL – This should automatically get your actual site URL – the one you have used to access the installation.
Once you have entered the needed details you can click the Next button.
The next step will verify the database login details and if everything is in order, you will be provided with the content of the configuration file for the application. You should copy this content, then create the file config.php using it and place it as instructed by the installation. Once you are ready, click the “I did it” button.

Next you will be asked to set the administrative details for the installation. Fill in the fields and click Next.

This is all. The next page should display that the database tables were successfully created and populated. Also you will be provided with a Link to the administrative area for the application.

Create a Static Website Using Textpattern
Textpattern works by using a database, and this is what gives it its power and versatility. But you aren’t compelled to take advantage of all the things a database can do. You can use Textpattern simply to display a static website if you want.By learning how to convert a simple, static website into the Textpattern format, you will understand how the system’s building blocks work.
Static HTML to Textpattern
By converting a normal HTML page into a Textpattern page, and then creating a Textpattern section dedicated to that page, your original HTML page will become part of a database website.
This is how to do it:
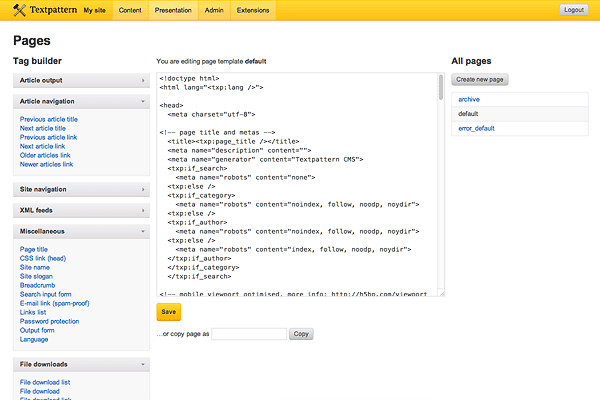
- Go to Presentation, then Pages
.
Create a new page by going to the box labelled Copy page as. Give it a name and click Copy.
- Take a static HTML page and paste it over the code on the Textpattern page.
- Click Save. Textpattern will not remind you to save your work.
- Go to Sections.
- Create a new section by writing the name of the new page in the uppermost box, and clicking Create.

- Scroll down the Sections screen until you find the name of your new section. Match the section to the page you have just created, by selecting the name of the page from the drop–down list labelled Uses page. For now, don’t worry about any of the other options.

- Click Save. Again, Textpattern will not remind you to save your work.
How Pages and Sections Link Together
A section is the primary structural unit of a Textpattern website. Each item in a website’s main navigation menu will normally be a section.The Textpattern page is a flexible template which contains the HTML code, the text, the links, and anything else that appears on the publicly–visible website.The Textpattern section is what anchors the Textpattern page to the database.
An Entire Website Using Textpattern
You can convert a static HTML website into Textpattern very simply:
- Make each static HTML page into a Textpattern page.
- Create a Textpattern section for each page
Linking the Pages
The only adjustment that’s needed is to change the links between the various pages from the standard HTML format to Textpattern’s database–friendly format.
So a link to a contact page would need to be changed from, say:
go to our <a href="contact.html">contact page</a>
to this, if you are using messy URLs:
go to our <a href="/?s=contact">contact page</a>
or this, if your web host allows you to use clean URLs:
go to our <a href="/contact/">contact page</a>
Textpattern URLs
The section name also appears in the URL:
http://www.mywebsite.com/contact/
You can select the type of URL that suits you by going to Admin then Preferences, and use the drop–down box by Permanent link mode:

The main Textpattern site contains information about clean and messy URL
Textpattern : Forms
Once you are able to create a static website with Textpattern’s pages and sections, you can move on to the feature of Textpattern that begins to exploit the power of databases: Textpattern forms.
What is a Textpattern Form?
Forget all about HTML forms such as contact forms. Textpattern forms are completely different.
Perhaps forms isn’t the best name for them. Other content management systems have similar features, and call them something like snippets or chunks.
Think of a Textpattern form as a versatile, self–contained unit of code or text.
Blocks of Code or Text
Most websites contain blocks of code or text, such as the navigation menu and the footer, that are identical on more than one page. Textpattern allows you to manage these self–contained blocks efficiently by placing each of them in a separate document, and automatically copying that document into each HTML page. This offers two benefits:
- Changing just one document is quicker and less prone to error than changing many identical copies.
- The total amount of code is usually reduced.
How to Use a Textpattern Form
To see how it works, go back to a Textpattern page that contains your complete HTML page. Let’s assume that the footer is the same on every HTML page of the website:
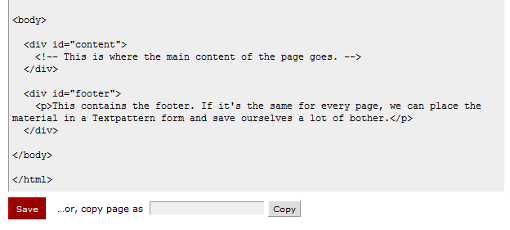
This is how to turn that footer into a Textpattern form:
- Cut the footer out of the Textpattern page.
- Go to Presentation, then Forms.
- Click Create new form.

- Paste the footer into the box.
- Below the box, give the footer a name, such as … well, ‘footer’.
- From the drop–down Type list, select misc. There are various types of Textpattern form, each of which is for use in certain situations. A standard chunk of code or text, such as a footer or a navigation menu, qualifies as a miscellaneous form.

- Click Save New. Textpattern will not remind you to save your work.
- Now we need to tell Textpattern to insert the footer in each page. Go to the area of the Textpattern page that was previously occupied by the footer, and add this piece of code:
<txp:output_form form="footer" /> - Click Save. Textpattern won’t remind … oh, you already know that.
This is how the Textpattern page looks now:

The Textpattern Form Tag
The Textpattern tag you have just used comes in two parts:
<txp:output_form />
This means: insert a Textpattern miscellaneous form here.form="footer"
This tells the software which form to use. If you don’t tell Textpattern which form to use, it will normally use the default form, which may or may not be what you want. It’s a good idea always to specify the name of the form.
Formatting
All Textpattern tags use XHTML formatting: everything is in lower–case, and there is a space before the closing slash. Feel free to use HTML 4 or HTML 5 in your website, but your Textpattern tags must follow the XHTML pattern.Several Textpattern tags, both built–in and generated through plug–ins, function as a shorthand way of placing code on a web page, and may produce XHTML code by default, although some will give you the option of specifying HTML formatting.
Textpattern Forms are Versatile
No matter how much material you have in your website’s footer, or how many HTML pages your website contains, all you need to do is place the same simple piece of code into each Textpattern page.You can use this technique anywhere in your website, wherever you have self–contained blocks of code that appear more than once. You can even place Textpattern forms inside other Textpattern forms.
Textpattern Backup
Creating a backup of your Textpattern installation includes 2 major steps. Backing up the Textpattern installation database and the web site files for it. Both steps are reviewed in details below.
Creating Textpattern Database Backup.
There are 2 possible ways to create the backup using the tools provided by FastWebHost. First of all you need to make sure which is the database used by your installation. This information can be acquired by checking the Textpattern configuration file. The file in question is in a sub-directory for your Textpattern installation:textpattern/config.phpNote that this is a folder named textpattern that resides inside the actual textpattern installation folder.The information that we need is the ‘db’ variable.
Here is a sample line that stores the needed information:$txpcfg[‘db’] = ‘user_sgtp’;In the particular case the database is ‘user_sgtp’. Note that user will be your cPanel username (all databases for your account will have this prefix) and sgtp is the actual name specified for the database when it was created. So in the particular case we need to create a backup for the user_sgtp database. As mentioned there are 2 ways to create the backup.1. Use the cPanel backup functionality. To do so, log in to cPanel for your account -> Backups.
Under Download a MySQL Database Backup all databases for your hosting account will be listed. Click on the database name and a download window will pop up. Use it to download and save the backup locally to your computer. This is the preferred option for creating the backup.2. You can also use cPanel -> phpMyAdmin in order to create the backup of the database. Detailed tutorial how to do so can be found here. Note that this option is less reliable and you might experience issues downloading larger databases via phpMyAdmin.
Creating Textpattern Website Files Backup.
Prior to downloading the web site files backup it is advisable to create an archive of the files. It is not a mandatory step but it helps for easier upload/download. Downloading a single archive file will be always faster than downloading all the files one by one.To create an archive of your textpattern installation files follow these steps:
- Login to cPanel for your account.
- Choose File Manager.
- Navigate to the installation directory (note that if the Textpattern CMS is accessible directly via your domain name the installation directory is public_html).
- You can use the ‘Select all’ button to select all files in the directory (it might be a good idea to exclude files and folders that are not from the installation. For example, other script installation sub-directories).
- Click the ‘Compress’ button. You will be asked for the directory where you would like the archive saved.
To download the backup of your Textpattern you can use either FTP client or cPanel -> File Manager. If you have stored it under the web root for your account you will be able to download the archive directly via HTTP download (pointing your web browser to the archive URL). Please note however that this is not recommended as it might be a major security issue.
Textpattern Plugins
In order to install additional plugins for the Textpattern CMS there are several steps you should take.First you need to log in with the administrative login details for the installation.Once logged in, navigate to the Admin tab and then click the plugins sub-tab.You need to copy the complete plugin source code and paste it in the text field, then click Upload. Note that the plugin installation code may be encrypted. This will not be a problem – the installer will properly parse it for you.On the page that loads you will be provided with the complete plugin code as well as the help available for it. Then you need to click install. The plugin will be automatically added to your application.Note that once the plugin is installed, you will need to activate it. This can be done by clicking ‘No’ under Active for the plugin. This will change the status to yes and the plugin will be active for your web site.
Textpattern Template
The textpattern template installation is generally a straight-forward process. However, there are at least several steps that need to be accomplished. There is no automatic installer available and each step should be performed separately. Each Textpattern template includes a file with detailed instructions how exactly to perform the installation. In all cases you need to follow those instructions.Here is a general overview what the template installation procedure includes.
Step 1. First of all, it is imperative to create a backup of your TextPattern web site. Both the files and the database should be backed up in case anything goes wrong.
Step 2. Download the desired template and extract it locally on your computer (most commonly the template installation files will come in an archive). By default the extracted folder will contain a file named “Instructions” where the exact steps needed to install the template are provided.
Each of the following 4 steps are accomplished via the functionality provided under the TextPattern admin area -> Presentation. This is where the look and feel of the site is adjusted.
Step 3. You will need to edit or add new Pages to the current installation.
Step 4. You will need to edit the existing or add new Forms.
Step 5. Also you will need to make similar modifications under Style.
Step 6. Finally you will have to create new sections or edit the options for existing ones.
You might also need to:
Step 7. Install new custom plugins needed for the template to work properly.
Step 8. Copy over images from the template installation package under your TextPattern installation. You will need to upload those via FTP or cPanel -> File Manager.
Those are the standard steps that you will need to take in order to install a TextPattern template. Note that one or more of those steps might not be included. This depends on the template you are installing.
Textpattern : Categories
Articles, Sections and Categories
A Textpattern article is located in the structure of the website by being assigned to a section.
There is not, however, always a direct correlation between an article’s subject matter and the section to which it is assigned. There may be occasions when you want to organise articles other than according to their sections:
- It may be necessary for the purposes of a particular website for articles within the same section to be sorted or grouped according to their subject matter.
- It may also be necessary to sort or group articles from different sections that have the same subject matter.
The Textpattern category feature allows you to do this.
Using Categories
Take the example of www.crawleysussex.co.uk. The bulk of this website consists of an online directory of businesses and other organisations based in and around Crawley in Sussex.
The directory itself comprises one section of the website. Within this section, the material is classified by category. Each entry in the directory is categorised by its type, such as butcher, baker or candlestickmaker (not many of those), and by its location.
The Textpattern category feature allows this one Textpattern page to act as a template for three types of HTML page:
- a section landing page which includes a list of categories;
- landing pages for each category, listing the entries that fall into each category;
- individual pages for each business or other organisation.
Categorising Articles
Textpattern’s default installation allows you to place each article in up to two categories.
The first thing to do is to create the categories. Go to Content then Categories. Several types of category are available. We need the type that applies to articles:

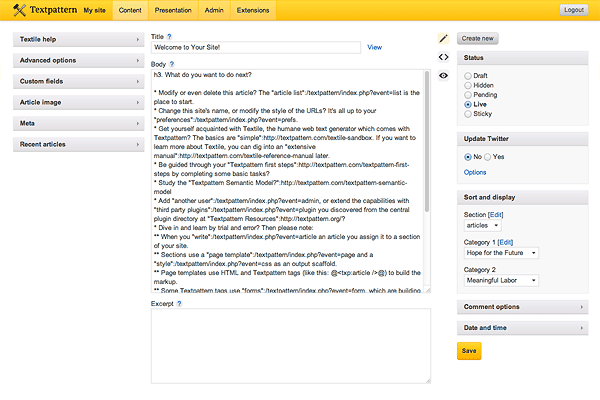
Write the name of the category in the box, and click Create. The categories you create will then be visible in drop–down boxes on the Write page. Simply select the category or categories which apply to that article:

Unlimited Categories Plug–In
In practice, two categories will not always be enough. You will usually find that you need either none or a lot more than two. Fortunately, there is an excellent plug–in that allows you to create an unlimited number of categories. It is called rss_unlimited_categories, and is available from the author’s website and the main Textpattern plug–in depository.
Categories and Landing Pages
By default, a Textpattern page will function as an HTML landing page, and display a list of all the articles assigned to the section which applies to that page.
We have seen how you can change the default settings so that the landing page displays a limited number of articles from that section, or displays articles from another section.
You can also change the default settings so that the landing page displays articles according to their category. To do so, you need to use this conditional statement:
<txp:if_category>
<!-- category–specific landing page code goes here -->
<txp:else />
<!-- non–category–specific landing page code here -->
</txp:if_category>
This is what the code tells Textpattern to do:
<txp:if_category>
This means: if the visitor has landed here by activating a link to a category, use the following code to display the articles according to their categories.<txp:else />
This means: if the visitor has not landed here by activating a link to a category, use the following code to display the articles in the normal way.</txp:if_category>
This is simply the end of the conditional statement.
Landing Page by Category Only
If the landing page is to display the articles only according to their category, you still need to use the conditional statement. Just leave the second area blank:
<txp:if_category>
<!-- category–specific landing page code goes here -->
<txp:else />
</txp:if_category>
Landing Page and Individual Article Page
If you want the Textpattern page also to display individual article pages, you will need to surround the code for the landing page with the standard conditional statements:
<txp:if_article_list>
<txp:if_category>
<txp:else />
</txp:if_category>
</txp:if_article_list>
<txp:if_individual_article>
</txp:if_individual_article>
Of course, if you have any Textpattern or HTML code that applies to both the category and non–category versions of the landing page, it can be placed outside the category conditional statements:
<txp:if_article_list>
<txp:output_form form="meta_data">
<txp:if_category>
<txp:else />
</txp:if_category>
<txp:output_form form="nav">
<txp:output_form form="footer">
</txp:if_article_list>
Or like this:
<txp:output_form form="meta_data">
<txp:if_article_list>
<txp:if_category>
<txp:else />
</txp:if_category>
</txp:if_article_list>
<txp:if_individual_article>
</txp:if_individual_article>
<txp:output_form form="nav">
<txp:output_form form="footer">
Category Tags
The conditional statement tags are the same whether you are using Textpattern’s two categories or the rss_unlimited_categories plug–in. The category–specific code, however, may differ. The various category tags that apply to the default installation are given on the Textpattern tag website.
Advantages
– It provides better information management than other CMS
– Textpattern is a better CMS for programmers
– The plugins provided here are flexible with customizable
– SEO improvement possibilities are vast with better content display mechanisms.
Disadvantages
– No concept of portable themes
– Links and files are poorly developed
– Auto-updates, code highlighting and other perks are less considered for simplicity
-Textpattern is a web application designed to help overcome the hurdles to publishing online, and to simplify the production of well-structured, standards-compliant web pages.
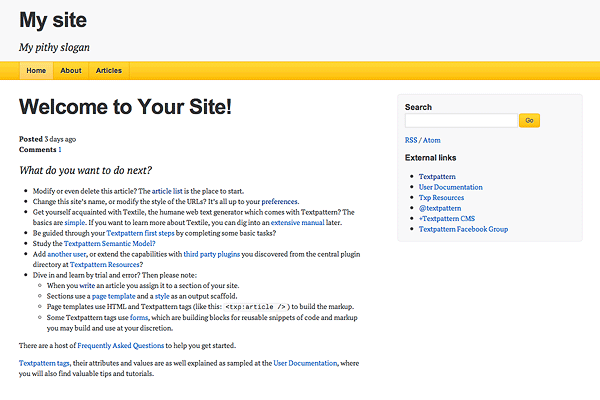
Welcome Page
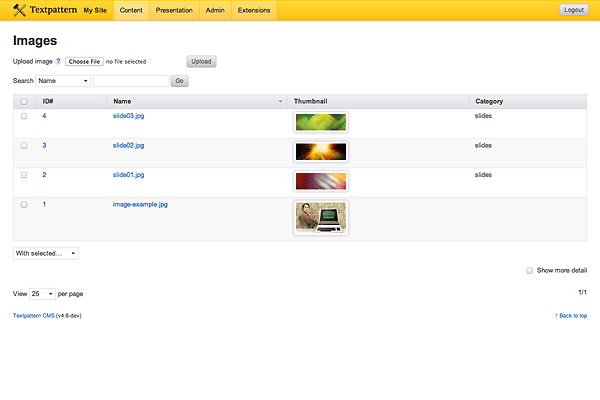
Upload Images
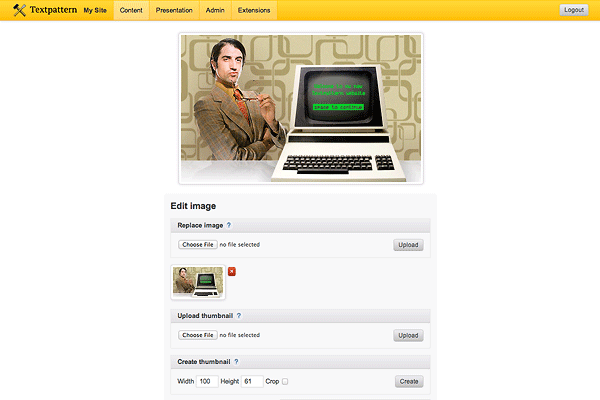
Edit Image
Pages
Textpattern is a flexible, elegant and easy-to-use content management system. It is both free and open source.Textpattern is released under the GNU/GPL license.
–
Features
Features of Textpattern
- Based on PHP, MySQL and jQuery.
- Corporate webs, personal blogs…
- Ideal for developers, designers, publications and bloggers.
- Flexible and expandable by means of plug-ins.
- Advanced tagging system.
- Protect articles with a password.
- Protection against SPAM.
- SEO optimisation.
- Import contents from other CMS programs.
Major Features of Textpattern
- Quick conversion of plain text to valid XHTML with Textile
- Quickly search old articles by keyword
- Up-to-the-minute visitor/referrer logs
- Browser-based template and CSS editing
- Unlimited site sections
- Unlimited article, link, file and image categories
- Browser-based file and image upload & organization
- Fast intuitive editing of articles, links, comments, page elements
- Posting, editing & design privileges hierarchy
- Unlimited site authors
- Browser-based plugin installation and maintenance
- Import content from other content management systems
Publishing Features
- Built-in search engine
- Visitors can subscribe to custom article and link XML feeds
- Browse categories and sections via popup or link list
- Adjustable date/time stamps on articles
- Articles can be set to appear at future date/time
- Comments are accepted on a per-article basis
- Comments may be closed after a fixed time or on the fly
- Password-protect site sections, or even specific articles
Videos
Textpattern Installation on a Nexcess Hosting Account


