1-click AWS Deployment 1-click Azure Deployment
Overview
PyroCMS is a content management system that, in recent months, has been growing in popularity, due to its intuitive back-end design and lightweight, modular architecture. Described as “a simple, flexible, community driven content management system,” PyroCMS is easy to learn, understand, and own.
Why PyroCMS?
In fact, PyroCMS is built using modular MVC, which means (in short) that each part of the system is its own micro-instance of MVC. This allows the system to be more flexible and cleanly organized than other CMS platforms. PyroCMS describes itself as a simple, flexible, community driven content management system.” And because PyroCMS is powered by CodeIgniter (at least for a bit longer, while the team migrates over to a Laravel backend), it is easy to learn, understand, and own.While it isn’t necessary for you to know the definition of modular MVC to use PyroCMS, it’s a good idea to brush up on what it refers to, before you build an add-on for PyroCMS.

Who Develops PyroCMS?
The core developers of PyroCMS are Adam Fairholm, Jerel Unruh, Phil Sturgeon, and Joshua Pekera, all of whom make frequent contributions to the project. If you’ve worked with CodeIgniter in the past, you’ve likely run across Phil Sturgeon’s name before. He’s authored a number of very useful libraries for CodeIgniter, including a RESTful server implementation, CodeIgniter-cURL, a popular template library for CodeIgniter, and CodeIgniter oAuth solutions.In similar fashion, Jerel Unruh wrote some of the largest components of PyroCMS, including the Multi-site Manager, a part of PyroCMS Professional that allows site admins to create, delete, and manage entire websites for their clients from a single interface.Needless to say, PyroCMS is in very good hands.Beyond the contributions of its core developers, PyroCMS has grown rapidly to be translated into more than 22 languages and accepted code from over 120 contributors. It is a growing open-source project!
Why Consider PyroCMS For Your Next Project?
There are a number of features that make PyroCMS a very viable option for your new website project. They include, but are not limited to:
Modular MVC
Module MVC is about taking a large project and breaking it down into many smaller, manageable pieces, with each piece of that large project becoming, itself, an instance of MVC. Having this programming pattern at your disposal makes PyroCMS very powerful and highly organized. If you’ve already downloaded PyroCMS, take a look in this directory:
|
1
|
[site_dir]/system/cms/modules/ |
If you haven’t yet installed PyroCMS, what you’ll find within this directory is every part of the core system broken down into a module. This same architecture is also used for system add-ons, and is a big part of what makes PyroCMS so easy to work with.
Control over navigation menus, email templates, and 301 redirects
In the PyroCMS control panel, admin users have the ability to build custom menus/navigation and email templates for use by the system, including add-ons. Admin users can also manage 301 redirects, using the built-in Redirects module.
Easy theme development
This particular part of the system is too large a topic to address in this introduction to PyroCMS, but building a theme in PyroCMS is easier than it is to do in WordPress and other systems, which leads to time savings. At the core of how PyroCMS outputs data is the Lex tag parser. For designers and front-end developers, tags are a simple syntax to display content and perform basic logic operations. For developers, tags are the way in which you can get your data into layouts.
Mobile device detection
A nice feature of PyroCMS is its ability to easily display separate layouts for mobile. As part of a theme, you simply place your mobile layout into a separate folder than your default web layouts. That separation is highlighted in the following examples:
Your default layout would be in a template folder, like this:
|
1
|
your-theme/views/web/layouts/default.html |
While your mobile layout would be in a template folder, such as:
|
1
|
your-theme/views/mobile/layouts/default.html |
Module view over-loading
Don’t like that default theme layout for the blog module in PyroCMS? Hate the way the comments are output by the system? No problem. You can customize them anyway you wish by overloading the views associated with those modules. PyroCMS allows you to replace any module view with a view inside your theme. Simply copy:
|
1
|
system/cms/modules/blog/views/posts.php |
to:
|
1
|
addons/[site-ref]/themes/[theme-name]/views/modules/blog/posts.php |
Once this view file is in your theme, you can edit it however you like to get the design you desire.
Blog
A blog module comes packaged by default in PyroCMS. Included, if you need it, is Akismet integration to help control spam comments.
Analytics, Akismet, Storage Provider (Amazon S3 and Rackspace), SMTP, and Twitter Integration
Out of the box, PyroCMS plays quite nicely with other services. The files module, for example, offers built-in support for cloud file providers, such as Amazon S3 and Rackspace. You can place a Twitter stream on a page using the included Twitter widget, and even send email from your site using SMTP.
PyroCMS is easy to extend
The most exciting feature of PyroCMS is how easy it is to extend. Building an add-on for PyroCMS is incredibly simple, when compared to other platforms. Part of its easy-going nature is that you’re working in modular MVC. Also, a module add-on contains a “details.php” that has all of the “meta-data” and installation instructions for the module. Adding a module is as simple as adding a new folder within the “addons” folder, and taking advantage of CodeIgniter. You can learn more about building addons for PyroCMS in the developer docs.
How to Get Started Using PyroCMS
PyroCMS comes in two different versions: a free community version and a professional version. The differences between the two are few, but include some powerful features. The professional version includes PyroStreams (a module that lets you build custom data streams for your site), a multi-site manager, and more. If you are just starting out, though, you can use the community version of PyroCMS. It’s a great choice for small to medium sized websites.
You can download PyroCMS from their website.

After you’ve downloaded and unzipped the PyroCMS files into your web root, loading the project in a browser for the first time will bring you to the PyroCMS installer. The installer will guide you through the steps necessary to install PyroCMS, including checking your server for the required software. Check out the server requirements page for a detailed list of what you’ll need. The installer, itself, supports multiple languages and can get you off the ground with PyroCMS very quickly.
How to Create a PyroCMS Theme
Like most content management systems, PyroCMS uses front-end themes. Though PyroCMS themes are built a bit differently than what you might be used to from other systems, they’re still quite easy to create. They’re so easy, in fact, that very little PHP experience is required to assemble them!
The Folder Structure
PyroCMS themes consist of HTML, images, CSS, and JavaScript, arranged into the following supported folders:
- css
- img
- js
- views
- views/layouts
- views/partials
- views/modules
While these folders will no doubt look familiar to you, the “views” folder makes the most sense within the context of MVC. When building a theme for PyroCMS, you are really building the views (including assets) of a MVC patterned application. These views consist of a master layout file and multiple partial files (i.e. a header.html or footer.html) that shares presentation logic between different layouts. We’ll discuss this more shortly.
Getting Started
To get started building your first PyroCMS theme, create the supported folder structure in one of the two places that themes may reside within an instance of PyroCMS:
|
1
|
addons/shared_addons/themes (for themes available to all sites) |
Or:
|
1
|
addons/[site-name]/themes (for themes available to only one specific site) |
Once you have the base theme folder containing the supported folder structure created, the first file that you’ll want to add to your theme is theme.php.
|
1
|
addons/shared_addons/themes/[my-theme-name]/theme.php |
This theme.php file contains all essential details for your theme, including its name, author, version, etc. In a way, this file is similar to the comment block found at the top of a WordPress theme’s style.css file. Here’s a basic example of a theme.php file for your PyroCMS theme:
|
01
02
03
04
05
06
07
08
09
10
11
12
13
|
<?php defined('BASEPATH') OR exit('No direct script access allowed');class Theme_Foo extends Theme{ public $name = 'Foo'; public $author = 'Zac Vineyard'; public $author_website = 'http://zacvineyard.com'; public $website = 'http://example.com/themes/foo'; public $description = 'The antithesis theme to your Bar theme.'; public $version = '1.0';} /* End of file theme.php */ |
Please take note that this file extends a PyroCMS class, called Theme. Also, because you are declaring a PHP class in this file, you’ll need to make sure that the name of the folder containing your theme is used in the class declaration. So, if the folder housing your theme is called, “foo,” the class created in your theme.php should be named, Theme_Foo (instead of Theme_Custom, as shown in the example within PyroCMS’ documentation).
Once you have created your theme.php file, you can login to your PyroCMS control panel and view your theme listed in the Themes module.

All layouts files for a PyroCMS theme exist in one of two locations:
|
1
|
addons/[site-ref]/themes/[my-theme-name]/views/layouts/ |
Or:
|
1
|
addons/shared_addons/themes/[my-theme-name]/views/layouts/ |
Every theme should have a layout file, named “default.html” in one of the locations listed above. Additional layout files are optional; I’ll show you how to add more layout files in a moment. First, it’s important to review the contents of a layout file.
Layout files in PyroCMS are built using HTML and a tag parser, referred to as the Lex Tag Parser. This is what a very basic PyroCMS layout file looks like:
|
01
02
03
04
05
06
07
08
09
10
11
|
<!DOCTYPE html><html><head> <title>{{ template:title }}</title> {{ template:metadata }}</head><body> <h1>{{ template:title }}</h1> {{ template:body }}</body></html> |
The special tags you see in this bit of HTML are Lex parser tags. If you’ve ever used Smarty templates in PHP, these may look somewhat familiar. The primary benefit to using Lex parser tags in your layout files is that you don’t have to put PHP directly in your views (remember, we’re using MVC), which gives you the best chance of creating PyroCMS themes that follow the don’t repeat yourself pattern.
The example that I’ve given above is simple, of course, but Lex parser tags are quite powerful. They can loop through data, work with attributes, and more.
A more complex PyroCMS layout file looks like this:
|
01
02
03
04
05
06
07
08
09
10
11
12
13
14
15
16
17
18
19
20
21
22
23
24
|
<!DOCTYPE html><html><head> <title>{{ template:title }}</title> {{ template:metadata }} {{ theme:favicon file="favicon.png" }} {{ theme:css file="style.css" }} {{ theme:js file="site.js" }}</head><body> <div class="header"> <div class="logo"> {{ theme:image file="logo.jpg" alt="Your Cool Logo" }} </div> <div class="nav"> {{ navigation:links group="header" }} </div> </div> <div class="content"> <h1>{{ template:title }}</h1> {{ template:body }} </div></body></html> |
You’ll notice that this layout file, using Lex, includes assets, like CSS, JavaScript, and images. Using Lex tags and HTML allows PyroCMS developers to build layout files very quickly.
Partials
Partials in PyroCMS, which stands for partial layouts, allows you to break layouts into reusable parts or sections. These sections can then be loaded by different layout files. This keeps you from typing the same code (header, footer, etc.) into multiple layout files.
Depending on where you’ve placed your theme files, partials are created in one of two locations:
|
1
|
addons/[site-ref]/themes/[my-theme-name]/views/partials/ |
Or:
|
1
|
addons/shared_addons/themes/[my-theme-name]/views/partials/ |
Partials are loaded into layouts using this Lex tag:
|
1
|
{{ theme:partial name="partialname" }} |
This Lex tag operates exactly like a PHP include statement – similar to one that you would find in WordPress or other themes. The code below is a simple example of a PyroCMS layout that takes advantage of partials.
|
1
2
3
4
5
6
7
8
|
{{ theme:partial name="header" }} <div class="content"> <h1>{{ template:title }}</h1> {{ template:body }} </div>{{ theme:partial name="footer" }} |
The contents of the header.html partial and footer.html files are, of course, the HTML we’ll need to reuse from the template in our previous code example above. One quick pointer: there is no limit to the number of partials that you can use in one layout. Additionally, partial files may contain any combination of valid HTML and Lex.
Multiple Layout Files
To add another layout to your instance of PyroCMS, create one more layout file in your theme’s views/layouts/ directory. This file may receive any name, but it’s a good idea to name it as descriptively as possible – like about.html.
For added flexibility, you can make use of as many layout files as you’d like. When you edit or create a Page Type in your PyroCMS control panel (Control Panel→Pages→Page Types) and select your desired file from the dropdown, all the layouts in your theme’s layout file will be available to use.

Mobile Layouts
PyroCMS is able to easily display separate layouts for mobile and desktops. To use this feature, move your layout files into a folder, called “web” within the views folder, so that your default layout will be located here:
|
1
|
[your-theme]/views/web/layouts/default.html |
When a user accesses your site using a desktop browser, the primary layout files in this location will be used. If the user accesses your site using a mobile device browser, users will be supplied with the mobile layouts that you’ve created in this location:
|
1
|
[your-theme]/views/mobile/layouts/default.html |
This feature works with multiple layout files.
Please take note of this warning found in the PyroCMS documentation: “PyroCMS does not consider the iPad a mobile device, so it will not load your mobile layouts if the user is accessing your site using an iPad.” If, however, on your site, you’d like to make an iPad recognized as a mobile device, you can change the “user_agent.php” file within the config/ directory to make the iPad recognized a mobile device.
The Control Panel
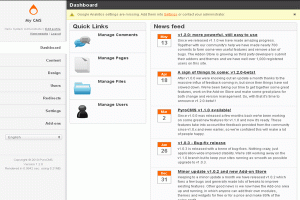
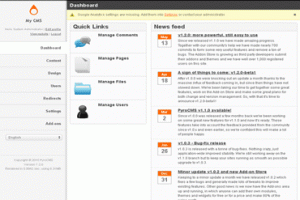
The control panel is where you (and your clients) will log in to manage your site. Pyro’s control panel is designed to be simple and intuitive. Below is an overview of what you’ll see on the back end.
Logging in
To log into your control panel, go to yoursite.com/admin. Enter your email address and password, and you should be good to go!

The PyroCMS Interface

The PyroCMS is designed to be simple and clear. On the top of the screen, you have the main menu, which is where you’ll find links to various
The CP Menu
Your entire control panel can be accessed from the top black navigation bar. The items with vary depending on which sections you have access to (you’re the administrator? that’s everything). It’s divided into the following sections:
| Section | About |
|---|---|
| Content | Modules that deal with your site’s content. You can find the pages, widgets, uploaded files and blog modules in here, among others. |
| Structure | Contains controls for structural elements like navigation, redirects, and email templates. |
| Data | Contains controls for shared data on your site, like keywords and variables. |
| Users | Controls for users, groups, and permissions. |
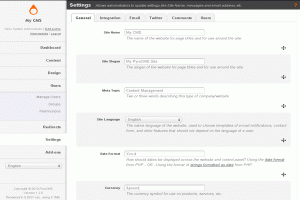
| Settings | This section holds settings for the entire site, from the site name to language preferences. Individual module preferences are editable here as well. |
| Add-ons | Contains areas to view a list of currently installed modules, field types, plugin, themes, and widgets. This is where you control which theme is being used on your site, as well as where you can install and upgrade modules. |
| Profile | View your details or change your password. The option to log out is also located on this menu. |
Changing the Default Language
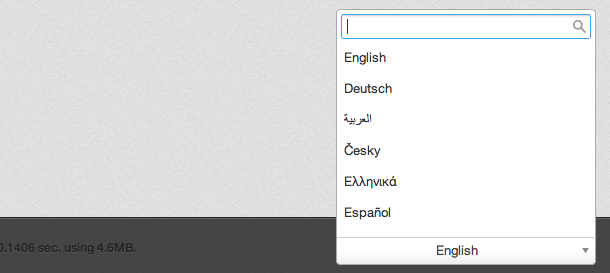
PyroCMS comes in many different languages, and to change the language (English, by default), choose a new language from the menu on the right hand side of the footer:
Plugins
Plugins are the simplest type of add-on in PyroCMS, but they are at the core of how you access functionality via tags.
Example Usage
Let’s take the user plugin, which is a part of the user module.Each plugin has a name by which we reference it in the tags. For example, the format plugin’s variables and functions can be referenced with format:foo. So, you can use the markdown’s format function like this:
{{ format:markdown }}Let's _convert_ this to **HTML**.{{ /format:markdown }}
Genreally, whenever you are using tags in PyroCMS, you are interfacing with a plugin. To get familiar with the tag syntax in PyroCMS, check out the tags guide.
Installing Plugins
Plugins have no installation procedure. Just upload them to addons/shared_addons/plugins_ or _addons/[site-ref]/plugins and use the tag in your layouts!You can see which plugins you have available to you by going to Add-ons → Plugins in the PyroCMS admin.
Widgets
Widgets are little chunks of code that are each designed to do a very specific thing. You can use them by creating widget “instances” and the and then adding that instance to your template code with PyroCMS tags.
Using Widgets
If you go to the Add-ons → Widgets section of the control panel, you’ll see a list of widgets that are available to use.
To use those widgets, head on over to the Content → Widgets section, where you can creat widget instances and widget areas.
Widget Instances
Widgets store configuration values that you enter on the back end, and a collection of those configuration values is an instance. For example, when you set up an instance of a Google Maps widget, you set what size you want the map, what the map should show, etc. That instance is the re-usable.
Widget Areas
Widget areas are simply groups of widget instances. So, for example, you can have an area of widgets for your blog sidebar that you can arrange in the order that you’d like. Then, that area can be added using a simple tag syntax:
{{ widgets:area slug="sidebar" }}
Setting Up Widgets
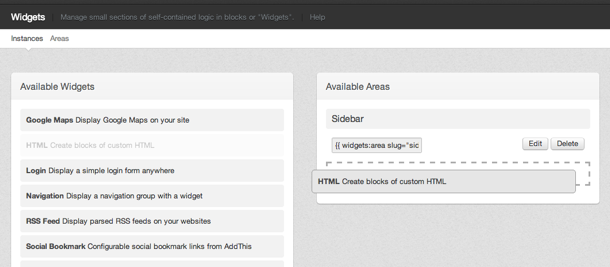
The widgets interface has two separate seections: the available widgets on the left, and the widget areas on the right. To create a new area, go into the Area section.
To add a new widget instance to an area, drag it under the area until you see a dotted line area where you can drog the widget.
Then, some configuration form inputs should appear.
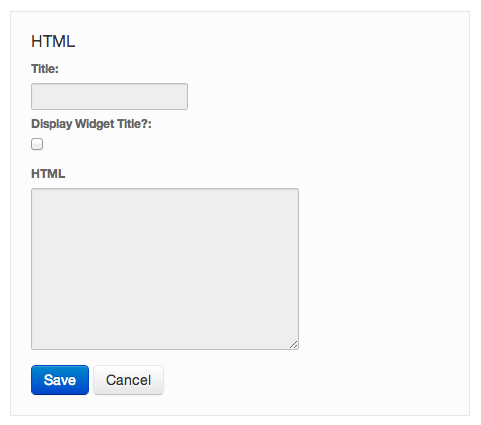
Fill those out, and you’ve got a widget instance!

Using Widget Instances Individually
Once you create an instance, you can use it in your template by specifying the instance id, even if that instance is in a widget area:
{{ widgets:instance id="6"}}Overloading Module Views
PyroCMS is written intended to be styled mainly by CSS, but as designers you want full control over how your site looks. We understand that, so PyroCMS will let you replace any module view with a view inside your theme. Let’s say you want to replace the main blog listing page. Simply copy:
system/cms/modules/blog/views/posts.php
to:
addons/[site-ref]/themes/<theme-name>/views/modules/blog/posts.php
If you wanted to overload an admin view you would do it like so:
addons/[site-ref]/themes/<theme-name>/views/admin/modules/blog/admin/form.php
Now you can edit that view however you like and upgrade PyroCMS knowing your customized views are safe.
Syntax in overloaded views
You can still use PHP in these overloaded views. This means you can just copy whatever is there exactly and change it. In later versions we may be removing this as there is always the possibility that themes can contain malicious PHP if downloaded from a third-party site, but we will likely make this a setting.Either way, you can use Tag syntax and this is most likely the safest, but can be more complicated for converting.
PyroCMS Folder Structure
PyroCMS only has three root-level folders with its default install (once you delete the installer folder), so it’s important to know what each does.
/addons/
All extra modules, plugins, widgets, and themes you add to PyroCMS go here in their respective folders. However, inside /addons/ there will be at least two folders:
- default (most likely)
- shared_addons
Since PyroCMS Pro is multi-site enabled, even single install of PyroCMS get its own slug (also used as a prefix for all your MySQL database table names). Although PyroCMS Community is not multi-site enabled, it still needs an identifier. The default identifier is default, which is why PyroCMS creates a folder named default in the addons folder.
PyroCMS Community Edition users: put your add-ons in either folder – PyroCMS will look in both.
PyroCMS Pro users: all add-ons you wish to be available to all sites go in your shared_addons folder. Add-ons that only belong to specific sites can go in their respective folder (matching the site slug) created on installation of the site.
/assets/
This is where your cached assets (JS, CSS, etc) are stored so they are web accessible.
/system/
The system folder contains two main things: a copy of CodeIgniter (the PHP framework that PyroCMS runs on) and PyroCMS itself. You will most likely never have to go inside this folder, but there are two files you should know:
/system/cms/config/database.php
When PyroCMS installs, it will create this file for you with your MySQL credentials. However, if you want to change this data or add another environment, you’ll need to edit this file.
/system/cms/config/config.php
The CodeIgniter application config file has a whole lot of items you’ll never need to touch. In fact, PyroCMS automatically sets your base url so you may never need to look at this file and be fine!
However, if you began without mod_rewriting URLs (i.e. with index.php still in them), and you want to remove index.php from links later on, you can remove that easily by finding:
$config['index_page'] = 'index.php';
and changing it to:
$config['index_page'] = '';PYROCMS PROS
·Updated Regularly
·Easy to Manage
Efficient Coding
PYROCMS CONS
· Some Coding Knowledge Needed
·Limited Official Plugins
-PyroCMS is an open source, object oriented content management system built using PHP5 andCodeIgniter. PyroCMS is easy to use, looks great and uses some smart caching to keep everything running smoothly. It can be easily extended with Modules, Widgets, and Plugins which are easy to make; and it can be customized with Themes, which are basic HTML with a few tags in place.
Login
Home
Dashboard
Setting
Quick links
Features
Features of PyroCMS:
1.Initial Setup
If you’re just looking for a generic installation of PyroCMS then you can use the one-click installation option that is included with all of our hosting packages. Getting everything up and working properly is very easy compared to many other options, and won’t take you very long. There are some settings available that you can adjust as needed, but most things are fine by default.
2.Plugins
You can find plugins to do most of the different things you will want your site to do. Unfortunately, the plugins are not available directly through the PyroCMS website, which can make it somewhat more difficult to find what you need. Since this platform is made with PHP, however, there are quite a few third party developers who can create anything that you might need without too much cost.
3.Themes
Just like plugins, there are no themes available directly through their website. Instead you will need to go to other theme sites, many of which will have multiple different theme options to choose. Installing themes is quite simple with this CMS, which makes it easier for those with less experience.
4.Customization
You can customize just about every aspect of PyroCMS, but in order to do so you may need to have some basic coding experience. Knowledge of HTML, CSS and PHP will be very helpful, though you certainly don’t need to have anything more than a basic understanding of how to use simple commands. Even without any real understanding of coding you can still make quite a few customizations using just the built in settings, plugins and themes available for this platform.
5.SEO Friendly
By default PyroCMS has all the basic on-site SEO most people will want. Things like ‘pretty links’ and internal linking structure are all done automatically so you don’t need to worry about it. If there is a specific SEO strategy you have in mind, the chances are you will be able to find a good plugin to take care of it for you. While not the best CMS for SEO, it is certainly good enough to meet the needs of most webmasters.
6.Cost of Running
PyroCMS is completely free to download, install and use for as long as you would like. All the updates are also completely free. The plugins and themes are all made by third parties so some may have a premium cost, but most of what I’ve seen available are also free. Since this platform operates quite efficiently, you can use a normal shared hosting package for most types of sites. Even larger sites can run well without requiring a high end hosting package.
-Major Features of PyroCMS
- SECURE: With Cross-Site Request Forgery protection, XSS filtering and very secure password encryption your website is safe with PyroCMS.
- FAST: Advanced caching system and the use of AJAX in the admin panel, page loads are much quicker than other CMS systems around.
- SIMPLE: PyroCMS’s admin panel isn’t cluttered with options and menus. Confusing options and settings don’t obscure the tools you need to fully manage your content.
- THEMES: The theme system is so easy to understand that everybody with basic PHP knowledge can create kickass designs for the sites.
- MULTI-LINGUAL: It has full support for multiple languages so your users and administrations can see the site in French, German, Spanish, Chinese, Polish and many more.
- INTEGRATION: Easily enable Google Analytics with your Analytics ID, check for spam without a captcha using Akismet and post your news to Twitter. PyroCMS will make it easy for you to interface with other websites.
Videos
How to use PyroCMS
PyroCMS Module Generator

