
Overview
PixelPost is a very simple yet powerful photoblog application that can help you post your images in a very easy and attractive way. If you are a photoblogger and want to start your own website to exhibit your works world-wide, then PixelPost is the right tool for you.PixelPost does not require any technical skills for installation. It is an ideal software for people wanting to regularly update their photos and images on the web. PixelPost is not a comprehensive full-fledged content management system or a text blog but looks to simplify the process of setting up photoblog in an efficient manner. It is an open source multi-lingual extensible software application and requires the users to have PHP4.3 or higher and MySQL 3.23 or greater versions.
PixelPost has a smooth install process and also allows the users an easy way to upgrade and comes with features that make uploading photos more fun. It allows users to tag and describe photos giving the visitors an enhanced browsing experience. It offers a very effective spam filtering solution as a safety and security addon. RSS feed is generated and customized as per the requirements of the users.
PixelPost offers multi-lingual capabilities, has comments features that allows the visitors to post their views and mark as favorites and allows tagging and descriptions. It has a wide range of templates and add-ons that can extend the available features more efficiently. The latest version of PixelPost is the 1.7.3 and the application was last developed in September 2009.
PixelPost Manual Installation
Here we are going to learn how to install PixelPost manually. There a few things that you should prepare before starting the process.First you must create a MySQL database. You can easily do this via your cPanel > MySQL Database Wizard. The second thing you will need to do is download the PixelPost script. You can do this from their official website at:https://www.pixelpost.org/
Once you have downloaded the archive, upload the archive content in your hosting account. If you want to access your website using https://yourdomain.com upload the files in the /public_html/ directory of your account. If you prefer to access the site using https://yourdomain.com/blog/ you should upload the files in /public_html/blog/ . You can easily upload the files using FTP client. In our case we have uploaded the files in the public_html directory. To start the install process go to:https://yourdomain.com/admin/install.php
This will bring the welcome page of the installation process:
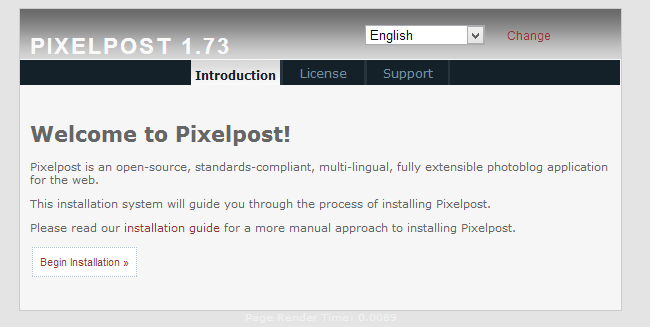
Proceed to the next step. PixelPost will make sure that all server requirements to run the script are met:
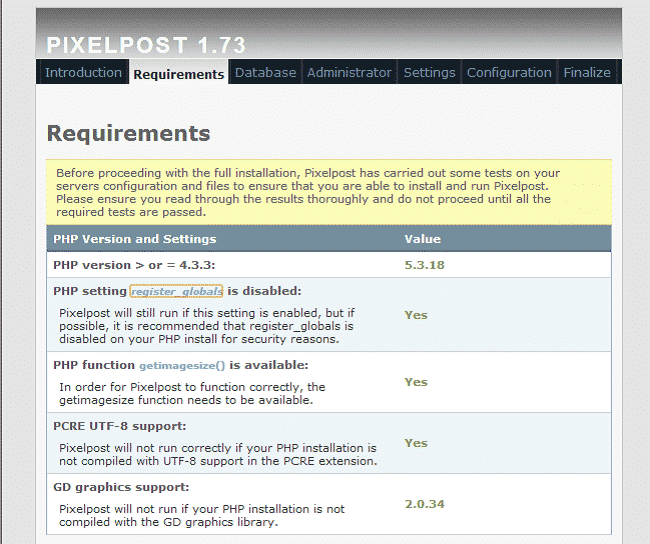
Click the “Begin Installation” button to proceed. On the next page you will need to enter the MySQL Database information that you have created:
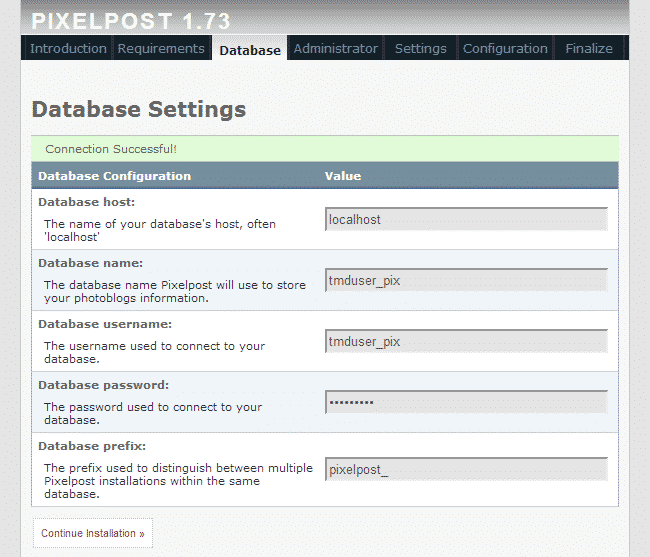
When you have filled in all the data, test the connection by clicking the “Test Connection”. Once the script has indicated that the connection is successful, click on the “Continue Installation” button. On the next page setup your administrative account:
Administrator username
Administrator password
Contact Email address – make sure to use a valid email address as you might need it later
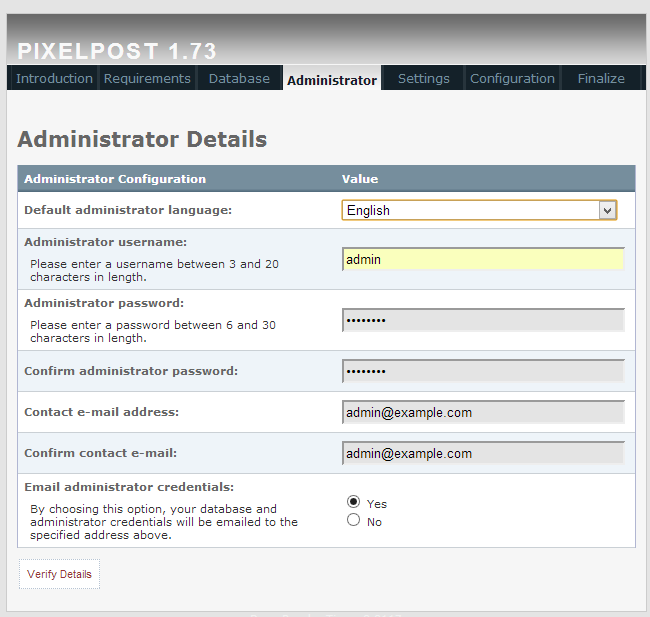
Click the “Verify Details” button to proceed. On the next page setup your site details:
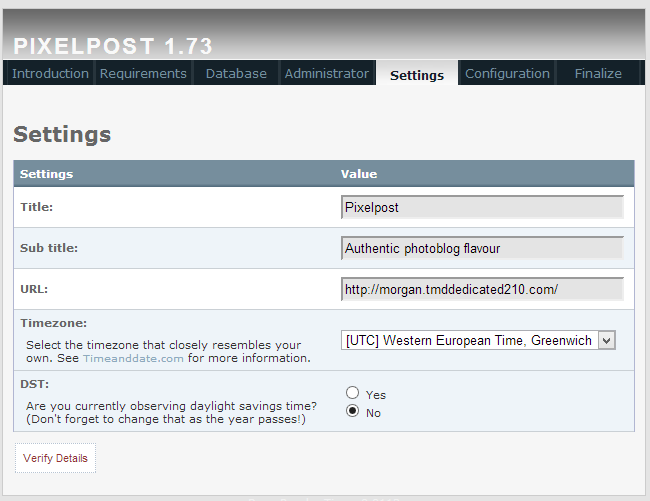
On the next page make sure that all requirements are met and click the “Continue Installation” button:
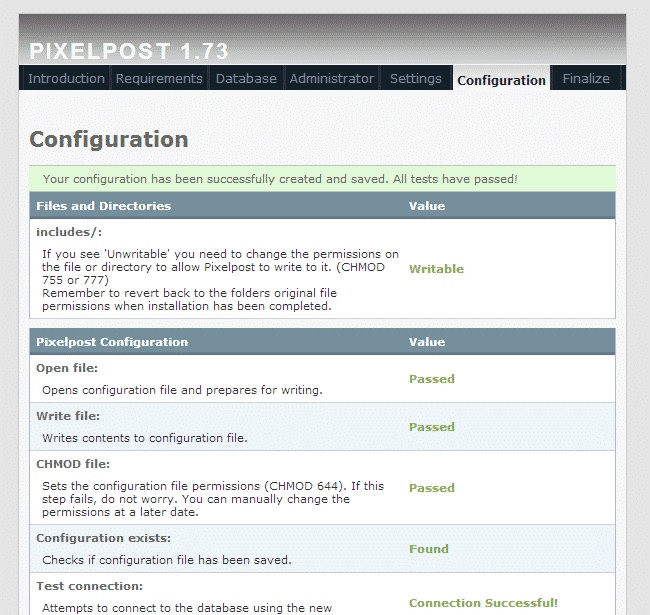
Wait for the script to finalize the installation. Once all the content has been created click the “Finish Installation” button:

You can now access your PixelPost website.
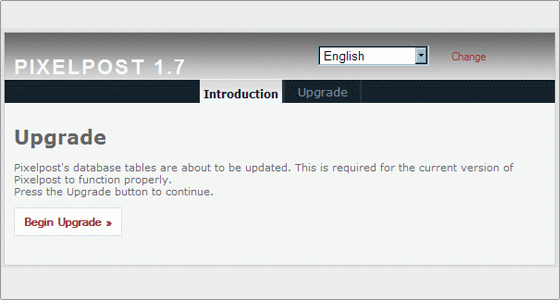
Before you start upgrading your PixelPost website, make sure you create a backup. Next, you have to download the installation package of the new PixelPost version from the official website(http://www.pixelpost.org/) of the application. Then extract it in a folder in your local hard drive. Once you do that remove the “images” and “thumbnails” folders from the extracted archive. Next you can use your favorite FTP client to upload the new files over the old ones. Don’t remove the old files from your PixelPost application, just overwrite them with the new ones when asked.Once you do that, navigate to http://yourdomainname.com/pixelpost/admin/install.php and follow the instructions in the upgrade wizard. Actually, you only have to click on the Begin Upgrade button. The wizard application will then do the rest for you.
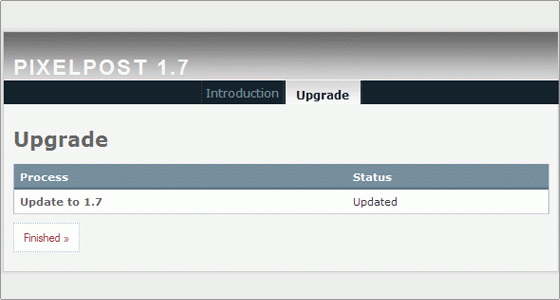
Finally click on the Finished button. You have just upgraded PixelPost to its latest version!
Note that some of the addons you have can be disabled by the upgrade wizard due to version incompatibilities. In such case you should check the official websites of those addons in order to receive more information on how to upgrade them.
Here,we will show you how to manage the content of your photo blog with PixelPost.
How to make a new photo post
To post in your Pixelpost photo blog, first you need to log in the administrative end of the application. For example, if you have installed Pixelpost into the public_html/photos folder in your account, the admin end would be accessible via http://yourdomainname.com/photos/admin/
How to group your posts in categories
To organize your photo posts better, you can group them into categories. To do this, go to the Categories menu in your administration panel. You can think of categories as “folders” for your posts. They don’t have any options that have to be set except for their name.
To create a new category, enter the name for it and press the Add Category button.
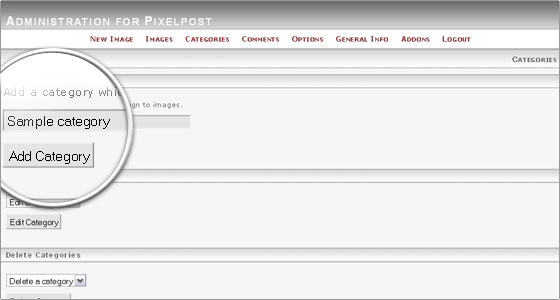
From now on, when you make new photo posts, you will be able to select the newly created category for them.
Changing your template is a simple task in PixelPost.First, you need to login to your administrative area. Next, go to the options tab and select the Template menu.In this page select the template you want to use with your website from the Switch Template drop-down list of available templates and click on the Update button next to it. You can now browse to the front end of your website and enjoy the new looks of your photo blog.
How to install a new template
To install a new template you should upload the files for it in the appropriate folders. Depending on the template you may have to upload its folder in the templates directory or to upload content in different folders. For detailed instructions on how to install and enable a new template in PixelPost.
How to Install PixelPost Modules:
There are many modules developed for PixelPost which can extend its functionality. You may find such modules in the PixelPost official website at:http://www.pixelpost.org/extend/addons/
Once you have chosen the module which you wish to install download its archive. Extract the archive which will contain a file having the name of the module. Upload that file in the “addons” folder of your PixelPost installation. You can upload the file using FTP or via cPanel > File Manager. Once you have uploaded the file go to your site’s admin area and activate the module via the “Addons” section.
To install new addons in PixelPost, you should first download their installation packages.
Next, extract them to a folder in your computer and upload all the files and folders of the extension in your PixelPost directory. Depending on the package itself you may have to upload only few files in the “addons” folder or to several other directories. It is important to follow the instructions in the Addon documentation in order to install it correctly.
Once you have uploaded the files for the addon, login to your administrative are and go to the Addons tab. The new addon will be listed as disabled (showing “status: OFF” next to it). You can enable it by clicking on the “Off” link next to it.
How to Enable PixelPost Addons:
When you first install PixelPost it comes with a list of pre-installed addons. Those, however, are disabled by default. To enable addons for your site go to your site’s admin area and click on “Addons”:

You will see a list of the available addons. To enable an addon, simply click the “OFF” sign next to it:

You will receive instructions how to use the addon once you enable it.

How to Add Images in PixelPost:
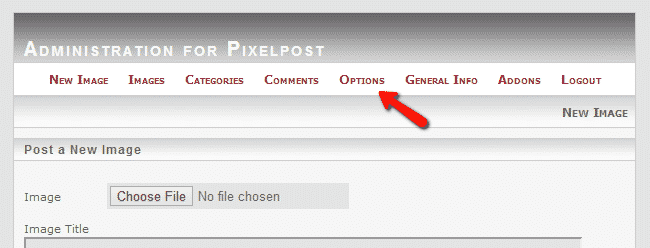
To add a new image in PixelPost, enter the admin area of the site. You will be automatically redirected to the “New Image” section of the site. You can add your new image in there by filling in the following details:
Choose image – select the image which you wish to upload
Image Tittle
Tags – tags for your image
Select Category
Image Description – describe the image or enter more details about it
Date and Time for the entry – choose when the new post should be published
Comment Setting – select the options for your comments
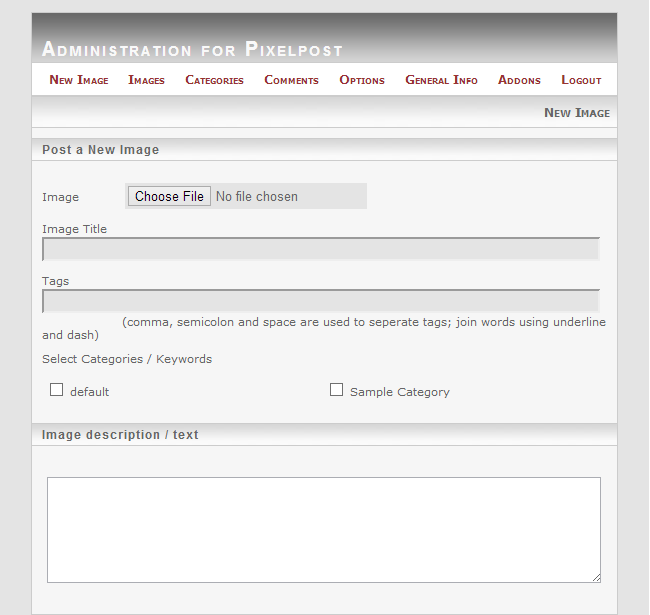
Click the “Upload” button once you have filled all the details.
How to Enable Spam Protection in PixelPost:
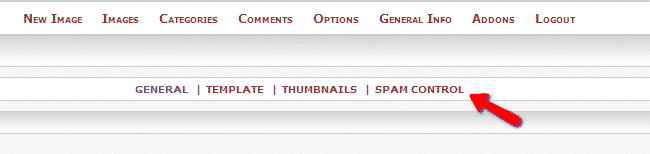
Here, we are going to show you how to protect your PixelPost website from spam messages. First, login to your site admin area and navigate to the “Options” section:

Then select the “Spam Control” section:
On that page you can edit the following settings:
Add a list of banned words
Add a list of banned IP addresses
Prevent spam flood by entering the number of seconds after which another comment can be submitted
Set the number of URLs allowed in one comment
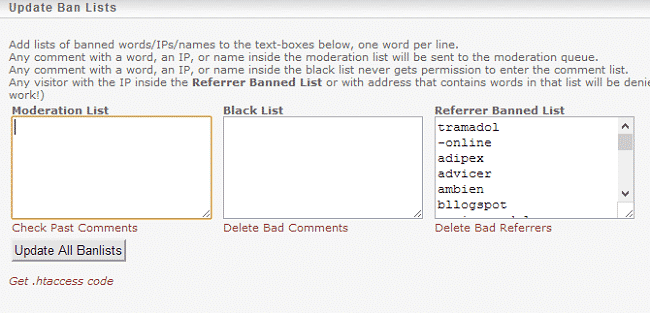
When using the bad words and IP address blocking options, click the “Generate .htaccess code” text. A box will open providing you with few lines of code. Copy that code and paste it in your site’s .htaccess file. You can edit the .htaccess file using a text editor like notepad.
How to Change the Language in PixelPost:
Using PixelPost you can choose your website language for the administrative control panel and your site frontend. To change your site’s language, login to the admin panel. If you are accessing your site with: https://yourdomain.com/, you should access the administrative area using https://yourdomain.com/admin.
If you have installed PixelPost in a subfolder of your /public_html/ directory, for example /public_htm/blog/ you should access the admin area using:
https://yourdomain.com/blog/admin/
Once you have logged in the admin control panel, go to the “Options” tab:
On the next page scroll down and find the following menus:
Language File – options for your site frontend
Admin Panel Language File – options for your admin panel
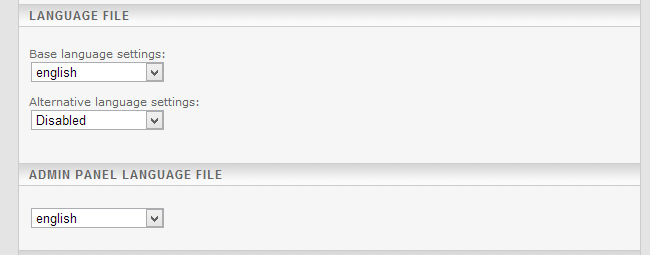
Using the drop-down menu select the languages for both your site’s frontend and backend. Under the “Alternative language settings” you can choose a second language for your site.When you have selected the preferred languages for your site save the changes and they will be immediately applied.
How to Define File Paths in PixelPost:
By default PixelPost will store its images and thumbnails in a folders called respectively “images” and “thumbnails”. Those folders are located in the root directory of your PixelPost installation. You may change those folders to ones of your choice. To make the changes, first create the new folders where you wish to store the images and the thumbnails for your website. You can create the folders via cPanel > File Manager or via FTP. Once the folders are created, login to your site’s admin area and go to “Options” tab:

Then scroll down and find the Images & Thumbnails section:
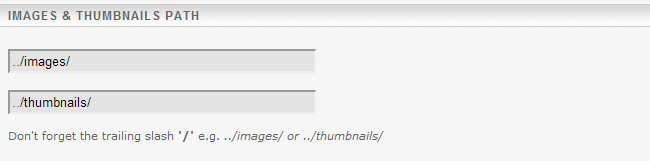
Set the paths to your newly created folders and save the changes.
How to Configure Comments in PixelPost:
Your site visitors can submit their comments to your posts. You will surely want to configure the comments section for your site. To configure the comments options for your site, login to the admin area and navigate to the “Options” section:

Then scroll down to “Global Comments Settings”:

Using the drop-down menu select one of the following options:
Publish instantly
To moderation queue – a moderator will need to approve the comment
Disable commenting
Save the changes when you have selected the options.
How to Transfer PixelPost Website:
Here, we are going to show you how to transfer your PixelPost to your hosting account .The first thing you will need to do is transfer your existing PixelPost files via FTP to your hosting account .. If you have accessed your PixelPost site using https://yourdomain.com/ you must upload your files in the /public_html/ directory of your account. If you have accessed the site using https://yourdomain.com/blog/ you must upload the files in /public_html/blog/.
The second thing you will need to do is export your PixelPost database. You can easily export the database using a database management tool like phpMyAdmin.
Now you will need to create a new MySQL database in your Hosting account. You can easily do this via your cPanel > MySQL Database Wizard. Simply follow the steps on the screen and wizard will guide you through the whole process.
Next you will need to import the exported copy of your site’s database in your newly created one. To import a MySQL database you can use phpMyAdmin.
The final step is to edit your PixelPost configuration file. The file is located in:
/path-to-pixelpost/includes/pixelpost.php
Find the following lines:
$pixelpost_db_host = “localhost”; // database host, often “localhost”
$pixelpost_db_user = “dabatase_user”; // database user
$pixelpost_db_pass = “password”; // database user password
$pixelpost_db_pixelpost = ” dabatase_name”; // database
Replace the dabatase_user, dabatase_name and password with the database credentials that you created earlier. Save the file and upload the updated version of the file in your account.
PIXELPOST PROS
Free
This platform is completely free to use for making any type of site you want.
Feed Options
You can use RSS or Atom feeds with this platform.
PIXELPOST CONS
Not Supported
There doesn’t appear to be any support from the developers on this system anymore.
Not Updated
The last version update for PixelPost was in 2009, making this a fairly outdated system that may have issues if you start using it today.
-Pixelpost, a small photoblog application that’s a no-brainer to set up and use. It’s perfect for anyone wishing to regularly post their photos on the web like a blog.Unlike other blog engines out there, Pixelpost doesn’t try to solve all of the worlds problems. Pixelpost simply does photoblogs, and it does them well. If you are looking for a full blown CMS or text-blog, Pixelpost isn’t for you. But if you want something simple, and designed from the ground up for photobloggers, like yourself, you’ve found the perfect app.
Log in
General Page

Administration Page

Categories
Features
Pixelpost features:
- – Multilingual capability
- – Comment, categories, and tagging functions
- – Exif-support (a file format standard that specifies the formats for images, sound, and ancillary tags used by digital cameras, scanners, and other systems handling images)
- – Theme-support (change the outlook of the website in just a few clicks)
- – Plugin-support (improves SEO, commenting and other features)
- – RSS-support (must-have function for blogs. RSS feed allows online users to subscribe to your website and receive updates)
- – Space for providing basic photo information (very important for viewers to learn more about how to duplicate the shots)
- – Spam filtering
-Major Features of PixelPost
- Smooth Install Assistant
Users who are upgrading will appreciate the new super-smooth upgrade system as well. - Fancy Admin Stuff
Lots of little tweaks that are sure to make your life better. - New Tags for Image and Browse Page
New features that will make the template system even easier to use. - New Defensio Addon
A brand new spam filtering web service which comes as Pixelpost default addon now, it can be used instead of Akismet. - Cool Feed Options
Setup your feeds to fit your needs. - New Languages
For our friends all over the world! - Brand New Front Workspaces
Addon creators are going to love us for this! - Bug Fixes
Yes, we admit, there were a few bugs in the last version, we are only human.
Videos
How to use PixelPost
