

Overview
Passenger in its Nginx integration mode is to be configured via the Nginx configuration file. There is no configuration file that is specific to Passenger only.Passenger’s supported integration modes. In the Standalone modes, Passenger uses a builtin web server. In the Nginx/Apache integration modes, Passenger integrates with Nginx or Apache
Nginx is owned by Nginx (https://www.nginx.com/) and they own all related trademarks and IP rights for this software.
If you have used Passenger Standalone, then you may be familiar with Passengerfile.json. Passenger for Nginx does not consult Passengerfile.json, only the Nginx configuration file.
Cognosys provides hardened and ready to run images of Passenger-Nginx on all public cloud ( AWS marketplace and Azure).
Deploy your Passenger-Nginx securely on cloud i.e. AWS marketplace and Azure with reliable services offered by Cognosys at one-click with easy written and video tutorials.
Configuring Passenger for Nginx works as follows:
1.During the Passenger installation process, an Nginx binary with the Passenger module compiled in, is installed.
2.The Passenger Nginx module registers Passenger-specific configuration options inside Nginx.
3.You, the administrator, configure Passenger by adding Passenger-specific configuration options to the Nginx configuration file.
4.Restart or reload Nginx to apply any configuration changes.
Passenger provides a wide range of features and customization options. Some of them are for improving or tweaking the application’s performance characteristics, some of them influence application or connection handling behavior etc. Please visit the configuration index page to learn what you can configure.
Secured Passenger Nginx on Ubuntu 14.04 LTS
Feature
Major Features of Nginx
- Standalone mode
The Standalone mode is what you’ve experienced in the Quickstart tutorial. You start Passenger through thepassenger startcommand. If you are a Ruby user, then in this mode Passenger behaves somewhat like “rails server”.In this mode, Passenger doesn’t automatically collaborate with other components, hence the name. Because of this, you do not need to setup any other components besides Passenger, which makes the Standalone mode the easiest mode to get started with. We recommend this mode for use during development. That said, this mode is also fit for production.In the Nginx and Apache integration mode, Passenger takes care of glueing Nginx/Apache together with Passenger. In the Standalone mode, you are expected to do that yourself, e.g. using reverse proxies, init scripts etc. - Nginx integration mode
The Nginx integration mode provides easy integration with Nginx. Passenger operates as an Nginx module. You operate Passenger mostly through Nginx and through Nginx configuration files. So instead of worrying about Passenger and Nginx seperately, you treat the both of them as a whole.This mode is mainly meant for production use, not for development use. - Apache integration mode
The Apache integration mode provides easy integration with Apache. Passenger operates as an Apache module. You operate Passenger mostly through Apache and through Apache configuration files. So instead of worrying about Passenger and Apache seperately, you treat the both of them as a whole.This mode is mainly meant for production use, not for development use.
Mail proxy features
- TLS/SSL support
- STARTTLS support
- SMTP, POP3 and IMAP proxy
- Authentication using an external HTTP server
Azure
Installation Instructions For Ubuntu
Note : How to find PublicDNS in Azure
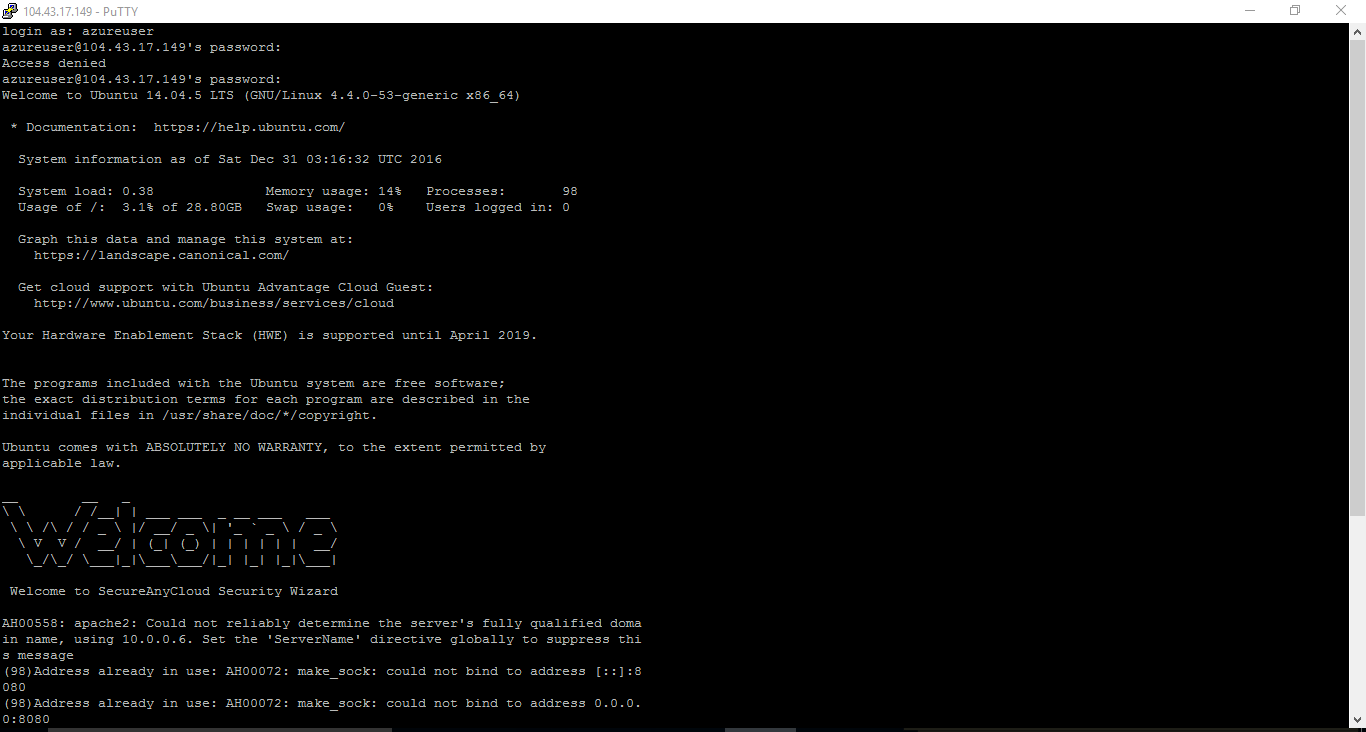
Step 1) SSH Connection: To connect to the deployed instance, Please follow Instructions to Connect to Ubuntu instance on Azure Cloud
1) Download Putty.
2) Connect to virtual machine using following SSH credentials:
- Hostname: PublicDNS / IP of machine
- Port : 22
Username: Your chosen username when you created the machine ( For example: Azureuser)
Password : Your Chosen Password when you created the machine ( How to reset the password if you do not remember)
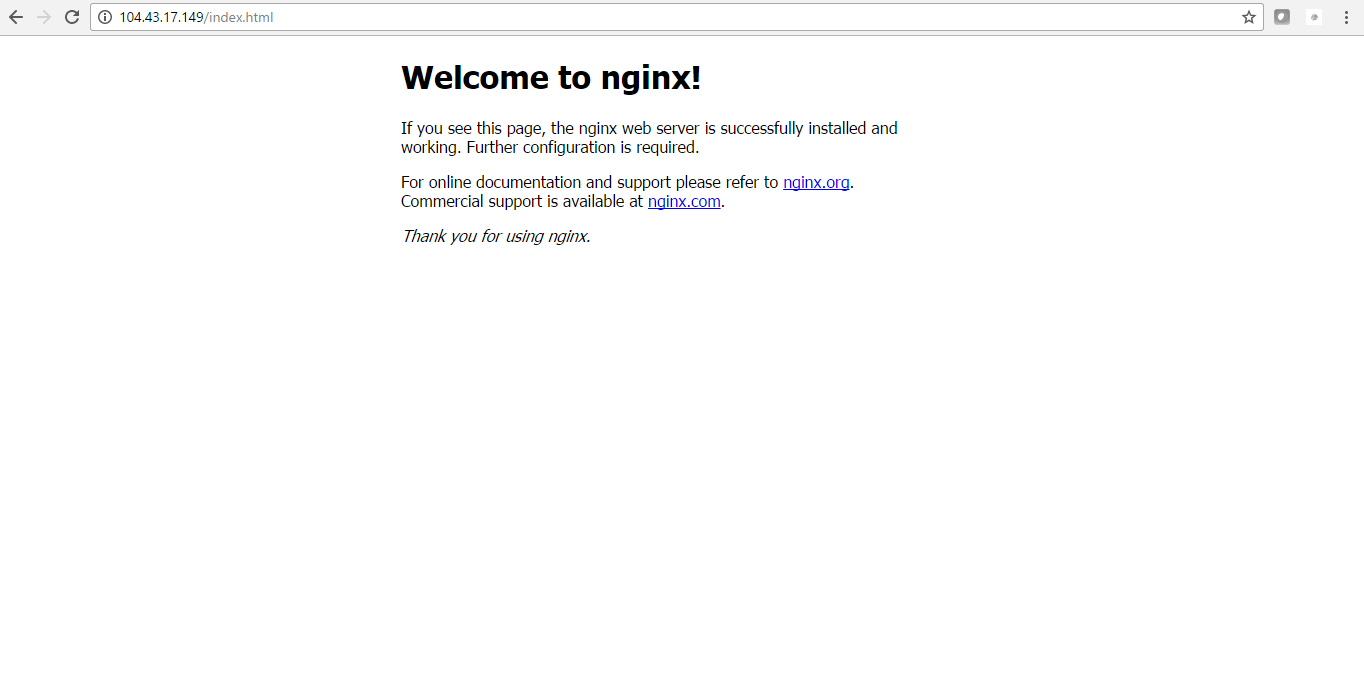
Step 2) Application URL: Access the application via a browser at http://PublicDNS/passenger-nginx.
Step 3) Other Information:
1. Default installation path: will be in your web root folder “/usr/sbin/nginx”.
Version:- 5.1.1
2.Default ports:
- Linux Machines: SSH Port – 22
- Http: 80
- Https: 443
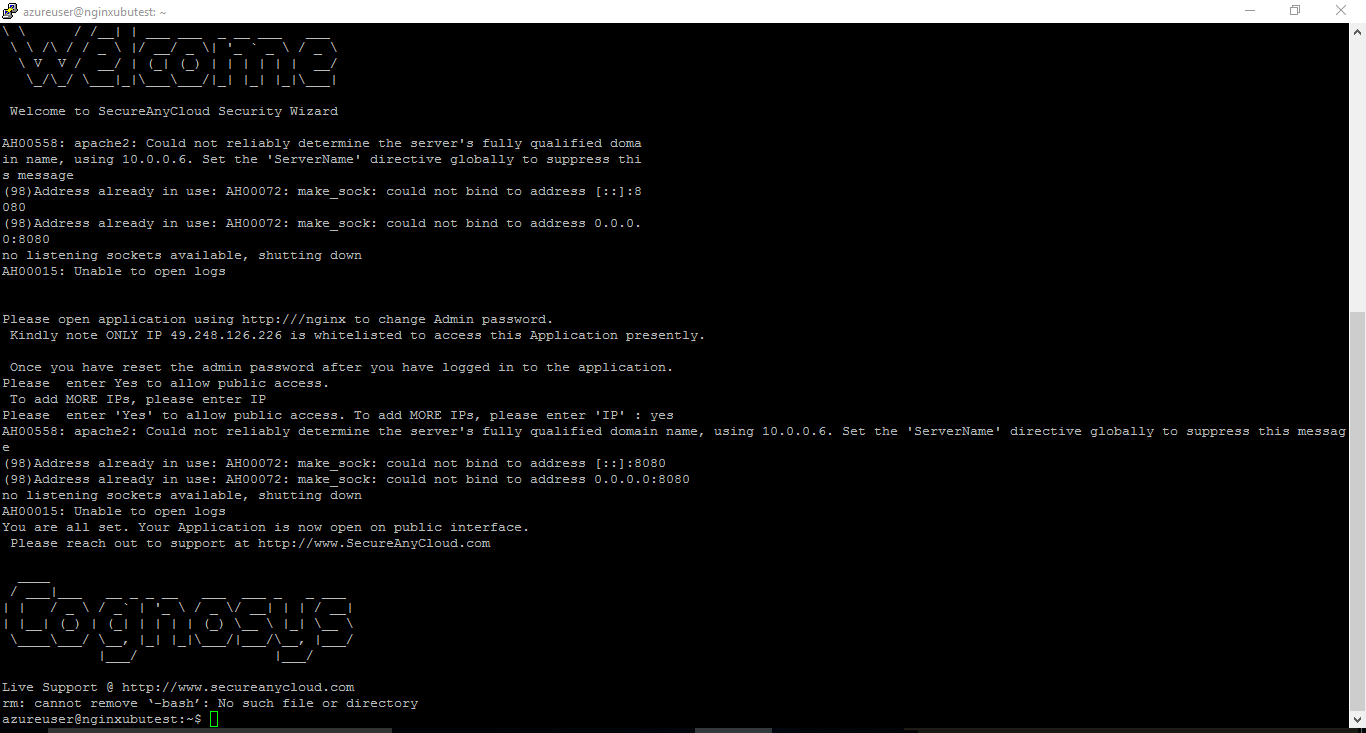
Note: Please change password immediately after first login.
Configure custom inbound and outbound rules using this link
Installation Instructions For Centos
Note : How to find PublicDNS in Azure
Step 1) SSH Connection: To connect to the deployed instance, Please follow Instructions to Connect to Centos instance on Azure Cloud
1) Download Putty.
2) Connect to virtual machine using following SSH credentials:
- Hostname: PublicDNS / IP of machine
- Port : 22
Username: Your chosen username when you created the machine ( For example: Azureuser)
Password : Your Chosen Password when you created the machine ( How to reset the password if you do not remember)
Step 2) Application URL: Access the application via a browser at http://PublicDNS/passenger-nginx.
Step 3) Other Information:
1. Default installation path: will be in your web root folder “/var/www/html/passenger-nginx”.
2. Default ports:
- Linux Machines: SSH Port – 22 or 2222
- Http: 80 or 8080
- Https: 443
Configure custom inbound and outbound rules using this link
3. To access Webmin interface for management please follow this link
Azure Step by Step Screenshots for Ubuntu 14.04 LTS

Installation Instructions For Redhat
Step 1) SSH Connection: To connect to the deployed instance, Please follow Instructions to Connect to Ubuntu instance on Google Cloud
1) Download Putty.
2) Connect to the virtual machine using SSH key
- Hostname: PublicDNS / IP of machine
- Port : 22
Step 2) Database Login Details:
The below screen appears after successful deployment of the image.

For local MySQL root password, please use the temporary password generated automatically during image creation as shown above.
i) Please connect to Remote Desktop as given in step 2 to ensure stack is properly configured and DB is initialized.
ii) You can use MySQL server instance as localhost, username root and password as shown above.
If you have closed the deployment page you can also get the MySQL root password from VM Details “Custom metadata” Section
Step 3) Application URL: Access the application via a browser at http://<yourip>/nginx
A) You will see the page where you can configure your site data with site name, nginx admin name etc.
B) On next page you will see configuration success message.
C) You can login to the nginx admin portal with the nginx username and its generated password from point A shown above.
D) You can access the configured site at http://yourIP/nginx
Step 4) Other Information:
1.Default ports:
- Linux Machines: SSH Port – 22
2. To access Webmin interface for management please follow this link
Installation Instructions For Ubuntu
Step 1) VM Creation:
1.Click the Launch on Compute Engine button to choose the hardware and network settings.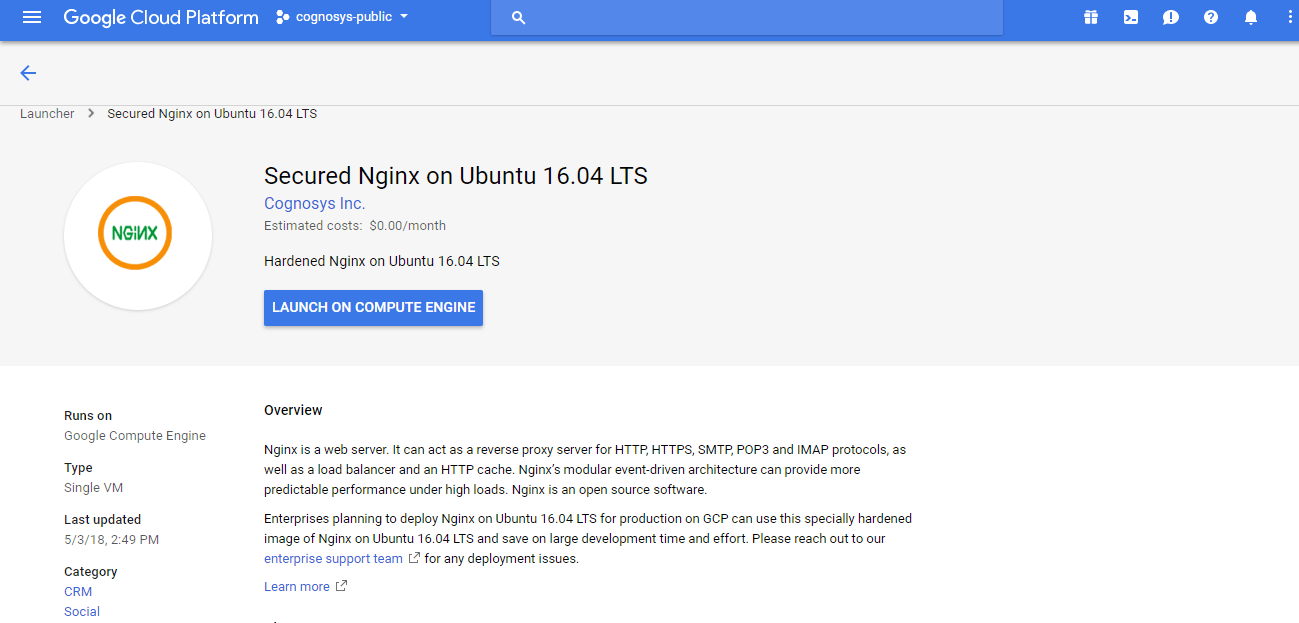
2.You can see at this page, an overview of Cognosys Image as well as some estimated costs of VM.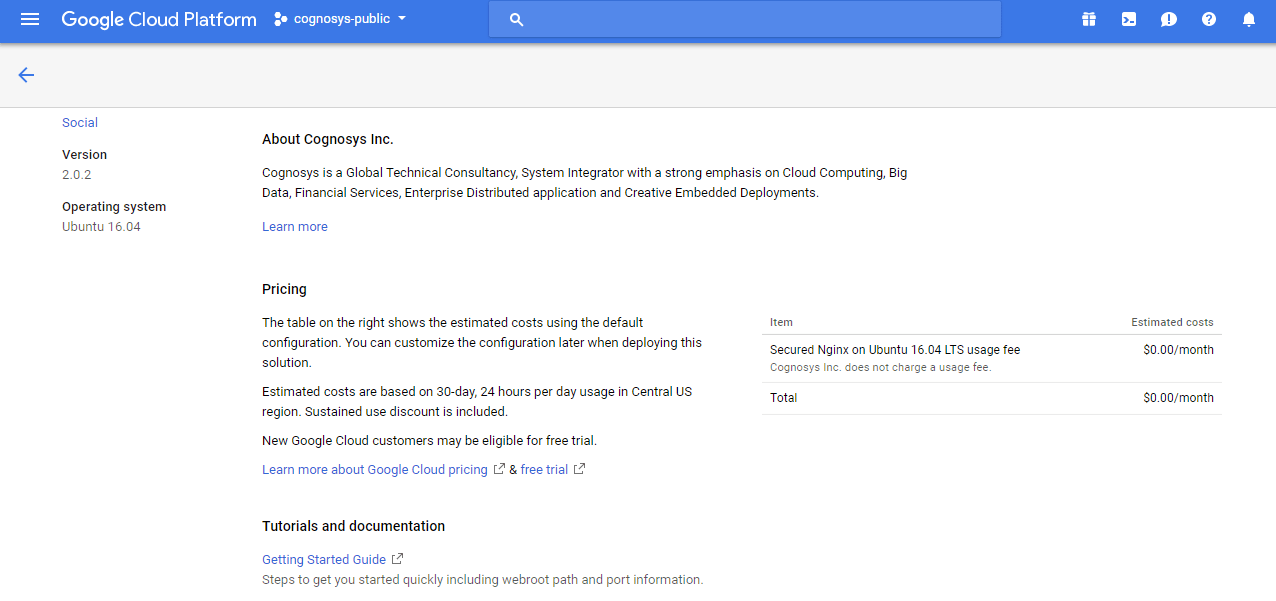
3.In the settings page, you can choose the number of CPUs and amount of RAM, the disk size and type etc.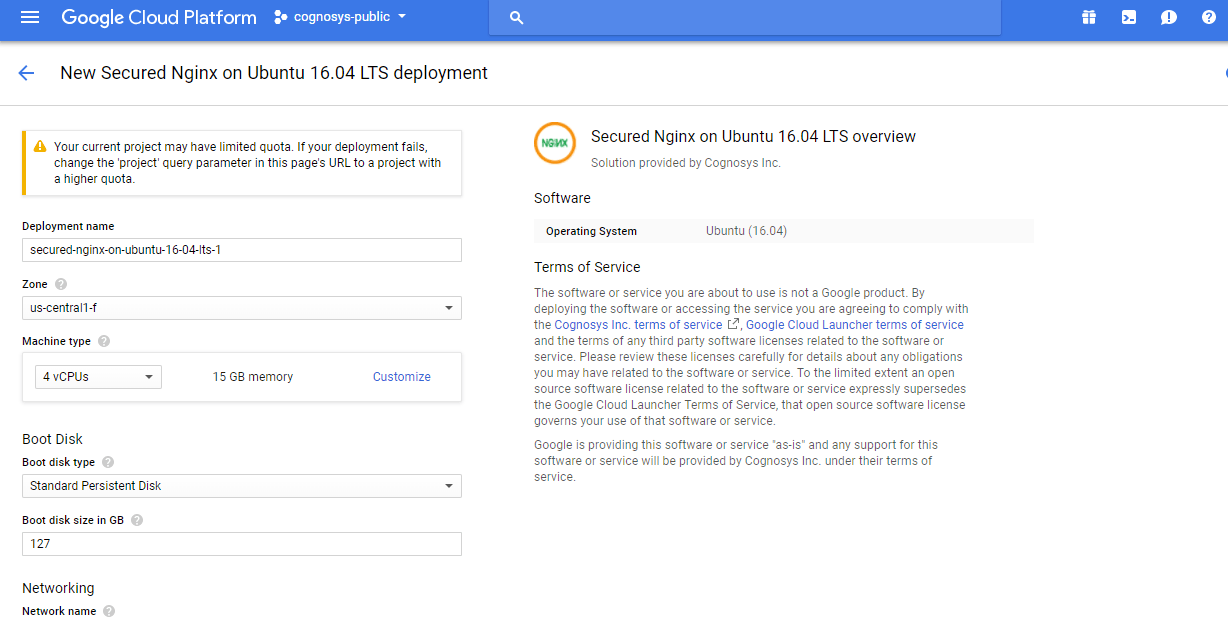
Step 2) SSH Connection: To connect to the deployed instance, Please follow Instructions to Connect to Ubuntu instance on Google Cloud
1) Download Putty.
2) Connect to the virtual machine using SSH key
- Hostname: PublicDNS / IP of machine
- Port : 22
Step 3) Other Information:
1.Default ports:
- Linux Machines: SSH Port – 22
2. To access Webmin interface for management please follow this link
