1-click AWS Deployment 1-click Azure Deployment 1-click Google Deployment
Overview
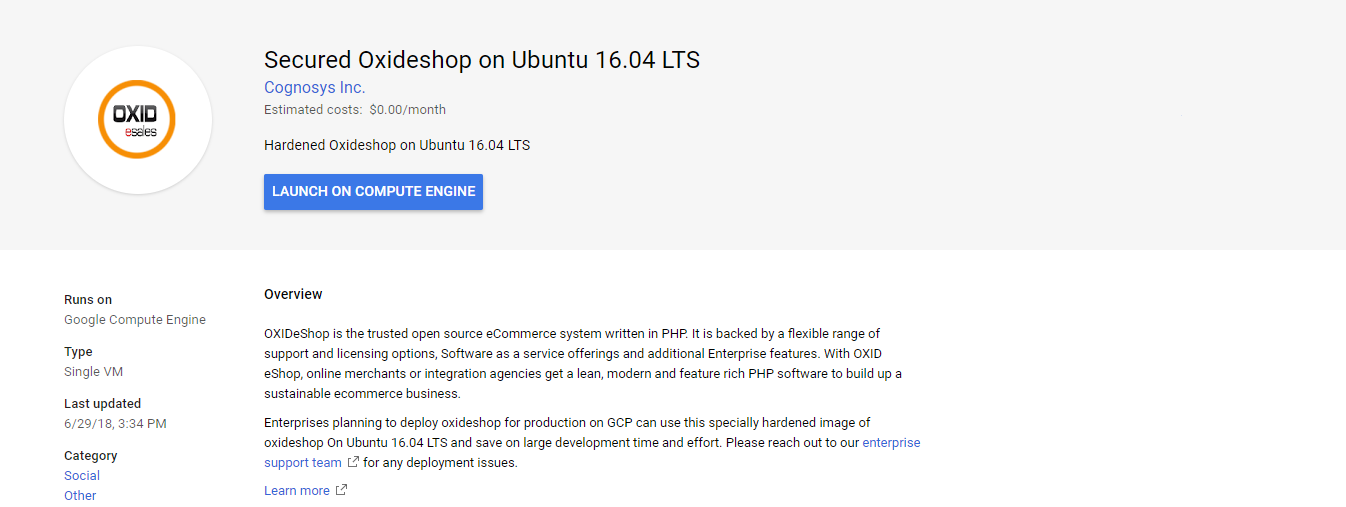
OXID eShop is the trusted Open Source eCommerce system written in PHP. It is backed by a flexible range of support and licensing options, Software as a service (SaaS) offerings and additional Enterprise features. With OXID eShop, online merchants or integration agencies get a lean, modern and feature rich PHP software to build up a sustainable e-commerce business.
OXID eShop is easy to customize: it uses the Smarty template engine for generating one’s unique store front design.
OXID eShop is owned by OXID eShop (https://oxidforge.org/en/) and they own all related trademarks and IP rights for this software.
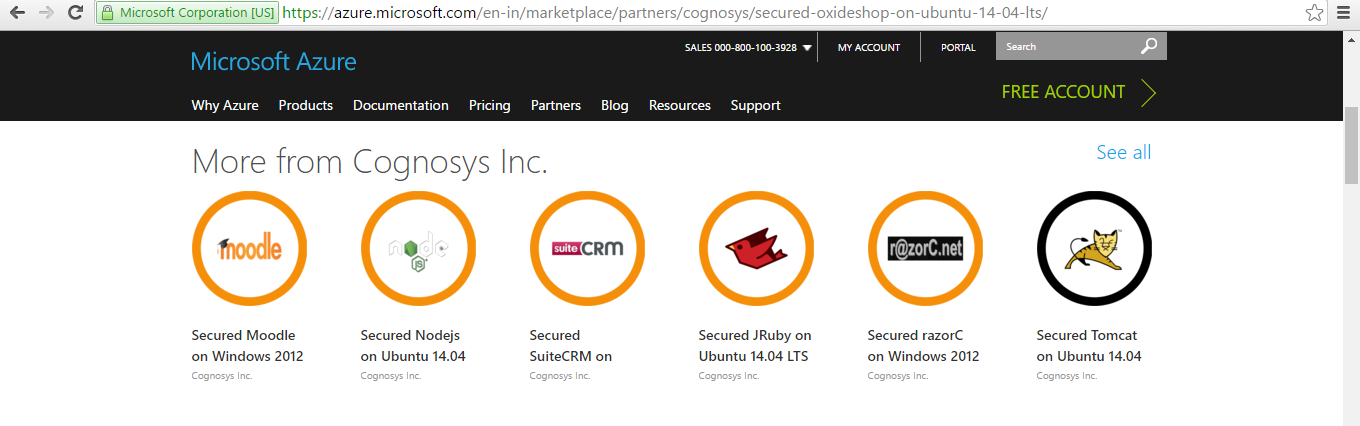
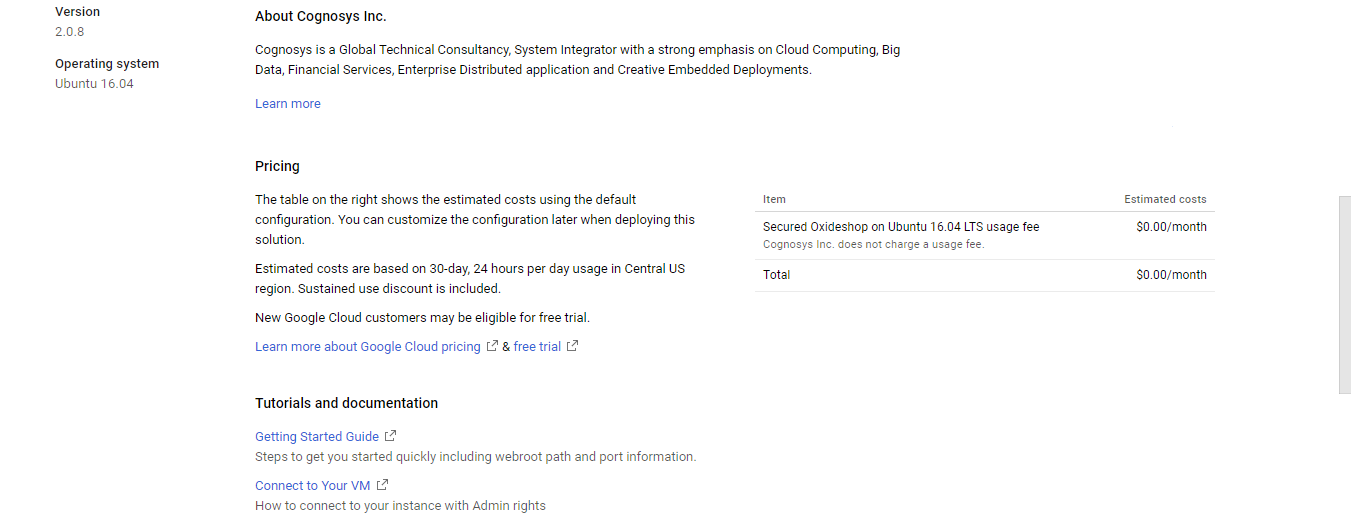
Cognosys provides hardened images of OXID eShop Web Edition on all public cloud i.e. AWS marketplace , Azure .
Secured Oxideshop on Ubuntu 14.04 LTS
OXID eShop on Cloud for Azure
Features
Major Features Of OXID eShop
- Unlimited shopping experience now available on the go,.Faster and safer payment transactions.
- Ready for the new SEPA ( Single Euro Payments Area.) direct debit system.
- Fewer abandoned shopping carts, more trust.
- Useful helpers and improved language handling.
Setup execution
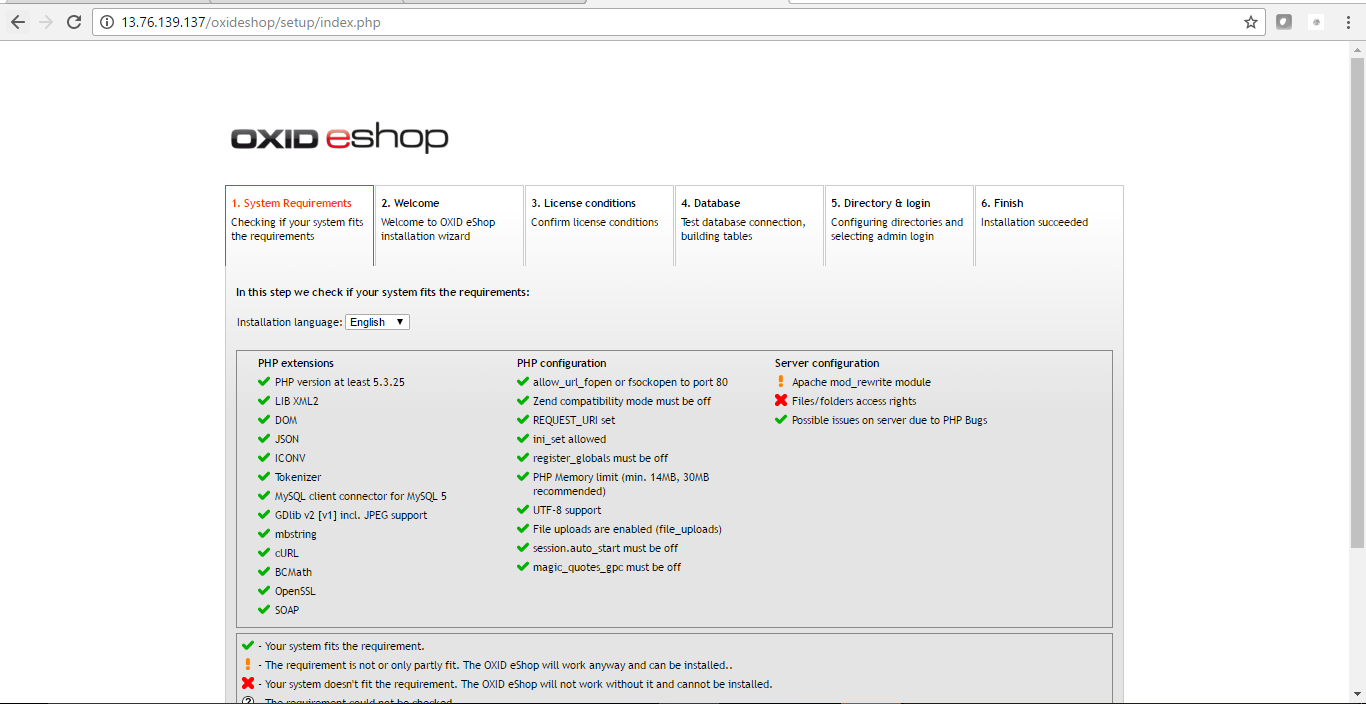
The OXID eShop is installed and configured via web based setup. Open a browser and invokewww.yourshopurl.de/setup. Replace www.yourshopurl.de with the URL under which your OXID eShop is going to be made available.
The setup starts. It consists of 6 or 7 steps. The additional step is required to enter a license key for the Enterprise Edition and Professional Edition.
Azure
Installation Instructions For Ubuntu
Note : How to find PublicDNS in Azure
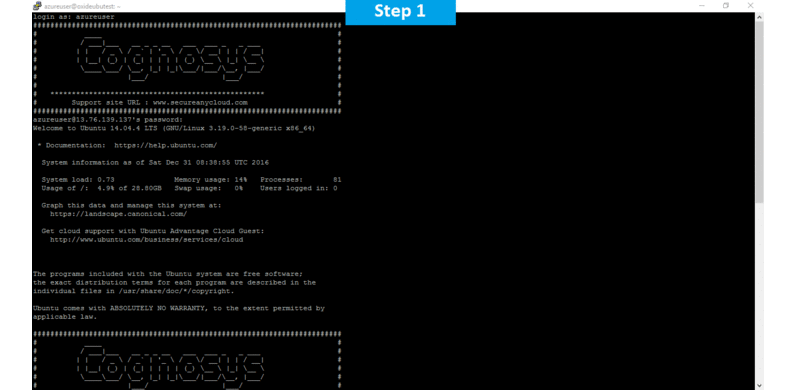
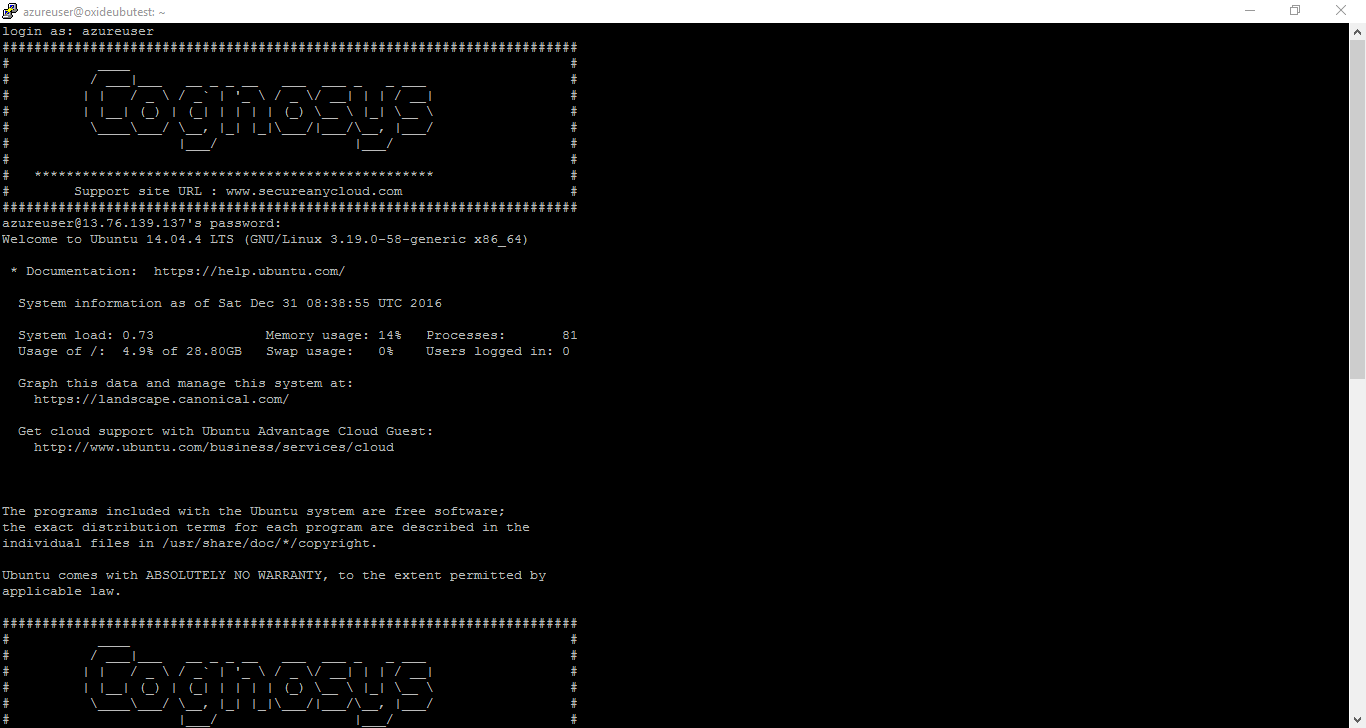
Step 1) SSH Connection: To connect to the deployed instance, Please follow Instructions to Connect to Ubuntu instance on Azure Cloud
1) Download Putty.
2) Connect to virtual machine using following SSH credentials:
- Hostname: PublicDNS / IP of machine
- Port : 22
Username: Your chosen username when you created the machine ( For example: Azureuser)
Password : Your Chosen Password when you created the machine ( How to reset the password if you do not remember)
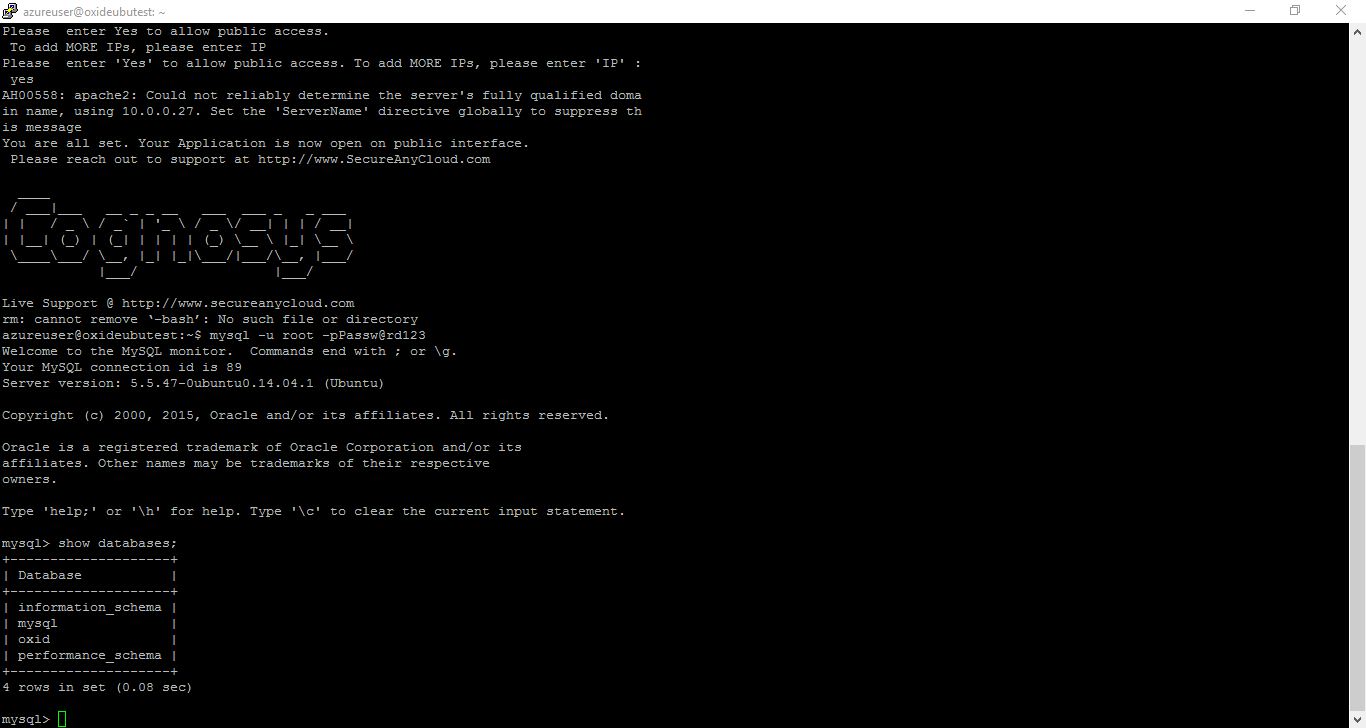
Step 2) Database Login Details:
Username : root || Password : Passw@rd123
Note: Please change the password immediately after the first login.
Step 2) Application URL: Access the application via a browser at http://PublicDNS/oxideshop
- Username : azureuser (Please create new user and delete this user)
- Password : Passw@rd123
Step 3) Other Information:
1. Default installation path: will be in your web root folder “/var/www/html/oxideshop”.
2. Default ports:
- Linux Machines: SSH Port – 22 or 2222
- Http: 80 or 8080
- Https: 443
- Mysql ports: By default these are not open on Public Endpoints. Internally Mysql server: 3306
Configure custom inbound and outbound rules using this link
3. To access Webmin interface for management please follow this link
Azure Step by Step Screenshots


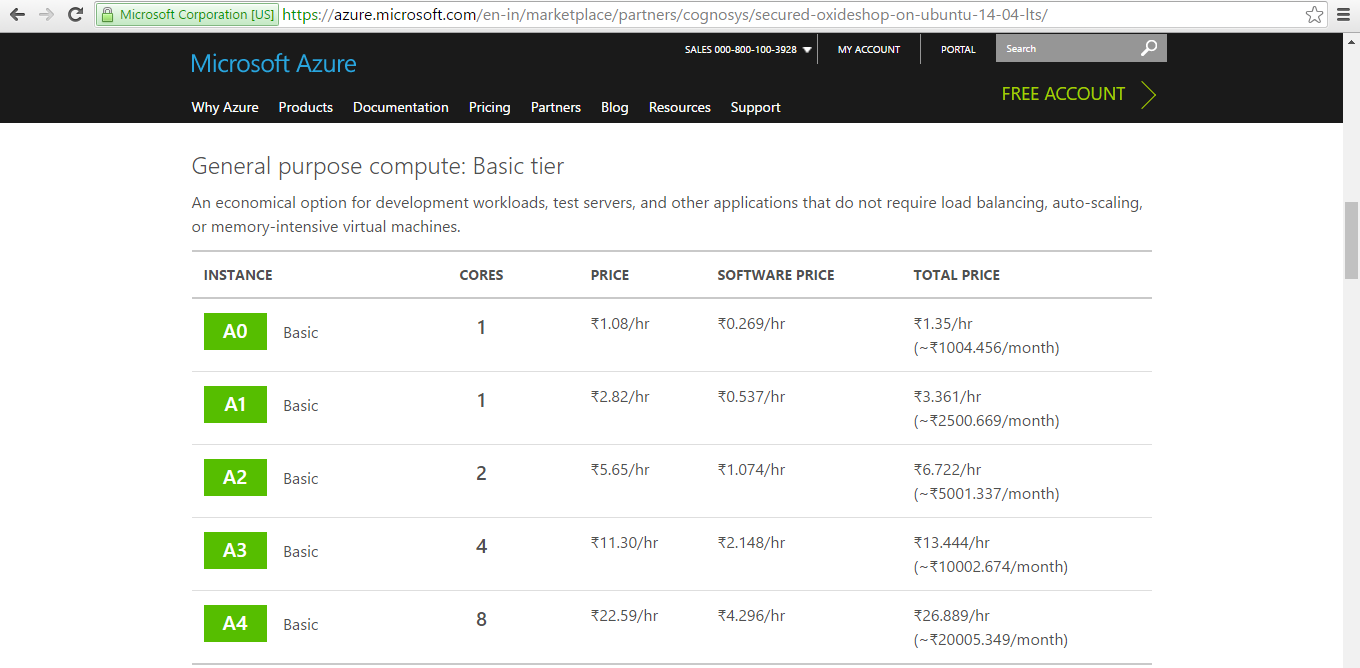
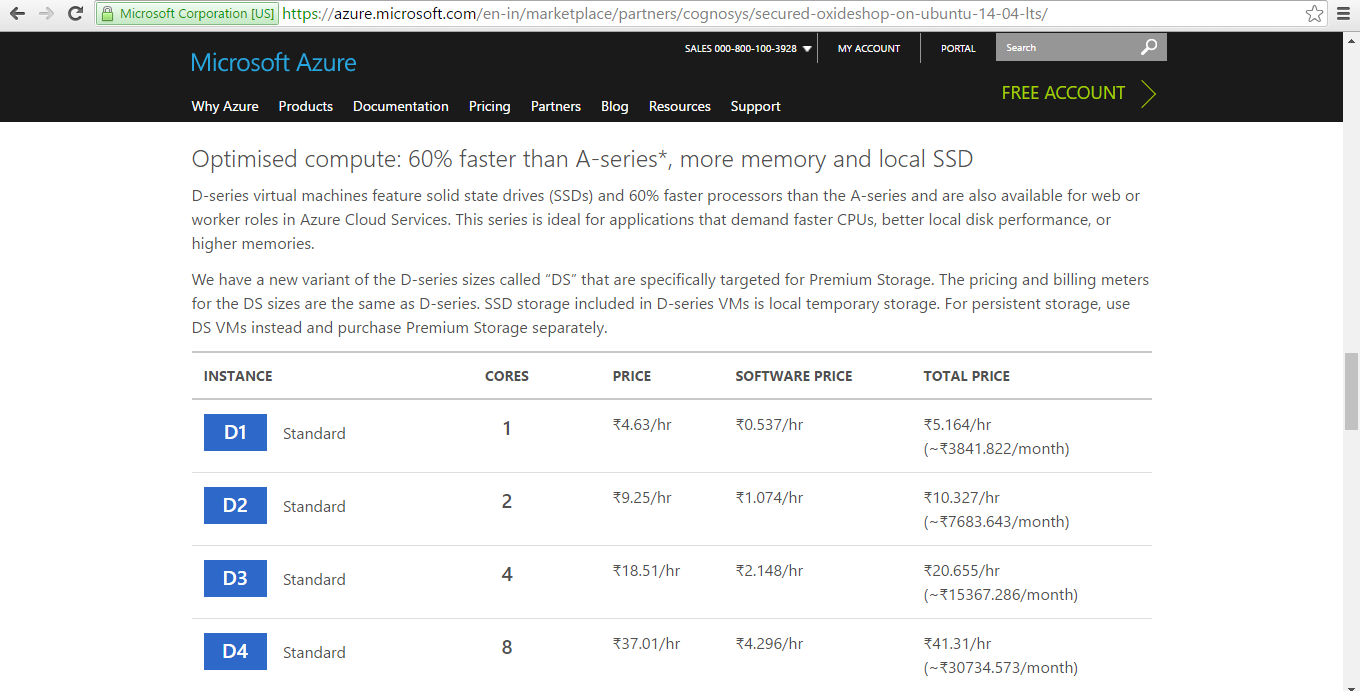
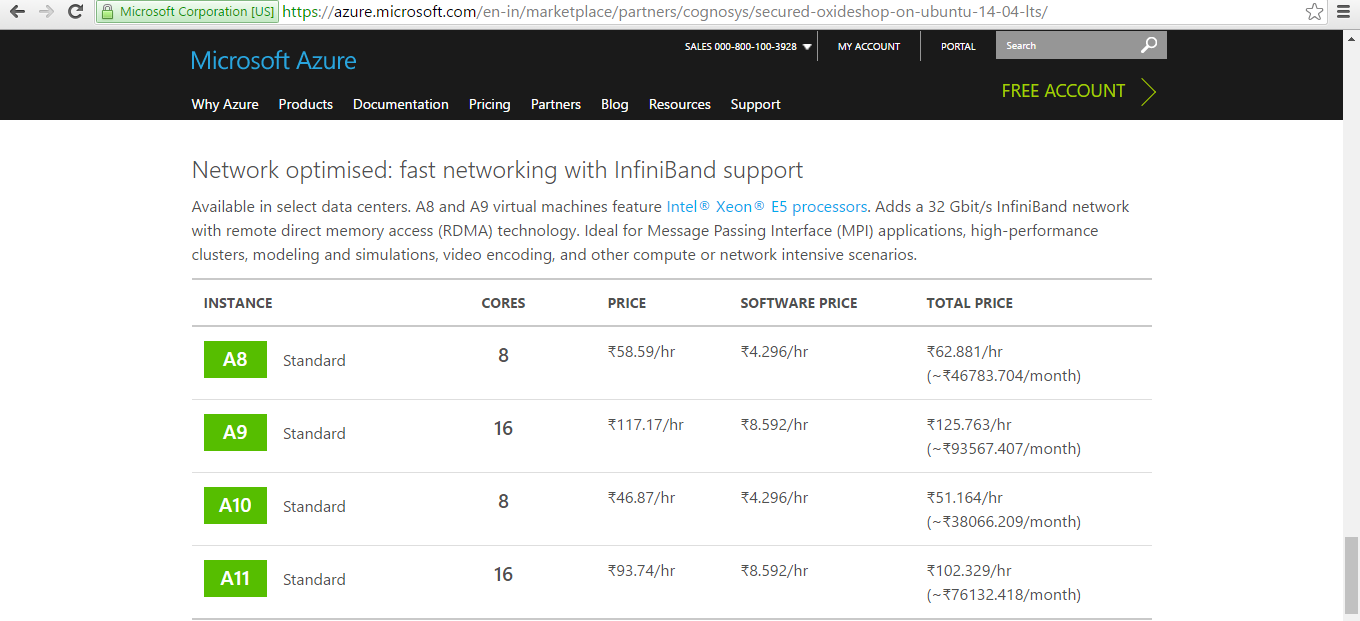
Pricing Details


Installation Instructions For Ubuntu
Installation Instructions for Ubuntu
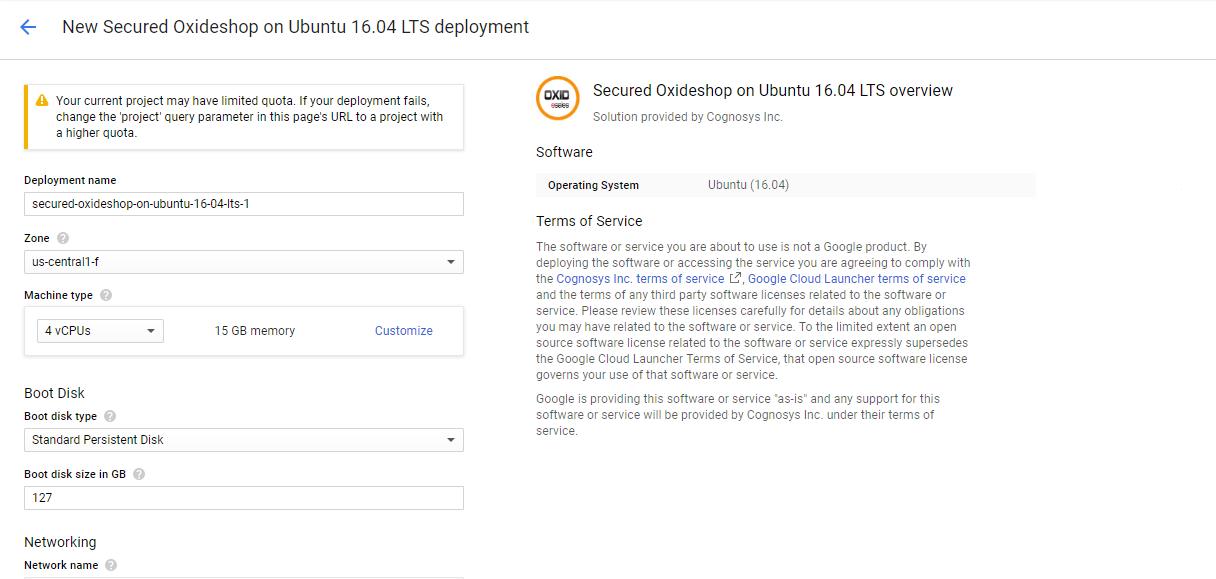
Step 1) VM Creation:
- Click the Launch on Compute Engine button to choose the hardware and network settings.

- You can see at this page, an overview of Cognosys Image as well as estimated cost of running the instance.

- In the settings page, you can choose the number of CPUs and amount of RAM, the disk size and type etc.
 Step 2) RDP Connection: To initialize the DB Server connect to the deployed instance, Please follow Instructions to Connect to Windows instance on Google Cloud
Step 3) Database Login Details:
The below screen appears after successful deployment of the image.

For local MySQL root password, please use the temporary password generated automatically during image creation as shown above.
i) Please connect to Remote Desktop as given in step 2 to ensure stack is properly configured and DB is initialized.
ii) You can use MySQL server instance as localhost, username root and password as shown above.
If you have closed the deployment page you can also get the MySQL root password from VM Details “Custom metadata” Section.
Step 4) Application URL: Access the application via a browser at http://PublicDNS/oxideshop
Step 5) Other Information:
1. Default installation path: will be in your web root folder “/var/www/html/oxideshop”.
2. Default ports:
- Linux Machines: SSH Port – 22 or 2222
- Http: 80 or 8080
- Https: 443
- Mysql ports: By default these are not open on Public Endpoints. Internally Mysql server: 3306
Videos
Secured Oxideshop on Ubuntu 14.04 LTS
OXID eShop Module
