1-click AWS Deployment 1-click Azure Deployment
Overview
OrangeHRM – human resource management (HRIS) solution, that is available both as an open source and an advanced hosted application (SaaS). OrangeHRM is released under the GNU General Public License.The architecture of the application targets small and medium enterprises. The functionality includes employee information management, employee absence management, recruitment management, employee performance evaluation and other HR management tools.
It is a web based application that has been written in PHP language and it uses a MySQL database to store data. It runs on PHP enabled Apache web server. Provided that both Apache and MySQL are running, you can access OrangeHRM via your web browse .Open Source Human Resource Management System and emerging in line with the new generation of HR Information Systems (HRIS) and will assist you in managing your company’s most important asset – human resource. Based on modular architecture, this comprehensive Open Source solution reflects the main areas of HR Management from simple personnel administration to today’s complex strategic approaches.
OrangeHRM, which is applicable to diverse business industries, is a perfect platform for re-engineering your HR processes and redefining the workflow operations of HR professionals, paving the way to a new level of HR Management.A great benefit of Open Source Software is the profound collaboration and increased transparency which leads to better communication with the users. This also applies to OrangeHRM and collaboration with the user community has been, and will always be, an important part of OrangeHRM.
Human resources management (HRM) is responsible for planning and determines how to manage with the staff /employees. Organizations working in the recruitment / selection, a person must meet the qualifications and performance includes how to maintain qualified personnel with paid posts. That are representatives of the salary and benefits in monetary / in for the money and the interests and welfare. The importance of developing employees is knowledge capability and performance. Make progress in your career and a better quality of life.
OrangeHRM is software written specifically to meet the needs of Human resource management features, including human resource management system.
- Personnel Information System Module
- Personal information (Date of birth, SSN, nationality, ethnic race etc.)
- Color picture
- Contact details
- Emergency Contact(s)
- Dependents
- Immigration details (Passport & Visa info)
- Job information
- Payment details (Pay Grade & Salary)
- Employee reporting structure (Assign Supervisor)
- Work Experience
- Education details
- Skills
- Assign Languages
- Assign Licenses
- Assign Memberships
- Attachments
- Define employee id (which was previously auto generated)
- Display more employee details in the employee list
- Employee Self Service Module (ESS)
- Reports Module
- Leave Module
- Define Leave Types
- View Leave Summary of all employees in one screen
- Define Days-off (weekends and specific holidays)
- Apply for and assign continuous leave
- Receive auto notification e-mails after performing leave related operations
- Time and Attendance Module (Time)
- Define organization’s customers and projects
- Create timesheets
- Administration and management of your own and your subordinates’ timesheets
- Benefit Module
- Define HSP
- Employee HSP Summary
- HSP Payments Due
- HSP Expenditure
- HSP Request
- Recruitment Module
Install OrangeHRM 3.3.2 on Windows:
Download and install XAMPP 5.6.21 from official site:
https://www.apachefriends.org/download.html

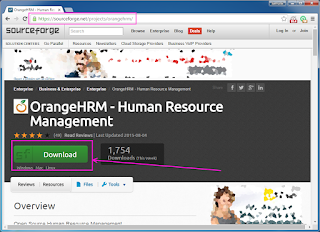
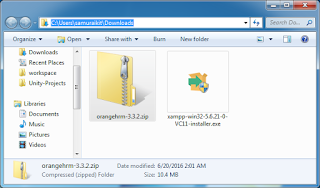
2. Download OrangeHRM 3.3.2 source files from :
https://sourceforge.net/projects/orangehrm
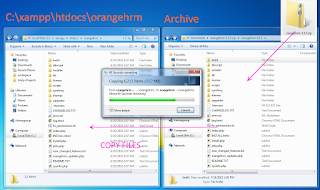
3. Create folder \orangehrm in XAMPP htdocs folder
C:\xampp\htdocs\orangehrm
and copy all files from downloaded OrangeHRM 3.3.2 .zip source
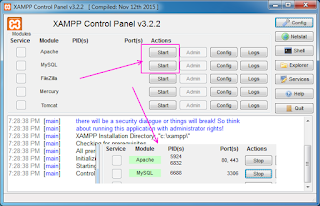
4. Run XAMPP Control Panel
– start Apache
– start Database
5. Open in browser following url to start OrangeHRM 3.3.2 installation
http://localhost/orangehrm
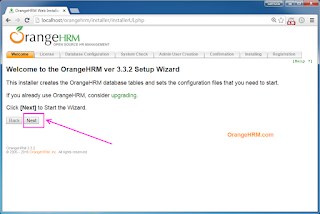
Click “Next” button
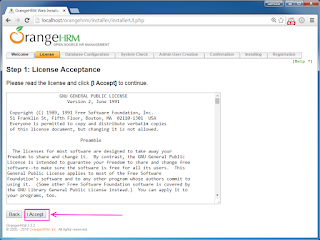
5. “Step 1 – License Acceptance” page – click “I Accept”
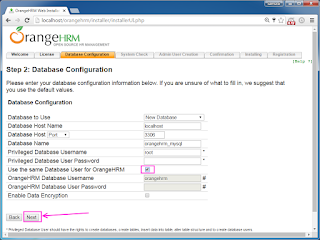
6. “Step 2 : Database Configuration” page
– use default values
– enable checkbox “Use the same datbase user for OrangeHRM”
– click “Next” button.
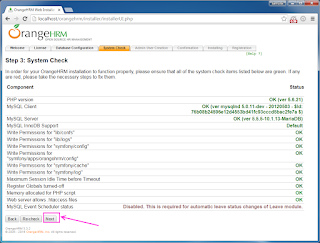
7. “Step 3: System Check” page – click “Next” button.
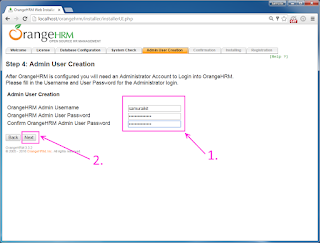
8. “Step 4: Admin User Creation” page – type admin credentials and press “Next” button
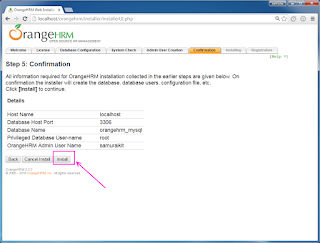
9. “Step 5: Confirmation ” page – click “Install” button
10. “Step 6: Installing ” – wait until all “done”, click “Next” button
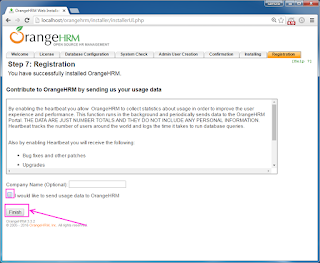
11. “Step 7: Registration” page – disable anonymous data and click “Finish”
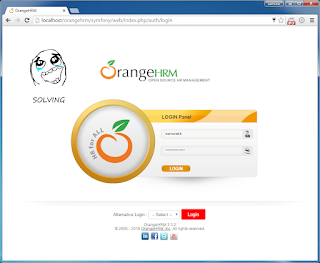
Enjoy OrangeHRM
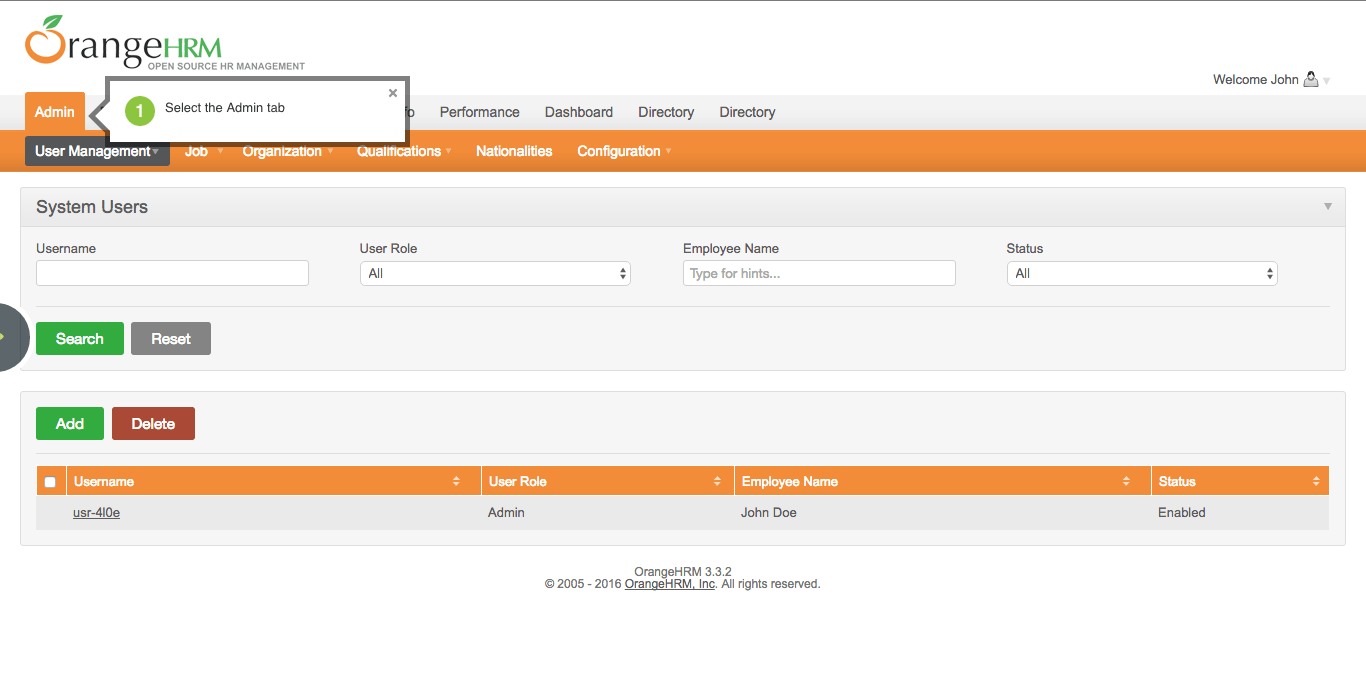
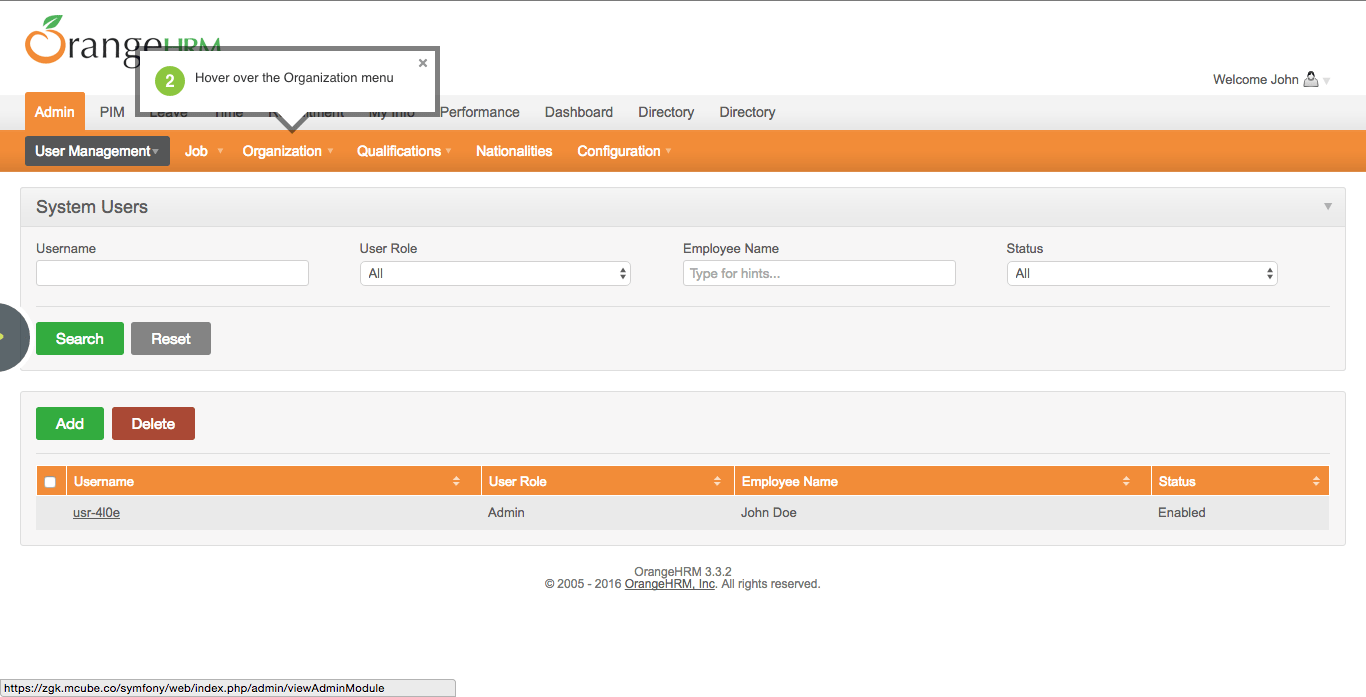
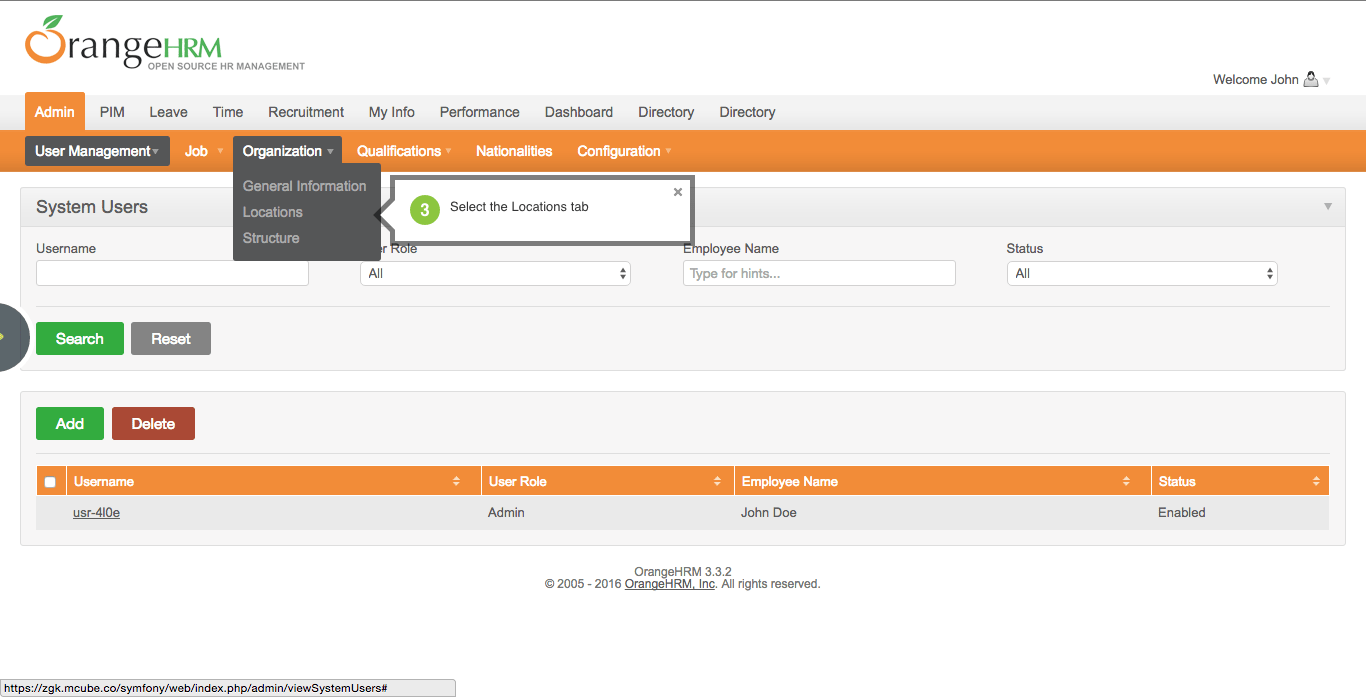
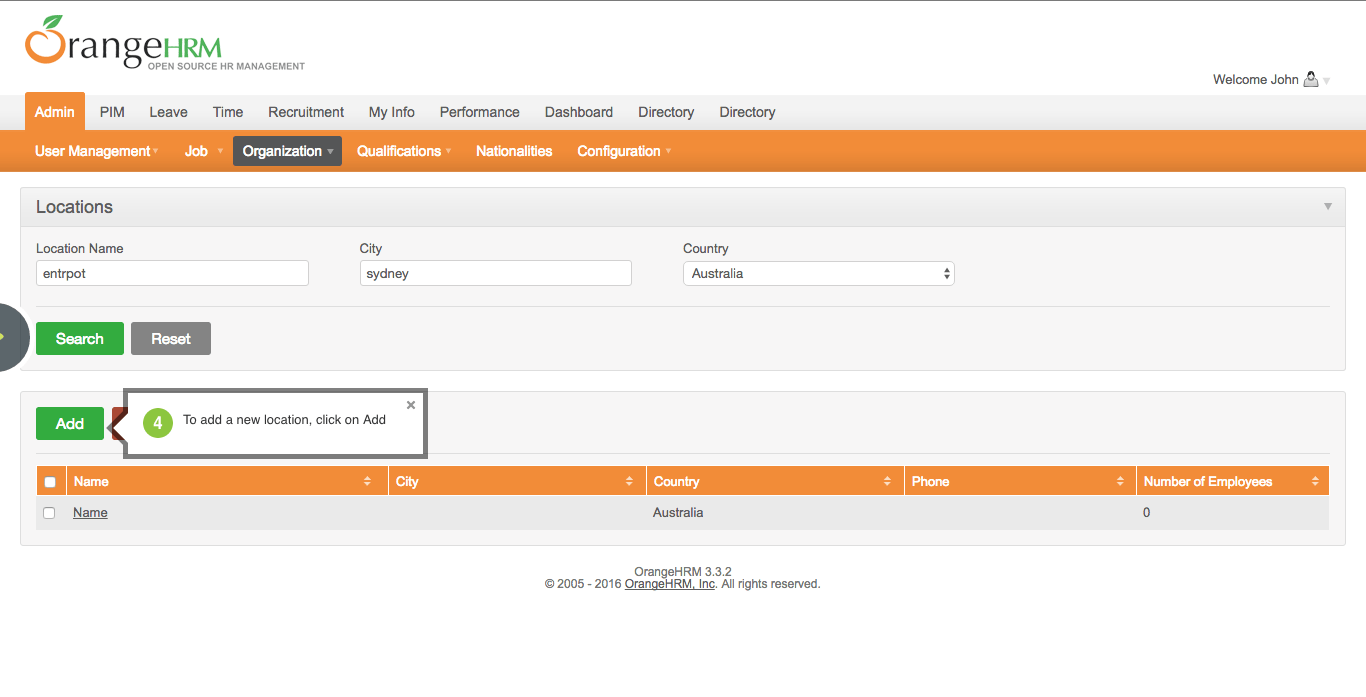
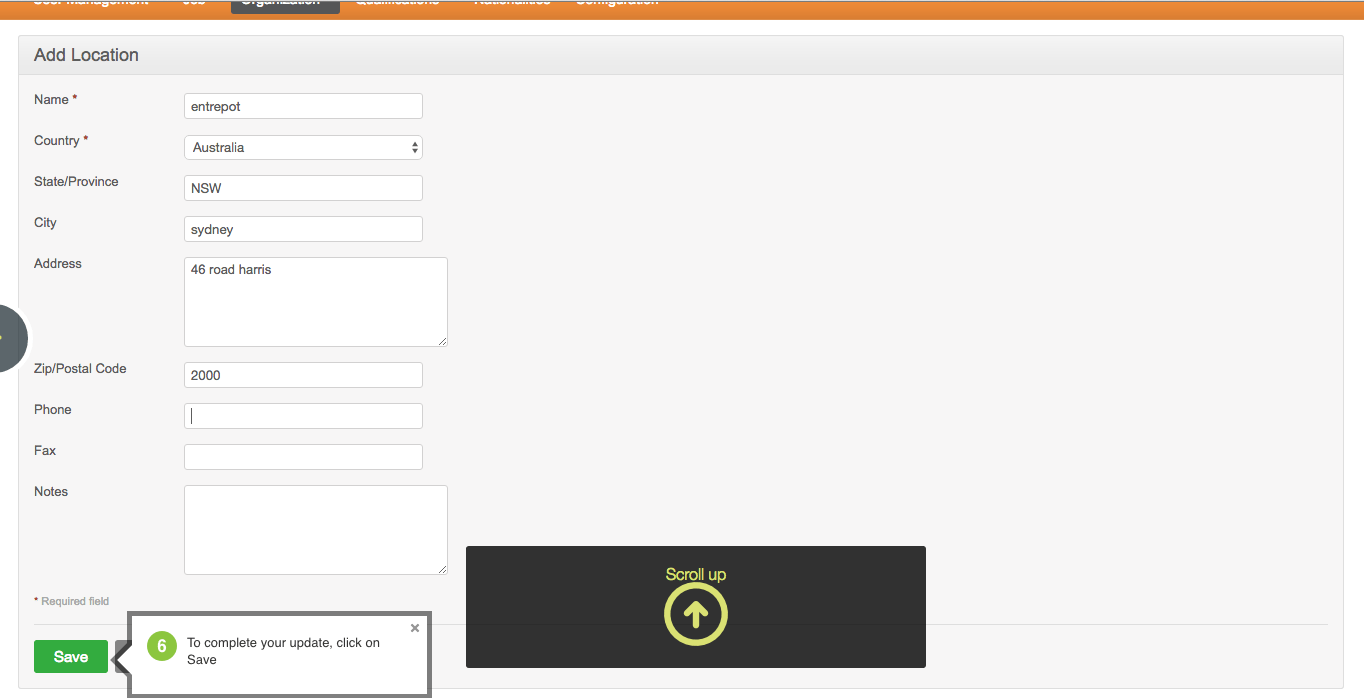
How to add new company location:
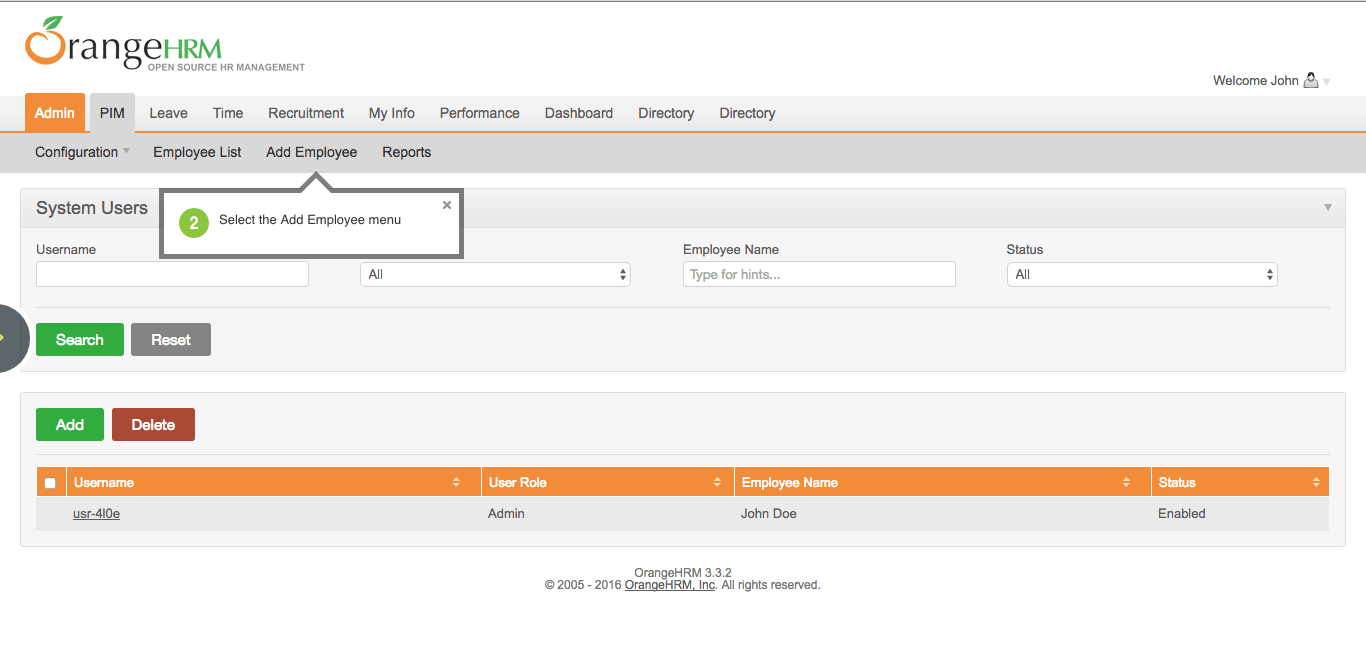
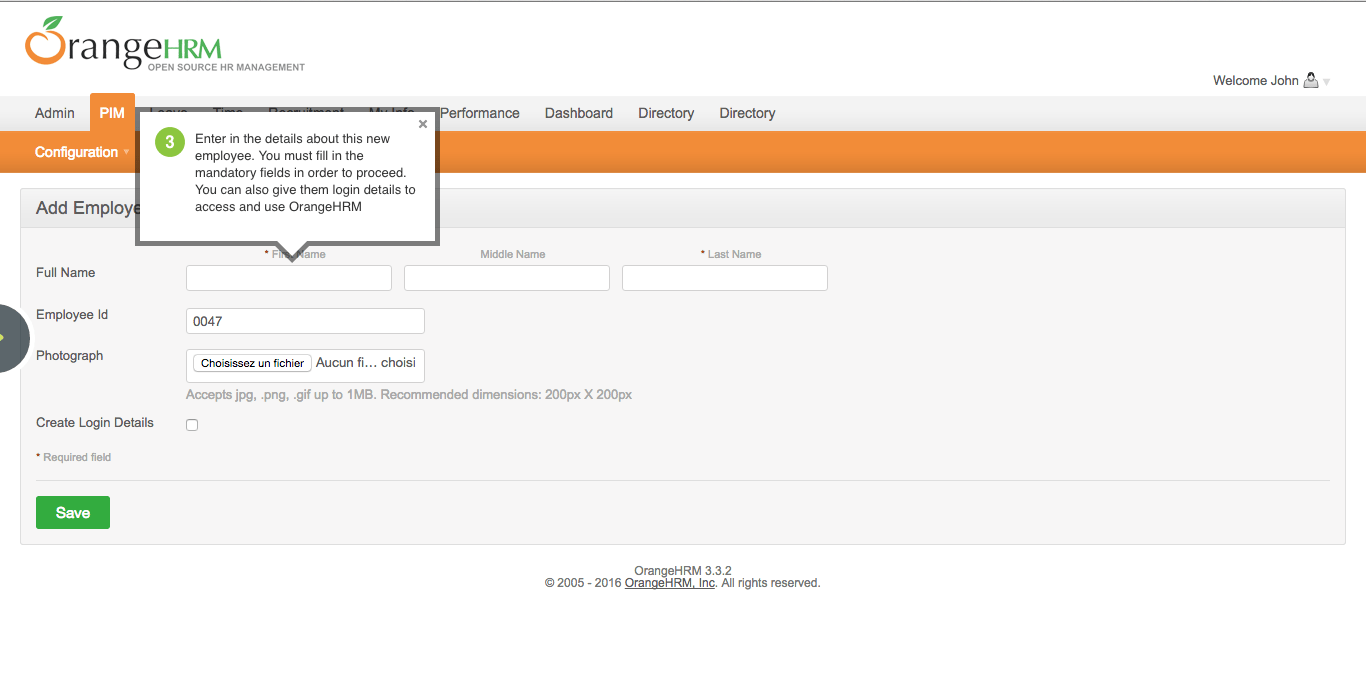
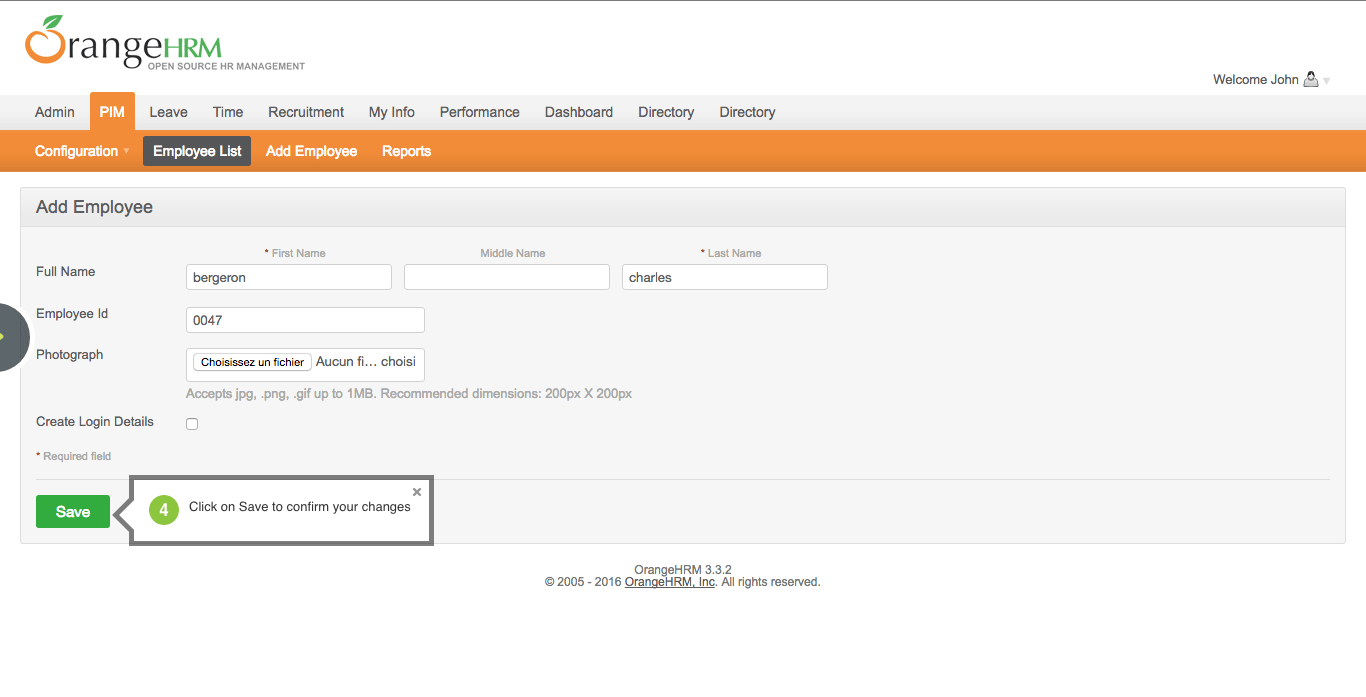
How to add new employee:
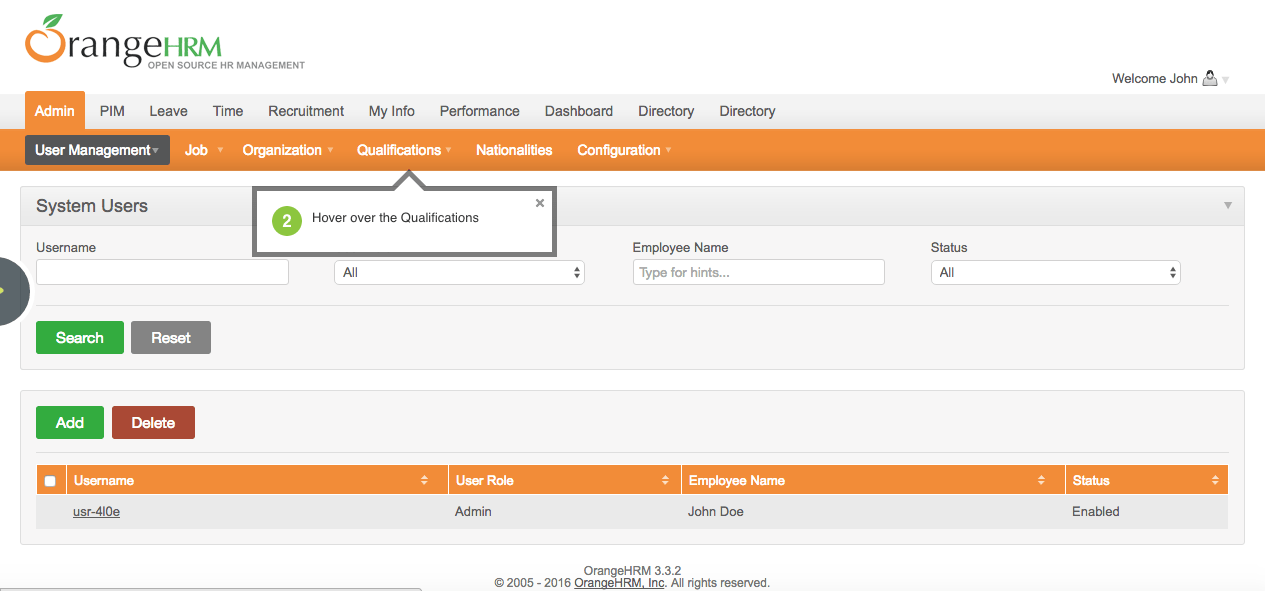
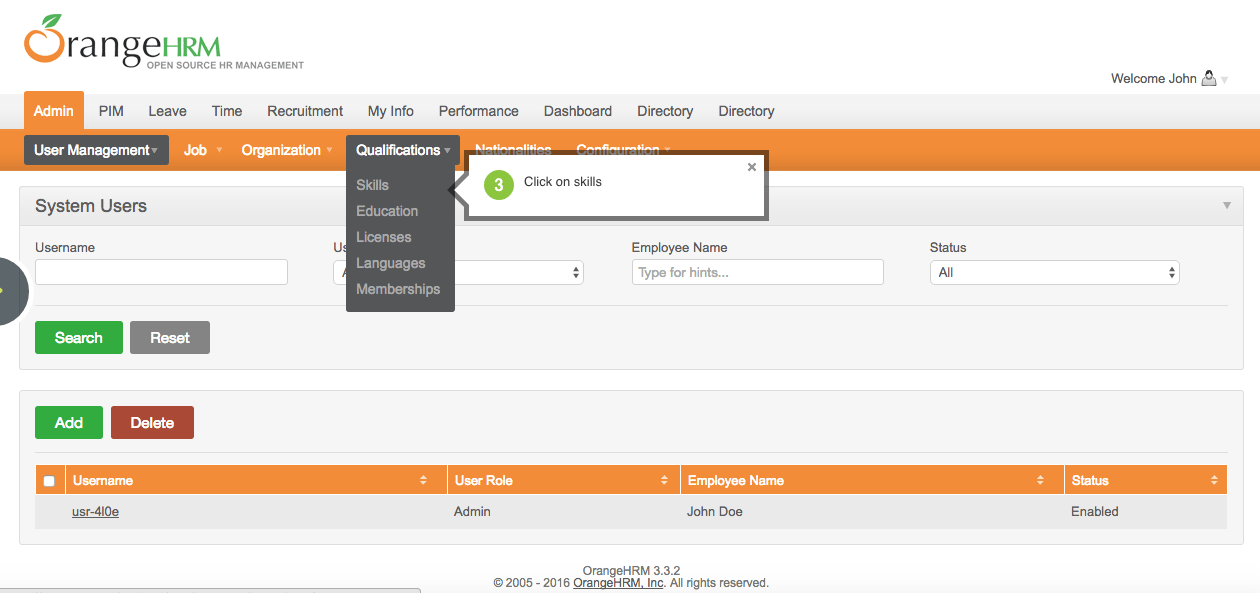
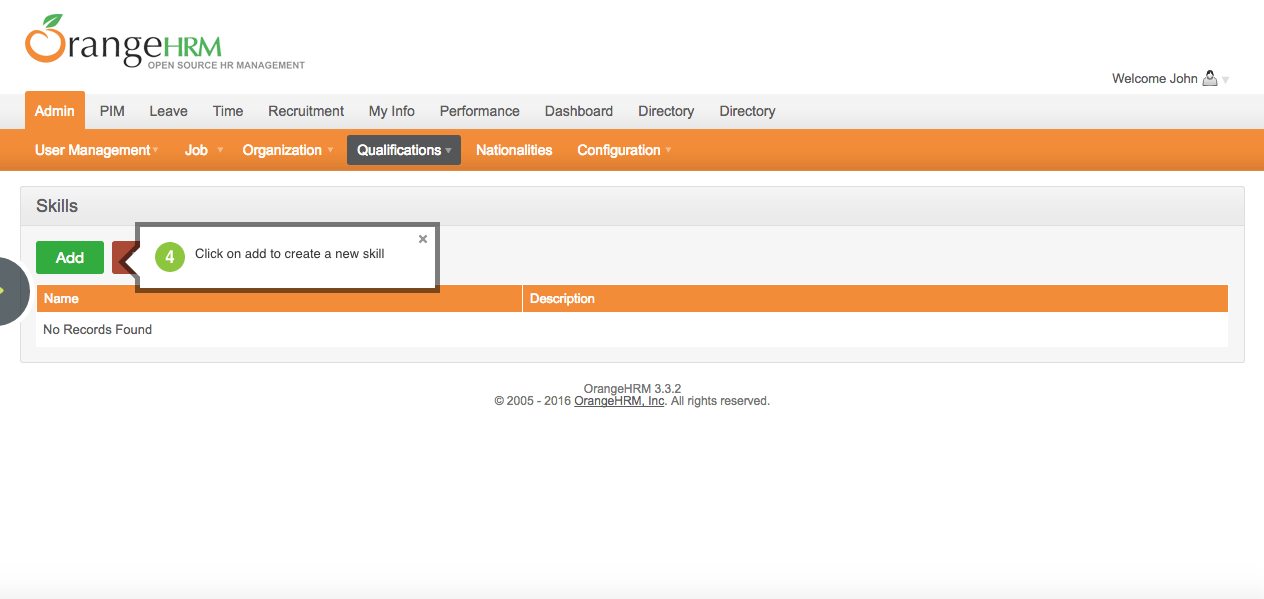
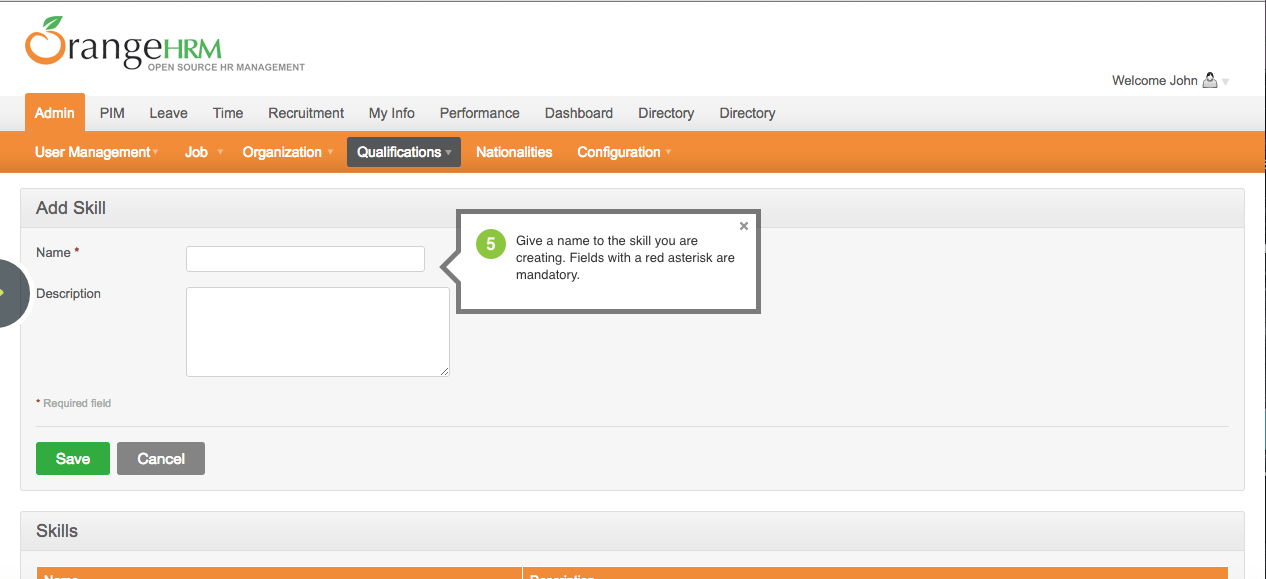
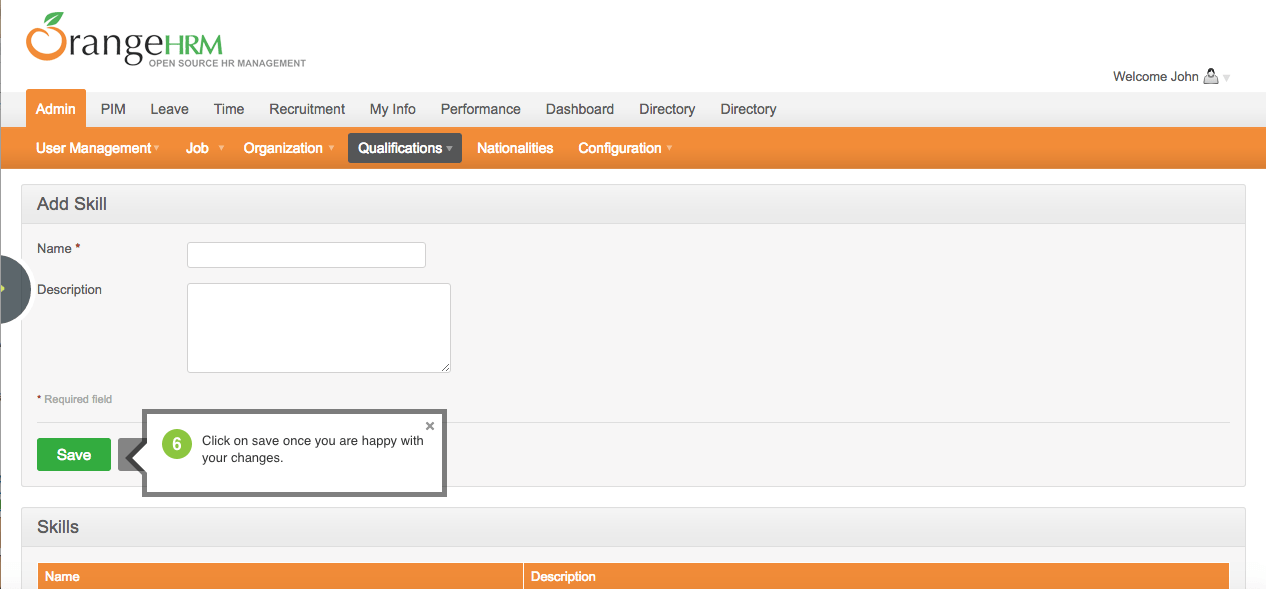
How to add new skill to organization:
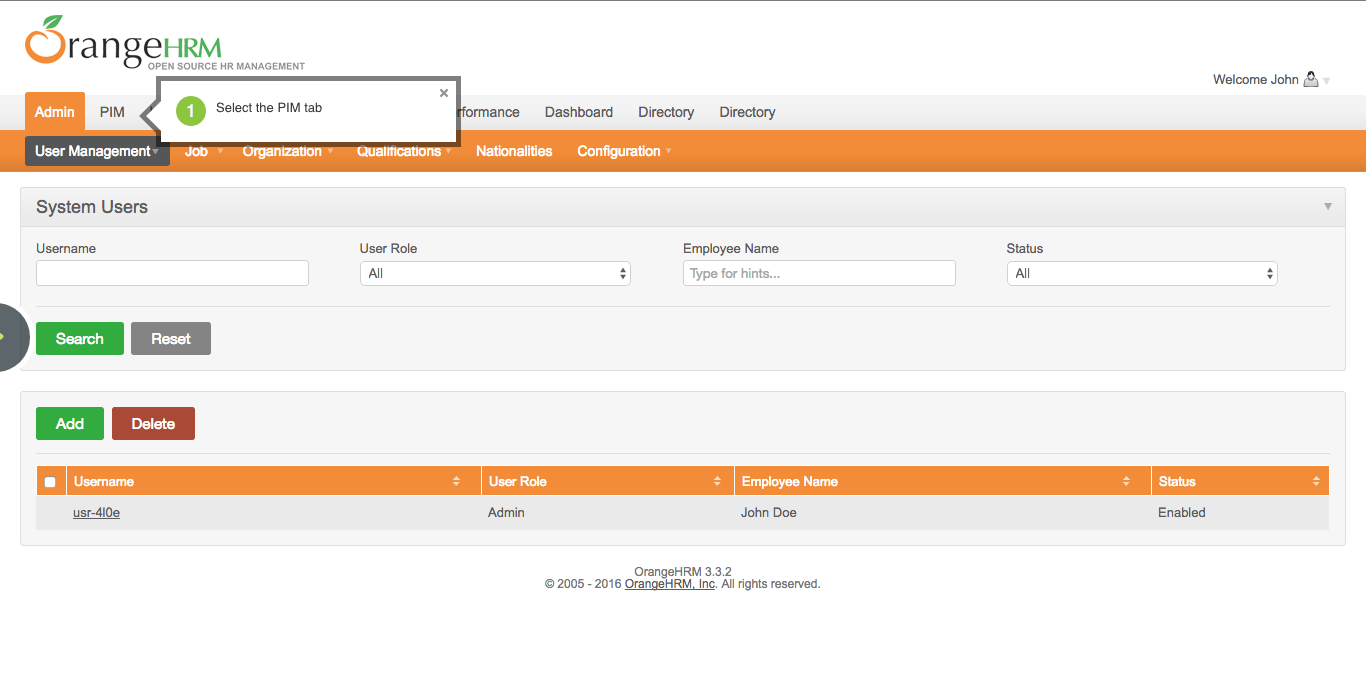
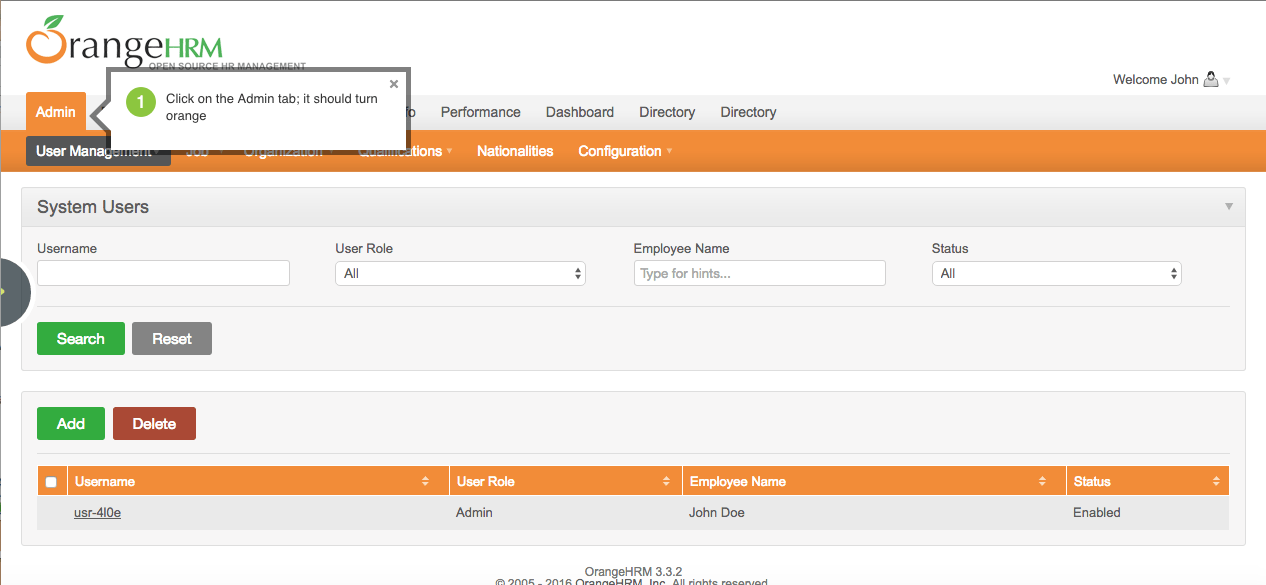
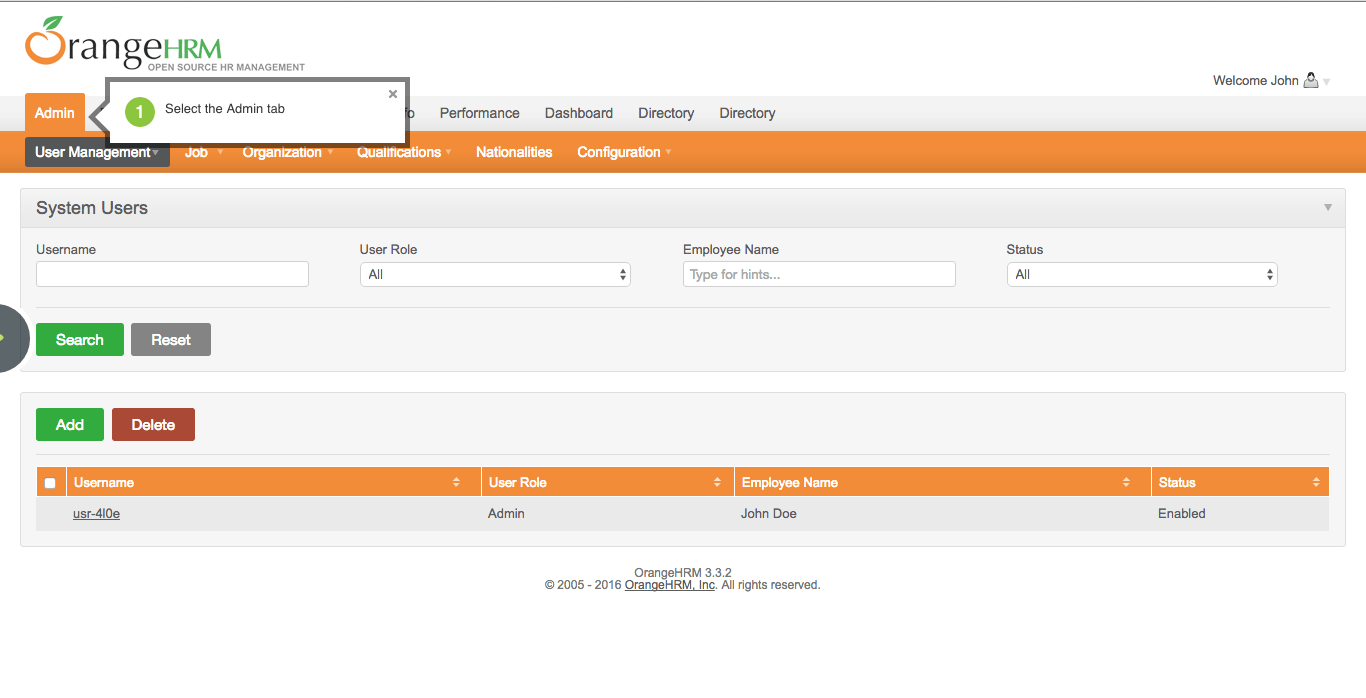
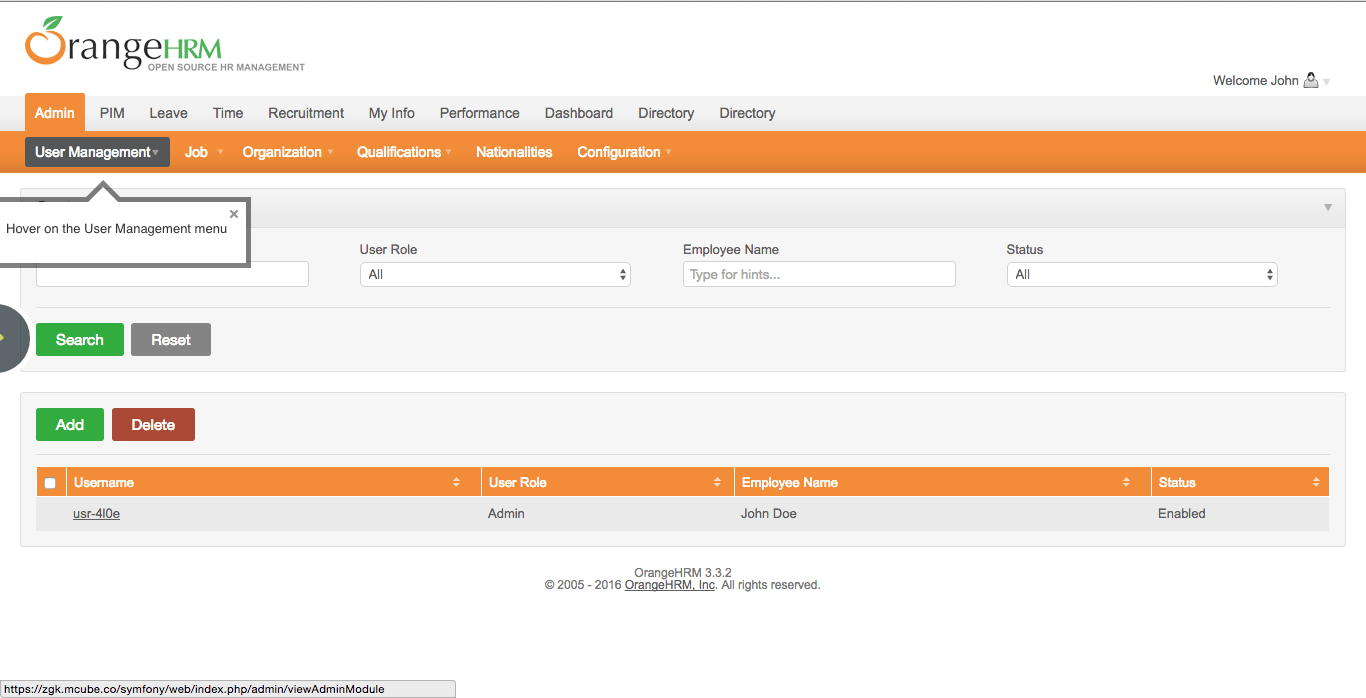
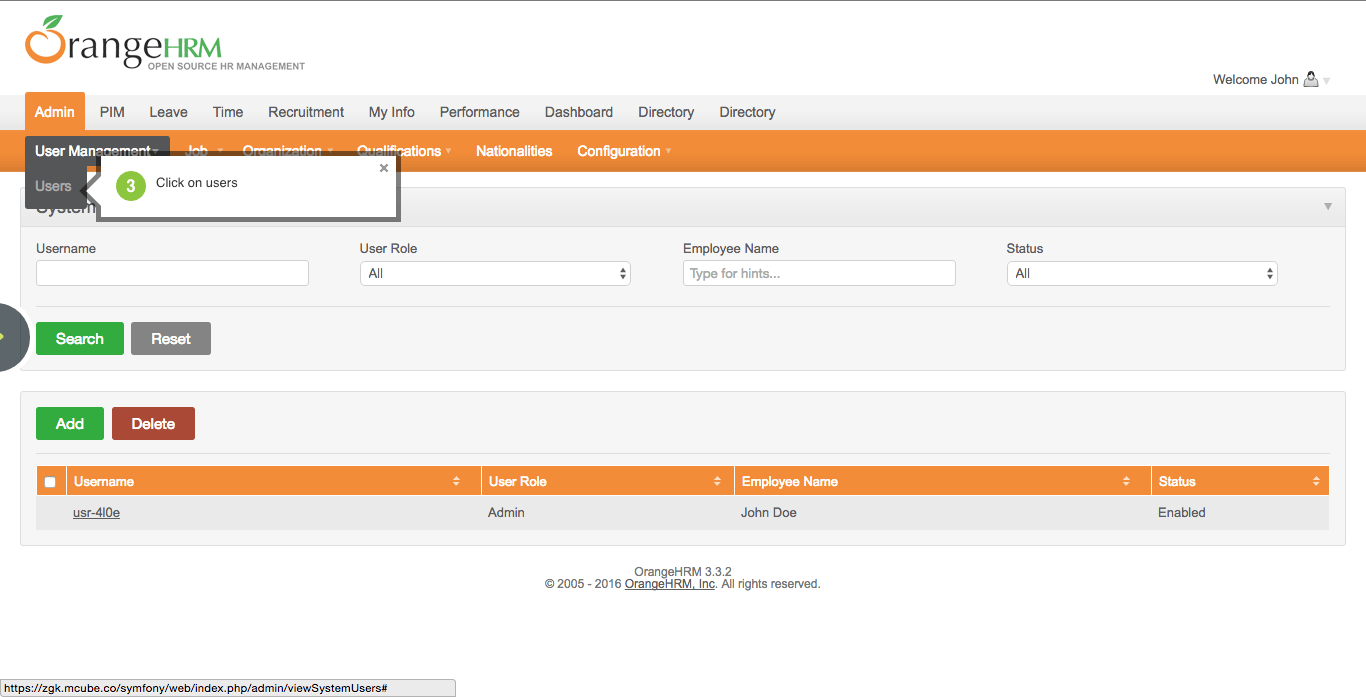
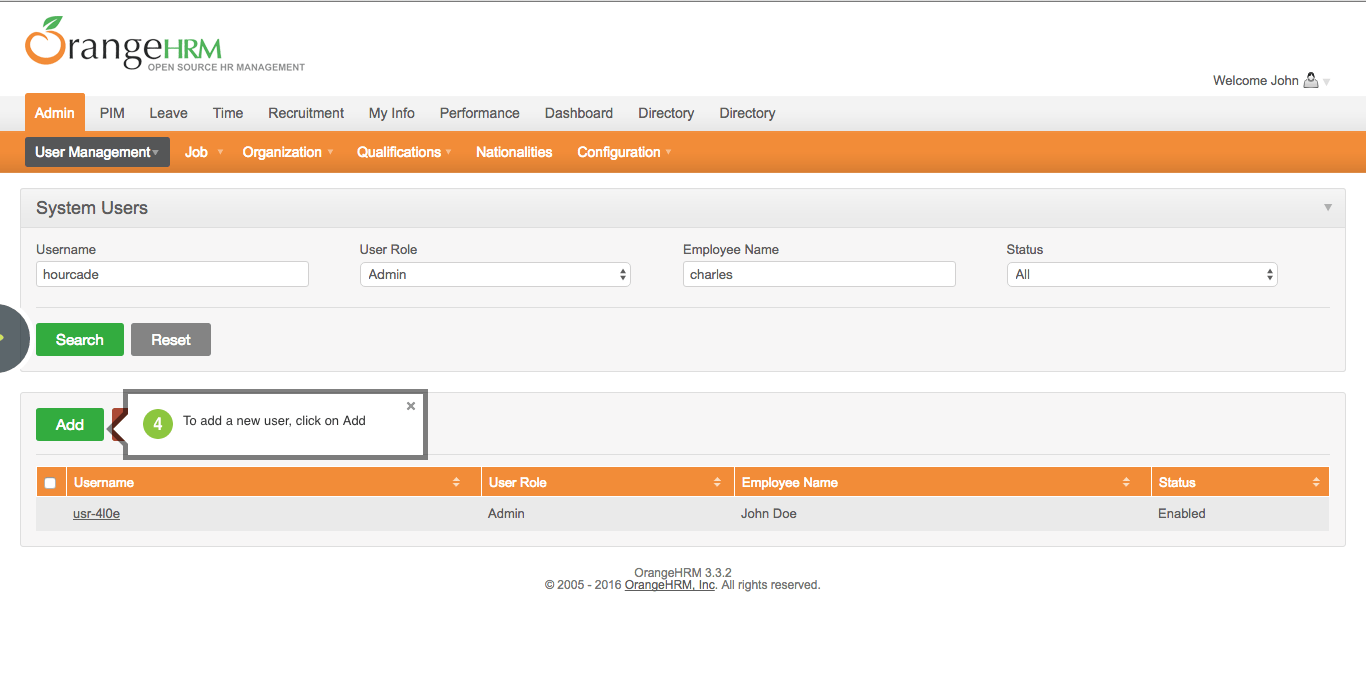
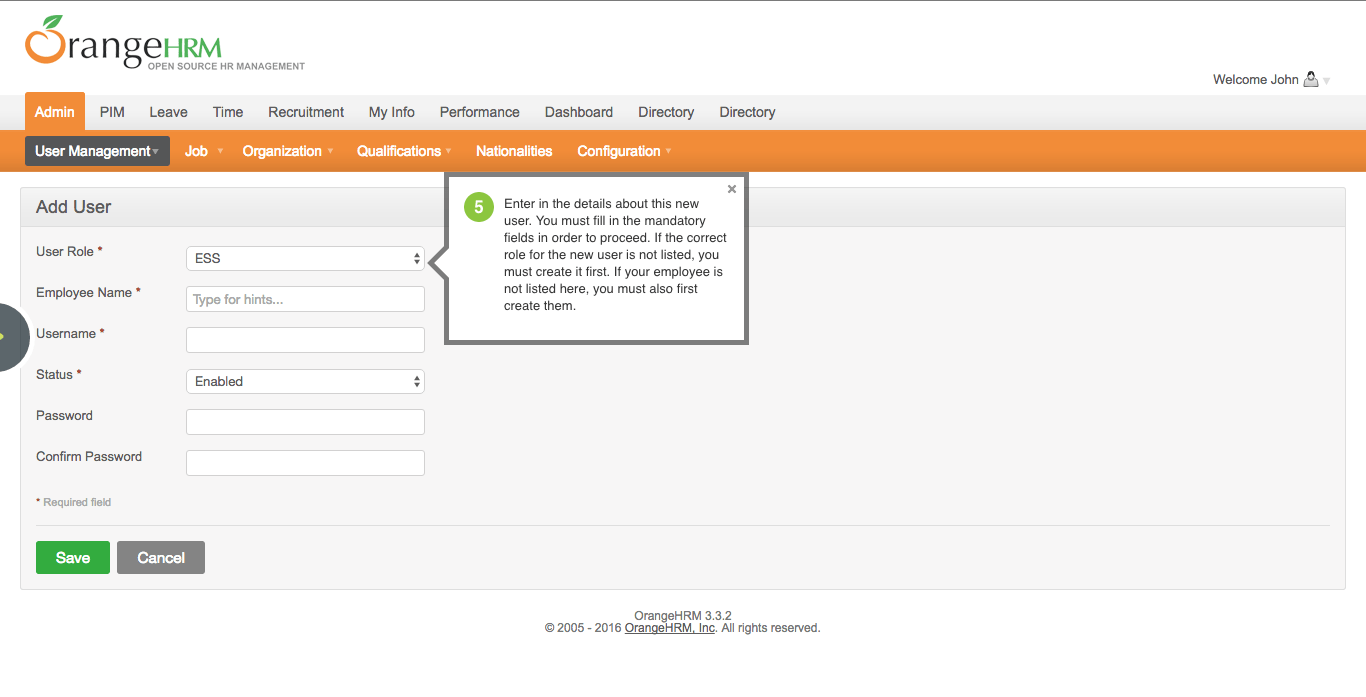
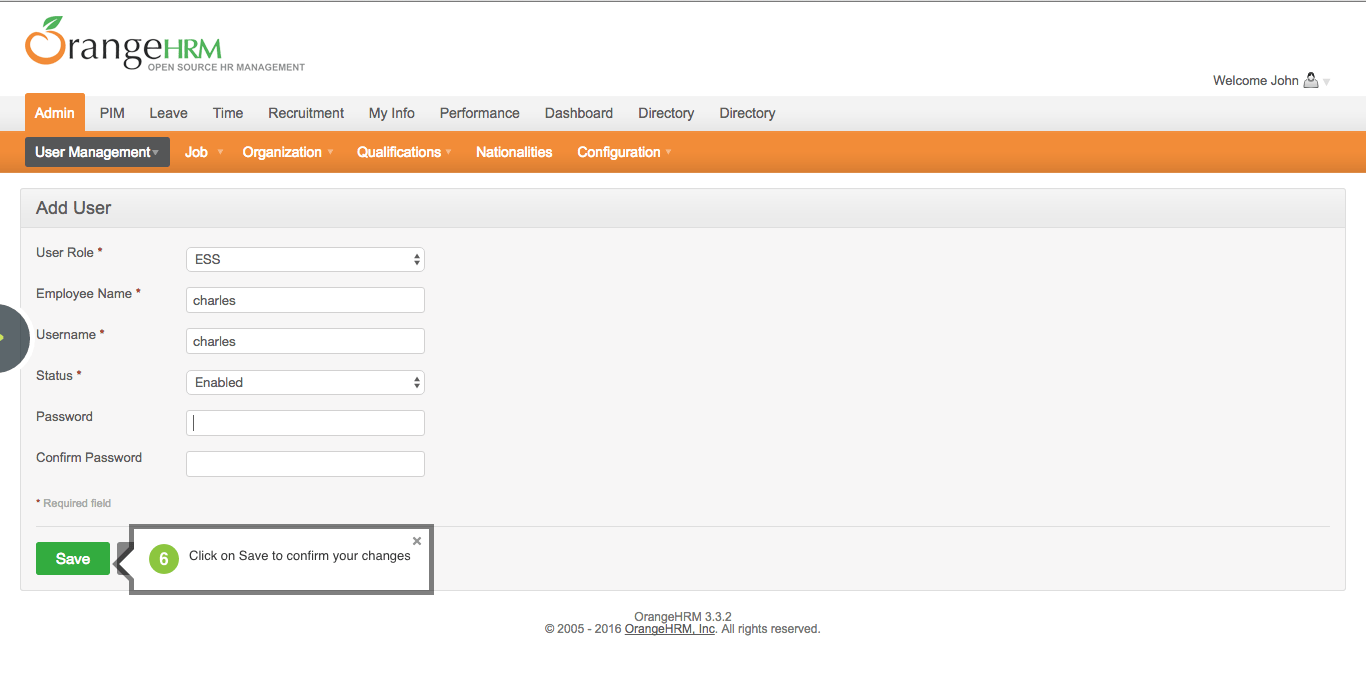
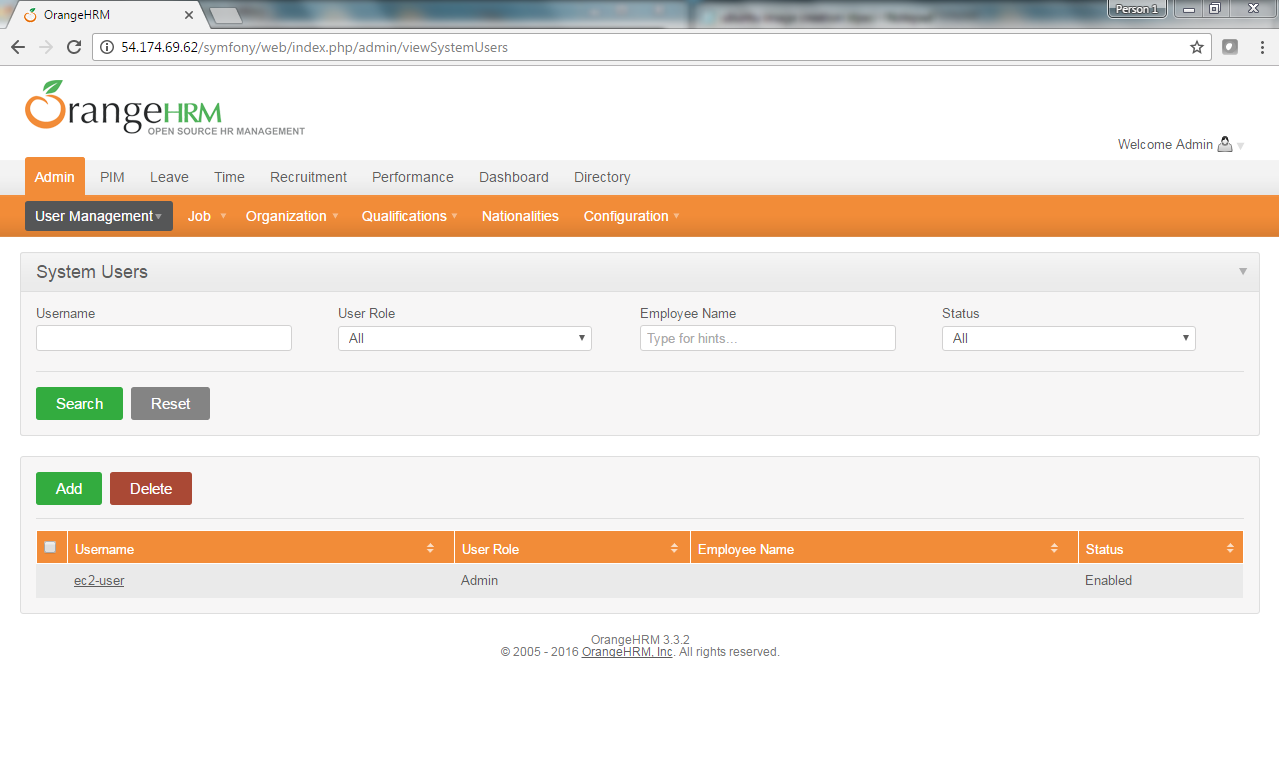
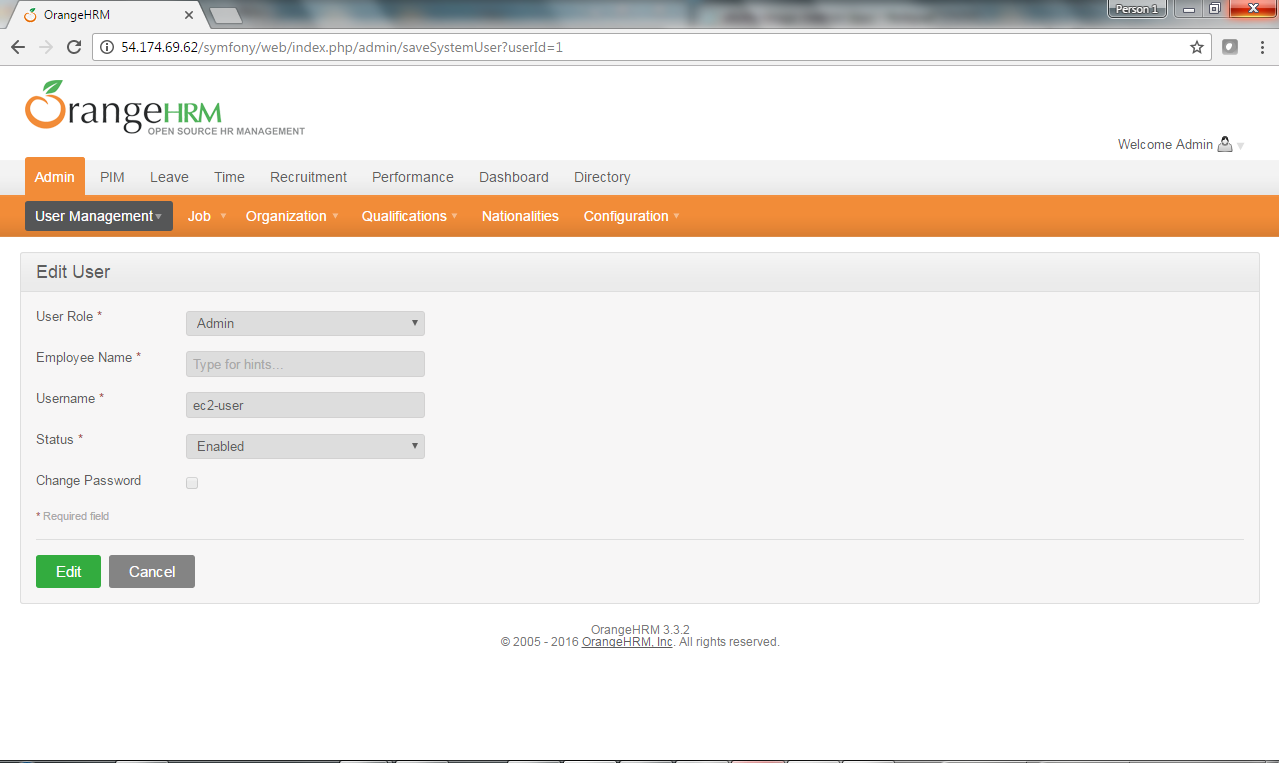
How to add new user:
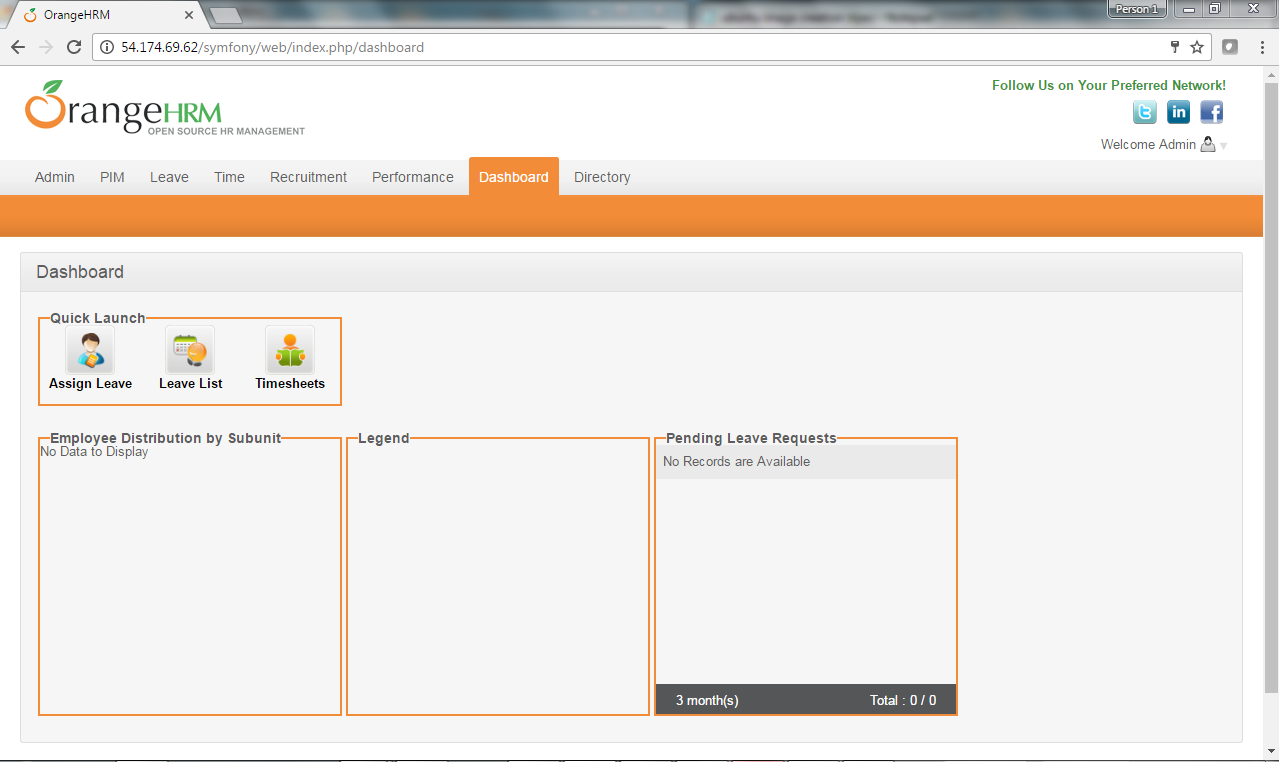
How to get Started – OrangeHRM:
Orange HRM is a precise and convenient HR Management (HRM) system targeted for Small and Medium Enterprises. The functionality includes employee information management, employee absence management, recruitment management, employee performance evaluation, leaves management, reporting lines management and many other HR management tools. Orange HRM also provides Expense tracker, timesheets, leave calendar, notifications and exports to Microsoft Excel (CSV extractor) for reports, leave and recruitment details.
1 – Getting started with OrangeHRM
To get started with OrangeHRM, you must first be registered and logged in your account. Once your application is installed on your dashboard, click on it to be automatically and securely logged in. Your OrangeHRM application is ready to use!
2 – Set up your organization in OrangeHRM
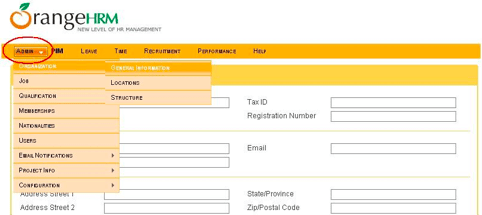
To set up your organization, click on Admin in the control panel and on the first menu item Organization. You will be able to enter all the details related to your organization.
Note that you will be able to enter the location or locations of your company in this section. The locations will be used when you enter your employees as part of their profiles.
You can also specify your company’s structure should your organisation be divided in sub-divisions or sub-sections. This again will be used in other parts of the application later on.
3 – Adding Employees and Users in OrangeHRM
Tips for adding users to OrangeHRM on Maestrano: You want to know the simplest and most secure way to add users to your OrangeHRM application [recommended]? Simply share your OrangeHRM app with the users you need through your Maestrano dashboard. It’s a 1-minute process, that will make you create an ‘Organization’ (The group of users you want to grant access to your application) and invite those users you want. Follow this very short guide and you will be done in 1 minute.The users will automatically receive an invitation email to access OrangeHRM.
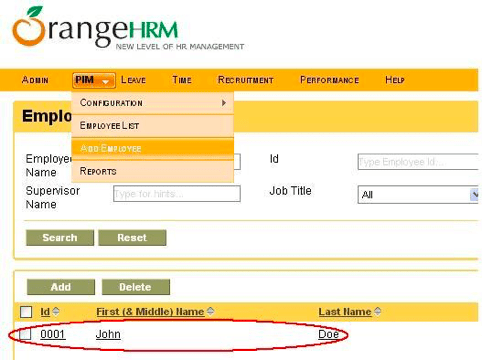
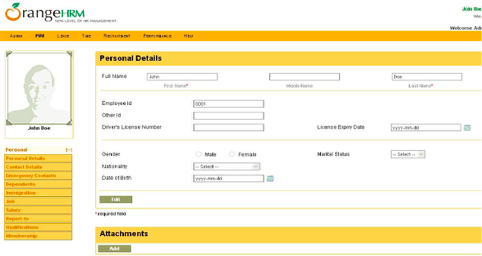
If you want to add users/employees directly from the OrangeHRM application [not recommended], click on PIM in the control panel. This tab is generally where you can enter all information related to your human resources. By clicking on Add Employee you will be able to enter all employees details.
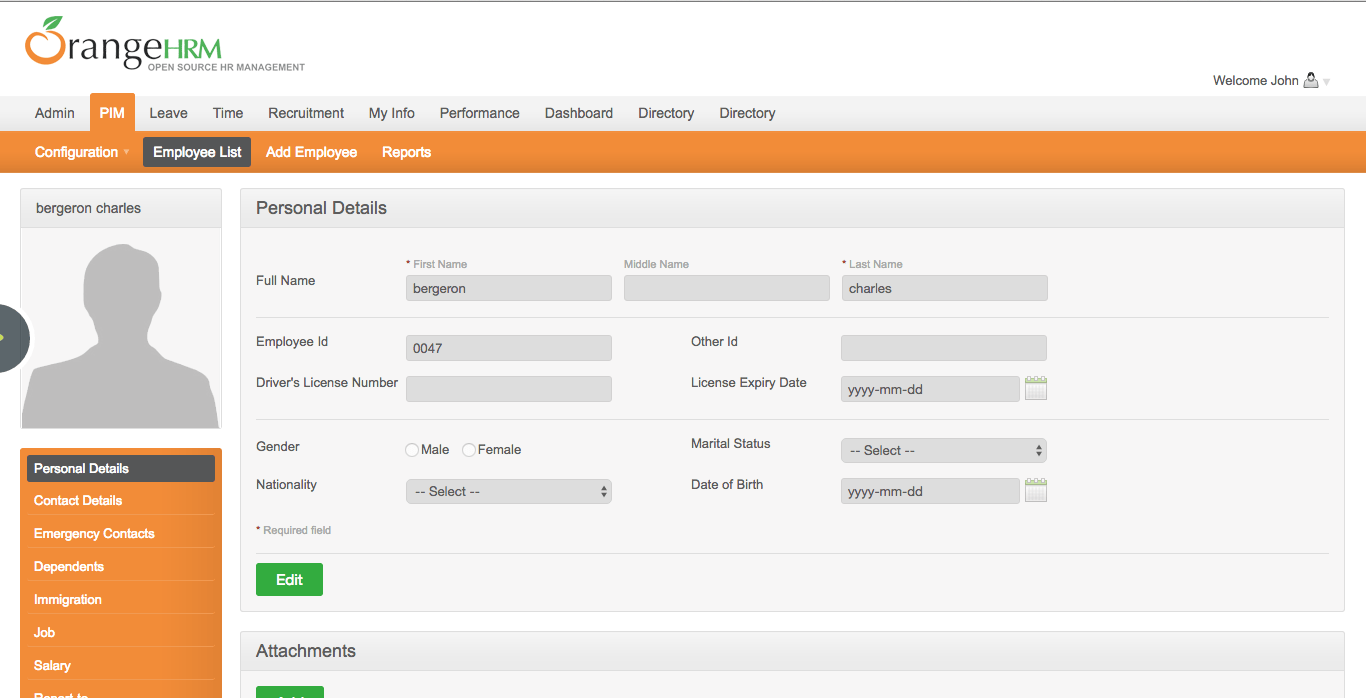
Once saved, your employee appears in the list, as highlighted in red on the figure above. By clicking on the employee’s name, you will see his/her full profile appearing.
You can now complete their profile with all the information you need.
In the Report-to tab, you will be able to assign a supervisor to your employee. You will not be able to complete this action if the supervisor is not entered in the employee list him/herself as the selection is made from a drop-down list with the names of the employees entered in your data base.
By going in the Job tab, you will be able to specify the function of your employee, as well as the job category, sub-unit and location. Those items are also populated from drop-down lists based on information you have provided in another section of the application. The location and sub-division information has been provided when you competed your organization setup in the Application . See below how to setup the jobs.
It is however important that you enter for each user a valid email address (So that they can receive the application’s notifications). This email address should be the same as the one they registered on their Maestrano account, to ensure that the users can actually access your OrangeHRM application. All users will need to create an account on Maestrano, using the same email address as the one entered in the OrangeHRM application.
4 – Set up the various jobs existing in your company
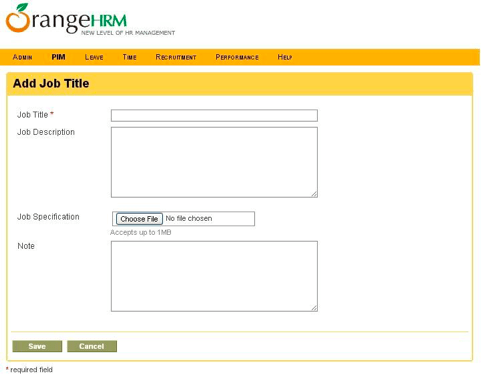
In order to create the list of jobs available in your organization (And be able to allocate those jobs to your employees as seen above), go to Admin in the control panel and click on the second menu item Job. In the sub-menu that appeared, click on Job Titles. By clicking on the button Add, you will be able to enter a new job in the window displayed below.
Note that you can import an existing Job Description and it can be the same one as the one used in the “Recruitment” section of the application.
Once Saved, the job is entered in the data base and can be used as part of your reports and to be allocated to your employees.
5 – Advanced functionalities of Orange HRM
You have now setup the basic elements of Orange HRM: your company (Including location and structure), your employees list, their jobs and associated information.
Orange HRM proposes much more practical functions, among others:
- Leaves tracking
- Timesheets tracking
- Recruitment process assistance and follow up
- Setup and monitoring of Key Performance Indicators (KPIs) for your workforce
- Annual discussions recording and tracking
- Those more advanced functions will be described in another tutorial (Coming soon!), but Orange HRM is a transparent application that always follows the same process: establish the parameters required by the application (Like you did for your company setup, jobs, etc.) and follow the flow of requirements prompted by the application.
How to set up an organization in Orange HRM:
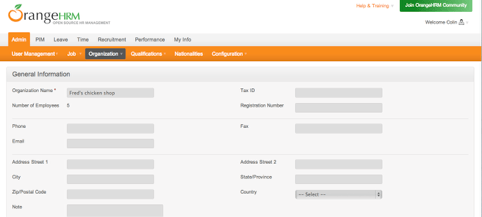
To set up an organization in OrangeHRM, first click on the “Admin” tab on the top left of the OrangeHRM main screen.
Under “Admin”, the choose “Organization” and then “General Information”.
On this screen, first press the green “Edit” button at the bottom of the page, and you can then enter all the general information about your organization. Remember to press “save” at the bottom when you have finished.
If your organizations has multiple locations or divisions, then back at the top, under the “Organization” tab, select either “Locations” (to enter the different locations within your organization) or “Structure” (to enter the various organizational sub-units or divisions).
Remember to finish by pressing the “Save” button at the bottom of the page each time.
Your organization is now set up and ready to use.
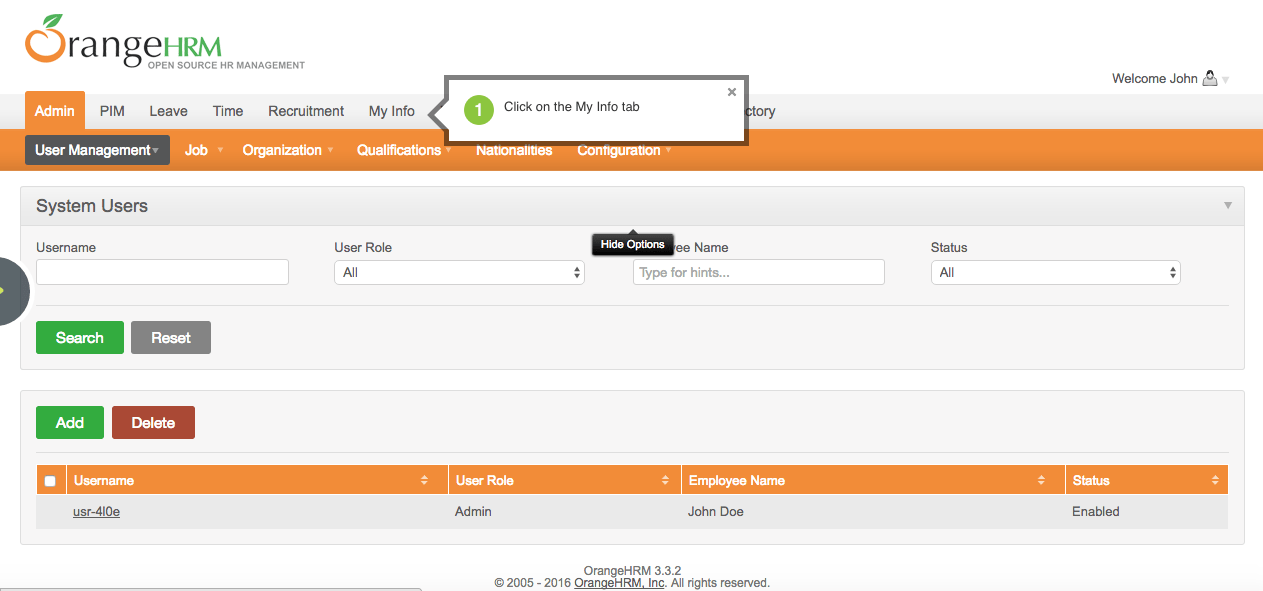
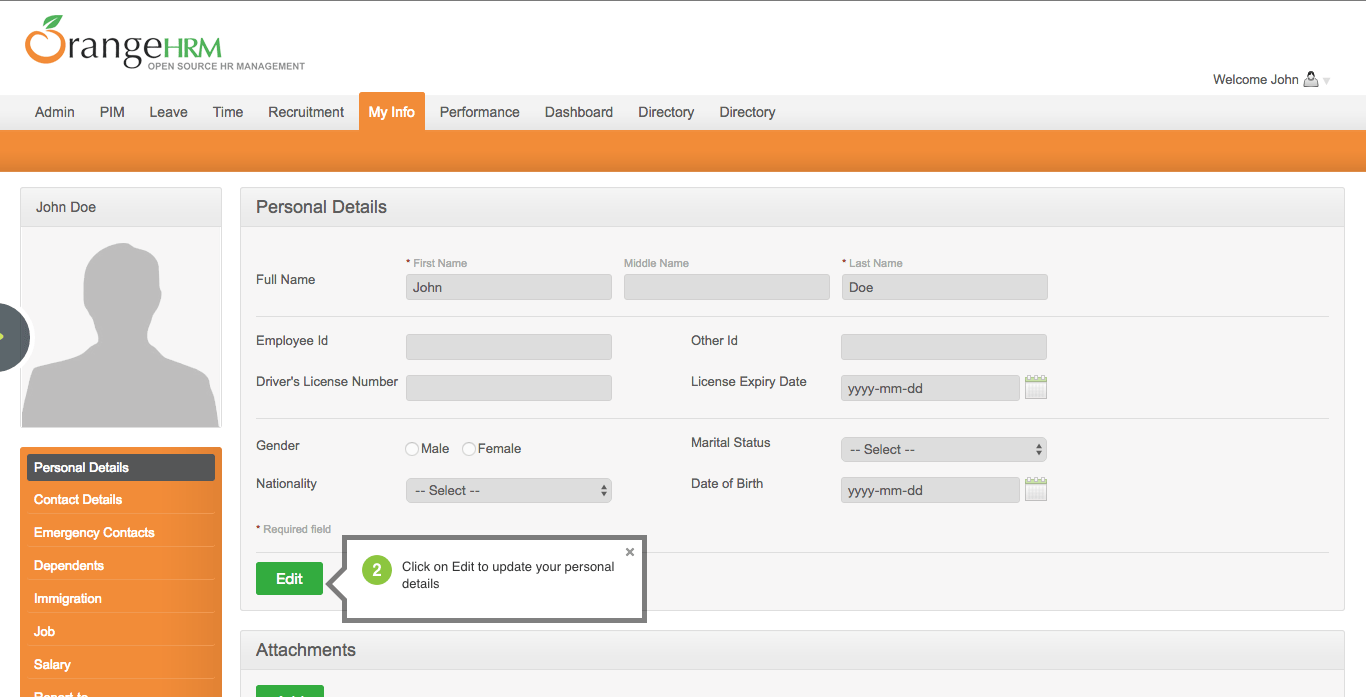
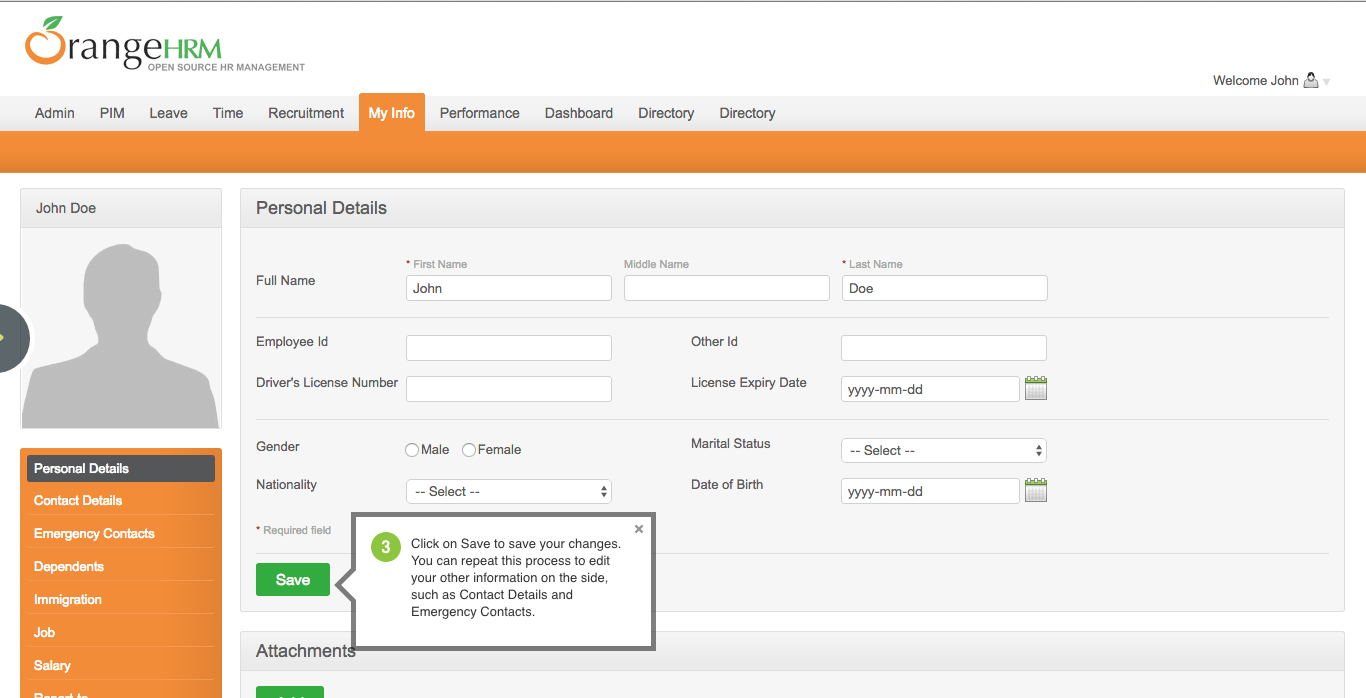
How to update personal details:
OrangeHRM is the world’s most popular Open Source Human Resource Management Software (HRMS) with over 1,000,000 users globally.
Benifits of the OrangeHRM:
- Significantly reduced manual efforts and paperwork
- Increased efficiency with employee self-service and automated reports
- Scalable solution helping the company spread and grow across the globe easily
- Significant reduction of overheads and inefficiencies resulting in improved productivity at lower cost
OrangeHRM Services include:
- Multiple proprietary and open source HR management solutions explored and OrangeHRM recommended
- Analysis of all internal HR processes and information formats for migration into new system
- Various HR functions like leaves, performance review and recruitment customized for specific needs of the company
- Integration with current systems like LDAP and Learning Management System (LMS)
- Many custom reports developed with search and rich UI.
-OrangeHRM aims to be the world’s leading open source HRM ( Human Resource Management ) solution for small and medium sized enterprises (SMEs) by providing a flexible and easy to use HRM system affordable for any company worldwide.OrangeHRM is released under the GNU GENERAL PUBLIC LICENSE.
OrangeHRM Inc. is a software company based in Secaucus, New Jersey. The company produces the human resource management (HRIS) solution, OrangeHRM, that is available both as an open source and an advanced hosted application (SaaS). OrangeHRM is released under the GNU General Public License.The company was established in 2005. Their first beta release, in January 2006, was the first open source HRIS. Today the solution has more than 1 million users and the company has partners in the US, Europe and Asia.
The architecture of the application targets small and medium enterprises. The functionality includes employee information management, employee absence management, recruitment management, employee performance evaluation and other HR management tools.OrangeHRM offers on-premise, online and also mobile solutions for businesses of all sizes within a variety of industries. Mobile compatibility also allows you to access this software remotely through a mobile-optimized site and on their Android or iOS mobile app.OrangeHRM is owned by OrangeHRM (https://www.orangehrm.com/) and they own all related trademarks and IP rights for this software.
Cognosys Provides Hardened images of OrangeHRM on the cloud ( AWS marketplace, Azure and Google Cloud Platform).
Deploy OrangeHRM securely on cloud i.e. AWS marketplace, Azure and Google Cloud Platform (GCP)
Secured Orange HRM on centos –
Secured OrangeHRM on Ubuntu 14.04 LTS
OrangeHRM On Cloud For AWS
Features
OrangeHRM Features:
Organization Management
Organizes employees in an org structure that can be used throughout the application for reporting, permissions, etc.
Time, Attendance, and PTO
Tracks time, attendance, paid time-off (PTO), sick time, schedules, and other workforce-related information.
Expense Management
Contains functionality for employees to submit expenses reports and track reimbursments
Salary Structures
Manages position descriptions and pay grades/structures for each role
Compliance
Helps protect risk areas by ensuring compliance standards are met through tracking and reporting
Benefits Administration
Enables employees to manage their benefit plans by viewing plans, make changes during open enrollement, and for life event changes. Employers can report and manage payroll deductions based on selected plan options
Automation
Automates some or all operation related tasks.
File Sharing
Provides robust sharing options for communication with both internal and external stakeholders.
Content Library
Provides users with a pre-built library of useable content, templates or libraries for performance review creation.
Reporting
Provides analytics tools that reveal important business metrics and track progress.
Interoperability
Connects to external systems and applications as needed to complete team workflows.
Performance
Is consistently available (uptime) and allows users to complete tasks reliably.
Feedback Management
360 degree feedback can be to make promotion and compensation decisions.
Customization
Allows administrators to customize to accomodate their unique processes. Includes ability to create custom objects, fields, rules, calculations, and views.
Integration APIs
Application Programming Interface – Specification for how the application communicates with other software. API’s typically enable integration of data, logic, objects, etc with other software applications.
Internationalization
Enables users to view and transact business with the same content in multiple languages and currencies.
User, Role, and Access Management
Grant access to select data, features, objects, etc. based on the users, user role, groups, etc.
Labor Forecasting
Predict the number and types of employees necessary to meet anticipated demand to control labor costs.
Team Communication
Message other team members or managers through built-in text or emailing functions and communicate scheduling or leave requests.
Mobile Shift Scheduling
Managers and employees can create or claim available work shifts and receive notifications on their mobile device
Self-Service Capabilities
Web portals through which employees can view their schedules, submit PTO requests, configure work availability and preferences, and self-schedule from available work times.
Workforce Analytics
Tools designed to help analyze employee data and develop baselines for evaluating and optimizing workforce management.
Succession Planning
Identify high performing employees with potential to be promoted with minimal development.
Time & Attendance Tracking
Let employees track the hours they have worked through integrations with time tracking products or built in time tracking features.
Shift Scheduling
Plan employee work shifts according to availability and provide notifications to employees when they are scheduled.
Labor Forecasting
Predict the number and types of employees necessary to meet anticipated demand to control labor costs.
-Major Features of OrangeHRM :
- New Look and Feel
- Enhanced Recruitment Module
- Implementation of Advanced Security Measures
- Benefits Management
- Custom Reporting
- Document Repository
- Employee Database
- Employee Self-Service
- Onboarding & Offboarding
- Performance Appraisal
- PTO Management
- Recruiting Management
- Time & Attendance Tracking
- Project Management
AWS
Installation Instructions For Ubuntu
Note: How to find PublicDNS in AWS
Step 1) SSH Connection: To connect to the deployed instance, Please follow Instructions to Connect to Ubuntu instance on AWS Cloud
1) Download Putty.
2) Connect to virtual machine using following SSH credentials :
- Hostname: PublicDNS / IP of machine
- Port : 22
Username: To connect to the operating system, use SSH and the username is ubuntu.
Password : Please Click here to know how to get password .
Step 2) Database Login Details :
- MYSQL Username : root
- MYSQL Password : Passw@rd123
Note :-Please change password immediately after first login.
Step 3) Application URL: Access the application via a browser at http://PublicDNS/Orangehrm
Step 4) Other Information:
1.Default installation path: will be in your web root folder “/var/www/html/orangehrm” ( Please see above Note for stack name)
2.Default ports:
-
- Linux Machines: SSH Port – 22 or 2222
- Http: 80 or 8080
- Https: 443
- Mysql ports: By default, these are not open on Public Endpoints.Mysql :3306
Configure custom inbound and outbound rules using this link
Installation Instructions For Red Hat Enterprise Linux
Note : How to find PublicDNS in AWS
Step 1) SSH Connection: To connect to the deployed instance, Please follow Instructions to Connect to Redhat instance on AWS Cloud
1) Download Putty.
2) Connect to virtual machine using following SSH credentials :
- Hostname: PublicDNS / IP of machine
- Port : 22
Username: To connect to the operating system, use SSH and the username is ubuntu.
Password: Please Click here to know how to get password .
Step 2) Database Login Details :
- MYSQL Username : root
- MYSQL Password : Passw@rd123
Note :-Please change password immediately after first login.
Step 3) Application URL: Access the application via a browser at http://PublicDNS/Orangehrm
Step 4) Other Information:
1.Default installation path: will be in your web root folder “/var/www/html/orangehrm” ( Please see above Note for stack name)
2.Default ports:
- Linux Machines: SSH Port – 22 or 2222
- Http: 80 or 8080
- Https: 443
- Mysql ports: By default, these are not open on Public Endpoints.Mysql :3306
Configure custom inbound and outbound rules using this link
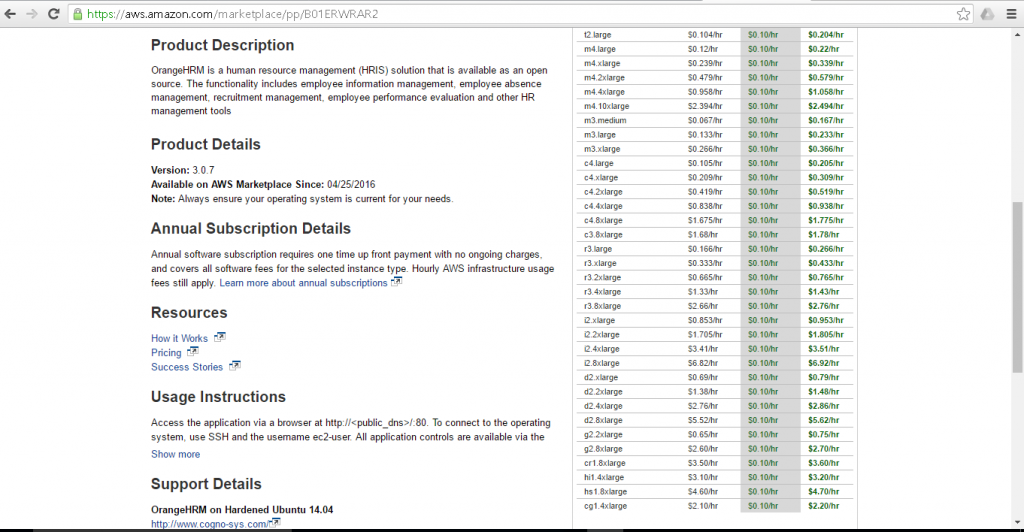
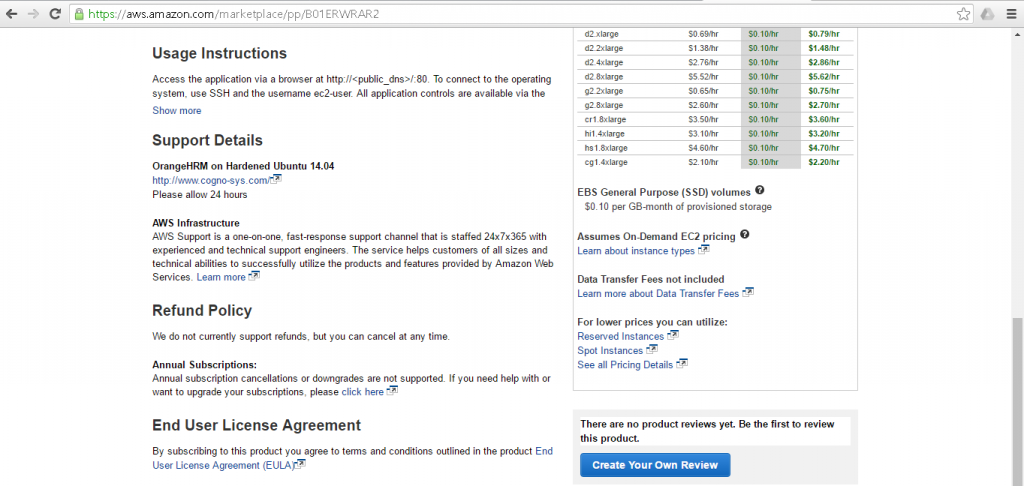
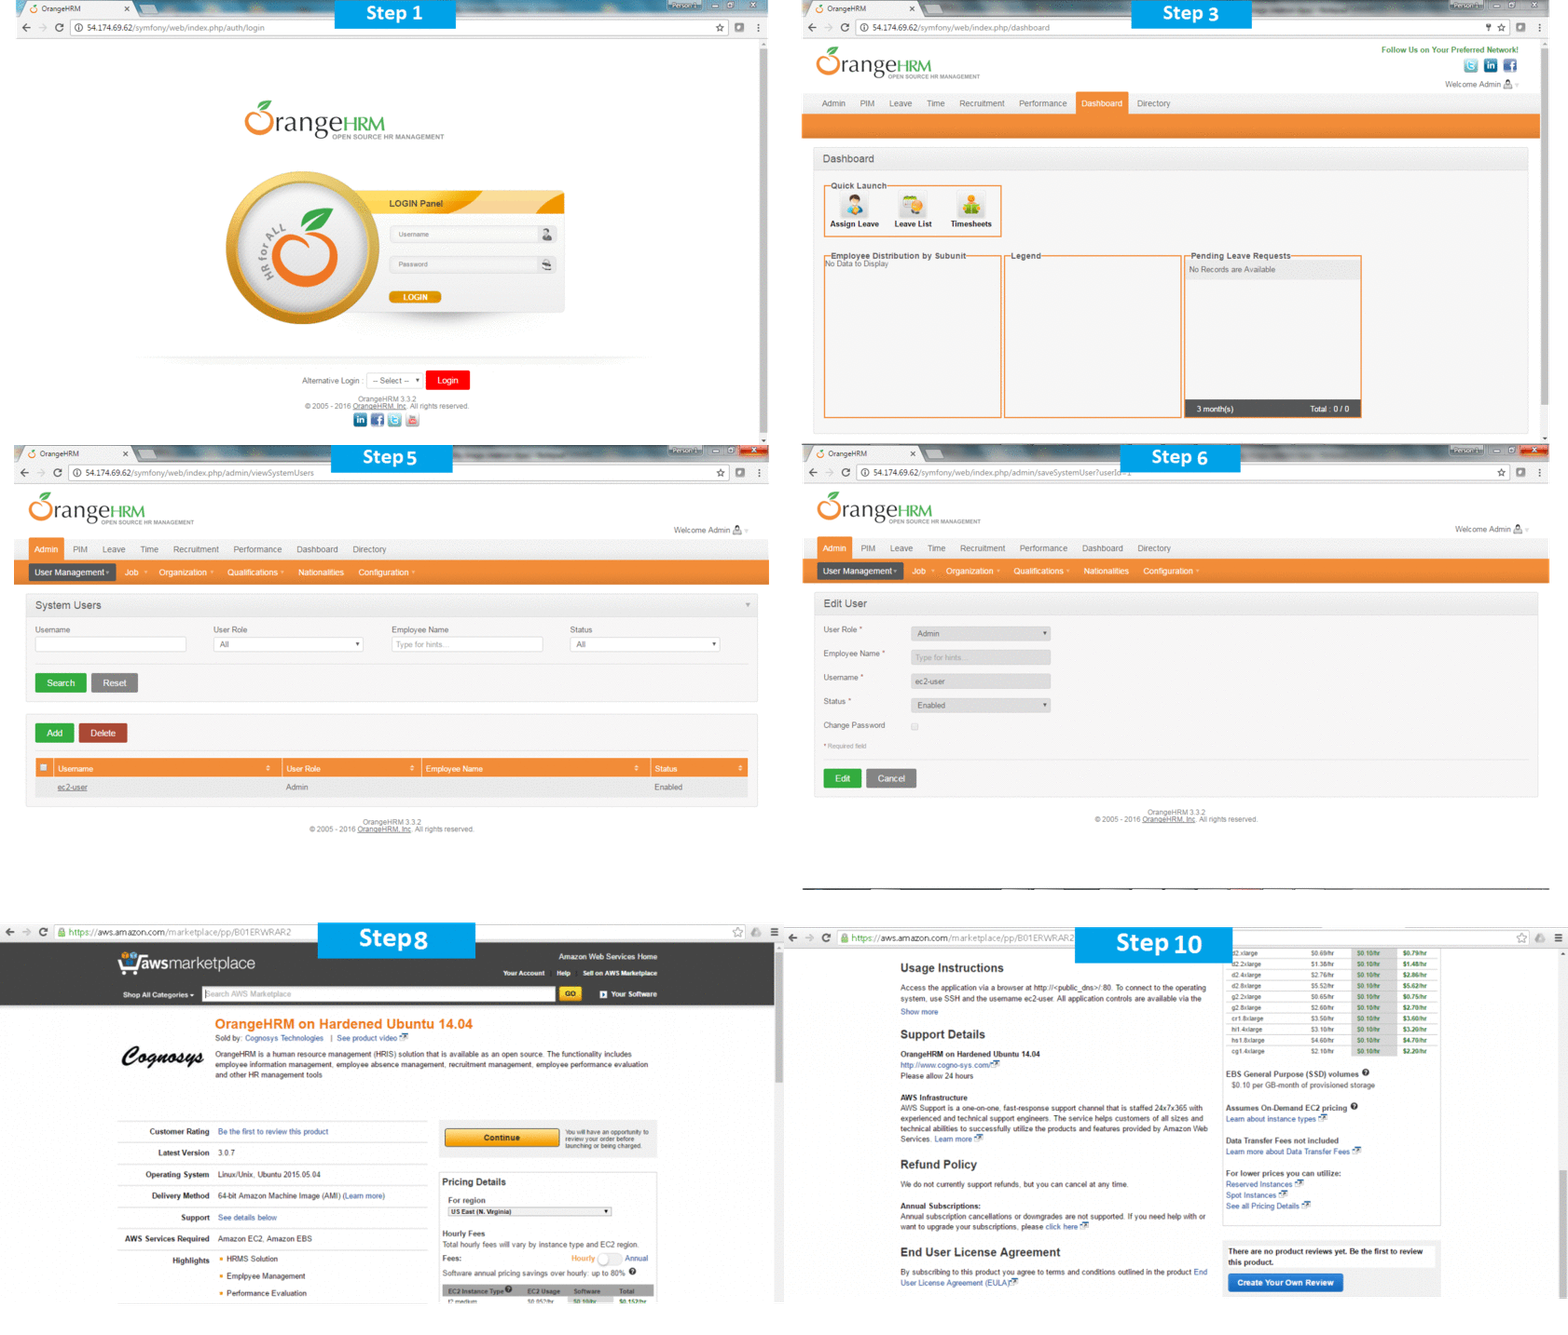
AWS Step by Step Screenshots
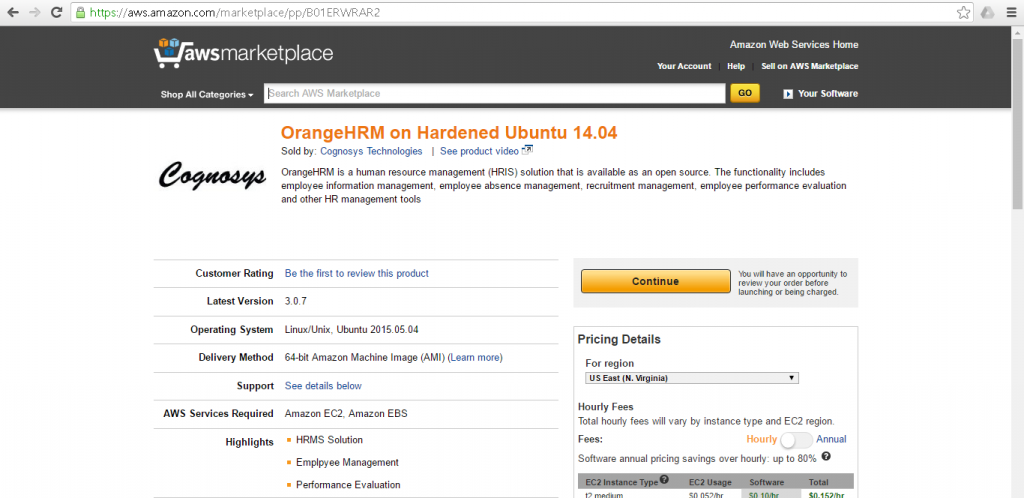
Product Overview
Azure
Installation Instructions For Ubuntu
Note : How to find PublicDNS in Azure
Step 1) SSH Connection: To connect to the deployed instance, Please follow Instructions to Connect to Ubuntu instance on Azure Cloud
1) Download Putty.
2) Connect to virtual machine using following SSH credentials :
- Hostname: PublicDNS / IP of machine
- Port : 22
Username: Your chosen username when you created the machine ( For example: Azureuser)
Password : Your Chosen Password when you created the machine ( How to reset the password if you do not remember)
Step 2) Database Login Details :
- MYSQL Username : root
- MYSQL Password : Passw@rd123
For Stack Database :-MySQL DB orangehrm with userorangehrmuser and password Passw@rd123 has already been created.Please use this MySQL database for you Stack Configuration.
Note: Please change the password immediately after the first login.
Step 3) Application URL: Access the application via a browser at http://PublicDNS/Orangehrm
Step 4) Other Information:
1.Default installation path: will be on your web root folder “/var/www/html/orangehrm” ( Please see above Note for stack name)
2.Default ports:
-
- Linux Machines: SSH Port – 22
- Http: 80 or 8080
- Https: 443
- Mysql ports: By default, these are not open on Public Endpoints. Mysql :3306
Configure custom inbound and outbound rules using this link
Installation Instructions For Centos
Note : How to find PublicDNS in Azure
Step 1) SSH Connection: To connect to the deployed instance, Please follow Instructions to Connect to Centos instance on Azure Cloud
2) Connect to virtual machine using following SSH credentials :
- Hostname: PublicDNS / IP of machine
- Port : 22
Username: Your chosen username when you created the machine ( For example: Azureuser)
Password : Your Chosen Password when you created the machine ( How to reset the password if you do not remember)
Step 2) Database Login Details:
- MYSQL Username : root
- MYSQL Password : Passw@rd123
For Stack Database :-MySQL DB orangehrm with userorangehrmuser and password Passw@rd123 has already been created.Please use this MySQL database for you Stack Configuration.
Note: Please change the password immediately after the first login.
Step 3) Application URL: Access the application via a browser at http://PublicDNS/Orangehrm
Step 4) Other Information:
1.Default installation path: will be on your web root folder “/var/www/html/orangehrm” ( Please see above Note for stack name)
2.Default ports:
- Linux Machines: SSH Port – 22
- Http: 80 or 8080
- Https: 443
- Mysql ports: By default, these are not open on Public Endpoints. Mysql :3306
Configure custom inbound and outbound rules using this link
Azure Step by Step Screenshots
Product name
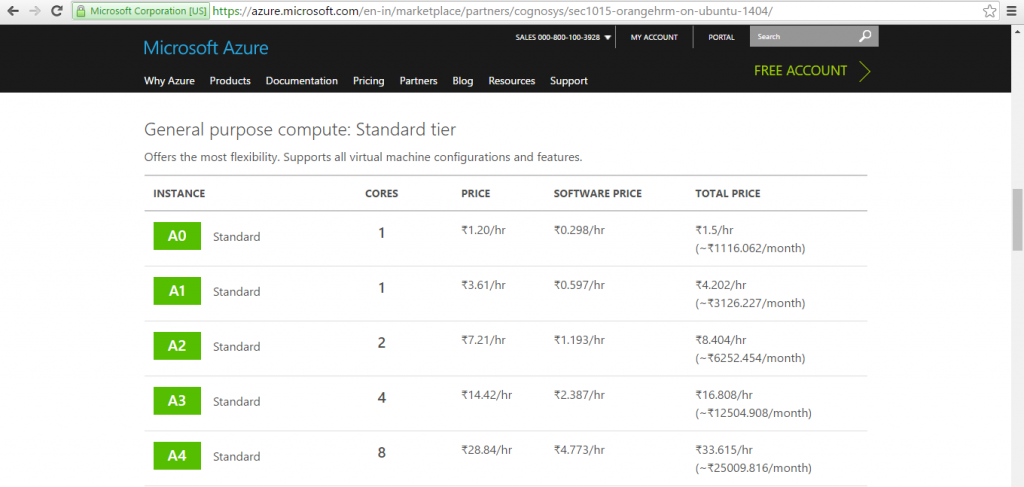
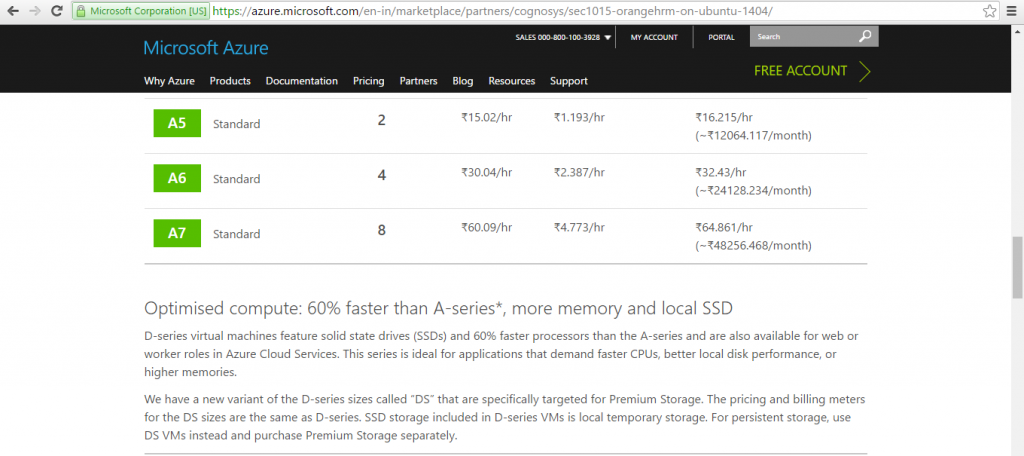
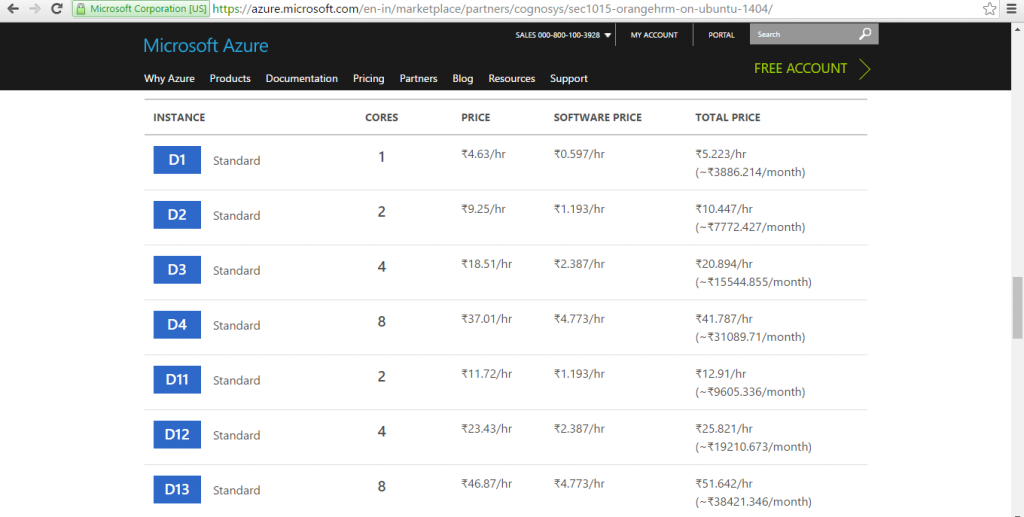
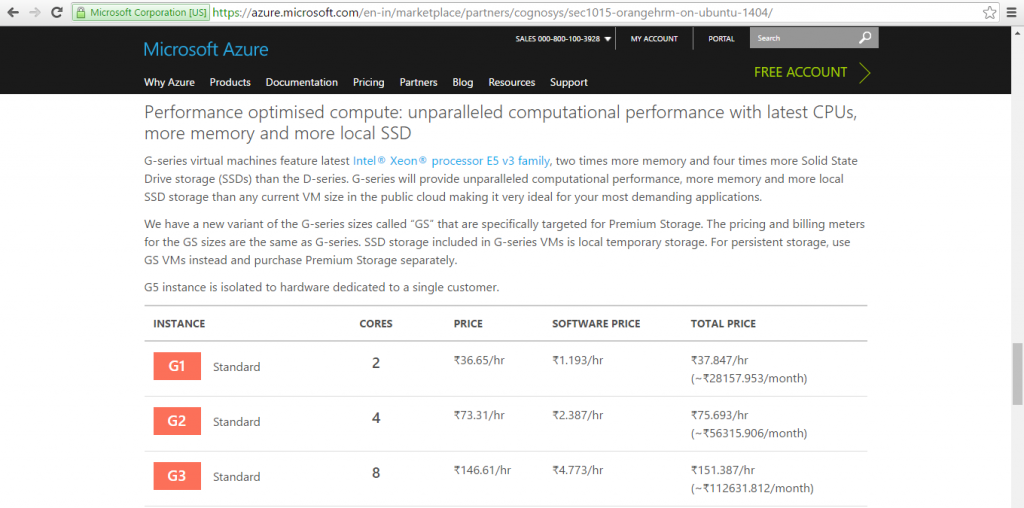
Pricing Details
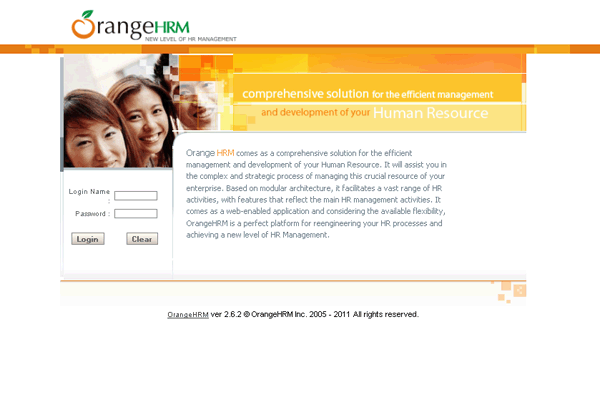
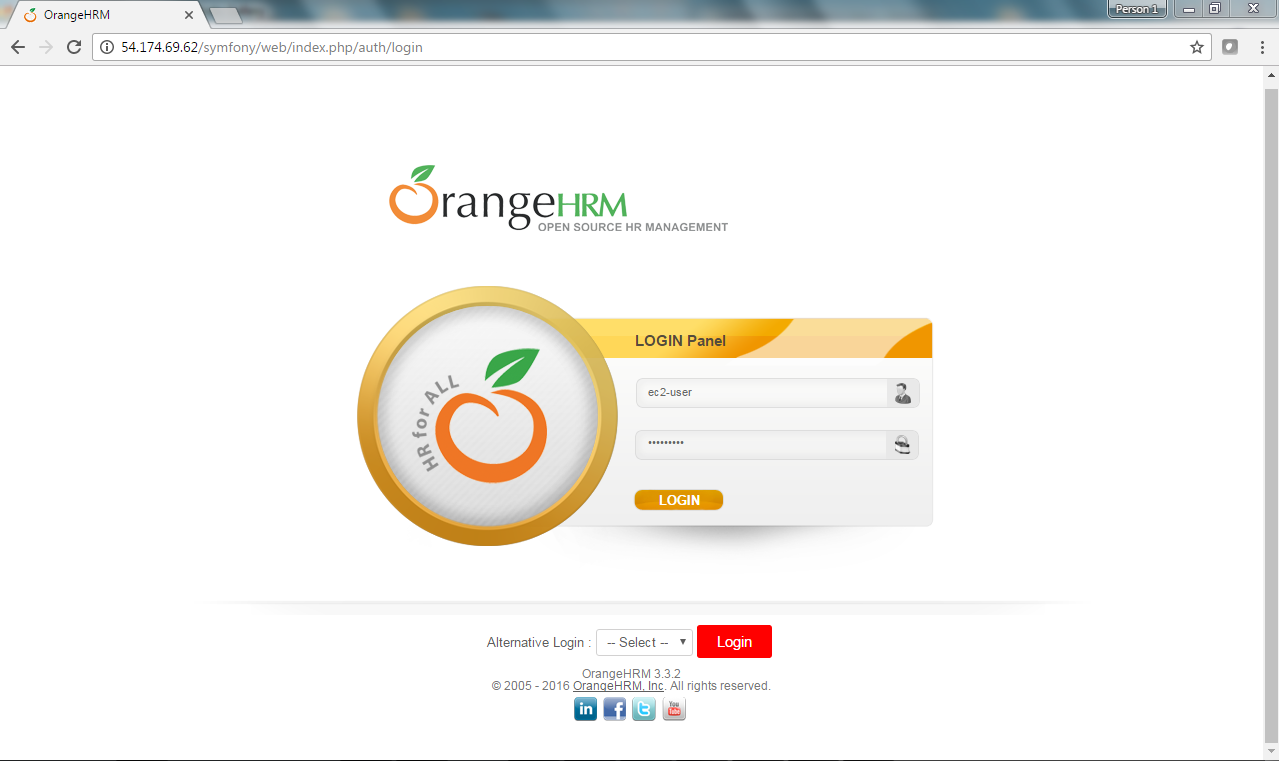
Login
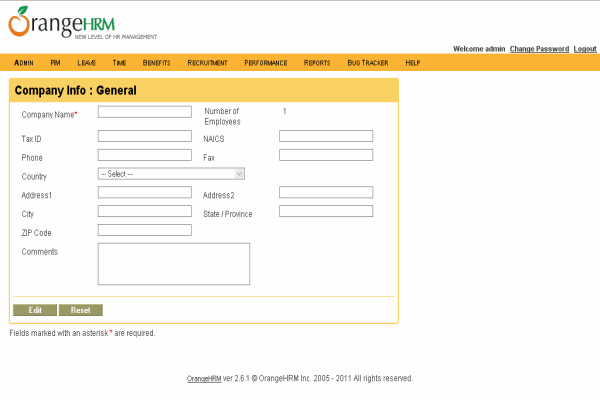
General
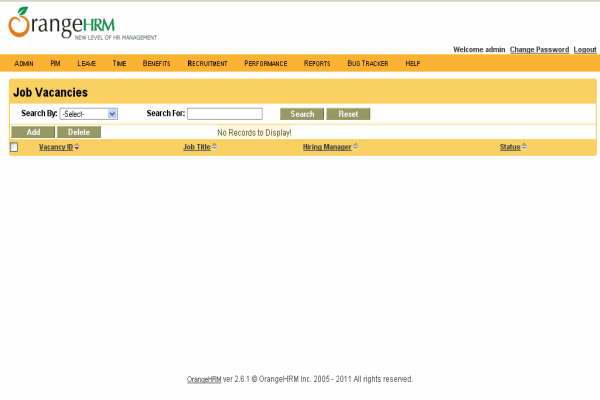
Job Vacancies
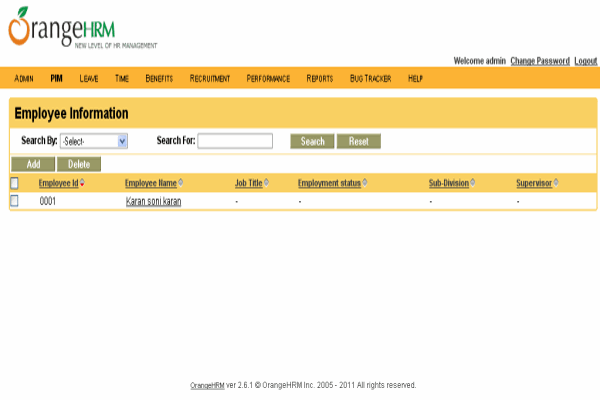
Employee Information
Installation Instructions For Windows
Step 1) VM Creation:
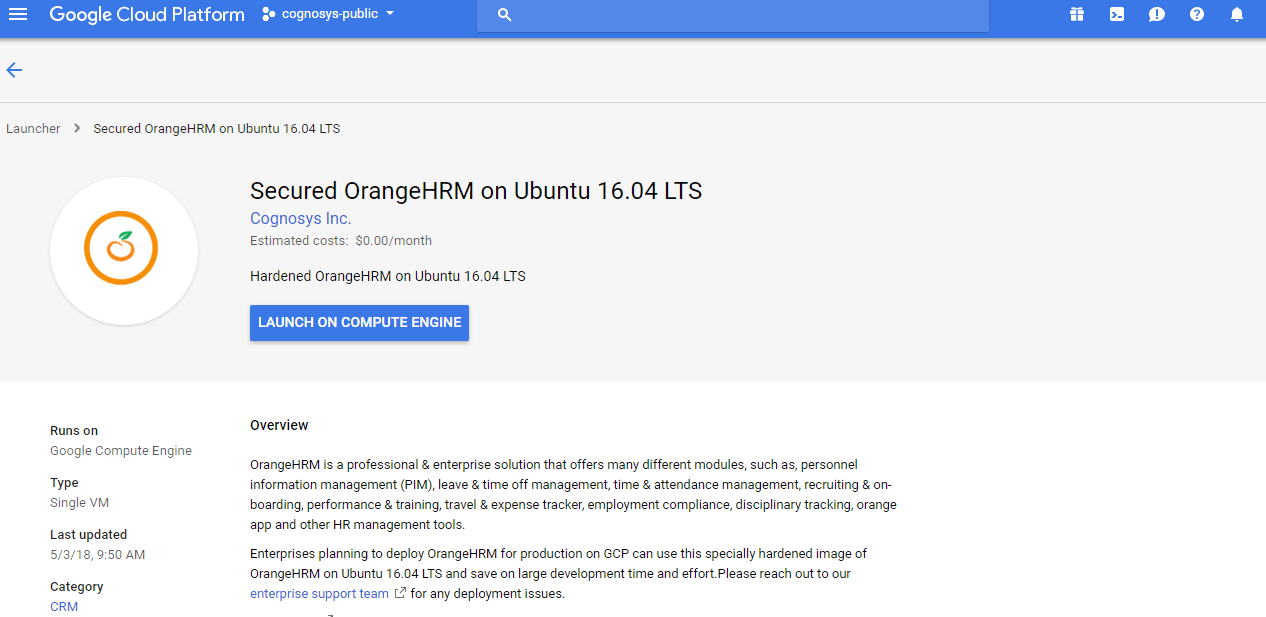
1.Click the Launch on Compute Engine button to choose the hardware and network settings.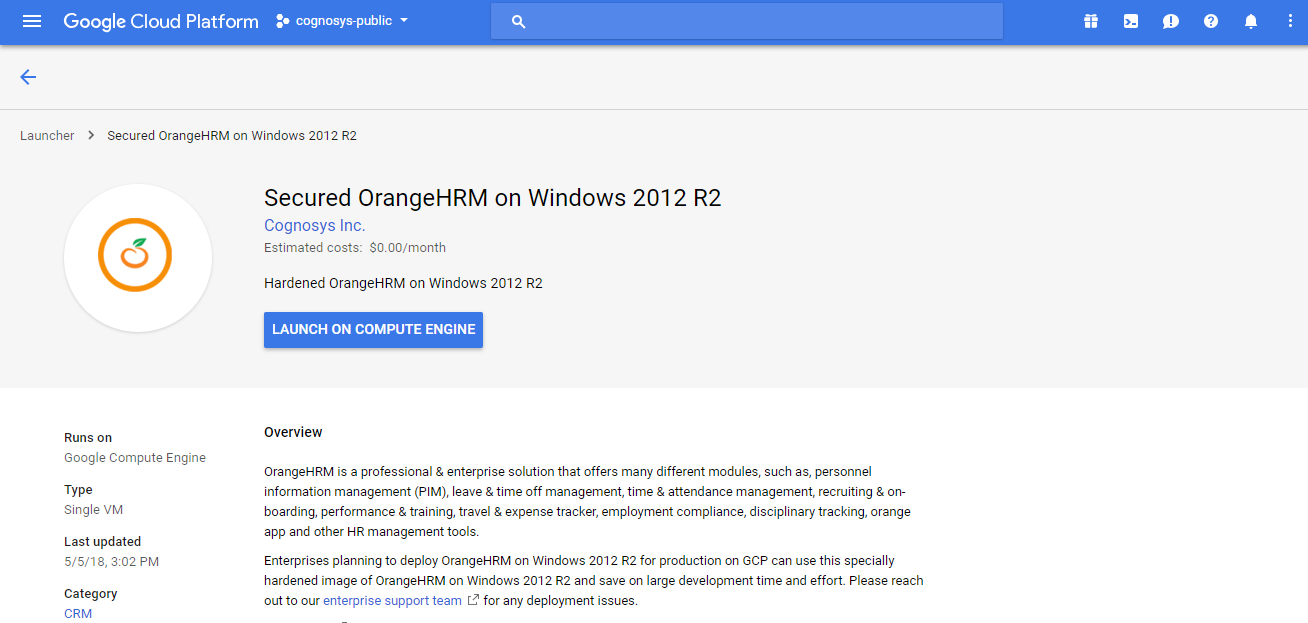
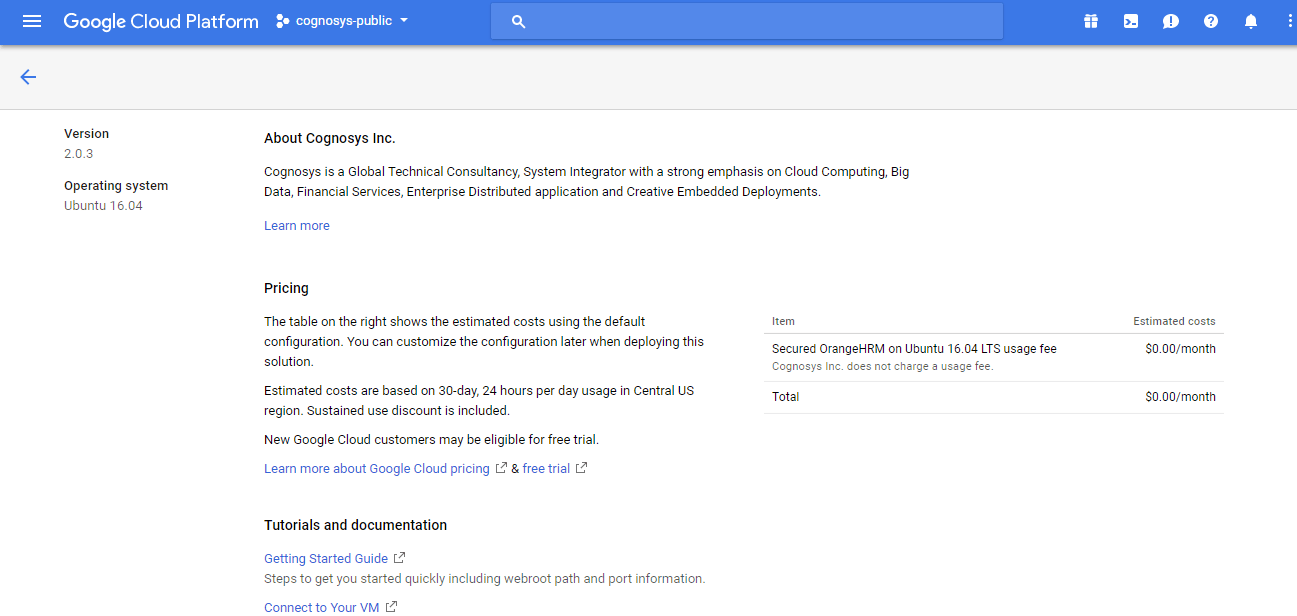
2.You can see at this page, an overview of Cognosys Image as well as some estimated costs of VM.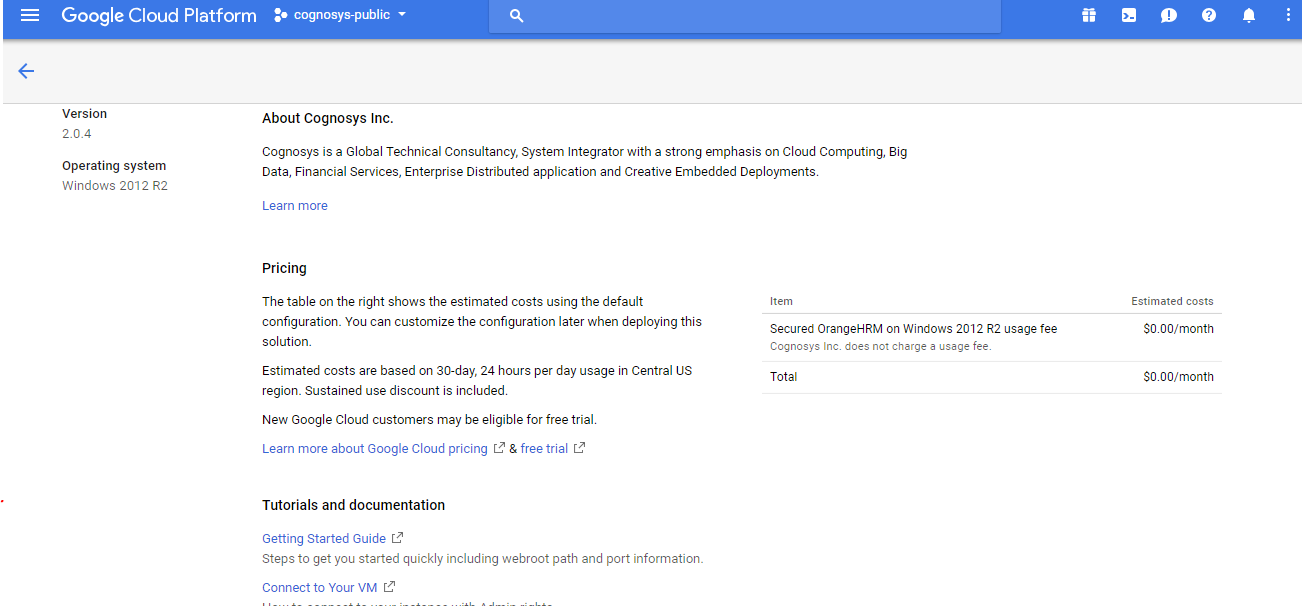
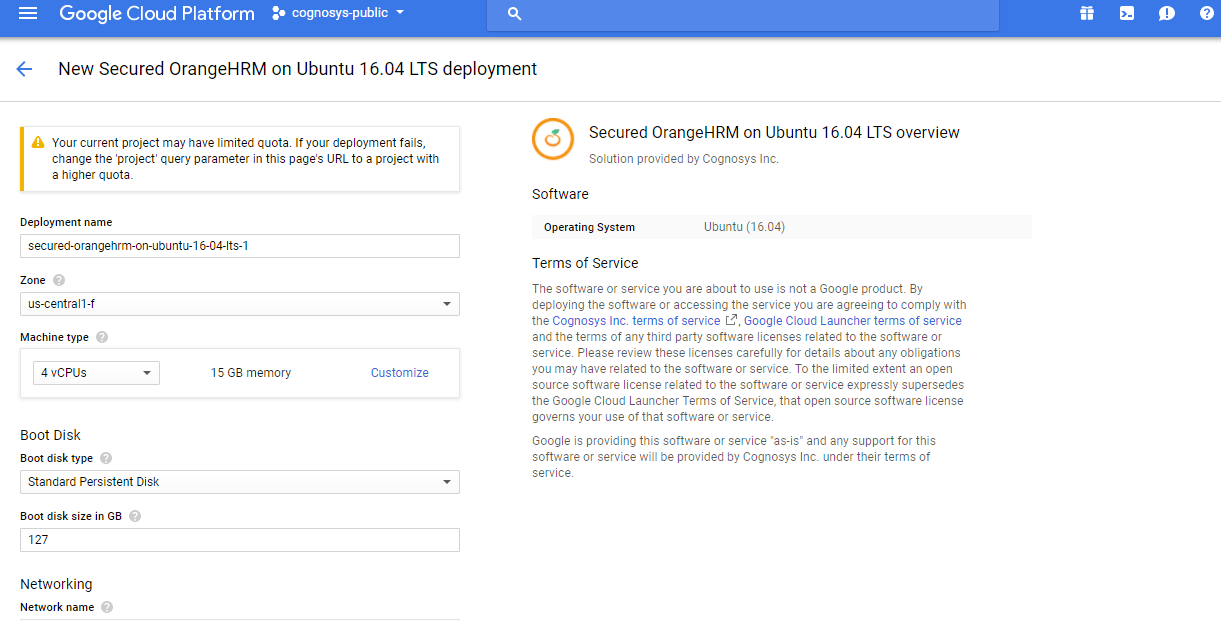
3.In the settings page, you can choose the number of CPUs and amount of RAM, the disk size and type etc.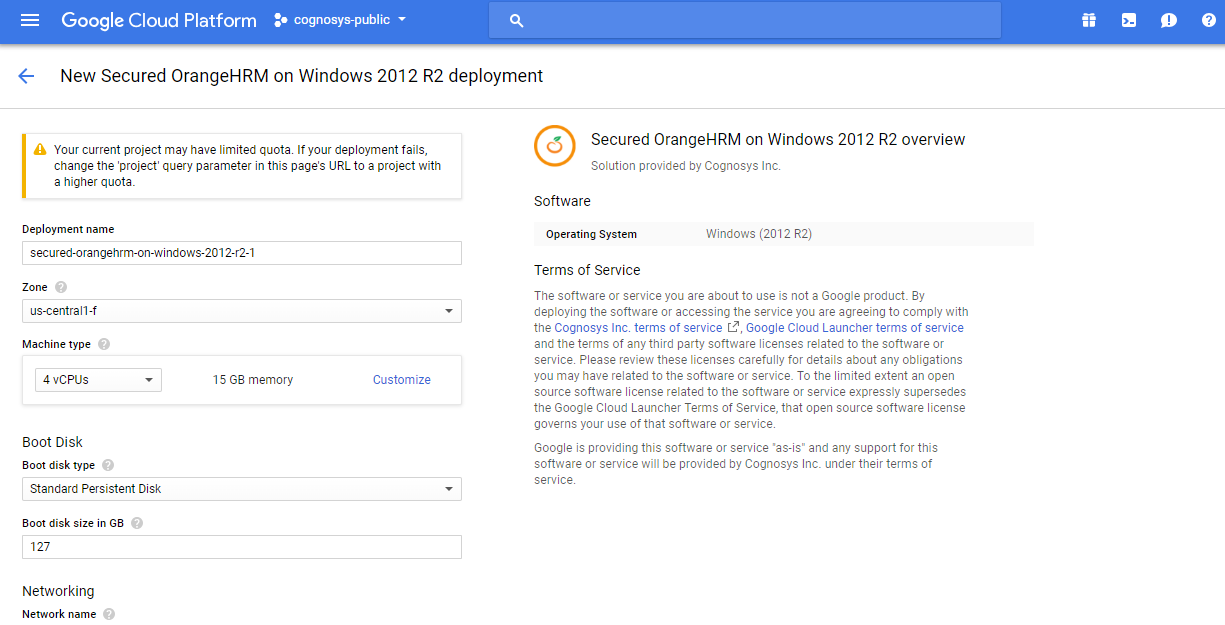
Step 2) RDP Connection: To initialize the DB Server connect to the deployed instance, Please follow Instructions to Connect to Windows instance on Google Cloud
Step 3) Database Login Details:
The below screen appears after successful deployment of the image.
For local MySQL root password, please use the temporary password generated automatically during image creation as shown above.
i) Please connect to Remote Desktop as given in step 2 to ensure stack is properly configured and DB is initialized.
ii) You can use MySQL server instance as localhost, username root and password as shown above.
If you have closed the deployment page you can also get the MySQL root password from VM Details “Custom metadata” Section
Step 5) Other Information:
1.Default installation path: will be on your web root folder “/var/www/html/orangehrm”
2.Default ports:
- Windows Machines: RDP Port – 3389
- Http: 80
- Https: 443
Step 4) Application URL: Access the application via a browser at http://<yourip>/orangehrm
A) You will see the page where you can configure your site data with site name, orangehrm admin name etc.
B) On next page you will see configuration success message.
C) You can login to the orangehrm admin portal with the orangehrm username and its generated password from point A shown above.
D) You can access the configured site at http://yourIP/orangehrm
Login
General
Job Vacancies
Employee Information
Installation Instructions For Redhat
Step 1) VM Creation:
- Click the Launch on Compute Engine button to choose the hardware and network settings.

- You can see at this page, an overview of Cognosys Image as well as some estimated costs of VM.

- In the settings page, you can choose the number of CPUs and amount of RAM, the disk size and type etc.

Step 2) SSH Connection: To connect to the deployed instance, Please follow Instructions to Connect to Ubuntu instance on Google Cloud
1) Download Putty.
2) Connect to the virtual machine using SSH key
- Hostname: PublicDNS / IP of machine
- Port : 22
Step 3) Database Login Details:
The below screen appears after successful deployment of the image.
For local MySQL root password, please use the temporary password generated automatically during image creation as shown above.
i) Please connect to Remote Desktop as given in step 2 to ensure stack is properly configured and DB is initialized.
ii) You can use MySQL server instance as localhost, username root and password as shown above.
If you have closed the deployment page you can also get the MySQL root password from VM Details “Custom metadata” Section
Step 4) Application URL: Access the application via a browser at http://<yourip>/orangehrm
A) You will see the page where you can configure your site data with site name, orangehrm admin name etc.
B) On next page you will see configuration success message.
C) You can login to the orangehrm admin portal with the orangehrm username and its generated password from point A shown above.
D) You can access the configured site at http://yourIP/orangehrm
Step 5) Other Information:
1.Default ports:
- Linux Machines: SSH Port – 22
2. To access Webmin interface for management please follow this link
Login
General
Job Vacancies
Employee Information
Videos
Welcome to OrangeHRM
Payroll management
Secured Orange HRM on centos –
Installation orangeHRM


