1-click AWS Deployment 1-click Azure Deployment 1-click Google Deployment
Overview
NopCommerce was launched in 2008 in Yaroslavl, Russia by Andrei Mazulnitsyn – a .NET developer and an online store owner.11 years later, nopCommerce has been installed thousands of times and is strongly supported by its community and partner companies, which together with the nopCommerce core team, constantly extend the platform’s capabilities. NopCommerce is an open source ecommerce software that contains both a catalog front end and an administration tool backend. nopCommerce is a fully customizable shopping cart, stable, secure and extendable. From downloads to documentation, nopCommerce.com offers a comprehensive base of information, resources, and support to the nopCommerce community. The nopCommerce documentation is here to help you through the process of setting up your store. These will allow you to up-and-run your site quickly. The nopCommerce Frontend is accessed online through web browser. It is an open source *.net based e-commerce solution and contains a fully customizable shopping cart. nopCommerce is an open source e-commerce solution that is ASP.NET 4.5 (MVC 5) based with a MS SQL 2008 (or higher) backend database. Our easy to-use shopping cart solution is uniquely suited for merchants that have outgrown existing systems, and may be hosted with your current web host or our hosting partners. It has everything you need to get started in selling physical and digital goods over the internet.
nopCommerce supports a mobile version of your website with a compelling, feature-rich and graphically pleasing storefront, and it provides means for retailers to immediately deliver relevant offers, promotions and products. The mobile-responsive version works on any connected device, without requiring extra development or add-ons. It is free and available out of the box. The global nopCommerce community helps us track the legislative changes so that we could add new features following it. Using nopCommerce, you can be sure that in every country where you conduct your online business, the platform complies with the regional laws and safety standards.
NopCommerce is simply an amazing eCommerce development solution. It is the only open source platform that offers premium features for free that are available on many other e-commerce development solutions with heavy license fees. NopCommerce can make a big difference the way you do business online. It is powerful, secure, cost-effective and offers many other features that can help your business run smoothly and grow exponentially.
What Are Plugins in nopCommerce?
Plugins are used to enhance the functionality of nopCommerce. nopCommerce has several types of plugins. Some examples are payment methods (such as PayPal), tax providers, shipping method computation methods (such as UPS, USP, FedEx), widgets (such as ‘live chat’ block), and many others. nopCommerce is already distributed with many different plugins. You can also search various plugins on the nopCommerce official site to see if someone has already created a plugin that suits your needs. If not, this article will guide you through the process of creating your own plugin.
A recommended name for a plugin project is “Nop.Plugin.{Group}.{Name}”. {Group} is your plugin group (for example, “Payment” or “Shipping”). {Name} is your plugin name (for example, “PayPalStandard”). For example, PayPal Standard payment plugin has the following name: Nop.Plugin.Payments.PayPalStandard. But please note that it’s not a requirement. And, you can choose any name for a plugin. For example, “MyGreatPlugin.
What are plugins in nopCommerce?
Plugins are used to extend the functionality of nopCommerce. nopCommerce has several types of plugins. For example, payment methods (such as PayPal), tax providers, shipping method computation methods (such as UPS, USP, FedEx), widgets (such as ‘live chat’ block), and many others. nopCommerce is already distributed with many different plugins. You can also search various plugins on the nopCommerce official site to see if someone has already created a plugin that suits your needs. If not, this article will guide you through the process of creating your own plugin.
A recommended name for a plugin project is “Nop.Plugin.{Group}.{Name}”. {Group} is your plugin group (for example, “Payment” or “Shipping”). {Name} is your plugin name (for example, “PayPalStandard”). For example, PayPal Standard payment plugin has the following name: Nop.Plugin.Payments.PayPalStandard. But please note that it’s not a requirement. And you can choose any name for a plugin. For example, “MyGreatPlugin”.
The plugin structure, required files, and locations
First thing you need to do is to create a new “Class Library” project in the solution. It’s a good practice to place all plugins into \Plugins directory in the root of your solution (do not mix up with \Plugins subdirectory located in \Nop.Web directory which is used for already deployed plugins). It’s a good practice to place all plugins into “Plugins” solution folder
Steps to create a new custom plugin in nopCommerce
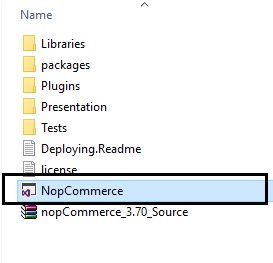
Step 1) Open the nopCommerce solution in Visual Studio (remember you need full source code)
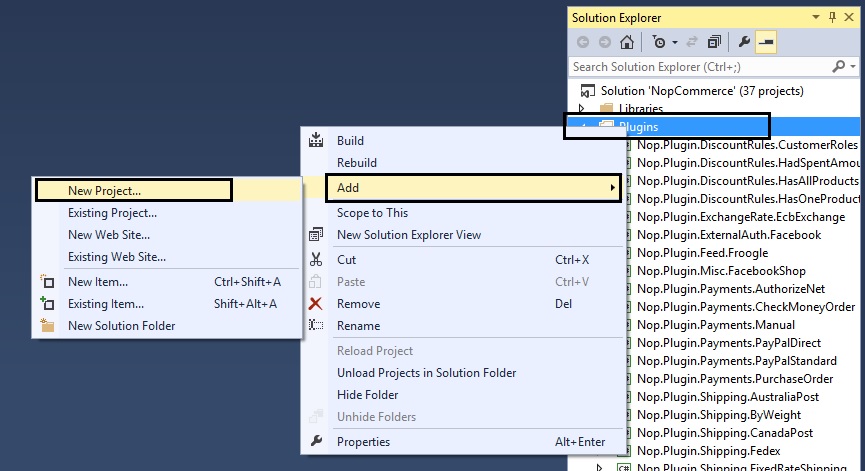
Step 2) Right click on the plugin folder: Add > New Project
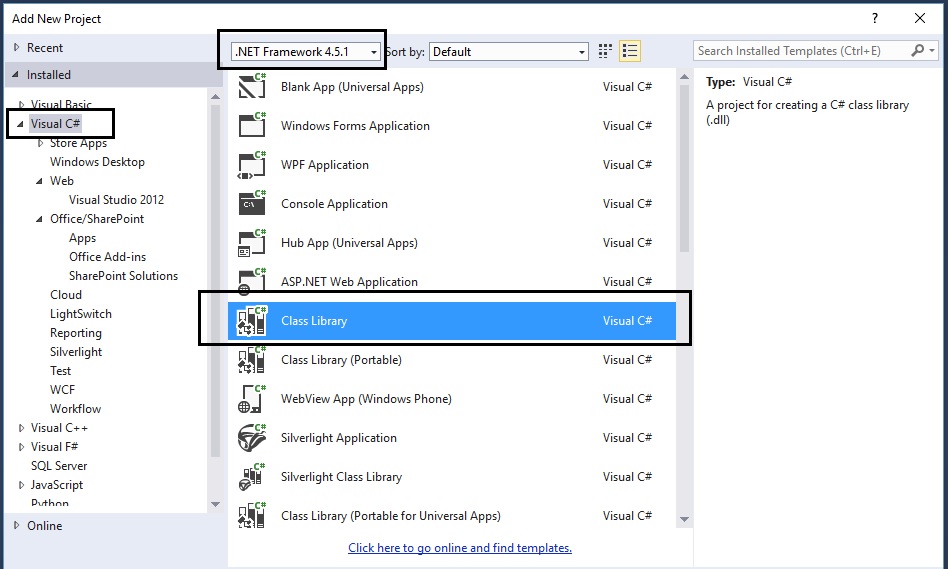
Select: Class Library
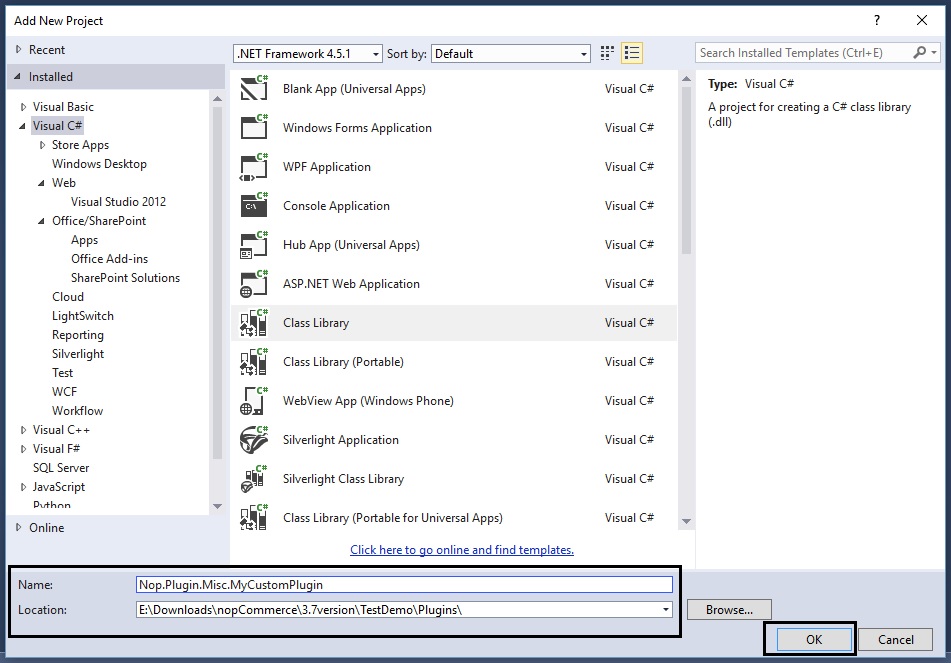
Location: You will need to click on the “Browse” button and select the plugin folder that contains the source code of all the plugins (not the folder inside Nop.Web that only contains the compiled dlls)
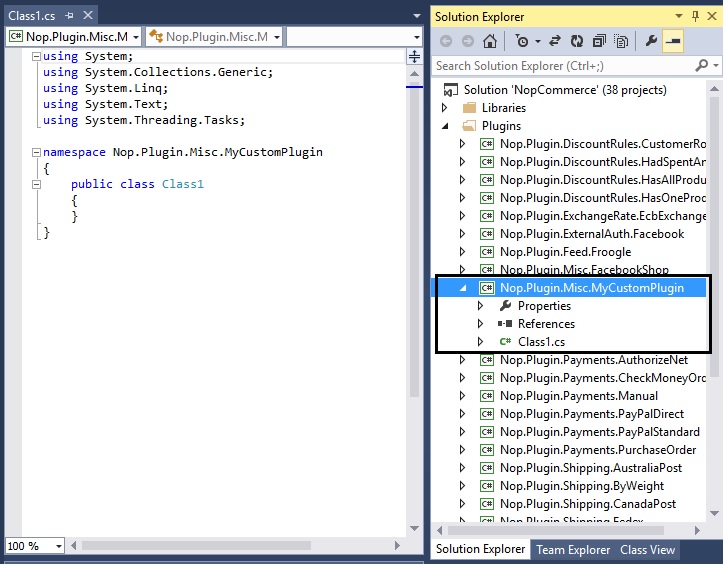
Step 5) Now, you should be able to see your custom plugin project in the solution explorer like this:
Step 6) Now is the time to add all the correct references. Go to: References > Add Reference…
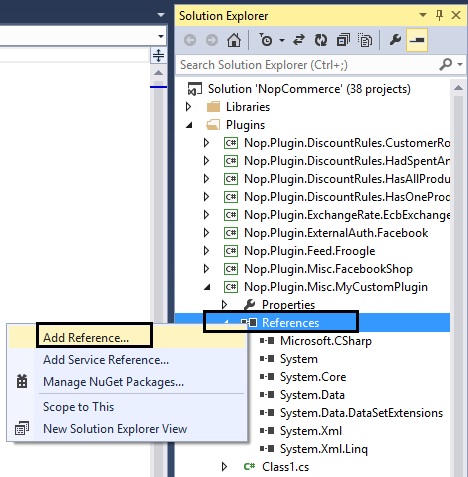
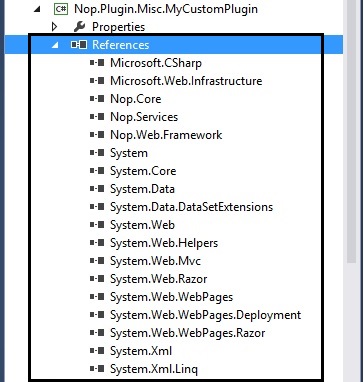
You will need to add all the references (see pic below). In case you are not able to find the right reference, simple go to any other plugin that has it and get the reference from there.
Group: MiscFriendlyName: MyCustomPluginSystemName: MyCustomPluginVersion: 1.00SupportedVersions: 3.70Author: Lavish KumarDisplayOrder: 1FileName: Nop.Plugin.Misc.MyCustomPlugin.dllWeb.config: You should also create a web.config file and ensure that it’s copied to output. Just copy it from any existing plugin.

Step 8) Add a class MyCustomPlugin.cs and use the following code:

using System;using System.Collections.Generic;using System.Linq;using System.Text;using System.Threading.Tasks;using System.Web.Routing;using Nop.Core.Plugins;using Nop.Services.Common;namespace Nop.Plugin.Misc.MyCustomPlugin{ public class MyCustomPlugin: BasePlugin, IMiscPlugin { /// <summary> /// Gets a route for provider configuration /// </summary> /// <param name="actionName">Action name</param> /// <param name="controllerName">Controller name</param> /// <param name="routeValues">Route values</param> public void GetConfigurationRoute(out string actionName, out string controllerName, out RouteValueDictionary routeValues) { actionName = "Configure"; controllerName = "MyCustomPlugin"; routeValues = new RouteValueDictionary { { "Namespaces", "Nop.Plugin.Misc.MyCustomPlugin.Controllers" }, { "area", null } }; } }}Step 9) Add a class MyCustomPluginController.cs (in folder “Controllers” within your plugin) and use the following code:

using System;using System.Collections.Generic;using System.Linq;using System.Text;using System.Threading.Tasks;using System.Web.Mvc;using Nop.Web.Framework.Controllers;namespace Nop.Plugin.Misc.MyCustomPlugin.Controllers{ [AdminAuthorize] public class MyCustomPluginController : BasePluginController { public ActionResult Configure() { return View("~/Plugins/Misc.MyCustomPlugin/Views/MyCustomPlugin/Configure.cshtml"); } }}Step 10) Add a Configure.cshtml (View) – In this case we are creating a blank plugin
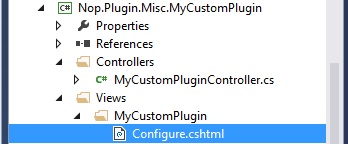
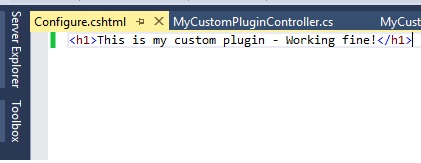
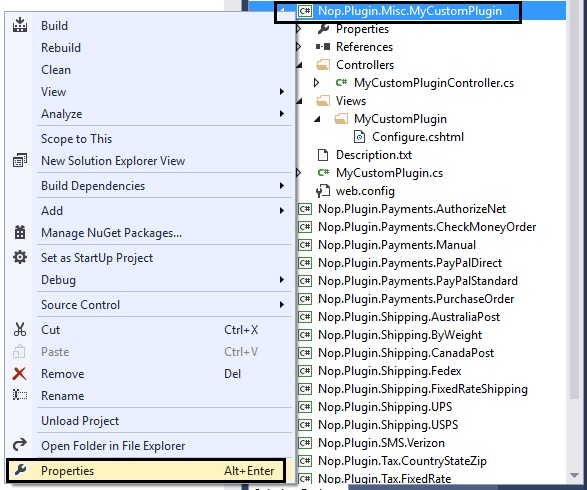
Step 11) Right click on the “Nop.Plugin.Misc.MyCustomPlugin” project and click “Properties”
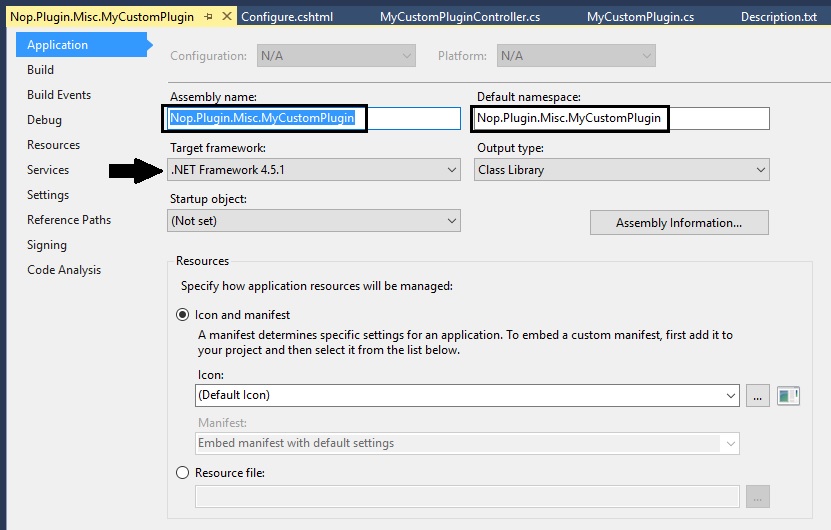
Make sure the assemble name and default namespaces are as follows (along with the .NET Framework):
Go to the left tab “Build” in the properties window:
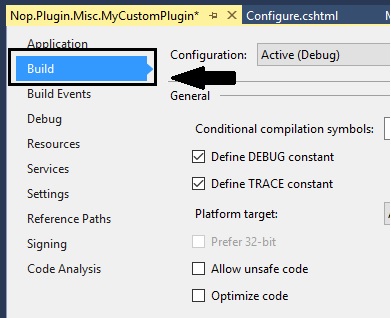
..\..\Presentation\Nop.Web\Plugins\Misc.MyCustomPlugin\

Step 12) Make sure everything is saved and look like this (and follows this structure):
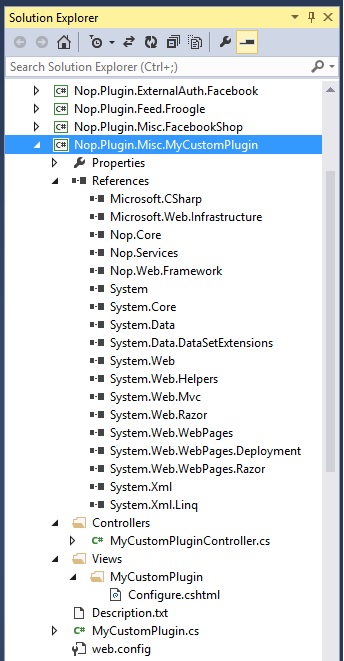
Step 13) Right click on your custom plugin project and click “Build”
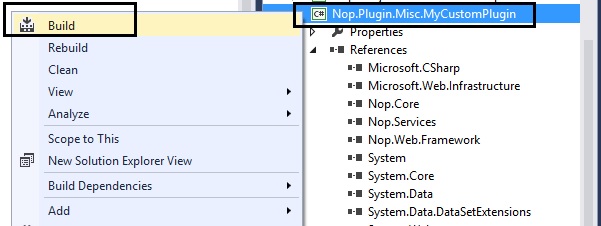
Step 14) After re-building your project, run the whole solution and go to the Administration section and “Clear cache”

Step 15) Go to the plugin directory and click on the button “Reload list of plugins”
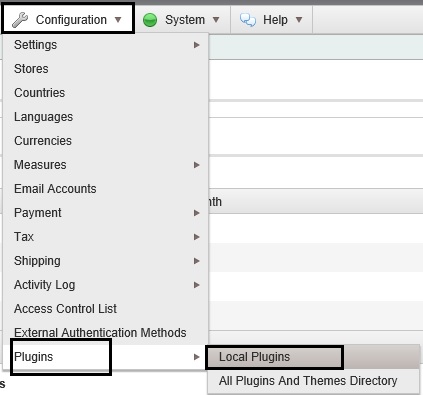
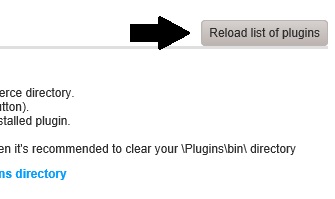
Step 16) Now, if you scroll down, you should be able to see your new custom plugin in the list of plugins – Click on the “Install” button for your custom plugin
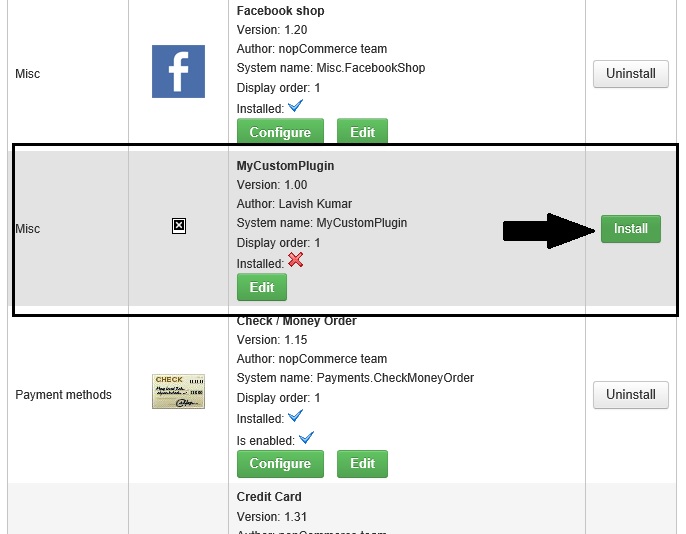
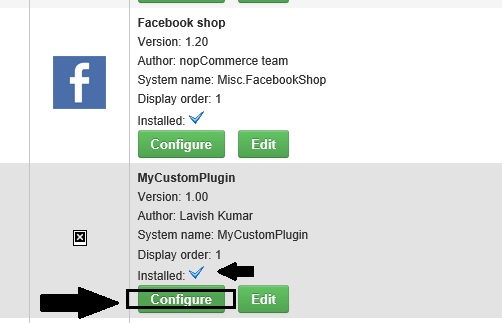
Step 17) Click on the “Configure” button for your custom plugin
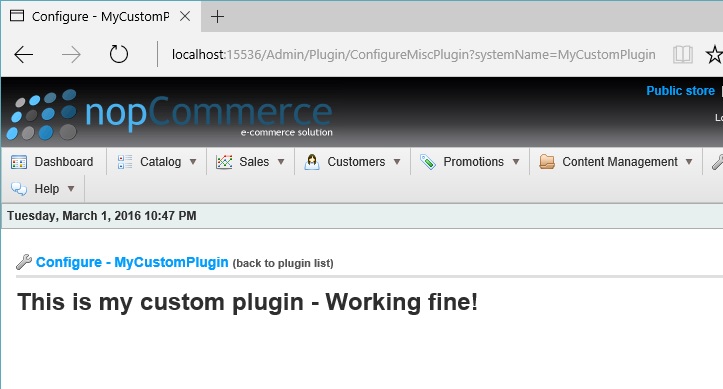
If everything worked correctly without any issues, you should be able to see this page:
Upgrading nopCommerce version may break plugins: Some plugins may become outdated and no longer work with the newer version of nopCommerce. If you have issues after upgrading to the newer version, delete the plugin and visit the official nopCommerce website to see if a newer version is available. Many plugin authors will upgrade their plugins to accommodate the newer version, however, some will not and their plugin will become obsolete with the improvements in nopCommerce. But in most cases, you can simply open an appropriate Description.txt file and update SupportedVersions field
The main benefits of nopCommerce include its affordability and security, integrated eCommerce products, and reliable customer support. Here are the specifics:
Affordable and Secure Solution
nopCommerce is a free solution that users can take advantage of for their business. Get started fast and easy, and scale your product seamlessly to support your visitors and products. Also, the software is safe and secure, thus necessitating the release of only one security patch since it was launched in 2008.
Integrated eCommerce Product
Albeit free, nopCommerce can work just like the leading enterprise platforms when it comes to the effectiveness of its tools and features. It delivers a wide variety of configurable options to answer the needs of store owners and is customizable for your business requirements. Lastly, nopCommerce can be integrated with marketing automation platforms, and shipping software, payment solutions. On top of that, it has free connectors to leading solution providers.
Reliable Customer Support
Since nopCommerce is an open source solution, it acknowledges input from developers across the world. The vendor has released over 35 versions of this product, and the team carefully analyzes suggestions and trends from the community before they are implemented in the latest version. Each version is client-oriented, and the nopCommerce team ensures only the most stable technologies are utilized in the development process.
—nopCommerce is an open source ecommerce software that contains both a catalog frontend and an administration tool backend. nopCommerce is a fully customizable shopping cart. It’s stable and highly usable. From downloads to documentation, nopCommerce.com offers a comprehensive base of information, resources and support to the nopCommerce community.
nopCommerce is open-source ecommerce solution. It’s stable and highly usable. nopCommerce is an open source ecommerce solution that is ASP.NET (MVC) based with a MS SQL 2008 (or higher) backend database. It has been downloaded more than 1.5 million times! Our easy-to-use shopping cart solution is uniquely suited for merchants that have outgrown existing systems and may be hosted with your current web host or our hosting partners. It has everything you need to get started in selling physical and digital goods over the internet. nopCommerce offers unprecedented flexibility and control.
nopCommerce on Cloud runs on Amazon Web Services (AWS), Azure and Google Cloud Platform and is built to provide a easy-to-use e-commerce solution with asp.net. nopCommerce on cloud is powerful enough for the most demanding e-commerce expert.
nopCommerce is owned by nopCommerce (https://www.nopcommerce.com/) and they own all related trademarks and IP rights for this software.
Cognosys provides hardened images of nopCommerce on all public cloud i.e. AWS marketplace, Azure and Google Cloud Platform.
Secured nopCommerce on Windows 2012 R2-
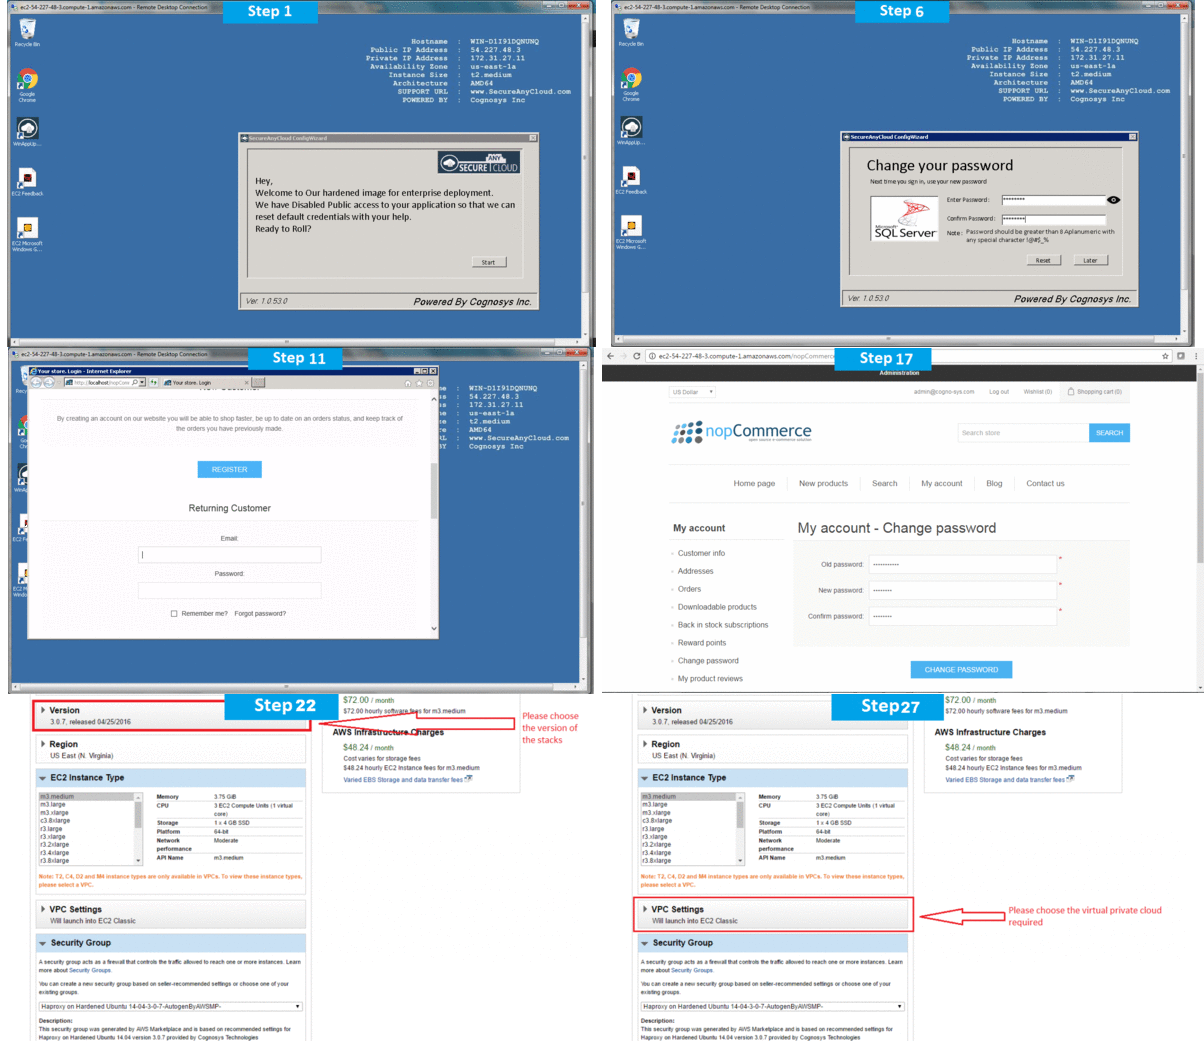
nopCommerce on Cloud for AWS
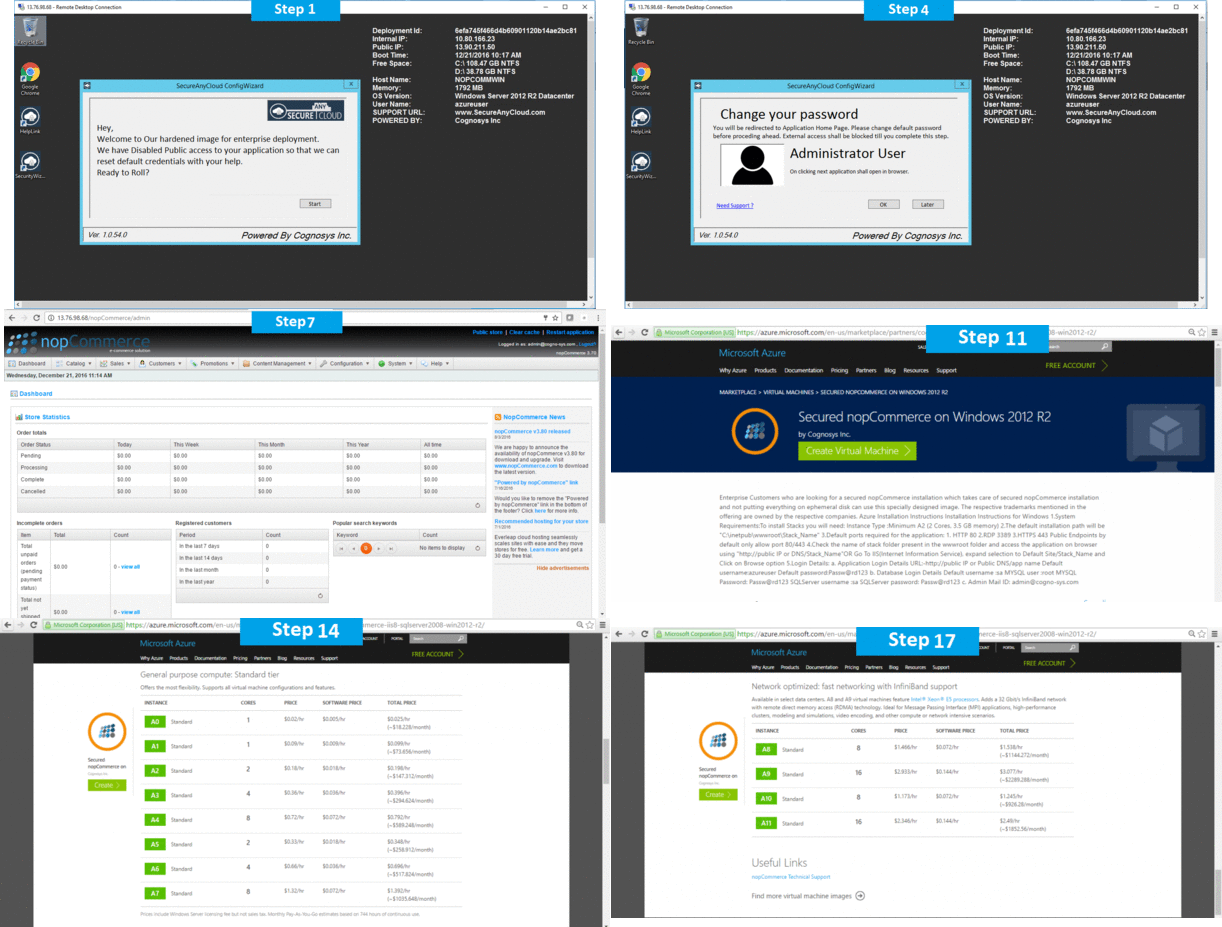
nopCommerce on Cloud for Azure
Features
NopCommerce Features
Open Source Platform:
The First thing about nopCommerce is that it is “Free. One can download the source code for free and modify it to fit your custom requirements. It beats other eCommerce development solutions in terms cost of running an eCommerce business.. Even its back-end support Microsoft SQL Server Express Edition is also free. Of course, if needed you can use a higher edition of SQL Server for better performance of your website. nopCommerce – A Free eCommerce Development Solution! Being free does not mean there is no support and release updates. nopCommerce is backed by an enthusiastic and helpful team of developers, graphic designers and professional support team who work hard to maintain the standards of the platform and deliver a solid digital solution to the interested eCommerce owners for free of cost. Being open source, anyone can contribute to nopCommerce, and therefore, there are many free & premium extensions and themes available in its marketplace for you to enhance nopCommerce.
Built on Dot Net Core
NopCommerce is developed on the Microsoft’s Dot Net Platform and is continuously upgraded to the latest Dot Net Framework. Since nopCommerce 4.0 release, it’s been upgraded to Dot Net Core MVC, which is the latest offering from Microsoft to the software developer community. Dot Net Core is also open source and offers many benefits over other frameworks. One of the key features of Dot Net Core is that it is cross-platform. Meaning that applications built on Dot Net Core can be run on multiple platforms like Windows, Linux as well as Mac. The current version nopCommerce 4.1 is not fully cross-platform. But nopCommerce team is working on making it support multiple platforms, especially Linux. This means a huge saving in terms of hosting costing as Linux hosting is very cost effective compared to Windows hosting.
Mobile Commerce Ready:
NopCommerce team is well aware of this fact and the importance of Mobile commerce. nopCommerce platform offers the mobile responsive feature which is free and available out of the box. NopCommerce offers many well-designed responsive templates that scale appropriately, optimizing the content for all kind of devices and the browsers. In short, your eCommerce website can go mobile in a very short time and that too without requiring extra development or add-ons.
Flexible, Easily Customizable & Manageable:
nopCommerce platform is a .NET based which is very common among developer. One can easily find a developer to customize your website. nopCommerce versatile administration tool allows easy website management. The nopCommerce administration panel is very flexible and offers many customization options for your store which can be managed from the administration panel without changing a single line of code. For example, using nopCommerce you can sell a physical product like a Digital Camera, or you can sell a digital product like a Digital Book or Software, or you can sell a customized Gift Card, or you can sell reoccurring membership kind of products, or you can sell an apartment! Moreover, it’s easy to customize the same. NopCommerce have a pluggable modular architecture that allows developers to add features and elements dynamically during run-time. One can easily select modules, add-ons and design his or her eCommerce website to make it look eye-catching for online shoppers. With nopCommerce, you can define up to 60 properties for a single product thus providing your customer with extensive detailing of your product.
Streamlined Payment Process
NopCommerce has an even payment process which has been designed keeping in mind the bounce rate during the checkout process. The payment process is customizable and helps a merchant to improve conversion rates by offering the best user experience to his or her customers.
The default checkout and payment methods on nopCommerce are as following:
- Accepts major credit and debit cards
- Supports more than 50 payment gateways such as CC Avenue, Amazon PayPal etc.
- Supports Cash on Delivery.
- Supports authorize only, or auth-capture credit card mode.
- Supports refunds and partial refunds.
- Offers exclusive marketing offers and pricing packages major payment processors across the globe.
- Supports Anonymous (Guest) checkout to finish the purchase quicker.
- Supports One-page checkout to reduce the steps and make the checkout easier for customers.
- Supports checkout attributes like offering gift wrap items or personalized messages.
- Supports Phone order.
- Supports Multilingual and multicurrency.
- Supports weights and dimensions measure configuring options.
- Supports SSL (secure browsing and checkout).
- Supports PDF order receipts.
NopCommerce developers know the importance of SEO and thus keep the platform up to date according to needs of the merchant and the search engine. The default SEO tool in nopCommerce Offers:
- Keyword tagging
- URLs customization and Management
- XML and HTML sitemap support
- Microdata (rich snippets)
- Breadcrumb navigation
- URL canonicalization
- Google Analytics integration
- URL localization
Multi-Store Feature:
This one is my favorite. The default Multi- Store feature in nopCommerce platform allows the eCommerce owner to run more than one store from a single nopCommerce installation. This means that you as an eCommerce owner can host multiple online stores on different domains and manage all of their admin operations from one single nopCommerce administration panel.The most convenient thing in this feature is that each store shares a single database. This means that your customer can log in using his or her credentials in any of your stores and you can share catalog data between stores.
NopCommerce also allows you to set the following features separately for each store:
- Products per store
- Categories and manufacturers per store
- Newsletters per store
- Graphical themes per store
- Content (news, blog, articles) per store
- Tax rules per store
- Payments per store
- Shipping methods per store
- Almost each configuration setting can be set per store
- Product prices per store
- Order filtering and reports per store
Multi-vendor support along with Drop-shipping
For those who are interested in running eCommerce website similar to Amazon, eBay or Flipkart, the multi-vendor and drop ship features are a must-have. Multi-vendor support along with Drop-shipping allows you to sell online without maintaining any stock inventory or ship orders. With this feature enabled, once an order is placed the respective vendor gets an email for the order. The vendor can be provided admin panel to manage their product and orders shipments on the store. If you are good with online marketing this process is a low investment and high-profit option.
Marketing Features
Marketing is important for any business, be it online or offline. NopCommerce platform offers an array of marketing features which allows the merchant to connect with new customers and retain old ones. The out of the box marketing features offered in nopCommerce are:
- Reward Points System
- Related products for up-selling
- Discounts and coupons
- Newsletter subscriptions
- Content, News & Blog Pages
- Gift cards
- Product reviews and ratings
- Product comparison
Easy to Scale
NopCommerce is suitable not only for small stores but also for stores with millions of products and thousands of orders a day. NopCommerce can be hosted with cheap Windows hosting solutions providers like Smarter ASP as well as it can be hosted on enterprise hosting platforms like EverLeap or Azure cloud. NopCommerce has been specially designed to use the cloud features that Azure offers making it easy to host on Azure. Also, availability of integrations like nopAccelerate Solr Integration takes nopCommerce to the next level by integrating it with Apache Solr for Search & Catalog Faceting. This not only improves the quality of search but also makes it easy to scale nopCommerce to work efficiently even on a scale where you have many millions of products in your catalog and huge traffic daily.
–Major Features of nopCommerce
Mobile Commerce –
NopCommerce Mobile works on any connected device, without requiring extra development or add-ons, regardless of device type. The application, which renders a device-aware shopping experience, delivers a compelling, feature-rich and graphically pleasing storefront and provides a means for retailers to immediately deliver relevant offers, promotions and products to increase sales and drive business across all channels, no matter what device the consumers are using.
Multi Store –
With multi-store support you can launch several online stores using a single integrated system. You can create unique online stores for multiple brands, products, B2B, B2C, affiliates, co-branded stores and more. You can also quickly launch micro-stores for promotional campaigns. The most convenient feature is that every online store shares a single database.
Multi vendor –
Multi-vendor and drop shipping support enables you to sell online without having to stock inventory or ship orders. When drop shipping is enabled, each product is assigned to a particular vendor whose details (including email address) are stored.
Multi-vendor support –
Multi-vendor and drop shipping support enables you to sell online without having to stock inventory or ship orders. When drop shipping is enabled, each product is assigned to a particular vendor whose details (including email address) are stored.
Search engine optimization –
Search engine optimization (SEO) is the process of affecting the visibility of a website in search engine results. SEO helps to ensure that a site is accessible to a search engine and improves the chances that the site will be found by the search engine. Our search engine optimization gives you higher search rankings, meaning more free traffic to your store
Checkout –
Anonymous checkout. The anonymous checkout feature allows customers to check out without creating an account. Many customers prefer this as it allows them to get through checkout more quickly.
Checkout attributes. At checkout you can provide customers with various options. For example, gift wrap their items or personalize with messages.
One-page checkout –
One-page checkout functionality dramatically reduces the steps required in the checkout process. By making checkout easier for customers, you will increase your revenue and conversion rate.
AWS
Installation Instructions for Windows
Note: How to find PublicDNS in AWS
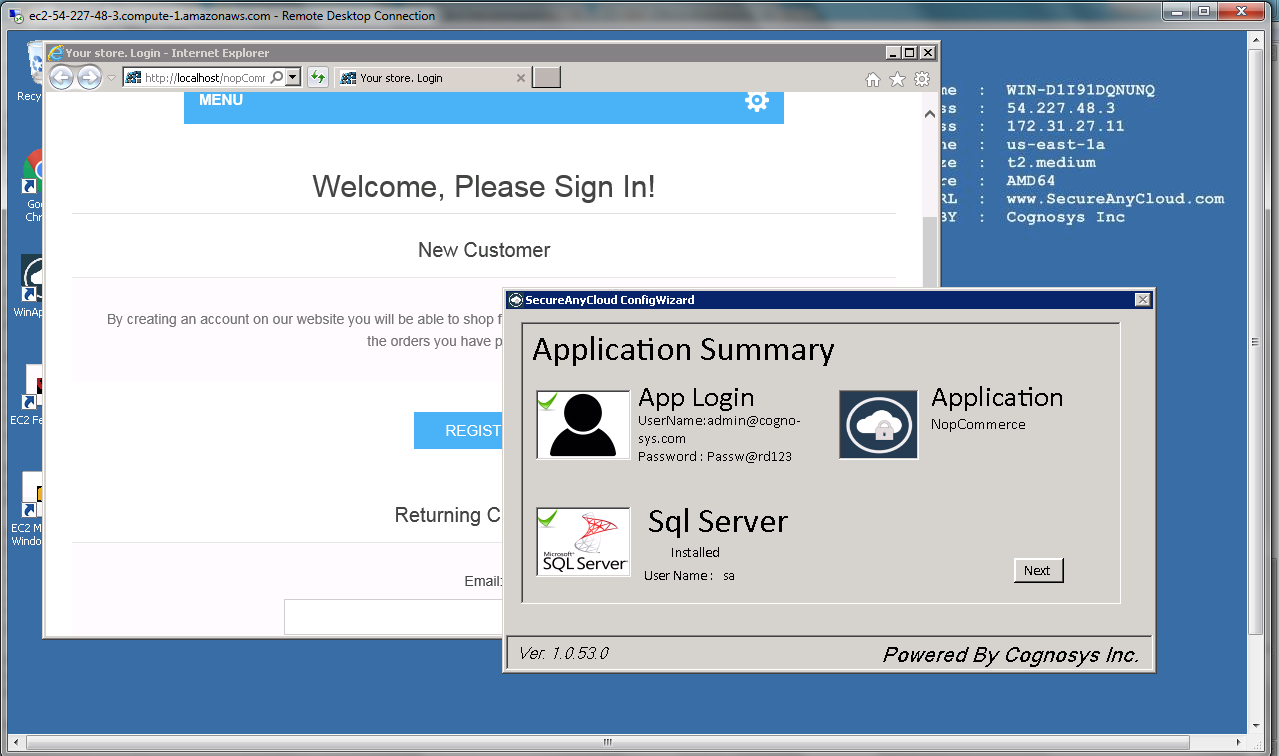
Step 1) RDP Connection: To connect to the deployed instance, Please follow Instructions to Connect to Windows instance on AWS Cloud
Connect to the virtual machine using following RDP credentials:
- Hostname: PublicDNS / IP of machine
- Port : 3389
Username: To connect to the operating system, use RDP and the username is Administrator.
Password: Please Click here to know how to get password
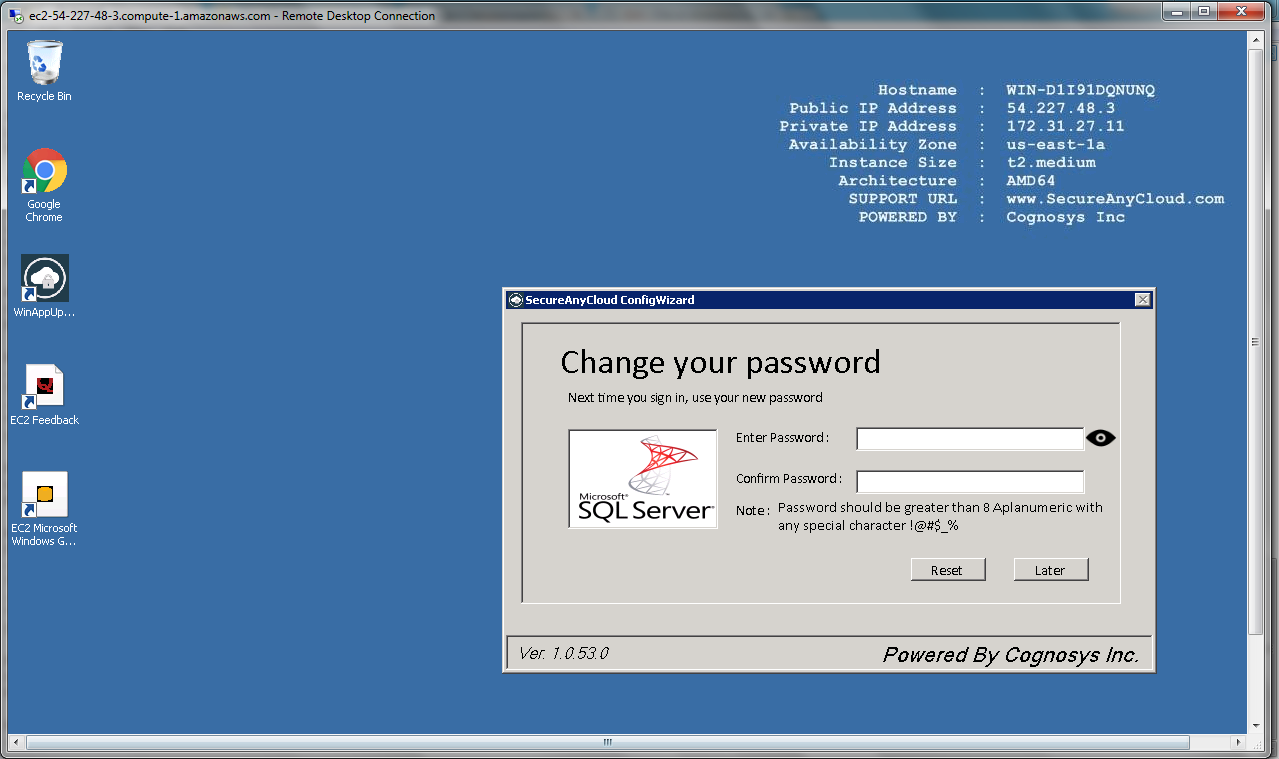
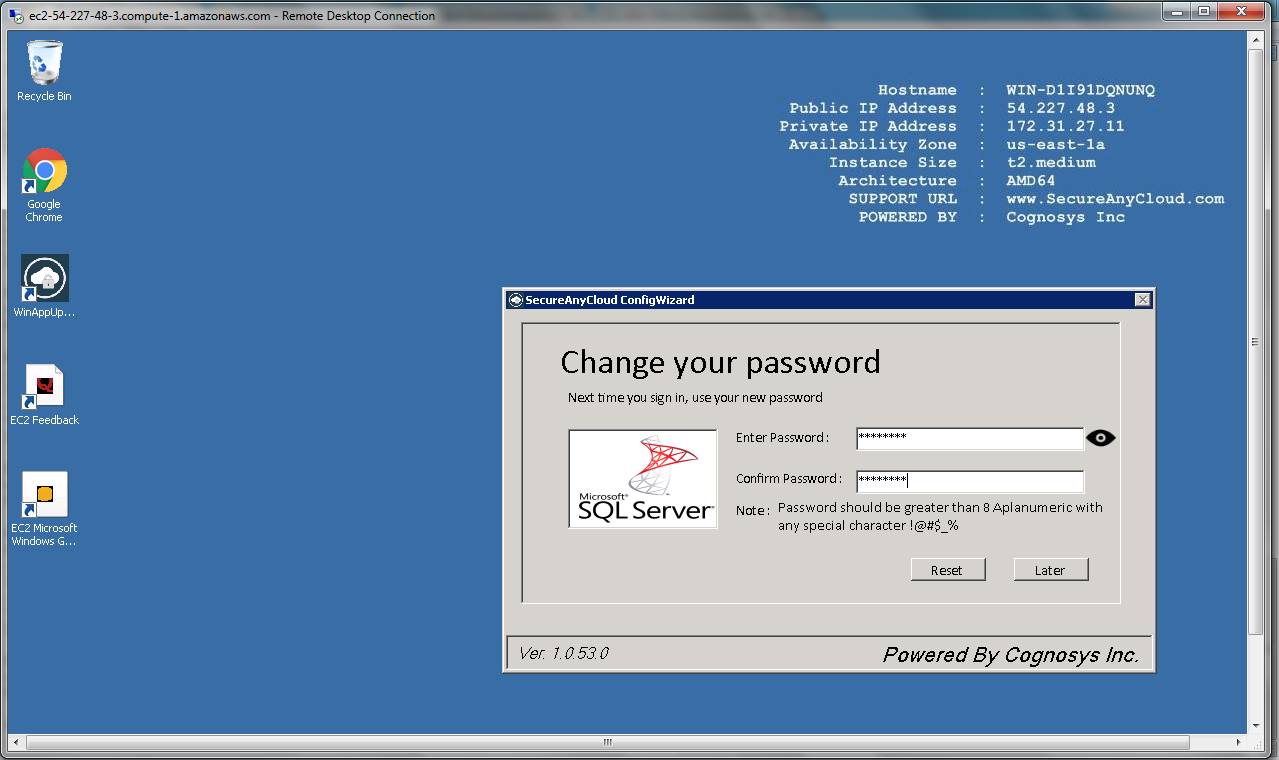
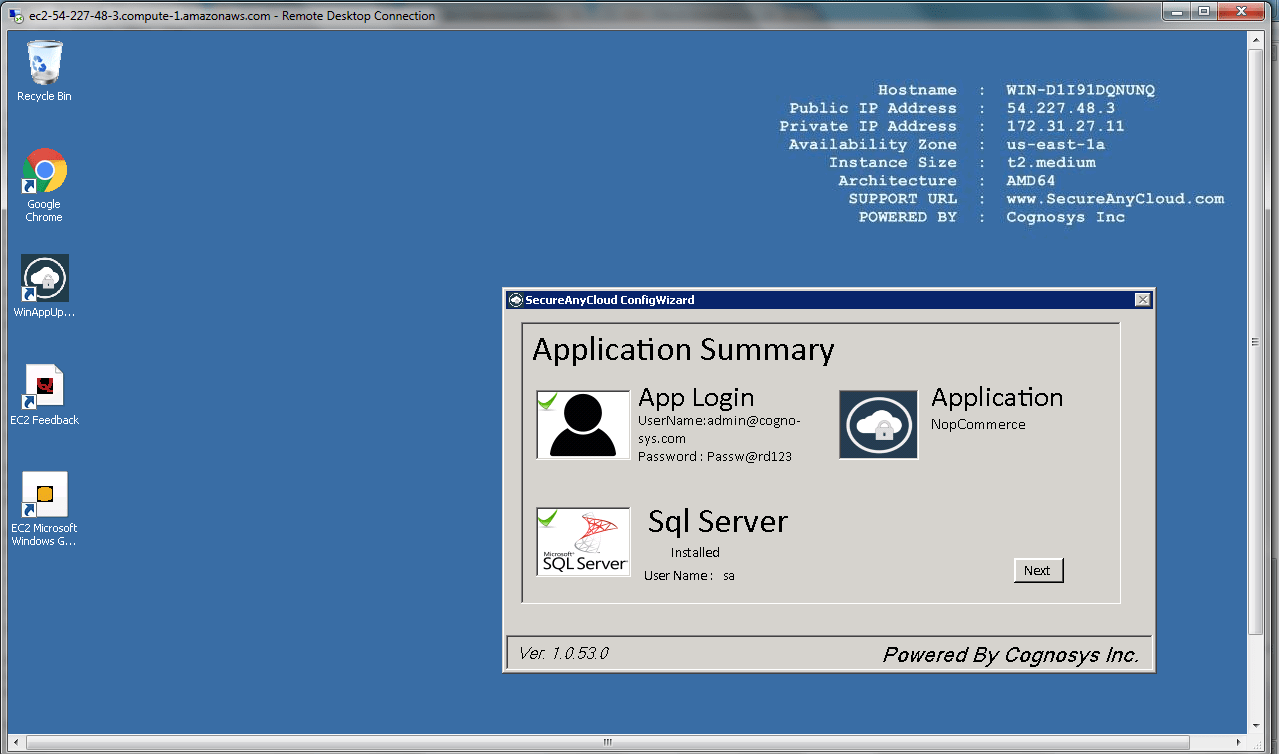
Step 2) Database Login Details:
Username : sa || Password : Passw@rd123
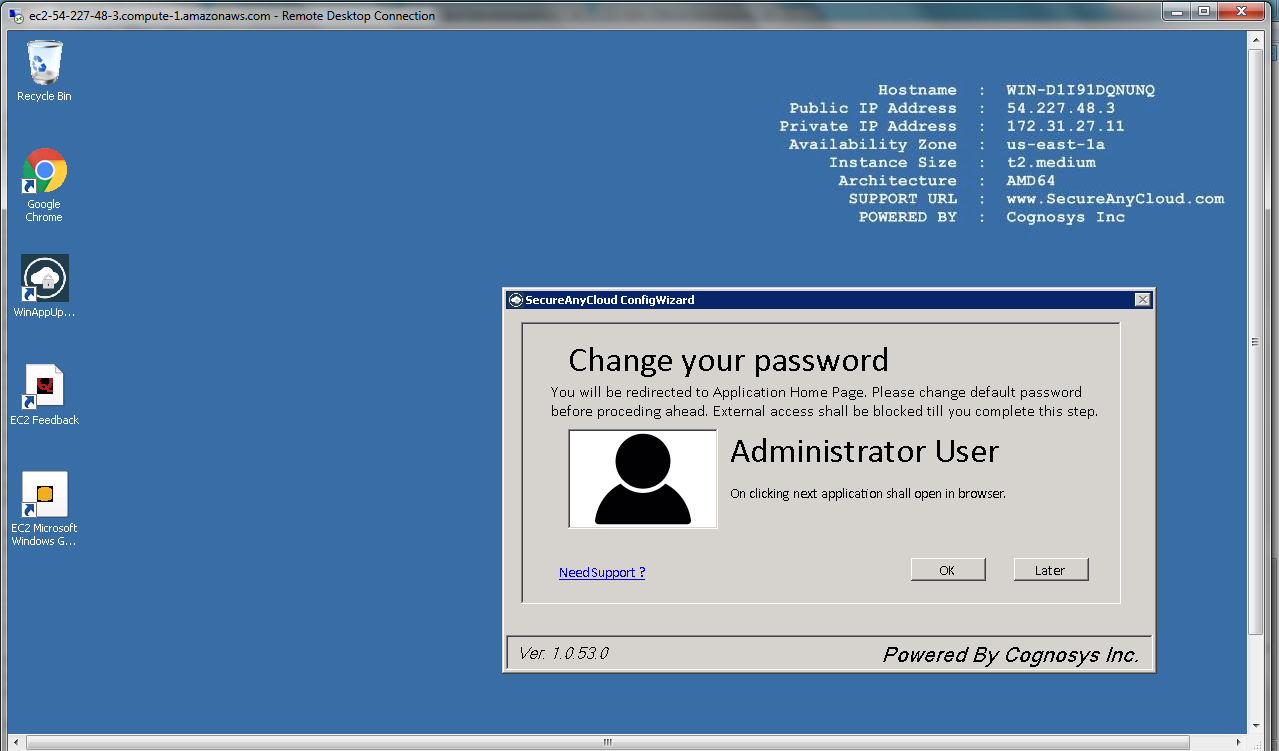
Please change the password immediately after the first login.
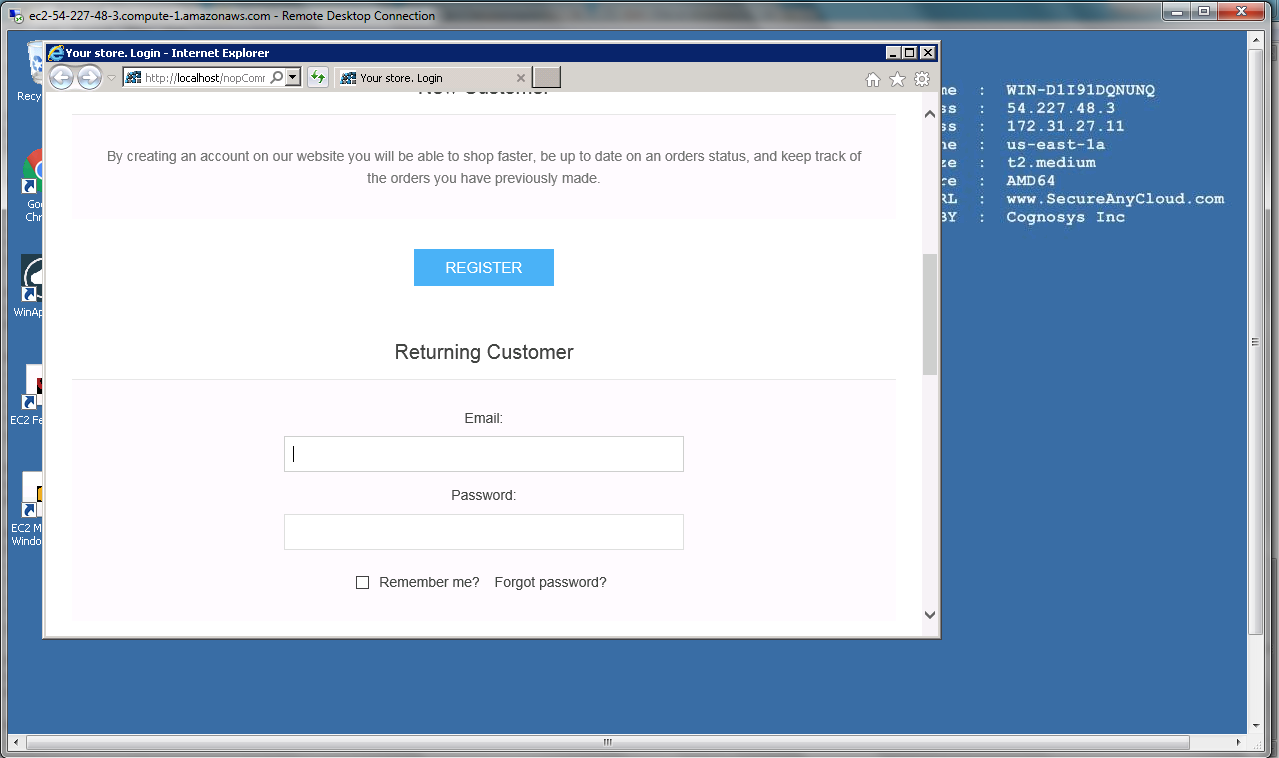
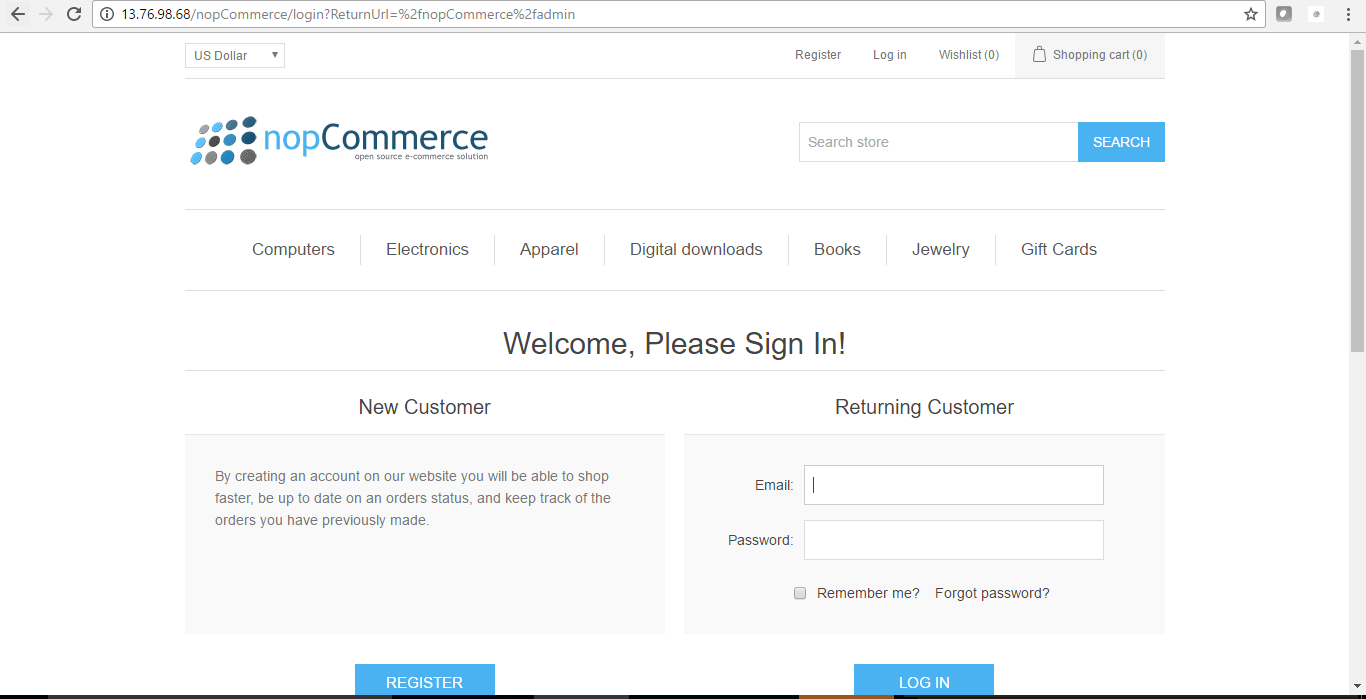
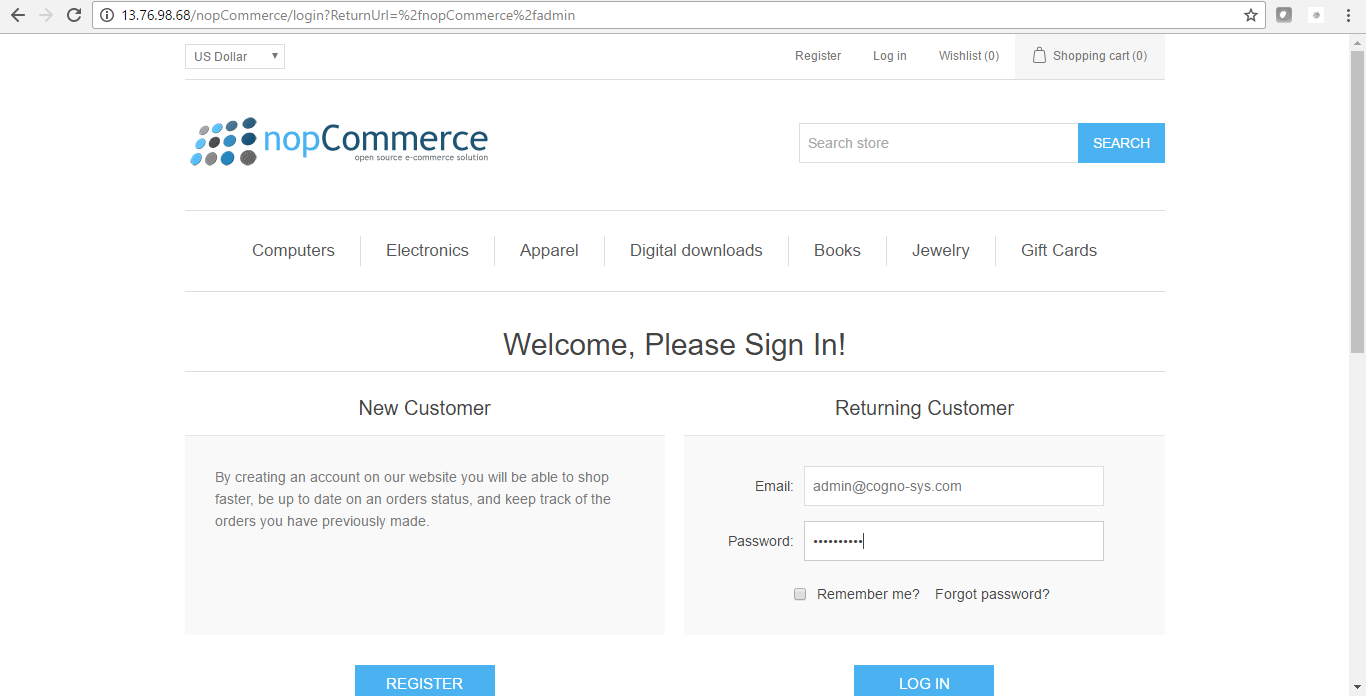
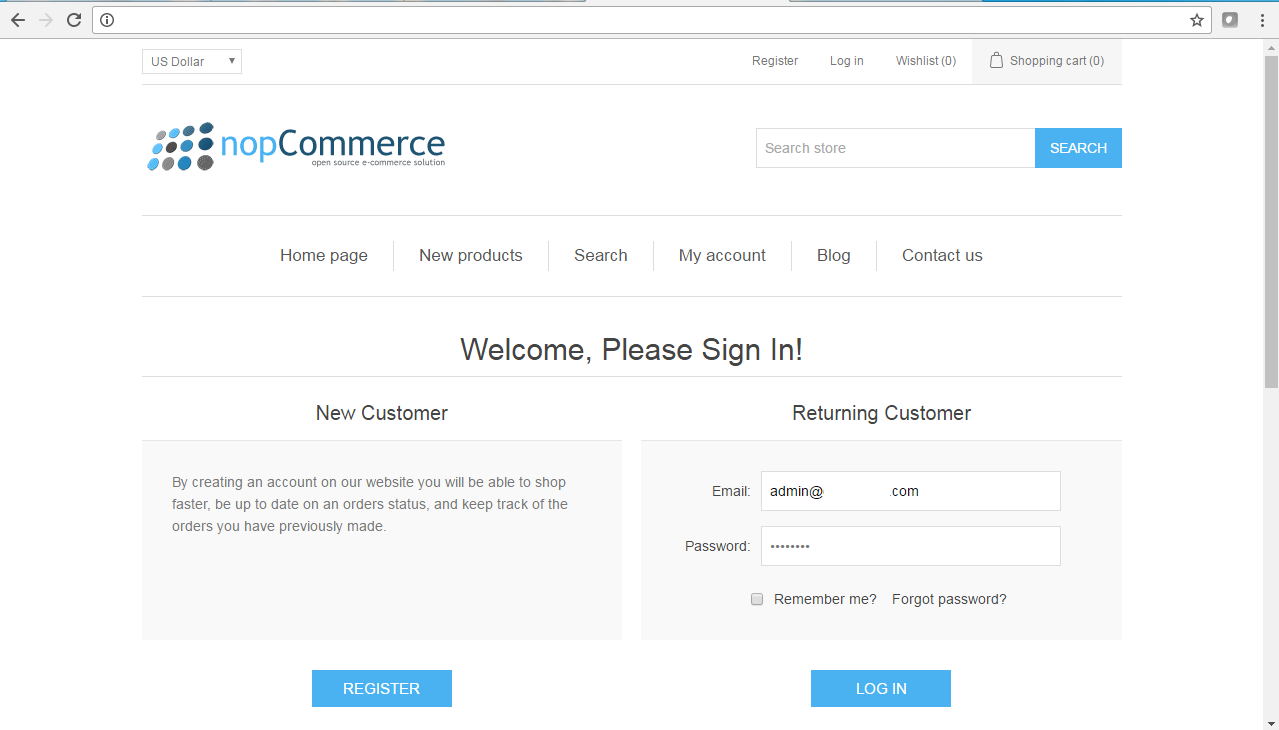
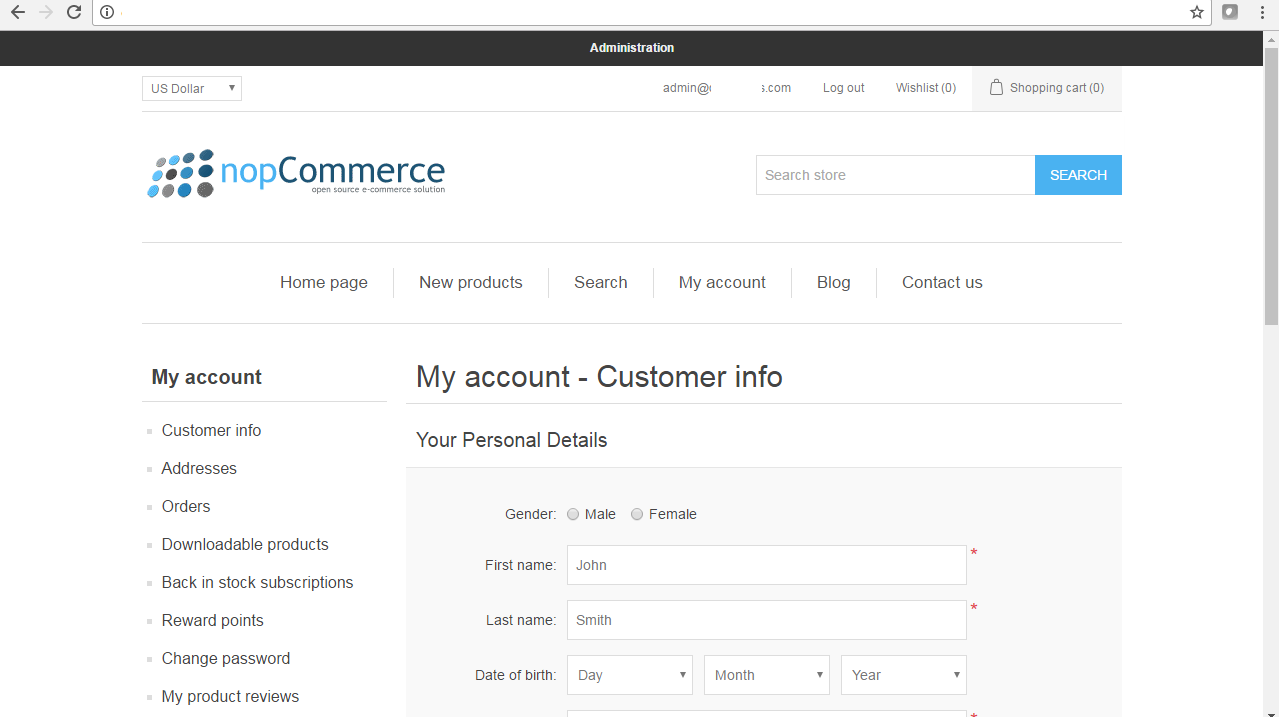
Step 3) Application URL: Access the application via a browser at http://PublicDNS/nopCommerce
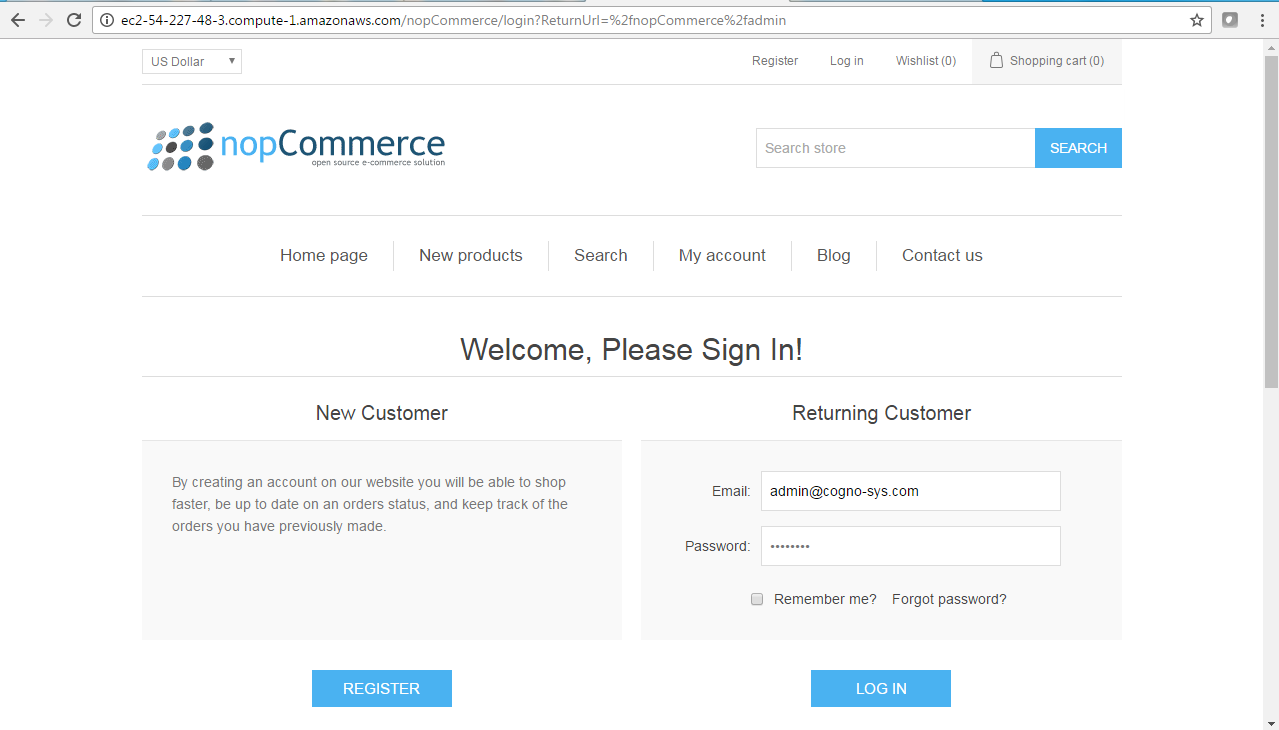
- User Name: admin@cogno-sys.com
- Password: Passw@rd123
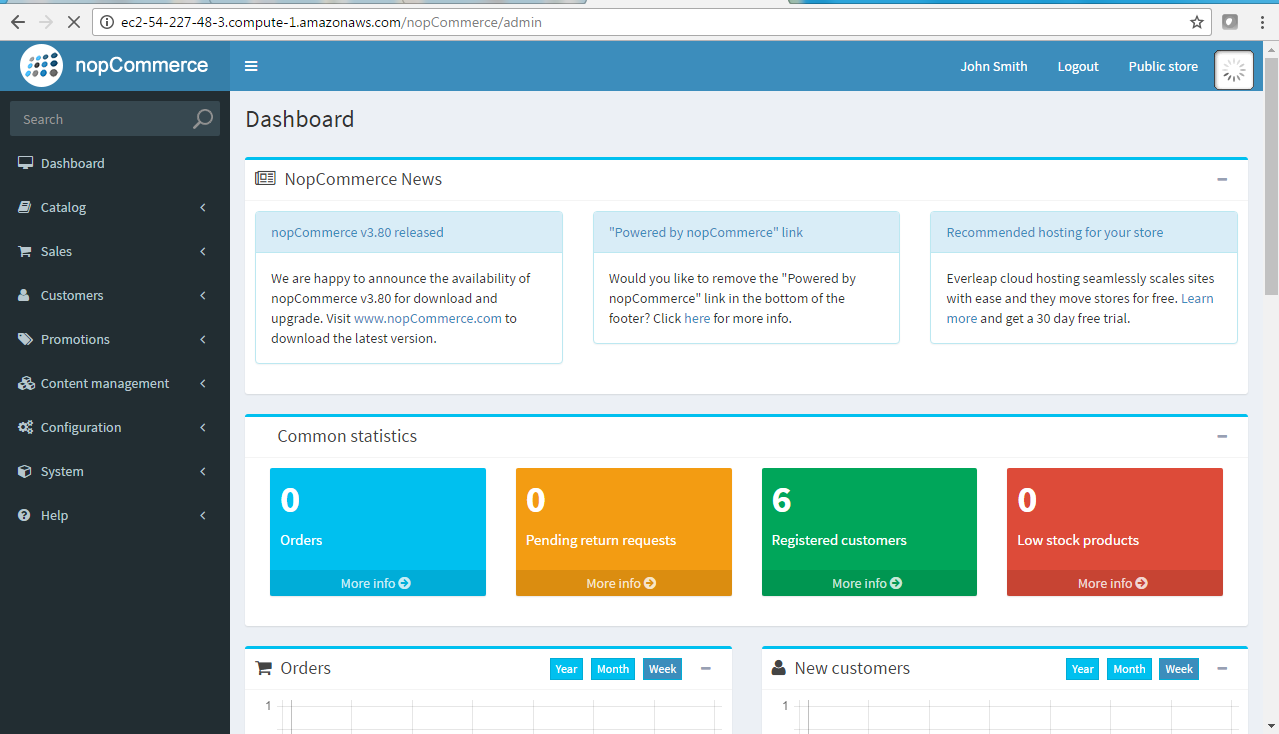
Steps to access the Admin Panel:
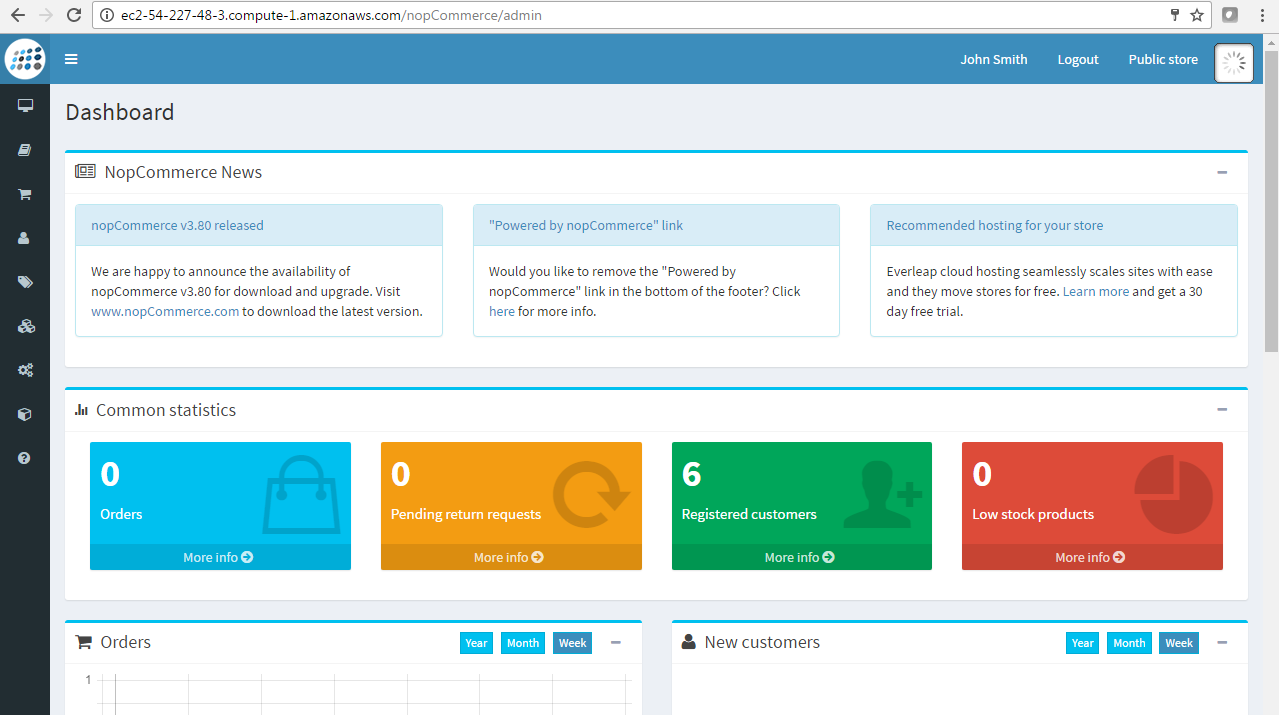
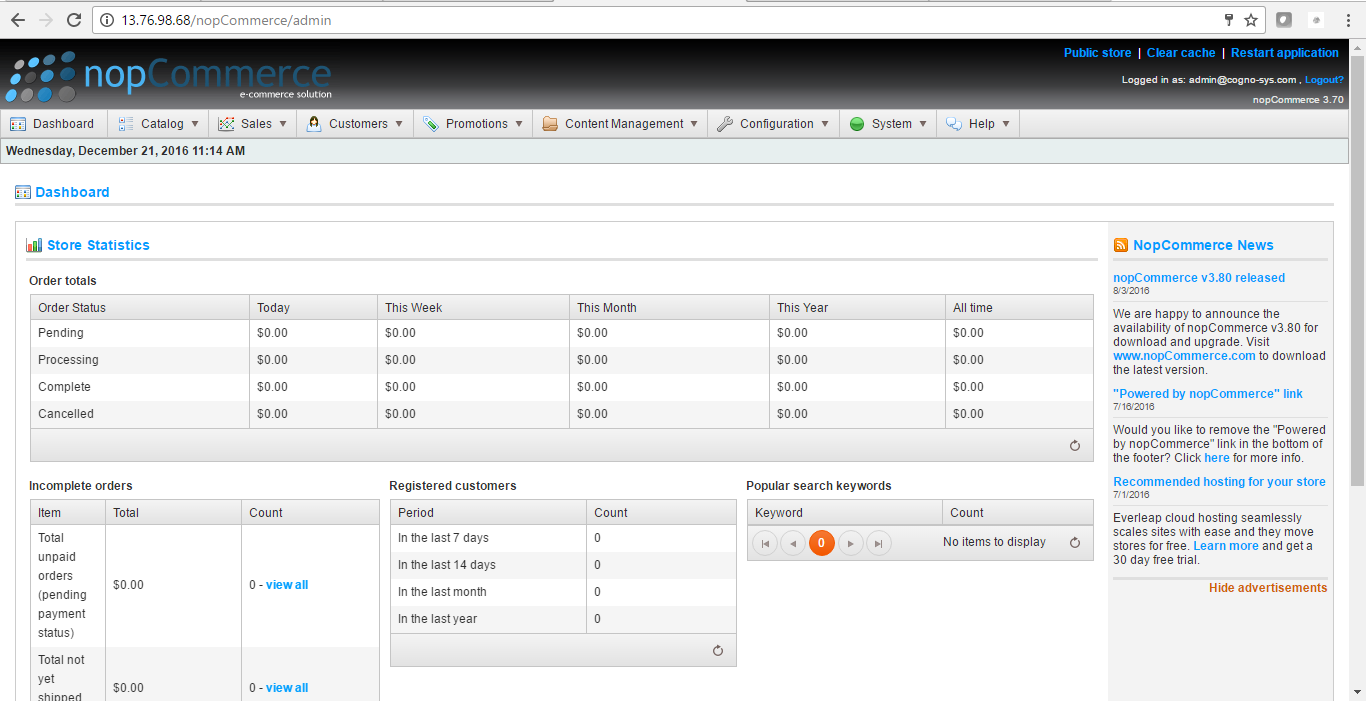
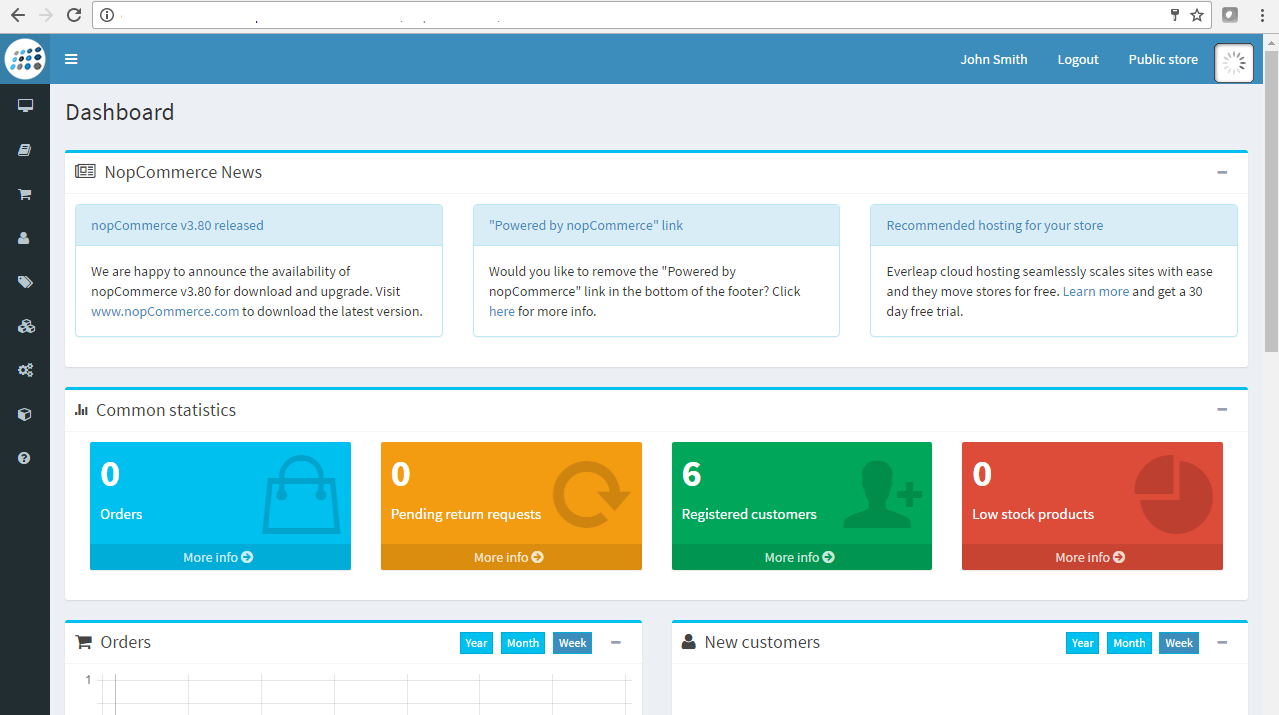
- To login to nopCommerce Administrative Panel, you need
to open your browser and navigate to http://PublicDNS/nopCommerce/admin - Enter username and password in the given fields and click on the “Login” button to access the Admin Panel.
- After successful login to the Admin Panel, you will get access to nopCommerce Dashboard.
Step 4) Other Information:
1.Default installation path: will be on your web root folder “C:\inetpub\wwwroot\nopCommerce”
2.Default ports:
- Windows Machines: RDP Port – 3389
- Http: 80
- Https: 443
- Sql ports: By default, these are not open on Public Endpoints. Internally Sql server: 1433.
Configure custom inbound and outbound rules using this link
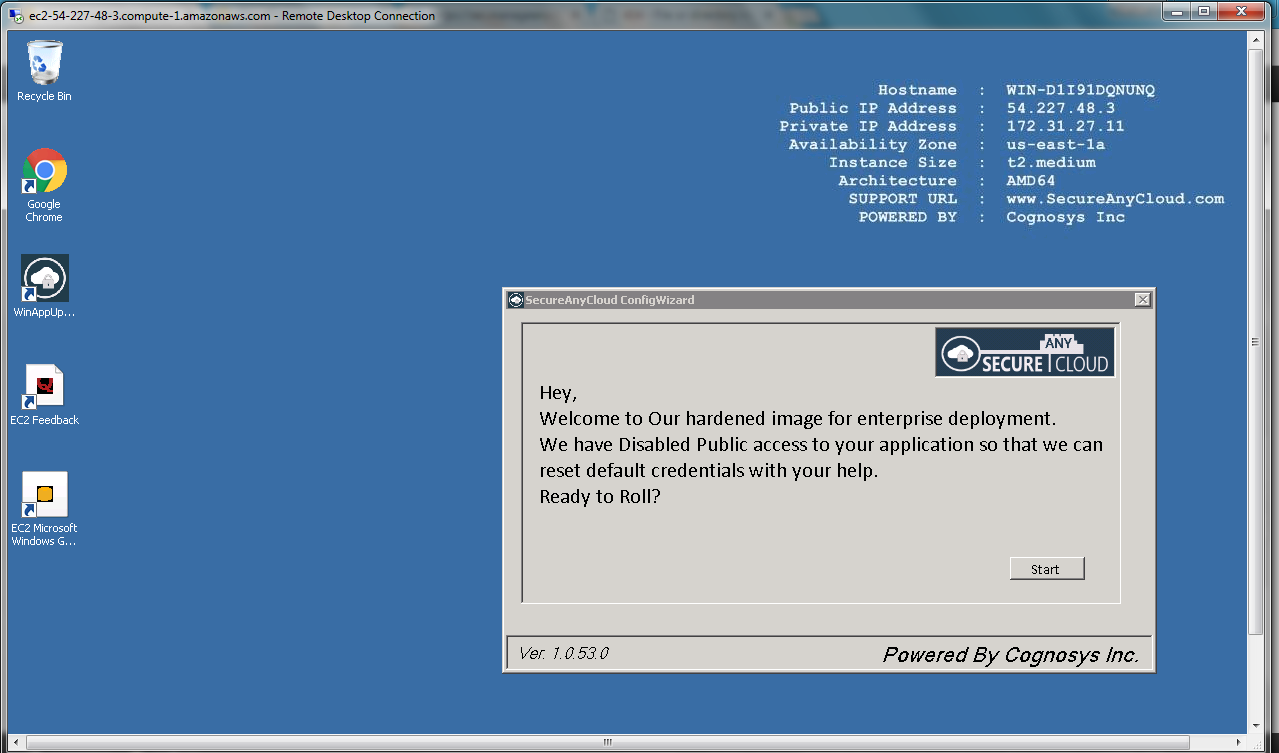
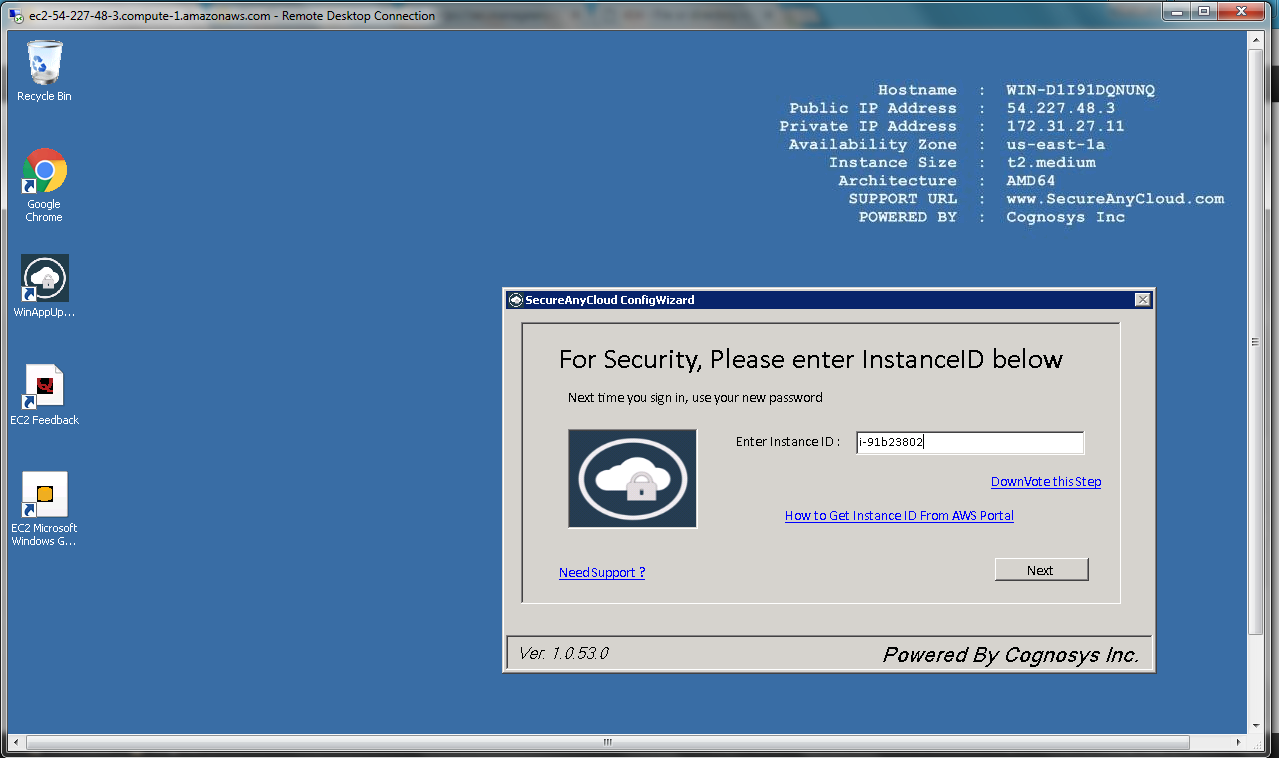
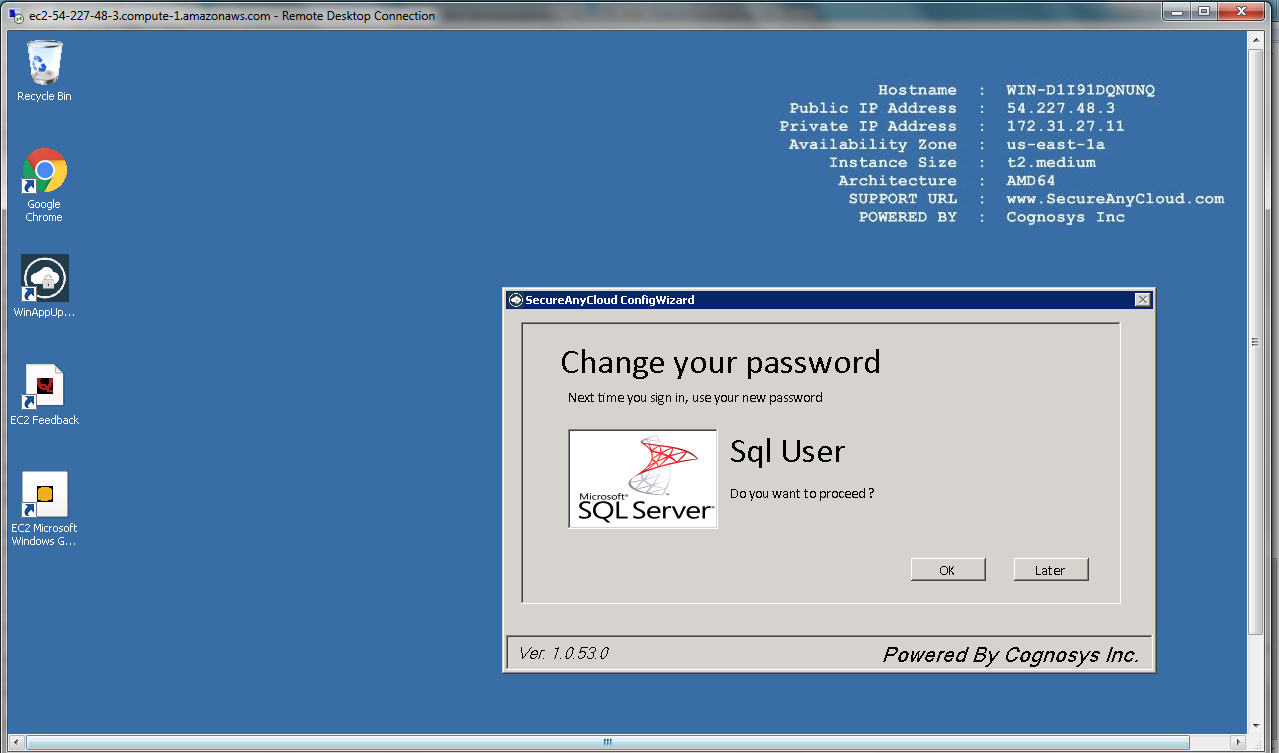
AWS Step by Step Screenshots :
Azure
Installation Instructions for Windows
Note: How to find PublicDNS in Azure
Step1 ) RDP Connection: To connect to the deployed instance, Please follow Instructions to Connect to Windows instance on Azure Cloud
Connect to virtual machine using following RDP credentials:
- Hostname: PublicDNS / IP of machine
- Port : 3389
Username: Your chosen username when you created the machine ( For example: Azureuser)
Password : Your Chosen Password when you created the machine ( How to reset the password if you do not remember)
Step 2 )Database Login Details:
- SQL Username : sa
- SQL Password : Passw@rd123
Note: For Stack Database: DB Name “nopcommerce151” with User Name : “default980” and Password : “n|Ufprf]HZ[f ” has already been created.Please use this database for you Stack Configuration.
Step 3 ) Application URL: Access the application via a browser at http://PublicDNS/
Step 4 ) Other Information:
1.Default installation path: will be on your web root folder “C:\inetpub\wwwroot\nopCommerce”
2.Default ports:
- Windows Machines: RDP Port – 3389
- Http: 80
- Https: 443
- Sql ports: By default these are not open on Public Endpoints. Internally Sql server: 1433.
Configure custom inbound and outbound rules using this link
Azure Step by Step Screenshots
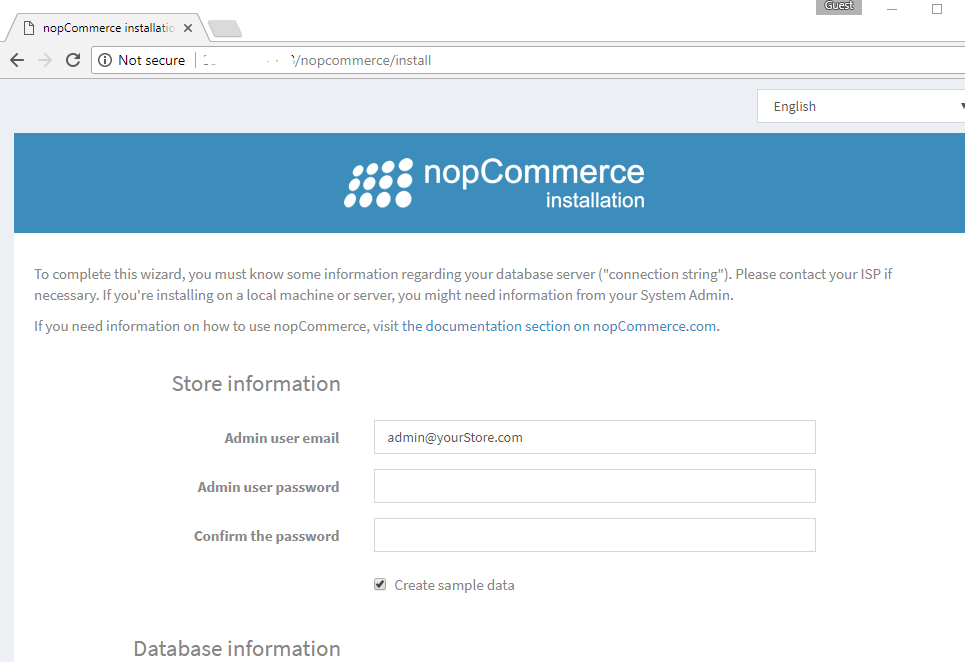
Installation Instructions for Windows
Step 1) VM Creation:
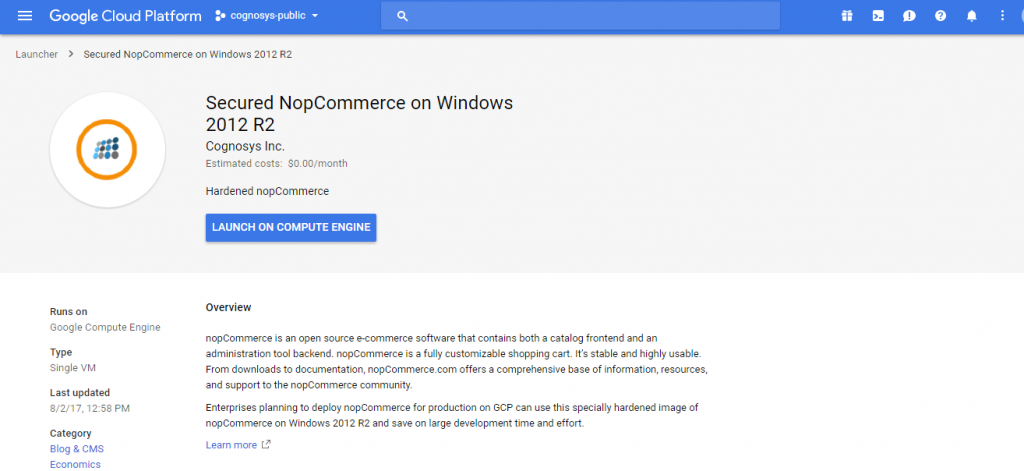
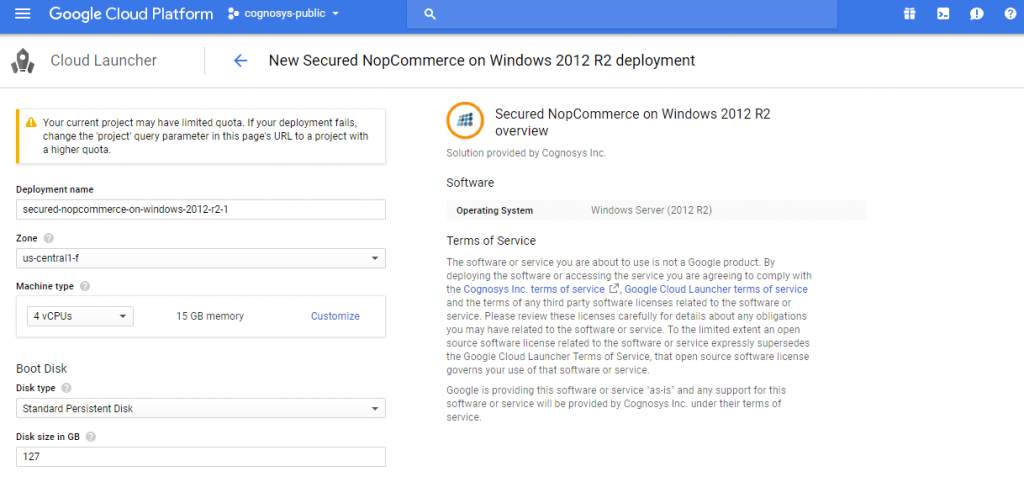
- Click the Launch on Compute Engine button to choose the hardware and network settings.
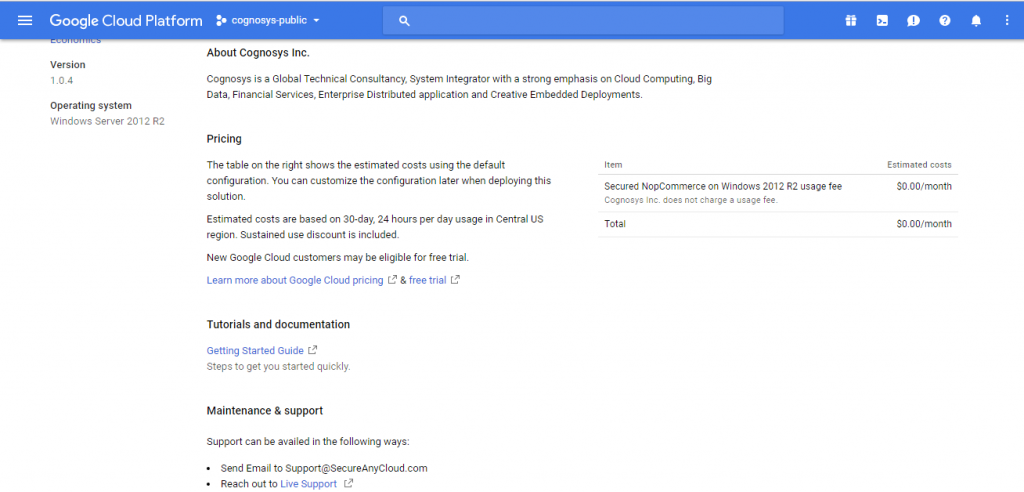
2.You can see at this page, an overview of Cognosys Image as well as some estimated costs of VM.
3.In the settings page, you can choose the number of CPUs and amount of RAM, the disk size and type etc.
Step 2) RDP Connection: To initialize the DB Server please connect to the deployed instance, Please follow Instructions to Connect to Windows instance on Google Cloud
Step 3) Database Credentials:
The below screen appears after successful deployment of the image.
For local SQL Server sa password, please use the temporary password generated automatically during image creation as shown above.
i) Please connect to Remote Desktop as given in step 2 to ensure stack is properly configured and DB is initialized.
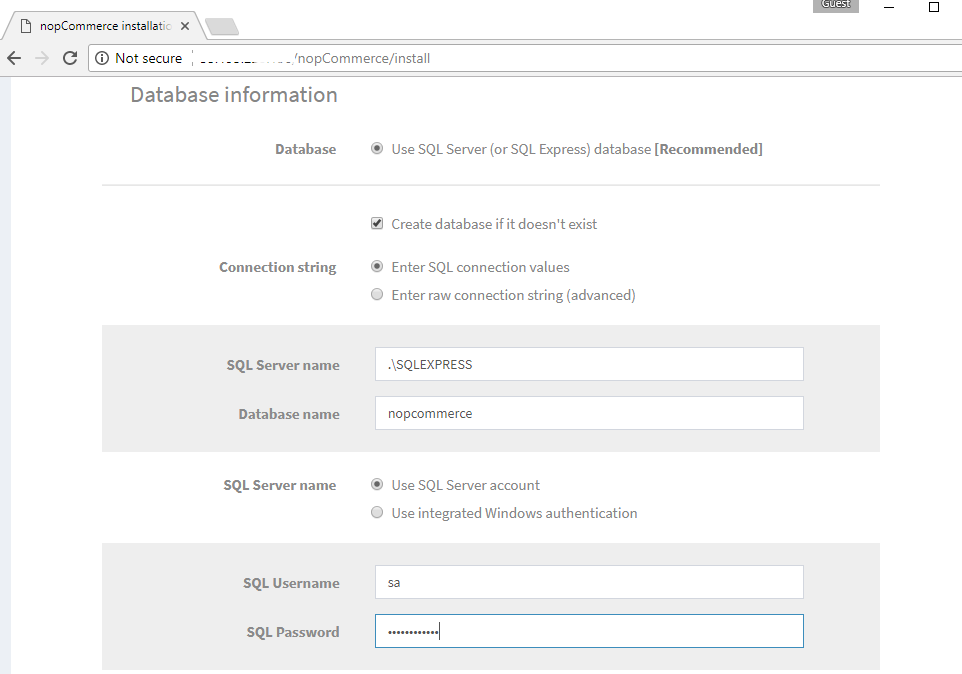
ii) You can use SQL server instance as SQLEXPRESS. The SQL Server instance name to be used is “.\SQLExpress”.
Connect to SQL Management Studio with username as sa and password provided in Custom Metadata .
If you have closed the deployment page you can also get the sa password from VM Details “Custom metadata” Section.
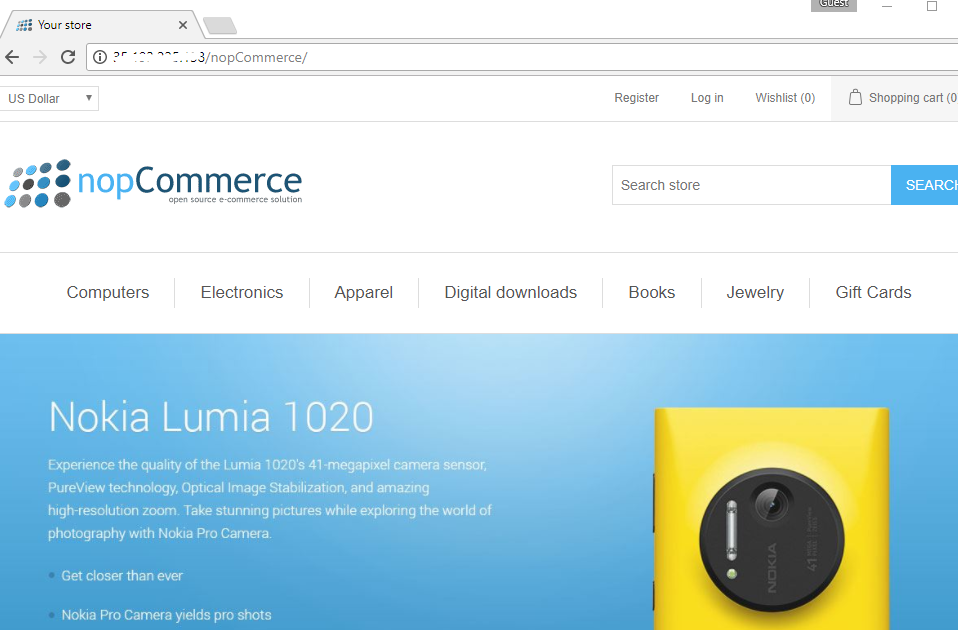
Step 4 ) Application URL: Access the application via a browser at http://PublicDNS/nopCommerce
For local SQL Server sa password please use the Temporary password set during image creation.
During configuration of the stack you can use the local SQL Express.
In SQL Server hostname use “.\SQLExpress”

Step 4 ) Other Information:
1.Default installation path: will be on your web root folder “C:\inetpub\wwwroot\nopCommerce”
2.Default ports:
- Windows Machines: RDP Port – 3389
- Http: 80
- Https: 443
- Sql ports: By default these are not open on Public Endpoints. Internally Sql server: 1433.
For a list of installation instructions customized for your platform nopCommerce Please Click here.
Videos
Secured nopCommerce on Windows 2012 R2
NopDevDay 2015 – past, present and future of nopCommerce

