1-click AWS Deployment 1-click Azure Deployment
Overview
MODX is a content management system that helps you create superlative web sites. There are two key benefits to MODX. First, it makes web sites easy for you and others you designate as site admins to maintain. Second, once you get used to it, it allows you to create very complex web sites in a very short time. Things that would take many lines of code for you to do yourself can often be accomplished with a line or two in MODX.
Within the MODX manager, you have access to a built-in package library which contains most of what any developer would need for common tasks. Creating your own plugins and scripts is quite trivial, and there are some good for-pay extras out there too. It helps you take control of your online content. An Open Source PHP application framework, it frees you to built sites exactly how you want and make them 100% yours. Zero restrictions and fast to build. Super-simple templates in regular HTML/CSS/JS (any lib you want). Registered user systems and a killer community. Welcome to web-building nirvana.
MODX Revolution (Revo) is an easy-to-use Content Management System (CMS) and Application Framework rolled into one. Despite the limitless possibilities that MODX affords you, we think you’ll find it refreshingly intuitive to work with. At every step, MODX strives to deliver Creative Freedom.
In addition to this documentation site, the MODX Community is vibrant and always willing to help. Go ahead and ask questions there – you’ll be pleasantly surprised at the responsiveness of the MODX user base. Additionally, there are trusted, experienced MODX Professionals with whom you can engage to get the job done. MODX also has vendor-backed commercial support options, so no matter your needs and requirements – you’re covered.
MODX is owned by MODX (https://modx.com/) and they own all related trademarks and IP rights for this software.
MODX CMS on Cloud runs on Amazon Web Services (AWS) and Azure and is built to provide the best place to host, manage and develop your MODX Revolution Websites.
Cognosys provides hardened images of MODX CMS on all public cloud i.e. AWS marketplace and Azure.
MODX is released under the GNU/GPL license.
MODx CMS on Cloud For AWS
MODx CMS on Cloud For Azure
Features
Major Features of Modx
-
- ModX is FREE
-
- ModX is easy to use
-
- ModX is SEO optimized
-
- ModX gives you the freedom to create your pages exactly the way you want them
-
- Adding and managing Snippets
-
- Adding and managing Chunks
-
- Adding and managing Plugins
- Adding and managing Modules
AWS
Installation Instructions For Windows
Note: How to find PublicDNS in AWS
Step 1) RDP Connection: To connect to the deployed instance, Please follow Instructions to Connect to Windows instance on AWS Cloud
Connect to the virtual machine using following RDP credentials:
- Hostname: PublicDNS / IP of machine
- Port : 3389
Username: To connect to the operating system, use RDP and the username is Administrator.
Password: Please Click here to know how to get password .
Step 2) Database Login Details:
- MYSQL Username : root
- MYSQL Password : Passw@rd123
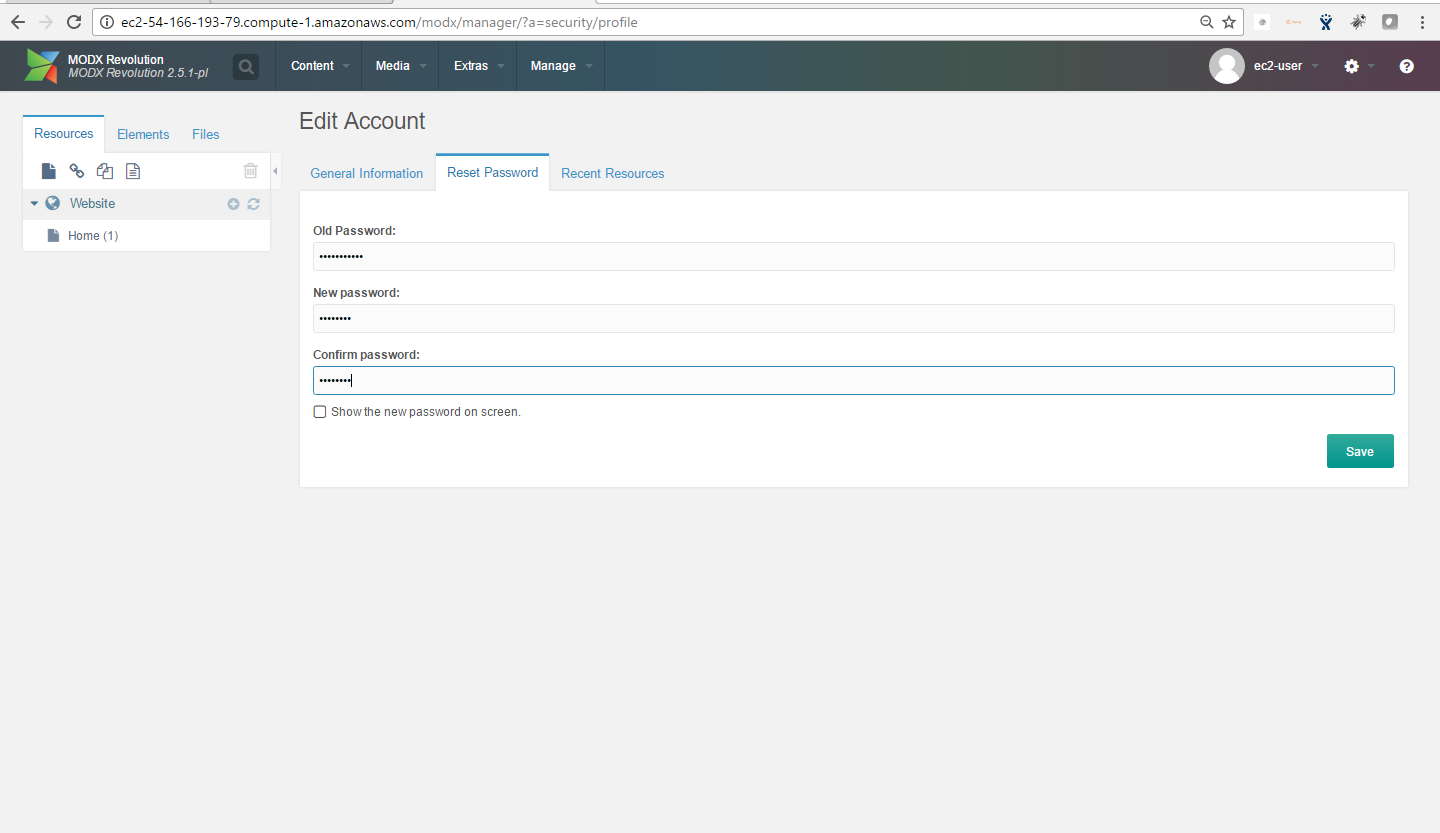
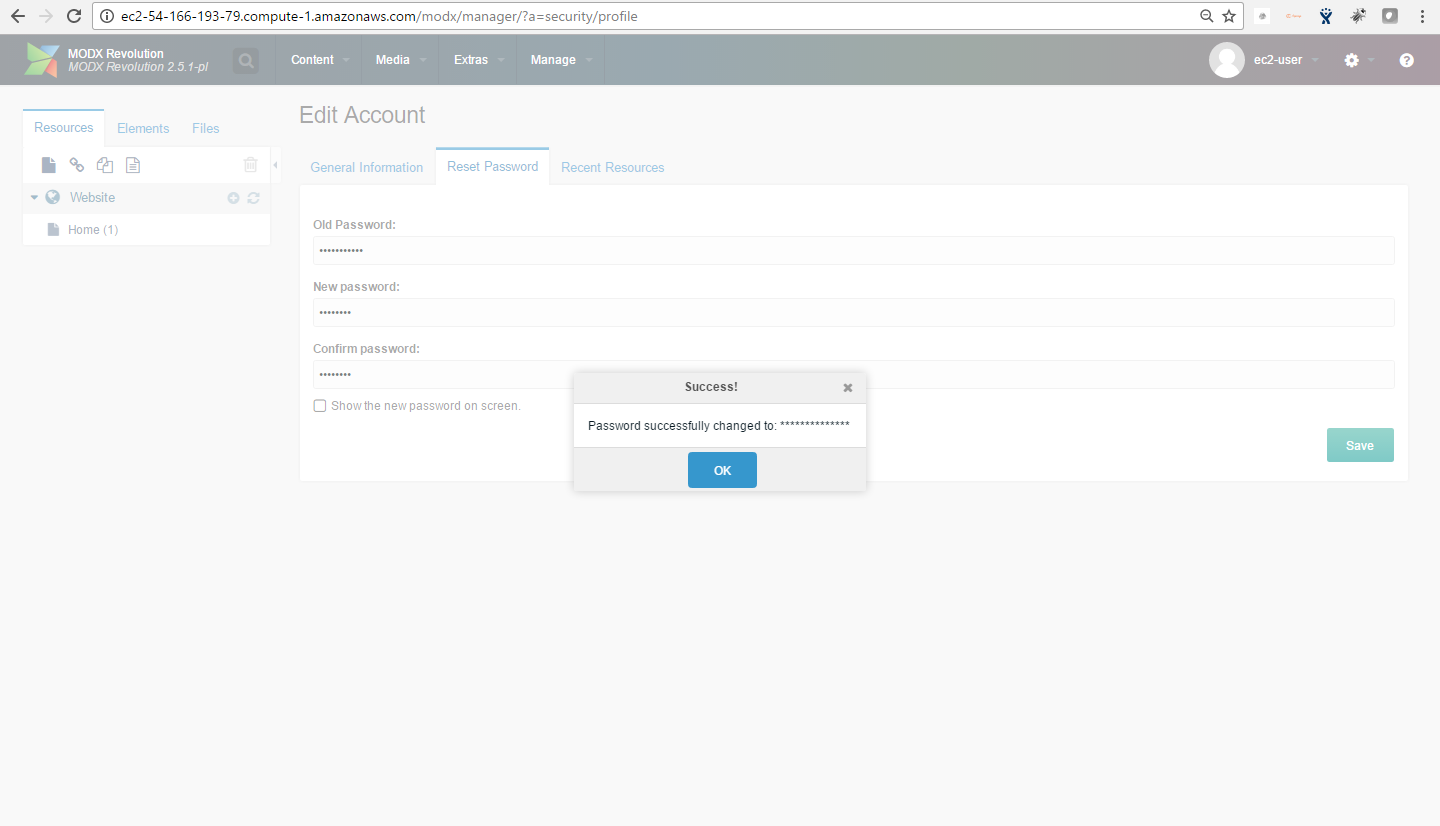
Note : Please change the password immediately after first login.
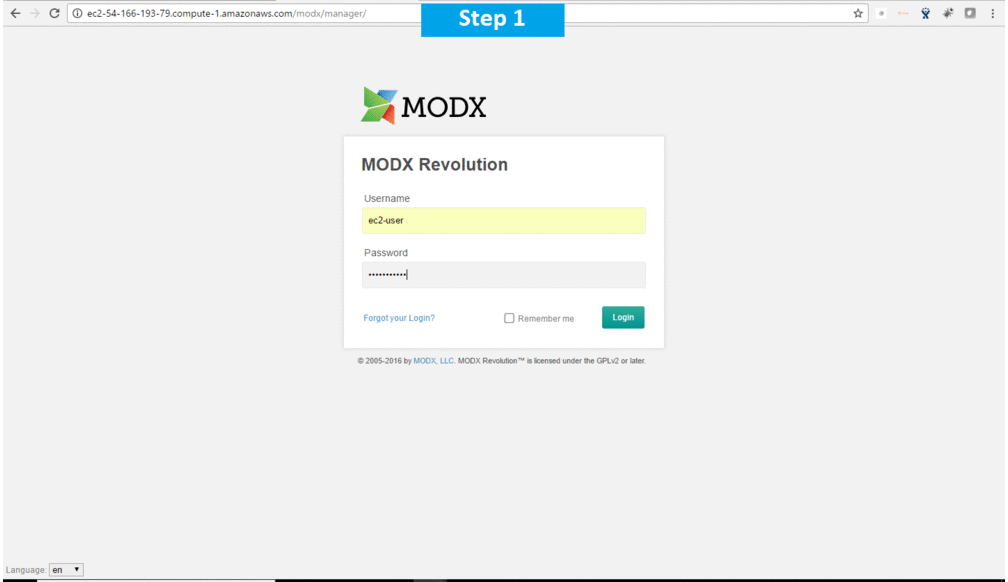
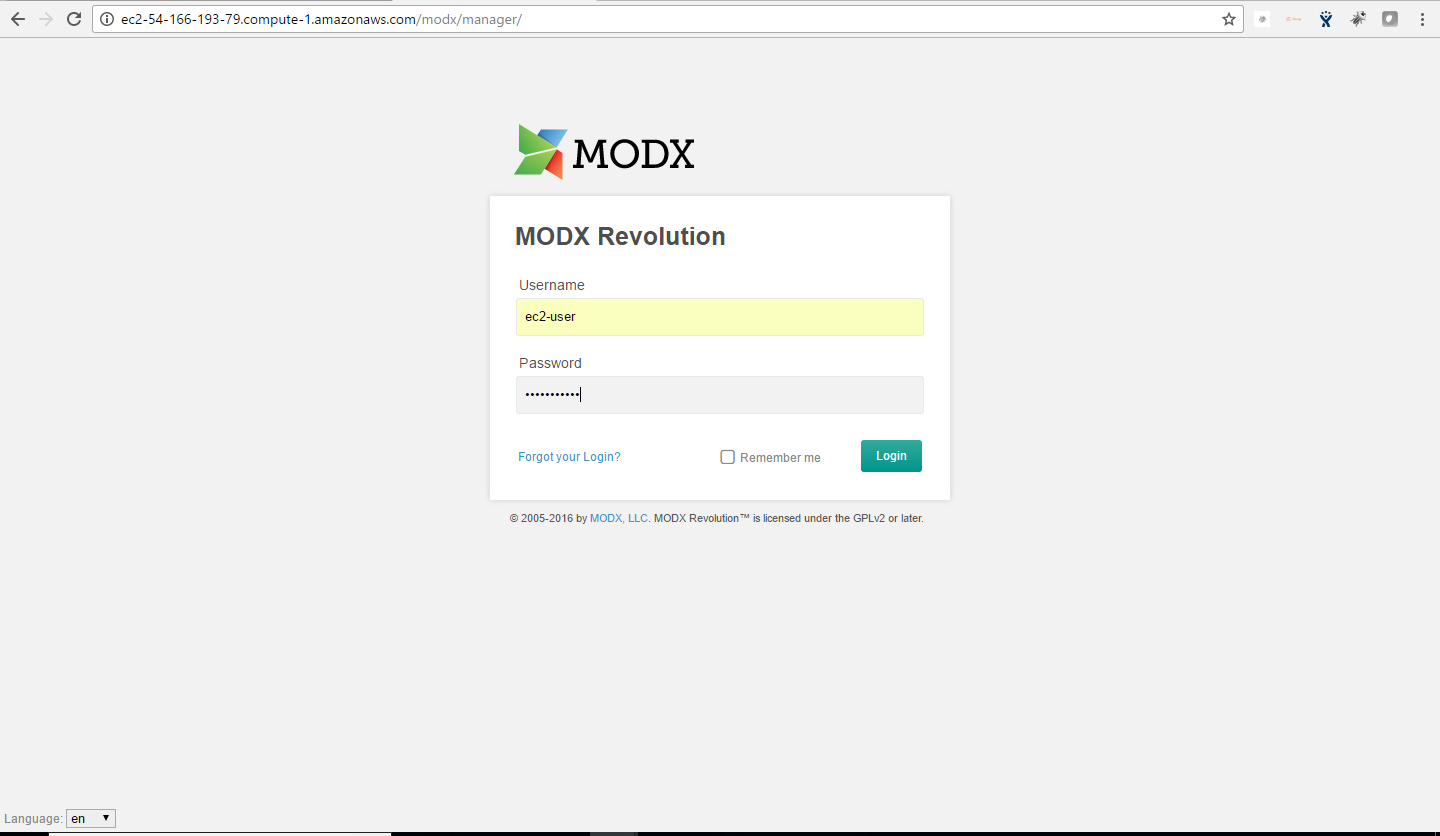
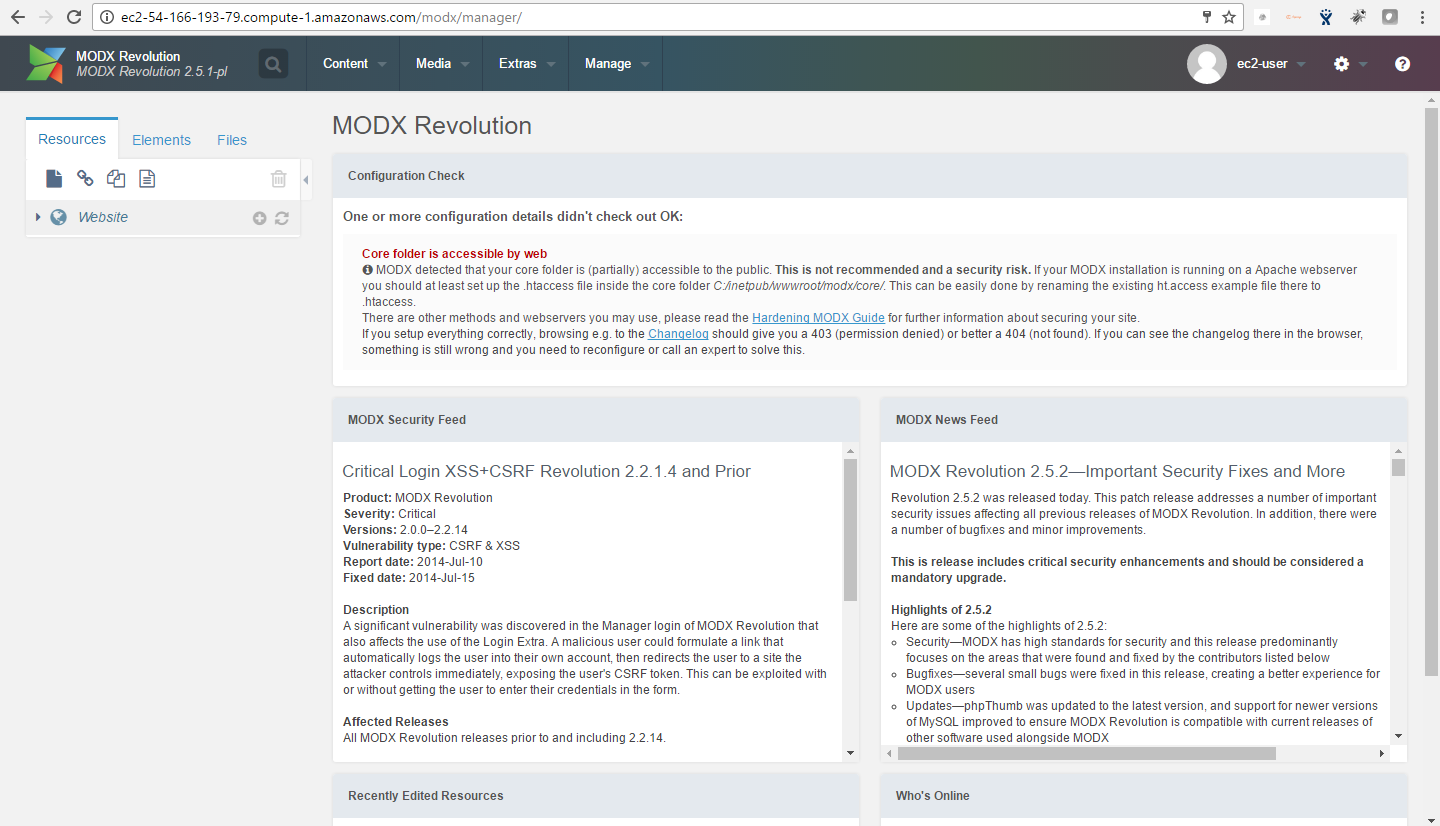
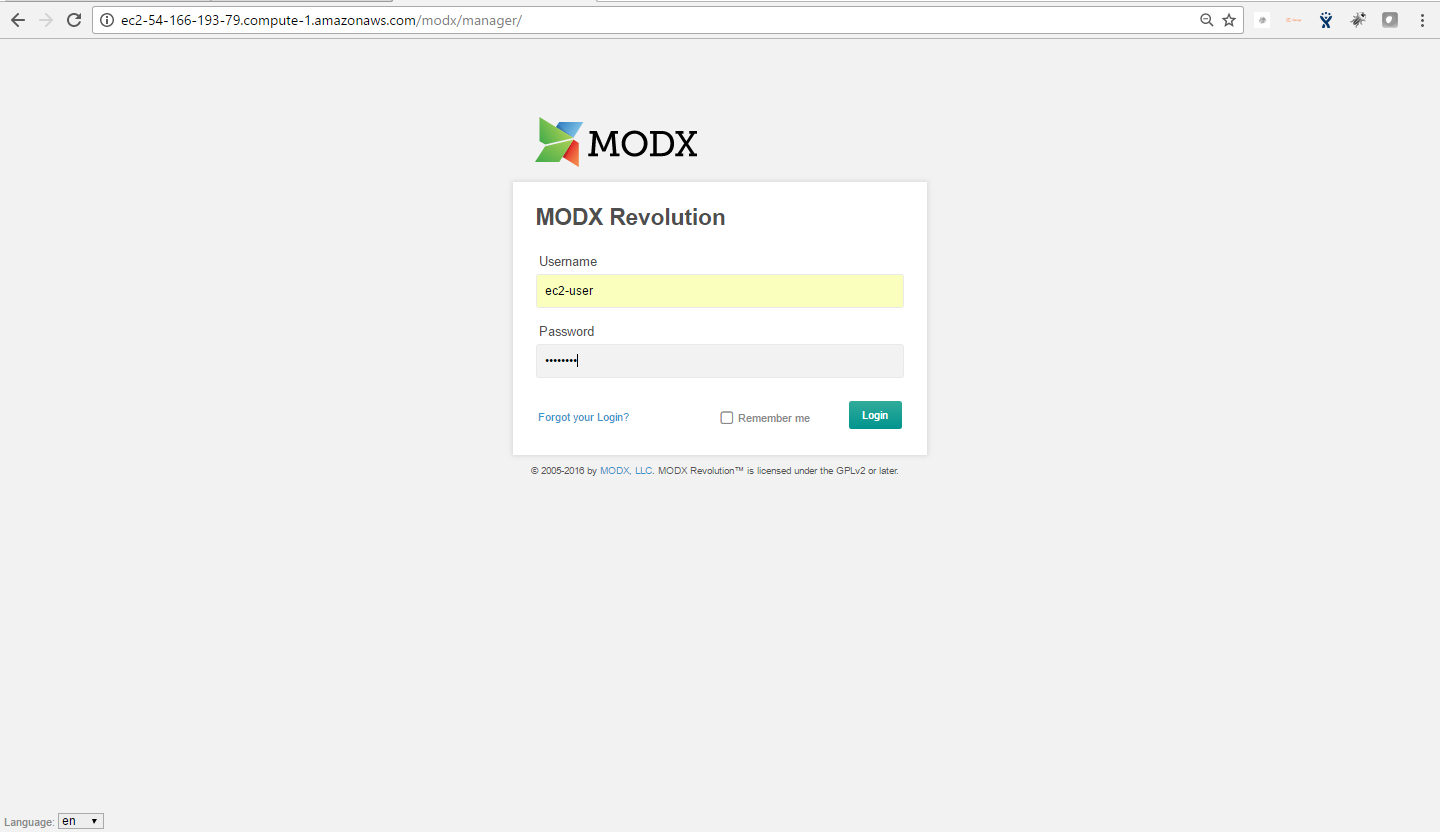
Step 3) Application URL: Access the application via a browser at http://PublicDNS/modx
- Username : ec2-user
- Password : Passw@rd123
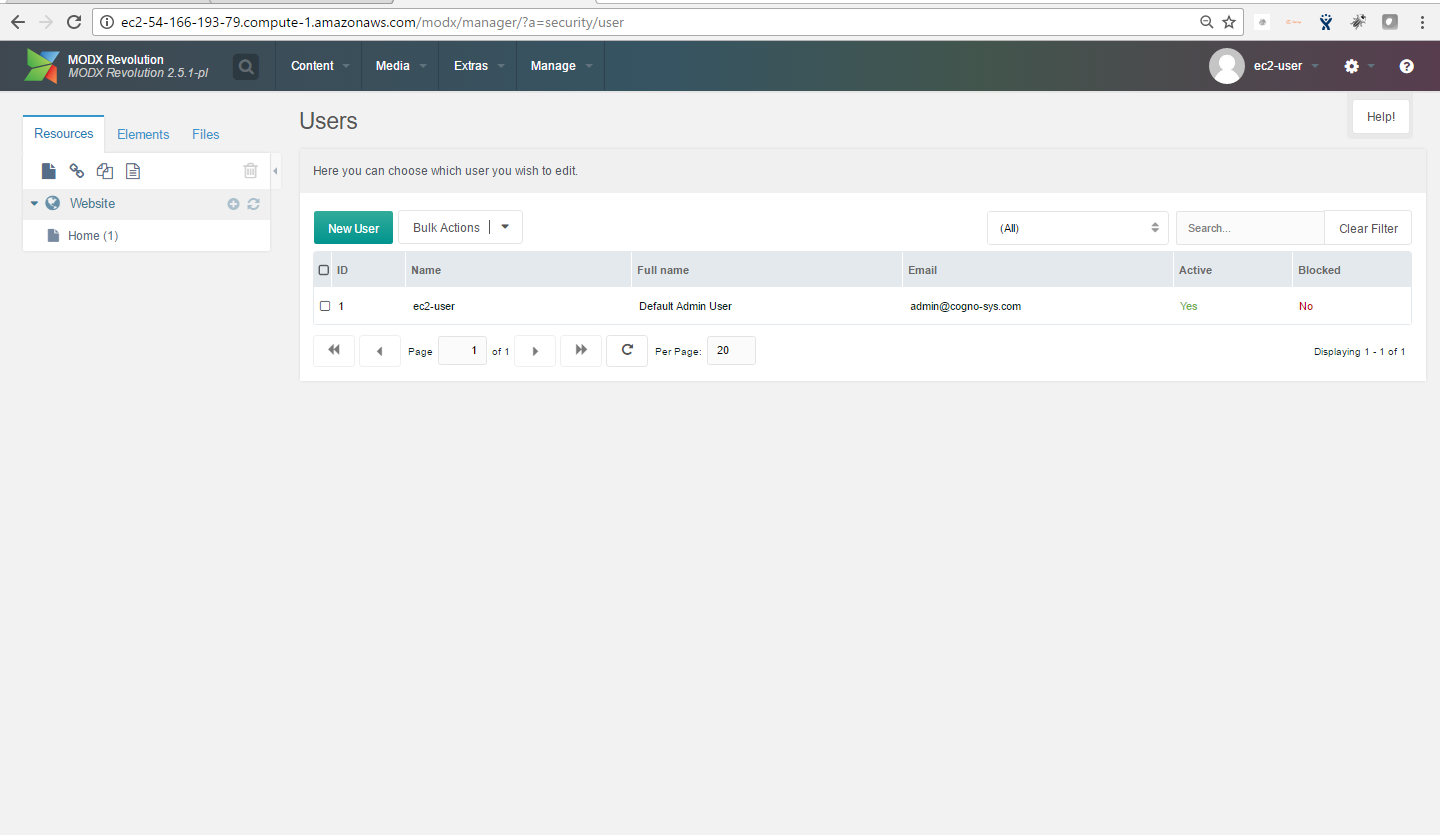
Steps to access the Admin Panel:
- To login to MODX Administrative Panel, you need
to open your browser and navigate to http://localhost/MODx/manager - Enter username and password in the given fields and click on the “Login” button to access the Admin Panel.
- After successful login to the Admin Panel, you will get access to MODX Dashboard.
Step 4) Other Information:
1.Default installation path: will be on your web root folder “C:\inetpub\wwwroot\modx”
2.Default ports:
- RDP:338
- Http: 80
- Https: 443
- Mysql ports: By default these are not open on Public Endpoints.Mysql :3306
Configure custom inbound and outbound rules using this link
AWS Step by Step Screenshots
Azure
- Installation Instructions For Ubuntu
- Installation Instructions For Windows
- Installation Instructions For Centos
Installation Instructions For Ubuntu
Note : How to find PublicDNS in Azure
Step 1) SSH Connection: To connect to the deployed instance, Please follow Instructions to Connect to Ubuntu instance on Azure Cloud
1) Download Putty.
2) Connect to virtual machine using following SSH credentials:
- Hostname: PublicDNS / IP of machine
- Port : 22
Username: Your chosen username when you created the machine ( For example: Azureuser)
Password : Your Chosen Password when you created the machine ( How to reset the password if you do not remember)
Step 2) Database Login Details:
Username : root || Password : Passw@rd123
For Stack Database: DB modxdb with user modxuser and password Passw@rd123 has already been created.Please use this database for you Stack Configuration.
Note : Please change the password immediately after first login.
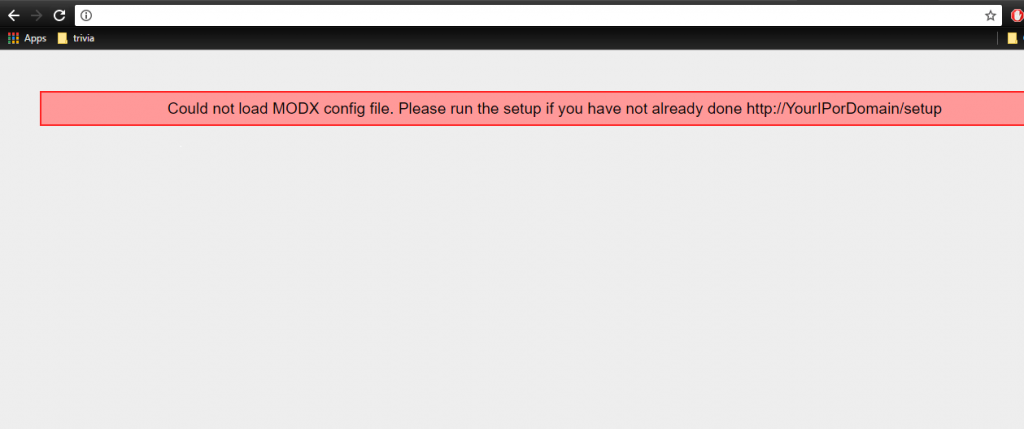
Step 3) Application URL: Access the application via a browser at http://PublicDNS
Step 4) Other Information:
Note : Please do the initial MODX setup with http://YourIP/setup
1.Default installation path: will be in your web root folder “/var/www/html”
2.Default ports:
- Linux Machines: SSH Port – 22
- Http: 80
- Https: 443
- MYSQL ports: By default, these are not open on Public Endpoints. MYSQL: 3306
Configure custom inbound and outbound rules using this link
3. To access Webmin interface for management please follow this link
Installation Instructions for Windows
Note: How to find PublicDNS in Azure
Step1 ) RDP Connection: To connect to the deployed instance, Please follow Instructions to Connect to Windows instance on Azure Cloud
Connect to virtual machine using following RDP credentials:
- Hostname: PublicDNS / IP of machine
- Port : 3389
Username: Your chosen username when you created the machine ( For example: Azureuser)
Password : Your Chosen Password when you created the machine ( How to reset the password if you do not remember)
Step 2 )Database Login Details:
MYSQL Username : root || MYSQL Password : Passw@rd123
Note : Please change the password immediately after first login.
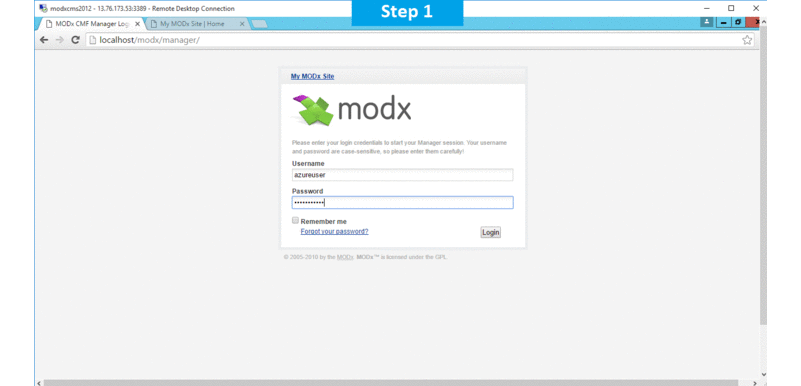
Step 3 ) Application URL: Access the application via a browser at http://PublicDNS/modx
- Username: azureuser (Please create new user and delete this user)
- Password : Passw@rd123
Steps to access the Admin Panel:
- To login to MODX Administrative Panel, you need
to open your browser and navigate to http://localhost/MODx/manager - Enter username and password in the given fields and click on the “Login” button to access the Admin Panel.
- After successful login to the Admin Panel, you will get access to MODX Dashboard.
Step 4) Other Information:
1.Default installation path: will be on your web root folder “C:\inetpub\wwwroot\modx”
2.Default ports:
-
- Windows Machines: RDP Port – 3389
- Http: 80
- Https: 443
- Mysql ports: By default these are not open on Public Endpoints. Internally Mysql :3306
Configure custom inbound and outbound rules using this link
Installation Instructions For Centos
Note: How to find PublicDNS in Azure
Step 1) SSH Connection: To connect to the deployed instance, Please follow Instructions to Connect to Centos instance on Azure Cloud
1) Download Putty.
2) Connect to virtual machine using following SSH credentials:
- Hostname: PublicDNS / IP of machine
- Port : 22
Username: Your chosen username when you created the machine ( For example: Azureuser)
Password : Your Chosen Password when you created the machine ( How to reset the password if you do not remember)
Step 2 )Database Login Details:
Username : root || Password : Passw@rd123
Note: For Stack Database DB modxdb with user modxuser and password Passw@rd123 has already been created.Please use this database for you Stack Configuration.
Please change the password immediately after the first login.
Step 3 ) Application URL: Access the application via a browser at http://PublicDNS/
Step 4 ) Other Information:
1.Default installation path: will be in your web root folder “/var/www/html”
2.Default ports:
- Linux Machines: SSH Port – 22 or 2222
- Http: 80 or 8080
- Https: 443
- MYSQL ports: By default, these are not open on Public Endpoints. MYSQL: 3306
Configure custom inbound and outbound rules using this link
3. To access Webmin interface for management please follow this link
Azure Step by Step Screenshots

Videos
How to Install MODx CMS
MODx PHP/MySQL Content Management System (CMS) Overview
