1-click AWS Deployment 1-click Azure Deployment
Overview
MANTIS is an open source bug tracking software. It can be used to track software defects for various software projects. It can be easily download and install the Mantis for your use. Mantisbt now also provides a hosted version of the software. You can easily customize Mantis to map your software development workflow.
.Mantis is also called as MantisBT, which means Mantis Bug Tracker. Here the name and logo of the Mantis known as Manidae family of insects. Here it is called as a bug. You can get the demo of the Mantis you need to Download (to set up your own Mantis) and Hosting version of the tool. Mantis offer support to different features for Issue Tracking and life cycle along with Release Management. The development of Mantis started in 2000 by Kenzaburo Ito. In 2012, GitHub is known as the official repository for the Mantis project source code.
License and Free Trial
- It is an open source software. License is not required to use its basic version.
- It provides Demo and Hosting Version for free trails.
- It supports Download feature to set up your own Mantis software. The user can sign up using email ID.
- Mantis has different price quotes based on added features that can be seen at https://www.mantishub.com/pricing
Usage
- To track all bugs/issue throughout Defect lifecycle.
- To manage at Release level as well.
- Supports Analytic and Reporting features.
- Supports plug-in with other softwares and IDE to make it more strong and effective.
Mantis – Login
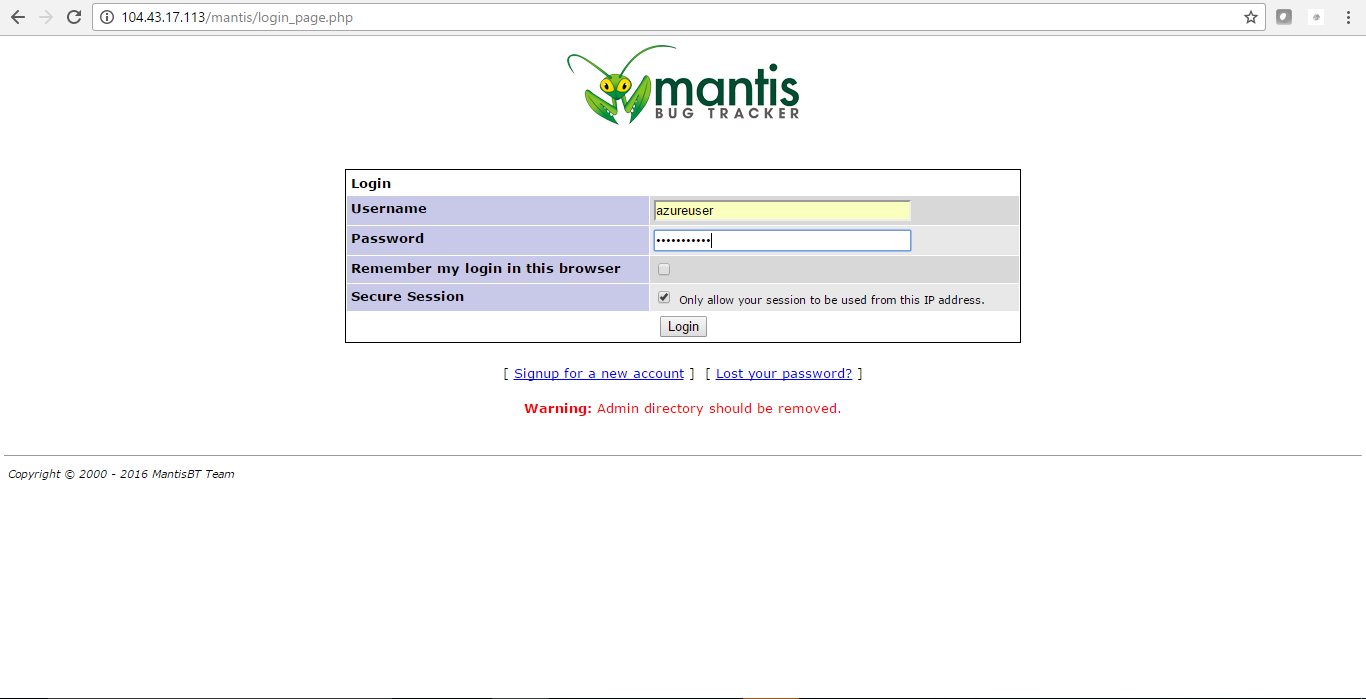
Step 1 − To login to Mantis, go to your sample demo website. It will open a login page.
Step 2 − Fill your registered email address/username and click Login.
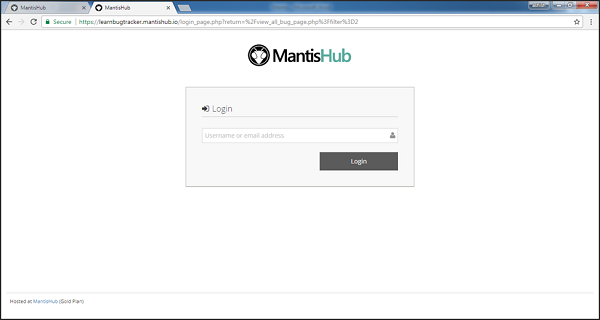
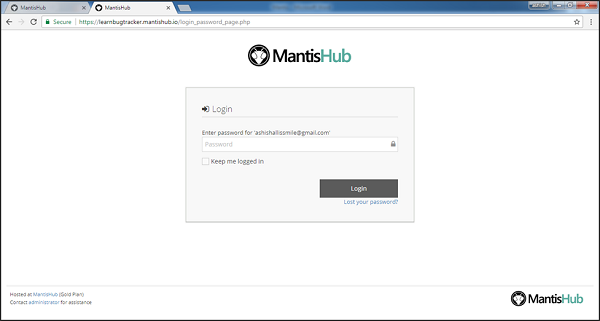
Step 3 − On successful validation of Username, it will ask for a Password. Enter the password and Click the Login button.The following screenshot shows how to login to Mantis using credentials.
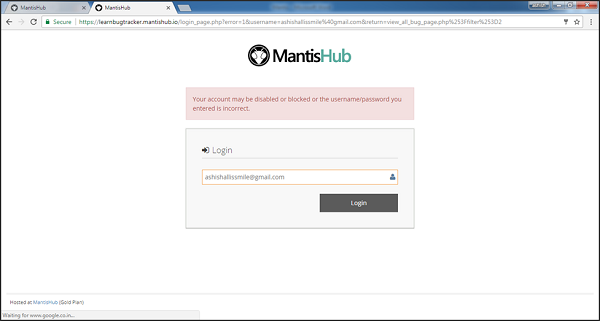
On Error
Due to unsuccessful login, an error page is displayed and the user will go back to the username page. Following screenshot shows the error message the user receives, if the password is incorrect.
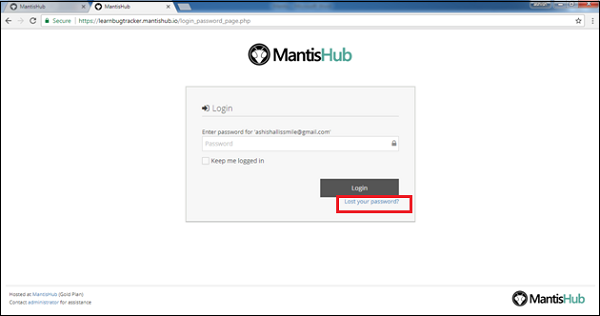
Click Lost your password?
Provide username and email address to get the password reset link. Click Submit as shown in the following screenshot.
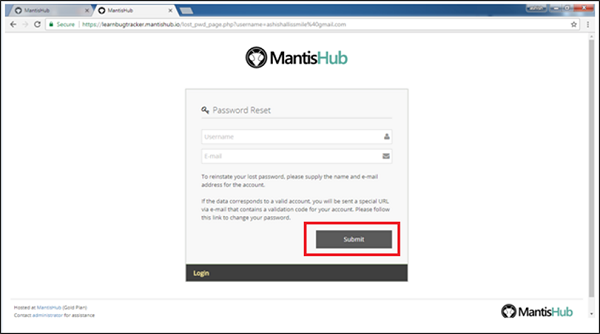
The user will get an email with the URL to reset the password.
On Successful Login
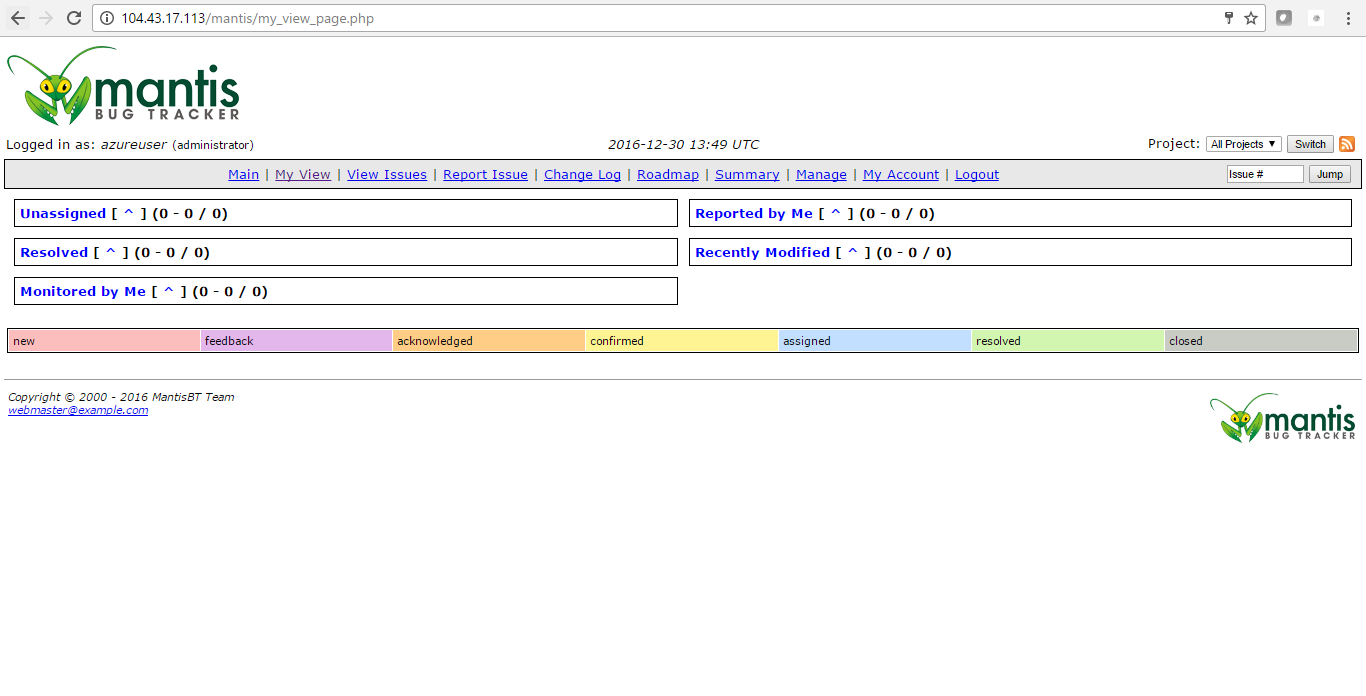
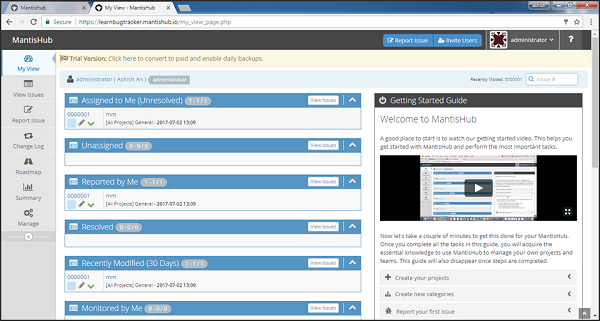
On successful login, the system dashboard will display if the account is associated with any project by admin or the user can create a sample project, which will be discussed in subsequent chapters.
The following screenshot displays the Dashboard/My View page of Mantis on successful login.
How to create an Issue in MantisBT:
Step 1 : Click Report Issue
Step 2 : In the next screen,
- Enter Bug Category
- Enter Reproducibility
- Enter Severity
- Enter Priority
- Enter the Profile
- Enter Platform
- Enter OS
- Enter OS Version
- Enter Product version ( will be available only if you have version under the project)
- Enter Assigned to
- Enter Target version
- Enter Summary
- Enter Description
Fields marked with * are required fields
Step 3 : If you scroll down a bit, enter the remaining details about the Issue.
11. Steps to Reproduce (Easy for developer to reproduce)
12. Enter Additional information (if necessary)
13. Upload File (Screenshots)
14. Select the Status (If its public can be accessed by all users)
Click Submit Report
Step 4 : Issue created successfully
Step 5 : Click View Issues to view all the issues created.
 Step 6 : To view the detailed information about an issue, Click the ID link of the issue.

Step 7 : Detailed issue details are displayed.

Step 8 : In this screen, you have additional actions that you can perform against the issue like,
- Edit Issue
- Change Assignee
- Change Status
- Clone Issue (Duplicate)
- Move Issue (Move to another project)
- Delete Issue
- Send a reminder (to any user with additional notes)
- View Issue History
- Print Issue
- Upload (additional screenshots)
So, now you know how to create an issue in MantisBT
How to create a Project in MantisBT:
Step 1: Login to MantisBT
Step 2 : To log issues, Project should be created first. Click Manage>Manage Projects option in the top bar.
- Enter Project Name
- Enter Project Status
- Public status can be accessed by all users
- Enter View Status
- Enter Description
Click Add Project
Step 3 : Project created successfully.
Step 4 : To edit the project, Click the Name of the project
Step 5 : In the next screen, you can the edit, update, and delete the project.
Step 6 : If you scroll a bit down the screen, you can also add project version and also can set release status to the project.
- Enter Project Version
Click Add and Edit Version
Step 7 : In the next screen,
- Enter Date order
- Enter Description
- Check option for Released/Obsolete if necessary
- Update Version
If you want to delete the create version, Click Delete Version in the bottom left of the screen.
Step 8 : Project Version added successfully.You can also edit and delete the existing version from this page.
So, successfully project and versions are created in MantisBT
How to create an Issue in MantisBT?
Step 1 : Click Report Issue
Step 2 : In the next screen,
- Enter Bug Category
- Enter Reproducibility
- Enter Severity
- Enter Priority
- Enter the Profile
- Enter Platform
- Enter OS
- Enter OS Version
- Enter Product version ( will be available only if you have version under the project)
- Enter Assigned to
- Enter Target version
- Enter Summary
- Enter Description
Fields marked with * are required fields
Step 3 : If you scroll down a bit, enter the remaining details about the Issue.
11. Steps to Reproduce (Easy for developer to reproduce)
12. Enter Additional information (if necessary)
13. Upload File (Screenshots)
14. Select the Status (If its public can be accessed by all users)
Click Submit Report
Step 4 : Issue created successfully
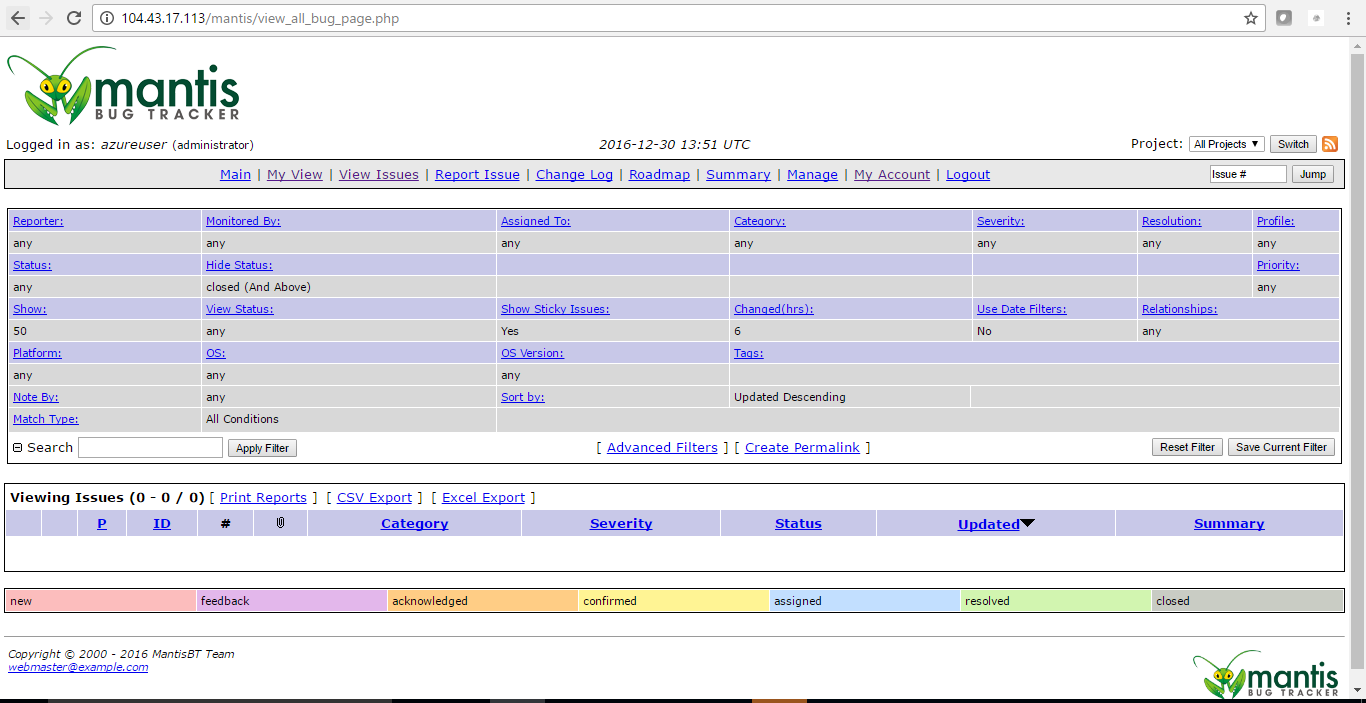
: Color codes are used to different issues.
Step 5 : Click View Issues to view all the issues created.
Step 6 : To view the detailed information about an issue, Click the ID link of the issue.
Step 7: Detailed issue details are displayed.
Step 8 : In this screen, you have additional actions that you can perform against the issue like,
- Edit Issue
- Change Assignee
- Change Status
- Clone Issue (Duplicate)
- Move Issue (Move to another project)
- Delete Issue
- Send a reminder (to any user with additional notes)
- View Issue History
- Print Issue
- Upload (additional screenshots)
So, now you know how to create an issue in MantisBT
Mantis – Installation
Mantis is a web application, provides a private website to individuals or set of requested users belonging to the same company/project.Mantis can be run at the server side. It is a PHP-based application and supports all OS platforms such as Windows, Linux of different versions, MAC, etc. It supports mobile browsers as well in mobile views.
System Requirements
Since Mantis is a web-application, it follows the concept of client/server. This means, Mantis can be installed centrally on the server and users can interact with it through web-browsers using a website from any computer.
- Web Server − Mantis is tested with Microsoft IIS and Apache. However, it can work with any latest web server software. Mantis only uses .php file. Configure the web server with .php extension only.
- PHP − The web server should support PHP. It can be installed as CGI or any other integration technology.
- Mandatory PHP Extensions − Extensions for RDBMS are mysqli, pgsql, oci8, sqlsrv mbstring is required for Unicode – UTF-8 support.
- Optional Extensions − Curl, GD, Fileinfo.
- Database − Mantis requires a database to store its data. MySQL and PostgreSQL are supported RDBMS.
- Client Requirements − Firefox 45 and above, IE 10 and above, Chrome, Safari, and Opera.
Users can separately install all the requirements either manually or automatically to use Mantis.
Installation of System Requirements
If a user has adequate knowledge about the installation process, all the requirements can be installed one by one separately before proceeding to Mantis.
Alternatively, there are many all-in-one packages available, having all the requirements and can be automatically installed in the system by exe file. Here, we will take the help of XAMPP to install pre-requisites easily.
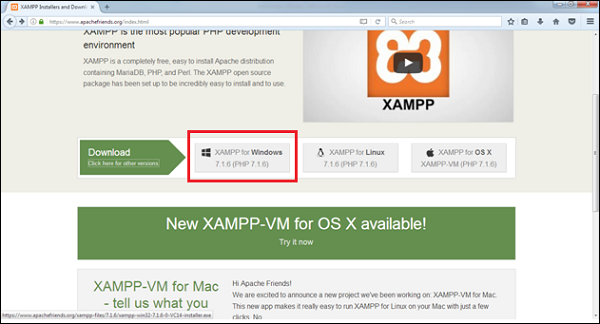
Step 1 − Go to https://www.apachefriends.org/index.html and click XAMPP for Windows as shown in the following screenshot.
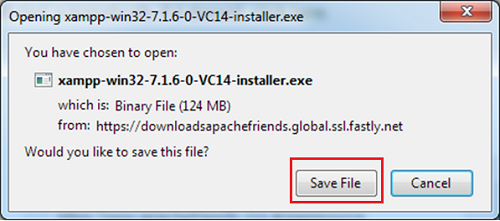
Step 2 − A pop-up will display to save the file. Click Save File. It will start downloading the file.
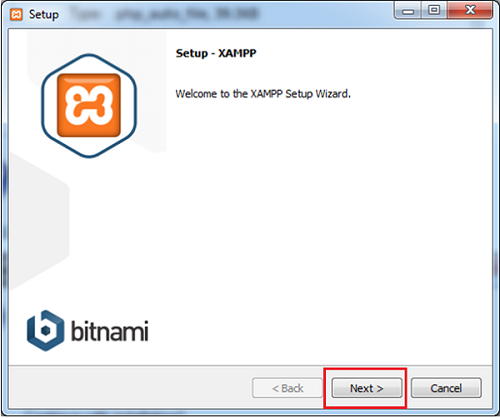
Step 3 − Run the .exe file to run the installation wizard. After clicking the .exe file, XAMPP Setup wizard displays. Click Next.
The following screenshot shows the XAMPP setup wizard.
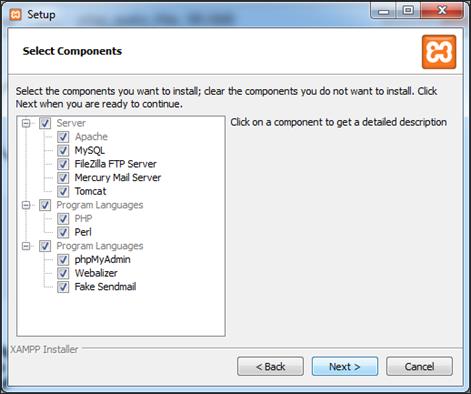
Step 4 − The next wizard displays all the component files that will install as shown in the following screenshot. Click Next after making a selection of components.
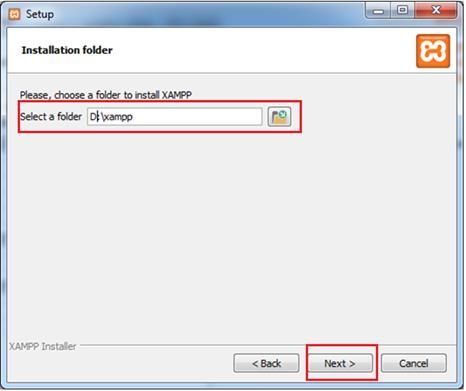
Step 5 − Provide a folder name where XAMPP will be installed and click Next.
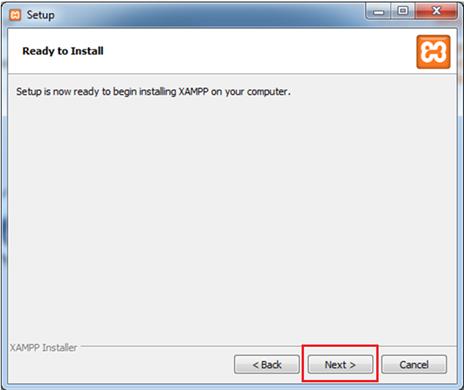
Ready to Install wizard is displayed.
Step 6 − Click Next to start the installation.
Step 7 − After successful installation, it will ask to start the control panel. Check the checkbox and click Finish. It will open the XAMPP control panel as displayed in the following screenshot.
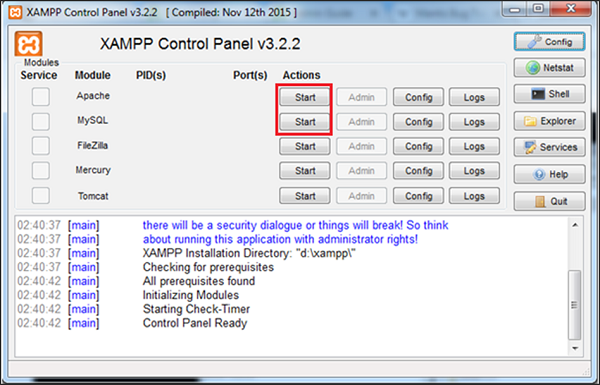
Step 8 − Click the Start button for Apache and MySQL, required for Mantis as shown in the above screenshot.
Step 9 − To verify whether all the pre-requisites such as Apache, PHP, and MySQL is installed properly, navigate to any of the browser, type http://localhost and press Enter. It will display the dashboard of XAMPP. Click phpAdmin at the right top corner as shown in the following screenshot.
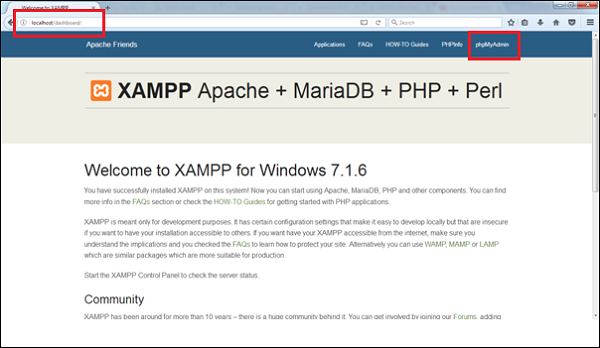
The next screenshot will display General Settings, Application Settings, Details of Database, Web Server, and phpMyAdmin.

If the installation is not proper, this page won’t be displayed. Till this point, all the pre-requisites are successfully installed in the system.
Install and Launch Mantis
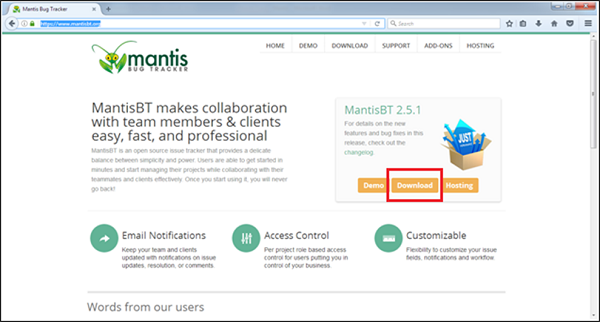
Step 1 − To download Mantis, go to https://www.mantisbt.org/ and click Download.
Step 2 − Click Download on the next page as shown in the following screenshot.
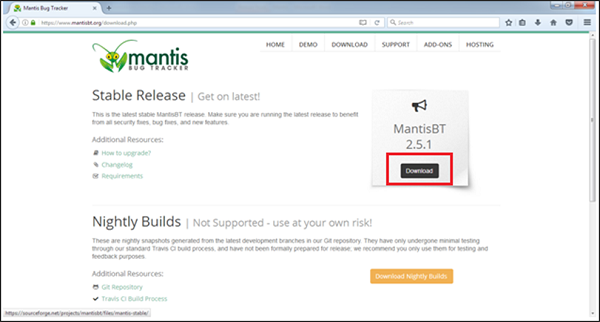
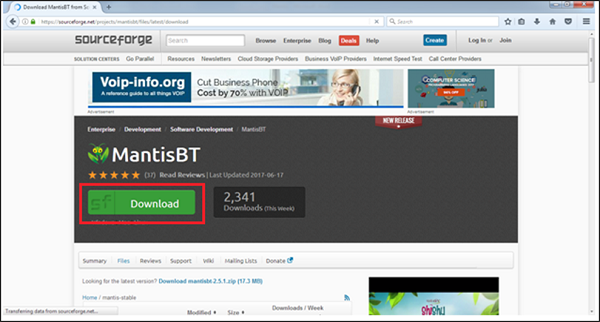
Step 3 − Again click Download as shown in the following screenshot and save the .zip file.
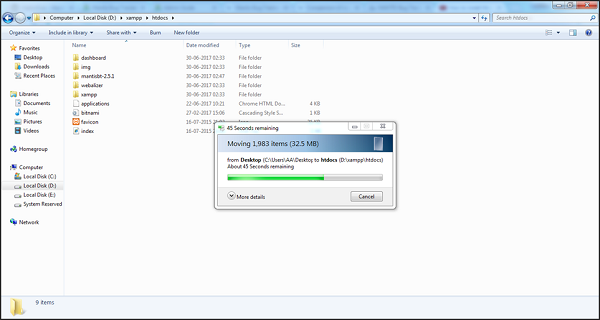
Step 4 − Go to XAMPP folder where it is installed and navigate to htdocs folder. Unzip the downloaded mantis and place it as shown in the following screenshot.
Step 5 − Rename the folder name mantis 2.5.1 as mantis for better URL.
Step 6 − Now open a browser and type http://localhost/mantis in the navigation bar and press Enter. It will display the index of mantis as shown in the following screenshot. Click mantis-2.5.1.

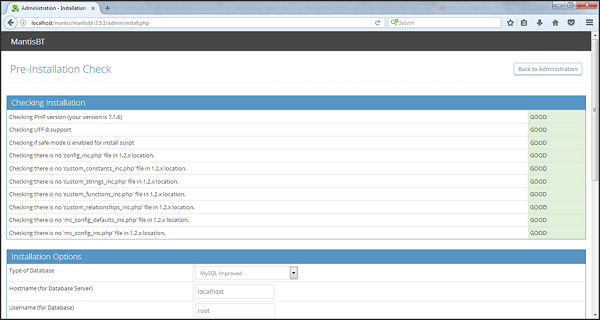
It will display the Pre-Installation page as shown in the following screenshot.
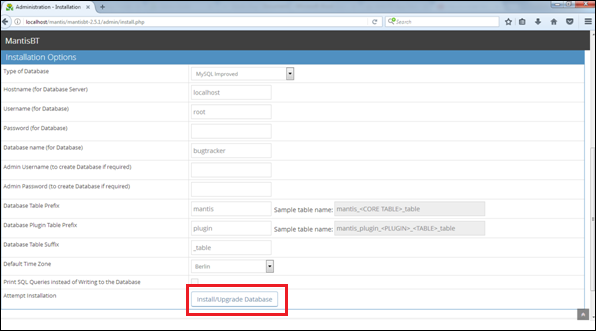
Step 7 − Go to the Installation section and make changes, if required. Then, click the Install/Upgrade Database button.
Once installation is complete, it will display the Check installation page and will be marked as Good, i.e. Mantis is installed properly.
Step 8 − To launch mantis, use the URL http://localhost/mantis and click mantis-2.5.1. It will display the Login page of Mantis as shown in the following screenshot.
Make sure the Web server and the Database, both are running before using the URL, otherwise Problem Loading Page error will be displayed.
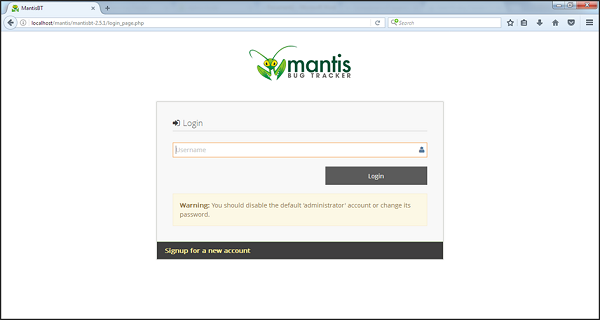
Step 9 − Provide the username as “Administrator” and click Login. It will ask to enter the password. Use “root” as password and click Login.
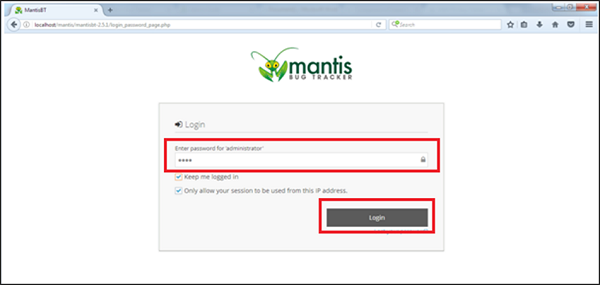
After successful Login, it will display the Dashboard of Mantis.
–MantisBT is a free popular web-based bug tracking system. It is written in the PHP scripting language and works with MySQL, MSSQL and PostgreSQL databases and a web server. MantisBT can be installed on Windows, Linux, Mac OS, OS/2 and others. Almost any web browser should be able to function as a client.
MantisBT is owned by MantisBT (https://www.mantisbt.org/) and they own all related trademarks and IP rights for this software.
Cognosys Provides Hardened images of MantisBT on the cloud ( AWS marketplace, Azure and Google Cloud Platform).
Deploy MantisBT securely on cloud i.e. AWS marketplace, Azure and Google Cloud Platform (GCP)
Secured MANTIS on Ubuntu 14.04 LTS
Mantis on cloud for Azure -Ubuntu
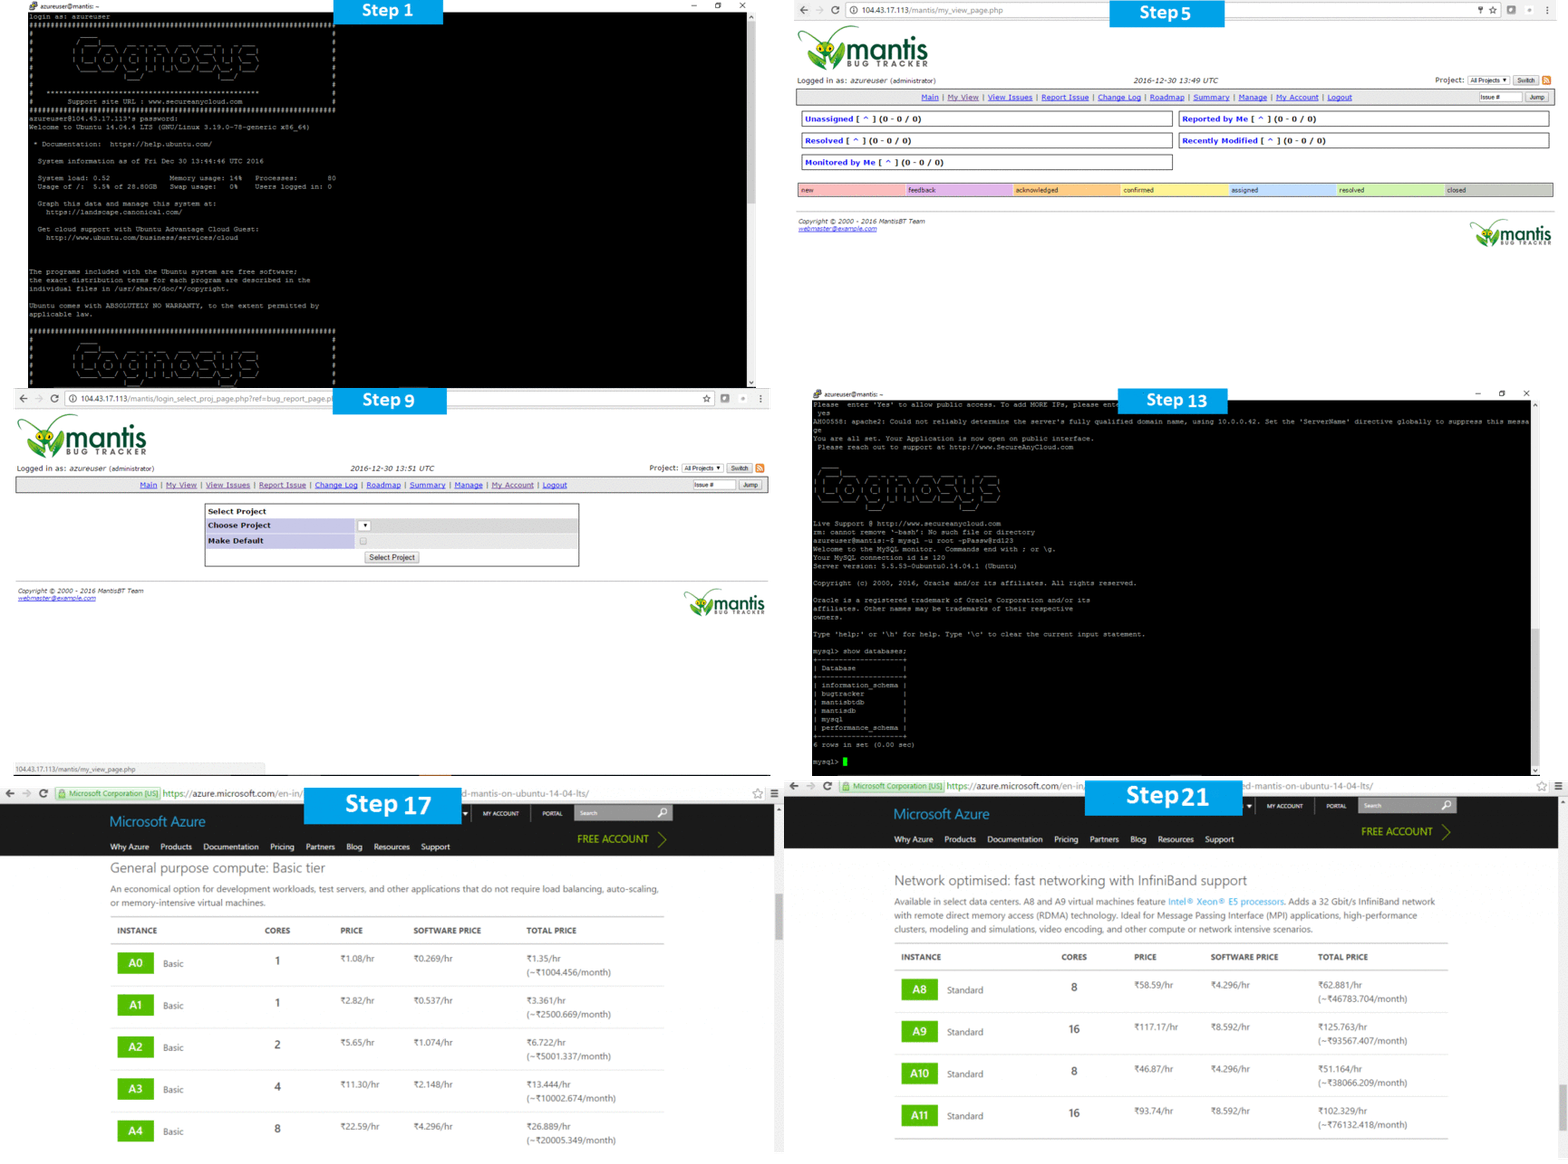
MantisBT is released under the GNU/GPL license.
Features
Mantis – Features
1.Collaboration and Hassle Free :It makes collaboration with team members and client easy, fast, and professional.As many users can use the same domain and same set of data. It is available only for Licensed product.
2.Email Notification :All users or set of team members can get email notification whenever there are any changes, updates, or resolutions on an issue.Email will be triggered for any action taken by any one among a group of users.Voting and watching features to keep an eye on the progress for stakeholders.Use @mention to get the attention of a specific team member for Comments/Description.
3.Access Control: Admin can grant access to the users based on individual role. It can be applicable differently for each project. Thus, one person can have different level of access for two different projects.
4.Customization: Mantis supports customization at each level, Users can customize fields for issue creation/view.Users can customize fields for issue workflow and notification as well.
5.Dashboard: Dashboard displays assigned to me, unassigned, reported by me and many other standard filters to look at all the issues belonging to individual users.Timeline feature allow to keep an eye on what is happening across the project.It displays live stream on the latest actions taken by any team member.
6.Release Management: Mantis helps to manage different releases. It supports Project Versions to track releases.Users can create future releases and mark issues for respective release as well.Issues and release information can also be summarized in a Roadmap page for better understanding.
7.Time Tracking: Mantis supports its own in-built time tracking feature.Users can easily enter the time spent on a particular issue. It can help make a report on the spent hours for each issue as an individual or as a team.
8.Integration/Plug-in: Mantis supports more than 100 add-ins to connect with different softwares to make the work easy.Wide range of add-ins make it universal across the globe – TestLodge, TestRail, TestCollab, Testuff, HipChat, Slack, etc.It also supports Eclipse IDE and JetBrains.
9.Common Features: Using Slack and HipChat integration, the team can communicate with each other.Mantis provides SSO (single sign on) access to log into MantisHub using GitHub or BitBucket credentials.
10.Customer Support: Mantis Helpdesk is a very popular feature. It allows integrating your support with your internal issue tracking.Using Grasshopper integration, users get direct voicemail line.
–Major Features Of Mantis Bug Tracker on cloud
- Simple User Experience
- Web Based
- Supports any platform that runs PHP (Windows, Linux, Mac, Solaris, AS400/i5 etc)
- Available in 68 localization.
- Simple/Advanced Issue Pages
- Multiple Projects per instance
- Support for Projects, Sub-Projects and Categories.
- Users can have a different access level per project
- Change log Support
- My View Page
- Search and Filter
- Full Text Search
- Simple/Advanced Filters
- Shared Filters (across users / projects)
- Built-in Reporting (reports / graphs)
- Custom Fields
- Email notifications
- Users can monitor specific issues
- Attachments (can be saved on web-server or in database – can also backup to an FTP account)
- Issue Change History
- RSS Feeds (news, issues matching saved filters, issues matching a specific project)
- Customization issue workflow
- Sponsorship Support – users are able to place bounties or sponsorships for specific issues, also developers can track such sponsorship / payments.
- Anonymous Access
- Signup with Captcha and Email Confirmation.
- Self-Service Reset Password Support
- Export to csv, Microsoft Excel, Microsoft Word
- Ability to extended functionality through hook (custom) functions.
- Reporting issues via Email (available as a patch – currently being integrated)
- And Much More
AWS
Installation Instructions For Ubuntu
Note: How to find PublicDNS in AWS
Step 1) SSH Connection: To connect to the deployed instance, Please follow Instructions to Connect to Ubuntu instance on AWS Cloud
1) Download Putty.
2) Connect to virtual machine using following SSH credentials :
- Hostname: PublicDNS / IP of machine
- Port : 22
Username: To connect to the operating system, use SSH and the username is ubuntu.
Password : Please Click here to know how to get password .
Step 2) Database Login Details :
- MYSQL Username : root || MYSQL Password : Passw@rd123
Note : Please change password immediately after first login.
Step 3) Application URL: Access the application via a browser at http://PublicDNS/Mantis.
Step 4) Other Information:
1.Default installation path: will be on your web root folder “/var/www/html/Mantis”
2.Default ports:
- Linux Machines: SSH Port – 22
- Http: 80
- Https: 443
- MYSQL ports: By default these are not open on Public Endpoints. MYSQL : 3306
Configure custom inbound and outbound rules using this link
Azure
Installation Instructions For Ubuntu
Note: How to find PublicDNS in Azure
Step 1) SSH Connection: To connect to the deployed instance, Please follow Instructions to Connect to Ubuntu instance on Azure Cloud
1) Download Putty.
2) Connect to virtual machine using following SSH credentials :
- Hostname: PublicDNS / IP of machine
- Port : 22
Username: Your chosen username when you created the machine ( For example: Azureuser)
Password : Your Chosen Password when you created the machine ( How to reset the password if you do not remember)
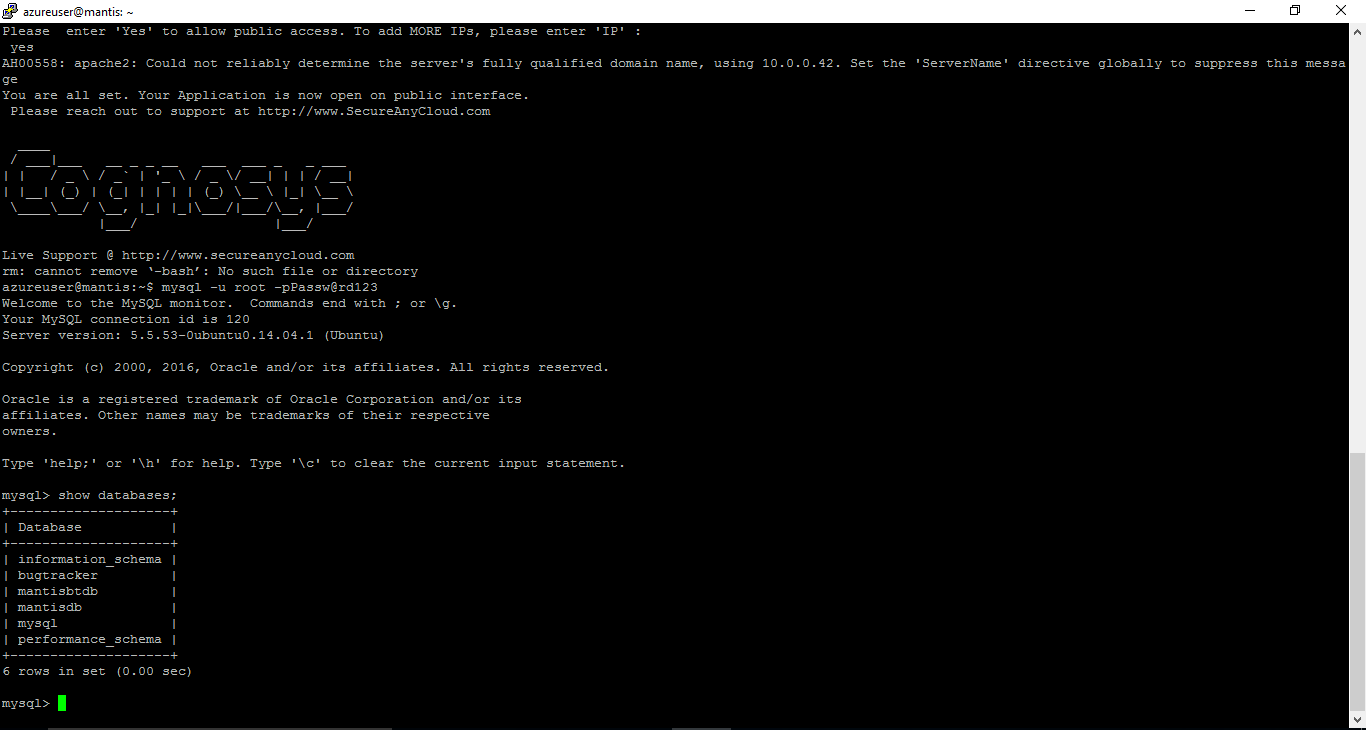
Step 2) Database Login Details :
- MYSQL Username : root || MYSQL Password : Passw@rd123
Note :-Please change password immediately after first login.
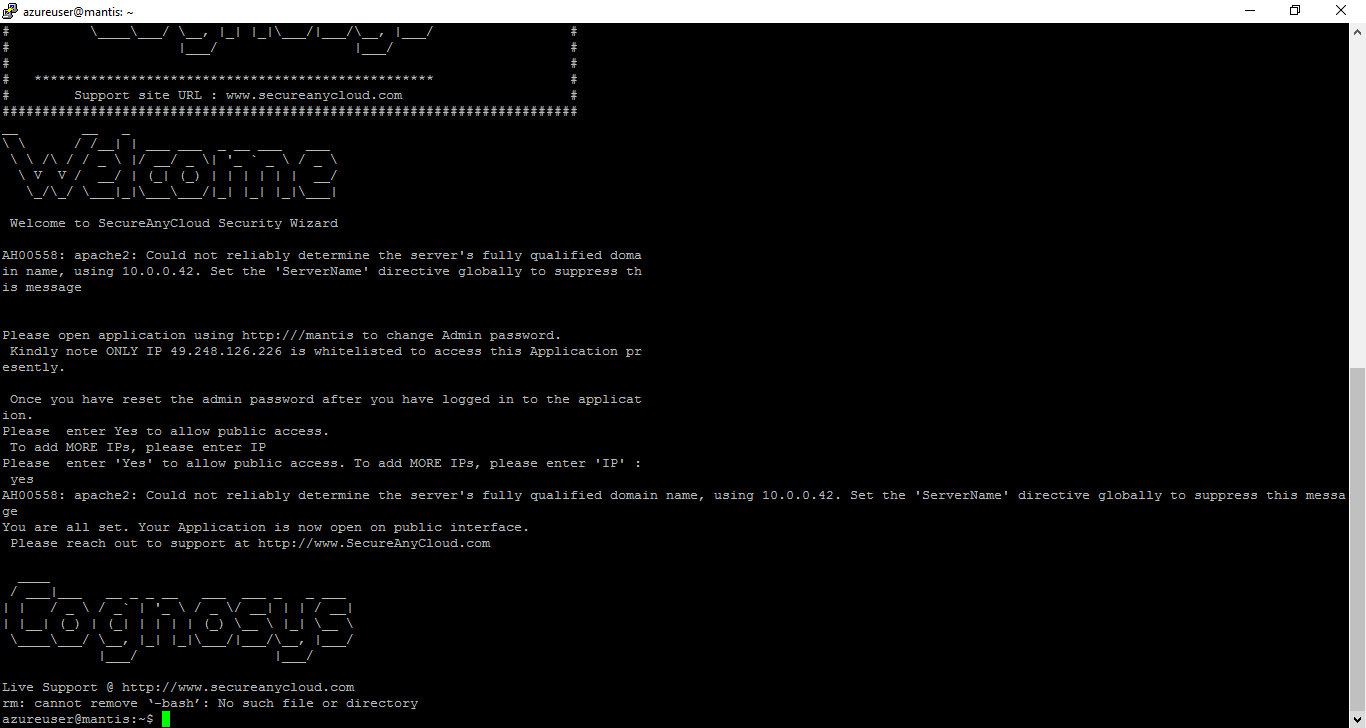
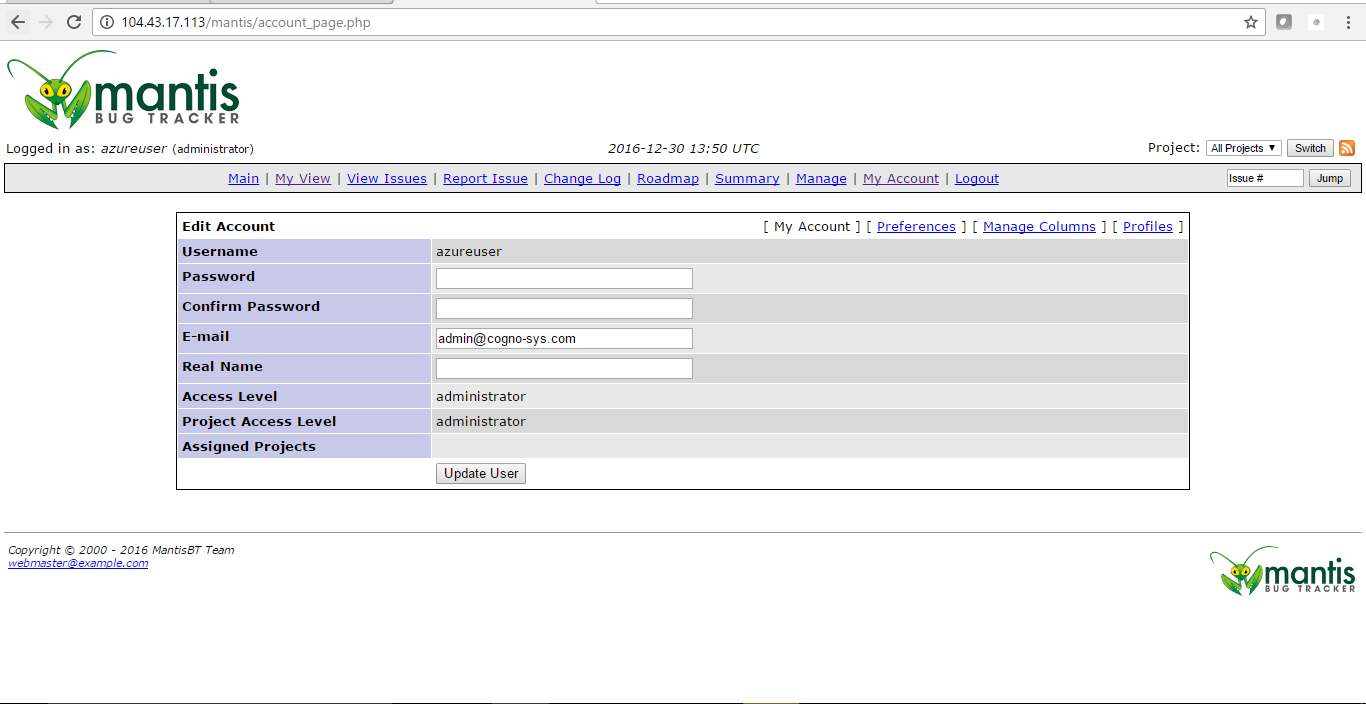
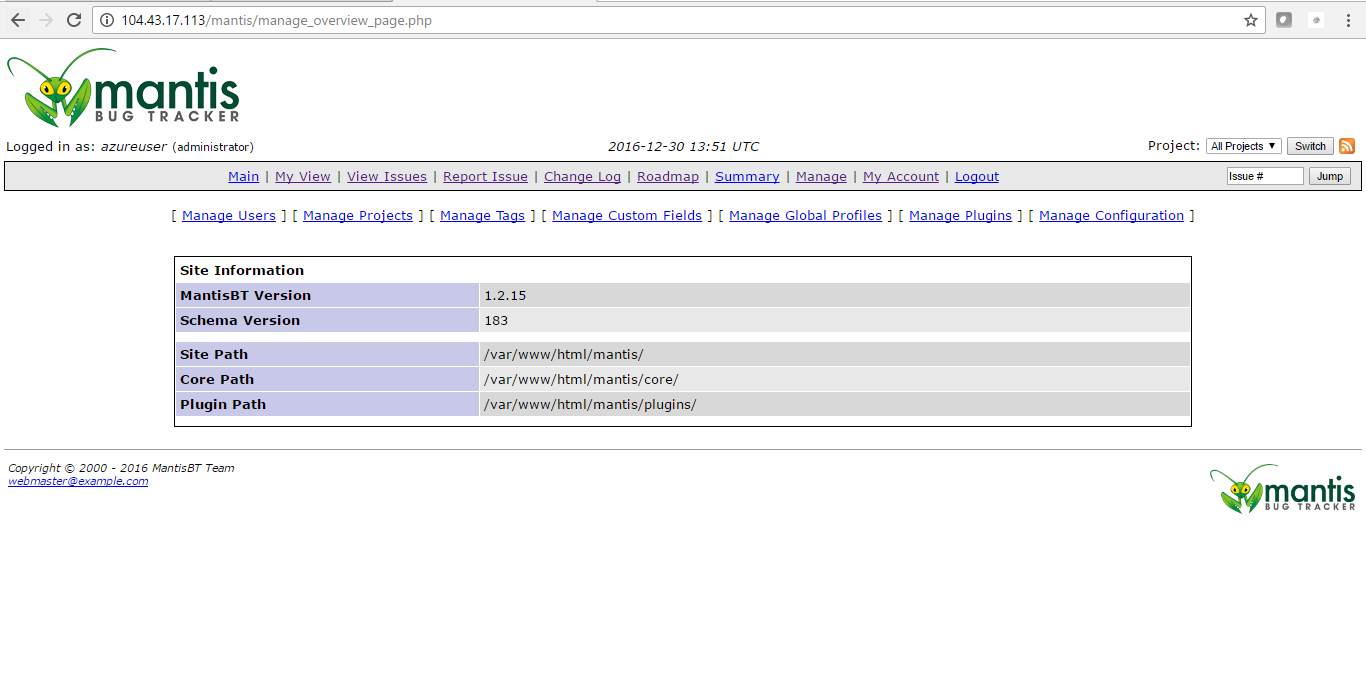
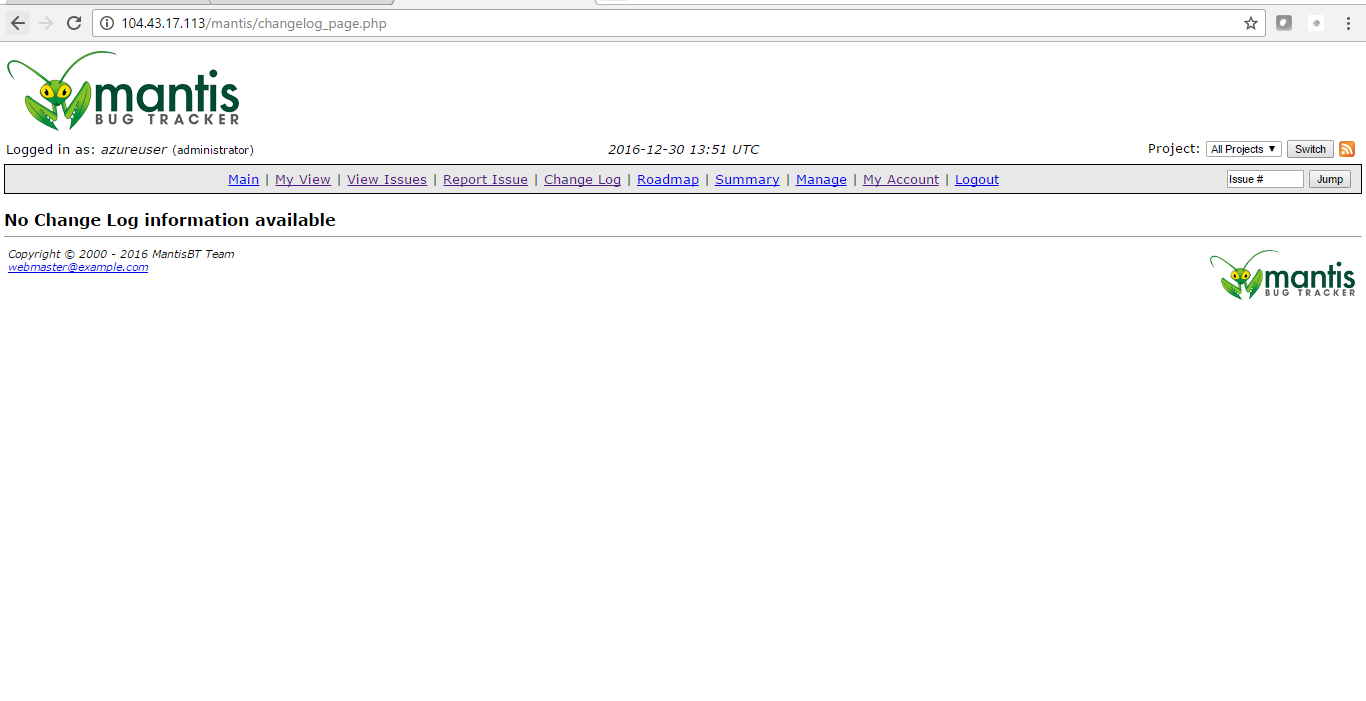
Step 3) Application URL: Access the application via a browser at http://PublicDNS/Mantis
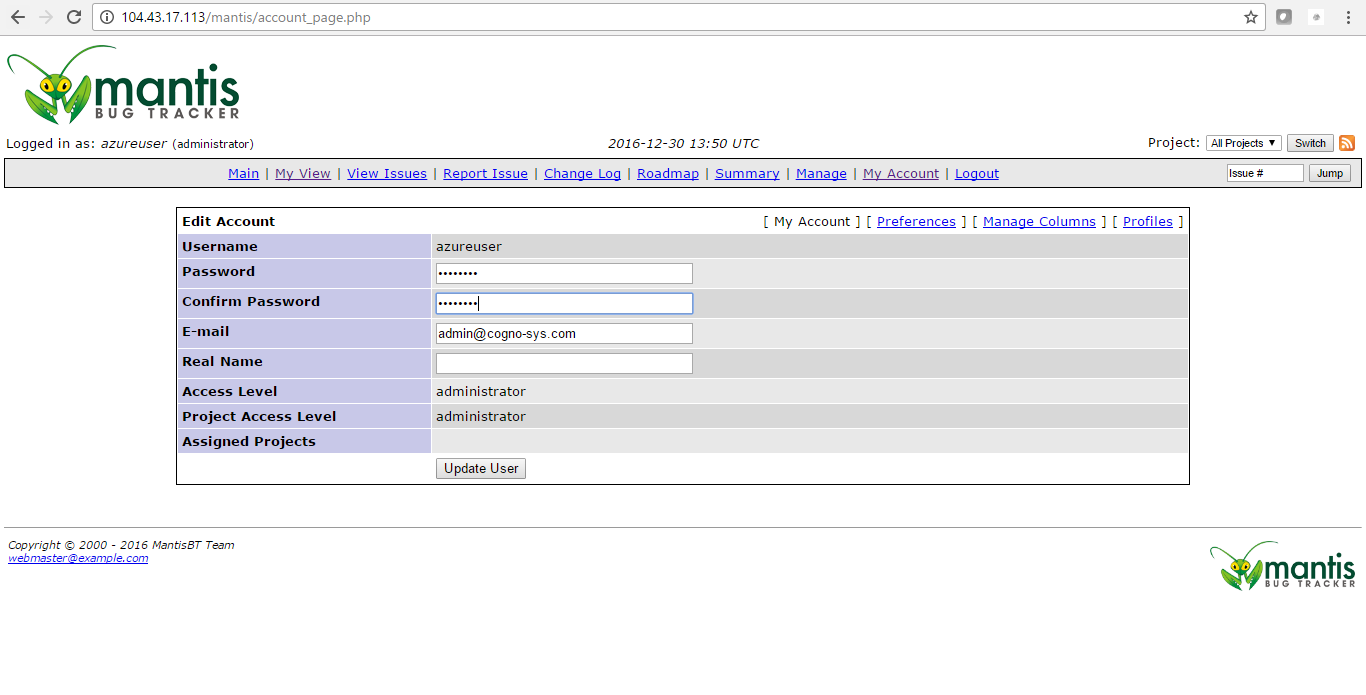
- Username : azureuser (Please create new user and delete this user)
- Password : Passw@rd123
Step 4) Other Information:
1. Default installation path: will be on your web root folder “/var/www/html/Mantis”
2. Default ports:
- Linux Machines: SSH Port – 22
- Http: 80
- Https: 443
- MYSQL ports: By default these are not open on Public Endpoints. MYSQL : 3306
Configure custom inbound and outbound rules using this link
Installation Instructions For Centos
Note : How to find PublicDNS in Azure
Step 1) SSH Connection: To connect to the deployed instance, Please follow Instructions to Connect to Centos instance on Azure Cloud
1) Download Putty.
2) Connect to virtual machine using following SSH credentials :
- Hostname: PublicDNS / IP of machine
- Port : 22
Username: Your chosen username when you created the machine ( For example: Azureuser)
Password : Your Chosen Password when you created the machine ( How to reset the password if you do not remember)
Step 2) Database Login Details :
- MYSQL Username : root || MYSQL Password : Passw@rd123
Note : Please change password immediately after first login.
Step 3) Application URL: Access the application via a browser at http://PublicDNS/Mantis
- Username : azureuser (Please create new user and delete this user)
- Password : Passw@rd123
Step 4) Other Information:
1. Default installation path: will be on your web root folder “/var/www/html/Mantis”
2. Default ports:
- Linux Machines: SSH Port – 22
- Http: 80
- Https: 443
- MYSQL ports: By default these are not open on Public Endpoints. MYSQL : 3306
Configure custom inbound and outbound rules using this link
Azure Step by Step Screenshots
Installation Instructions For Windows
Step 1) VM Creation:
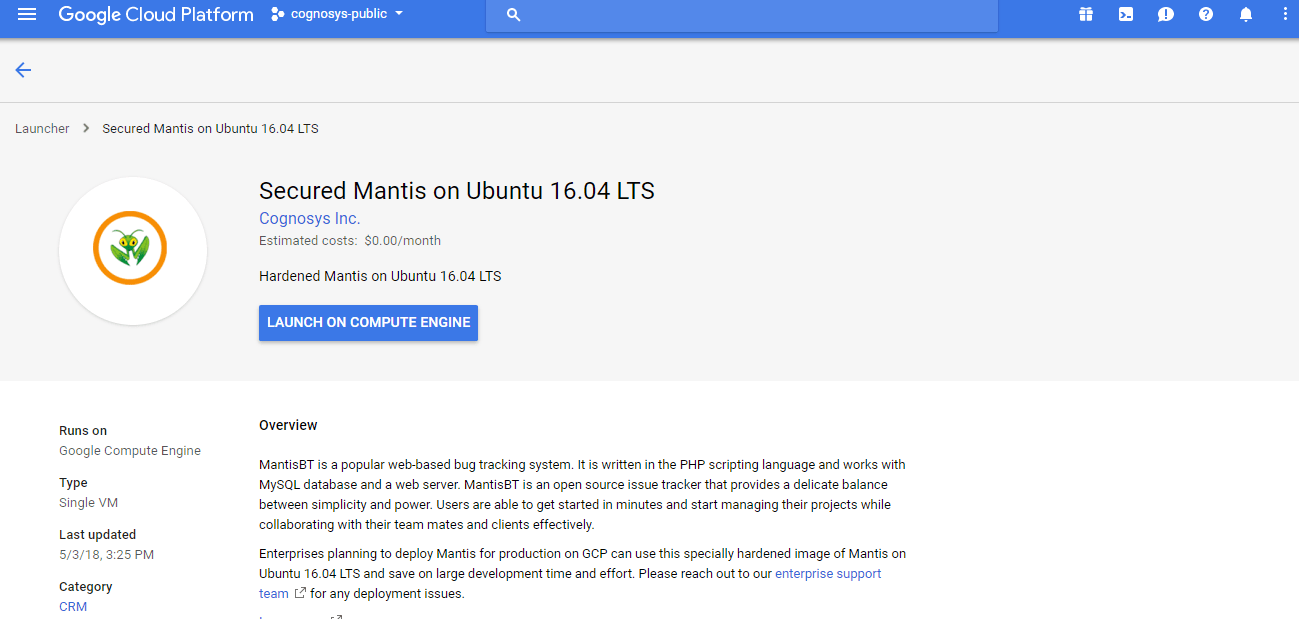
1.Click the Launch on Compute Engine button to choose the hardware and network settings.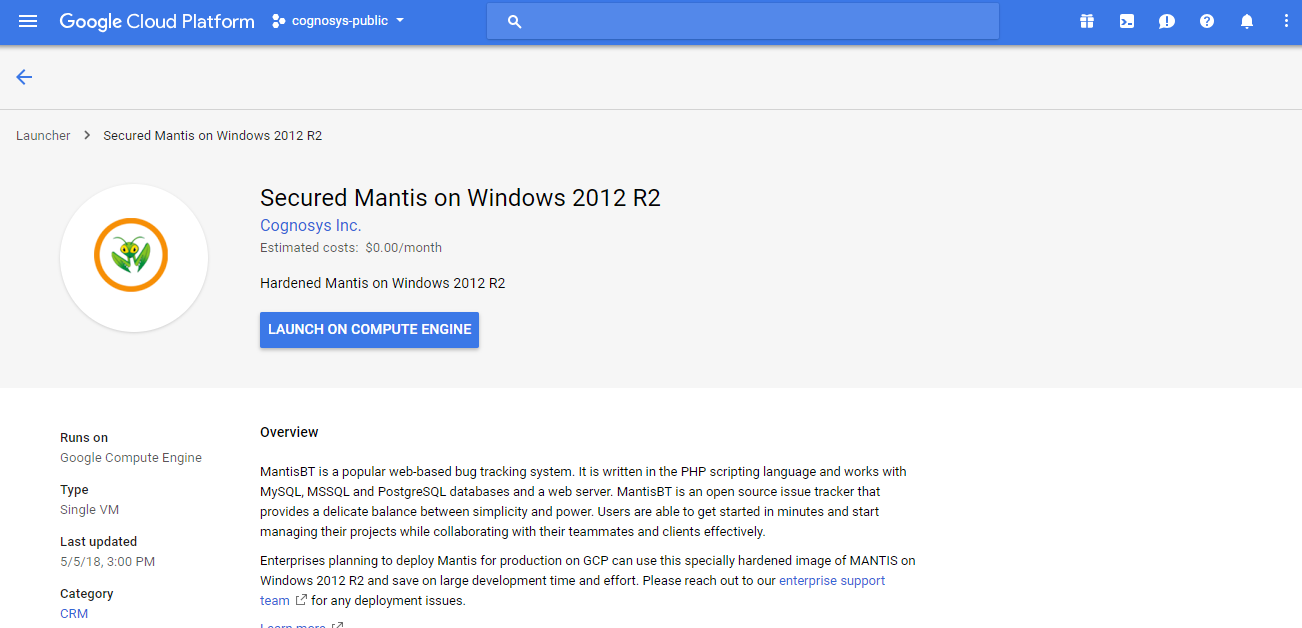
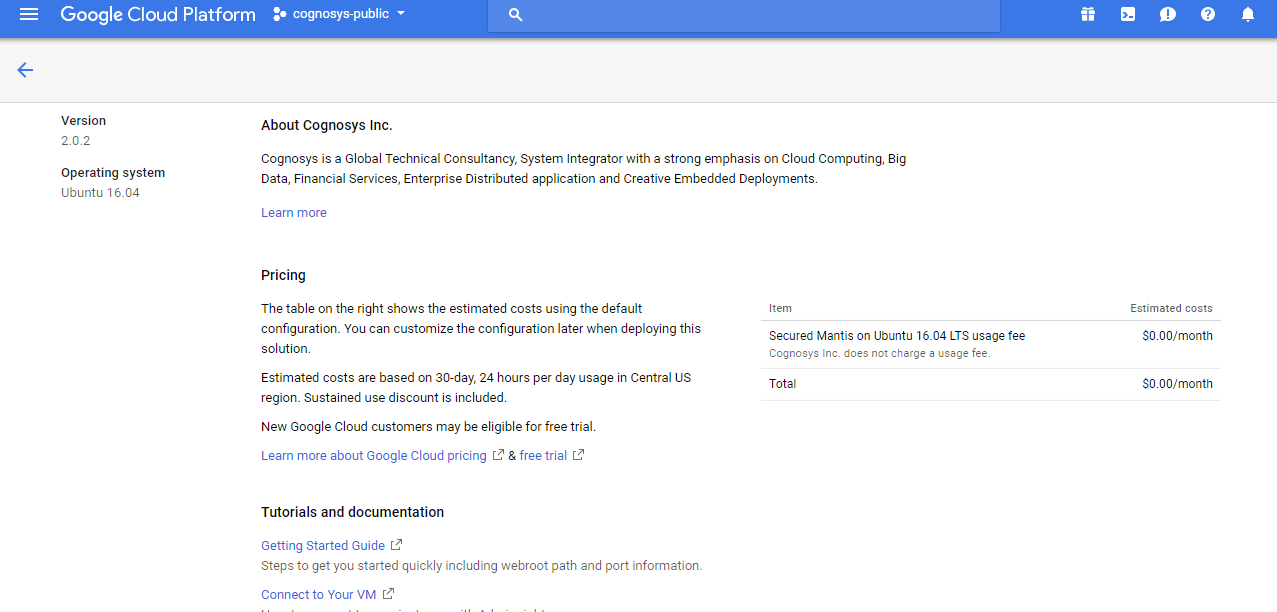
2.You can see at this page, an overview of Cognosys Image as well as some estimated costs of VM.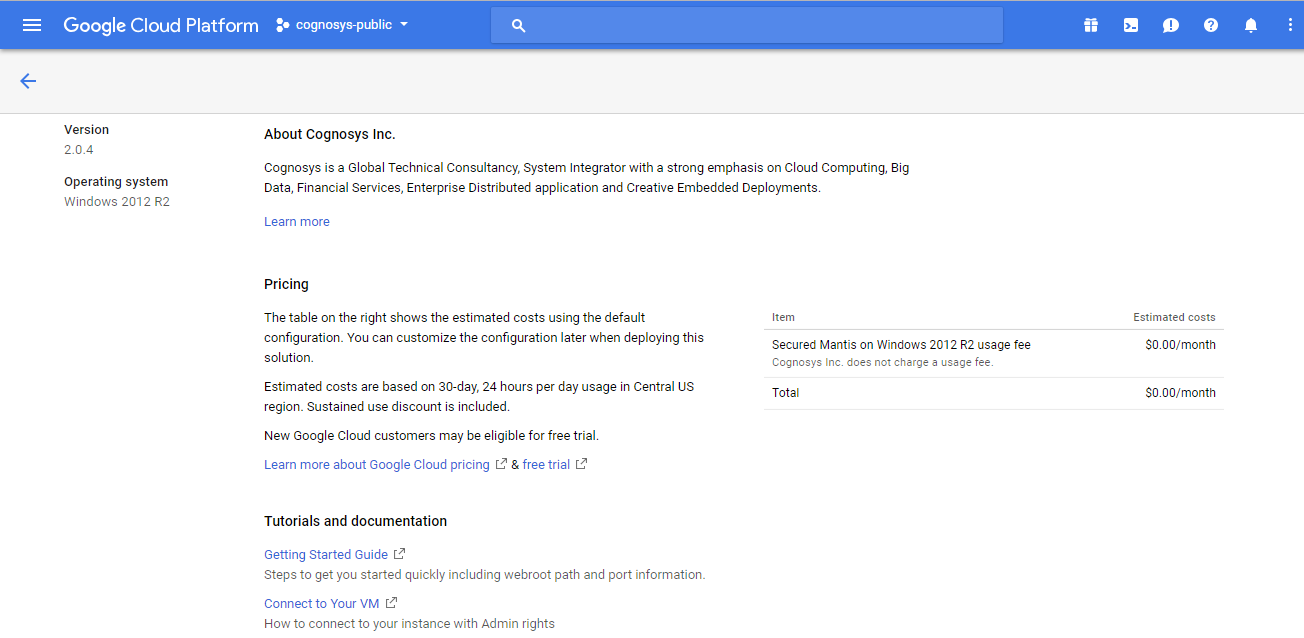
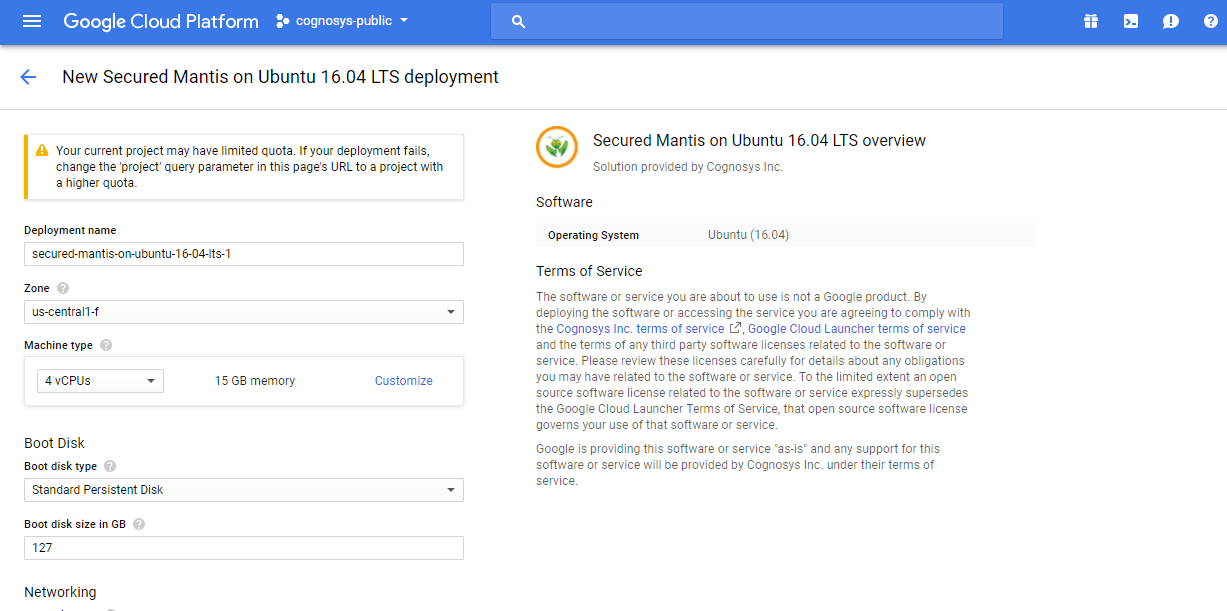
3.In the settings page, you can choose the number of CPUs and amount of RAM, the disk size and type etc.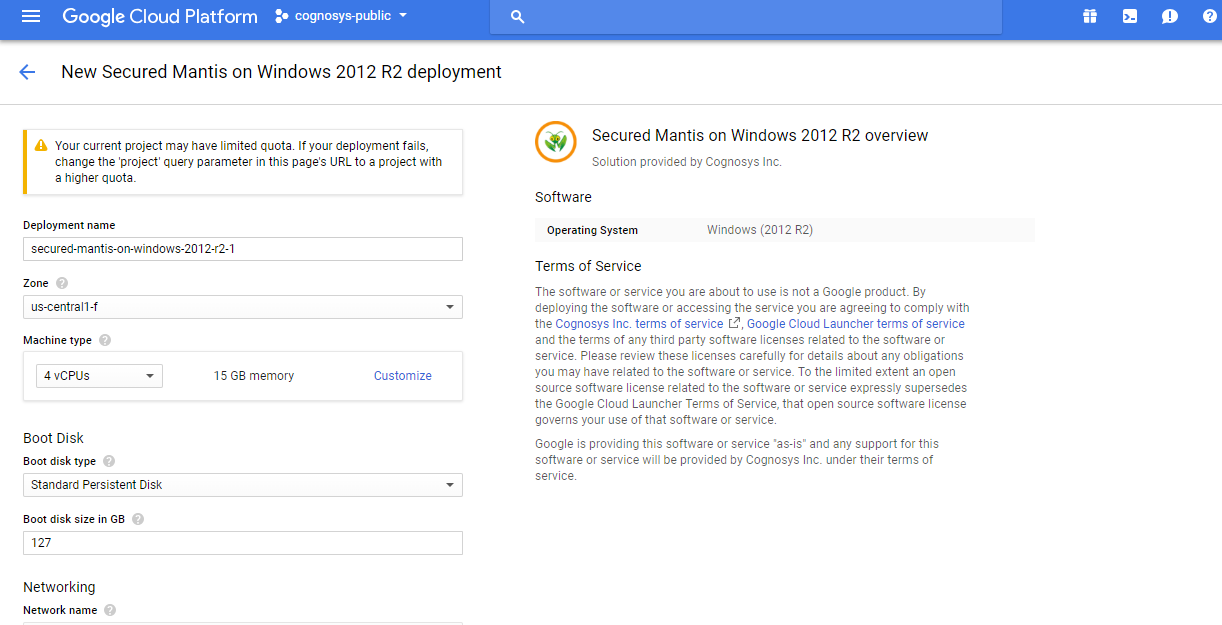
Step 2) RDP Connection: To initialize the DB Server connect to the deployed instance, Please follow Instructions to Connect to Windows instance on Google Cloud
Step 3) Database Login Details:
The below screen appears after successful deployment of the image.

For local MySQL root password, please use the temporary password generated automatically during image creation as shown above.
i) Please connect to Remote Desktop as given in step 2 to ensure stack is properly configured and DB is initialized.
ii) You can use MySQL server instance as localhost, username root and password as shown above.
If you have closed the deployment page you can also get the MySQL root password from VM Details “Custom metadata” Section
Step 4) Application URL: Access the application via a browser at http://PublicDNS/Mantis
Step 5) Other Information:
1.Default installation path: will be on your web root folder “/var/www/html/Mantis”
2.Default ports:
- Windows Machines: RDP Port : 3389
- Http: 80
- Https: 443
Installation Instructions For Ubuntu
Step 1) VM Creation:
- Click the Launch on Compute Engine button to choose the hardware and network settings.

- You can see at this page, an overview of Cognosys Image as well as some estimated costs of VM.

- In the settings page, you can choose the number of CPUs and amount of RAM, the disk size and type etc.

Step 2) SSH Connection: To connect to the deployed instance, Please follow Instructions to Connect to Ubuntu instance on Google Cloud
1) Download Putty.
2) Connect to the virtual machine using SSH key
- Hostname: PublicDNS / IP of machine
- Port : 22
Step 3) Other Information:
1.Default ports:
- Linux Machines: SSH Port – 22
2. To access Webmin interface for management please follow this link


