1-click AWS Deployment 1-click Azure Deployment
Overview
Laravel is a widely-used open-source PHP web framework that was created by Taylor Otwell and released in June 2011. It was developed with the intention of providing a more elegant and developer-friendly approach to building web applications.
Here’s an overview of the history, introduction, and key details of Laravel:
Laravel
-
- Laravel was created by Taylor Otwell, a software developer from the United States.
- Otwell initially developed Laravel as an alternative to the existing PHP frameworks available at the time.
- The first version, Laravel 1, was released in June 2011. It provided a simple and expressive syntax while incorporating modern features and best practices.
- Subsequent versions, such as Laravel 2 and Laravel 3, introduced improvements and enhancements based on community feedback.
- However, it was Laravel 4, released in May 2013, that gained significant attention and popularity, establishing Laravel as a leading PHP framework.
- Laravel has continued to evolve and release new versions, with Laravel 5 being a major milestone that introduced significant architectural improvements and performance enhancements.
- Laravel 6, 7, 8, and subsequent versions have introduced various features, improvements, and backward-compatible changes, making it one of the most actively maintained frameworks in the PHP ecosystem.
Intro
-
- Laravel follows the Model-View-Controller (MVC) architectural pattern, which separates the application’s concerns and improves code organization and maintainability.
- It emphasizes simplicity, elegance, and developer productivity, aiming to provide an enjoyable development experience.
- Laravel promotes convention over configuration, meaning it includes sensible defaults and conventions to reduce the amount of boilerplate code developers need to write.
- It incorporates modern PHP features, such as namespaces, anonymous functions, and Composer dependency management.
Key Details
-
- Routing: Laravel provides a powerful and flexible routing system that allows developers to define clean and user-friendly URLs for their applications.
- Templating: Laravel’s Blade templating engine provides an intuitive syntax for creating and rendering views, with features like template inheritance and sections.
- Database Support: Laravel offers a query builder and an ORM called Eloquent, making it easy to interact with databases and perform database operations.
- Authentication and Authorization: Laravel provides a comprehensive authentication system with ready-to-use features like user registration, login, password reset, and role-based access control.
- Caching: Laravel includes a caching system that helps improve application performance by storing frequently accessed data in cache stores.
- Task Scheduling: Laravel’s task scheduler allows developers to automate various tasks within their applications.
- Testing: Laravel has a built-in testing framework, PHPUnit, making it easier to write unit tests and ensure application stability.
Laravel’s popularity can be attributed to its intuitive syntax, extensive documentation, active community support, and its ability to streamline the development process. It is widely used for developing a wide range of applications, from small websites to large-scale enterprise systems.
Laravel Application design
When designing a Laravel application, it’s essential to follow best practices and adhere to Laravel’s conventions to ensure a well-structured and maintainable codebase. Here are some key aspects to consider when designing a Laravel application:
- MVC Architecture: Laravel follows the Model-View-Controller (MVC) architectural pattern. This pattern separates the application’s concerns into three distinct components:
- Models: Represent the data and business logic of the application. They handle interactions with the database and contain methods to perform data retrieval, manipulation, and validation.
- Views: Handle the presentation layer of the application. They display the data to the users and receive user input.
- Controllers: Act as the intermediaries between the models and views. They receive user requests, process the input, interact with models to fetch or manipulate data, and pass the data to the appropriate views for display.
- Routing: Laravel provides a robust routing system that maps URLs to specific controllers and actions. It’s important to define clear and logical routes that reflect the application’s functionality and adhere to RESTful principles.
- Database Interaction: Laravel offers an intuitive query builder and an Object-Relational Mapping (ORM) called Eloquent. When designing the database interaction, it’s recommended to define models that correspond to the database tables. Use relationships, such as one-to-one, one-to-many, or many-to-many, to establish associations between models. This helps ensure data integrity and simplifies database queries.
- Views and Templating: Laravel’s Blade templating engine provides a straightforward and expressive way to design views. Use Blade’s template inheritance, sections, and layouts to create reusable and modular view components. This promotes code reuse and keeps the views clean and organized.
- Authentication and Authorization: Laravel includes a complete authentication system that simplifies user authentication and authorization. Design the authentication process by leveraging Laravel’s built-in functionality for user registration, login, password reset, and remember me functionality. Additionally, implement role-based access control (RBAC) using Laravel’s authorization features to control user permissions and access levels.
- Middleware: Laravel’s middleware feature allows you to filter HTTP requests entering your application. Design and utilize middleware to handle tasks such as authentication, request validation, logging, and more. This helps keep your code modular, maintainable, and reusable.
- Error Handling and Logging: Implement proper error handling and logging mechanisms in your application. Laravel provides various tools to handle exceptions, log errors, and send appropriate error responses to users. Make sure to log critical application events and exceptions for debugging and troubleshooting purposes.
- Testing: Laravel includes a testing framework, PHPUnit, for writing automated tests. Design and implement unit tests and integration tests to verify the functionality of your application, ensure code quality, and prevent regressions. Writing tests also makes it easier to maintain and refactor your codebase in the future.
- Scalability and Performance: Consider the scalability and performance requirements of your application during the design phase. Utilize Laravel’s caching mechanisms, database optimizations, and performance profiling tools to ensure your application performs well under heavy load.
Overall, when designing a Laravel application, focus on creating a clean, modular, and maintainable codebase. Follow Laravel’s conventions and leverage its features and tools to simplify development tasks and improve the overall quality and efficiency of your application.
Install Laravel on Windows
Laravel – Installation
The top crucial part to install laravel on windows is requirements that demand the proper workflow of the framework. You need to fulfil the condition mentioned below before establishing the Laravel framework.
- PHP >= 5.6.4
- OpenSSL PHP Extension
- Tokeniser PHP Extension
- Mbstring PHP Extension
- XML PHP Extension
- PDO PHP Extension
For handling dependencies, Laravel applies composer. You need to be sure that you have a Composer installed on your system before you install Laravel on windows. In this section, you will understand the installation process of Laravel. You will need to comprehend the measures given below for installing Laravel onto your system.
Step 1
Visit the below-mentioned URL and download composer to install it on your system.
https://getcomposer.org/download/
Check Composer Installed successfully type “composer” in command line
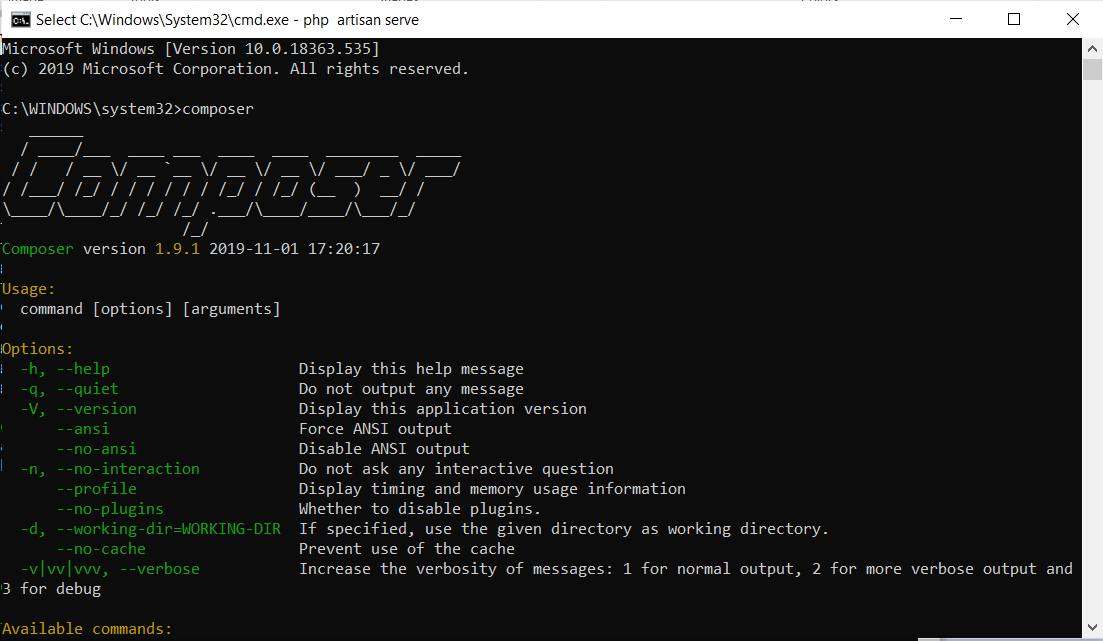
Step 2
After downloading composer, open the command prompt browse to the web server root directory or localhost folder. Well! Hopefully, you already have installed XAMP or WAMP server in (C:\wamp, open C:\wamp\www)for PHP working environment.
Step 3
Now you need to type the following command to create new Laravel project using composer.
Composer create-project --prefer-dist laravel/laravel mylaravel

You can replace mylaravel with your desired project name.
Step 4
If you have done the steps mentioned above carefully and then you need to check whether it is properly working or not and for that, you need to test the installation by opening the following link in your browser.
http://Localhost/mylaravel/public/
Again if you want, then you can change or replace the mylaravel with your project name. Laravel is utmost popular in this era and growing on a regular basis this beginner guide to install laravel windows will help you develop your skill on using framework correctly and become a master so that after completing this full beginner learning process you can build a gleaming attractive web application.
Laravel Basic Routing
Routing is one of the essential concepts in Laravel. The main functionality of the routes is to route all your application requests to the appropriate controller.
Default Route files
All Laravel routes are defined inside the route files located in the routes directory. When we create a project, then a route directory is created inside the project. The route/web.php directory contains the definition of route files for your web interface. The routes in web.php are assigned with the web middleware group that provides the features like session state and CSRF protection. The routes defined in routes/api.php are assigned with the API middleware group, and they are stateless.
We will start by defining the routes in routes/web.api file. The routes defined in the routes/web.php can be accessed by entering the defined URL to the browser. Let’s understand this through an example.
The definition of default route files.
- <?php
- Route::get(‘/’, function ()
- {
- return view (‘welcome’);
- });
In the above case, Route is the class which defines the static method get(). The get() method contains the parameters ‘/’ and function() closure. The ‘/’ defines the root directory and function() defines the functionality of the get() method.
In the above route, the url is ‘/’; therefore, we entered the localhost/laravelproject/public URL in the web browser.
Output:
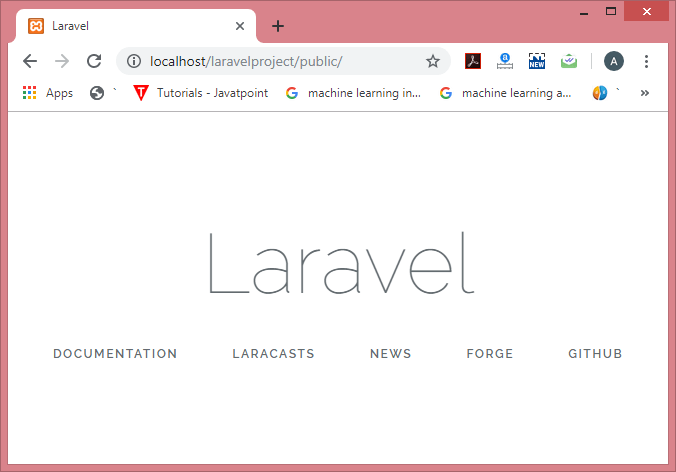
As the method returns the view(‘welcome’), so the above output shows the welcome view of the Laravel.
Let’s see another example.
Now, we provide another url in this example.
- <?php
- Route::get(‘/example’, function ()
- {
- return “Hello javaTpoint”;
- });
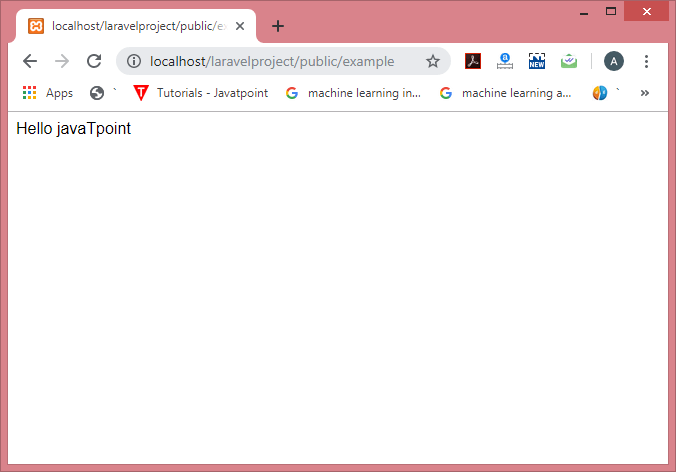
In the above example, the route is defined in which URL is ‘/example’, so we need to enter the URL “localhost/laravelproject/public/example” in the web browser.
Output:
CSRF Protection
The HTML forms that are pointing to Post, Put or Delete routes defined in the web route files should include CSRF token field. If the CSRF token field is not included, then the request will be rejected.
- <form method=“POST” action=“/profile”>
- @csrf
- …
- </form>
The router defines the routes that can respond to the following http verbs:
Route::get($uri, $callback);
Route::post($uri, $callback);
Route::put($uri, $callback);
Route::patch($uri, $callback);
Route::delete($uri, $callback);
Route::options($uri, $callback);
Sometimes the situation arises when you need to register a route that responds to the multiple http verbs, and this can be achieved by using the match() method. Sometimes you want to register a node that responds to all the http verbs, so we use any() method.
- Route::match([‘get’, ‘post’], ‘/’, function () {
- //
- });
- Route::any(‘/’, function ()
- {
- //
- })
Two most commonly used route methods are:
- Redirect() method
Redirect() method is used to navigate from one URL to another URL. This method provides a convenient or shortcut way to move from one URI to another URI. With the help of this method, you don’t need to define the full route.
There are two ways of using redirect() method:
First way is to declare the redirect() method in get() method:
- <?php
- Route::get(‘hello’, function () {
- return redirect(‘/’);
- })
Second way is to access the redirect() method directly.
- <?php
- Route::redirect(‘hello’,‘/’);
In the above cases, both the routes are navigating from /hello to the root directory, i.e., ‘/’.
- View() method
View() method is used to return the view of another URL.
- <?php
- Route::get(‘/’, function () {
- return view(‘welcome’);
- });
- <?php
- Route::view(‘/’,‘welcome’);
Introduction to Laravel Controllers
Preferably of determining all of your request administration or handling logic as Closures in route files, you may prefer to build this action applying or using Controller classes. Controllers can group associated request handling logic within a single category or class. Controllers are saved or stored in the app/Http/Controllers of laravel controller constructor directory. In the MVC framework, the character ‘C’ stands for Controller. It operates as governing traffic connecting Views and Models. In this chapter, you will discover and learn in depth about Controllers in Laravel.
Basic Controllers
Creating Controllers
Initiate the command prompt or terminal based on the working system you are utilising and type the following command to generate or create a controller applying the Artisan CLI (Command Line Interface). php artisan make:controller <controller-name> –plain You can now replace the <controller-name> with the name of your desired controller, will produce a plain constructor as we are transferring or passing the argument — plain. If you don’t require to generate a plain constructor, you can neglect the argument. The created constructor can be viewed at app/Http/Controllers. You can append your custom coding as you will see the basic coding has already been done for you. The generated controller may be called from routes.php by the following syntax. The example given below is a basic controller class. Perceive that the laravel controller constructor elongates the base controller class involved with Laravel. The base class implements a few convenience systems or method such as the middleware method, which can be applied to append middleware to controller operations: Syntax
Route::get(‘base URI’,’controller@method’);

<?php

namespace App\Http\Controllers;

use App\User;
use App\Http\Controllers\Controller;

class UserController extends Controller
{
    /**
     * Show the profile for the given user.
     *
     * @param  int  $id
     * @return View
     */
    public function show($id)
    {
        return view('user.profile', ['user' => User::findOrFail($id)]);
    }
}
You can determine a route to this controller action like so: Route::get(‘user/{id}’, ‘UserController@show’); Promptly, when a provided request meets the particularised route URI, the show method on the UserController class will be administered. Also, it is obvious that the route parameters will also be declared and passed to the method. Controllers & Namespaces The most significant thing in laravel controller creation to note is that we did not require to define the full controller namespace when determining the controller route. Considering the RouteServiceProvider loads your route data files inside or within a route group that comprises the namespace, we only specified the part of the class name that appears after the App\Http\Controllers division of the namespace. If you prefer to nest your controllers deep-toned into the App\Http\Controllers record directory, apply the particular class name corresponding to the App\Http\Controllers root namespace. So, if your full controller class is App\Http\Controllers\Images\AdminController, you should register routes to the controller like so: Route::get(‘foo’, ‘Photos\AdminController@method’); Single Action Controllers If you would wish to assign or define a controller that only manipulates or handle a single operation, you may put or place a unique or a single__invoke method on the controller:
<?php

namespace App\Http\Controllers;

use App\User;
use App\Http\Controllers\Controller;

class ShowProfile extends Controller
{
   /**
    * Show the profile for the given user.
    *
    * @param  int $id
    * @return View
    */
   public function __invoke($id)
   {
       return view('user.profile', ['user' => User::findOrFail($id)]);
   }
}
Laravel Middleware
Middleware in Laravel behaves as a layer between the user and the request. It simply means that whenever the user requests to the server, the request is passed through the middleware and then the middleware verifies whether the authentication of the request. After the user’s request is authenticated then the request of the user is sent to the backend. Suppose the user’s request is denied authentication, then the middleware will simply redirect the user to the login screen.
Creating a middleware in Laravel
In an example, where the command “php artisan make: middleware DemoTest” is typed where DemoTestis the name of the middleware. You will see that the middleware created successfully with the name “DemoTest”.
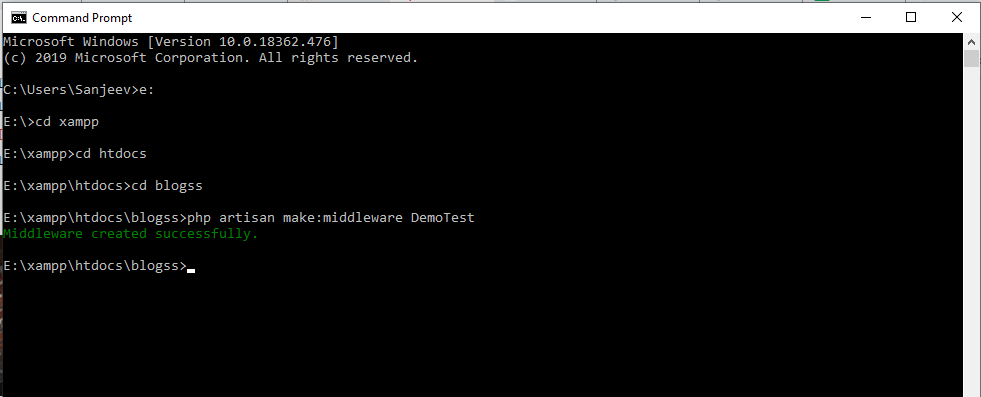
In order to check whether the DemoTest middleware is created or not, simply go to your project. Since we have named our project laravelproject hence, the path for the middleware is: C:\xampp\htdocs\laravelproject\app\Http\Middleware.
What are the views?
Views contain the html code required by your application, and it is a method in Laravel that separates the controller logic and domain logic from the presentation logic. Views are located in the resources folder, and its path is resources/views.
Let’s see the simple example of views.
Suppose we want to create the view of the contact.
Step 1: First, we create the view file named Contact.php in resources/views directory.
Contact.php
- <html>
- <body>
- <h1>Name of the Contact is : <?php echo $name; ?></h1>
- </body>
- </html>
Step 2: Add the following code in web.php.
- Route::get(‘/contact’, function(){
- return view(‘Contact’,[‘name’=>‘John’]);
- });
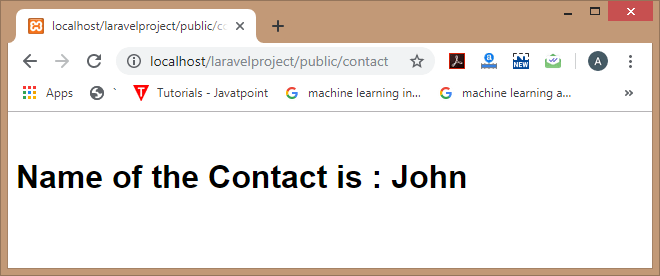
In the above code, view() method contains two arguments. The first argument is the name of the file that contains the view, and the second argument is the array passed to the given file. In array, we are passing the name variable to the Contact.php file.
Step 3: Enter the URL http://localhost/laravelproject/public/contact to the web browser, then the output would be:
 Let’s see another example of views.
In this example, we use the view() method in the Controller class.
Step 1: First, I need to create a controller. Suppose I have created the controller named ‘PostController‘, and then add the code given below in a PostController.php file.
- public function display(){
- return view(‘about’);
- }
Step 2: Now, we create the about.php file in which we add the html code.
- <html>
- <body>
- <h1>About Us</h1>
- </body>
- </html>
Step 3: Last step is to add the route in web.php file.
- Route::get(‘/post’,‘PostController@display’);
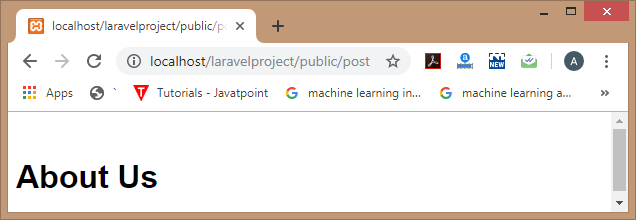
Step 4: Enter the URL http://localhost/laravelproject/public/post to the web browser.
Nesting the Views
Views can also be nested within the sub-directory resources/views directory.
Let’s understand the nested views through an example.
Suppose we want to know the admin details. The view of the admin details is available at the resources/views/admin/details.blade.php directory.
Step 1: First, we create details.blade.php file in the admin folder, and the code of the details.blade.php file is given below:
- <html>
- <body>
- <h1>Admin Details</h1>
- </body>
- </html>
Step 2: Now, we need to add the display() function in PostController.php file which is returning the view of the ‘admin.details‘.
- public function display(){
- return view(‘admin.details’);
- }
Step 3: Lastly, we will add the route in a web.php file.
- Route::get(‘/details’, ‘PostController@display’);
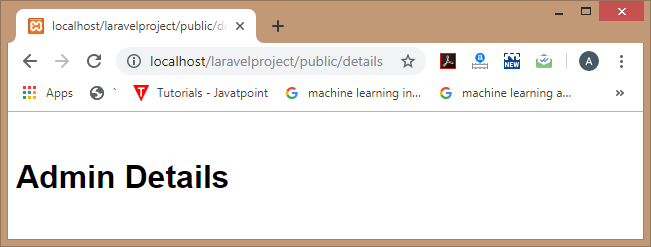
Step 4: To see the output, enter the url ‘http://localhost/laravelproject/public/details‘ to the web browser.
Determining the existence of view
Laravel also allows you to determine whether the view exists or not by using the View façade. We can use the exists() method that returns true if the view exists.
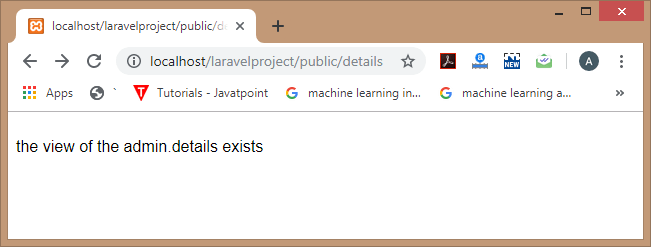
Suppose we want to check whether the view of the admin.details exists or not, then we can use the following code in PostController.php file:
- use Illuminate\Support\Facades\View;
- public function display()
- {
- if (View::exists(‘admin.details’)) {
- echo “the view of the admin.details exists”;
- }
- else
- echo “view does not exist”;
- }
In the above code, View::exists(‘admin.details’) method determines whether the admin.details exist or not. If it exists, then the ‘if‘ statement is executed; otherwise, the ‘else‘ statement is executed.
Output
Enter the url ‘http://localhost/laravelproject/public/details‘ to the web browser, and then the output would be:
Passing data to views
In this topic, we will learn that how we can pass the data to views.
There are various ways of passing data to views:
- By using the name array
- By using with() function
- By using compact() function
Name array
The name array is the array of data that is passed as the second parameter to the view() method.
Let’s understand through an example.
Step 1: First, we create the student.blade.php, which contains the view of the page.
student.blade.php
- <html>
- <body>
- <h1>Name of the Students are : <br>
- <?php
- echo $name1;
- echo “<br>”;
- echo $name2;
- echo “<br>”;
- echo $name3; ?></h1>
- </body>
- </html>
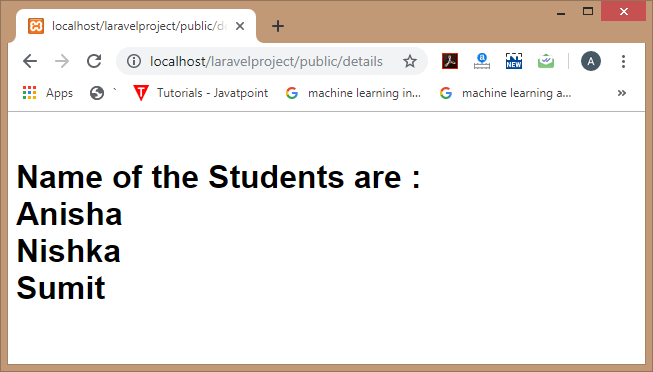
In the above code, we are displaying the values of three variables, i.e., name1, name2, and name3. The values of these three are retrieved from the StudentController.php file.
Step 2: Now, we create the StudentController.php file.
StudentController.php.
- <?php
- namespace App\Http\Controllers;
- use Illuminate\Http\Request;
- class StudentController extends Controller
- {
- public function display()
- {
- return view(‘student’,[‘name1’=> ‘Anisha’,‘name2’=>‘Nishka’,‘name3’=>‘Sumit’]);
- }
- }
In the above code, we have defined the display() function in which we are returning the view of the student.blade.php file.
Step 3: Now, we define the route in web.php file.
web.php
- Route::get(‘/details’, ‘StudentController@display’);
Output
with() function
We can also use the with() function to pass the data to views.
- First, we create the student.blade.php file which contains the view of the page.
- <html>
- <body>
- <h1>Student id is :
- <?php
- echo $id;
- ?>
- </body>
- </html>
The above code displays the value of the ‘id‘.
- Now, we create the StudentController.php file.
- <?php
- namespace App\Http\Controllers;
- use Illuminate\Http\Request;
- class StudentController extends Controller
- {
- public function display($id)
- {
- return view(‘student’)->with(‘id’,$id);
- }
- }
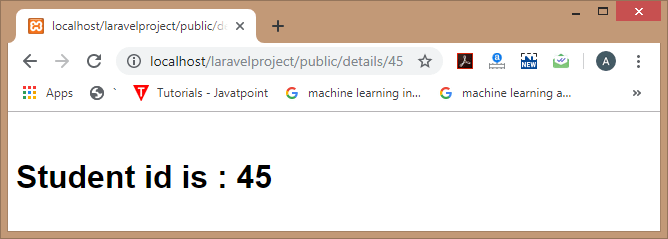
In the above code, we create the display() function that returns the view of the student.blade.php file, and we are passing the value of ‘id‘ by using the with() function. The ‘with()‘ function contains two parameters, i.e., variable name(id) and the value of the ‘id‘.
- Now, we define the route.
- Route::get(‘/details/{id}’, ‘StudentController@display’);
Output
compact() function
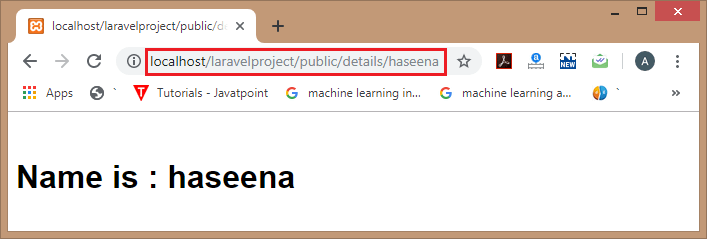
The compact() function is also used to pass the data to views. It contains a single parameter, i.e., the name of the variable.
Let’s understand through an example.
- First, we create the student.blade.php file which contains the view of the page.
- <html>
- <body>
- <h1>Name is :
- <?php
- echo $name;?>
- </body>
- </html>
- Now, we create the StudentController.php file.
- <?php
- namespace App\Http\Controllers;
- use Illuminate\Http\Request;
- class StudentController extends Controller
- {
- public function display($name)
- {
- return view(‘student?, compact(‘name’));
- } }
- Now, we define the route in the web.php file.
- Route::get(‘/details/{name}’, ‘StudentController@display’);
Output
We can pass multiple parameters to the compact() function.
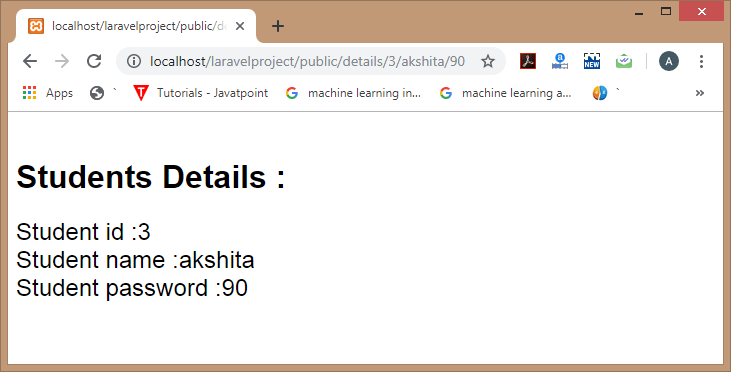
Let’s understand through an example.
Student.blade.php
- <html>
- <body>
- <h1>Students Details : <br>
- <font size=‘5’ face=‘Arial’>
- <?php
- echo “student id is :” .$id;
- echo “<br>”;
- echo “Student name is :” .$name;
- echo “<br>”;
- echo “Student password is :” .$password; ?></h1>
- </font>
- </body></html>
StudentController.php
- <?php
- namespace App\Http\Controllers;
- use Illuminate\Http\Request;
- class StudentController extends Controller
- {
- public function display($id,$name,$password)
- {
- return view(‘student’,compact(‘id’,‘name’,‘password’));
- }
- }
web.php
- Route::get(‘/details/{id}/{name}/{password}’, ‘StudentController@display’);
Output
Here are important benefits of Laravel:
- Laravel has blade template engine to create dynamic layouts and increase compiling tasks.
- Reuse code without any hassle.
- Laravel provides you to enforce constraints between multiple DBM objects by using an advanced query builder mechanism.
- The framework has an auto-loading feature, so you don’t do manual maintenance and inclusion paths
- The framework helps you to make new tools by using LOC container.
-Laravel is a clean and classy framework for PHP web development.Freeing you from spaghetti code, Laravel helps you create wonderful applications using simple, expressive syntax. Development should be a creative experience that you enjoy, not something that is painful. Enjoy the fresh air. Laravel is released under the MIT LICENSE.
Features
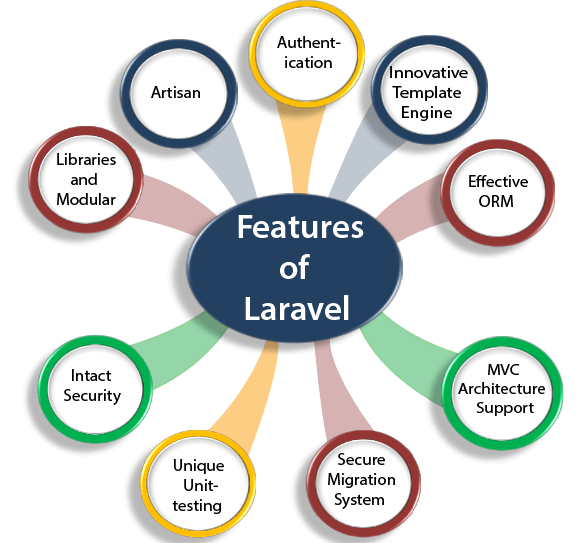
Following are the features of Laravel:
Authentication
Authentication is the most important factor in a web application, and developers need to spend a lot of time writing the authentication code. Laravel makes a simpler authentication when Laravel is updated to Laravel 5. Laravel contains an inbuilt authentication system, you only need to configure models, views, and controllers to make the application work.
Innovative Template Engine
Laravel provides an innovative template engine which allows the developers to create the dynamic website. The available widgets in Laravel can be used to create solid structures for an application.
Effective ORM
Laravel contains an inbuilt ORM with easy PHP Active Record implementation. An effective ORM allows the developers to query the database tables by using the simple PHP syntax without writing any SQL code. It provides easy integration between the developers and database tables by giving each of the tables with their corresponding models.
MVC Architecture Support
Laravel supports MVC architecture. It provides faster development process as in MVC; one programmer can work on the view while other is working on the controller to create the business logic for the web application. It provides multiple views for a model, and code duplication is also avoided as it separates the business logic from the presentation logic.
Secure Migration System
Laravel framework can expand the database without allowing the developers to put much effort every time to make changes, and the migration process of Laravel is very secure and full-proof. In the whole process, php code is used rather than SQL code.
Unique Unit-testing
Laravel provides a unique unit-testing. Laravel framework can run several test cases to check whether the changes harm the web app or not. In Laravel, developers can also write the test cases in their own code.
Intact Security
Application security is one of the most important factors in web application development. While developing an application, a programmer needs to take effective ways to secure the application. Laravel has an inbuilt web application security, i.e., it itself takes care of the security of an application. It uses “Bcrypt Hashing Algorithm” to generate the salted password means that the password is saved as an encrypted password in a database, not in the form of a plain text.
Libraries and Modular
Laravel is very popular as some Object-oriented libraries, and pre-installed libraries are added in this framework, these pre-installed libraries are not added in other php frameworks. One of the most popular libraries is an authentication library that contains some useful features such as password reset, monitoring active users, Bcrypt hashing, and CSRF protection. This framework is divided into several modules that follow the php principles allowing the developers to build responsive and modular apps.
Artisan
Laravel framework provides a built-in tool for a command-line known as Artisan that performs the repetitive programming tasks that do not allow the php developers to perform manually. These artisans can also be used to create the skeleton code, database structure, and their migration, so it makes it easy to manage the database of the system. It also generates the MVC files through the command line. Artisan also allows the developers to create their own commands.
-Major Features of Laravel:
INCREDIBLY WELL DOCUMENTED
A class API just doesn’t cut it. Laravel has great documentation to help you get up to speed as quickly as possible. It’s readable and thorough. You’ll love it.
GRAB SOME BUNDLES
Bundles are a great way to package and share Laravel code. They can be anything – from a complete ORM or simple debugging tools, and it’s a breeze to drop them into your application!
ALL THE COOL KIDS ARE DOING IT
“Laravel has brought the fun back to programming; it’s so expressive it speaks my language.”
NOW GIT TO WORK!
Laravel is open-source software. All of the code is available on Github and anyone can contribute, so go fork the repository and make a pull request!
Videos
How to Install Laravel 5 (Step by step guide on Laravel 5 Installation

