1-click AWS Deployment 1-click Azure Deployment
Overview
LAMP is an open source Web development platform that uses Linux as the operating system, Apache as the Web server, MySQL as the relational database management system and PHP as the object-oriented scripting language. Because the platform has four layers, LAMP is sometimes referred to as a LAMP stack. Stacks can be built on different operating systems. Developers that use these tools with a Windows operating system instead of Linux are said to be using WAMP; with a Macintosh system, MAMP; and with a Solaris system, SAMP.
LAMP stands for Linux, Apache, MySQL and PHP, and each one of them adds something unique to the development of high-performance web applications.
Linux: the LAMP Stack’s operating system. Linux started life in 1991. It’s an open source operating system and its free. It’s endured partly because it’s flexible and other operating systems are harder to configure. It’s used around the world and has proved itself in lots of different industries. So, it has a loyal fan base willing to shout its praises and help new users get up to speed.
Apache: the LAMP Stack’s web server. Apache HTTP Server is a free web server software package made available under an open source license. It used to be known as Apache Web Server when it was created in 1995. It offers a secure and extendable Web server that’s in sync with current HTTP standards.
MySQL: the LAMP Stack’s dbms. MySQL is a relational database management system used to store application data. It’s open source, and it lets you keep all your data in a format that can easily be queried with the SQL language. SQL works great with well-structured business domains and it’s a great workhorse that can handle even the largest and most complicated websites with ease.
PHP: the LAMP Stack’s programming language. PHP is an open source scripting language. It fits hand in glove with Apache to make building dynamic web pages a breeze. For instance, it steps into do what HTML can’t: enabling dynamic processes that involve pulling elements out of a database. PHP makes it easy to do tasks like this. You can add your code to the page at the part that you want to be dynamic, and hey presto! Job done. It’s an efficient and flexible language, and you can see the results of your new code as soon as you’ve written it. Just add it, hit refresh and it’s there. But if you’d prefer to use Perl or Python instead then you can, no problem.
LAMP delivers a strong platform for developing and hosting large, performant web applications. With the biggest and oldest community, countless libraries and tools, you get great support and will find developers quite easily
There are also some derivatives of this stack:
LAMP (with Perl or Python instead of PHP)
LAMP (with MongoDB instead of MySQL)
WAMP (Windows as OS)
MAMP (Mac OS X as OS)
XAMPP (Any OS + Perl or PHP + FTP Server)
LAPP (PostgreSQL as database)
Pros:
LAMP is kind of the dinosaur of web development, used by hundreds of thousands of companies and therefore maintained and supported very well. With endless modules, libraries and add-ons available you can adapt it to your company’s needs.Being Linux based, you will find help for any topic in the large open source community. MySQL is a very reliable and scalable solution. PHP is in version 7 and is also supported by a mature and big community. PHP is also very fast and integrates well with the rest of the stack.You can control the server and decide which versions and software you install, so you don’t have to depend on the client’s browser. Best for if you have lots of server-side tasks.
What is LAMP architecture like?
LAMP architecture is layered in the classic style, with Linux at the bottom, followed by Apache, MySQL, then PHP. Although PHP sits on the highest layer, it’s actually inside Apache.
How do the elements work together?
It all begins when someone’s browser sends a request for a web page to the Apache web server. If it’s for a PHP file, the request is forwarded to PHP, which loads the file and runs its code, then asks MySQL to fetch any information that the code may have referenced.The code and the data it pulls up are used to create the output that lets browsers display webpages. The LAMP stack is good at delivering both static and dynamic pages, which is good because this is slightly more difficult to achieve because as the name suggests, dynamic content can change every time the page is loaded.Once the file code has been run, PHP sends the data it produces back to the Apache web server, which then shunts it on to the browser, and this new data can also be stored in MySQL.
Flexibility
The LAMP stack is based on Linux, but you could also use Windows if you needed to, which would give it the equally attractive title of a WAMP stack. You can swap in Mac OS to get a MAMP stack, or there’s even WIMP, which uses Windows and the Internet Information Services web server from Microsoft.But the beauty of the LAMP stack is that all its components are free and open source, so you’re not tied in to use or pay for any of them. You just use what you need, when you need it.The LAMP stack is flexible in other ways too. Apache has a modular design, so it’s possible to add on custom modules to extend functionality.
Improving Efficiency – LAMP vs LEMP
The LAMP stack is a veteran that has been around for more than 10 years now, which means there are plenty of users who’ve been building modules for it for ages. The advantage of this is that whatever you might need to build for your own project, a lot of the work will have been done already. It’s great knowing that whatever you need, the work of others is waiting to help you cut down on your development time.Another way to gain efficiency is by replacing Apache with NGINX, which is an is an open-source high-performance web server is a web server which can also be used as a reverse proxy, mail proxy, load balancing solution and HTTP cache. NGINX focuses strongly on high concurrency, high performance and low memory use. Nowadays NGINX powers variety of high-load sites including Pinterest, Cloudflare, Airbnb, Netflix, Hulu, WordPress.com and GitHub.
Exploding the Acronym
Simply exploding the acronym on a letter by letter basis gives us the following elements:
Linux
Apache Web server
MySQL database
Perl, Python, or PHP
Individually, each of these items is a powerful component in its own right. The key to the idea behind LAMP, a term originally coined by Michael Kunze in the German magazine c’t in 1998, is the use of these items together. Although not actually designed to work together, these open source software alternatives are readily and freely available. This has lead to them often being used together. In the past few years, their compatibility and use together has grown and been extended. Certain extensions have even been created specifically to improve the cooperation between different components.
Today, the products that make up the LAMP stack are included by default in nearly all Linux distributions, and together they make a powerful web application platform. Below figure illiustrates the relationship between the components.

LAMP Relationships
Each of the components in the LAMP stack is an example of Free or Open Source Software (FOSS). The benefit of the FOSS approach is three-fold. First, the nature of FOSS software means applications are available for free download, making them readily available to a wide range of people without payment. That makes the software incredibly attractive to a wide range of users who would otherwise have to pay for “professional” commercial tools, which is often an expensive step in producing a Web site.
Second, FOSS licenses are open and thus have few restrictions on their use and deployment of applications based on the FOSS technology. It is possible to develop and deploy LAMP-based projects without paying any license fees for distributing the software, and this, again, makes it popular for both hobbyists and professionals alike.
Third, and a major reason for the growth and use of FOSS technology (including LAMP), is that because users have access to the source it is much easier to fix faults and improve the applications. In combination with the open license, this simplifies the development process for many enterprises and gives them flexibility that simply isn’t available within the confines of a proprietary or commercial-based product.
Why should you use the LAMP technology for website development?
LAMP would provide you with plenty of alternatives to other packages. It would work along with a software program that could offer you with the right platform for developing and implementing web-based servers and applications. LAMP offers one of the most effective and popular ways of developing enterprise-level web applications because of its flexibility, customization and cost-effectiveness. Organizations all over the world are entirely dependent on programming for everyday tasks. When you want to create and keep up big business-related sites, applications and server, it is not going to be simple. The LAMP stack is one of the most effective options for companies that are developing economically.You get to feature LAMP with more reliable database MySQL. This is also a prominent web server Apache with secured Linux and languages such as Perl and PHP. They are actually open-source scripting languages. Hence we consider it to be one among the most popular choices in web development. It holds a number of advantages over different platforms such as ASP.Net, J2EE and Ruby on Rails.
What are the advantages of using LAMP Technology for your website development ?
With LAMP, you are going to get a perfect web server using a number of working frameworks such as Windows, Unix, Mac OS, Unix and much more. LAMP is going to be one among the most effective ways to develop any enterprise-level application. The open-source option of the stack has led on to create different elements to help you grow steadily over different times. The LAMP stack would also ensure that you do not spend too much bucks. You can acquire it at a low price when you compare it with other platforms. We, the tech community, have been using Linux, PHP and Apache for more than 20 years. With the security features, it has gone on to impress everyone. When you are going to use LAMP, you get a wide exposure to build products that would sustain in the market. Hence it would always be a wise option to use LAMP to leverage all these operational and functional benefits of lamp stack. LAMP is going to bring much more needed changes in your business with its over-the-top features. A quaint developer can explain you why you have to use Lamp stack
The arrival of new technologies
The LAMP web development platform is an extremely flexible website application development platform. You can create a number of web applications from the beginning. The web applications you develop with LAMP are extremely compatible with a number of web browsers. With the number of the coding process. You can easily develop LAMP applications and deploy them locally. The major advantage is that LAMP stack gets updated regularly with new updates and improvements. You can run it on a number of platforms which would offer users more flexibility. With the arrival of new technologies, you are going to get more exposure to a number of other options. This is going to help you build a present and future-friendly application.
Benefits of LAMP Development
The LAMP web development platform is a highly flexible web application development platform, and offers developers the flexibility to create flawless web applications of their choice from scratch. Following are the benefits of LAMP-based web development –
The web applications developed using LAMP are compatible with a majority of web browsers
The coding process with the help of LAMP is easy and applications can get up and running in minimum time
LAMP-based applications can be easily developed and deployed locally
The robust Linux architecture ensures safe and secure LAMP web development
The LAMP stack can be acquired at a comparatively low price compared to other software architecture bundles
LAMP stacks are constantly updated to incorporate new improvements and can run on many platforms giving flexibility of use for its users
A LAMP (Linux, Apache, MySQL, PHP) stack is a common web stack used for hosting web content.The LAMP stack is an open source web platform that can be used to run dynamic web sites and servers. LAMP on cloud includes Linux, Apache, MySQL and PHP/Python/Perl and is considered by many the platform of choice for development and deployment of high-performance web applications which require a solid and reliable foundation.
Cognosys provides hardened images of LAMP server on cloud ( AWS marketplace, Azure and Google Cloud Platform).
Deploy own LAMP server securely on cloud i.e. AWS marketplace and Azure and Google Cloud Platform (GCP).
Secured LAMP On Ubuntu 14.04 LTS On Cloud
Secured LAMP on Ubuntu 16.04 LTS
Secured LAMP On Centos 7.3 On Cloud
Features
Major Features of LAMP Stack
- SSL support out of the box.
- PHP, Python and Perl support for Apache2 and MySQL.
- XCache – PHP opcode caching acceleration.
- Adminer administration frontend for MySQL (listening on port 12322 – uses SSL).
- Postfix MTA (bound to localhost) to allow sending of email from web applications (e.g., password recovery).
Webmin modules for configuring Apache2, PHP, MySQL and Postfix.
AWS
Installation Instructions For Centos
Installation Instructions For Ubuntu 14.04 LTS
Note: How to find PublicDNS in AWS
Step 1) SSH Connection: To connect to the deployed instance, Please follow Instructions to Connect to Ubuntu instance on AWS Cloud
1) Download Putty.
2) Connect to the virtual machine using SSH key Refer this link:
- Hostname: PublicDNS / IP of machine
- Port : 22
Username: To connect to the operating system, use SSH and the username is ubuntu.
Password: Please Click here to know how to get password .
Step2 ) Database Login Details :
- MYSQL Username : root
- MYSQL Password : Passw@rd123
Note :Please change the password immediately after first login.
Server version: 5.7.18 MySQL Community Server
MYSQL Services:
To start MySQL Service: service mysql start
To stop MySQL Service: service mysql stop
To restart MySQL Service: service mysql restart
To get status of MySQL Service: service mysql status
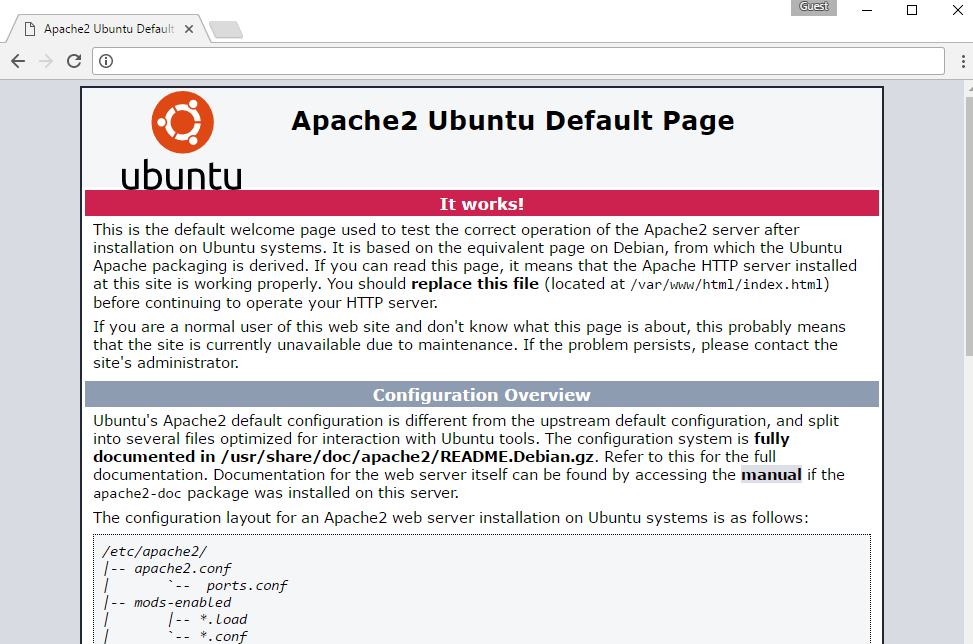
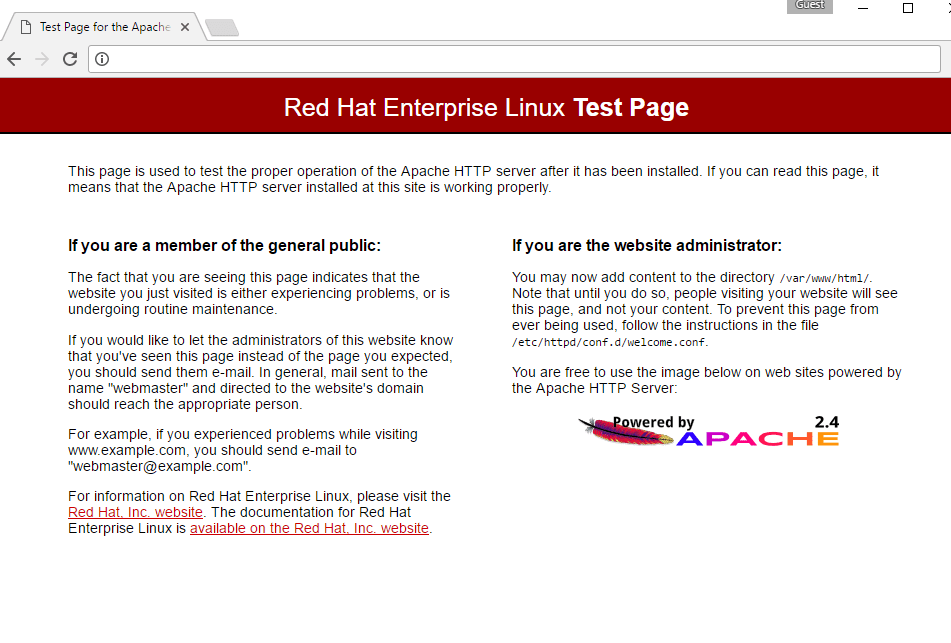
Step 3) Application URL: Access the application via a browser at “http://PublicDNS
Step 4) Other Information:
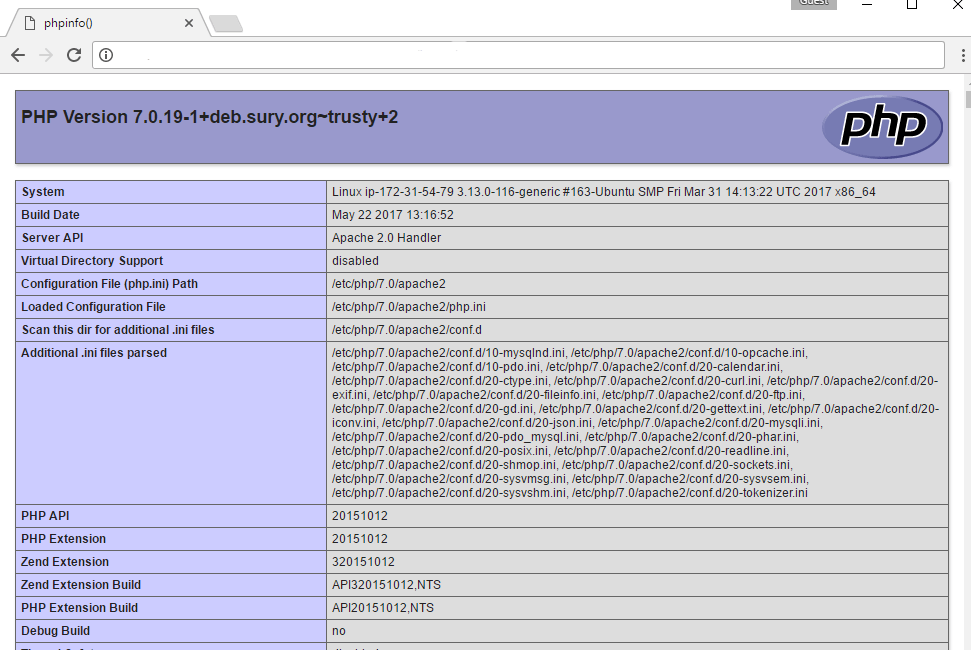
PHP Version is 7.0.19
1.Default installation path: will be in your web root folder “/var/www/html”
2.Default ports:
- Linux Machines: SSH Port – 22
- Http: 80
- Https: 443
- MySQL Port : 3306 this is by default not allowed on cloud firewall for security.
Configure custom inbound and outbound rules using this link
3. To access Webmin interface for management please follow this link
For getting started with LAMP Stack Kindly note that :
1) Apache comes with a default virtual host file called 000-default.conf
The default site root here is /var/www/html.If you put any file in this folder like test.txt you can access it with <yourPublicip>/text.txt or <yourDomain>/test.txt
2)To Create New Virtual Host Files:
Virtual host files specify the actual configuration of our virtual hosts and dictate how the Apache web server will respond to various domain request
3) You can use the a2ensite tool to enable each of your sites : sudo a2ensite example.com.conf
4) If you wish to disable the default site defined in 000-default.conf use a2dissite command:
sudo a2dissite 000-default.conf
5) To reflect the changes restart apache service
service apache2 restart
Installation Instructions For Ubuntu 16.04 LTS
Note : How to find PublicDNS in AWS
Step 1) SSH Connection: To connect to the deployed instance, Please follow Instructions to Connect to Ubuntu instance on AWS Cloud
1) Download Putty.
2) Connect to virtual machine using following SSH credentials:
- Hostname: PublicDNS / IP of machine
- Port : 22
Username: To connect to the operating system, use SSH and the username is ubuntu.
Password: Please Click here to know how to get password .
Step2 ) Database Login Details :
- MYSQL Username : root
- MYSQL Password : Passw@rd123
Note : Please change the password immediately after the first login.
Server version: 5.7.17 MySQL Community Server
MYSQL Services:
To start MySQL Service: service mysql start
To stop MySQL Service: service mysql stop
To restart MySQL Service: service mysql restart
To get status of MySQL Service: service mysql status
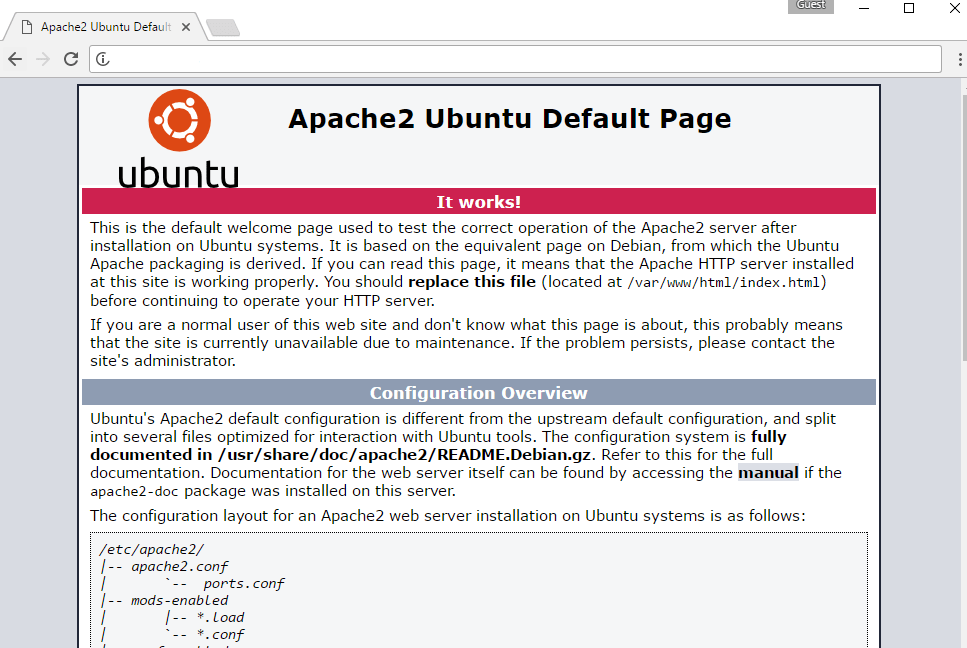
Step 3) Application URL: Access the application via a browser at “http://PublicDNS”
Step 4) Other Information:
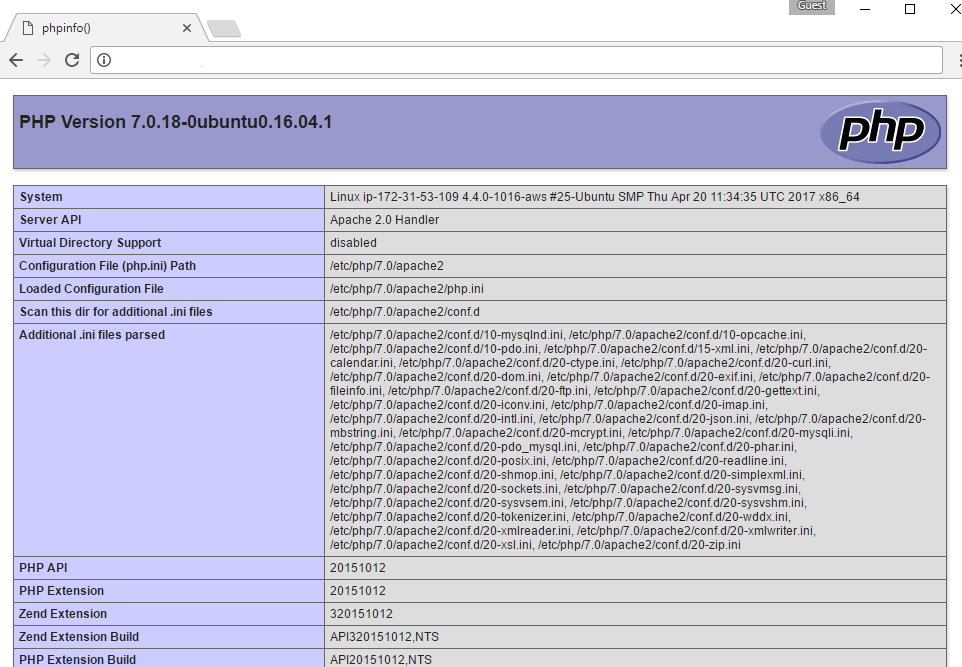
PHP Version is 7.0
1.Default installation path: will be in your web root folder “/var/www/html”
2.Default ports:
- Linux Machines: SSH Port – 22
- Http: 80
- Https: 443
- MySQL Port : 3306 this is by default not allowed on cloud firewall for security.
Configure custom inbound and outbound rules using this link
3. To access Webmin interface for management please follow this link
For getting started with LAMP Stack Kindly note that :
1) Apache comes with a default virtual host file called 000-default.conf
The default site root here is /var/www/html.If you put any file in this folder like test.txt you can access it with <yourPublicip>/text.txt or <yourDomain>/test.txt
2)To Create New Virtual Host Files:
Virtual host files specify the actual configuration of our virtual hosts and dictate how the Apache web server will respond to various domain request
3) You can use the a2ensite tool to enable each of your sites: sudo a2ensite example.com.conf
4) If you wish to disable the default site defined in 000-default.conf use the a2dissite command:
sudo a2dissite 000-default.conf
5) To reflect the changes restart Apache service
service apache2 restart
Installation Instructions For Red Hat Enterprise Linux
Note : How to find PublicDNS in AWS
Step 1) SSH Connection: To connect to the deployed instance, Please follow Instructions to Connect to Redhat instance on AWS Cloud
1) Download Putty.
2) Connect to the virtual machine using following SSH credentials :
- Hostname: PublicDNS / IP of machine
- Port : 22
Username: To connect to the operating system, use SSH and the username is ubuntu.
Password: Please Click here to know how to get password .
Step2 ) Database Login Details :
- MYSQL Username : root
- MYSQL Password : Passw@rd123
Note: Please change the password after first login.
Mysql Server version: 5.7.18 MySQL Community Server
MYSQL Services:
To start MySQL Service: systemctl start mysqld
To stop MySQL Service: systemctl stop mysqld
To restart MySQL Service: systemctl restart mysqld
To get status of MySQL Service: systemctl status mysqld
Step 3) Application URL: Access the application via a browser at http://PublicDNS
Step 4) Other Information:
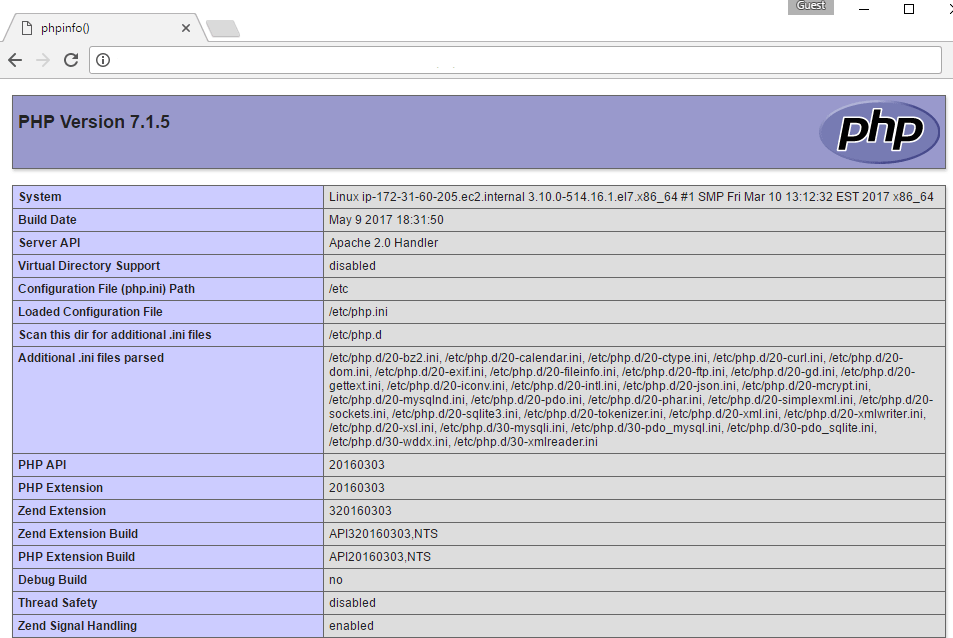
PHP Version is 7.1.5
1. Default installation path: will be in your web root folder “/var/www/html”
2. Default ports:
- Linux Machines: SSH Port – 22
- Http: 80
- Https: 443
- MySQL Port: 3306 this is by default not allowed on cloud firewall for security.
Configure custom inbound and outbound rules using this link
3. To access Webmin interface for management please follow this link
For getting started with LAMP Stack Kindly note that :
1) Apache comes with a default virtual host file called 000-default.conf
The default site root here is /var/www/html.If you put any file in this folder like test.txt you can access it with <yourPublicip>/text.txt or <yourDomain>/test.txt
2)To Create New Virtual Host Files:
Virtual host files specify the actual configuration of our virtual hosts and dictate how the Apache web server will respond to various domain request
3) You can use the a2ensite tool to enable each of your sites: sudo a2ensite example.com.conf
4) If you wish to disable the default site defined in 000-default.conf use the a2dissite command:
sudo a2dissite 000-default.conf
5) To reflect the changes restart Apache service
service apache2 restart
Installation Instructions For CentOS
Note: How to find PublicDNS in AWS
Step 1) SSH Connection: To connect to the deployed instance, Please follow Instructions to Connect to CentOS instance on AWS Cloud
1) Download Putty.
2) Connect to the virtual machine using SSH key Refer this link:
- Hostname: PublicDNS / IP of machine
- Port : 22
Username: To connect to the operating system, use RDP and the username is Administrator.
Password : Please Click here to know how to get password .
Step 2 )Database Login Details:
- MYSQL Username : root
- MYSQL Password : Passw@rd123
Step 3) Other Information:
1.Default installation path: will be in your web root folder “/var/www/html/”
2.Default ports:
- Linux Machines: SSH Port – 22
- Http: 80
- Https: 443
- MYSQL ports: By default, these are not open on Public Endpoints. MYSQL: 3306
3. To access Webmin interface for management please follow this link
Configure custom inbound and outbound rules using this link.
Azure
Installation Instructions For Ubuntu
Note: How to find PublicDNS in Azure
Step 1) SSH Connection: To connect to the deployed instance, Please follow Instructions to Connect to Ubuntu instance on Azure Cloud
1) Download Putty.
2) Connect to virtual machine using following SSH credentials:
- Hostname: PublicDNS / IP of machine
- Port : 22
Username: Your chosen username when you created the machine ( For example: Azureuser)
Password : Your Chosen Password when you created the machine ( How to reset the password if you do not remember)
Step 2) Database Login Details :
- MYSQL Username : root
- MYSQL Password : Passw@rd123
Note: Please change password immediately after first login.
Step 3) Application URL: Access the application via a browser at “http://PublicDNS
Step 4) Other Information:
1. Default installation path: “/var/www/html/”.
2. Default ports:
- Linux Machines: SSH Port – 22
- Http: 80
- Https: 443
- MySQL ports: By default, these are not open on Public Endpoints. MySQL:3306
Configure custom inbound and outbound rules using this link
3. To access Webmin interface for management please follow this link
For getting started with LAMP Stack Kindly note that :
1) Apache comes with a default virtual host file called 000-default.conf
The default site root here is /var/www/html.If you put any file in this folder like test.txt you can access it with <yourPublicip>/text.txt or <yourDomain>/test.txt
2)To Create New Virtual Host Files:
Virtual host files specify the actual configuration of our virtual hosts and dictate how the Apache web server will respond to various domain request
3) You can use the a2ensite tool to enable each of your sites: sudo a2ensite example.com.conf
4) If you wish to disable the default site defined in 000-default.conf use the a2dissite command:
sudo a2dissite 000-default.conf
5) To reflect the changes restart Apache service
service apache2 restart
Installation Instructions For CentOS
Note : How to find PublicDNS in Azure
Step 1) SSH Connection: To connect to the deployed instance, Please follow Instructions to Connect to CentOS instance on Azure Cloud
1) Download Putty.
2) Connect to virtual machine using following SSH credentials :
- Hostname: PublicDNS / IP of machine
- Port : 22
Username: Your chosen username when you created the machine ( For example: Azureuser)
Password : Your Chosen Password when you created the machine ( How to reset the password if you do not remember)
Step 2) Database Login Details :
- MYSQL Username : root
- MYSQL Password : Passw@rd123
Note :-Please change password immediately after first login.
Step 3) Application URL: Access the application via a browser at “http://PublicDNS
Step 4) Other Information:
1. Default installation path: “/var/www/html/”.
2. Default ports:
- Linux Machines: SSH Port – 22
- Http: 80
- Https: 443
- MySQL ports: By default these are not open on Public Endpoints. MySQL :3306
Configure custom inbound and outbound rules using this link
3. To access Webmin interface for management please follow this link
To troubleshoot any SELinux issues please refer this link.
For getting started with LAMP Stack Kindly note that :
1) Apache comes with a default virtual host file called 000-default.conf
The default site root here is /var/www/html.If you put any file in this folder like test.txt you can access it with <yourPublicip>/text.txt or <yourDomain>/test.txt
2)To Create New Virtual Host Files:
Virtual host files specify the actual configuration of our virtual hosts and dictate how the Apache web server will respond to various domain request
3) You can use the a2ensite tool to enable each of your sites: sudo a2ensite example.com.conf
4) If you wish to disable the default site defined in 000-default.conf use the a2dissite command:
sudo a2dissite 000-default.conf
5) To reflect the changes restart Apache service
service apache2 restart
Step by Step Screenshots :
Installation Instructions For CentOS
Installation Instructions For Ubuntu
Step 1) VM Creation:
1.Click the Launch on Compute Engine button to choose the hardware and network settings.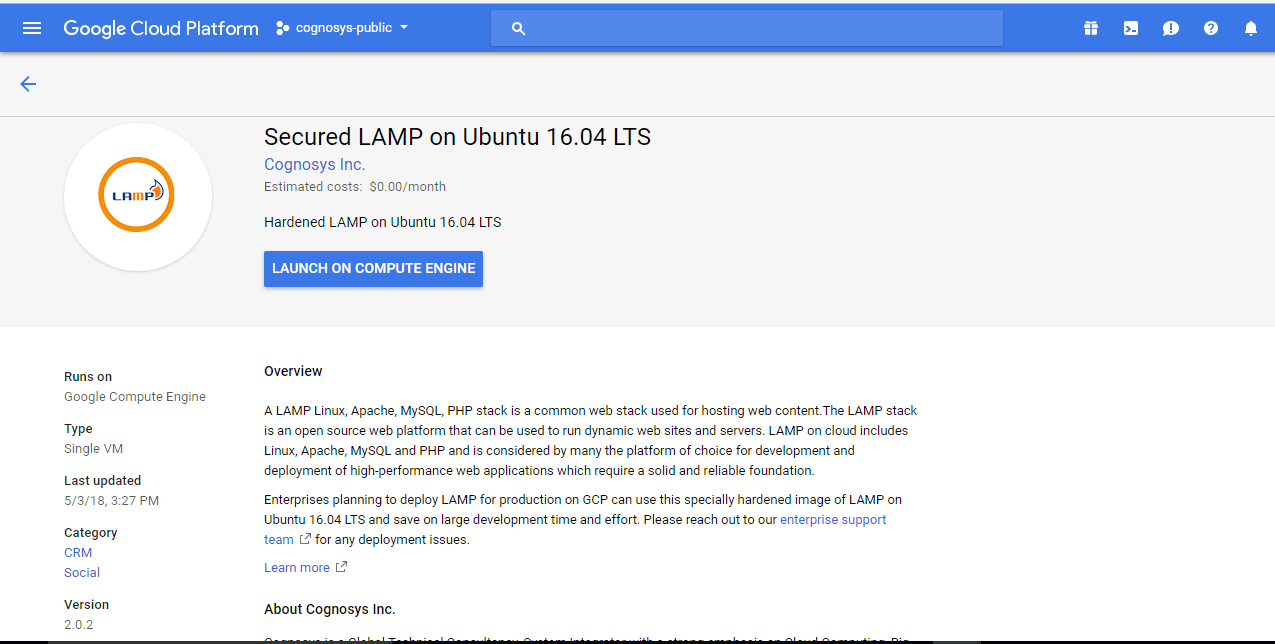
2.You can see at this page, an overview of Cognosys Image as well as some estimated costs of VM.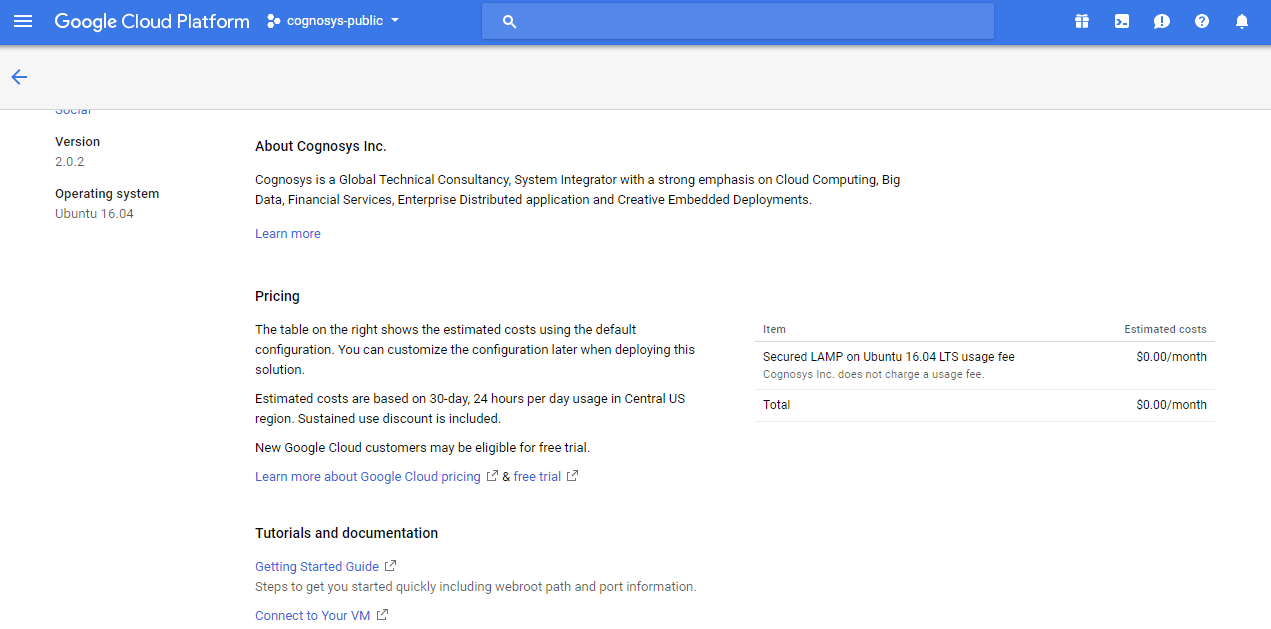
3.In the settings page, you can choose the number of CPUs and amount of RAM, the disk size and type etc.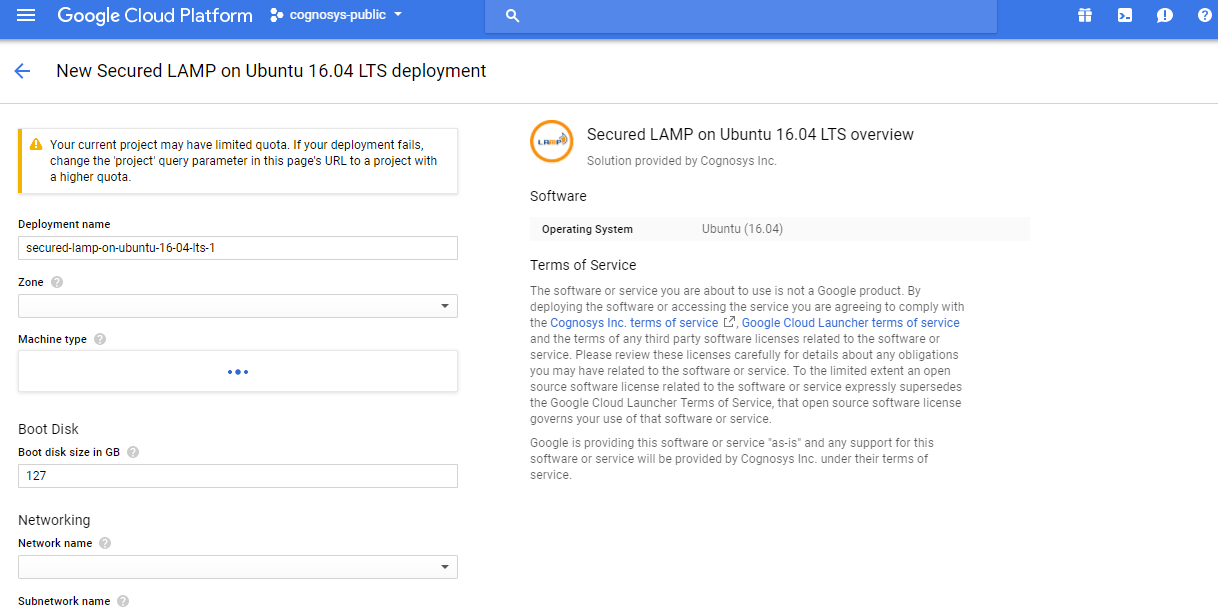
Step 2) SSH Connection: To connect to the deployed instance, Please follow Instructions to Connect to Ubuntu instance on Google Cloud
1) Download Putty.
2) Connect to the virtual machine using SSH key
- Hostname: PublicDNS / IP of machine
- Port : 22
Step 3) Database Login Details:
The below screen appears after successful deployment of the image.
For local MySQL root password, please use the temporary password generated automatically during image creation as shown above.
i) Please connect to Remote Desktop as given in step 2 to ensure stack is properly configured and DB is initialized.
ii) You can use MySQL server instance as localhost, username root and password as shown above.
If you have closed the deployment page you can also get the MySQL root password from VM Details “Custom metadata” Section
Step 4) Other Information:
1.Default ports:
- Linux Machines: SSH Port – 22
2. To access Webmin interface for management please follow this link
For getting started with LAMP Stack Kindly note that :
1) Apache comes with a default virtual host file called 000-default.conf
The default site root here is /var/www/html.If you put any file in this folder like test.txt you can access it with <yourPublicip>/text.txt or <yourDomain>/test.txt
2)To Create New Virtual Host Files:
Virtual host files specify the actual configuration of our virtual hosts and dictate how the Apache web server will respond to various domain request
3) You can use the a2ensite tool to enable each of your sites: sudo a2ensite example.com.conf
4) If you wish to disable the default site defined in 000-default.conf use the a2dissite command:
sudo a2dissite 000-default.conf
5) To reflect the changes restart Apache service
service apache2 restart
Installation Instructions For Redhat
Step 1) VM Creation:
- Click the Launch on Compute Engine button to choose the hardware and network settings.
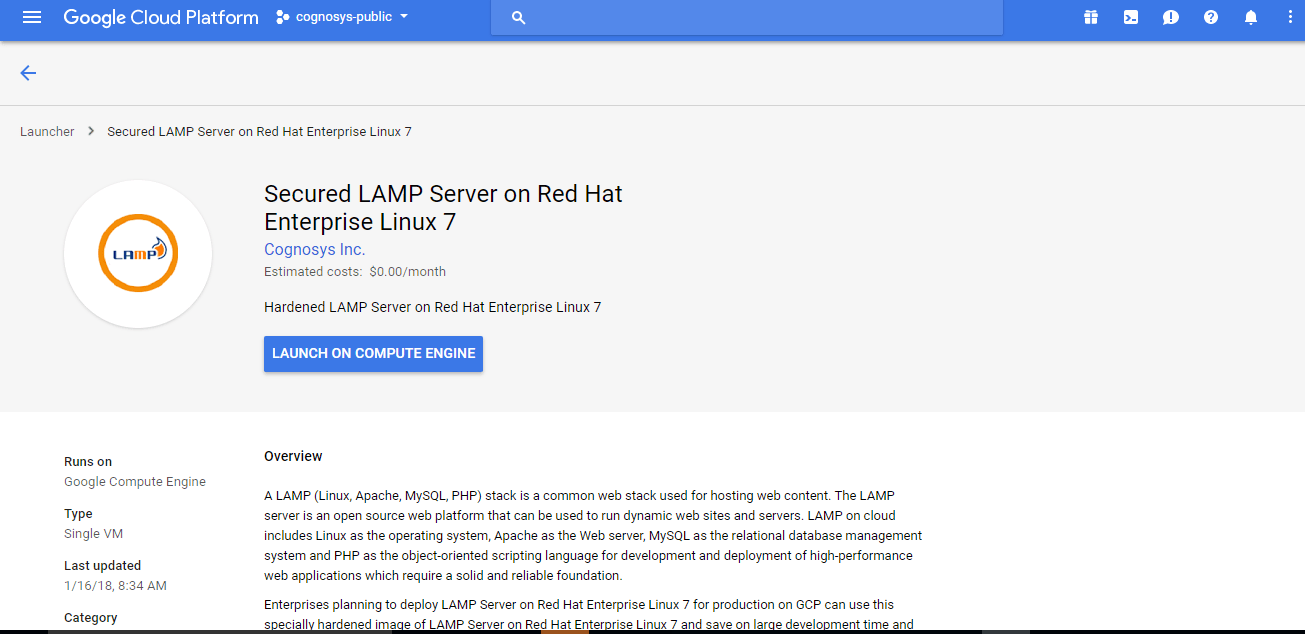
2.You can see at this page, an overview of Cognosys Image as well as some estimated costs of VM.
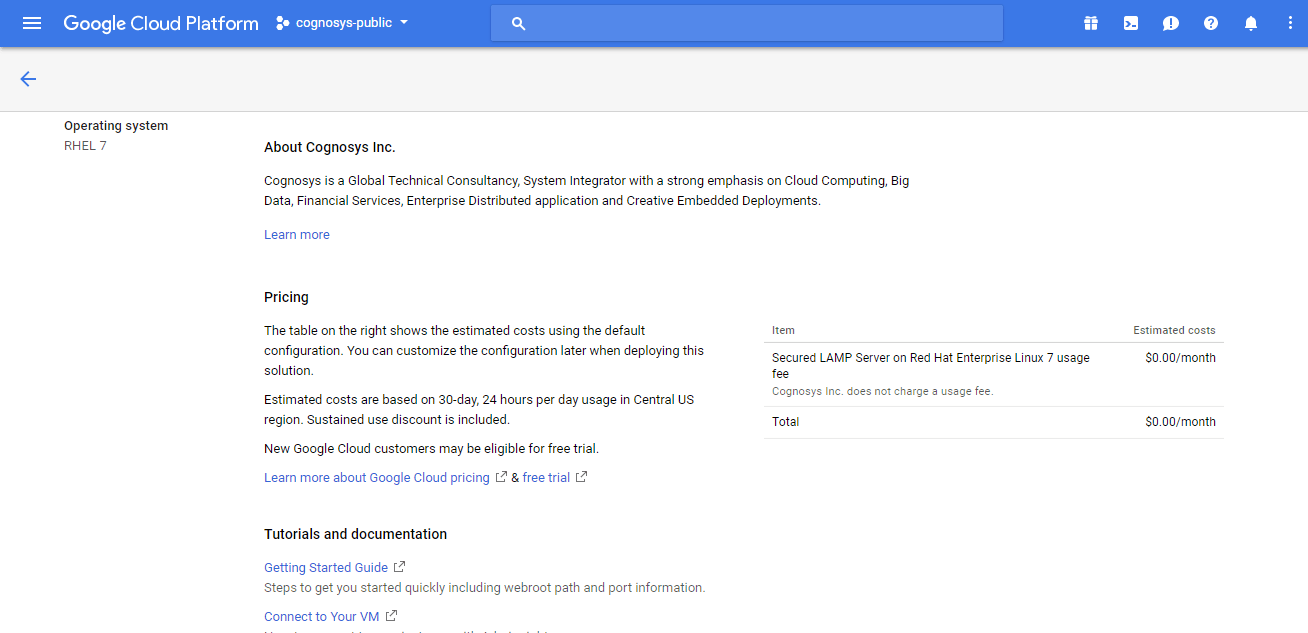
3.In the settings page, you can choose the number of CPUs and amount of RAM, the disk size and type etc.
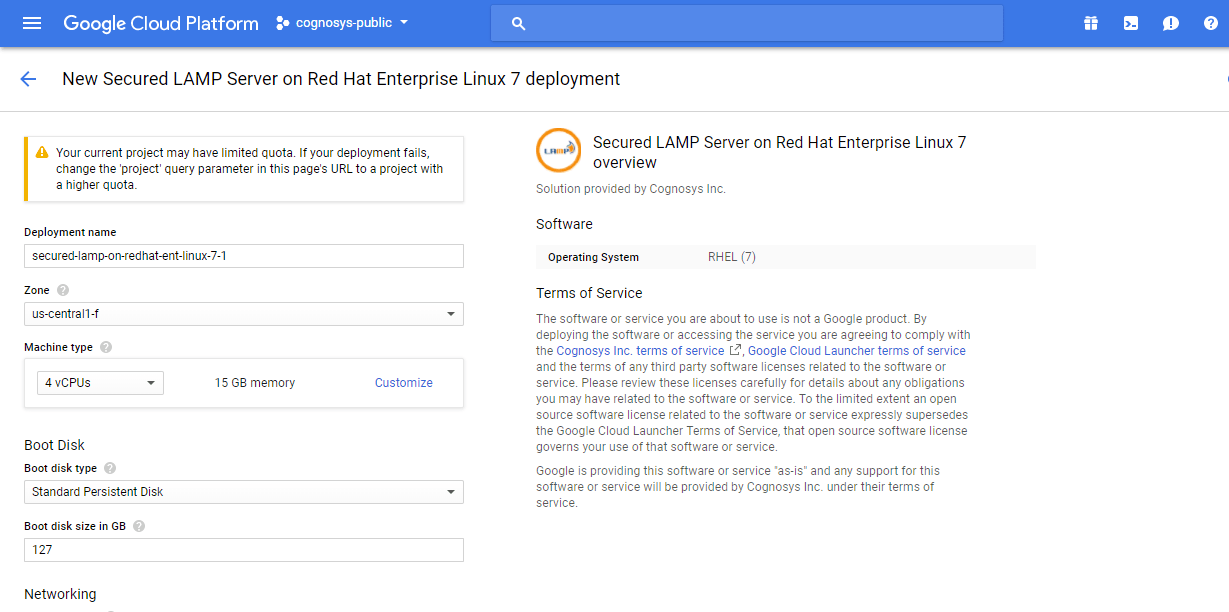 Step 2) SSH Connection: To connect to the deployed instance, Please follow Instructions to Connect to Redhat instance on Google Cloud
1) Download Putty.
2) Connect to the virtual machine using SSH key
- Hostname: PublicDNS / IP of machine
- Port : 22
Step 3) Database Login Details:
The below screen appears after successful deployment of the image.
For local MySQL root password, please use the temporary password generated automatically during image creation as shown above.
i) Please connect to Remote Desktop as given in step 2 to ensure stack is properly configured and DB is initialized.
ii) You can use MySQL server instance as localhost, username root and password as shown above.
If you have closed the deployment page you can also get the MySQL root password from VM Details “Custom metadata” Section
Step 4) Other Information:
1.Default ports:
- Linux Machines: SSH Port – 22
2. To access Webmin interface for management please follow this link
For getting started with LAMP Stack Kindly note that :
1) Apache comes with a default virtual host file called 000-default.conf
The default site root here is /var/www/html.If you put any file in this folder like test.txt you can access it with <yourPublicip>/text.txt or <yourDomain>/test.txt
2)To Create New Virtual Host Files:
Virtual host files specify the actual configuration of our virtual hosts and dictate how the Apache web server will respond to various domain request
3) You can use the a2ensite tool to enable each of your sites: sudo a2ensite example.com.conf
4) If you wish to disable the default site defined in 000-default.conf use the a2dissite command:
sudo a2dissite 000-default.conf
5) To reflect the changes restart Apache service
service apache2 restart
Installation Instructions For CentOS
Step 1) SSH Connection: To connect to the deployed instance, Please follow Instructions to Connect to CentOS instance on Google Cloud
1) Download Putty.
2) Connect to virtual machine using following SSH credentials:
- Hostname: PublicDNS / IP of machine
- Port : 22
Username: Your chosen username when you created the machine
Password : Your Chosen Password when you created the machine ( How to reset the password if you do not remember)
Step 2) Other Information:
1.Default ports:
- Linux Machines: SSH Port – 22
2. To access Webmin interface for management please follow this link
Step by Step Screenshots :
Videos
Secured LAMP on Ubuntu 14.04 LTS
Secured LAMP on Ubuntu 16.04 LTS
Secured LAMP on CentOS 7.3
How to Install LAMP in Ubuntu Server 14.04 LTS


