1-click AWS Deployment 1-click Azure Deployment
Overview
JasperReports is a popular open-source reporting engine whose main purpose is to help creating page oriented, ready to print documents in a simple and flexible manner. JasperReports is written in 100% Java and can be embedded in any Java application. JasperReports has the ability to deliver rich content in various formats such as PDF, HTML, XLS, CSV, XML files, or directly on the screen or printer.
JasperReports is distributed under two licenses, an Apache-style license and the LGPL license. Due to its flexible licensing, JasperReports is the perfect candidate to complete the reporting features for any commercial or open-source application.
BITNAMI JASPER REPORTS S Download installers and virtual machines, or run your own jasperreports server in the cloud. The JasperReports Server can be used as a stand-alone or embedded reporting and BI server that offers web-based reporting, analytic tools and visualization, and a dashboard feature for compiling multiple custom views.
TACK SINGLE-TIER
Bitnami Cloud Images extend stack appliances to run in a cloud computing environment. You can run Bitnami applications on a pay-as-you-go basis, programmatically starting and stopping them. Bitnami JasperReports Stack is pre-configured and ready-to-use immediately on any of the platforms below.
- Quickly deploy your applications to the cloud and make them available online
- Only pay for the resources you use
LAUNCH IN THE CLOUD
You can deploy JasperReports in any of the following cloud providers:
TIBCO JasperReports Server on AWS
This Quick Start deploys TIBCO JasperReports Server, a reporting and analytics server, on the Amazon Web Services (AWS) Cloud. Using JasperReports Server, you can create, share, and manage reports, dashboards, and data visualizations. This Quick Start is for developers, IT professionals, architects, and other technical users who plan to implement or extend their deployment of JasperReports Server to the AWS Cloud.
JasperReports Server can run as a standalone server, or it can be embedded into web applications. JasperReports Server is designed with automatic detection functionality for connecting to Amazon Relational Database Service (Amazon RDS), Amazon Redshift, and Amazon EMR.
Use this Quick Start to automatically set up the following JasperReports Server environment on AWS:
- A highly available architecture that spans two Availability Zones.*
- A virtual private cloud (VPC) configured with public and private subnets according to AWS best practices, to provide you with your own virtual network on AWS.*
- In the public subnets:
- Managed network address translation (NAT) gateways to allow outbound internet access for resources in the private subnets.*
- A Linux bastion host in an Auto Scaling group to allow inbound Secure Shell (SSH) access to Amazon Elastic Compute Cloud (Amazon EC2) instances in public and private subnets.*
- An Application Load Balancer to control the load on the Amazon EC2 instances, reachable from the internet.
- In the private subnets:
- A TIBCO JasperReports Server cluster deployed on Amazon EC2 instances.
- A JasperReports Server repository based on Amazon RDS for PostgreSQL with Multi-AZ deployment.
- An Amazon Simple Storage Service (Amazon S3) bucket for the license and for customization.
* The template that deploys the Quick Start into an existing VPC skips the components marked by asterisks and prompts you for your existing VPC configuration.
JasperReports Server is a stand-alone and embeddable reporting server. It provides reporting and analytics that can be embedded into a web or mobile application as well as operate as a central information hub for the enterprise by delivering mission critical information on a real-time or scheduled basis to the browser, mobile device, or email inbox in a variety of file formats. JasperReports Server is optimized to share, secure, and centrally manage your Jaspersoft reports and analytic views
Create IBM Cloud Object Storage Reports on JasperReports Server:
Deploy the CData JDBC Driver on JasperReports Server to provide real-time IBM Cloud Object Storage data access from reports, embedded analytics, and more.
The CData JDBC Driver for IBM Cloud Object Storage enables you to provide access to IBM Cloud Object Storage data across the enterprise. This article shows how to deploy the driver on JasperReports server and create a simple report based on a reporting domain, a business view of IBM Cloud Object Storage data.
Deploy the Driver JAR
Follow the steps below to deploy the driver JAR on JasperReports Server. The instructions below contain specifics for IBM Cloud Object Storage and the Tomcat server bundled with JasperReports Server. If you are using JBoss AS 7 instead of Tomcat, you can follow the standard process to deploy the IBM Cloud Object Storage JDBC Driver on JBoss.
- Copy the driver JAR and .lic file, located in the lib subfolder of the installation directory, to the lib subfolder of the apache-tomcat folder, located in the JasperReports Server installation directory.
- Navigate to apache-tomcat -> webapps -> jasperserver-pro -> META-INF and add the following resource entry to the context.xml file:
<Resourcename="jdbc/ibmcloudobjectstorage"auth="Container"type="javax.sql.DataSource"driverClassName="cdata.jdbc.ibmcloudobjectstorage.IBMCloudObjectStorageDriver"url="jdbc:ibmcloudobjectstorage:ApiKey=myApiKey;CloudObjectStorageCRN=MyInstanceCRN;Region=myRegion;OAuthClientId=MyOAuthClientId;OAuthClientSecret=myOAuthClientSecret;"maxActive="20"maxIdle="10"maxWait="-1"factory="com.jaspersoft.jasperserver.tomcat.jndi.JSCommonsBasicDataSourceFactory"/>Specify the required connection properties in the JDBC URL — the url attribute.
Register a New Instance of Cloud Object Storage
If you do not already have Cloud Object Storage in your IBM Cloud account, follow the procedure below to install an instance of SQL Query in your account:
- Log in to your IBM Cloud account.
- Navigate to the page, choose a name for your instance and click Create. You will be redirected to the instance of Cloud Object Storage you just created.
Connecting using OAuth Authentication
There are certain connection properties you need to set before you can connect. You can obtain these as follows:
API Key
To connect with IBM Cloud Object Storage, you need an API Key. You can obtain this as follows:
- Log in to your IBM Cloud account.
- Navigate to the Platform API Keys page.
- On the middle-right corner click “Create an IBM Cloud API Key” to create a new API Key.
- In the pop-up window, specify the API Key name and click “Create”. Note the API Key as you can never access it again from the dashboard.
Cloud Object Storage CRN
If you have multiple accounts, you will need to specify the CloudObjectStorageCRN explicitly. To find the appropriate value, you can:
- Query the Services view. This will list your IBM Cloud Object Storage instances along with the CRN for each.
- Locate the CRN directly in IBM Cloud. To do so, navigate to your IBM Cloud Dashboard. In the Resource List, Under Storage, select your Cloud Object Storage resource to get its CRN.
Connecting to Data
You can now set the following to connect to data:
- InitiateOAuth: Set this to GETANDREFRESH. You can use InitiateOAuth to avoid repeating the OAuth exchange and manually setting the OAuthAccessToken.
- ApiKey: Set this to your API key which was noted during setup.
- CloudObjectStorageCRN (Optional): Set this to the cloud object storage CRN you want to work with. While the connector attempts to retrieve this automatically, specifying this explicitly is recommended if you have more than Cloud Object Storage account.
When you connect, the connector completes the OAuth process.
- Extracts the access token and authenticates requests.
- Saves OAuth values in OAuthSettingsLocation to be persisted across connections.
Built-in Connection String Designer
For assistance in constructing the JDBC URL, use the connection string designer built into the IBM Cloud Object Storage JDBC Driver. Either double-click the JAR file or execute the jar file from the command-line.
java -jar cdata.jdbc.ibmcloudobjectstorage.jarFill in the connection properties and copy the connection string to the clipboard.

- When you configure the JDBC URL, you may also want to set the Max Rows connection property. This will limit the number of rows returned, which is especially helpful for improving performance when designing reports and visualizations.
- Navigate to jasperserver-pro -> WEB-INF and add the following reference to the web.xml file:
<resource-ref><description>IBM Cloud Object Storage data JSP</description><res-ref-name>jdbc/ibmcloudobjectstorage</res-ref-name><res-type>javax.sql.DataSource</res-type><res-auth>Container</res-auth></resource-ref> - Restart the server.
Create the IBM Cloud Object Storage JDBC Data Source
Follow the steps below to map the IBM Cloud Object Storage JDBC driver to a JDBC data source:
- Log into JasperReports Server and click Create -> Data Source.
- In the Type menu, select JNDI Data Source.
- In the Service Name box, enter the JDNI lookup defined in the resource definition in the web.xml file. In the example, the lookup is “jdbc/ibmcloudobjectstorage”.
- Click Save to create the Data Source.
Create a Domain
A domain is a metadata and access-control layer that surfaces a relevant business view to report creators. Follow the steps below to select IBM Cloud Object Storage columns, apply filters, and execute SQL to create a domain.
- Click Create -> Domain. Enter an Id for the domain and select a save location.
- Click Browse in the Data Source section and select the IBM Cloud Object Storage data source you created.
- In the Domain Design section, click Create with Domain Designer.
- Select the schema containing your tables.
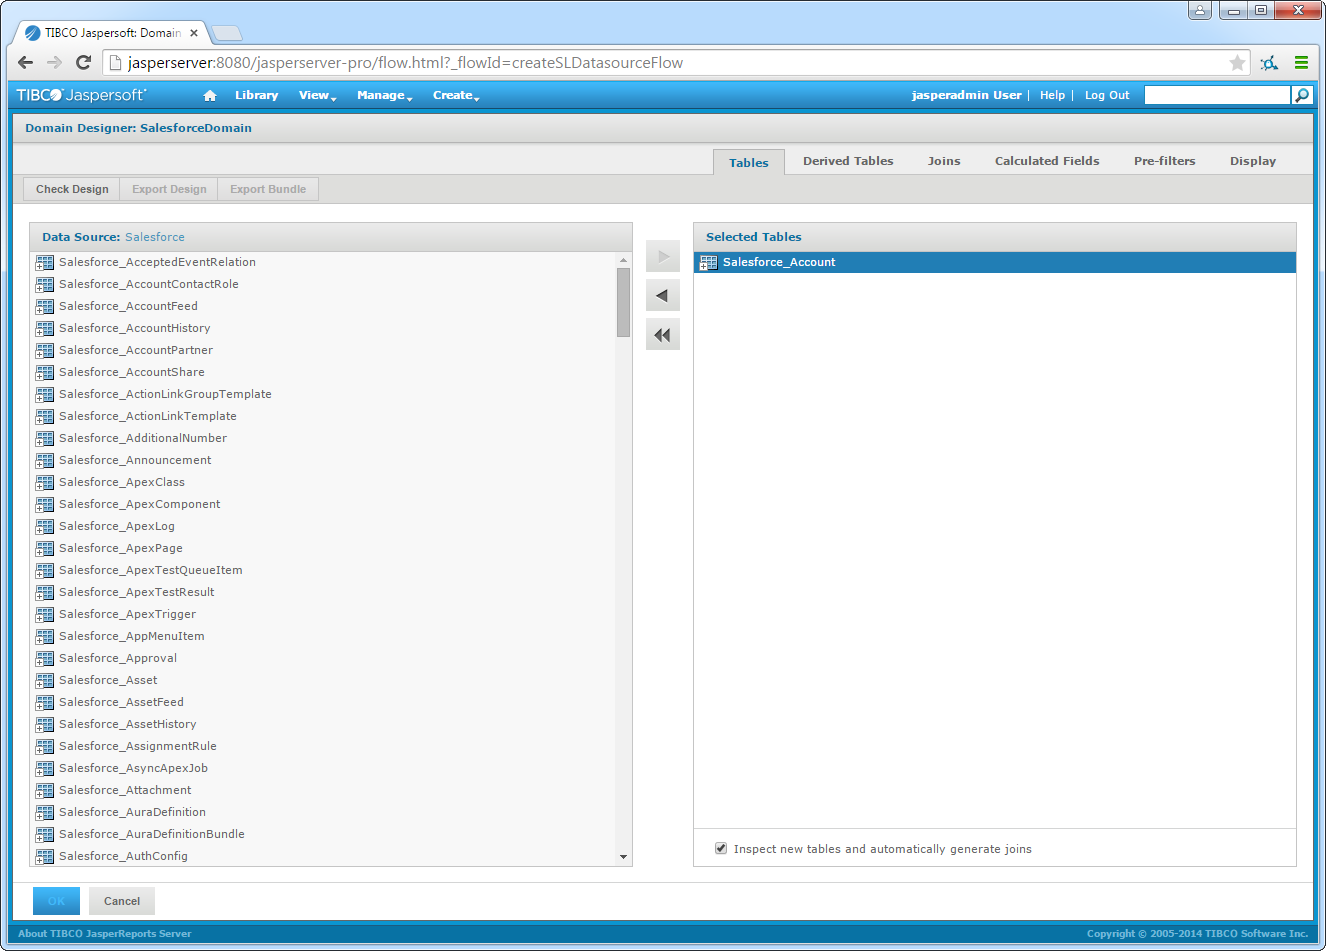
- On the Tables tab, select a table in the Data Source pane and then click the arrow to add them to the Selected Tables pane.

- On the Derived Tables tab, you can define domains based on SQL queries. For example,
SELECTKey, EtagFROMObjectsWHEREBucket ='someBucket' - On the Joins tab, you can join tables by selecting the columns you want to build the join condition and selecting the join type.
- On the Pre-Filters tab, drag and drop columns to define search criteria that filters the data exposed through the domain.
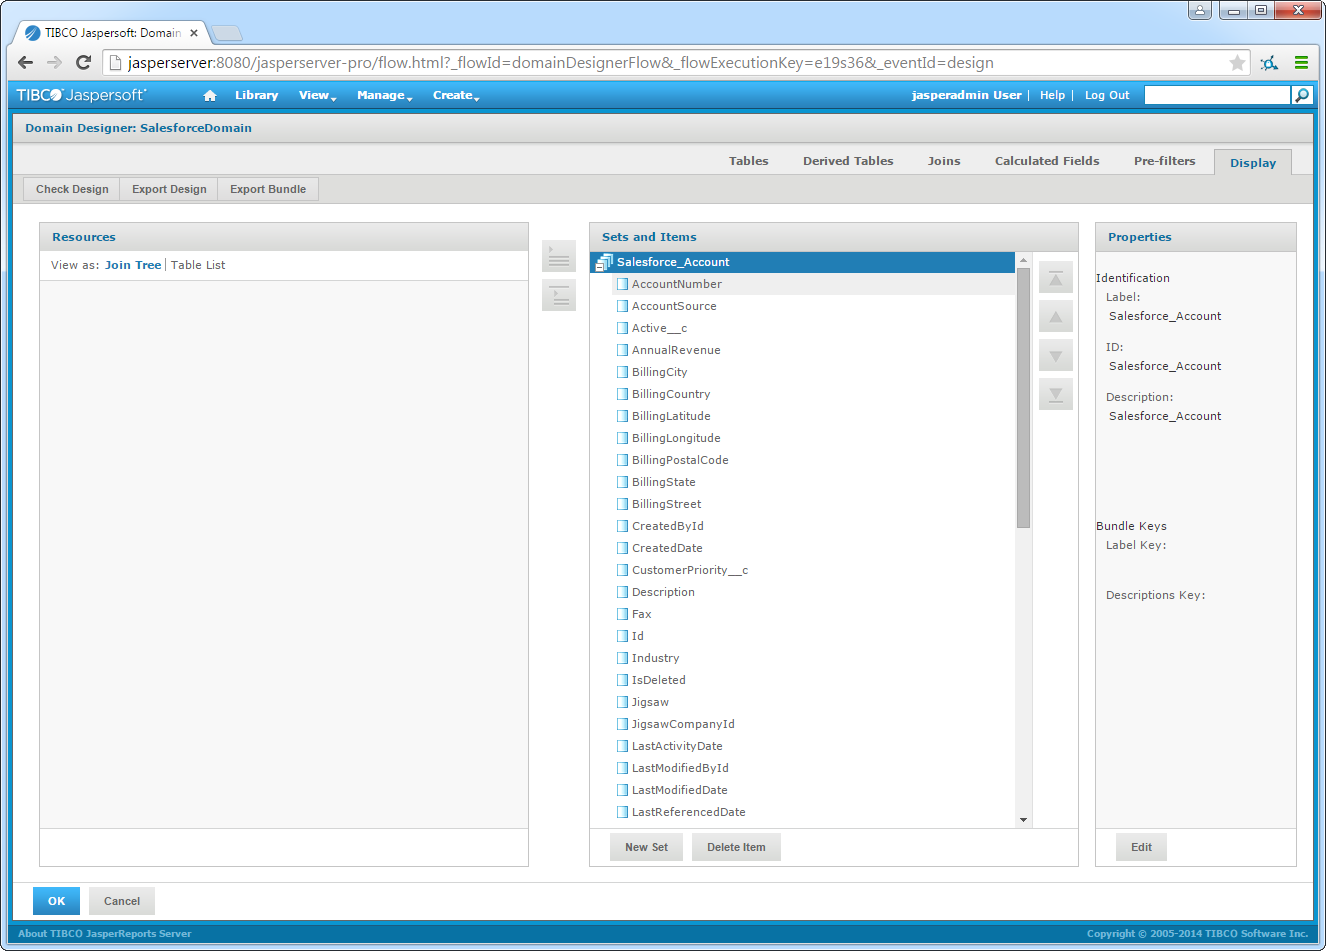
- On the Display tab, select IBM Cloud Object Storage data into the data sets presented to the user.

- Click OK to accept your changes and click Submit to create the domain.
Explore Data in Real Time
After you have created a domain, you are ready to connect to data. Follow the steps below to create an Ad Hoc View in the Ad Hoc Editor.
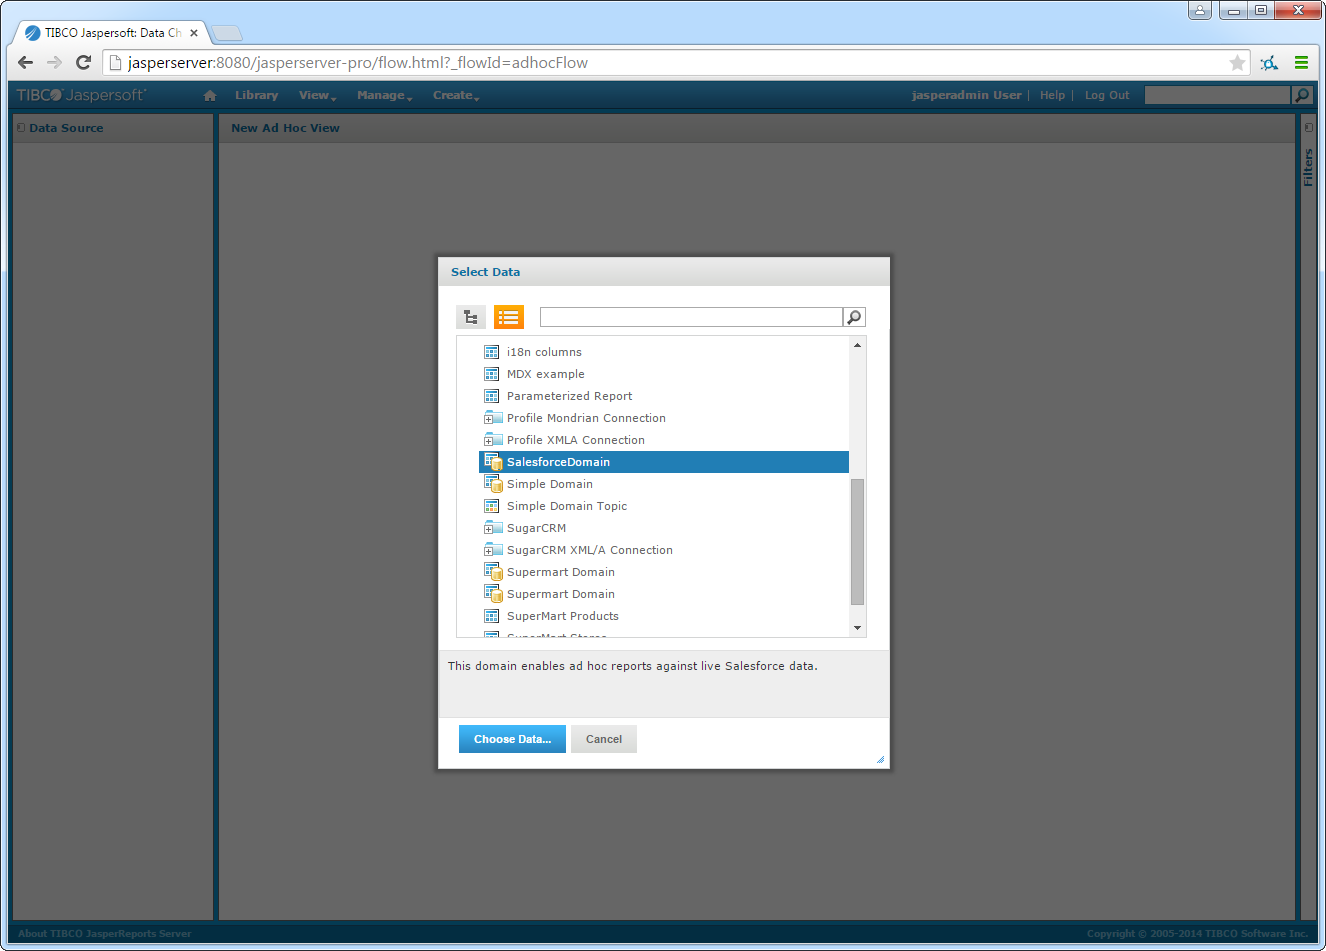
- Click Create -> Ad Hoc View.
- In the resulting dialog, select the IBM Cloud Object Storage domain you created.

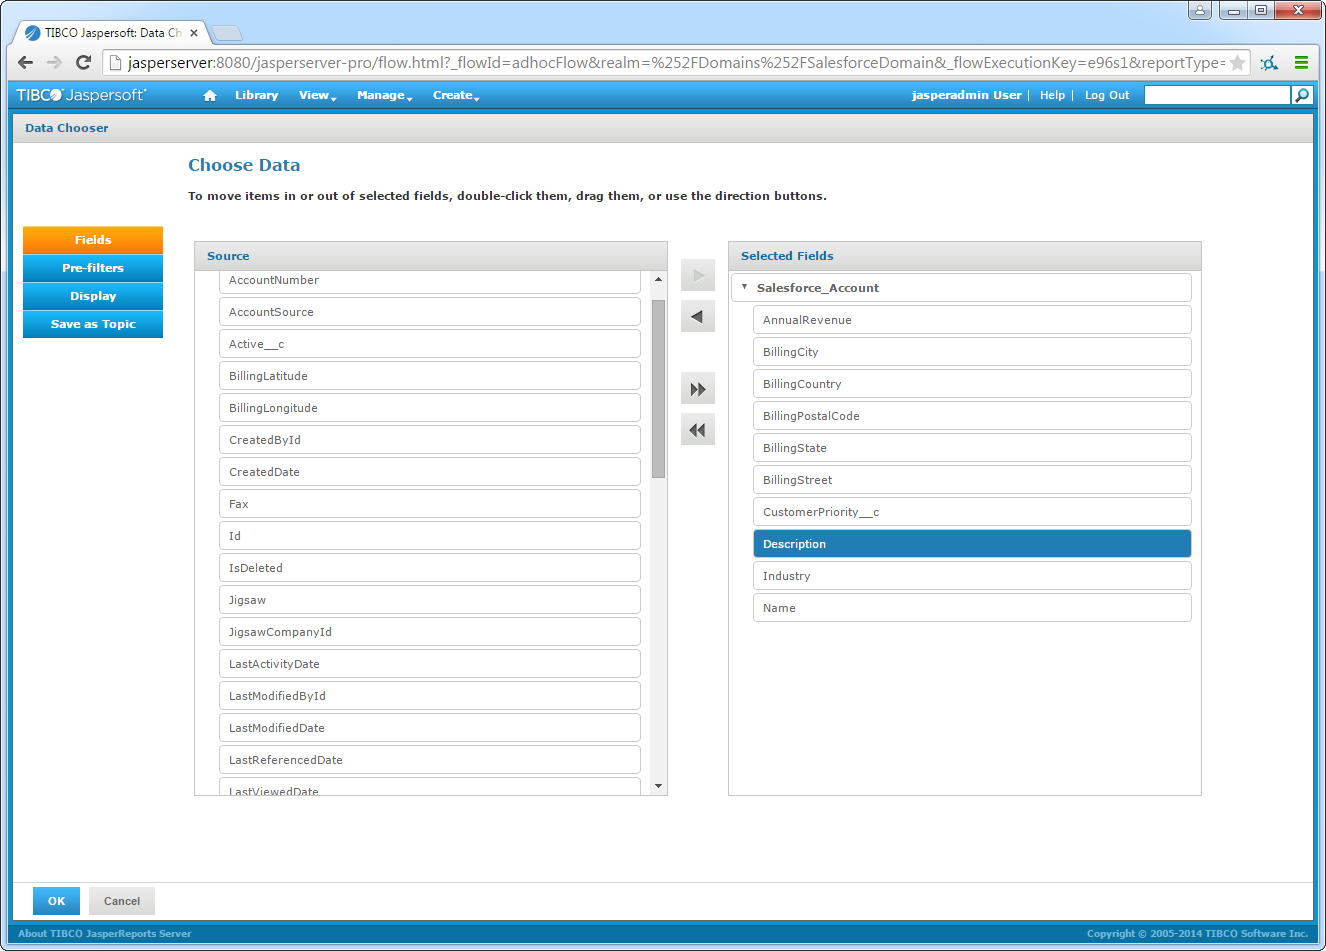
- On the Choose Data page, select columns that you want to use in the view. In the Pre-Filters section, you can create filters based on the selected fields. In the Display section, you can modify column information as presented by the domain.

- After completing the wizard, select the view type and add columns to the view. JasperSoft uses the metadata of the driver to detect the available dimensions and measures, based on the data type. Drag dimensions and measures onto the Columns and Rows boxes. Right-click a measure to change the summary calculation. Drag the Columns slider to the the desired data level in the Filters section.
- To access updates to the data as you design the view, change the menu selection from Sample Data to Full Data in the design mode toolbar. As you make changes, JasperSoft Server executes the underlying SQL queries to the driver.
- Save the view.
Create a Real-Time Report
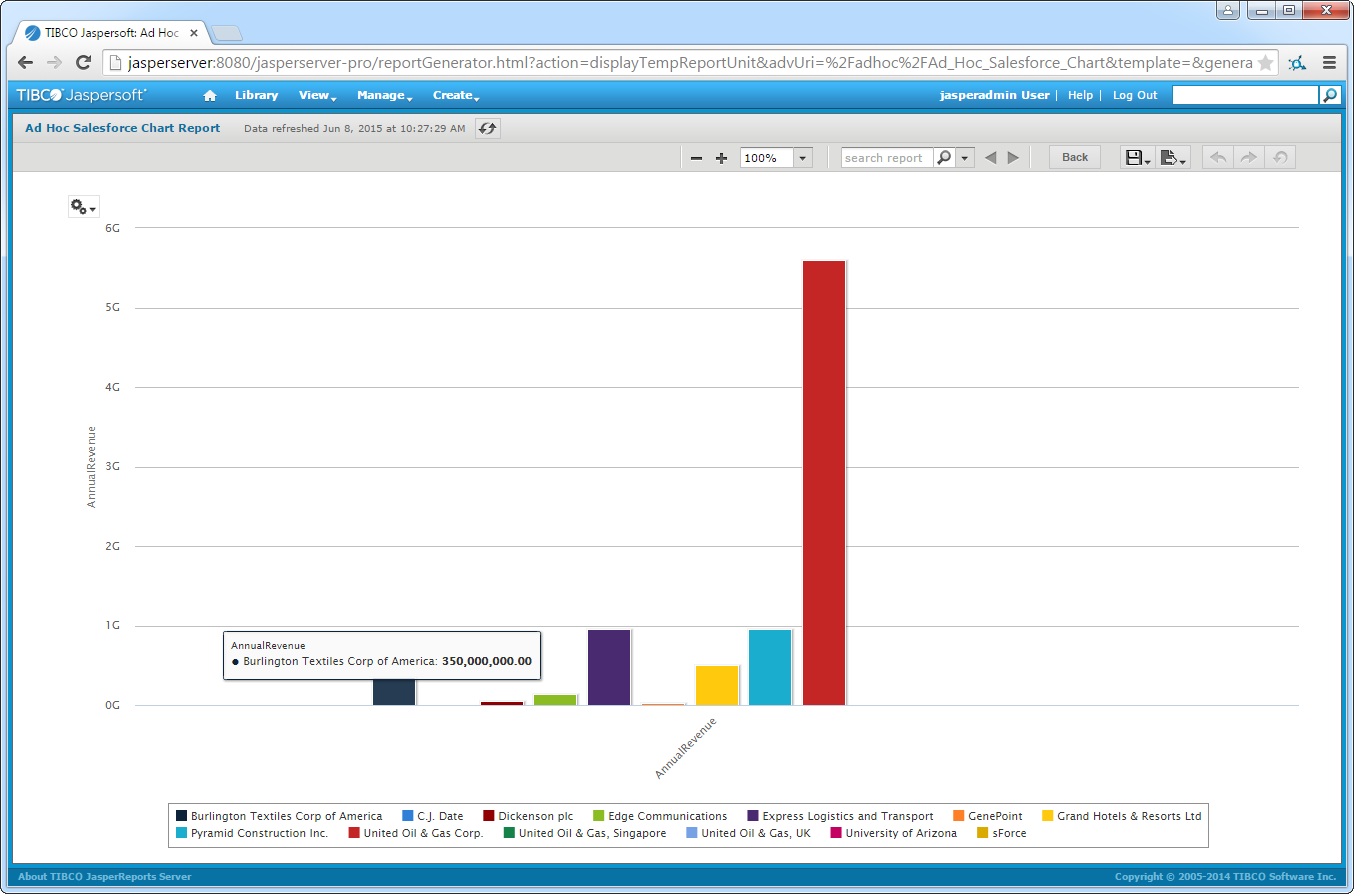
You can now create reports hosted on JasperSoft Server. To do so from the Ad Hoc Editor, click Save Ad Hoc View and click Create Report.
Features
Major Features of Jasper Reports:
1. Scriptlets may accompany the report definition, which the report definition can invoke at any point to perform additional processing. The scriptlet is built using Java, and has many hooks that can be invoked before or after stages of the report generation, such as Report, Page, Column or Group.
2. Sub-reports
3. Extensive Datasource Support
4. Flexible, Modern, and Embeddable Server Architecture
5. Centralized Reporting, Dashboards, and Data Analytics
6. Secured Data Access and Auditing
7. Ad Hoc Report and Dashboard Development
8. OLAP Analysis
AWS
Installation Instructions For Ubuntu
Note : Please use “Jasper” in the place of “stack_name”
Access the application via a browser at http://publicdns:8080
To connect to the operating system, use SSH and the username is ubuntu.
Please Click here to know how to generate password .
1.Default installation path: will be on your web root folder “/var/www/html/stack_name”
2.Default ports:
Internal Endpoints: Internal Services are normally running on below ports and Shall be NAT-ted with the Public Endpoint as required. Although we do not recommend
Any RDBMS or Nosql admin ports to be opened to Public endpoints and these are all not exposed by default externally.
- 22 – SSH
- 80/443 – Webserver
External Endpoints: For Public Endpoints, normally only below port are Opened, although this can change from stack to stack. We recommend changing SSH and RDP ports to Non Standard ports and Putting ACL to your IP.
- 8080/8443 – Webserver
- 2222 – SSH
Configure custom inbound and outbound rules using this link
Videos
How to create a simple Jasper Report in iReports using sample database


