1-click AWS Deployment 1-click Azure Deployment
Overview
PHP is a server-side scripting language designed for web development but also used as a general-purpose programming language. Originally created by Rasmus Lerdorf in 1994,the PHP reference implementation is now produced by The PHP Group. PHP originally stood for Personal Home Page,[3] but it now stands for the recursive backronym PHP: Hypertext Preprocessor.
PHP code may be embedded into HTML code, or it can be used in combination with various web template systems, web content management system and web frameworks. PHP code is usually processed by a PHP interpreter implemented as amodule in the web server or as a Common Gateway Interface (CGI) executable. The web server combines the results of the interpreted and executed PHP code, which may be any type of data, including images, with the generated web page. PHP code may also be executed with a command-line interface (CLI) and can be used to implement standalone graphical applications.
The standard PHP interpreter, powered by the Zend Engine, is free software released under the PHP License. PHP has been widely ported and can be deployed on most web servers on almost every operating system and platform, free of charge.
The PHP language evolved without a written formal specification or standard until 2014, leaving the canonical PHP interpreter as a de facto standard. Since 2014 work has gone on to create a formal PHP specification.
PHP is a server-side scripting language designed for web development but also used as a general-purpose programming language. PHP code may be embedded into HTML code, or it can be used in combination with various web template systems, web content management system and web frameworks. PHP code is usually processed by a PHP interpreter implemented as amodule in the web server or as a Common Gateway Interface (CGI) executable. The web server combines the results of the interpreted and executed PHP code, which may be any type of data, including images, with the generated web page. PHP code may also be executed with a command-line interface (CLI) and can be used to implement standalone graphical applications.
The standard PHP interpreter, powered by the Zend Engine, is free software released under the PHP License. PHP has been widely ported and can be deployed on most web servers on almost every operating system and platform, free of charge.
The PHP language evolved without a written formal specification or standard until 2014, leaving the canonical PHP interpreter as a de facto standard. Since 2014 work has gone on to create a formal PHP specification.
What You Can Do with PHP
There are lot more things you can do with PHP.
- You can generate pages and files dynamically.
- You can create, open, read, write and close files on the server.
- You can collect data from a web form such as user information, email, phone no, etc.
- You can send emails to the users of your website.
- You can send and receive cookies to track the visitor of your website.
- You can store, delete, and modify information in your database.
- You can restrict unauthorized access to your website.
- You can encrypt data for safe transmission over internet.
The list does not end here, there are many other interesting things that you can do with PHP. You will learn about all of them in detail in upcoming chapters.
Advantages of PHP over Other Languages
If you’re familiar with other server-side languages like ASP.NET or Java, you might be wondering what makes PHP so special. There are several advantages why one should choose PHP.
- Easy to learn: PHP is easy to learn and use. For beginner programmers who just started out in web development, PHP is often considered as the preferable choice of language to learn.
- Open source: PHP is an open-source project. It is developed and maintained by a worldwide community of developers who make its source code freely available to download and use.
- Portability: PHP runs on various platforms such as Microsoft Windows, Linux, Mac OS, etc. and it is compatible with almost all servers used today such Apache, IIS, etc.
- Fast Performance: Scripts written in PHP usually execute or runs faster than those written in other scripting languages like ASP, Ruby, Python, Java, etc.
- Vast Community: Since PHP is supported by the worldwide community, finding help or documentation related to PHP online is extremely easy.
Internet Information Services (IIS, formerly Internet Information Server) is an extensible web server created by Microsoft for use with Windows NT family.IIS supports HTTP, HTTPS, FTP, FTPS, SMTP and NNTP. It has been an integral part of the Windows NT family since Windows NT 4.0, though it may be absent from some editions (e.g. Windows XP Home edition), and is not active by default.
IIS is a web server that runs on the Microsoft .NET platform on the Windows OS. While it’s possible to run IIS on Linux and Macs using Mono, it’s not recommended and will likely be unstable. (There are other options, which I’ll present later). It’s versatile and stable, and it’s been widely used in production for many years. Version 10 is the most current. Once it’s installed you’ll see this welcome page in your browser. “Tervetuloa!”

IIS Architecture
IIS has two main layers – Kernel Mode and User Mode. The Kernel Mode contains the HTTP.SYS and User Mode contains WAS and W3 service. The subsection of both are shown in fig.
INSTALLING IIS
- Open the Windows PowerShell and type the below command to install IIS service with CGI extension.
Install-WindowsFeature -name web-server,web-cgi –IncludeManagementTools

- It will take few minutes to complete the installation.


- Once the installation is completed, verify the CGI feature was installed in the server using the below command.
Get-WindowsFeature web-cgi

INSTALLING PHP
- Go to the below URL to download the PHP 7.1 version.
http://windows.php.net/download/

- Extract the ZIP file to C:\program files folder.

- There will be two PHP.ini files are available in that folder. Rename the php-.ini-development to php.ini.

- Open the php.ini file Add the following line at the end of the file.
extension=php_wincache.dll

- Save and close the php.ini file.
- Right-click on the windows start menu and click on system.

- Click on Advanced system settings.

- Click on Environment Variables.

- Under System Variables, select path variable and click on Edit.

- Click on New button and add the PHP binary path.

- Click OK thrice to close the system properties window.
INSTALL WINCACHE EXTENSION
- Browse the below URL to download the Wincache extension for PHP.
https://www.iis.net/downloads/microsoft/wincache-extension

- Scroll down and download WinCache 2.0 for PHP 7.1 under download section.

Note : In this demo, we are installing PHP 7.1, so we are downloading corresponding wincache version
- Once you download, double-click on the wincache-2.0.0.8-dev-7.1-nts-vc14-x64.exe file and extract the files to a folder.


- Copy the php.wincache.dll file to C:\Program Files\php-7.1\ext folder.

CONFIGURE PHP IN IIS
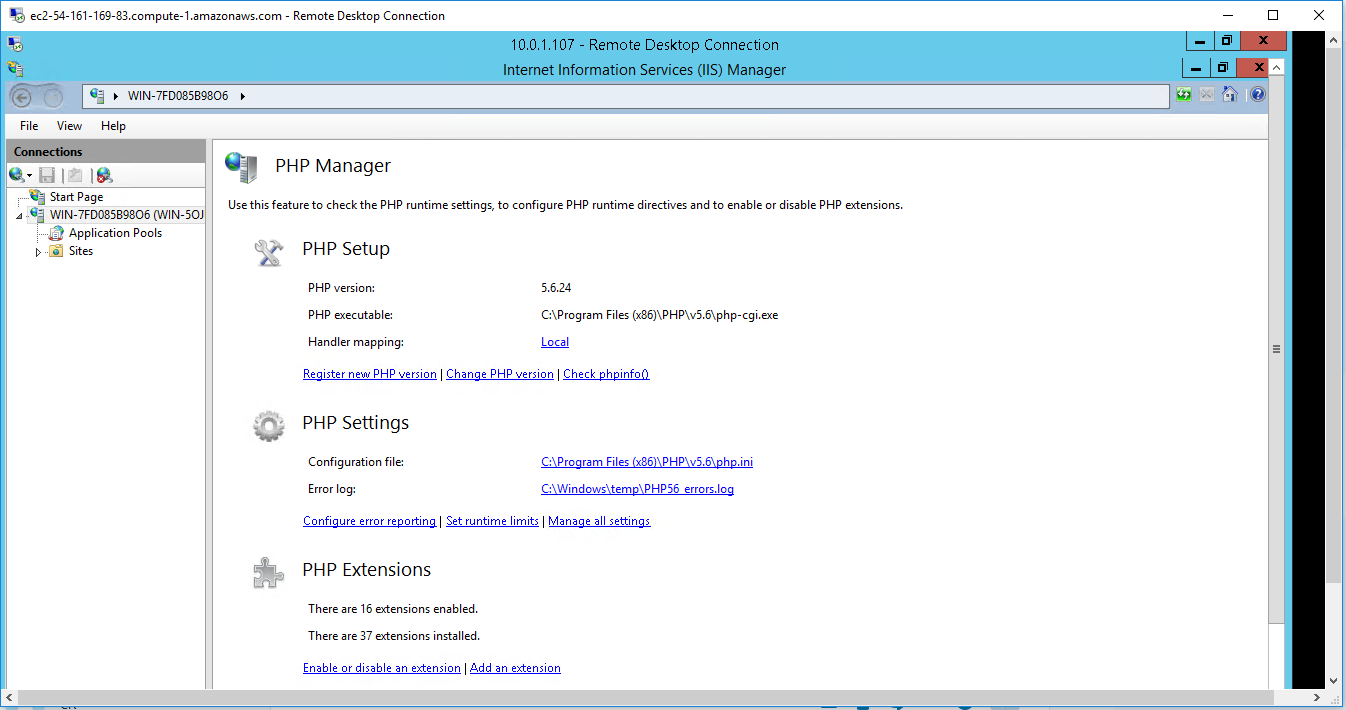
- Open IIS snap-in and click on the server name.

- Double click on Handler Mappings icon.

- Click on Add Module Mapping… under actions menu.

- Provide the below information as shown below. And click on Request Restrictions, under Mapping make sure you have select the File or Folder button.

- Click OK twice to close configuration window. Now the PHP will be listed under Handler Mappings List.

During the 2010s there have been increased efforts towards standardisation and code sharing in PHP applications by projects such as PHP-FIG in the form of PSR-initiatives as well as Composer dependency manager and the Packagist repository
Install IIS 10 on Windows 10
The first thing we’ll need to do is install IIS via the Control Panel. Once you are there, click on Programs and Features.

Next click on Turn Windows features on and off in the left-hand column.

Now scroll down until you see Internet Information Services in the list. Go ahead and click in the empty checkbox next to the title. It should turn into a small black square.

Note that having the black square instead of the checkmark just means that not all of the sub-items are being installed. For example, by default, checking IIS will not install the FTP server option. If you want to install FTP Server, you have to expand the + box and manually check it. Go ahead and click OK at this point and Windows 10 will install IIS. You shouldn’t need the DVD to install IIS.
Once it has finished, you should be able to load the default website by going to your IE and tying in //localhost. This should bring up the IIS 10 default web page.

Next, you can then go to Control Panel and click on Administrative Tools. Here you will see Internet Information Services (IIS) Manger. You’ll get the familiar IIS console screen:

On the left hand side, you can expand out the server to see the list of sites. To start, you only have the Default Web Site, which is stored under C:\inetpub\wwwroot.

To setup a new website in IIS 10, right-click on Sites and choose Add Website.

Give your site a name and browse to the physical path where the web files are stored.

In the Binding section, you can specify what IP address the website should be listening on and which port. You can also specify a host name if your computer has a static public IP address with DNS records for the domain name pointing to that IP address. In this post, I won’t go into how to access your website from outside your local network.
Click OK and you’ll get a warning about how another site is already using the same settings and therefore it will conflict. That’s because the default website is also set to All Unassigned for the IP address and port 80. I just stopped the default website and started my test website. You can stop a website by selecting it in the left-hand pane and then clicking Stop in the far-right pane. Then when I visited //localhost again, my new index.html file came up:

That’s it, now you can start playing around with the settings to configure your website. A good place to start is the Microsoft Web Platform Installer, which is a tool that quickly sets you up with all the different Microsoft web components like SQL Server Express, .NET Framework, Visual Web Developer, and lots more. Also, check out the IIS.net home page to learn more about managing IIS. Enjoy!
How to Install PHP on Windows
The PHP Installer
Although an installer is available from php.net, I would recommend the manual installation if you already have a web server configured and running.
Manual Installation
Manual installation offers several benefits:
- backing up, reinstalling, or moving the web server can be achieved in seconds (see 8 Tips for Surviving PC Failure) and
- you have more control over PHP and Apache configuration.
Step 1: Download the files
Download the latest PHP 5 ZIP package from www.php.net/downloads.php
As always, virus scan the file and check its MD5 checksum using a tool such as fsum.
Step 2: Extract the files
We will install the PHP files to C:\php, so create that folder and extract the contents of the ZIP file into it.
PHP can be installed anywhere on your system, but you will need to change the paths referenced in the following steps.
Step 3: Configure php.ini
Copy C:\php\php.ini-development to C:\php\php.ini. There are several lines you will need to change in a text editor (use search to find the current setting). Where applicable, you will need to remove the leading semicolon to uncomment these setting.
Define the extension directory:
extension_dir = "C:/php/ext"Enable extensions. This will depend on the libraries you want to use, but the following extensions should be suitable for the majority of applications:
extension=curl
extension=gd2
extension=mbstring
extension=mysql
extension=pdo_mysql
extension=xmlrpc
If you want to send emails using the PHP mail() function, enter the details of an SMTP server (your ISP’s server should be suitable):
[mail function]
; For Win32 only.
SMTP = mail.myisp.com
smtp_port = 25

; For Win32 only.
sendmail_from = my@emailaddress.com
Step 4: Add C:\php to the path environment variable
To ensure Windows can find PHP, you need to change the path environment variable. Open Settings, type ‘environment variables’ into the search field and open the result. Select the “Advanced” tab, and click the “Environment Variables” button.
Scroll down the System variables list and click on “Path” followed by the “Edit” button. Click “Edit text” and add ;C:\php to the end of the Variable value line (remember the semicolon).

Now click OK until you’re out. You might need to reboot at this stage.
Step 5: Configure PHP as an Apache module
Ensure Apache is not running (use net stop Apache2.2 from the command line) and open its confhttpd.conf configuration file in an editor. The following lines should be changed:
On line 239, add index.php as a default file name:
DirectoryIndex index.php index.html
At the bottom of the file, add the following lines (change the PHP file locations if necessary):
# PHP5 module
LoadModule php5_module "c:/php/php5apache2_2.dll"
AddType application/x-httpd-php .php
PHPIniDir "C:/php"
Save the configuration file and test it from the command line (Start > Run > cmd):
cd Apache2bin
httpd -t
Step 6: Test a PHP file
Create a file named index.php in Apache’s web page root (either htdocs or D:WebPages) and add this code:
<?php phpinfo(); ?>Features
Major Features of PHP
- HTTP authentication with PHP
- Cookies
- Sessions
- Dealing with XForms
- Handling file uploads
- POST method uploads
- Error Messages Explained
- Common Pitfalls
- Uploading multiple files
- PUT method support
- Using remote files
- Connection handling
- Persistent Database Connections
- Safe Mode
- Security and Safe Mode
- Functions restricted/disabled by safe mode
- Command line usage — Using PHP from the command line
- Introduction
- Differences to other SAPIs
- Options — Command line options
- Usage — Executing PHP files
- I/O streams — Input/output streams
- Interactive shell
- Built-in web server
- INI settings
- Garbage Collection
- Reference Counting Basics
- Collecting Cycles
- Performance Considerations
- DTrace Dynamic Tracing
- Introduction to PHP and DTrace
- Using PHP and DTrace
- Using SystemTap with PHP DTrace Static Probes
- Improved performance− Having PHPNG code merged in PHP7, it is twice as fast as PHP 5.
-
-
- Lower Memory Consumption− Optimized PHP 7 utilizes lesser resource.
- Scalar type declarations− Now parameter and return types can be enforced.
- Consistent 64-bit support− Consistent support for 64-bit architecture machines.
- Improved Exception hierarchy− Exception hierarchy is improved.
- Many fatal errors converted to Exceptions− Range of exceptions is increased covering many fatal error converted as exceptions.
- Secure random number generator− Addition of new secure random number generator API.
- Deprecated SAPIs and extensions removed− Various old and unsupported SAPIs and extensions are removed from the latest version.
- The null coalescing operator (??)− New null coalescing operator added.
- Return and Scalar Type Declarations− Support for return type and parameter type added.
- Anonymous Classes− Support for anonymous added.
- Zero cost asserts− Support for zero cost assert added.
PHP 7 uses new Zend Engine 3.0 to improve application performance almost twice and 50% better memory consumption than PHP 5.6. It allows to serve more concurrent users without requiring any additional hardware. PHP 7 is designed and refactored considering today’s workloads.
Heightened Features In IIS
1) FTP Logon Attempt Restrictions
This module ensures the security and manageability. Due to this feature you can now use greylisting and access patterns enabling you to smoothly and dynamically manage access for number of sites to the internet and FTP servers.
2) Improved CPU Throttling
In IIS8 there are kernel level changes to support real CPU throttling. There are two actions possible for sites that reach the CPU threshold. These are:
1. Throttle
2. Throttle Under Load
Throttling is based on the user and not specifically on the application pool. The throttle feature will keep the CPU for a particular worker process at the specified level.
Throttle under load will allow a site to use all possible CPU, while throttling the worker process if the server is under load. If you used WSRM (Windows System Resource Manager) in the past, you no longer need to do so.
3) Application Initialization Module
Priorly known as the application warm-up module which was used for a time, and now it is completely ready as Application Initialization Module. This allows loading sites and pages before the traffic arrives and handling of requests in a friendly and more smoother way while the application first loads. It is possible to set up home page or use URL rewrites.
4) SSL Scalability
In previous versions of IIS each SSL (Secure Socket Layer) site required its own IP address, and since each certificate was loaded into the memory on the first visit to an SSL site, startup performance can be slow. In IIS8 the SSL certificate is easily scalable to thousands of secure sites per system because only the certificate that is needed is loaded. Additionally, also loading of large numbers of certificates is essentially improved.
5) SNI / SSL Host Header Support
Using host headers and a shared IP address with SSL certificate has always been ambiguous. IIS8 now offers Server Name Indication (SNI) support through which many SSL sites can share the same IP. SNI is a pretty new feature which allows host headers to work with SSL. The most recent browsers are supporting SNI.
6) Use ASP.NET 3.5 And 4.5
IIS 8.0 on Windows Server 2012 runs ASP.NET applications on all .NET Framework versions supported on Windows Server 2012. This means ASP.NET applications can run on IIS 8.0 using either .NET Framework 3.5, or .NET Framework 4.5. IIS 8.0 hosts versions of the .NET Framework in different application pools, thus allowing multiple ASP.NET applications with different .NET Framework versions to run simultaneously on Windows Server 2012.
7) Web Sockets
Allows you to build more interactive and powerful web applications because of a continuous and bidirectional communication between the web browser and the web server. Web Sockets require Windows Server 2012 or higher versions.
8) Dynamic IP Restriction (DIPR)
With DIPR we can Customize IIS reply like Unauthorized (HTTP 401), Forbidden (HTTP 403), Not Found (HTTP 404), or Abort (IIS terminates the HTTP connection). Also we can allow or deny specific IP address or a range of IP addresses, even if they violate a dynamic restriction setting. We can block dynamic IP addresses based on the number of concurrent requests or the number of requests over a period of time.Finally it is a very useful feature for web servers behind firewall, because of the proxy mode property that enables IIS to cross checks the values in the X-Forwarded-For HTTP header. So it can verify the IP address of the client who initially made the request.
9) Multicore Scaling On NUMA Hardware
Internet Information Services (IIS) on Windows Server 2012 supports Multicore Scalling on NUMA hardware and provides the optimal configuration for the IT administrators. Following options describes the different configuration options to achieve the best performance with IIS 8.0 on NUMA hardware.IIS supports following two ways of partitioning the workload:
I. Run Multiple Worker Processes In One Application Pool
If you are using this mode, by default, the application pool is configured to run one worker process. For maximum performance, you should consider running the same number of worker processes as there are NUMA nodes, so that there is 1:1 affinity between the worker processes and NUMA nodes. This can be done by setting “Maximum Worker Processes” AppPool setting to 0. Due to this setting, IIS determines how many NUMA nodes are available on the hardware and starts the same number of worker processes.
II. Run Multiple Applications Pools In Single Workload/Site
In this configuration, the workload/site is divided into multiple application pools. For example, the site may contain several applications that are configured to run in separate application pools. Effectively, this configuration results in running multiple IIS worker processes for the workload/site and IIS intelligently distributes the processes for maximum performance
-
AWS
Installation Instructions for Windows
Note: How to find PublicDNS in AWS
Step 1) RDP Connection: To connect to the deployed instance, Please follow Instructions to Connect to Windows instance on AWS Cloud
1) Connect to the virtual machine using following RDP credentials:
- Hostname: PublicDNS / IP of machine
- Port : 3389
Username: To connect to the operating system, use RDP and the username is Administrator.
Password: Please Click here to know how to get password .
Step 2) Choose Start, expand All Programs, and then select PHP
Step 3) Other Information:
1.Default installation path: will be in your root folder “C:\inetpub\wwwroot”
2.Default ports:
- Windows Machines: RDP Port – 3389
- Http: 80
- Https: 443
Configure custom inbound and outbound rules using this link
AWS Step by Step Screenshots

Product Overview
azure
Videos
How to install and configure php on iis 2008 R2
Embedded media removed during static cleanup.
How to install and configure PHP Website on IIS 8 in Windows 2012
Embedded media removed during static cleanup.
