Overview
HeidiSQL is a useful and reliable tool designed for web developers using the popular MySQL server, Microsoft SQL databases and PostgreSQL. It enables you to browse and edit data, create and edit tables, views, procedures, triggers and scheduled events.
HeidiSQL is an all-in-one tool for database management, development, and administration. You may use HeidiSQL to remotely connect to a database created here on Hostinger. While our web hosting plans offer phpMyadmin to help with database management, HeidiSQL is the preferred choice for many developers. Using it can greatly speed up development. The remote MySQL connection made via your local machine will let you apply new updates and changes quicker, thus saving you the trip to the web hosting control panel.
How to Use HeidiSQL to Connect to a MySQL Database:
HeidiSQL client should be already installed on your local machine. So following are the steps to access a MySQL database created on Hostinger:
1)Allowing a Remote MySQL connection from your IP address
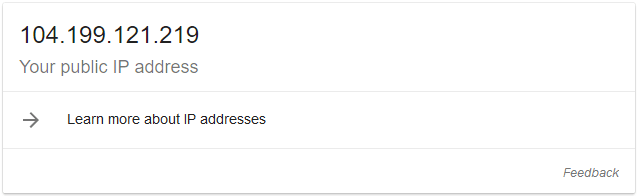
Firstly, locate your IP address using any online tool. One way to get it is by typing what is my IP in Google search engine. Here’s an example:
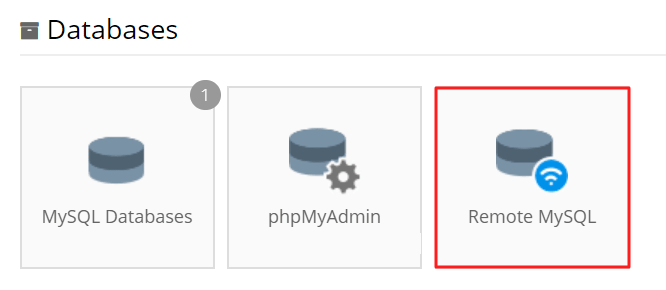
Next, navigate to Remote MySQL section in your web hosting control panel.
You will need to add your public IP there to allow the remote database connection. In this section, you’ll also find the remote MySQL hostname, which we will need later.
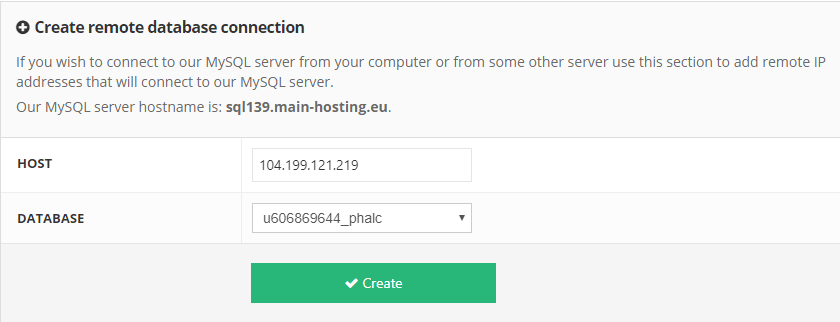
Host – enter your public IP address.
Database – select the MySQL database that you will connect to.
Once everything is filled in, press Create and you will see a confirmation message.

After that, the remote database access will work in a few seconds.
2 – Gathering MySQL database details
Secondly, you will need the database information. You can get the required credentials in MySQL Databases section in the control panel.
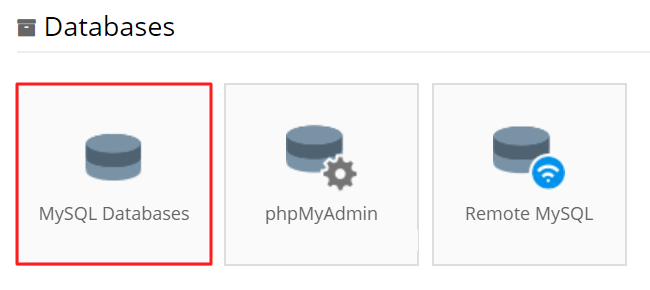
Since we already located the remote MySQL hostname in the previous step, we will only need the database name and user.

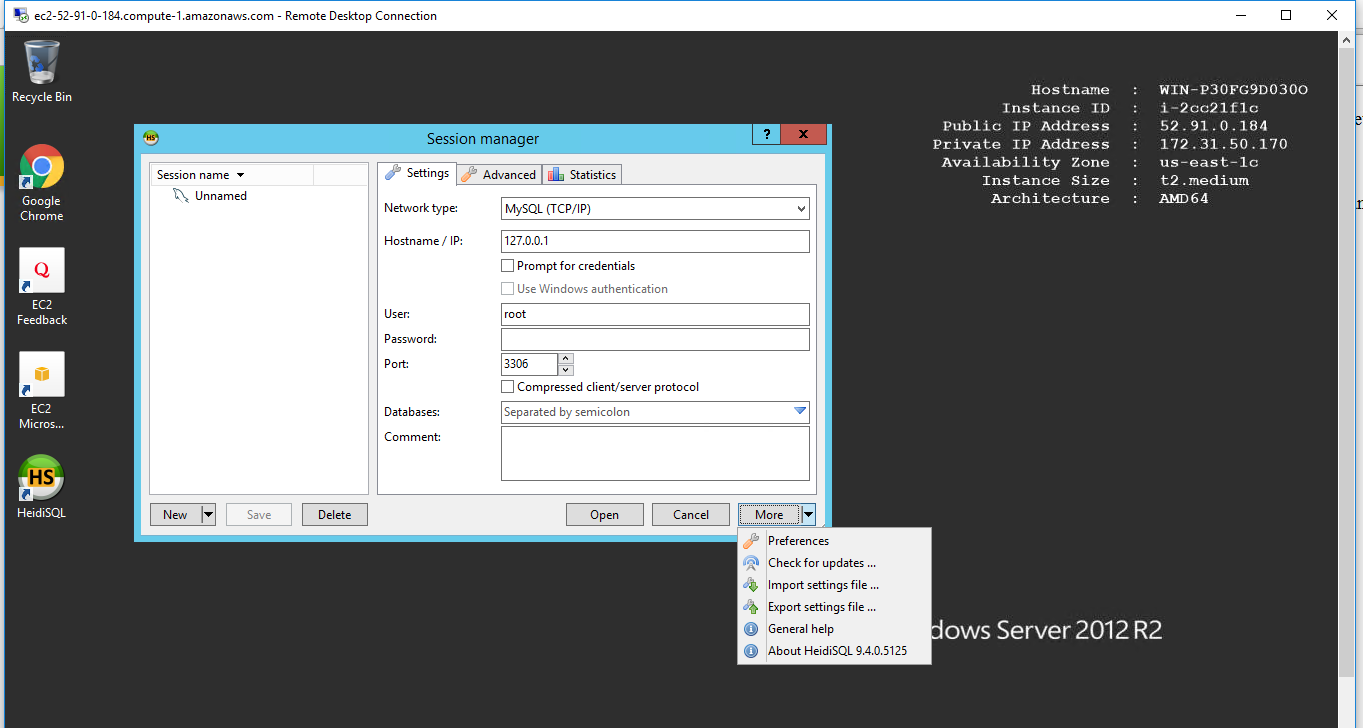
3 – Configuring HeidiSQL client
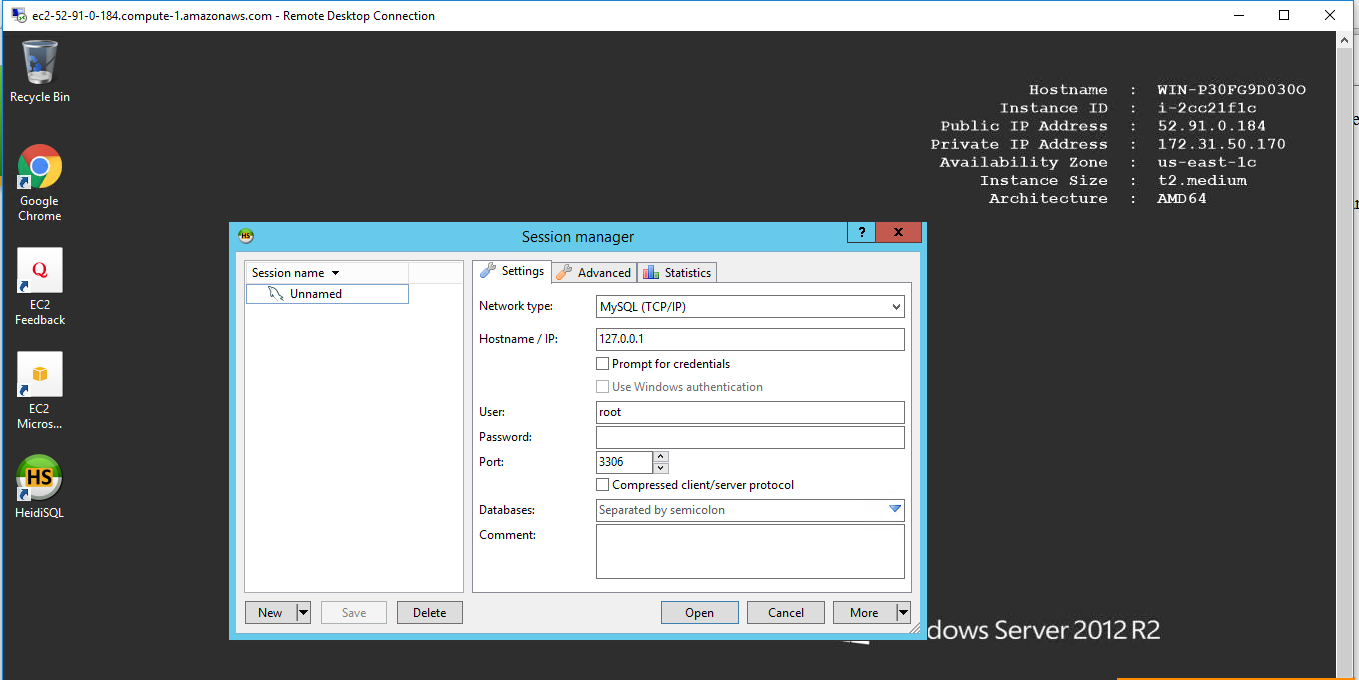
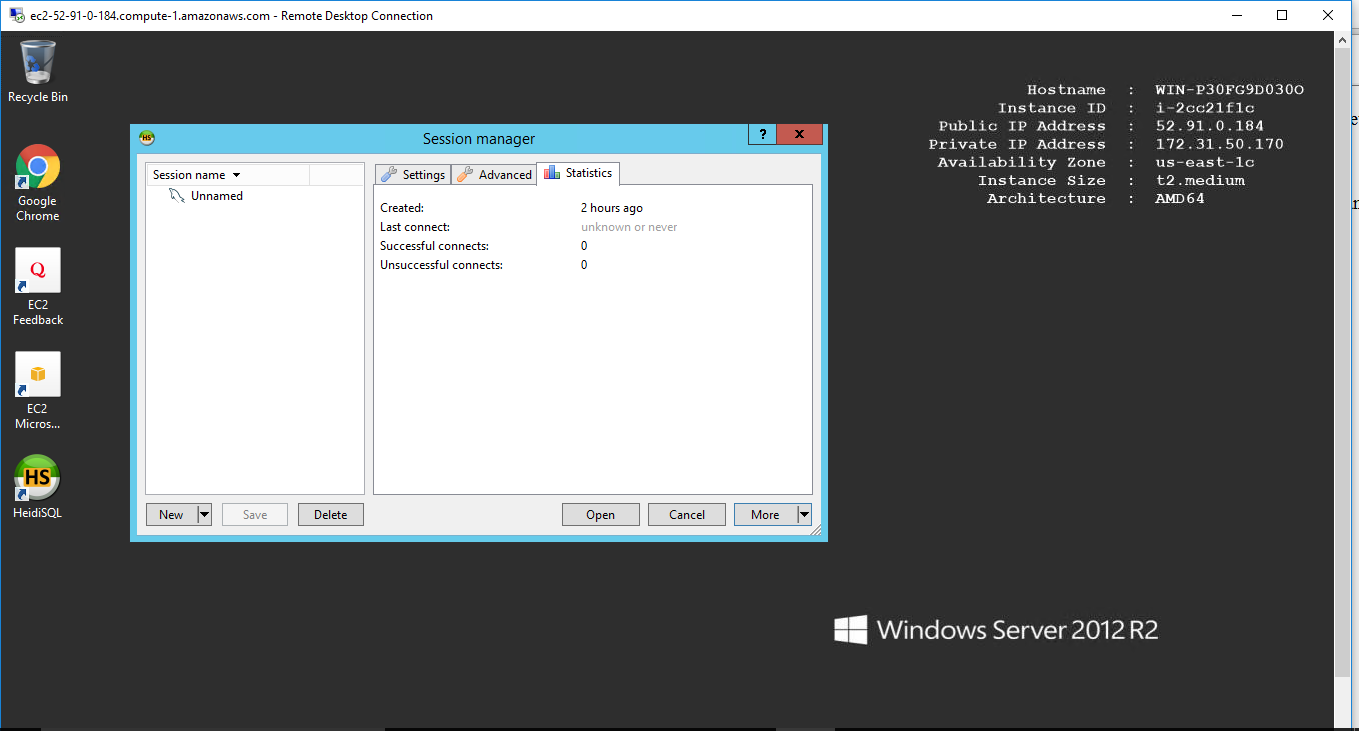
Open the database client and press New to create an entry.

Then, you will need to name the entry and fill in the MySQL database configuration.

Make sure to complete the following fields:
Network Type – set it to MySQL (TCP/IP).
Hostname / IP – enter the remote MySQL hostname located in step 1 of this tutorial.
User – Enter the MySQL database user located in step 2.
Password – Fill in the user password.
Port – The default MySQL port for local and remote connections is 3306.
Databases – Input the MySQL database name found in step 2.
Once done, press the Open button and you’ll be inside your database.
You can now access your databases remotely using a HeidiSQL client.
Basic help on using HeidiSQL
Connecting to a server
Basics
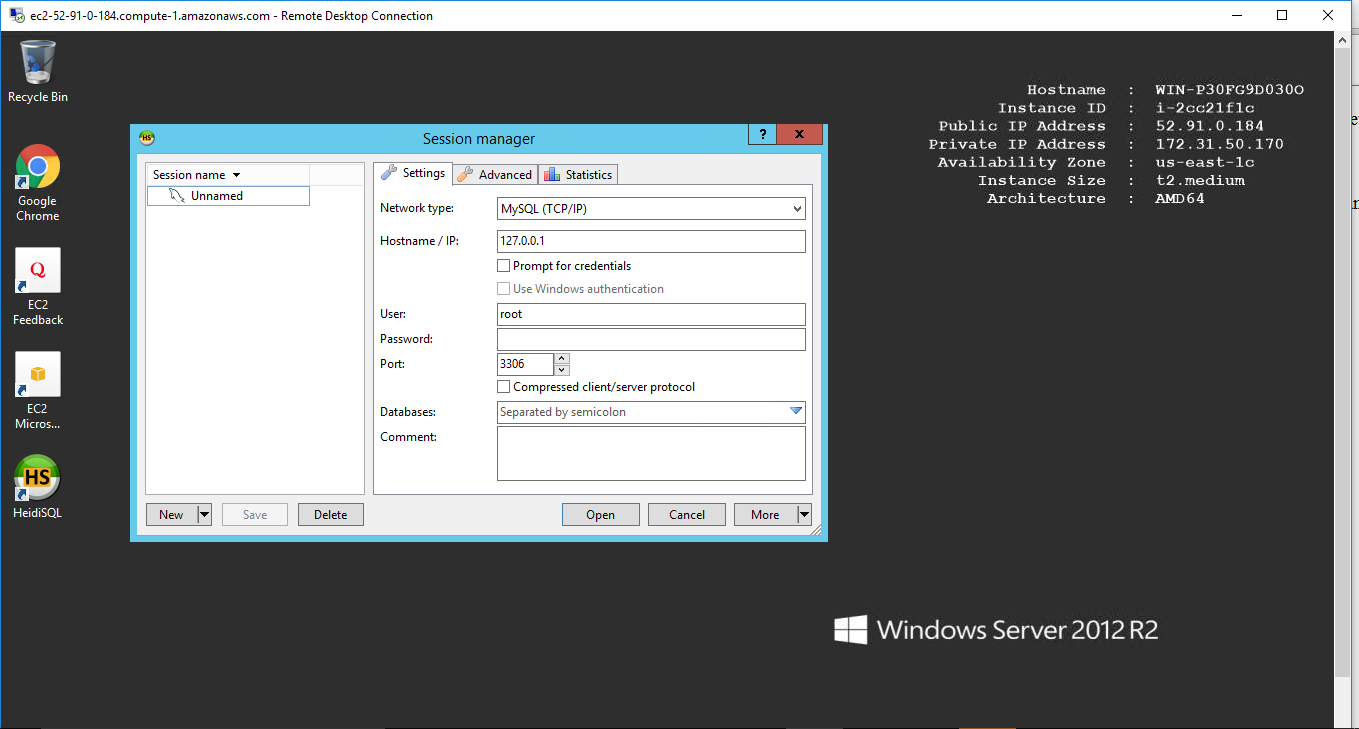
HeidiSQL is a so called client application, only usable when you have some server available. So, make sure you have some MariaDB, MySQL, MS SQL or PostgreSQL server to connect to.
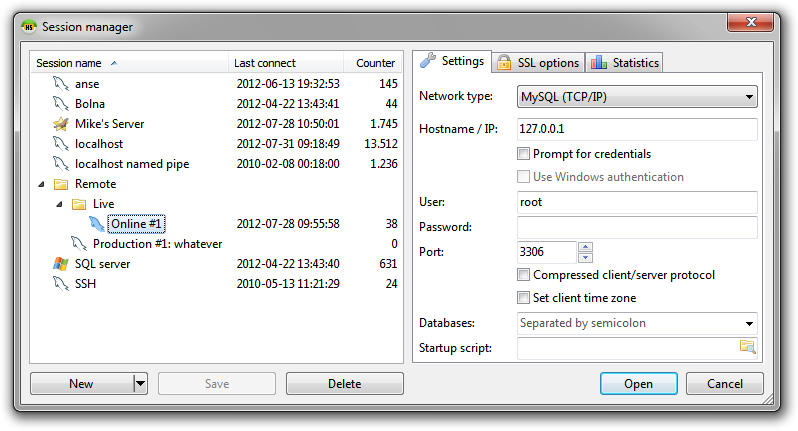
A simple setup is to have a MariaDB server installed on localhost (equivalent to the special IP address 127.0.0.1). In HeidiSQL’s session manager, you click on the “New” button to create a new connection, and most default settings are already set for you, except from the password, which is mostly not an empty one on a newly installed MariaDB server:
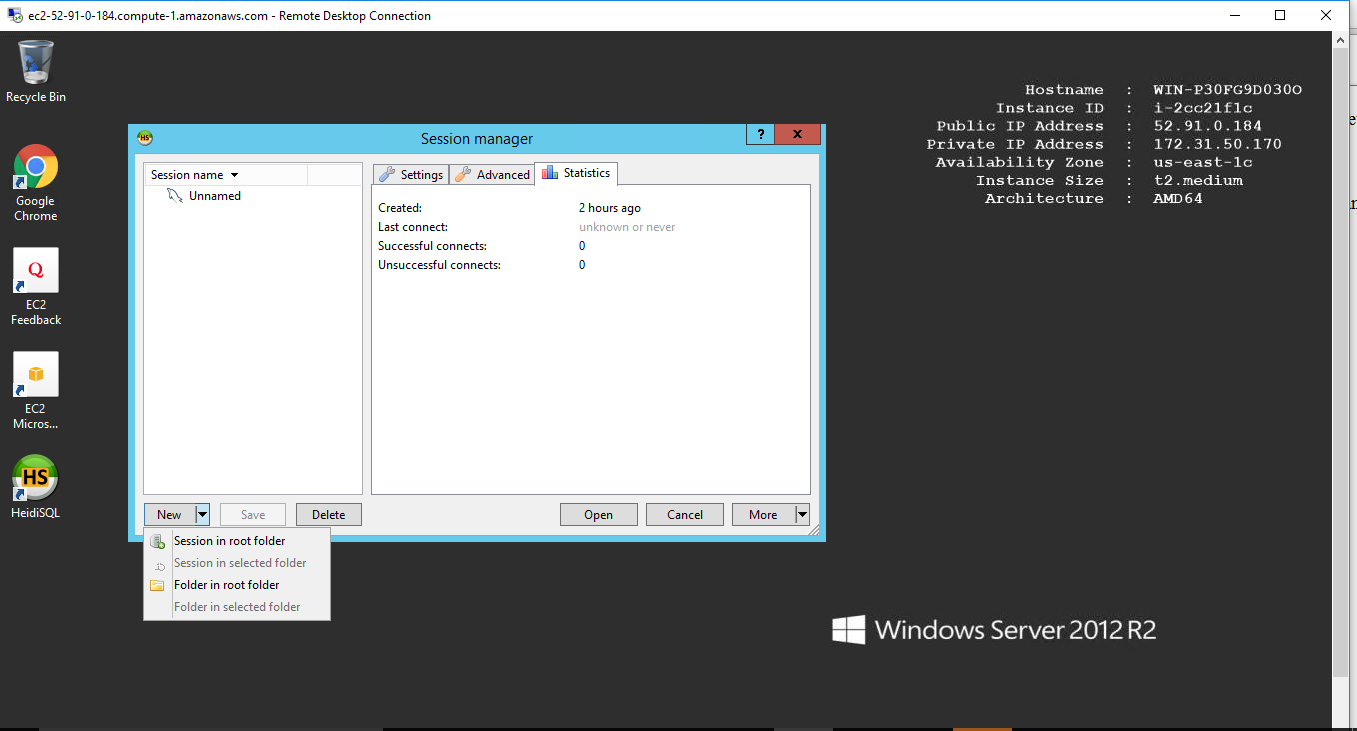
You can organize your stored sessions in folders. To create a folder, click the dropdown arrow on the “New” button, then click “Folder in root folder” or “Folder in selected folder”. Once you have a folder, you can create connections in it, or drag existing connections into that folder.
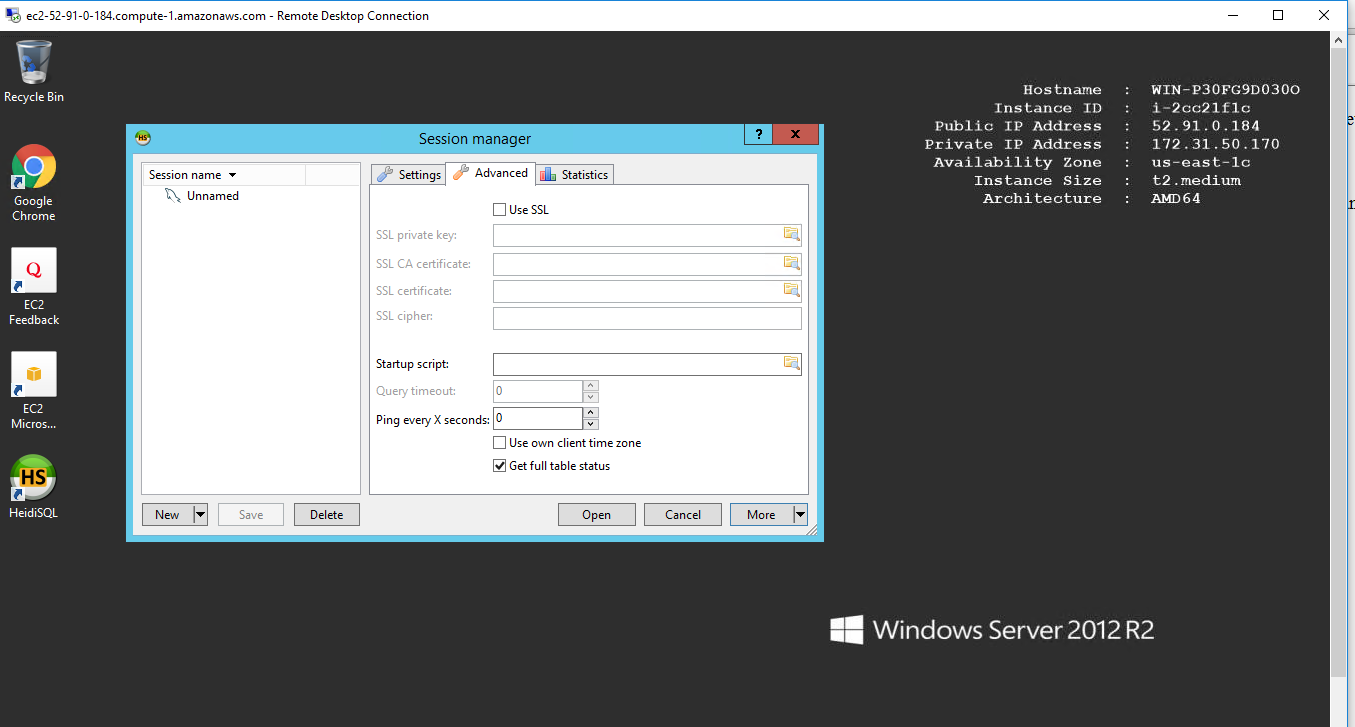
Setting up a SSH tunnel connection to MariaDB/MySQL
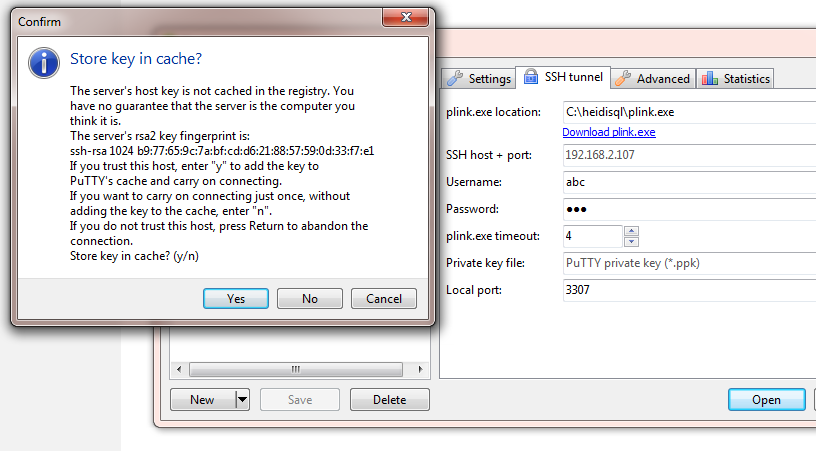
If your MariaDB/MySQL server is located on a remote machine which is only accessible via SSH, then you still can use HeidiSQL to connect to it. You just need the additional plink.exe from the PuTTY project, place it somewhere on your harddisk, and finally tell HeidiSQL where it is and the SSH credentials plus the MariaDB/MySQL credentials.
Note that the default host name for the SSH server is the one you entered in the “Settings” tab. HeidiSQL then advices plink.exe to connect to that host name, or, when you entered a SSH host name, that one is taken. Additionally, the host name on the “Settings” tab is always taken for the -L (listen) option in plink.exe.
The database tree
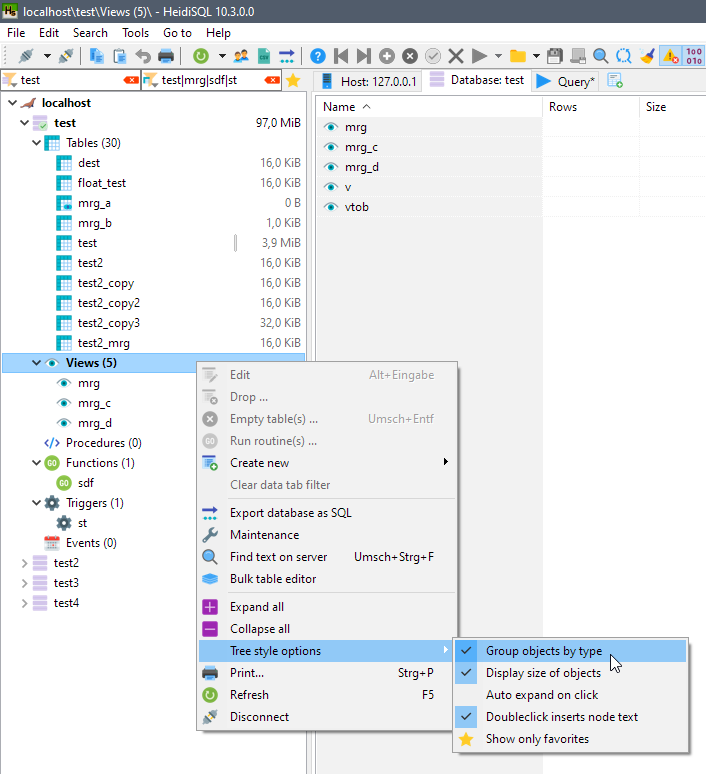
When you have a large amount of tables, views or whatever in your database(s), you probably want to group these by their type, for a better overview. Just right click the tree and activate Tree style options > Group objects by type:
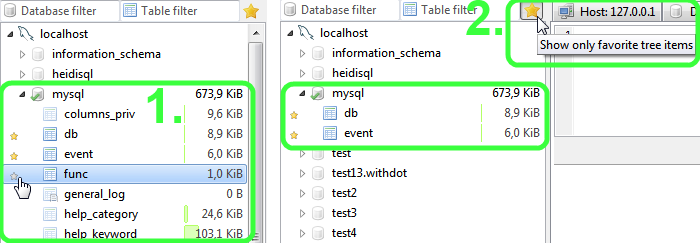
You can also mark important items as so called favorites, by mouse click on the very left area of a table. Afterwards, you can limit the tree to show only favorites by a click on the new “Show only favorites” button at the top:
Creating a table
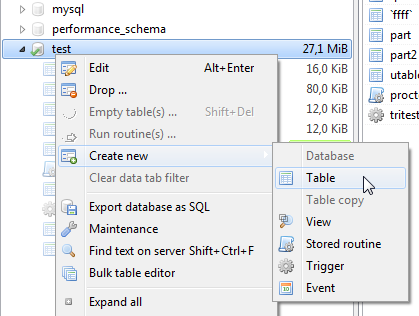
HeidiSQL comes with a feature-rich GUI for creating and editing a table structure. Just right click the datatabase in which you want to create a table, then point on “Create new”, then click “Table”:
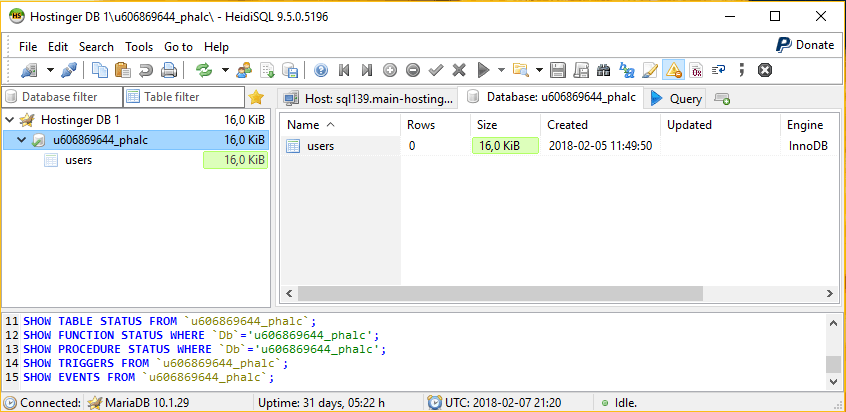
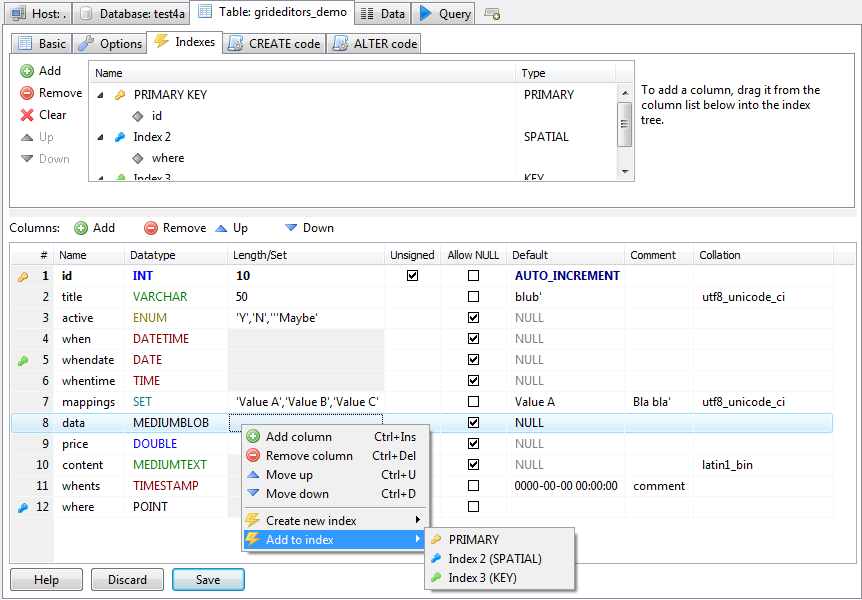
Done that, you’ll see the table editor like in the following picture:
Creating a view
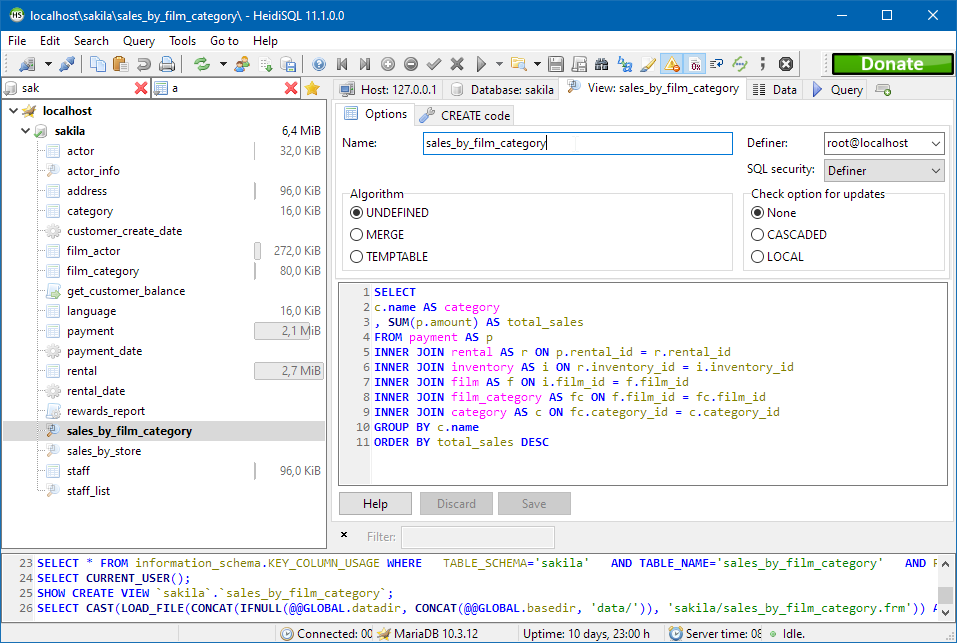
Creating a stored procedure
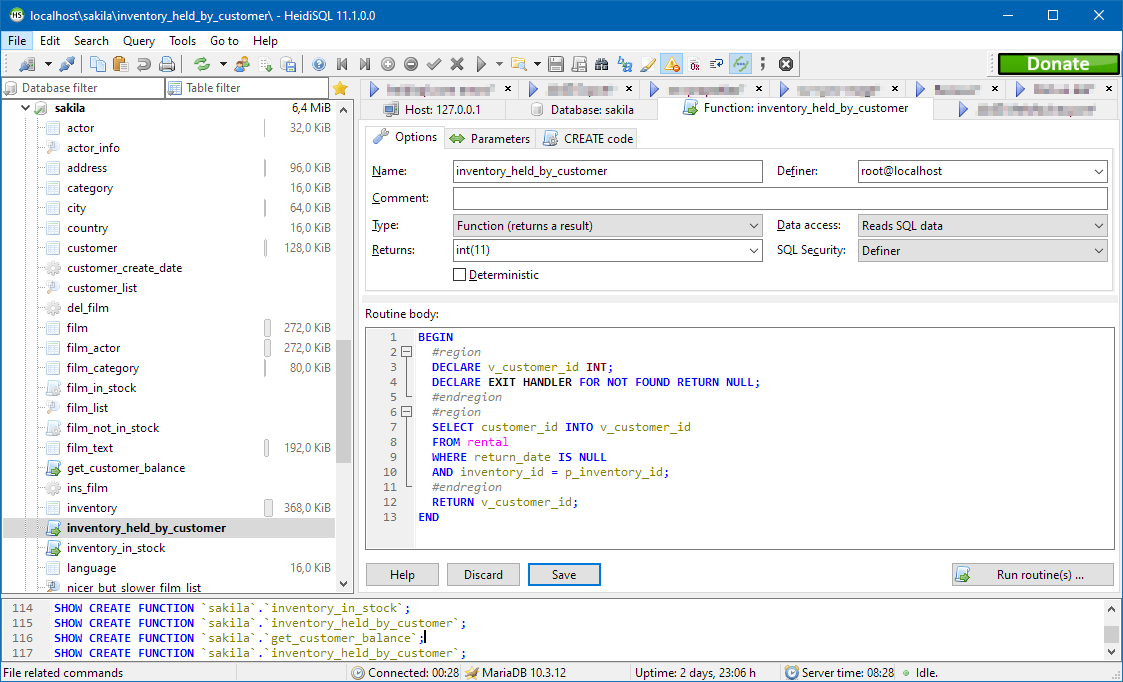
Just right click the datatabase in which you want to create a procedure, then point on “Create new”, then click “Procedure” or “Function”. Done that, you’ll see the procedure editor like in the following picture:
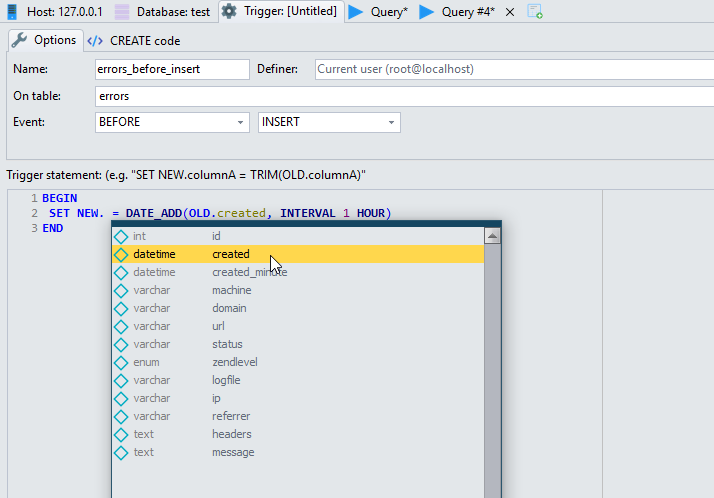
Creating a trigger
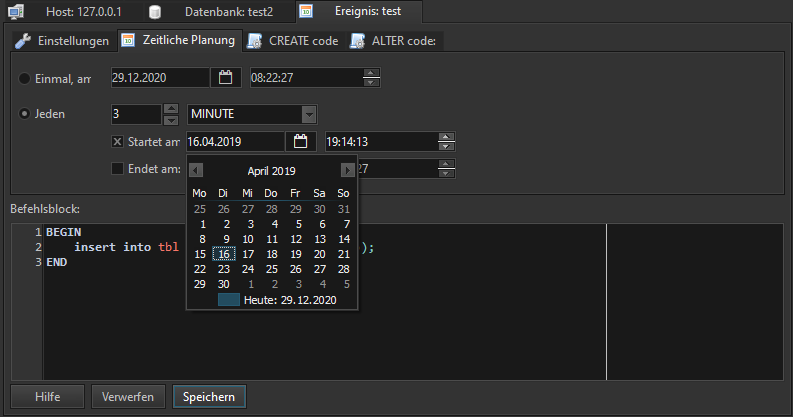
Creating a scheduled event
The Data tab
On the data tab, the contents of the currently selected table or view are displayed. This is one of the most useful and powerful features of HeidiSQL. You will see different colors for the various groups of data types. These colors are customizable in Tools > Preferences > Data appearance.
Pressing F2 or one-long-click in a grid cell will start the editor mode. This will allow you inserting ordinary values into a row. For inserting special values, such as SQL functions, NULL or GUIDs, right click a cell, and point to the Insert value > submenu.
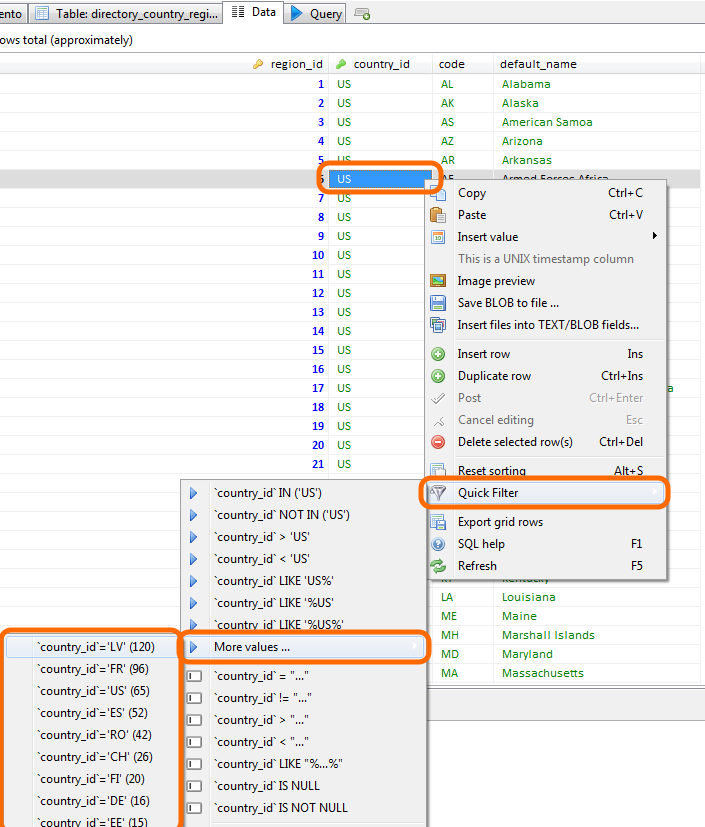
Quick filters: Right click a value in the grid, then click Quick filter to get various one-click options to create a WHERE clause on the grid values. This filter can be base on either the focused cell in the grid, a prompted value, or on the contents of your clipboard.In the Quick filter sub menu, you will find a More values sub-sub-menu. Pointing to that menu, HeidiSQL quickly collects and displays the top 30 items in the focused column, grouped by their value:
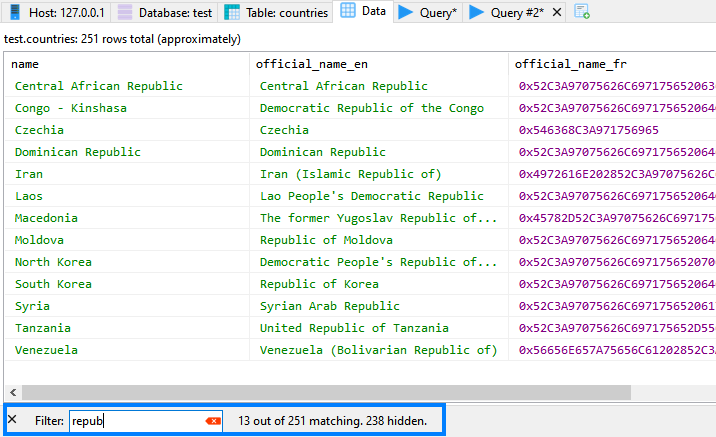
Finding specific values in such a grid can be a pain. For a simple client side filter, you can enter some value in the filter panel. Activate it in Edit > Filter panel (Ctrl+Alt+F):
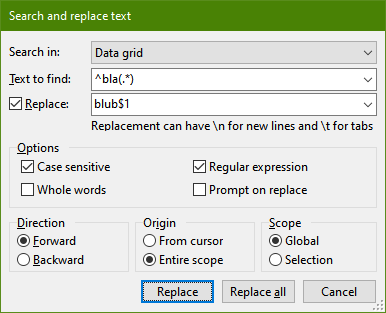
HeidiSQL can also assists you with a Search and replace dialog (Find mode: Ctrl+F, Replace mode: Ctrl+R). That dialog can be used on SQL query tabs tool.
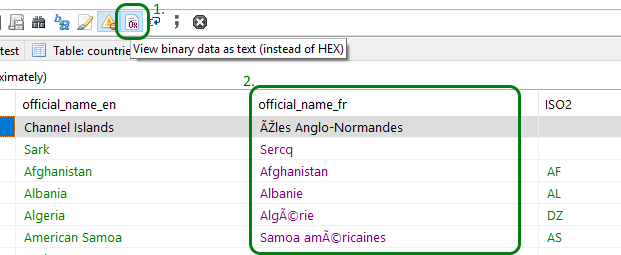
Binary values, also called BLOBs, are by default displayed in hexadecimal format, which is mostly unreadable for a human being. For cases in which such BLOBs contain readable text, HeidiSQL offers to toggle between hex-mode and text-mode. Press or “unpress” the white button with the purple “0x” on it:
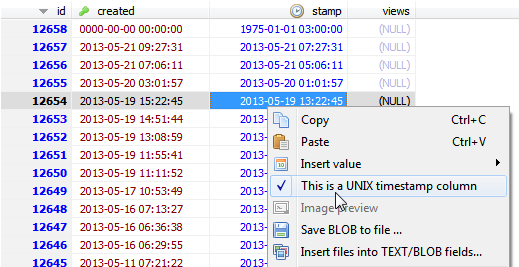
Probably you have a table with one or more integer columns which represent UNIX timestamps. HeidiSQL can display such integer columns as date/time values, so you can better read them:
Running SQL queries
HeidiSQL has a “Query” tab by default. You can create more than this default one by pressing Ctrl+T, or by right clicking the main tabs, then click “New query tab”. In such a query tab, you can write your own database queries, or load a .sql file from your harddisk. Pressing F9, or the button with the blue “play” icon on it executes your query or queries.HeidiSQL can execute a batch of queries (= multiple queries, separated by semicolon) in one go. That way, execution gets dramatically faster, especially when having tons of mini queries. To activate that “one go execution”, just click the drop down menu of the blue “play” button, then click “Send batch in one go”:

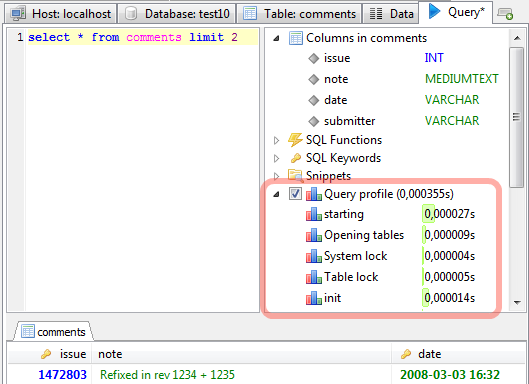
To see how your query performs in MariaDB or MySQL, you can activate the “Query profile” option in the helpers box on the right. Then, run your query or queries, and see what the profile timings show. This is basically what SHOW PROFILE in MySQL 5.0.37 and later releases does
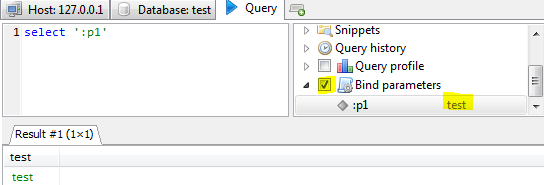
HeidiSQL supports parameterized SQL queries: Activate it per click on the checkbox “Bind parameter”, and start writing a query with parameters, e.g. select ‘:p’.
SQL export
HeidiSQL can generate nice SQL export files for you. This is basically what mysqldump also does. However, you can also tell HeidiSQL to put the results of the export into
an .sql file
a ZIP compressed .sql file
into your clipboard
another database on the same server
a new or existing database on a server on which you have a configured HeidiSQL session
Database(s)
Controls whether to a) drop an existing database on the target server first, and b) create it.
This is meant for the target server, not the source server!
Table(s)
Same as above, just for tables, views, procedures etc. When checked, the table(s) will be dropped first, and/or created afterwards.
Data
How the rows are created on the target server. Select “No data” to make a structure-only export. Default is “INSERT”.
Max INSERT size
Defines the maximum size of the extended INSERT statements, which can hold multiple rows in one statement. Note that a MariaDB/MySQL server limits the size of a query sent to the server by the server variable max_allowed_packet. Be sure to use a lower value in this dialog, otherwise MariaDB/MySQL will kill your connection when importing that file.
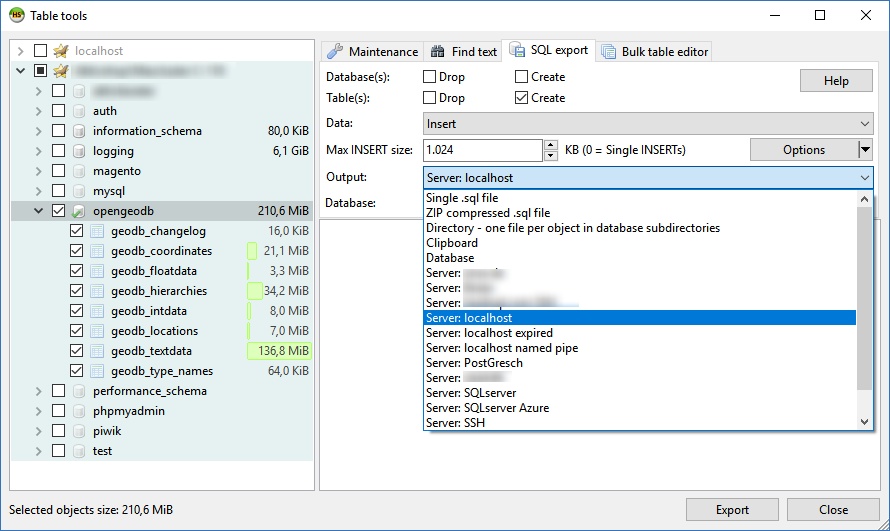
Output
Either select a filename (zip compressed or uncompressed), a directory in which HeidiSQL will place .sql files, clipboard, another database or a configured HeidiSQL (and a database name below).
Filename, Directory, or Database
Depends on what you selected in the “output” pulldown menu.
Importing files
HeidiSQL can import .sql files with data rows and/or structure, .csv files with data rows and binary files for BLOBs.
Importing .sql files
At first, activate the database you want the import to run in. Then, go to File > “Run SQL file”, and select the file to import. Below the filename input box, you will find an Encoding dropdown menu. Using “Auto detect” is a common way to get broken data afterwards – so if are sure about the encoding in that file, you should definitely select the right one, e.g. “UTF-8”. After clicking “OK”, HeidiSQL will start to execute the contained commands immediately, and you can watch the progress:

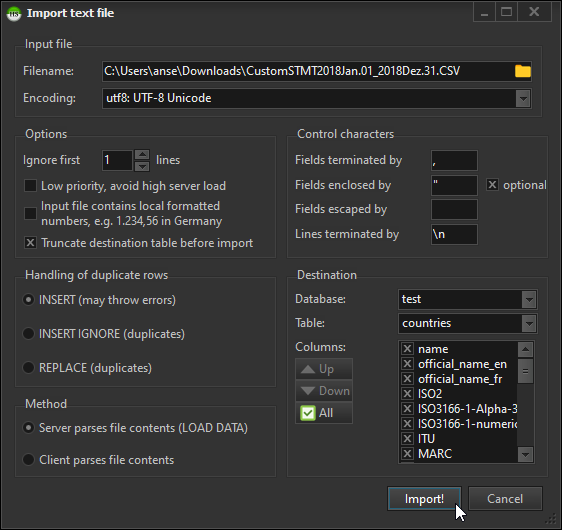
Importing .csv files (text files)
A .csv file is a text file with data rows for one table. You can import such a file into a table via Tools > “Import CSV file”. You will have to tell HeidiSQL the format of the file (line terminator, enclosing character etc.).
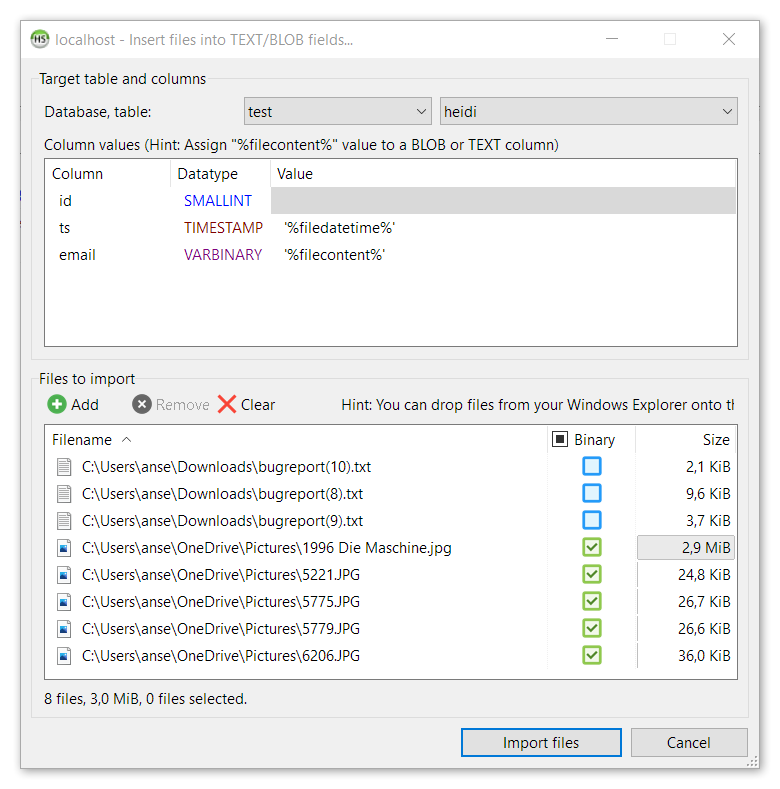
Importing binary or text files into BLOBs
Via Tools > “Insert files into TEXT/BLOB fields”, you can insert new rows from all kind of files into your tables. First, select the database and the table you want to put the files into. Then, click on the green “Add” button, to add one or more files to the listing. In the upper listing you will have to tell HeidiSQL with placeholders in which column the file content goes. In the “Value” column, click besides the right field name and select ‘%filecontent%’. Some other placeholders are available in that dropdown. You can also wrap the placeholders (or even static text) with some SQL function. For example if you want the file name in lowercase, you apply LOWER(‘%filename%’).
HeidiSQL portable
If HeidiSQL finds a portable.lock file, or a portable_settings.txt, or the custom filename as noted above, it starts in portable mode. Which means basically that all settings are restored from that file and when exiting stored again into that file.When you download the portable package, that portable_settings.txt needs to be manually copied from your old portable HeidiSQL directory. Not doing so will show you an empty session manager.
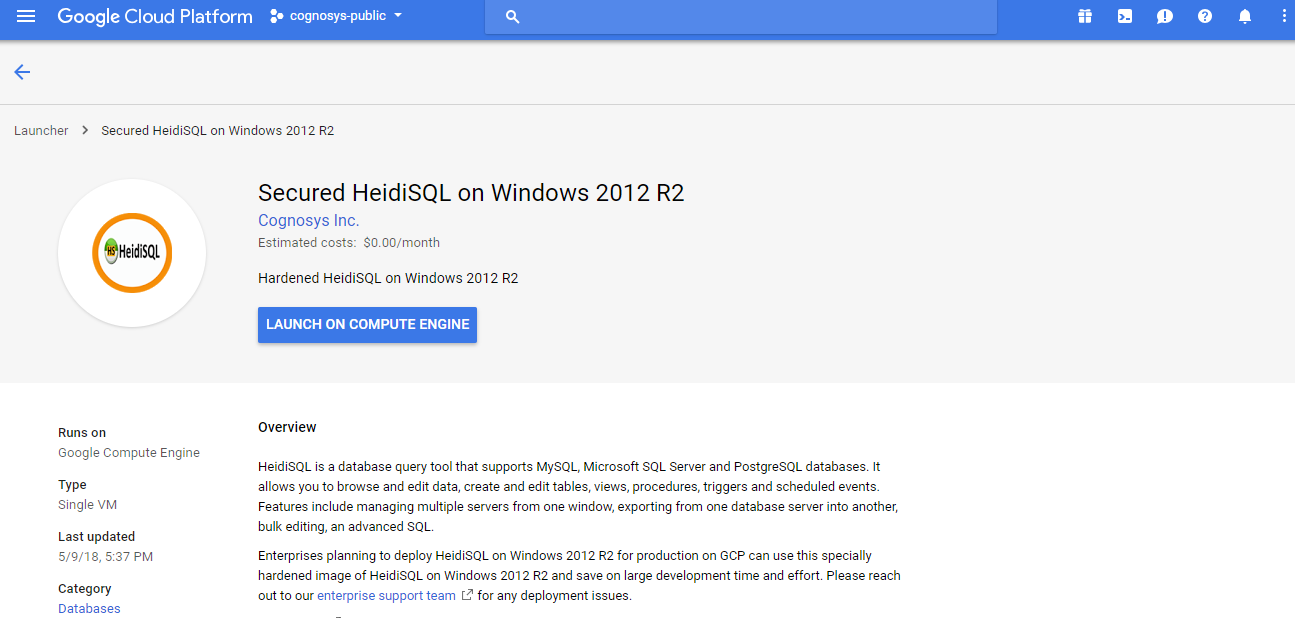
HeidiSQL is a database query tool that supports MySQL, Microsoft SQL Server and PostgreSQL databases. It allows you to browse and edit data, create and edit tables, views, procedures, triggers and scheduled events. Features include managing multiple servers from one window, exporting from one database server into another, bulk editing, an advanced SQL syntax editor, and database optimization and repair functions.
HeidiSQL on Cloud runs on Amazon Web Services (AWS) and Azure and is reliable tool designed for web developers using the popular MySQL server, Microsoft SQL databases and PostgreSQL.
HeidiSQL is owned by HeidiSQL (https://www.heidisql.com/) and they own all related trademarks and IP rights for this software.
Cognosys provides hardened images of HeidiSQL on all public cloud i.e. AWS marketplace and Azure.
HeidiSQL on Cloud For AWS