1-click AWS Deployment 1-click Azure Deployment
Overview
GLPI is an open source web-based helpdesk that handles functions and asset management system. In it there are features that collect information about the computer (Personal Computer or Notebook) in a LAN network. Information collected as the brand of computer, memory, hard drive, monitor, serial number and others.This web-based application built with PHP programming language and MySQL database.GLPI can optimally gather information with the help of open source OCS Inventory.
GLPI stands for Gestionnaire Libre de Parc Informatique is a Free Asset and IT Management Software package, that provides ITIL Service Desk features, licenses tracking and software auditing.
GLPI Network is a professional distribution based on GLPI Project and other open source technologies, such as: FusionInventory, Maria DB or Linux. It’s an open-source ITSM (IT and Asset Management System) that makes IT Administrators daily life much easier, thanks to a wide range of enhanced functions.
Featuring a web-based administration interface, GLPI allows you to build your own database including multi-user support, multi-location use, multilingual management, mail notifications and direct help desk requests for users – amongst many other functionalities.
With GLPI, you can create, maintain, manage and track the inventory of the data assets of your entire company (computers, software, smartphones and tablets, printers, consumables, etc.) from a centralized console.
Easy integration available to any type of worldwide companies and businesses, looking for a solution to standardize processes, cut costs and optimize staff productivity.
Installation of GLPI/Fusion Inventory Server:
Step 1: Dependency Installation:
1. The first step in the process is to boot up and prepare the Debian server. GLPI will require Apache2, MySQL, and some PHP additions in order to function properly. The easiest way to get these packages is with the Apt meta-packager.
# apt-get install apache2 mysql-server-5.5 php5 php5-mysql php5-gd
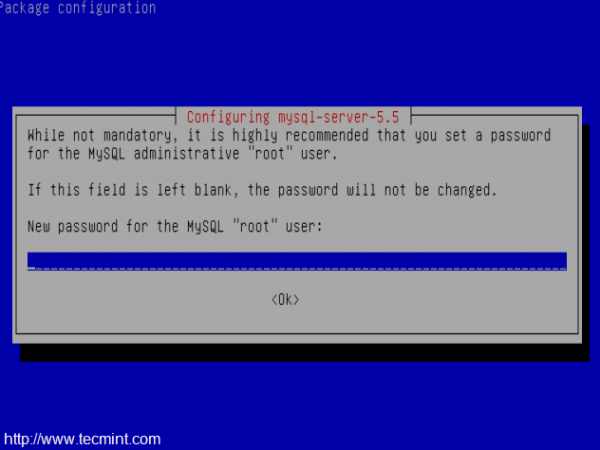
This command will download and install the necessary packages and start the basic server services. While MySQL is installing, it will likely ask to have the MySQL root password set. Set this password but DO NOT forget it as it will be needed soon.
2. After all of the packages finish installing, it is always a good idea to make sure that the server services are running. This is easily accomplished by evaluating the system to see what services are listening on what ports with the ‘lsof‘ utility.
# lsof -i :80 				[will confirm apache2 is listening to port 80]
# lsof -i :3306				[will confirm MySQL is listening to port 3306]
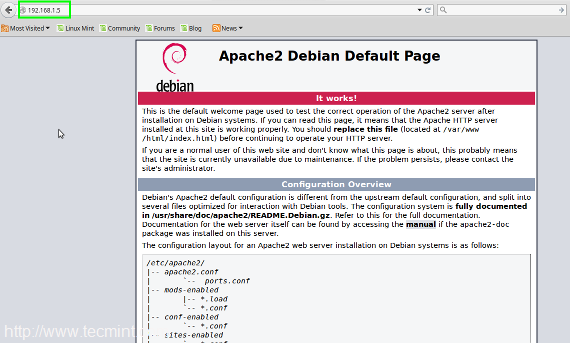
Another way to confirm apache2 is working and delivering a web-page is to open a web browser and type the Debian server’s IP address in the URL bar. If Apache2 is working, the web browser should return the “default” Apache2 page.
http://Your-IP-Addresss
Now that Apache2 is at least serving up a web-page, lets first prepare the MySQL database and then configure Apache2 to server GLPI.
Step 2: MySQL Configuration
3. From the Debian server, log into the MySQL command line interface using the ‘mysql‘ command.
# mysql -u root -p
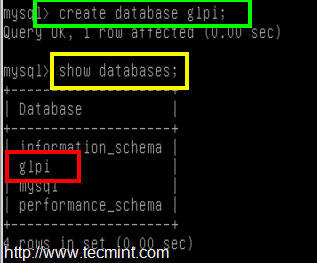
This command will attempt to log into MySQL as the MySQL root user (NOT the system root user). The ‘-p‘ argument will prompt the user for the MySQL root user password that was configured when MySQL was installed in the prior paragraph. At this point, a new database ‘glpi‘ needs to be created for GLPI. The SQL command to do accomplish this task:
mysql> create database glpi;
To confirm that this new database was indeed created, the ‘show databases;‘ command can be issued. The result should look similar to the below screen-shot.
mysql> show databases;
4. From here, a new user with privileges to this database should be created. It is never a good idea to use the root user! To create a new MySQL user and assign them permissions to the ‘glpi‘ database:
- create user ‘glpi’@’localhost’; → creates a MySQL user called ‘glpi‘.
- grant all privileges on glpi.* to ‘glpi’@’localhost’ identified by ‘some_password’; → this grants all database privileges on the database called ‘glpi‘ to the newly created user ‘glpi‘ and then assigns a password required for that user to access the SQL database.
- flush privileges; → run this for the new privileges to be read by the MySQL server.
mysql> create user 'glpi'@'localhost';
mysql> grant all privileges on glpi.* to 'glpi'@'localhost' identified by 'some_password';
mysql> flush privileges;
At this point, MySQL is ready and it is time to obtain the GLPI software.
Step 3: Obtain and Prepare GLPI for Installation
5. Obtaining GLPI is very simple and can be accomplished one of two ways. The first method is to visit the project’s home page and Download GLPI Software or via the command line utility known as ‘wget‘.
This will download and install version 9.4.2 which is the current version as of this article.
# wget -c https://github.com/glpi-project/glpi/releases/download/9.4.2/glpi-9.4.2.tgz
6. Once the software is downloaded, the contents of the tarball need to be extracted. Using the tar utility, the contents can be decompressed, extracted, and placed in the proper location on the Debian server for the GLPI webpage to be accessible.
This will extract the tarball contents to a folder called ‘glpi‘ in the /var/www directory. By default, this is the directory that Apache2 serves files on Debian.
# tar xzf glpi-9.4.2.tgz -C /var/www
7. The above tar command will extract all the contents into the ‘/var/www/glpi‘ directory but it will all be owned by the root user. This will need to be changed for Apache2 and other security reasons using the chown command.
This will change the owner and primary group ownership for all of the files in /var/www/glpi to www-data which is the user and group that Apache2 will be using.
# chown -R www-data:www-data /var/www/glpi
At this point, Apache2 will need to be reconfigured in order to serve the newly extracted GLPI contents and the following section will detail the steps.
Basic configuration of GLPI:
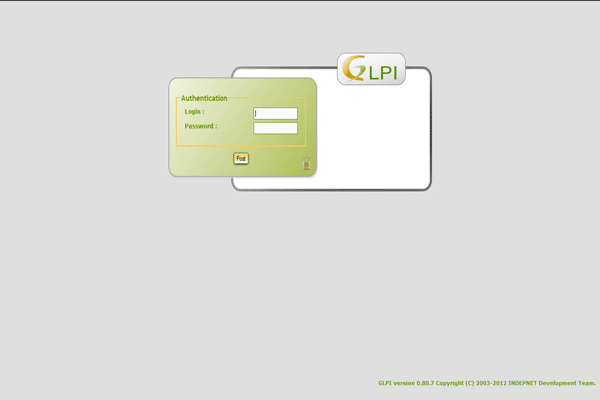
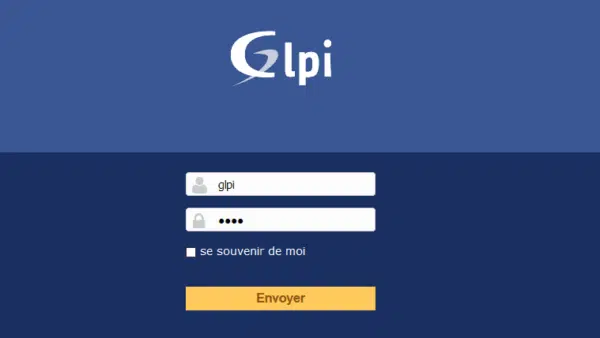
Log in with the default identifiers glpi / glpi.
An alert message appears about the Install folder and the default users.

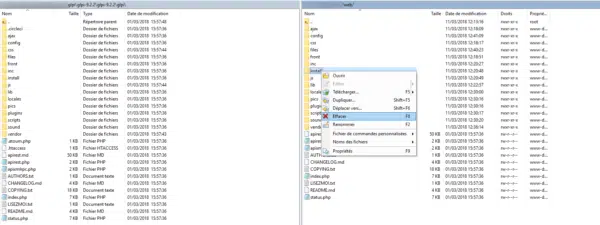
Delete the install folder
Go to the installation folder on the WEB server and delete the install folder.
Return to GLPI and refresh the page. The alert for the installation folder should no longer be displayed.

Disable default users
To disable the accounts, we will use the bulk modification feature of GLPI. This feature allows you to edit a large number of items at one time.
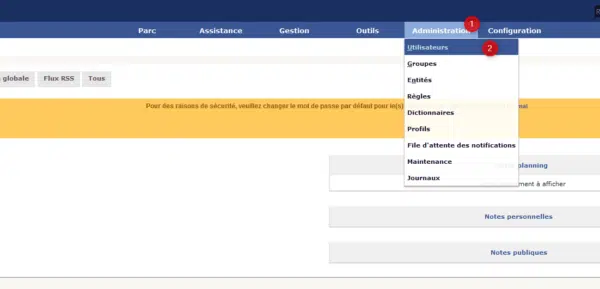
From the navigation menu go to Administration 1 and Users 2.
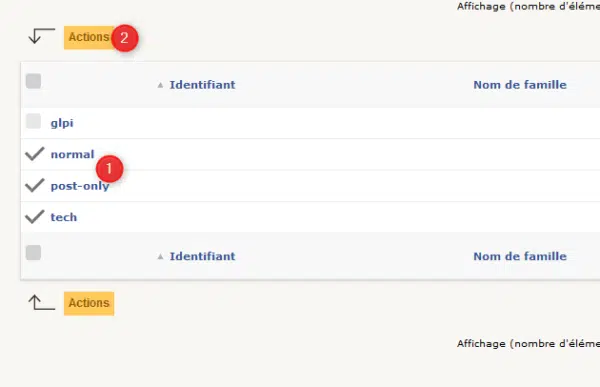
Select all users except GLPI 1 then click on the Actions button 2.
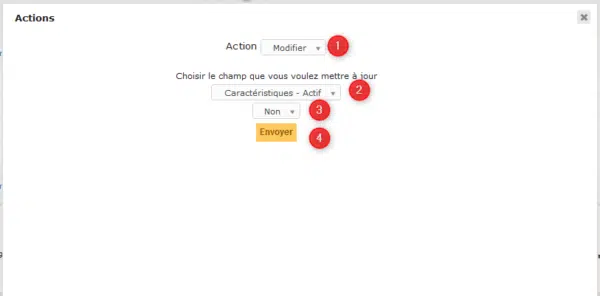
Select the action Modify 1, choose the element to modify: Characteristic Active 2, set the value: NO 3 and click on Send 4 to apply the change
Users are disabled.

Returning the home page, it should remain only the alert on the user glpi.
Change the password of the user GLPI
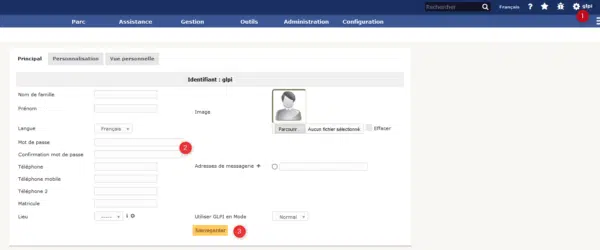
Access the account details by clicking on the logged in user 1. Enter the new password 2 (2x times) and click the Save button 3.
Configuring the sending of e-mail
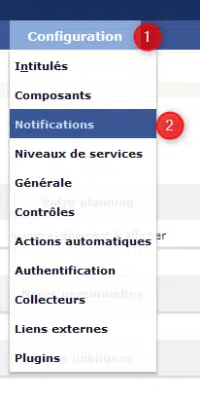
From the navigation menu go to Settings 1 / Notifications 2.
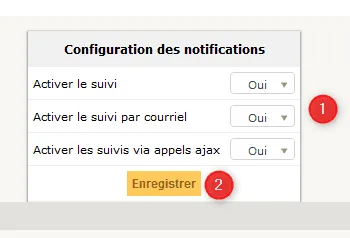
Enable notifications 1 and click Save 2.
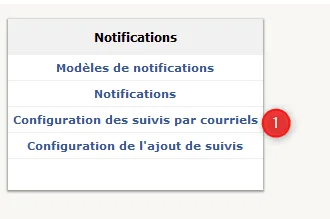
Once the page is reloaded, click on Click on Configuration of follow-ups by emails 1.
PHP
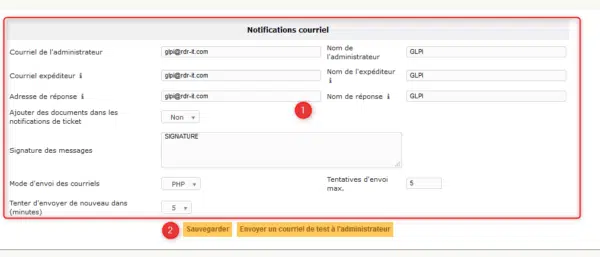
Fill in the form 1 leaving PHP for the Send Mode.
Create a new plugin:
An utility script to create a new plugin – plugin.sh is provided. You will call it with a plugin name, a version, an optionally the path where your want it to be created:
$ ./plugin.sh MyGreatPlugin 0.0.1
The script will sanityze and lowercase the name you provided, copy the templates files into the new directory, and then make some replacements.
Using the script without destination parameter, it will create you directory plugin, mygreatplugin just beside its own directory. Otherwise, it would create the new directory in the specified path:
$ ./plugin.sh MyGreatPlugin 0.0.1 /path/to/glpi/plugins/
Update existing plugin
There is no automated way to update an existing plugin, because there would be too many cases to handle. But don’t worry, procedure is quite simple 😉
Using empty features is as simple as creating a few files:
composer.json,.travis.yml,Robofile.php,.gitignore.
If you do not have yet any composer or travis configuration file, you can just copy the ones from empty plugin. Otherwise; in you composer.json, just add:
{
  "minimum-stability": "dev",
  "prefer-stable": true
}
And then run composer require glpi-project/tools.
In the travis configuration file, just add the CS call:
script:
  - vendor/bin/robo --no-interaction code:cs
In the .gitignore file, add the following:
dist/
vendor/
.gh_token
*.min.*
As for the Robo.li configuration file, note that the one embed in the empty plugin is a bit specific, you’ll have to edit it in order to get things working. See below for more informations.
Finally, as the tools project will provide you some features, you can remove duplicated tools scripts (files such as release, extract_template.sh, …) that would be present in your plugin.
Features
Coding standards
The GLPI PHPCodeSniffer rulesets are provided as vendor/glpi-project/coding-standard/GlpiStandard/.
To check coding standards, just use the Robo.li task code:cs:
$ ./vendor/bin/robo code:cs
Note
The above command will ignore vendor and run on the current directory.
If you want to adapt ignore list or checked directories, you can just override $csignore and/or $csfiles in the RoboFile.php of the plugin:
<?php

class RoboFile extends Glpi\Tools\RoboFile
{
   protected $csignore = ['/vendor/', '/lib/'];
   protected $csfiles  = ['./', 'setup.php.tpl']
   [...]
}
Automated checks
For convenience; a .travis.yml file is also provided, that is setup to:
- check coding standards,
- run on a bunch on different configuration
You still have to enable travis-ci builds from the website in order to activate automated tests.
Of course, the .travis.yml file can be pimped; you can run unit tests, create/update a database, activate notifications, and so on. Refer to the Travis-CI documentation to know more.
Minifying CSS ans JS
A convenient script, using Robo.li is provided. The RoboFile.php file is an empty class that extends Glpi\Tools\RoboFile (provided by glpi-project/tools dependency) in which you can set your own stuff.
That way, you can quite easily update the common file and get your own tasks remaining the same.
To get the required libs installed, you’ll have to get composer installed and then run:
$ composer install -o
There are three available targets:
minifythat will minify all CSS and JS files (see below),minify:cssthat will minify all css stylesheets files in thecssdirectory of your plugin, creating a.min.cssversion along with the original file,minify:jsthat will minify all javascript files in thejsdirectory of your plugin, creating a.min.jsversion along with the original file.
Just choose a target, and run something like:
$ ./vendor/bin/robo minify:css
Note
Remember compiled files should not be commited on your repository sources. It is a release process to minify files.
Also remember to adapt your scripts so they load your minified versions if available, and the original one otherwise 🙂
As of GLPI 9.2; you do not have to care about loading minified files when using add_css and add_javascript hooks! You just need to call not minified script; and GLPI will use the minified version if it exists and if not in DEBUG mode.
Translations
GLPI and its plugins use gettext for internationnalization. Several steps are required before that can work:
1 translatable strings must be extracted from source files, a POT file will be created or updated accordingly, 2 PO files must be created or updated from the POT file, 3 PO files must be translated, 4 MO files must be compiled from the latest PO.
In the vendor/bin directory, you’ll find a extract_template.sh script. This is designed to extract translatable strings from your source code (see first point above).
Once it has been ran, a locale/mygreatplugin.pot file will be created/updated.
For the second and third step, you’ll have to make a choice. You can use gettext tools to update your PO files and translate them using a dedicated tool, like poedit; or you can use an online translation system like Transifex or Zanata. GLPI core and many of existing plugins are translated using Transifex right now.
Once you get your updated PO files, you’ll have to compile them to MO files. You can run it manually, the release script will compile them again anywways; see the compiling MO files section.
Release script
A release script is provided in vendor/bin/plugin-release. This is a “simple” Python script; you should just have Python installed on your system (this is installed by default on most linux distributions).
Warning
Note that the release script is only compatible if you use semantic versionning!
Using just the defaults, the script will try to retrieve the latest tag in your git repository, add third party dependencies and create a Release on the github project:
$ ./vendor/bin/plugin-release
Do you want to build version 1.9.5? [Yes/no] y
Building glpi-order-1.9.5...
Archiving GIT tag 1.9.5
Adding vendor libraries
$ ls dist
glpi-order-1.9.5.tar.bz2  glpi-order-1.9.5.tar.bz2.asc
Requirements
You will need a python interpreter installed as well as the following modules:
- termcolor,
- gitdb,
- github (to check for existing versions in also in drafts, and to create github releases), unless you use the
--nogithuboption
If you want to get help on the script, try to run ./vendor/bin/plugin-release -h.
Process
The release process will achieve the following tasks for you:
- check if the version constant is the same as the tag you’ve requested;
- check if the version in the website XML file is the same as the tag you’ve requested;
- check if a release already exists, locally, and remotely (assuming your project is hosted in the pluginsGLPI organization and the release is public);
- make a git archive of the paths that are not excluded (
.git,tools,tests, …); - if any, install composer dependencies;
- if any, compile you
MOfiles; - if any, compile you CSS stylesheets and your Javascript files (using Robo.li);
- create a release archive with all that; that will be available in the
distdirectory; - use GPG to sign the archive.
Note
The standard release process will not work on your files directly, it will make a copy in the dist/src directory before. The only exception is the MO compiling option.
In order to check if all is OK before doing real release; create your tag and run ./vendor/bin/plugin-release -C before pushing your tag. That way, you’ll be able to fix potential issues and re-create your tag locally (remember published tags should never be removed).
Compiling MO files
The release process will automatically compile every PO file it will found in your locales directory. But you probably want the sources to contain the latests MO files, for testing purposes. The release script provide the --compile-mo (or -m) to achieve that:
$ ./vendor/bin/plugin-release --compile-mo
Warning
The above command will work on your plugins files directly; not on a copy as does other commands.
Pre-releases
Per default, the release script will work only on existing tags. Any pre-release should have its own tag; but you may want to create a release archive without any tags in some circumstances.
In order to tell the release script what it should archive, you’ll have to specify several parameters:
--commit(or-c) giving the commit hash,--release(or-r) giving the release version (usually, it will be the next release version),--extra(or-e) to specify an extra string (such as alpha, beta, rc1, etc…)
As an example with the order plugin:
$ ./vendor/bin/plugin-release --commit 632d515d4ac0 --release 1.9.5 --extra alpha1
$ ls dist
glpi-order-1.9.5-alpha1-20161103-632d515d4a.tar.bz2
Signing releases
Signing releases with a GPG key would permit users to check download integrity before installing. You’ll need a GPG key publically available to users; the sign option is activated per default, you can deactivate using the --nosign (or -S) option.
A file containing the signature with the same name as the archive with a .asc extension will be created in the dist directory.
GitHub release
The release script will create a release on your GitHub repository, as a draft, unless you use --nogithub (or -g) option.
Unfortunately, I was not able to get the newly created archive uploaded to this new release… Maybe that could be fixed in the future.
In order to use this feature, you will need the github installed; and you will need an access token. Access token is valid per user, and gives accesss to all his repositories.
You’ll have to go to your github account settings page, in the personnal access token tab. Click on generate new token, give the description you want, and make sure you’ll check the public_repo box only (no need to check anything else, you can create several access token if you need).
The token will be displayed only once; store it in the .gh_token file in your plugin directory; and that’s all!
Excluding files
You can create a .ignore-release file at the root of your plugin and list here files and directories you want to explicitely exclude from the release archive. Write one expression per line
.+\.png
screenshots/
Some files will automatically be excluded:
- .git*,
- .gh_token
- .tx/
- tools/
- tests/
- .atoum.php
- .travis.yml
- .circleci/
- .ignore-release
- composer.lock
- Robofile.php
Tag:
Features
- Add tags on every GLPI item type (which extends CommonDBTM)
- Add tags on FusionInventory Task (plugin fusioninventory)
- Add tags on Appliance (plugin appliance)
- Manage tag from labels
- Tags are displayed and editable in the object form header (just below title)
- You can search for tags and display them in objects lists
- You can display a report from associated objects in administration
Install the Plugin
- Uncompress the archive.
- Move the
tagdirectory to the<GLPI_ROOT>/pluginsdirectory - Navigate to the Configuration > Plugins page,
- Install and activate the plugin.
Usage
The plugin will create required tables in the database automatically. Those tables will be updated along with the plugin.
Plugin usage is quite simple:
- Create tag
You will access the create form from the Setup > Plugins > tag.
Define name, color, sub-entities visibility and associated itemtype

- Use tag
On associated itemtype, you can add tag previously created

- Search items by tag
You can easily find items with tag

- Get all items associated to tag
Go to tag form, clic on tab “Associated items”

News:
Features
This plugin allows to display alerts messages on GLPI homepage and / or login page.
- Create alert with rich text as for notes.
- Choice of begin/end publication date.
- Manage alerts by entity.
- Target : display alerts by profile / group / user.
Install the Plugin
- Uncompress the archive.
- Move the
newsdirectory to the<GLPI_ROOT>/pluginsdirectory - Navigate to the Configuration > Plugins page,
- Install and activate the plugin.
Usage
The plugin will create required tables in the database automatically. Those tables will be updated along with the plugin.
Plugin usage is quite simple:
- configure alerts
You will access the plugin configuration from the Tools > Alerts.
Create alerts
- Name : display as talert title
- Active : is active or not
- Description : content of alert
- Visibility start / end : period of Visibility
- Type : type of alert (General, Information, Warning, Problem)
- Can close alert : User can close alert ?
- Show on login page : display or not alert on login page
- Show on helpdesk page : display or not alert on helpdesk page
- Sub-entity : display or not on sub-entity

Targets
You can define target by type
- Group : for all users of group
- Profil : for all users with profile
- User : for specifi user

SCCM:
Requirements for latest version
This plugin requires :
- PHP 7.2 or higher
- GLPI >= 9.4
- FusionInventory plugin for GLPI
- SCCM >= 1802
- PHP curl_init and sqlsrv_connect
- Microsoft System Center Configuration Manager
- Microsoft Drivers for PHP for Microsoft SQL Server
Features
Plugin to synchronize computers from SCCM (version 1802) to GLPI (version 9.3 and 9.4). It uses the “FusionInventory for GLPI” plugin and the power of its internal engine.
Workflow
- This plugin add two automatic actions : “SCCMCollect” et “SCCMPush”
- The automatic action “SCCMCollect” queries the SCCM server with MsSQL queries.
- This same action builds an XML foreach computer (in FusionInventory format).
- The automatic action “SCCMPush” injects XML files into GLPI over HTTP(s) (via cURL and FusionInventory) to display computer in GLPI.
Collected data
Depending on data availability in the SCCM server, foreach computer we collect:
- Computer: name, last connected user, UUID, user login, domain, comments, serial
- Operating system: name, architecture, version, service pack
- BIOS information: tag, model, type, manufacturer, serial, install date, version
- CPU: description (or name), manufacturer, frequency, type (arch), nb core, nb threads
- Softwares: name, version, editor, install date
- Memory (RAM): capacity, decription, frequency, type, bus, serial
- Graphical card: name, chipset, memory
- Sound card: name, manufacturer
- Network card: name, MAC address, IP address (v4, v6)
- Disk part: name, mount type, total size
-GLPI is the Information Resource-Manager with an additional Administration- Interface.You can use it to build up a database with an inventory for your company (computer, software, printers…). It has enhanced functions to make the daily life for the administrators easier, like a job-tracking-system with mail-notification and methods to build a database with basic information about your network-topology.
Login
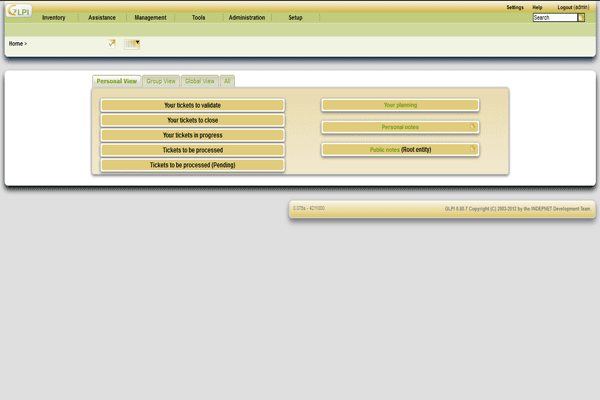
Personal View
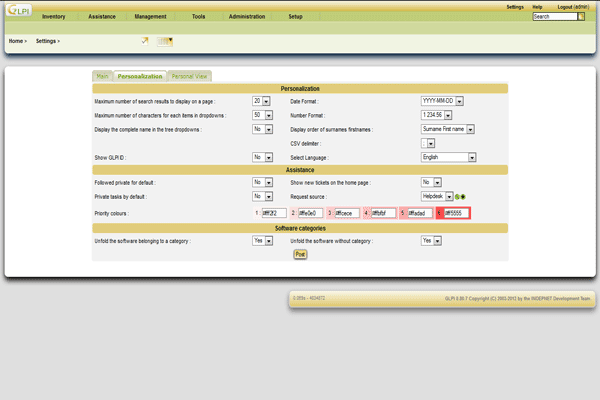
Settings
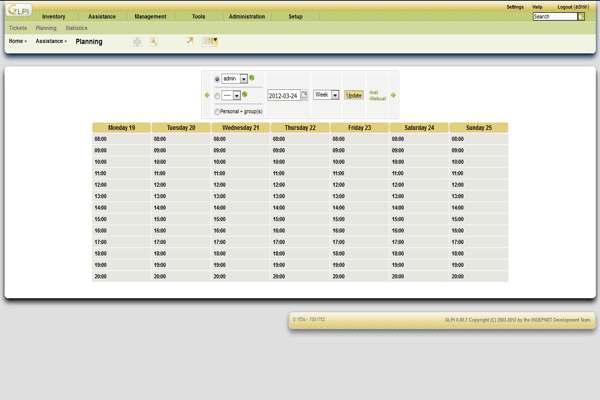
Planning
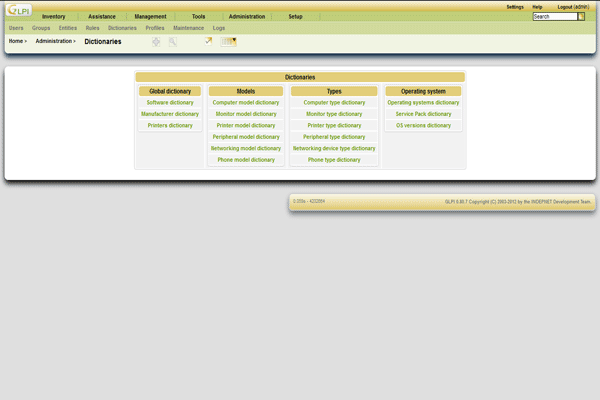
Dictionaries
GLPI is released under the GNU/GPL version 2
Features
KEY FEATURES:
- Multi-entity management (multi-location, multi-structure)
- Multilingual management (45 languages available)
- Multi-user support
- Inventory of computers, peripherals, software and any associated components
- Administrative and financial management
- Licenses management (ITIL compliant)
- ITIL ServiceDesk (end users, technicians)
- Statistics reports in PNG, SVG or CSV
- Management of companies and associated contacts
- Management of contracts and documents
- Integrated knowledge base
- Ticket and request management tracking and monitoring features
- Report generator: hardware, network or interventions
-Major Features Of GLPI:
General
- Multi-entities management (multi-park, multi-structure)
- Multi-users management
- Multiple Authentication System (local, LDAP, AD, Pop/Imap, CAS, x509…) and multiple servers.
- Multilingual management
- Permissions and profiles system
- Pagination system
- Configurability of display fields in lists
- Export System in PDF, CSV, SLK (spreadsheet), PNG and SVG
- Saving/restoration module of the database to the SQL format
- Exportation of the database to the XML format
- System of notifications on events (consumable stock, expiry of contracts and licenses), customizable and by entity
Inventory
- Import data of the inventory from one or several OCS Inventory NG servers or with the plugins FusionInventory
- Inventory of the computers fleet with management of its components, disk space and TCO management
- Inventory of the monitors with management of the connections to the computers
- Inventory of the network hardware fleet with management of the connections to the devices (IP, Mac addresses, VLANs…).
- Inventory of printers fleet with management of connections to the computers and management of consumable associated and consumption and the thresholds of alarm.
- Inventory of the external devices (scanners, graphical tables…) with management of the connections to the computers – Inventory of the telephones fleet with management of connections to the computers
- Inventory if the software fleet with license and expiration dates management
- Administrative and financial Information management (purchase, guarantee and extension, damping)
- Management of the various states for the materials (in repair…) – Management of generic peripherals and monitors being able to be associated several computers
- Management of external bonds towards other applications
- History of the modifications on the elements of the inventory
Videos
Installation GLPI Windows


