1-click AWS Deployment 1-click Azure Deployment
Overview
eXtplorer is a web based file storage and management platform designed to let people put their files onto their own web storage area. This makes it so their files are more protected from viruses, hardware issues, and other common ways that files get lost. In addition, it allows people to access their files from anywhere that they have an Internet connection.
The system is build using PHP as well as Javascript. This makes it easy to use for most people, and it also runs very efficiently so you won’t need a large hosting account (unless you’re storing a ton of files). While this platform is not as polished as many of the higher end options, it works really well and does a lot to make storing, manipulating, and using files very easy for any type of user. One other really nice thing about eXtplorer is that it can be added to a Joomla (a popular content management system) site as a plugin. This makes it really easy to use and interact with in a way that other file manager platforms don’t allow.
For many, cloud computing means being able to access your data and software from anywhere you happen to be through the Internet. I’ve written several times in this column that cloud computing is great… but only as long as it happens in your cloud, that is in (Free!) software environments that you control and that you can move wherever you want. I already explained, in a previous post, how to put in such a personal cloud your bookmarks. This time, I’ll show you one of the simplest possible ways to manage your own files (and those of your friends, family or coworkers!) in the cloud.
eXtplorer is a Free Software application that works inside any graphical browser as a simple file manager on any website where you decide to run it. It’s not really full featured nor terribly fast, but it has all the basics and will run pretty much everywhere: its only requirements are a folder on a Web hosting account that supports PHP (at least version 4.3!) and any browser with JavaScript enabled.
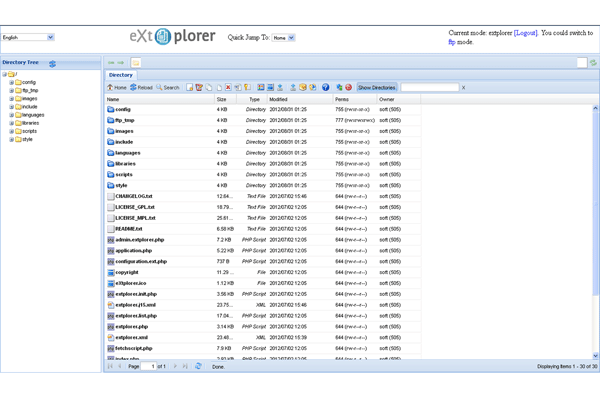
As you can see in Figure A, EXtplorer provides a very clean interface (the screenshots here are from version 2.1.0) in which you can:
- create folders
- move files and folders by drag and drop
- run searches with regular expressions
- sort files by any column shown in the main pane
- download many files as one compressed archive
- upload archives and expand them on the server
Figure A
Click to enlarge.
The installation procedure is very simple. It’s just not documented completely, but don’t worry! I’ll show you exactly how to do it, after telling you what I like the most in eXtplorer.
Each user can have a different “home” directory, completely invisible, if you so wish, to all other ordinary users. Figure B shows that the “root” folder for the “friends” user in Konqueror is different from the “root” of the eXtplorer administrator in the Firefox window.
Figure B
You may even control which files each user sees through regular expressions (see Figure C).
Figure C
In general you can let a user view files and folders, but not create or modify them, and forbid him to change his own password. One problem with all these “permissions” is that they have meaning only inside eXtplorer, which at the file system level has the same permissions of the account running the Web Server (let’s call that account “www”).
This may confuse users who already have an FTP account on the same computer. What if John usually puts his files via FTP in a folder like /home/john, that only the system user “john” can access? In such a case, John won’t see his files when he logs in as “john” on the eXtplorer page: the operating system will refuse that request, because it comes from “www”, not the only “john” it knows about. Luckily, eXtplorer can handle these situations by switching to an FTP mode (top right corner of Figure A) in which users can work with their actual FTP accounts.
The other thing that I like in eXtplorer are bookmarks. When you click on the little star in the top central part of the window, eXtplorer will ask you an alias for the current directory and then jump to it whenever you select that alias from the bookmark drop-down menu.
INSTALL EXTPLORER ON LINUX HOSTING
Most other hosting providers comes with a web-based file manager. Unfortunately, if you have used them, you will know that they are not the most user-friendly. They are slow and cumbersome to use.
So my quest for finding a web-based FTP client that is fast, lightweight, user-friendly, secure, and is accessible for anywhere through the browser result two solutions: eXtplorer and Ajaxplorer. In this post, I will show you how to install eXtplorer on Linux hosting account on GoDaddy. eXtplorer currently includes the following great features:
- Copy & Move Files and Directories by Drag&Drop
- Dynamic Directory Tree with on-demand loading of subdirectories
- Edit Files (with Syntax-Highlighting thanks to EditArea)
- Rename, Delete or Create new Files and Directories
- Access Files through ”FTP” or directly (using PHP) to totally overcome permission and file ownership issues
- Upload or Download files just as you like
- Create and Extract Archives (ZIP, Tar, Tar/GZ, Tar/BZ)
- User Management with different permission levels like “View only” or “Edit” and “Admin”
DOWNLOAD EXTPLORER
First, download the latest version of eXtplorer as a zip file, and extract it. In this instance it is version 2.1.3.
UPLOAD EXTPLORER
For now you will either have to use GoDaddy’s file manager or any FTP Client. In the example below, I have renamed the extplorer_2.1.3 folder to extplorer and uploaded it to the root directory of my hosting space. Note that you can call it anything. In fact, I recommend that you name it something other than extplorer for security reasons (just one tiny step to make a hacker’s life harder).
If not, no big deal, after we install eXtplorer on Linux hosting, I will show you how to secure it.
VISIT YOUR EXTPLORER
Next, open your browser and visit location where you installed extplorer (example: http://www.domain.com/extplorer). You should be greeted with a login screen.
The default username and password are admin and admin. Needless to say, these have to be changed as soon as you login for the first time. In fact, eXtplorer will warn you as soon as you login.
Click “OK”, close the window, and move on for now.
SETUP FOLDER PERMISSIONS
Before we proceed with password change and setting up user accounts, you will first have to ensure that right permissions are set for some of the files and folders. Go back your GoDaddy file manager and into the eXtplorer folder. Select the ftp_tmp folder and then click on “Permissions” from the menu. Move to “Advanced” tab and ensure that the permissions are set as shown below and click “OK”.
Then, find the .htusers.php file within config folder and ensure that the permissions are set as shown below and click “OK”.
SETUP YOUR ADMIN ACCOUNT
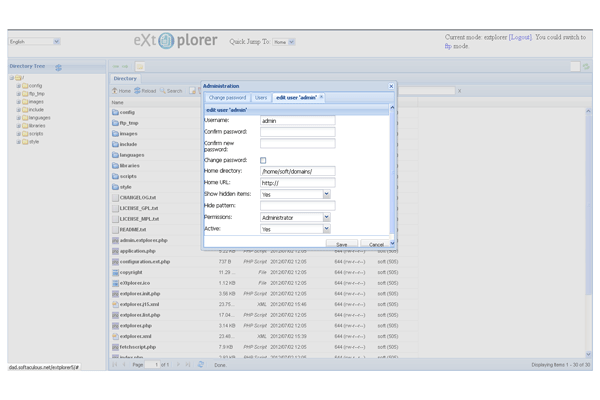
Click on the “Admin” icon and you will see a list of all the user accounts that can access your eXtplorer. At this point, you should only see the admin user. You may select admin user, edit it, and change the password. However, you cannot change the default username “admin” as you are currently logged in as “admin”.
Therefore, I recommend you do something different. Click on “Add” and create a new user with settings shown in the picture below. Of course, you may choose the username and password of your choice. You do not have to edit “Home directory” or “Home URL”. Ensure that “Administrator” is selected for permissions and click “Save” to create a new user.
Now logout and login as the new user you just created. Click on the “Admin” icon to open the users list. Then, select the “admin” user (the default admin account) and click “Remove”. Now you will have one admin account with a custom username (another tiny step to improve security).
That is all there is to install eXtplorer on Linux hosting.
EXTPLORER SECURITY
You have already changed the default username and default password. In addition, I recommend that you password protect the “extplorer” folder on your GoDaddy hosting space. This will add Apache HTTP authentication, providing another big layer of security. To enable HTTP authentication, select the eXtplorer folder and click on “Permissions”. Move to the “Password Protect” tab and check “Password protect directory”. For password prompt provide anything you would like. This name will appear on the login window. Then, click on “Add user” and provide a username and password to access eXtplorer.
Finally, click “OK” to enabled HTTP authentication for eXtplorer. Doing this will add double authentication to your eXtplorer. First, HTTP authentication screen is presented.
Upon providing the correct username and password you will be taken to the eXtplorer login screen.
EXTPLORER AS FTP CLIENT
Not only can you use eXtplorer as a web-based file manager, you can also use it as a FTP client to connect to files on a remote FTP server. Just switch from the “extplorer” mode to “ftp” mode and provide the credentials to access the FTP server.
There you go, install eXtplorer on Linux hosting space and access your files with easy from anywhere.
EXTPLORER PROS:
Easy to Use
eXtplorer is very easy to use for end users, which makes it great for personal need and sharing files with friends and family.
Cost
This is a free system that you can use. They also offer two licensing options depending on whether you’re looking to do additional development or not.
Features Included
Right out of the box you will have plenty of options for adding, copying, moving, deleting, and otherwise manipulating your files.
EXTPLORER CONS:
Documentation
They don’t have very good documentation for basic users. It is mostly targeted toward developers and other advanced users.
Website
Their main website is very simple looking, and does not come off as a very professional system.
-eXtplorer is a php-based file manager for your own web space. It’s cross-browser compliant and offers everything you need.eXtplorer is a PHP- and Javascript-based File Manager, which you can be placed on your own web space.
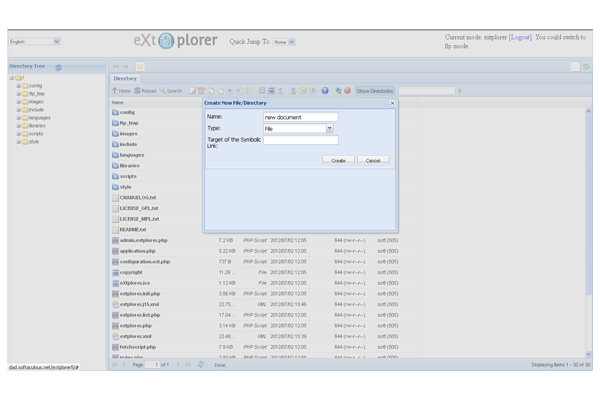
Create new File
Administration
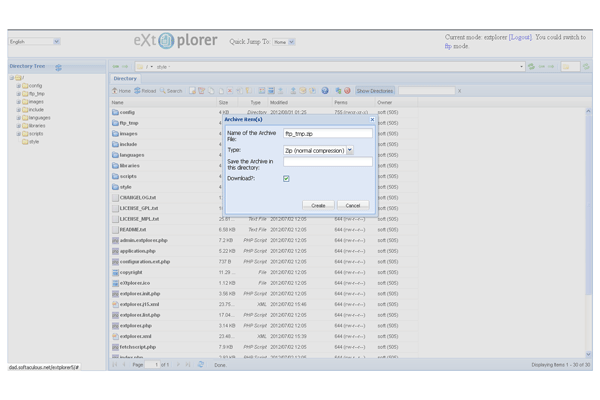
Archive item
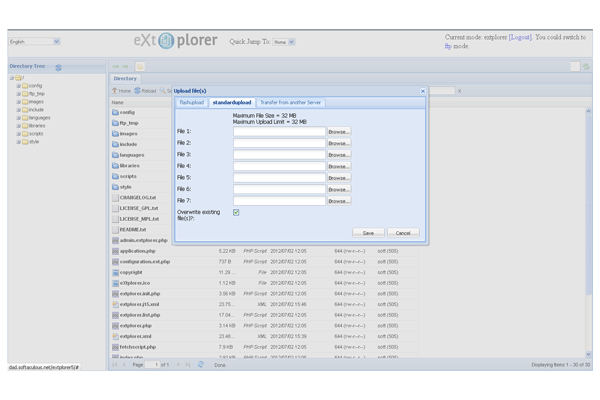
Upload files
Directory
eXtplorer is released under the GNU GENERAL PUBLIC LICENSE.
Features
Key Features of Extplorer:
-
Initial Setup
Setting this system up is fast and easy, especially when you use the one-click install options that are available to all hosting customers. Once installed, you’ll need to go through and setup permissions on who can access files in which folders. Depending on how many people you want to have access to your files, this can take a little while to get through. While it can take some time, however, it isn’t difficult at all. They have a very user-friendly interface that people will get used to quite quickly.
-
Plugins
There are no plugins built for this system. It is made to be a fairly simple file manager, and doesn’t offer extensive customizability for admins. With this in mind, it isn’t likely the right option for advanced users who need a lot of features. Those who just want a simple system that is easy to use, this is likely the one. While there are no plugins for eXtplorer, it can be added to a Joomla based website as a plugin, which is an interesting option for those who run sites on Joomla CMS.
-
Themes
eXtplorer does not offer any type of templates to adjust the user interface’s look. The system is setup in a standard way that most users will be able to interact with without much trouble, so having additional themes or adjustments would only complicate the interface.
-
Customization
There isn’t too much customization that can be done to the system itself unless you get into the coding and develop your own things. Since this can be used as a Joomla plugin, however, you will be able to build a primary site around eXtplorer.
-
Cost of Running
This is a free system to download, use, and manipulate if you choose. Whether you use it as a standalone service or part of a Joomla site, you won’t be charged a dime. To run this system, however, you will need a web hosting server to run it and store the files. It is a small system that won’t require much for CPU or RAM. Depending on how many files you plan to store, and how large they are, however, you may need quite a bit of disk space so make sure to keep that in mind when looking through the available hosting packages.
-
Other Programs like it
eXtplorer is just one of many file manager systems that you can get for your hosting server.
-The Main Features of eXtplorer :
-
- Copy & Move Files and Directories by Drag & Drop
- Dynamic Directory Tree with on-demand loading of subdirectories
- Edit Files
- Rename, Delete or Create new Files and Directories
- Access Files through ”FTP” or directly (using PHP) to totally overcome permission and file ownership issue
- Upload or Download files just as you like
- Create and Extract Archives (ZIP, Tar, Tar/GZ, Tar/BZ)
- User Management with different permission levels like “View only” or “Edit” and “Admin”
All these features are packed into an intuitive Layout which makes working with files very easy.
Videos
Installing eXtplorer


