1-click AWS Deployment 1-click Azure Deployment 1-click Google Deployment
Overview
Django is a Python-based web framework that allows you to quickly create efficient web applications. It is also called batteries included framework because Django provides built-in features for everything including Django Admin Interface, default database – SQLlite3, etc. When you’re building a website, you always need a similar set of components: a way to handle user authentication (signing up, signing in, signing out), a management panel for your website, forms, a way to upload files, etc. Django gives you ready-made components to use and that too for rapid development.
Django is a high-level, open-source web framework for building web applications using the Python programming language. It follows the Model-View-Controller (MVC) architectural pattern and emphasizes the principle of “don’t repeat yourself” (DRY). Django provides a robust set of tools and features that help developers create scalable, secure, and maintainable web applications quickly and efficiently.
Key features of Django include:
- Object-Relational Mapping (ORM): Django provides an ORM that allows developers to interact with the database using Python objects instead of writing SQL queries directly. This abstraction layer makes it easier to work with databases and helps maintain portability across different database backends.
- URL routing: Django provides a powerful URL routing system that maps URLs to view functions, allowing for clean and organized URL patterns.
- Template engine: Django includes a template engine that enables developers to separate the presentation logic from the business logic. Templates are HTML files with embedded Django tags and filters, making it easy to generate dynamic content.
- Forms handling: Django simplifies the process of working with HTML forms by providing a forms API that handles form validation, rendering, and data binding.
- Authentication and authorization: Django provides a built-in authentication system that handles user authentication, password management, and user sessions. It also offers an authorization framework for controlling access to different parts of an application.
- Admin interface: Django’s admin interface is automatically generated based on your application’s models. It provides a user-friendly interface for managing data in the database without writing custom views or templates.
- Security features: Django incorporates various security features, including protection against common web vulnerabilities such as cross-site scripting (XSS), cross-site request forgery (CSRF), and SQL injection attacks.
- Internationalization and localization: Django has built-in support for handling multiple languages and time zones, making it easier to develop applications with internationalization and localization requirements.
Django is widely used by developers to build all kinds of web applications, from simple websites to complex, data-intensive platforms. It has a large and active community, extensive documentation, and a vast ecosystem of reusable third-party packages, making it a popular choice for web development in Python.
MVC and MVT – Django Architecture

MVC (Model-View-Controller) and MVT (Model-View-Template) are two different architectural patterns commonly used in web application development. While MVC is a widely adopted architectural pattern, MVT is specific to the Django web framework.
- MVC (Model-View-Controller): The MVC pattern separates an application into three interconnected components:
- Model: The model represents the application’s data and business logic. It defines how data is structured and how it can be manipulated. In the context of web development, models often correspond to database tables or other data sources.
- View: The view is responsible for presenting the data to the user and handling user interactions. It defines how the data should be displayed and receives user input, forwarding it to the controller for processing.
- Controller: The controller acts as an intermediary between the model and the view. It receives user input from the view and updates the model accordingly. It also listens for changes in the model and updates the view to reflect those changes.
In the MVC pattern, the model and view are independent of each other and communicate through the controller. This separation of concerns promotes modularity and allows for easier maintenance and scalability of the application.
- MVT (Model-View-Template): MVT is a variation of the MVC pattern specifically used in the Django web framework. It is a high-level architectural pattern that divides the application into three components:
- Model: The model component represents the data and business logic of the application, similar to the MVC pattern. It defines the structure of the data, database relationships, and provides methods for data manipulation.
- View: The view component in Django is responsible for handling requests and generating responses. It processes user input, interacts with the model to retrieve or modify data, and determines the appropriate template for rendering the response.
- Template: The template is responsible for defining the presentation logic. It defines how the data should be rendered into HTML or other output formats. Templates in Django use a combination of HTML and a templating language (usually Django’s built-in template language) to dynamically generate the output.
In the MVT pattern, the controller component of the MVC pattern is replaced by the framework itself. Django’s framework takes care of the controller functionality, such as routing requests, processing form submissions, and handling the flow of data between the model and the view.
The MVT pattern simplifies development by providing a clear separation between the different components and enforcing conventions, which allows developers to focus on specific tasks without worrying about the underlying architectural details.
Django Components
- Models: Models represent the data structure and define how data is stored and accessed in a database. They are typically defined as Python classes that inherit from Django’s
models.Modelclass. Models define fields and relationships, such as strings, numbers, dates, foreign keys, and many more. Django’s ORM (Object-Relational Mapping) handles the database operations, allowing developers to interact with the database using Python code rather than writing SQL queries directly. - Views: Views handle the business logic of a Django application. They receive HTTP requests, process the data, interact with the models to retrieve or modify data, and return HTTP responses. Views can be written as Python functions or classes, and they can access and manipulate data through the models. Views can also render templates to generate dynamic HTML content or other response formats.
- Templates: Templates define the presentation logic of a Django application. They are typically written in HTML and may include variables, loops, conditionals, and other constructs provided by Django’s template language. Templates can access data passed from views and generate dynamic content. They are responsible for rendering the final output that is sent back to the client’s web browser.
- URLs: URLs (Uniform Resource Locators) define the mapping between URLs and views in a Django application. They specify the URL patterns that a Django application should respond to and map them to specific view functions or classes. URLs are defined using regular expressions or path converters, allowing for flexible and customizable URL routing.
- Forms: Django provides a form handling mechanism that simplifies the process of building and processing HTML forms. Forms in Django allow developers to define form fields, validation rules, and rendering logic. They can be used to handle user input, validate data, and save it to the database. Django forms also provide built-in security measures to protect against common web vulnerabilities like CSRF (Cross-Site Request Forgery).
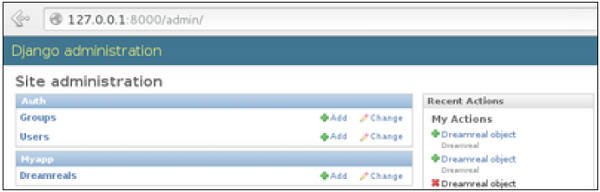
- Admin: Django’s admin is a powerful component that provides an automatic and customizable administrative interface for managing data in the application. By registering models with the admin, developers can easily perform CRUD (Create, Read, Update, Delete) operations on the database records through a user-friendly web interface.
Why Django Framework :
- Excellent documentation and high scalability.
- Used by Top MNCs and Companies, such as Instagram, Disqus, Spotify, Youtube, Bitbucket, Dropbox, etc. and the list is never-ending.
- Easiest Framework to learn, rapid development and Batteries fully included.
- The last but not least reason to learn Django is Python, Python has huge library and features such as Web Scrapping, Machine Learning, Image Processing, Scientific Computing, etc. One can integrate it all this with web application and do lots and lots of advance stuff.
Before understanding Django, let’s first understand why do we need a web framework? A web framework is a server-side application framework which is designed to support the development of dynamic websites. With the help of a framework, you don’t have to handle the hassles of web development and its various components. Therefore, it makes the life of a web application developer much easier as they don’t have to code from scratch. There are various web development frameworks available in the market. Some of them are listed below:
- React JS
- Angular
- Ruby on Rails
- Express
One of the highlights of Django is that it is built on python. From several years python has been the most popular programming language and continues to be a favorite among the skilled programmers. Hence, Django delivers transparent and high-quality code writing, making it important for the developers as well as the customers. It has various other advantages as it has an automatic administration interface, Object-relational mapper(ORM) and many more. So let’s understand what exactly it is.
Django Installation
Let me guide you through the process of installing Django on your system. Just follow the below steps:
Step 1: Go to the link: https://www.djangoproject.com/download/
Step 2: Type the pip command on command prompt and installation will get started.
Refer to the below screenshot to get a better understanding.

By following the above steps, you are done with the Django installation part. Next, its time we build our own web application.Excited? Let’s get started!
Build Your First Web Application in Django
For creating a web application, first let’s create a project. To create a project, just enter into a directory where you would like to share your code, then run the following command:
|
1
|
django-admin startproject myproject |
Once your project has been created, you will find a list of files inside the project directory. Let’s discuss each one of them.
manage.py – It is a command-line utility that lets you interact with this Django project in various ways.
myproject/ – It is the actual Python package for your project. It is used to import anything, say – myproject.urls.

init.py – Init just tells the python that this is to be treated like a python package.
settings.py – This file manages all the settings of your project.
urls.py – This is the main controller which maps it to your website.
wsgi.py – It serves as an entry point for WSGI compatible web servers.
Note that to create your application, make sure you are in the same directory as manage.py and then type the below command:
|
1
|
python manage.py startapp webapp |
Now if we look at the ‘webapp’ directory, we have some extra things from the original myproject. It includes model, test which are related to your backend databases.
Next in Django tutorial, you need to import your application manually inside your project settings. For that, open your myproject/settings.py and add your app manually:
|
1
2
3
4
5
6
7
8
9
|
INSTALLED_APPS = ( 'webapp', 'django.contrib.admin', 'django.contrib.auth', 'django.contrib.contenttypes', 'django.contrib.sessions', 'django.contrib.messages', 'django.contrib.staticfiles',) |
Once you have installed your app, let’s create a view now. Open your webapp/views.py and put the below code in it:
|
1
2
3
4
5
|
from django.shortcuts import renderfrom django.http import HttpResponsedef index(request): return HttpResponse("<H2>HEY! Welcome to Edureka! </H2>") |
In the above code, I have created a view which returns httpResponse. Now we need to map this view to a URL. We need a URLconf in our application. So let’s create a new python file “urls.py” inside our webapp. In webapp/urls.py include the following code:
|
1
2
3
4
5
|
from django.conf.urls import urlfrom . import viewsurlpatterns = [ url(r'^$', views.index, name='index'),] |
In the above code, I have referenced a view which will return index (defined in views.py file). The url pattern is in regular expression format where ^ stands for beginning of the string and $ stands for the end.
The next step is to point the root URLconf at the webapp.urls module. Open your myproject/urls.py file and write the below code:
|
1
2
3
4
5
6
7
|
from django.conf.urls import include, urlfrom django.contrib import adminurlpatterns = [ url(r'^admin/', include(admin.site.urls)), url(r'^webapp/', include('webapp.urls')),] |
In the above code, I have added my webapp and included the webapp.urls. Now don’t forget to import django.conf.urls.include and insert an include() in the urlpatterns list. The include() function allows referencing other URLconfs.
Note that the regular expression doesn’t have a ‘$’ but rather a trailing slash, this means whenever Django encounters include(), it chops off whatever part of the URL matched up to that point and sends the remaining string to include URLconf for further processing.

Python Django Training and Certification
Weekday / Weekend Batches
We are now done with the coding part! Let’s now start the server and see what happens. To start the server, type the below command:
|
1
|
python manage.py runserver |
After running the server, go to http://localhost:8000/webapp/ in your browser, and you should see the text “HEY! Welcome to Edureka!”, which you defined in the index view.

We have successfully created a basic Web App.
How to Create a Basic Project using MVT in Django:
Prerequisite – Django Project MVT Structure
Assuming you have gone through the previous article. This article focusses on creating a basic project to render a template using MVT architecture. We will use MVT (Models, Views, Templates) to render data to a local server.
Create a basic Project:
-
- To initiate a project of Django on Your PC, open Terminal and Enter the following command
django-admin startproject projectName
- A New Folder with name projectName will be created. To enter in the project using terminal enter command
cd projectName
- Create a new file views.py inside the project folder where settings.py, urls.py and other files are stored and save the following code in it-
# HttpResponse is used to# pass the information# back to viewfromdjango.httpimportHttpResponse# Defining a function which# will receive request and# perform task depending# upon function definitiondefhello_geek (request) :# This will return Hello Geeks# string as HttpResponsereturnHttpResponse("Hello Geeks")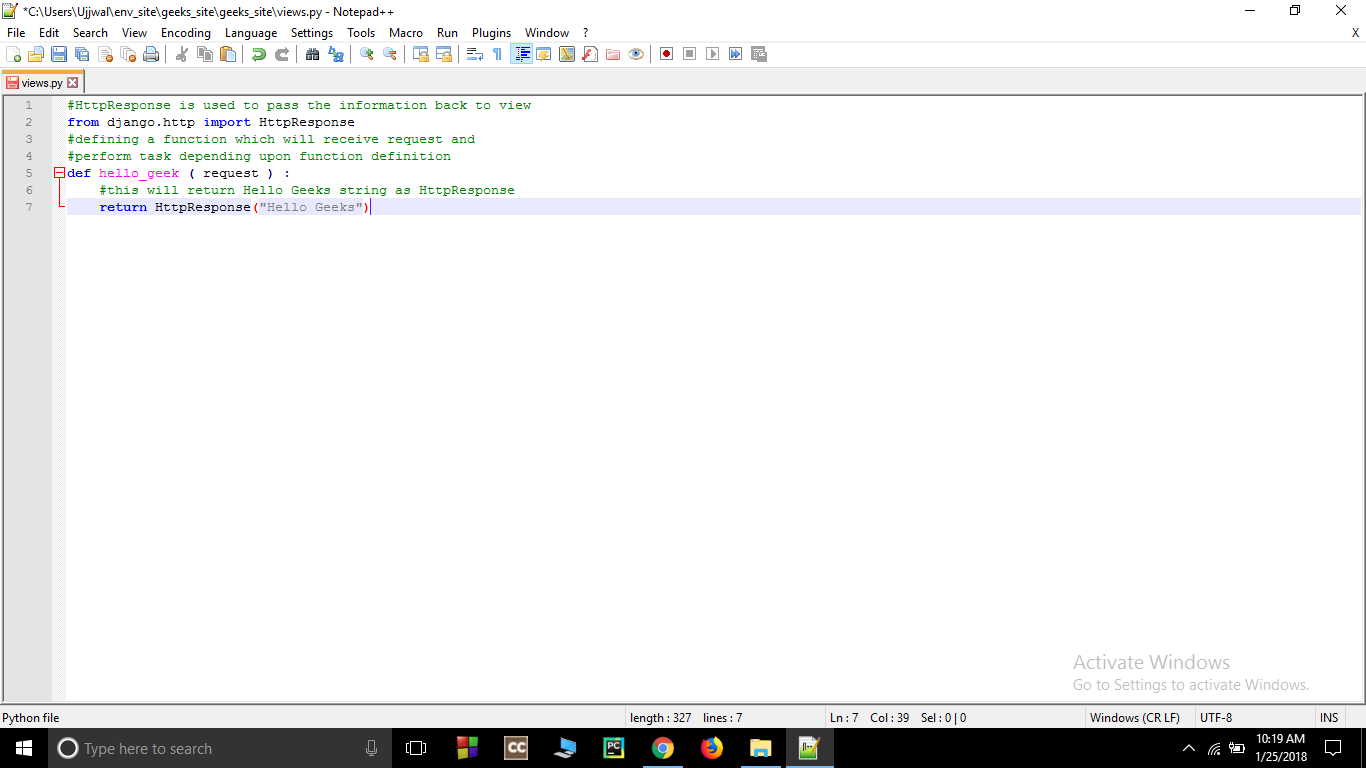

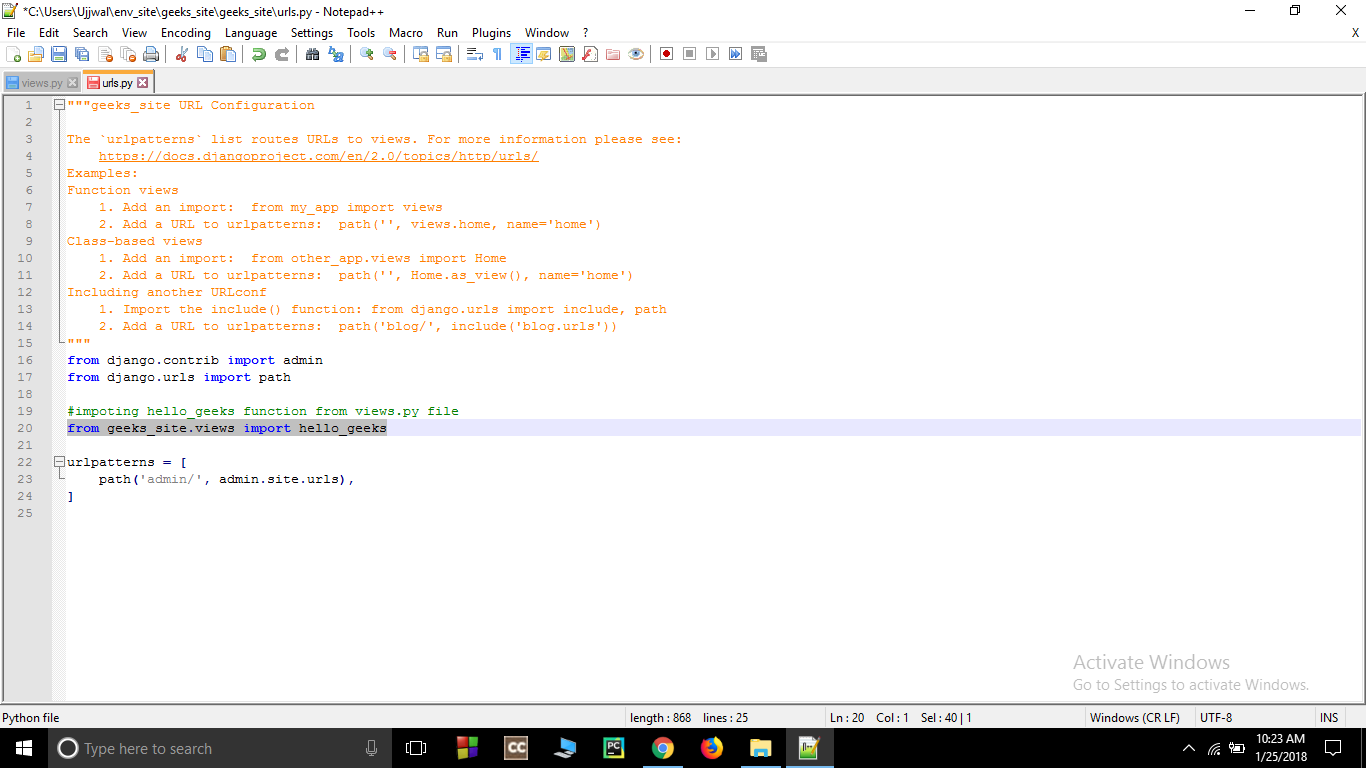
- Open urls.py inside project folder (projectName) and add your entry-
- Import hello_geek function from views.py file.
from projectName.views import hello_geeks
- Add an entry in url field inside url patterns-
path('geek/', hello_geek),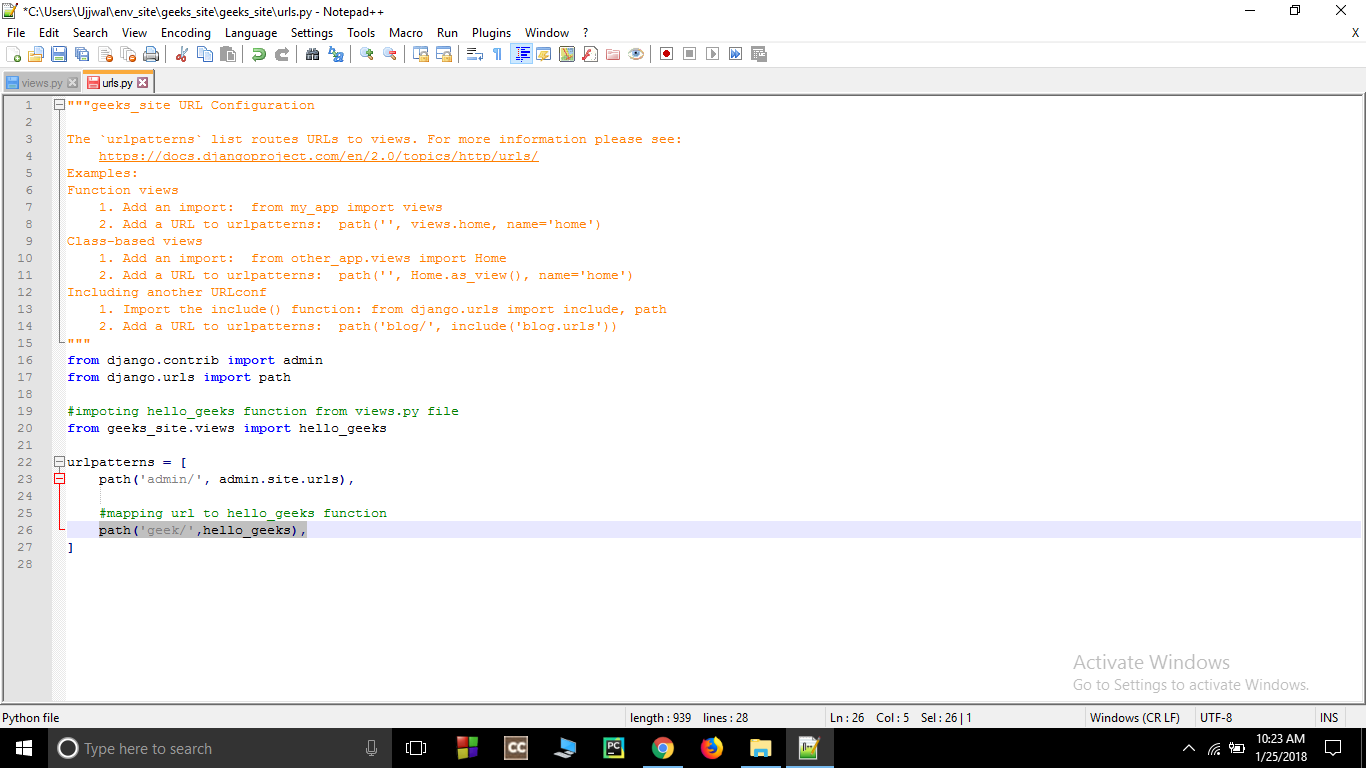
- Import hello_geek function from views.py file.
- Now to run the server follow these steps-
-
- Open command prompt and change directory to env_site by this command-
$ cd env_site
- Go to Script directory inside env_site and activate virtual environment-
$ cd Script
$ activate
- Return to the env_site directory and goto the project directory-
$ cd ..
$ cd geeks_site
- Start the server- Start the server by typing following command in cmd-
$ python manage.py runserver
- Open command prompt and change directory to env_site by this command-
-
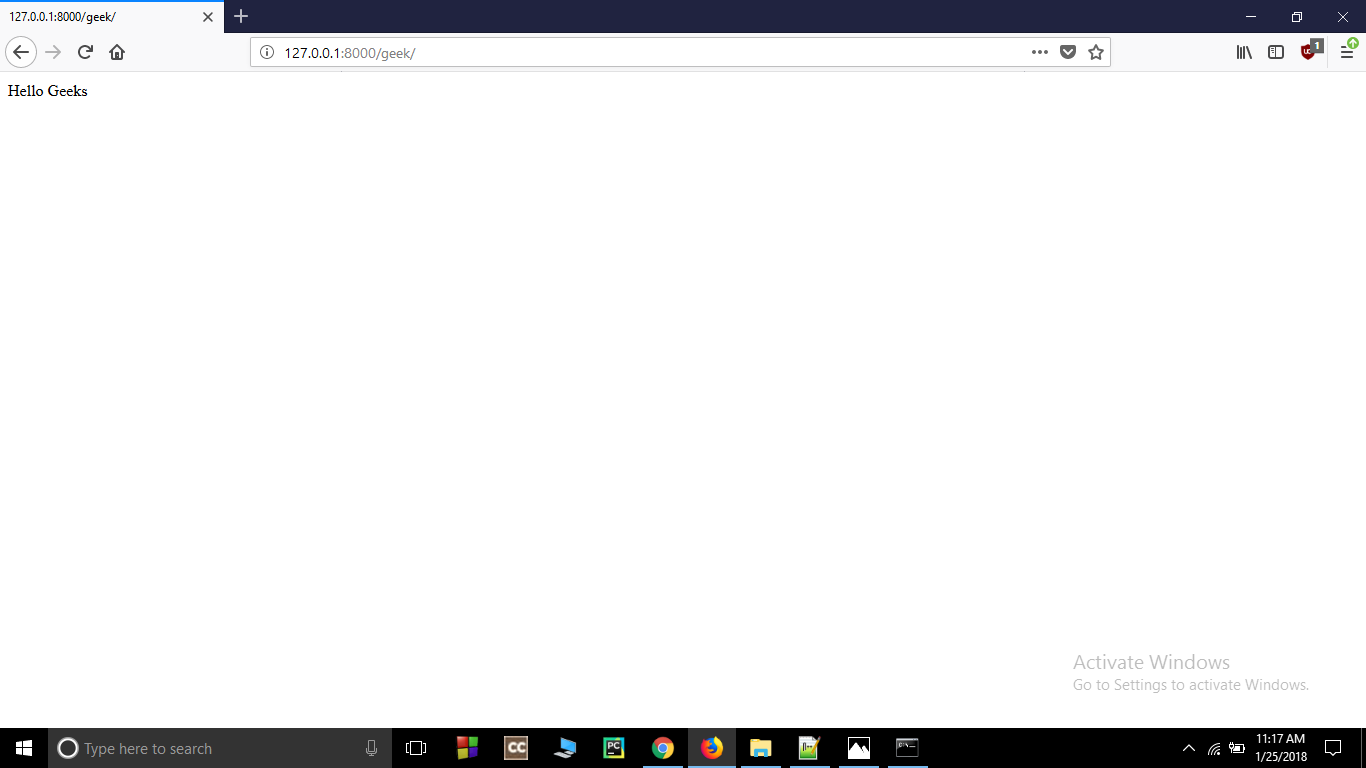
- Checking – Open the browser and type this url-
http://127.0.0.1:8000/geek/
- To initiate a project of Django on Your PC, open Terminal and Enter the following command
Bingo…!! You are done with creating and rendering a basic Project.
How to Create an App in Django:
Django is famous for its unique and fully managed app structure. For every functionality, an app can be created like a completely independent module. This article will take you through how to create a basic app and add functionalities using that app.For example, if you are creating a Blog, Separate modules should be created for Comments, Posts, Login/Logout, etc. In Django, these modules are known as apps. There is a different app for each task.
Creating an App in Django :
Let us start building an app.
- To create a basic app in your Django project you need to go to directory containing
manage.pyand from there enter the command :python manage.py startapp projectApp
Now you can see your directory structure as under :


- To consider the app in your project you need to specify your project name in INSTALLED_APPS list as follows in settings.py:
# Application definitionINSTALLED_APPS=['django.contrib.admin','django.contrib.auth','django.contrib.contenttypes','django.contrib.sessions','django.contrib.messages','django.contrib.staticfiles','projectApp'] - So, we have finally created an app but to render the app using urls we need to include the app in our main project so that urls redirected to that app can be rendered. Let us explore it.
Move toprojectName-> projectName -> urls.pyand add below code in the headerfrom django.urls import include
Now in the list of URL patterns, you need to specify app name for including your app urls. Here is the code for it –
fromdjango.contribimportadminfromdjango.urlsimportpath, includeurlpatterns=[path('admin/', admin.site.urls),# Enter the app name in following# syntax for this to workpath('', include("projectApp.urls")),] - Now You can use the default MVT model to create URLs, models, views, etc. in your app and they will be automatically included in your main project.The main feature of Django Apps is independence, every app functions as an independent unit in supporting the main project.
Django – Creating Views:
A view function, or “view” for short, is simply a Python function that takes a web request and returns a web response. This response can be the HTML contents of a Web page, or a redirect, or a 404 error, or an XML document, or an image, etc. Example: You use view to create web pages, note that you need to associate a view to a URL to see it as a web page.
In Django, views have to be created in the app views.py file.
Simple View
We will create a simple view in myapp to say “welcome to my app!”
See the following view −
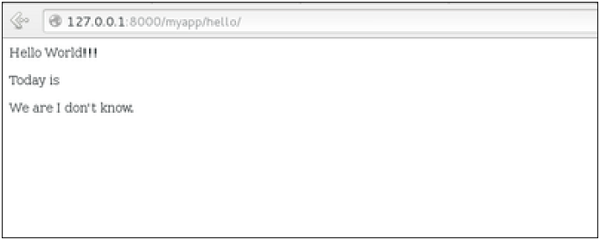
from django.http import HttpResponse

def hello(request):
   text = """<h1>welcome to my app !</h1>"""
   return HttpResponse(text)
In this view, we use HttpResponse to render the HTML (as you have probably noticed we have the HTML hard coded in the view). To see this view as a page we just need to map it to a URL (this will be discussed in an upcoming chapter).
We used HttpResponse to render the HTML in the view before. This is not the best way to render pages. Django supports the MVT pattern so to make the precedent view, Django – MVT like, we will need −
A template: myapp/templates/hello.html
And now our view will look like −
from django.shortcuts import render

def hello(request):
   return render(request, "myapp/template/hello.html", {})
Views can also accept parameters −
from django.http import HttpResponse

def hello(request, number):
   text = "<h1>welcome to my app number %s!</h1>"% number
   return HttpResponse(text)
When linked to a URL, the page will display the number passed as a parameter
Django – URL Mapping:
Now that we have a working view as explained in the previous chapters. We want to access that view via a URL. Django has his own way for URL mapping and it’s done by editing your project url.py file (myproject/url.py). The url.py file looks like −
from django.conf.urls import patterns, include, url
from django.contrib import admin
admin.autodiscover()

urlpatterns = patterns('',
   #Examples
   #url(r'^$', 'myproject.view.home', name = 'home'),
   #url(r'^blog/', include('blog.urls')),

   url(r'^admin', include(admin.site.urls)),
)
When a user makes a request for a page on your web app, Django controller takes over to look for the corresponding view via the url.py file, and then return the HTML response or a 404 not found error, if not found. In url.py, the most important thing is the “urlpatterns” tuple. It’s where you define the mapping between URLs and views. A mapping is a tuple in URL patterns like −
from django.conf.urls import patterns, include, url
from django.contrib import admin
admin.autodiscover()

urlpatterns = patterns('',
   #Examples
   #url(r'^$', 'myproject.view.home', name = 'home'),
   #url(r'^blog/', include('blog.urls')),

   url(r'^admin', include(admin.site.urls)),
   url(r'^hello/', 'myapp.views.hello', name = 'hello'),
)
The marked line maps the URL “/home” to the hello view created in myapp/view.py file. As you can see above a mapping is composed of three elements −
- The pattern − A regexp matching the URL you want to be resolved and map. Everything that can work with the python ‘re’ module is eligible for the pattern (useful when you want to pass parameters via url).
- The python path to the view − Same as when you are importing a module.
- The name − In order to perform URL reversing, you’ll need to use named URL patterns as done in the examples above. Once done, just start the server to access your view via :http://127.0.0.1/hello
Organizing Your URLs
So far, we have created the URLs in “myprojects/url.py” file, however as stated earlier about Django and creating an app, the best point was to be able to reuse applications in different projects. You can easily see what the problem is, if you are saving all your URLs in the “projecturl.py” file. So best practice is to create an “url.py” per application and to include it in our main projects url.py file (we included admin URLs for admin interface before).
How is it Done?
We need to create an url.py file in myapp using the following code −
from django.conf.urls import patterns, include, url

urlpatterns = patterns('', url(r'^hello/', 'myapp.views.hello', name = 'hello'),)
Then myproject/url.py will change to the following −
from django.conf.urls import patterns, include, url
from django.contrib import admin
admin.autodiscover()

urlpatterns = patterns('',
   #Examples
   #url(r'^$', 'myproject.view.home', name = 'home'),
   #url(r'^blog/', include('blog.urls')),

   url(r'^admin', include(admin.site.urls)),
   url(r'^myapp/', include('myapp.urls')),
)
We have included all URLs from myapp application. The home.html that was accessed through “/hello” is now “/myapp/hello” which is a better and more understandable structure for the web app.
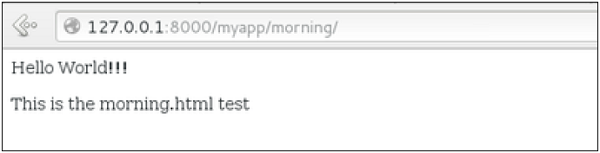
Now let’s imagine we have another view in myapp “morning” and we want to map it in myapp/url.py, we will then change our myapp/url.py to −
from django.conf.urls import patterns, include, url

urlpatterns = patterns('',
   url(r'^hello/', 'myapp.views.hello', name = 'hello'),
   url(r'^morning/', 'myapp.views.morning', name = 'morning'),
)
This can be re-factored to −
from django.conf.urls import patterns, include, url

urlpatterns = patterns('myapp.views',
   url(r'^hello/', 'hello', name = 'hello'),
   url(r'^morning/', 'morning', name = 'morning'),)
As you can see, we now use the first element of our urlpatterns tuple. This can be useful when you want to change your app name.
Sending Parameters to Views
We now know how to map URL, how to organize them, now let us see how to send parameters to views. A classic sample is the article example (you want to access an article via “/articles/article_id”).
Passing parameters is done by capturing them with the regexp in the URL pattern. If we have a view like the following one in “myapp/view.py”
from django.shortcuts import render
from django.http import HttpResponse

def hello(request):
   return render(request, "hello.html", {})

def viewArticle(request, articleId):
   text = "Displaying article Number : %s"%articleId
   return HttpResponse(text)
We want to map it in myapp/url.py so we can access it via “/myapp/article/articleId”, we need the following in “myapp/url.py” −
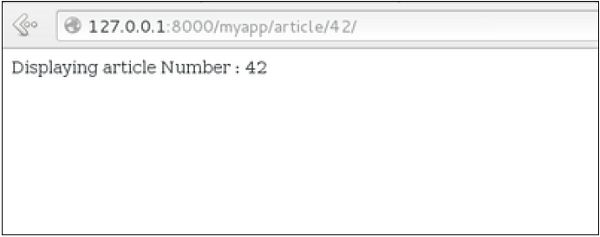
from django.conf.urls import patterns, include, url

urlpatterns = patterns('myapp.views',
   url(r'^hello/', 'hello', name = 'hello'),
   url(r'^morning/', 'morning', name = 'morning'),
   url(r'^article/(\d+)/', 'viewArticle', name = 'article'),)
When Django will see the url: “/myapp/article/42” it will pass the parameters ’42’ to the viewArticle view, and in your browser you should get the following result −
Note that the order of parameters is important here. Suppose we want the list of articles of a month of a year, let’s add a viewArticles view. Our view.py becomes −
from django.shortcuts import render
from django.http import HttpResponse

def hello(request):
   return render(request, "hello.html", {})

def viewArticle(request, articleId):
   text = "Displaying article Number : %s"%articleId
   return HttpResponse(text)

def viewArticle(request, month, year):
   text = "Displaying articles of : %s/%s"%(year, month)
   return HttpResponse(text)
The corresponding url.py file will look like −
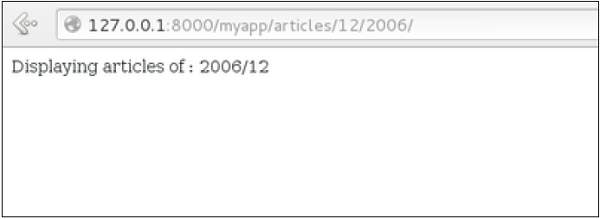
from django.conf.urls import patterns, include, url

urlpatterns = patterns('myapp.views',
   url(r'^hello/', 'hello', name = 'hello'),
   url(r'^morning/', 'morning', name = 'morning'),
   url(r'^article/(\d+)/', 'viewArticle', name = 'article'),
   url(r'^articles/(\d{2})/(\d{4})', 'viewArticles', name = 'articles'),)
Now when you go to “/myapp/articles/12/2006/” you will get ‘Displaying articles of: 2006/12’ but if you reverse the parameters you won’t get the same result.
To avoid that, it is possible to link a URL parameter to the view parameter. For that, our url.py will become −
from django.conf.urls import patterns, include, url

urlpatterns = patterns('myapp.views',
   url(r'^hello/', 'hello', name = 'hello'),
   url(r'^morning/', 'morning', name = 'morning'),
   url(r'^article/(\d+)/', 'viewArticle', name = 'article'),
   url(r'^articles/(?P\d{2})/(?P\d{4})', 'viewArticles', name = 'articles'),)
Django – Models:
A model is a class that represents table or collection in our DB, and where every attribute of the class is a field of the table or collection. Models are defined in the app/models.py (in our example: myapp/models.py)
Creating a Model
Following is a Dreamreal model created as an example −
from django.db import models

class Dreamreal(models.Model):

   website = models.CharField(max_length = 50)
   mail = models.CharField(max_length = 50)
   name = models.CharField(max_length = 50)
   phonenumber = models.IntegerField()

   class Meta:
      db_table = "dreamreal"
Every model inherits from django.db.models.Model.
Our class has 4 attributes (3 CharField and 1 Integer), those will be the table fields.
The Meta class with the db_table attribute lets us define the actual table or collection name. Django names the table or collection automatically: myapp_modelName. This class will let you force the name of the table to what you like.
There is more field’s type in django.db.models, you can learn more about them on https://docs.djangoproject.com/en/1.5/ref/models/fields/#field-types
After creating your model, you will need Django to generate the actual database −
$python manage.py syncdb
Manipulating Data (CRUD)
Let’s create a “crudops” view to see how we can do CRUD operations on models. Our myapp/views.py will then look like −
myapp/views.py
from myapp.models import Dreamreal
from django.http import HttpResponse

def crudops(request):
   #Creating an entry

   dreamreal = Dreamreal(
      website = "www.polo.com", mail = "sorex@polo.com",
      name = "sorex", phonenumber = "002376970"
   )

   dreamreal.save()

   #Read ALL entries
   objects = Dreamreal.objects.all()
   res ='Printing all Dreamreal entries in the DB : <br>'

   for elt in objects:
      res += elt.name+"<br>"

   #Read a specific entry:
   sorex = Dreamreal.objects.get(name = "sorex")
   res += 'Printing One entry <br>'
   res += sorex.name

   #Delete an entry
   res += '<br> Deleting an entry <br>'
   sorex.delete()

   #Update
   dreamreal = Dreamreal(
      website = "www.polo.com", mail = "sorex@polo.com",
      name = "sorex", phonenumber = "002376970"
   )

   dreamreal.save()
   res += 'Updating entry<br>'

   dreamreal = Dreamreal.objects.get(name = 'sorex')
   dreamreal.name = 'thierry'
   dreamreal.save()

   return HttpResponse(res)
Other Data Manipulation
Let’s explore other manipulations we can do on Models. Note that the CRUD operations were done on instances of our model, now we will be working directly with the class representing our model.
Let’s create a ‘datamanipulation’ view in myapp/views.py
from myapp.models import Dreamreal
from django.http import HttpResponse

def datamanipulation(request):
   res = ''

   #Filtering data:
   qs = Dreamreal.objects.filter(name = "paul")
   res += "Found : %s results<br>"%len(qs)

   #Ordering results
   qs = Dreamreal.objects.order_by("name")

   for elt in qs:
      res += elt.name + '<br>'

   return HttpResponse(res)
Linking Models
Django ORM offers 3 ways to link models −
One of the first case we will see here is the one-to-many relationships. As you can see in the above example, Dreamreal company can have multiple online websites. Defining that relation is done by using django.db.models.ForeignKey −
myapp/models.py
from django.db import models

class Dreamreal(models.Model):
   website = models.CharField(max_length = 50)
   mail = models.CharField(max_length = 50)
   name = models.CharField(max_length = 50)
   phonenumber = models.IntegerField()
   online = models.ForeignKey('Online', default = 1)

   class Meta:
      db_table = "dreamreal"

class Online(models.Model):
      domain = models.CharField(max_length = 30)

   class Meta:
      db_table = "online"
As you can see in our updated myapp/models.py, we added the online model and linked it to our Dreamreal model.
Let’s check how all of this is working via manage.py shell −
First let’s create some companies (Dreamreal entries) for testing in our Django shell −
$python manage.py shell

>>> from myapp.models import Dreamreal, Online
>>> dr1 = Dreamreal()
>>> dr1.website = 'company1.com'
>>> dr1.name = 'company1'
>>> dr1.mail = 'contact@company1'
>>> dr1.phonenumber = '12345'
>>> dr1.save()
>>> dr2 = Dreamreal()
>>> dr1.website = 'company2.com'
>>> dr2.website = 'company2.com'
>>> dr2.name = 'company2'
>>> dr2.mail = 'contact@company2'
>>> dr2.phonenumber = '56789'
>>> dr2.save()
Now some hosted domains −
>>> on1 = Online()
>>> on1.company = dr1
>>> on1.domain = "site1.com"
>>> on2 = Online()
>>> on2.company = dr1
>>> on2.domain = "site2.com"
>>> on3 = Online()
>>> on3.domain = "site3.com"
>>> dr2 = Dreamreal.objects.all()[2]
>>> on3.company = dr2
>>> on1.save()
>>> on2.save()
>>> on3.save()
Accessing attribute of the hosting company (Dreamreal entry) from an online domain is simple −
>>> on1.company.name
And if we want to know all the online domain hosted by a Company in Dreamreal we will use the code −
>>> dr1.online_set.all()
To get a QuerySet, note that all manipulating method we have seen before (filter, all, exclude, order_by….)
You can also access the linked model attributes for filtering operations, let’s say you want to get all online domains where the Dreamreal name contains ‘company’ −
>>> Online.objects.filter(company__name__contains = 'company'
That kind of query is just supported for SQL DB. It won’t work for non-relational DB where joins doesn’t exist and there are two ‘_’.
But that’s not the only way to link models, you also have OneToOneField, a link that guarantees that the relation between two objects is unique. If we used the OneToOneField in our example above, that would mean for every Dreamreal entry only one Online entry is possible and in the other way to.And the last one, the ManyToManyField for (n-n) relation between tables. Note, those are relevant for SQL based DB.
Django – Generic Views:
In some cases, writing views, as we have seen earlier is really heavy. Imagine you need a static page or a listing page. Django offers an easy way to set those simple views that is called generic views.
Unlike classic views, generic views are classes not functions. Django offers a set of classes for generic views in django.views.generic, and every generic view is one of those classes or a class that inherits from one of them.
There are 10+ generic classes −
>>> import django.views.generic
>>> dir(django.views.generic)

['ArchiveIndexView', 'CreateView', 'DateDetailView', 'DayArchiveView',
   'DeleteView', 'DetailView', 'FormView', 'GenericViewError', 'ListView',
   'MonthArchiveView', 'RedirectView', 'TemplateView', 'TodayArchiveView',
   'UpdateView', 'View', 'WeekArchiveView', 'YearArchiveView', '__builtins__',
   '__doc__', '__file__', '__name__', '__package__', '__path__', 'base', 'dates',
   'detail', 'edit', 'list']
This you can use for your generic view. Let’s look at some example to see how it works.
Static Pages
Let’s publish a static page from the “static.html” template.
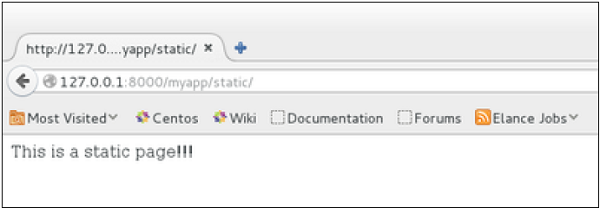
Our static.html −
<html>
   <body>
      This is a static page!!!
   </body>
</html>
If we did that the way we learned before, we would have to change the myapp/views.py to be −
from django.shortcuts import render

def static(request):
   return render(request, 'static.html', {})
and myapp/urls.py to be −
from django.conf.urls import patterns, url

urlpatterns = patterns("myapp.views", url(r'^static/', 'static', name = 'static'),)
The best way is to use generic views. For that, our myapp/views.py will become −
from django.views.generic import TemplateView

class StaticView(TemplateView):
   template_name = "static.html"
And our myapp/urls.py we will be −
from myapp.views import StaticView
from django.conf.urls import patterns

urlpatterns = patterns("myapp.views", (r'^static/$', StaticView.as_view()),)
When accessing /myapp/static you get −
For the same result we can also, do the following −
- No change in the views.py
- Change the url.py file to be −
from django.views.generic import TemplateView
from django.conf.urls import patterns, url

urlpatterns = patterns("myapp.views",
   url(r'^static/',TemplateView.as_view(template_name = 'static.html')),)
As you can see, you just need to change the url.py file in the second method.
List and Display Data from DB
We are going to list all entries in our Dreamreal model. Doing so is made easy by using the ListView generic view class. Edit the url.py file and update it as −
from django.views.generic import ListView
from django.conf.urls import patterns, url

urlpatterns = patterns(
   "myapp.views", url(r'^dreamreals/', ListView.as_view(model = Dreamreal,
      template_name = "dreamreal_list.html")),
)
Important to note at this point is that the variable pass by the generic view to the template is object_list. If you want to name it yourself, you will need to add a context_object_name argument to the as_view method. Then the url.py will become −
from django.views.generic import ListView
from django.conf.urls import patterns, url

urlpatterns = patterns("myapp.views",
   url(r'^dreamreals/', ListView.as_view(
      template_name = "dreamreal_list.html")),
      model = Dreamreal, context_object_name = ”dreamreals_objects” ,)
The associated template will then be −
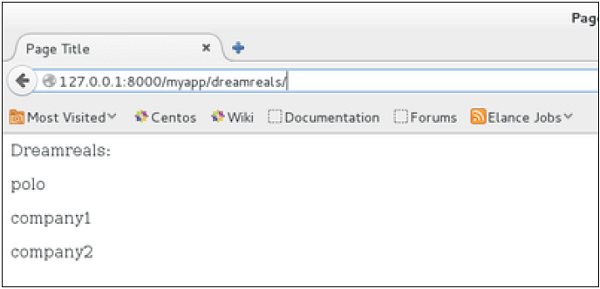
{% extends "main_template.html" %}
{% block content %}
Dreamreals:<p>
{% for dr in object_list %}
{{dr.name}}</p>
{% endfor %}
{% endblock %}
Accessing /myapp/dreamreals/ will produce the following page −
Django – File Uploading:
It is generally useful for a web app to be able to upload files (profile picture, songs, pdf, words)
Uploading an Image
Before starting to play with an image, make sure you have the Python Image Library (PIL) installed. Now to illustrate uploading an image, let’s create a profile form, in our myapp/forms.py −
#-*- coding: utf-8 -*-
from django import forms

class ProfileForm(forms.Form):
   name = forms.CharField(max_length = 100)
   picture = forms.ImageFields()
As you can see, the main difference here is just the forms.ImageField. ImageField will make sure the uploaded file is an image. If not, the form validation will fail.
Now let’s create a “Profile” model to save our uploaded profile. This is done in myapp/models.py −
from django.db import models

class Profile(models.Model):
   name = models.CharField(max_length = 50)
   picture = models.ImageField(upload_to = 'pictures')

   class Meta:
      db_table = "profile"
As you can see for the model, the ImageField takes a compulsory argument: upload_to. This represents the place on the hard drive where your images will be saved. Note that the parameter will be added to the MEDIA_ROOT option defined in your settings.py file.
Now that we have the Form and the Model, let’s create the view, in myapp/views.py −
#-*- coding: utf-8 -*-
from myapp.forms import ProfileForm
from myapp.models import Profile

def SaveProfile(request):
   saved = False

   if request.method == "POST":
      #Get the posted form
      MyProfileForm = ProfileForm(request.POST, request.FILES)

      if MyProfileForm.is_valid():
         profile = Profile()
         profile.name = MyProfileForm.cleaned_data["name"]
         profile.picture = MyProfileForm.cleaned_data["picture"]
         profile.save()
         saved = True
   else:
      MyProfileForm = Profileform()

   return render(request, 'saved.html', locals())
The part not to miss is, there is a change when creating a ProfileForm, we added a second parameters: request.FILES. If not passed the form validation will fail, giving a message that says the picture is empty.
Now, we just need the saved.html template and the profile.html template, for the form and the redirection page −
myapp/templates/saved.html −
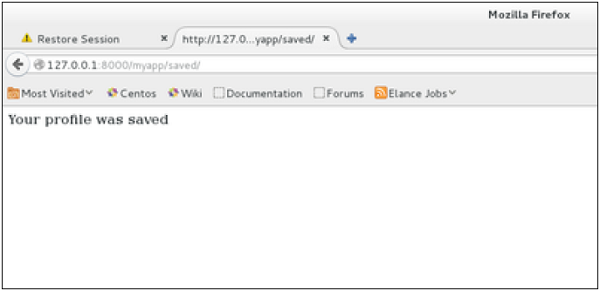
<html>
   <body>

      {% if saved %}
         <strong>Your profile was saved.</strong>
      {% endif %}

      {% if not saved %}
         <strong>Your profile was not saved.</strong>
      {% endif %}

   </body>
</html>
myapp/templates/profile.html −
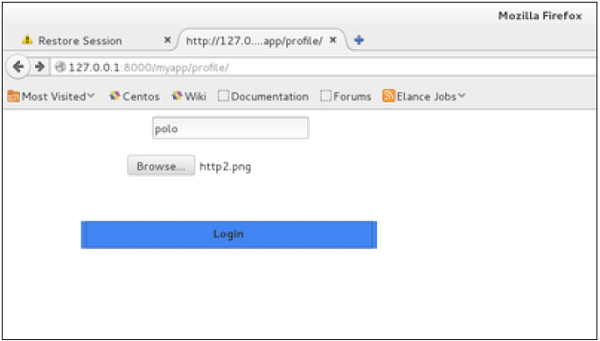
<html>
   <body>

      <form name = "form" enctype = "multipart/form-data"
         action = "{% url "myapp.views.SaveProfile" %}" method = "POST" >{% csrf_token %}

         <div style = "max-width:470px;">
            <center>
               <input type = "text" style = "margin-left:20%;"
               placeholder = "Name" name = "name" />
            </center>
         </div>

         <br>

         <div style = "max-width:470px;">
            <center>
               <input type = "file" style = "margin-left:20%;"
                  placeholder = "Picture" name = "picture" />
            </center>
         </div>

         <br>

         <div style = "max-width:470px;">
            <center>

               <button style = "border:0px;background-color:#4285F4; margin-top:8%;
                  height:35px; width:80%; margin-left:19%;" type = "submit" value = "Login" >
                  <strong>Login</strong>
               </button>

            </center>
         </div>

      </form>

   </body>
</html>
Next, we need our pair of URLs to get started: myapp/urls.py
from django.conf.urls import patterns, url
from django.views.generic import TemplateView

urlpatterns = patterns(
   'myapp.views', url(r'^profile/',TemplateView.as_view(
      template_name = 'profile.html')), url(r'^saved/', 'SaveProfile', name = 'saved')
)
When accessing “/myapp/profile”, we will get the following profile.html template rendered −
And on form post, the saved template will be rendered −
We have a sample for image, but if you want to upload another type of file, not just image, just replace the ImageField in both Model and Form with FileField.
Django – Cookies Handling:
Sometimes you might want to store some data on a per-site-visitor basis as per the requirements of your web application. Always keep in mind, that cookies are saved on the client side and depending on your client browser security level, setting cookies can at times work and at times might not.
To illustrate cookies handling in Django, let’s create a system using the login system we created before. The system will keep you logged in for X minute of time, and beyond that time, you will be out of the app.
For this, you will need to set up two cookies, last_connection and username.
At first, let’s change our login view to store our username and last_connection cookies −
from django.template import RequestContext

def login(request):
   username = "not logged in"

   if request.method == "POST":
      #Get the posted form
      MyLoginForm = LoginForm(request.POST)

   if MyLoginForm.is_valid():
      username = MyLoginForm.cleaned_data['username']
   else:
      MyLoginForm = LoginForm()

   response = render_to_response(request, 'loggedin.html', {"username" : username},
      context_instance = RequestContext(request))

   response.set_cookie('last_connection', datetime.datetime.now())
   response.set_cookie('username', datetime.datetime.now())

   return response
As seen in the view above, setting cookie is done by the set_cookie method called on the response not the request, and also note that all cookies values are returned as string.
Let’s now create a formView for the login form, where we won’t display the form if cookie is set and is not older than 10 second −
def formView(request):
   if 'username' in request.COOKIES and 'last_connection' in request.COOKIES:
      username = request.COOKIES['username']

      last_connection = request.COOKIES['last_connection']
      last_connection_time = datetime.datetime.strptime(last_connection[:-7],
         "%Y-%m-%d %H:%M:%S")

      if (datetime.datetime.now() - last_connection_time).seconds < 10:
         return render(request, 'loggedin.html', {"username" : username})
      else:
         return render(request, 'login.html', {})

   else:
      return render(request, 'login.html', {})
As you can see in the formView above accessing the cookie you set, is done via the COOKIES attribute (dict) of the request.
Now let’s change the url.py file to change the URL so it pairs with our new view −
from django.conf.urls import patterns, url
from django.views.generic import TemplateView

urlpatterns = patterns('myapp.views',
   url(r'^connection/','formView', name = 'loginform'),
   url(r'^login/', 'login', name = 'login'))
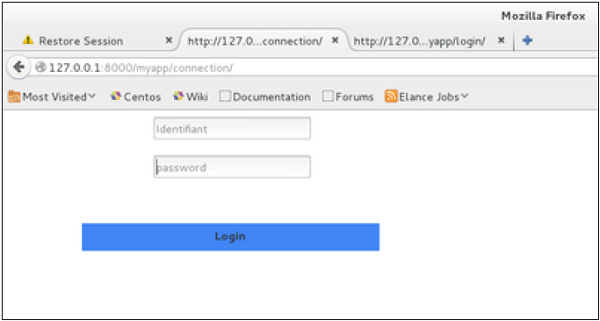
When accessing /myapp/connection, you will get the following page −
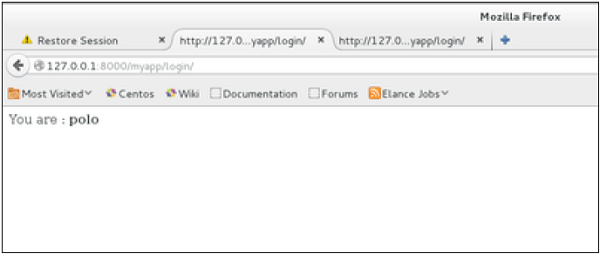
And you will get redirected to the following screen on submit −
Now, if you try to access /myapp/connection again in the 10 seconds range, you will get redirected to the second screen directly. And if you access /myapp/connection again out of this range you will get the login form (screen 1).
Django – Sessions:
We can use client side cookies to store a lot of useful data for the web app. We know that we can use client side cookies to store various data useful for our web app. This leads to lot of security holes depending on the importance of the data you want to save.
For security reasons, Django has a session framework for cookies handling. Sessions are used to abstract the receiving and sending of cookies, data is saved on server side (like in database), and the client side cookie just has a session ID for identification. Sessions are also useful to avoid cases where the user browser is set to ‘not accept’ cookies.
Setting Up Sessions
In Django, enabling session is done in your project settings.py, by adding some lines to the MIDDLEWARE_CLASSES and the INSTALLED_APPS options. This should be done while creating the project, but it’s always good to know, so MIDDLEWARE_CLASSES should have −
'django.contrib.sessions.middleware.SessionMiddleware'
And INSTALLED_APPS should have −
'django.contrib.sessions'
By default, Django saves session information in database , but you can configure the engine to store information using other ways like: in file or in cache.
When session is enabled, every request (first argument of any view in Django) has a session (dict) attribute.
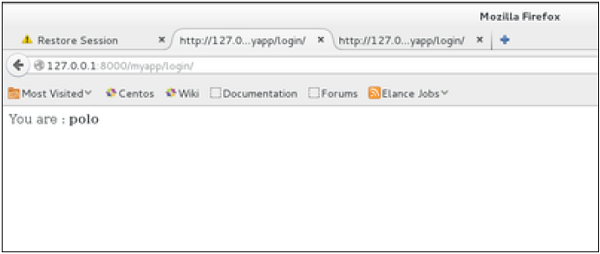
Let’s create a simple sample to see how to create and save sessions. We have built a simple login system before . Let us save the username in a cookie so, if not signed out, when accessing our login page you won’t see the login form. Basically, let’s make our login system we used in Django Cookies handling more secure, by saving cookies server side.
For this, first lets change our login view to save our username cookie server side −
def login(request):
   username = 'not logged in'

   if request.method == 'POST':
      MyLoginForm = LoginForm(request.POST)

      if MyLoginForm.is_valid():
         username = MyLoginForm.cleaned_data['username']
         request.session['username'] = username
      else:
         MyLoginForm = LoginForm()

   return render(request, 'loggedin.html', {"username" : username}
Then let us create formView view for the login form, where we won’t display the form if cookie is set −
def formView(request):
   if request.session.has_key('username'):
      username = request.session['username']
      return render(request, 'loggedin.html', {"username" : username})
   else:
      return render(request, 'login.html', {})
Now let us change the url.py file to change the url so it pairs with our new view −
from django.conf.urls import patterns, url
from django.views.generic import TemplateView

urlpatterns = patterns('myapp.views',
   url(r'^connection/','formView', name = 'loginform'),
   url(r'^login/', 'login', name = 'login'))
When accessing /myapp/connection, you will get to see the following page −

And you will get redirected to the following page −
Now if you try to access /myapp/connection again, you will get redirected to the second screen directly.
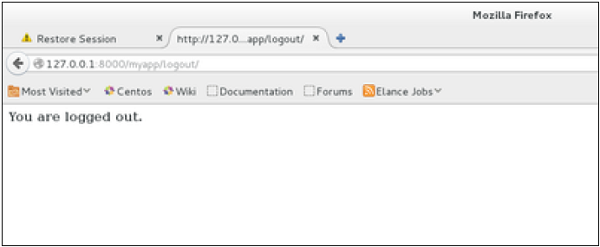
Let’s create a simple logout view that erases our cookie.
def logout(request):
   try:
      del request.session['username']
   except:
      pass
   return HttpResponse("<strong>You are logged out.</strong>")
And pair it with a logout URL in myapp/url.py
url(r'^logout/', 'logout', name = 'logout'),
Now, if you access /myapp/logout, you will get the following page −
If you access /myapp/connection again, you will get the login form (screen 1).
Some More Possible Actions Using Sessions
We have seen how to store and access a session, but it’s good to know that the session attribute of the request have some other useful actions like −
- set_expiry (value) − Sets the expiration time for the session.
- get_expiry_age() − Returns the number of seconds until this session expires.
- get_expiry_date() − Returns the date this session will expire.
- clear_expired() − Removes expired sessions from the session store.
- get_expire_at_browser_close() − Returns either True or False, depending on whether the user’s session cookies have expired when the user’s web browser is closed.
Key Advantages:
Here, are prime reasons for using Django:
- Django is easy to set up and run. It offers a variety of options to get started
- It provides a ready-to-use user interface for administrative activities
- It enables multilingual websites by using its built-in internationalization system
- Helps you to meet the massive traffic demands quickly
- Django is used to build all types of content management systems, social networks as well as scientific computing platforms.
- Django helps you to provide end-to-end application testing
- Helps you to document your API with an HTML output
- REST Framework has rich support for several authentication protocols
- Permissions and throttling policies
- It is widely used for rate limiting API requests from a single user.
Disadvantages of using Django:
- A process cannot handle multiple requests simultaneously.
- Django is a very much monolithic tool.
- Components get deployed together which can create confusion.
- Knowledge of full system needed to work on Django
- Makes web application components tightly-coupled
- You need to do lengthy programming for minor tasks.
-Django on cloud is a free and open-source web framework, written in Python, which follows the model–view–controller (MVC) architectural pattern. Django’s primary goal is to ease the creation of complex, database-driven websites. Django emphasizes reusability and “pluggability” of components, rapid development, and the principle of don’t repeat yourself. Python is used throughout, even for settings, files, and data models.
Django is owned by Django (https://www.djangoproject.com/) and they own all related trademarks and IP rights for this software.
Cognosys Provides Hardened images of DJango on the cloud ( AWS marketplace, Azure and Google Cloud Platform).
Deploy DJango securely on cloud i.e. AWS marketplace, Azure and Google Cloud Platform (GCP)
Secured Django on Ubuntu 14.04 LTS
Features
Top Features of Django Framework:
1. Excellent Documentation
This is one of the main reasons to start learning Django. If we compare Django with other open source technologies, it offers the best documentation in the market.
Better documentation of any technology is like a very well-established library for any developer. There, he can search for any function desired with ease with the time involving in the searching purpose only.
The documentation of any technology is also one of the categories to grade a technology, as it lets other developers other than its own creators to efficiently utilize the technology.
Django has been best at documentation from the beginning, from the point it became open source in 2005 to the present date, and the documentation has only been getting better with active development of technology and it is also offered in different languages.
2. Python Web-framework
Python is also one of the main reasons people started learning Django. It is that one tool which can solve all your problems and in any kind of operation out there, we can use it. It’s very simple and easy to use. All these features are inside Python. In fact, Python is currently the most popular language in the market. It is because of these 2 main features.
Python is the easiest to learn programming language out there. We can use this language in almost everything from web-development (Django) to machine-learning and everything in between.
These features allow the python and thus Django to be the most powerful and yet easy to learn framework than others.
Yet you must have some basic knowledge of Python and web-working to start developing with Django. It offers rapid development and it achieves so by being simple and logical.
3. SEO Optimised
This is a special feature of Django due to which it has edge over others. SEO is Search Engine Optimization as from the name it means that adding your website to the search engine such that it appears in the top results. As we know that the search engines do use some algorithms which sometimes doesn’t cooperate much with the web-developer. Since we are creating our website in the human understandable form and they have to add it in the URL form on the server so that its best recognized by the search engine.
Django clears that concept by maintaining the website through URLs rather than the IP addresses on the server, which makes it easy for SEO engineers to add the website to the server while the web-developer don’t have to convert the URL into some numeric code.
That’s the gist of it although it’s not the whole and complete process but for our purpose it’s sufficient.
4. High Scalability
A lot of MNCs on a worldwide scale uses Django and it gets implement there without any defects or errors. It is the best example of Django being scalable.
Scalability means that at what scope or level, our technology gets to implement. For bigger websites like Instagram, there are lots of active users (millions of them) which generate data in huge amounts (terabytes of data/day). This kind of level requires our system or application to be very precise and error-free. It is, of course, difficult even for programmers and web developers that have years of experience.
Django is written by those experienced programmers from scratch without using any python library existing other then what the developers created themselves. Thousands of tests and debugging and now with lots of time on the market side as the opensource project makes Django ideal for anyone who wants to make their websites error-free and scalable to a bigger environment.
5. Versatile in Nature
Django is very versatile in its own Django way. The logical project structure and MVT architecture of Django sometimes seem very limiting. But, that’s just opposite because by giving us the files it is providing us with a solid foundation which can then be used to make whichever application we want to create.
All that with integration with almost all the technologies out there with upgradations is by fulfilling the industry standards.
It allows extending Django with all the technologies we work with and also with the upcoming ones. Therefore, Django is the future of web development and everyone who was previously using PHP will majorly use Django.
6. Offers High Security
Django is super secure. To prove the feature, you can always take examples of lots of websites which are worldwide and posses huge traffic.
Django is secure because it covers the loopholes by default which were once left open for the backend developer to complete. Although while using Django you may not feel it but those expert backend developers can tell the quality and security of the work done by Django.
The writing of Django’s code is totally from scratch while that accounts for its other features as well, but it also accounts for the security you are getting with this framework. We cannot get the security at such a huge scale with this much expertise level of code in other technologies.
It’s been written by web-developers keeping in mind what problems are faced by the same and with that to get a rapid development speed.
7. Thoroughly Tested
Whenever we are learning a new technology, we want it to be durable and powerful enough to withstand the dynamic changes happening in the industry. Well, Django achieves that task with flying colors. We are trying to state that “Django has been in the industry for more than a decade and is still a popular technology which is beating frameworks like Laravel(PHP) in their own game.”
MNCs all over the world extensively uses Django for creating projects so we can say that it works well to handle all the traffics and also accomplish international standards.
Its been around for so much time that lots of bugs and errors have been taken care of. It is a good time to learn this technology. The number of developers using Django for web development keeps growing day by day. Thus, it makes Django a crowd-tested technology. If it was not stable or task accomplishing why would it gain popularity and still be in the market.
8. Provides Rapid Development
Although, lots of technologies cover this feature as the primary feature but Django has so many other better features that sets it apart.
Here, rapid development means that we won’t need expert backend knowledge to make a fully functional website. We will also not create separate server files to design the database and connect the same while also making another file for transferring data to and from the server. Django handles this work and a lot of other tasks. We won’t need extra files for each task.
These tasks are like half the project time and money, and they are surely important for almost any website out there. While Django supports them inbuilt thus, allowing you to work more on your website’s unique feature.
We can handle many complex tasks with the help of Django Features mentioned above.
-Major Features of Django :
- Ridiculously fast.
- Fully loaded
- Reassuringly secure
- Exceedingly scalable
- Incredibly versatile
- Simple installation
- No 3rd-party requirements
AWS
Installation Instructions For Windows
Step 1) RDP Connection: To connect to the deployed instance, Please follow Instructions to Connect to Windows instance on AWS Cloud
Connect to the virtual machine using following RDP credentials:
- Hostname: PublicDNS / IP of machine
- Port : 3389
Username: To connect to the operating system, use RDP and the username is Administrator.
Password: Please Click here to know how to get password .
Step 2) Application URL: Access the application via a browser at “http://127.0.0.1/admin” or “http://localhost/admin”
Step 3) How Can We Get Started With Django?
To get started, we suggest the following steps:
- Open Command Prompt by Clicking on Desktop Icon and choose path for project cd C:\inetpub\wwwroot
- Enter in Command Prompt – virtualenv test
- Enter in Command Prompt – cd test
- Enter in Command Prompt – pip freeze
- Enter in Command Prompt – python -m pip install –upgrade pip
- Enter in Command Prompt – pip freeze
- Enter in Command Prompt – .\Scripts\activate
- Enter in Command Prompt – pip freeze
- Enter in Command Prompt – pip install django==1.6.5
- Enter in Command Prompt – pip freeze ( To see Django Version , If empty then follow 8th step )
- Enter in Command Prompt – python .\Scripts\django-admin.py startproject projectname
- Enter in Command Prompt – cd project name
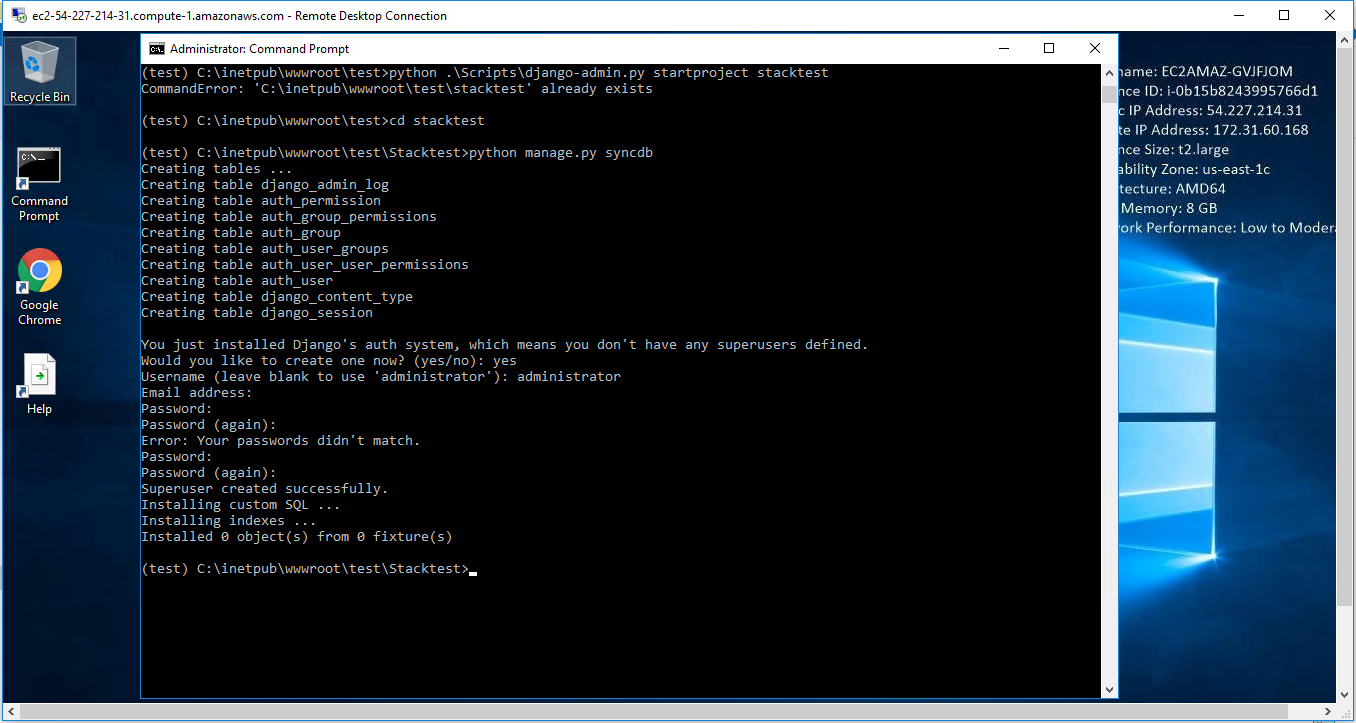
- Enter in Command Prompt – python manage.py syncdb
- Fill all the details – Username(optional) || Mail ID(optional) || Password(Compulsory)
- Enter in Command Prompt – python manage.py runserver 0.0.0.0:80
How To Access A Django Server Application?
14. The Django server will be accessible only when using 127.0.0.1/localhost
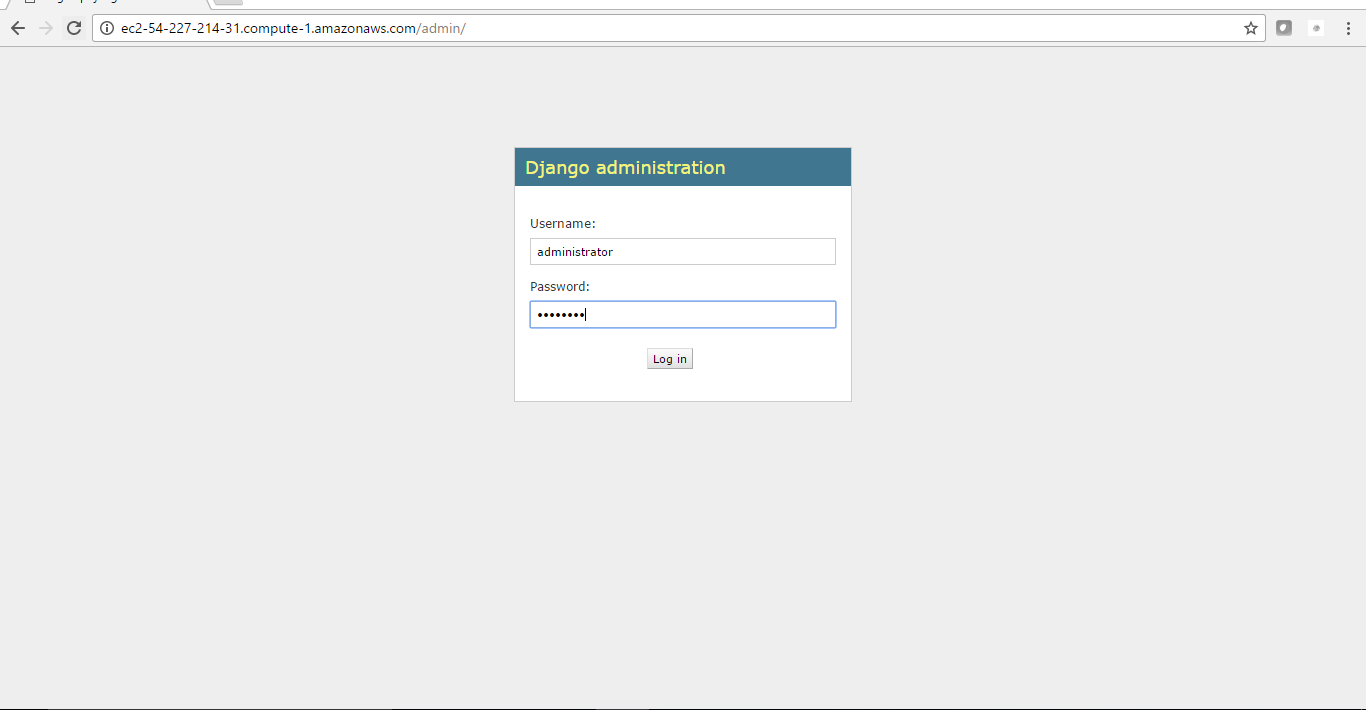
15. Admin URL – http://127.0.0.1/admin or http://localhost/admin
or Access via PublicDNS or Public-IP by http://publicdns/admin

AWS Step by Step Screenshots for Windows
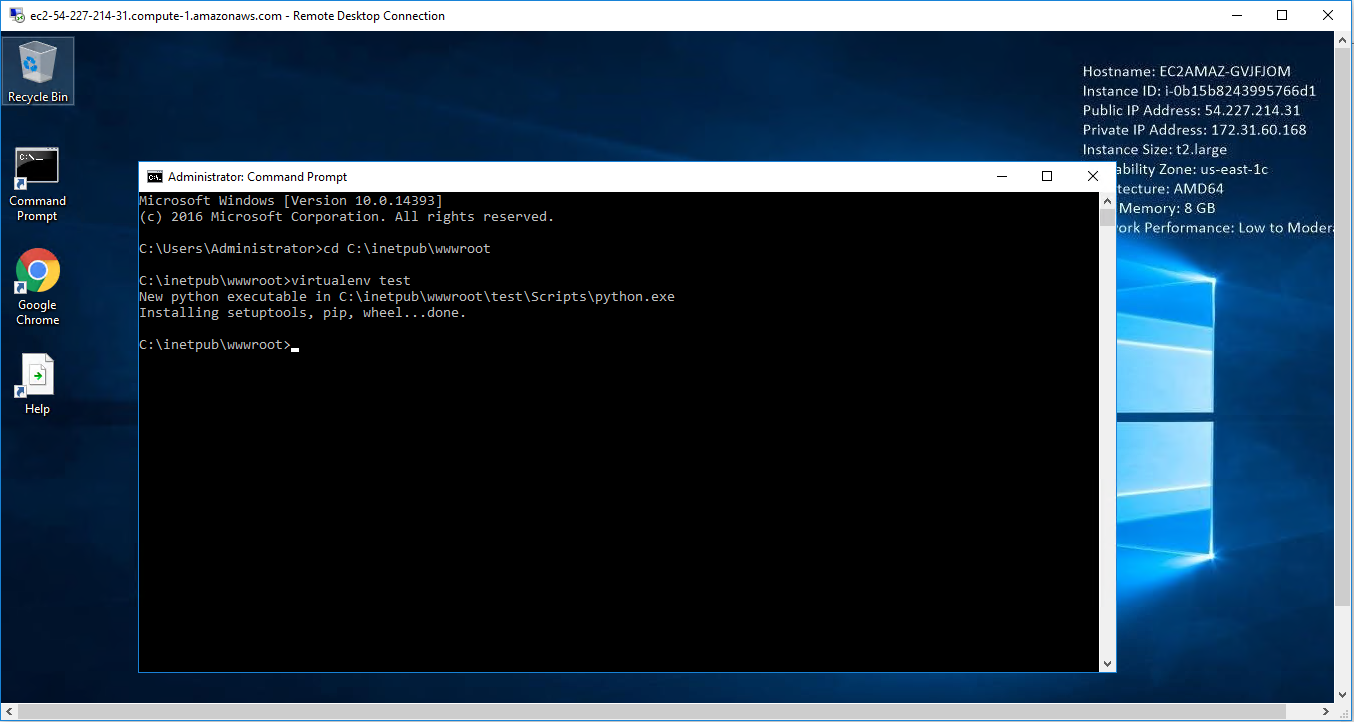
Step 1. Open Command Prompt by Clicking on Desktop Icon and choose path for project ( For Example: cd C:\inetpub\wwwroot )
Step 2. Enter – virtualenv name_of_env ( For Example: virtualenv test )
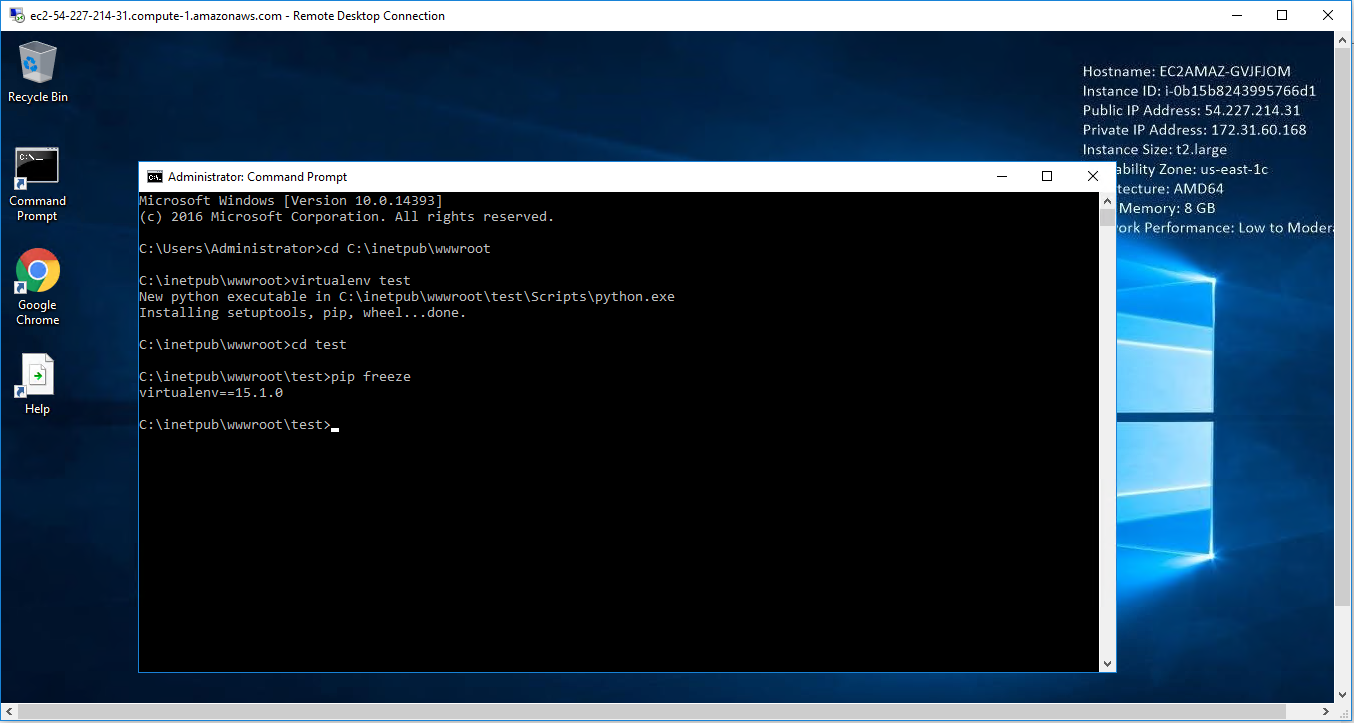
Step 3.Enter – cd name_of_env ( It will go to your Env Directory )

Step 4.Enter – pip freeze ( To check ENV Version )
Step 5.Enter – .\Scripts\activate ( TO actiavte ENV )
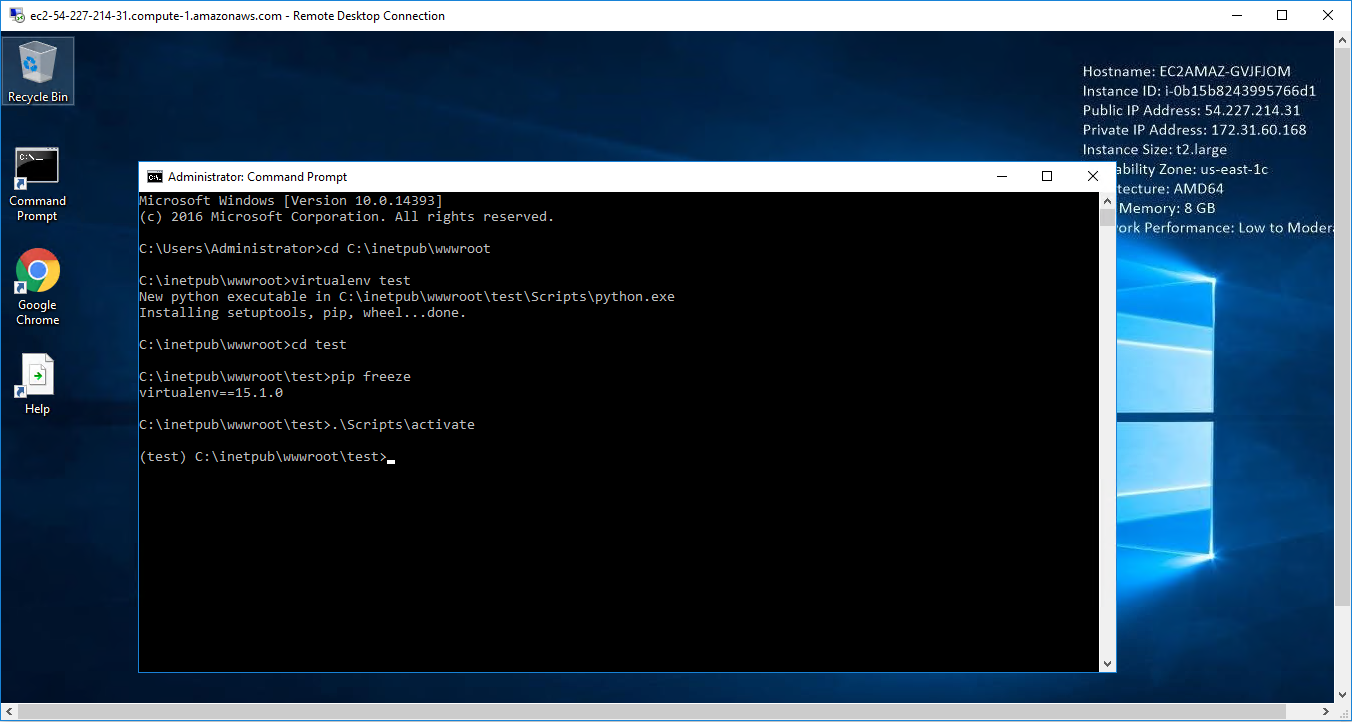
Step 6.Enter – pip freeze ( To see Django Version , If empty then follow 8th step )
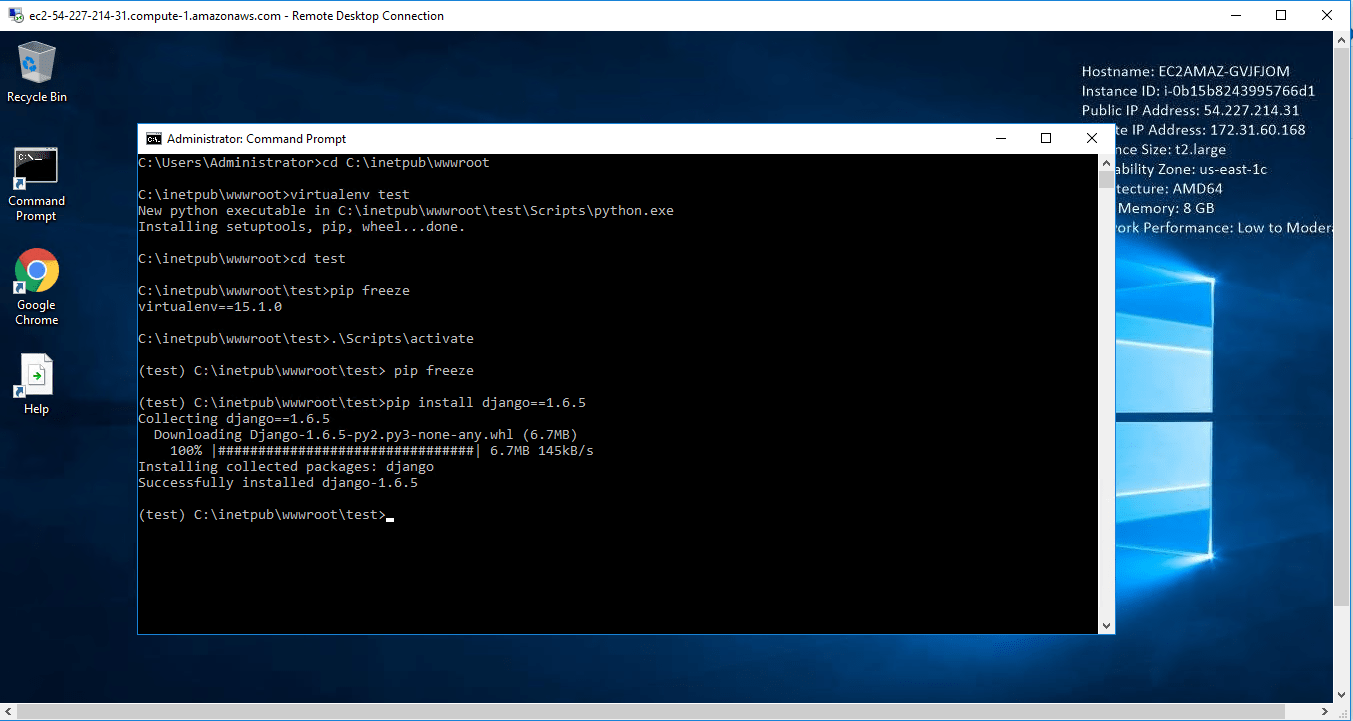
Step 7.Enter – pip install django==1.6.5 ( It will install Django latest version )
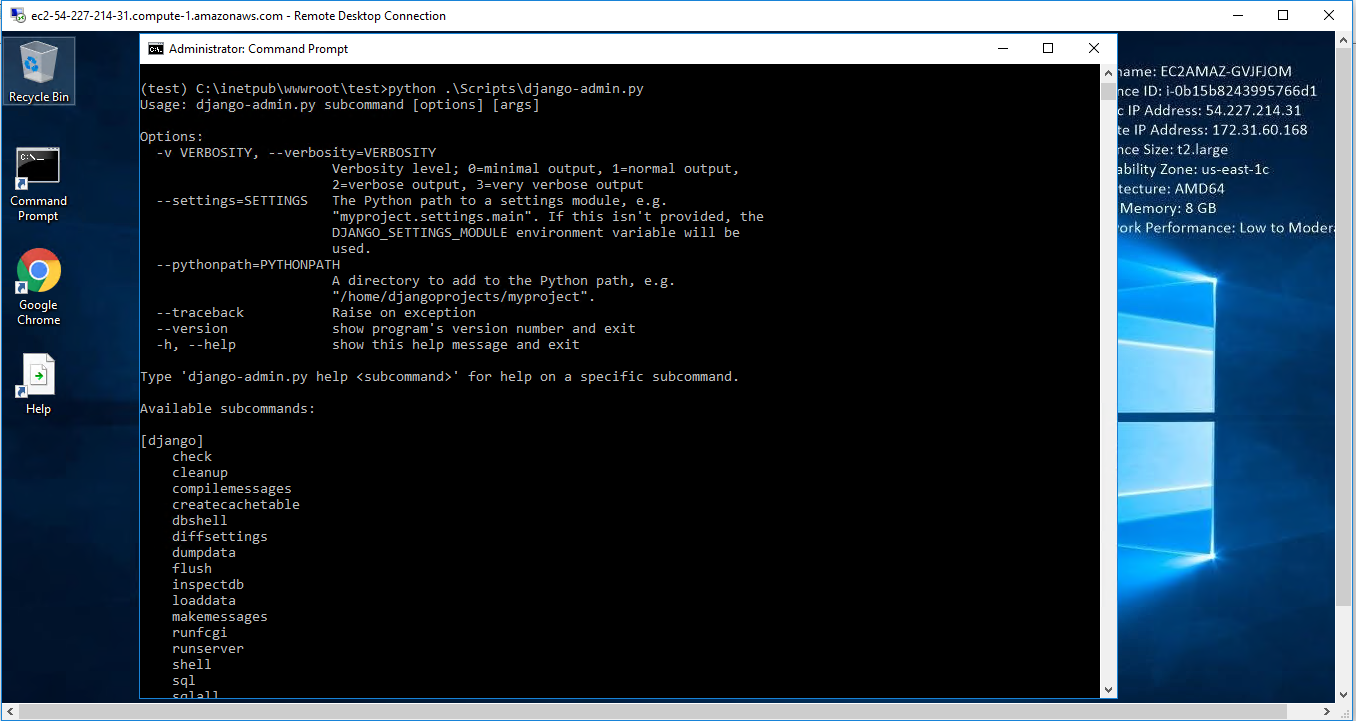
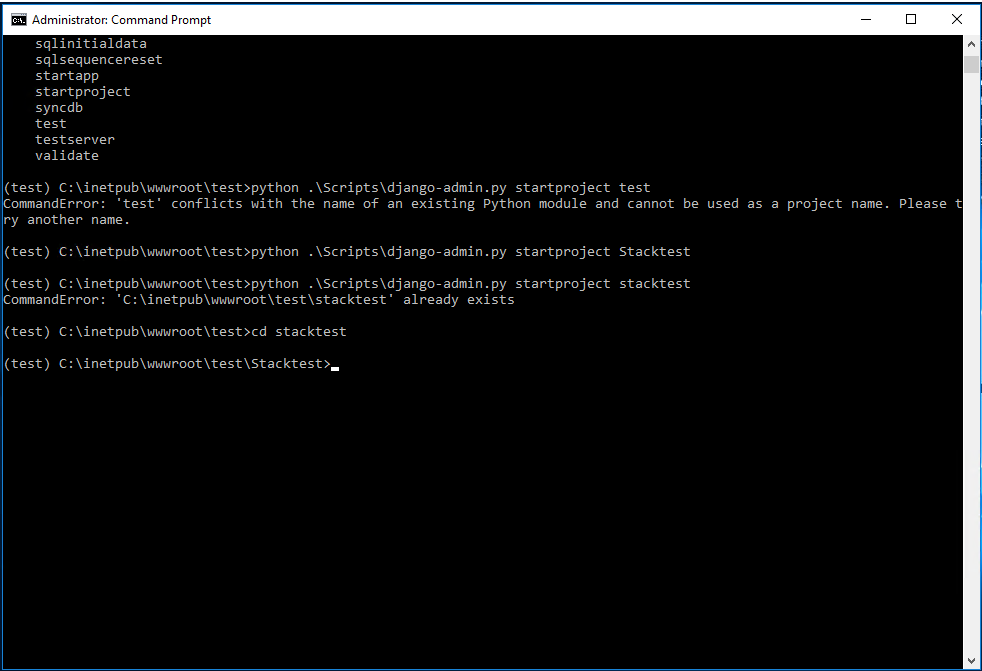
Step 8.Enter – python .\Scripts\django-admin.py startproject projectname
Step 9.Enter – cd projectname
Step 10.Enter – python manage.py syncdb
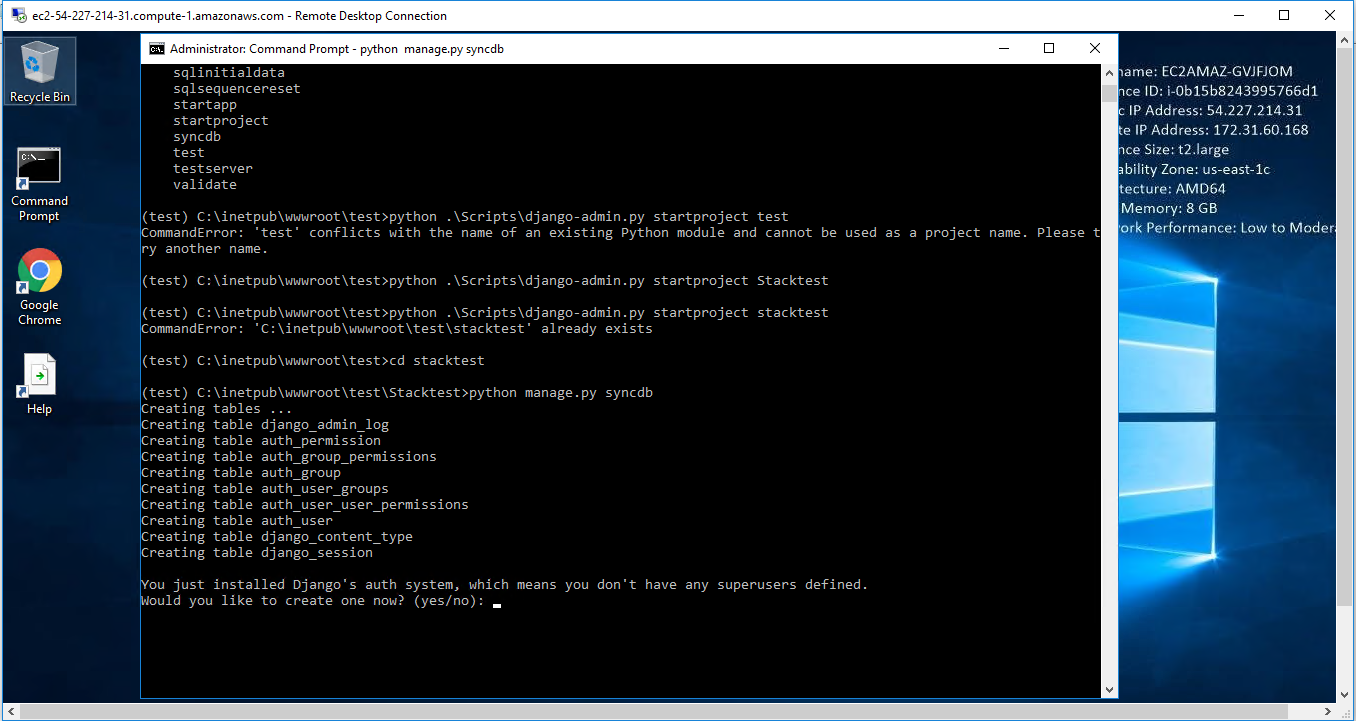
Step 11.Fill all the details – Username(optional) || Mail ID(optional) || Password(Compulsory)
Step 12.Enter – python manage.py runserver 0.0.0.0:80
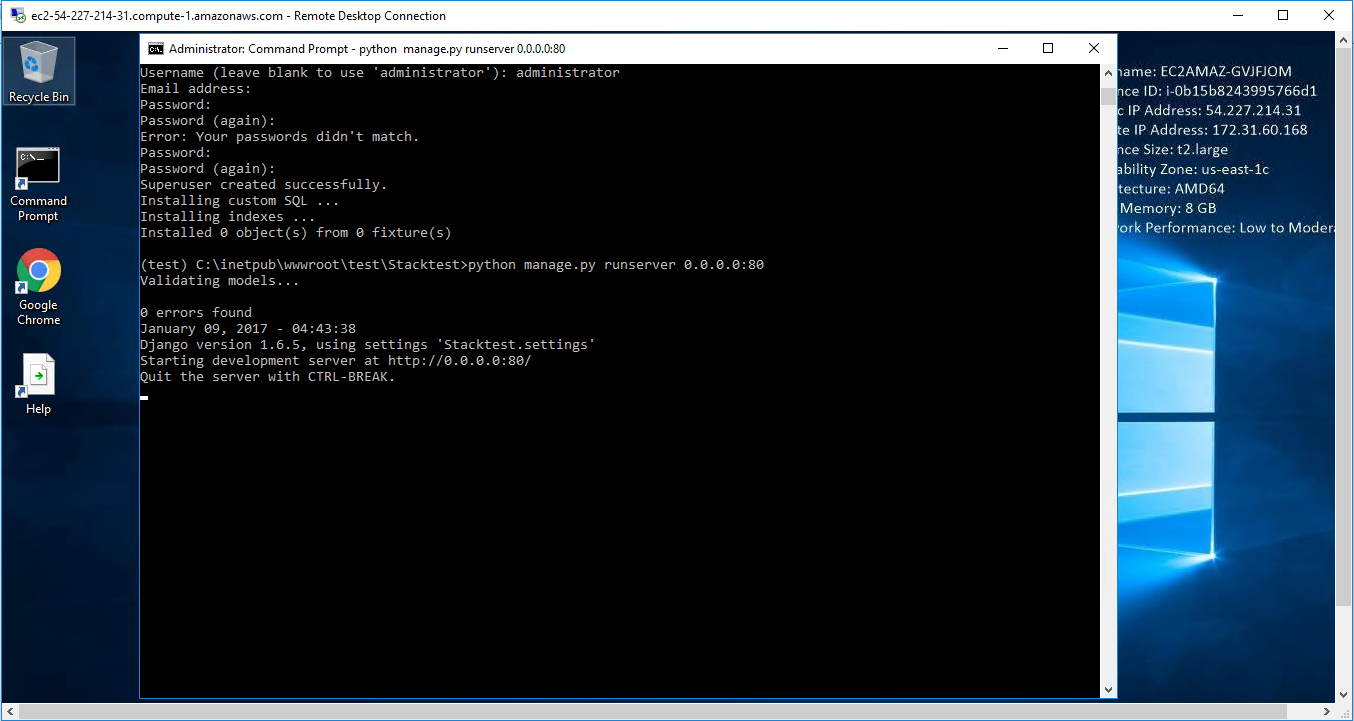
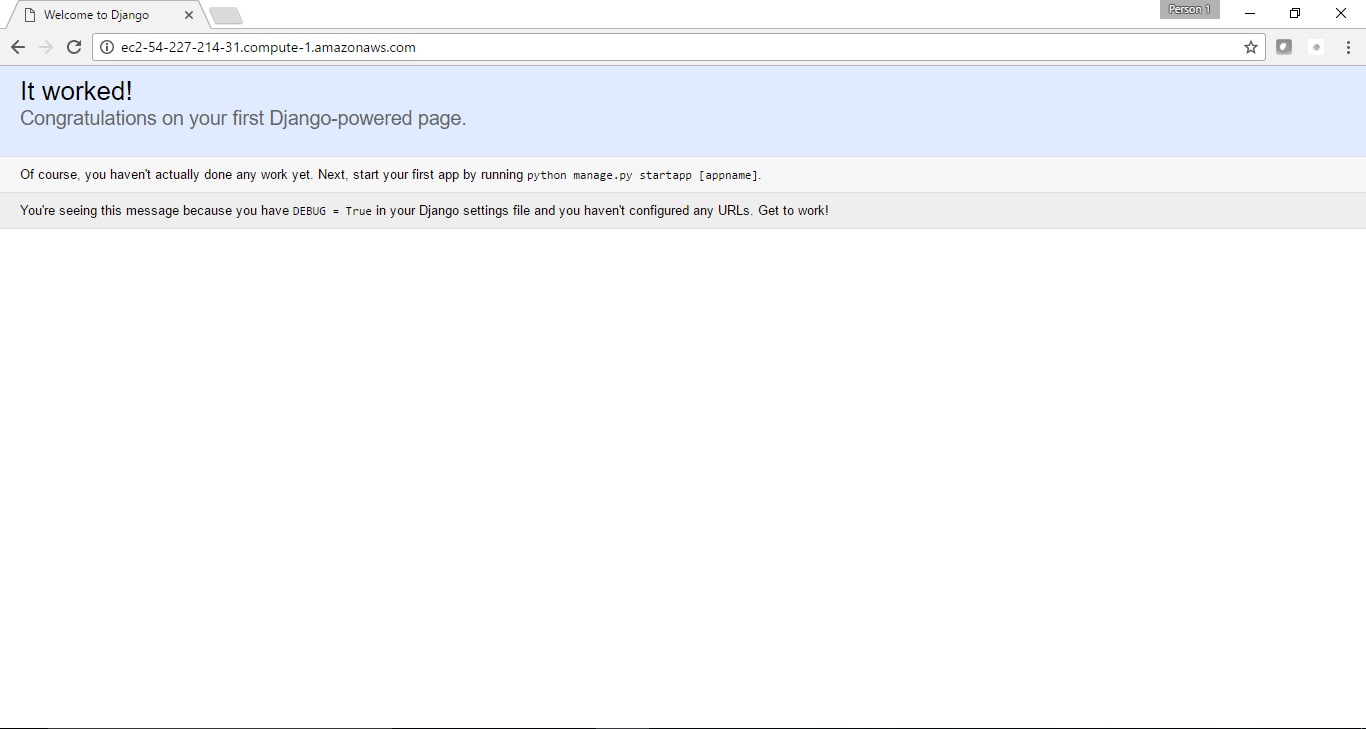
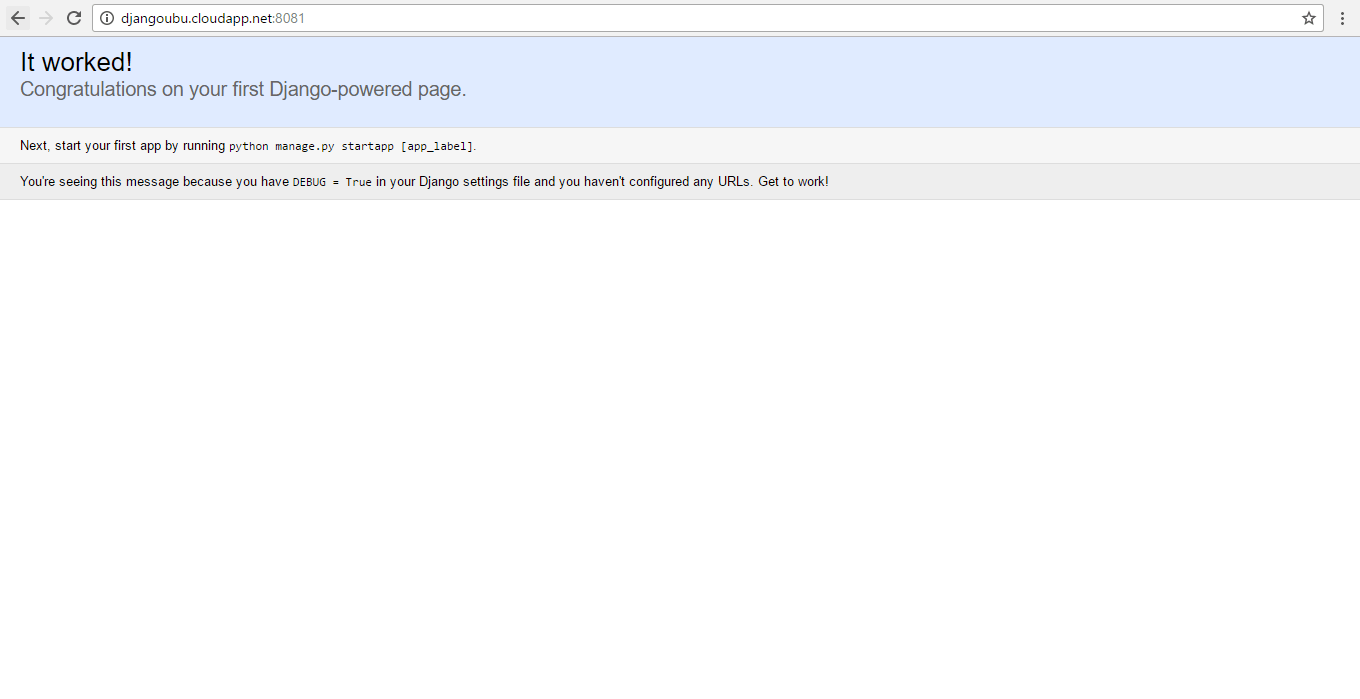
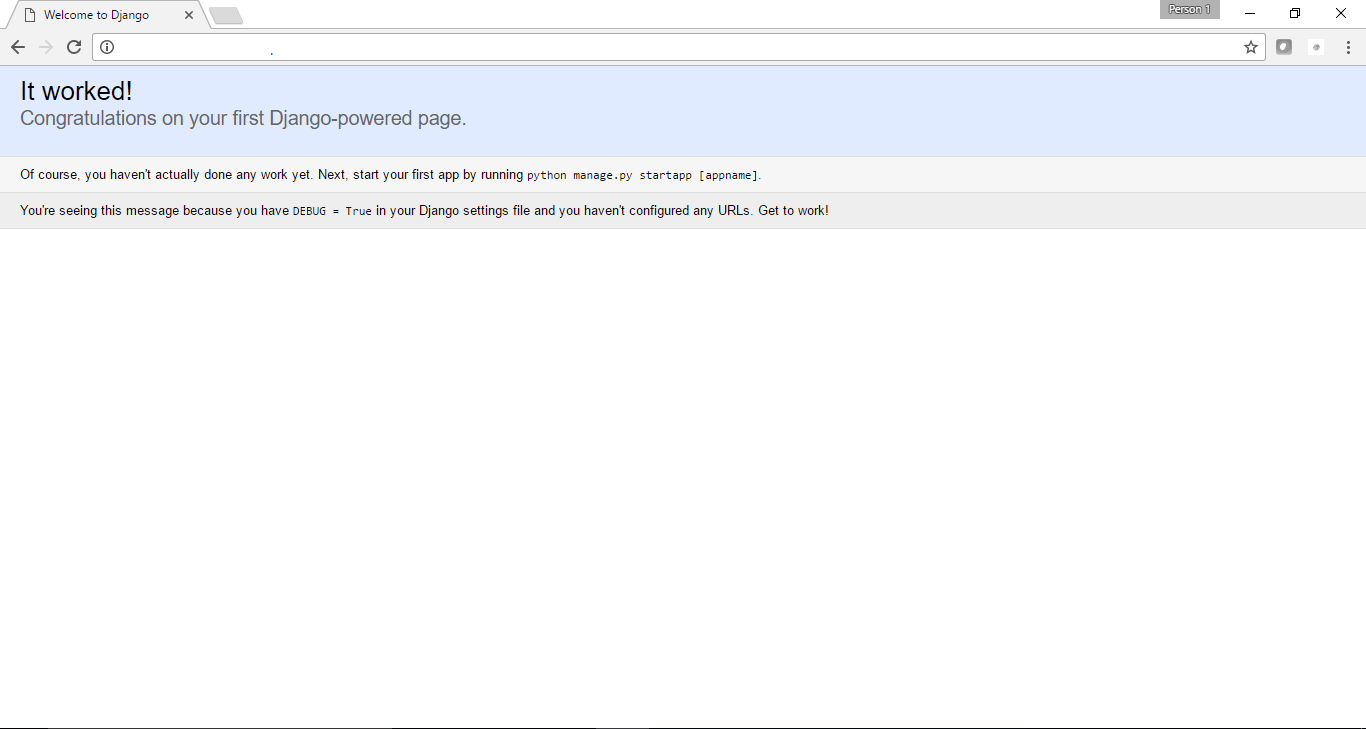
Step 13.Django ready for use opne in Browser-wellcome page

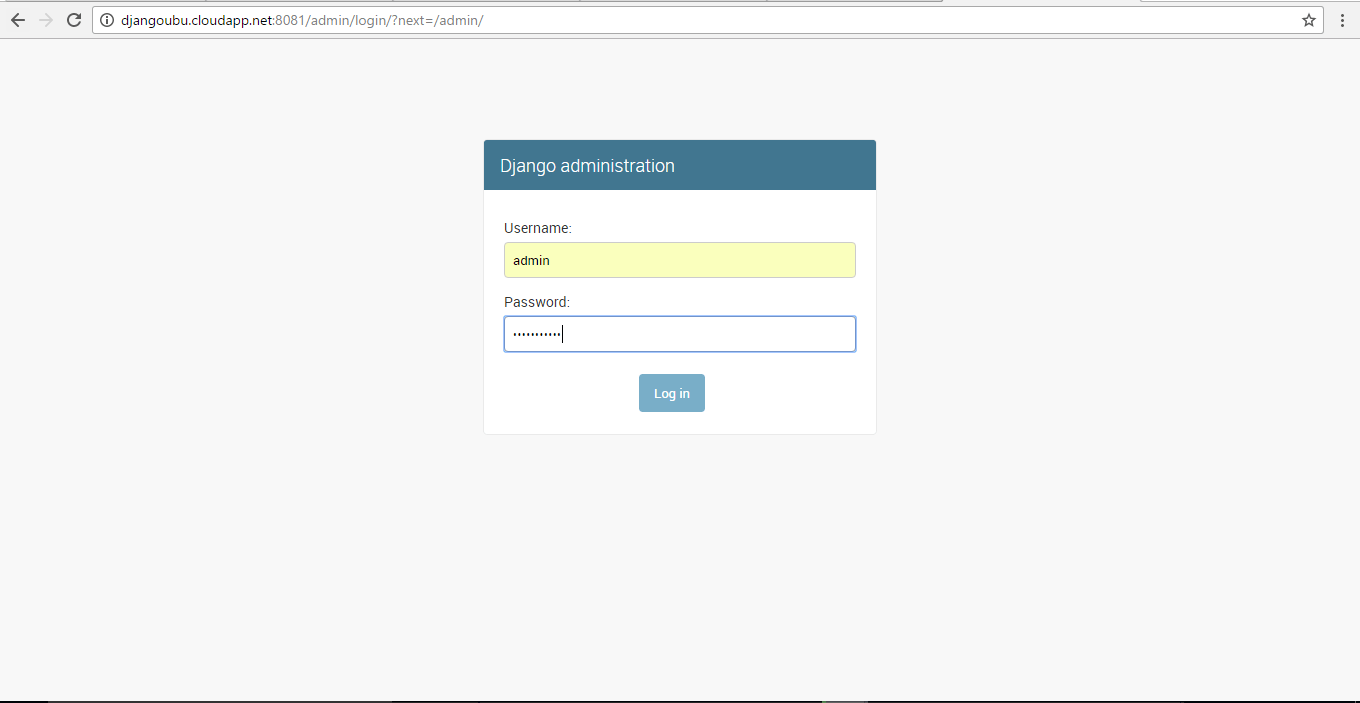
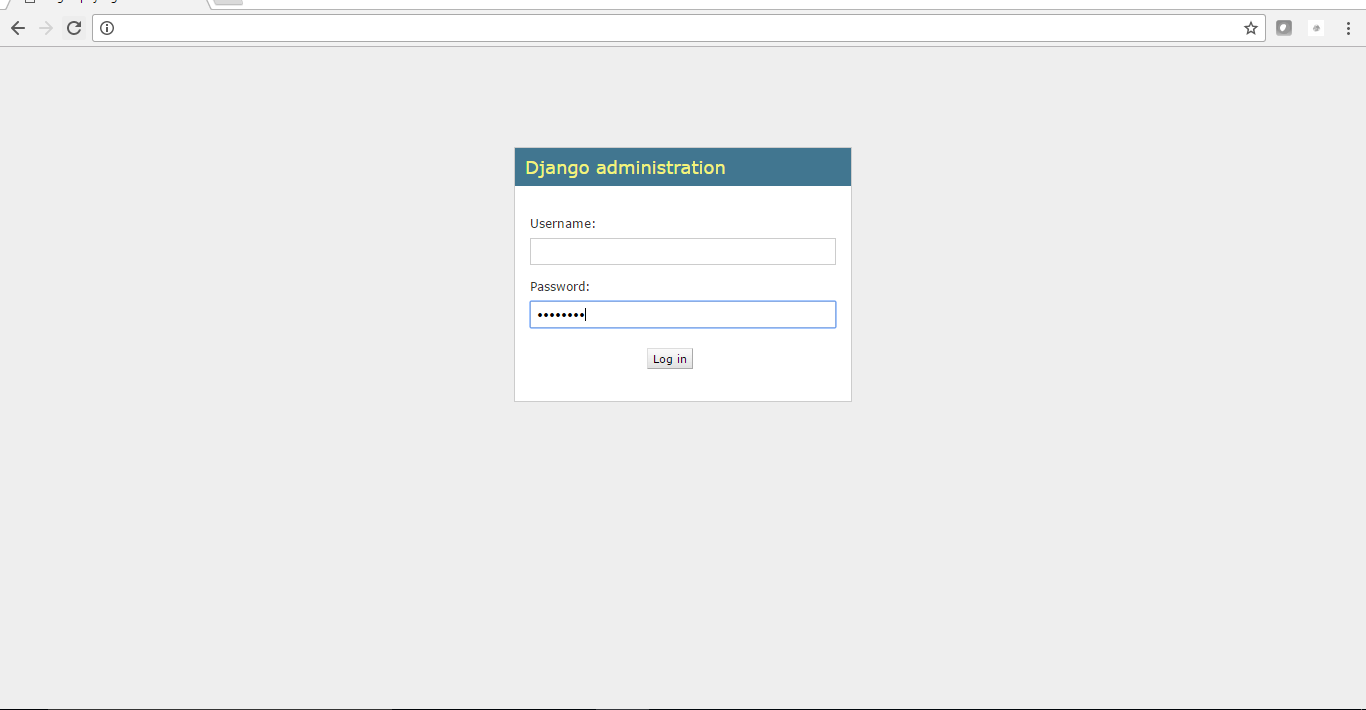
Step 14.Django login window
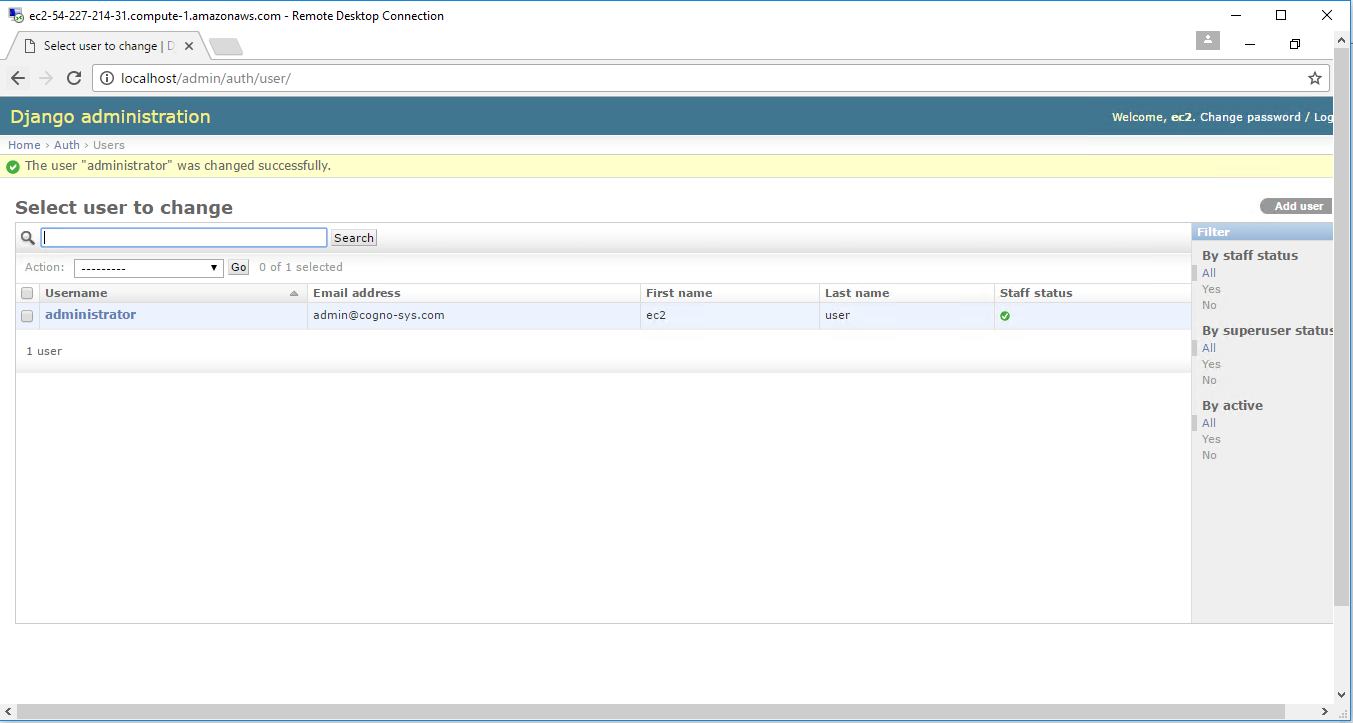
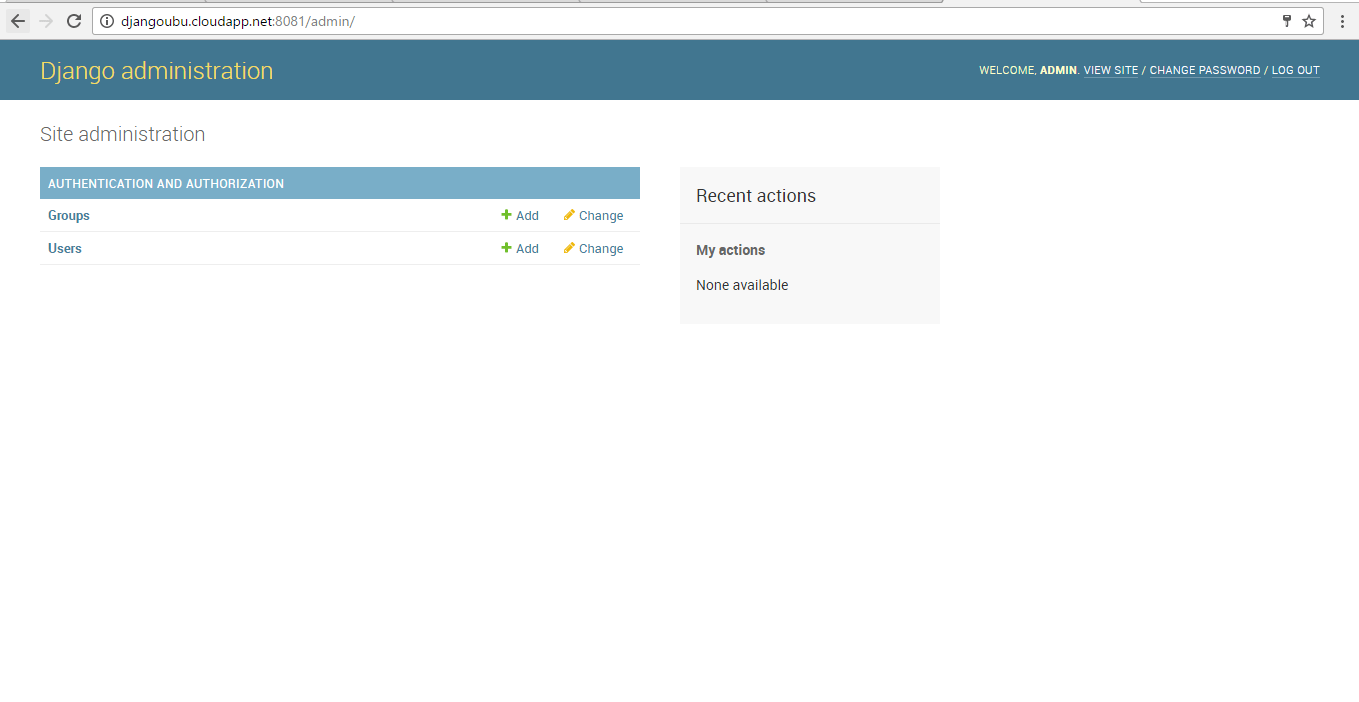
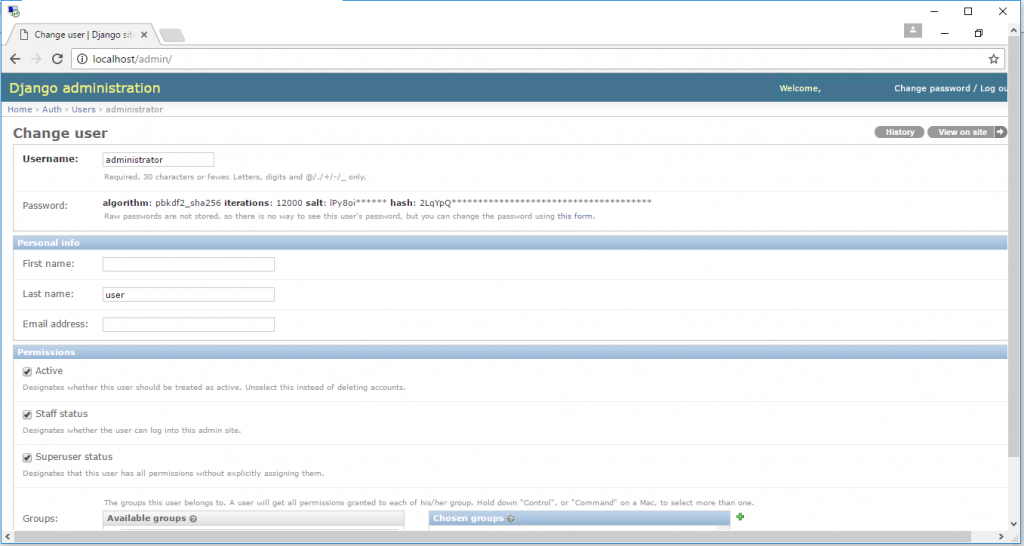
Step 15.After login open user panel
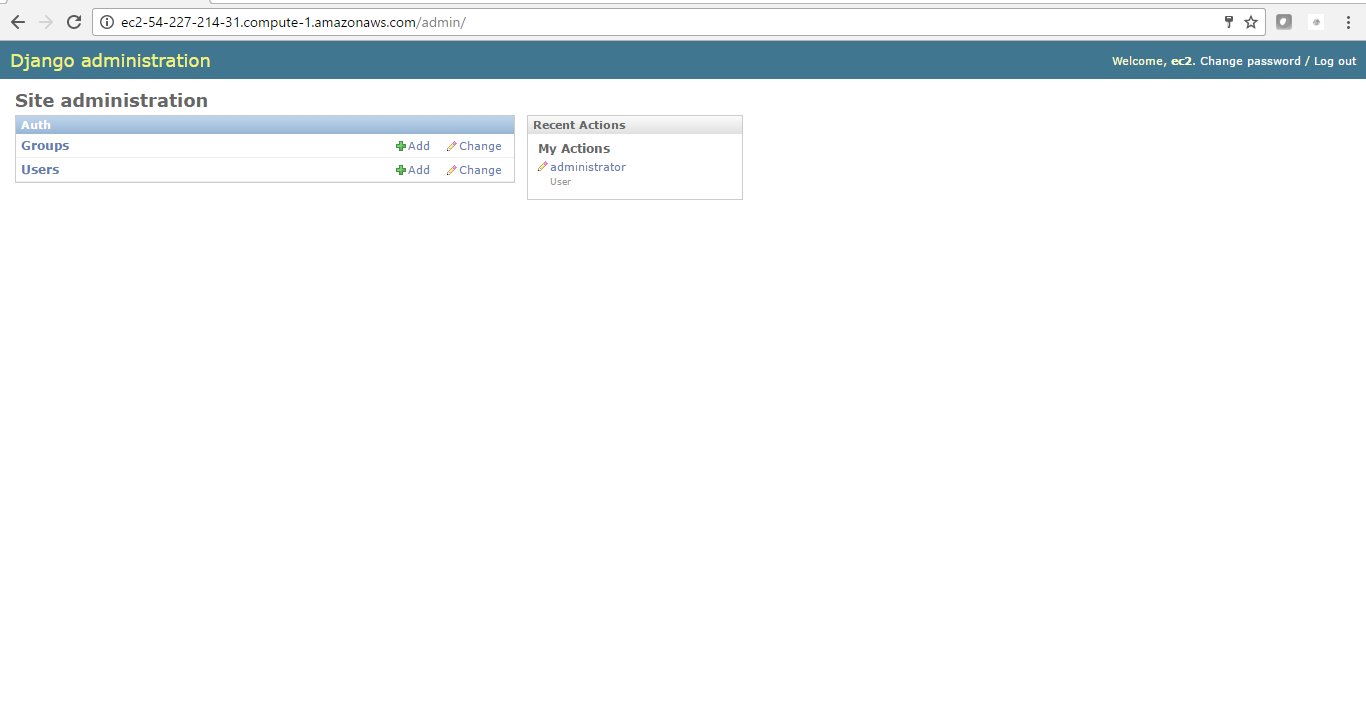
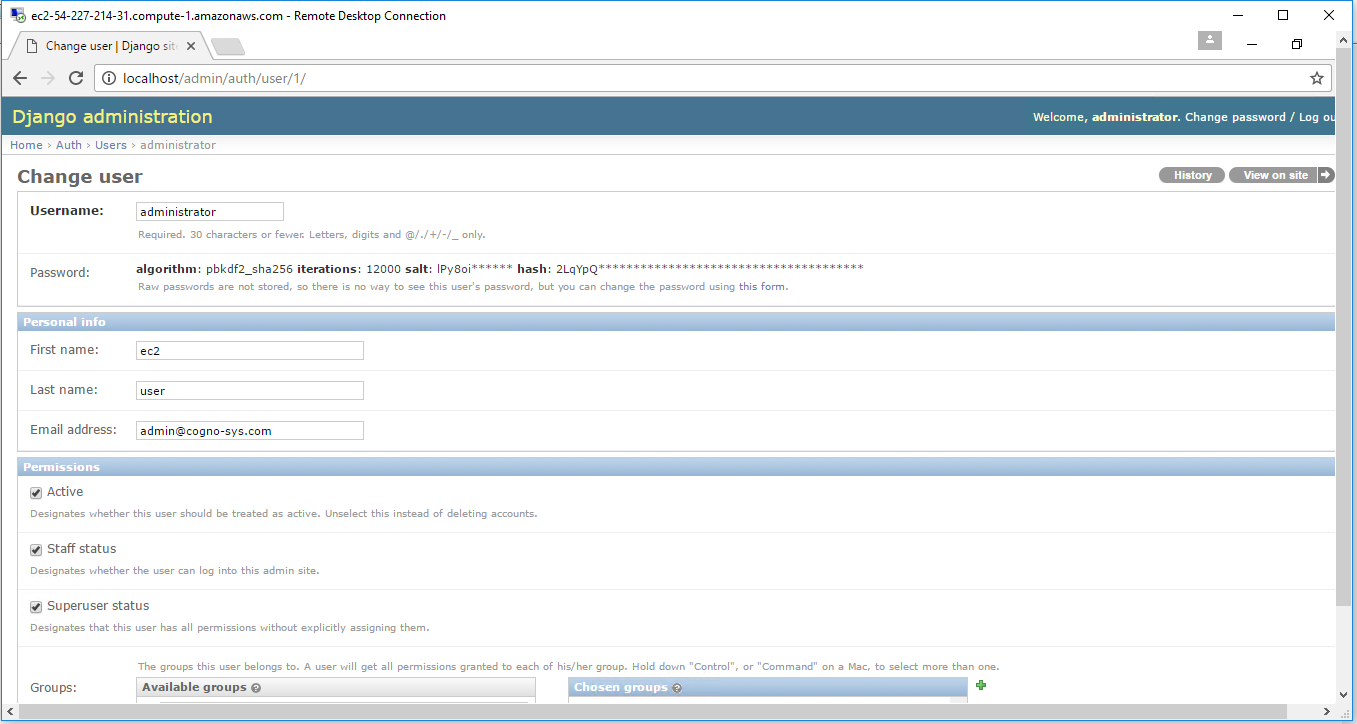
Step 16.Administrator profile
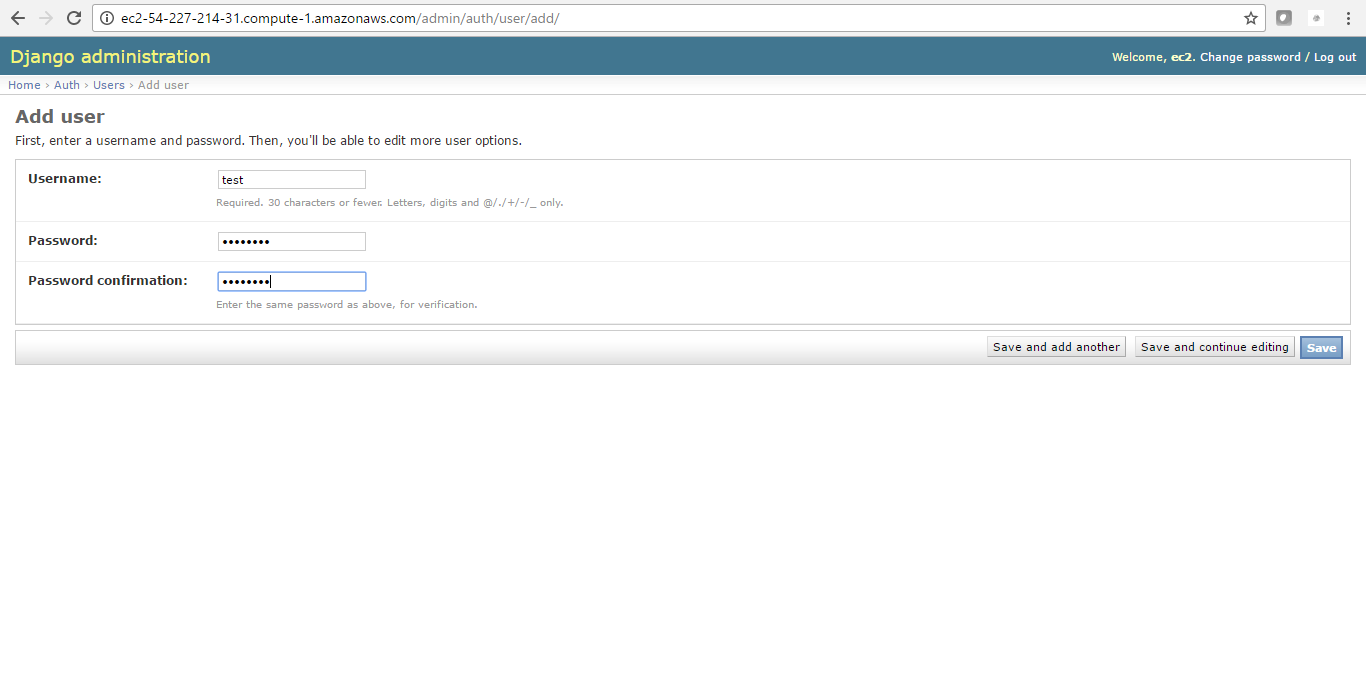
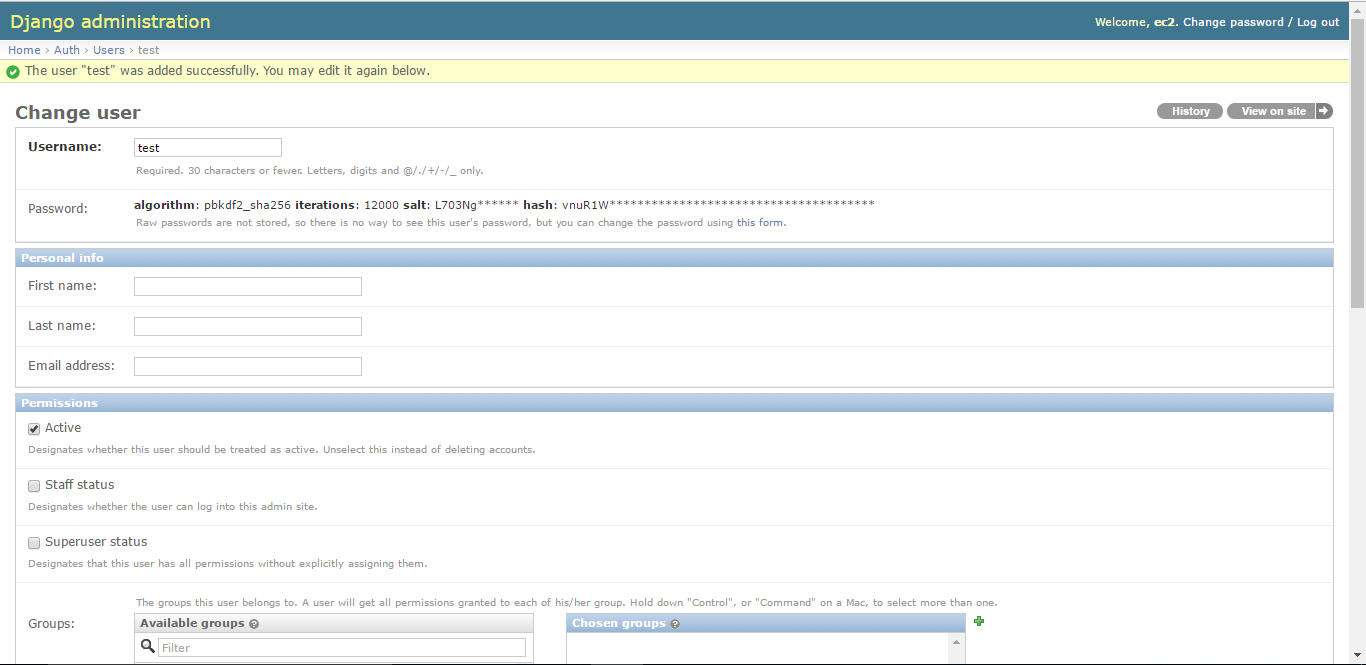
Step 17.add new user
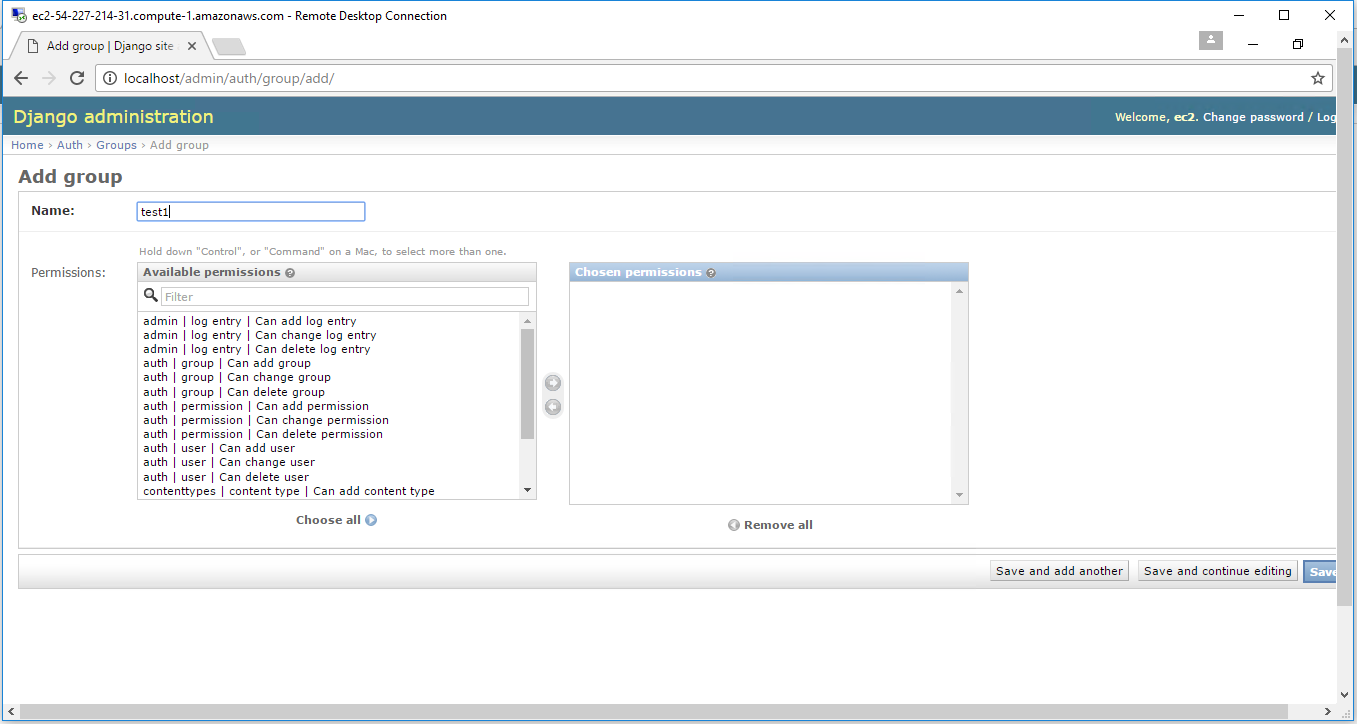
Step 18. Add group
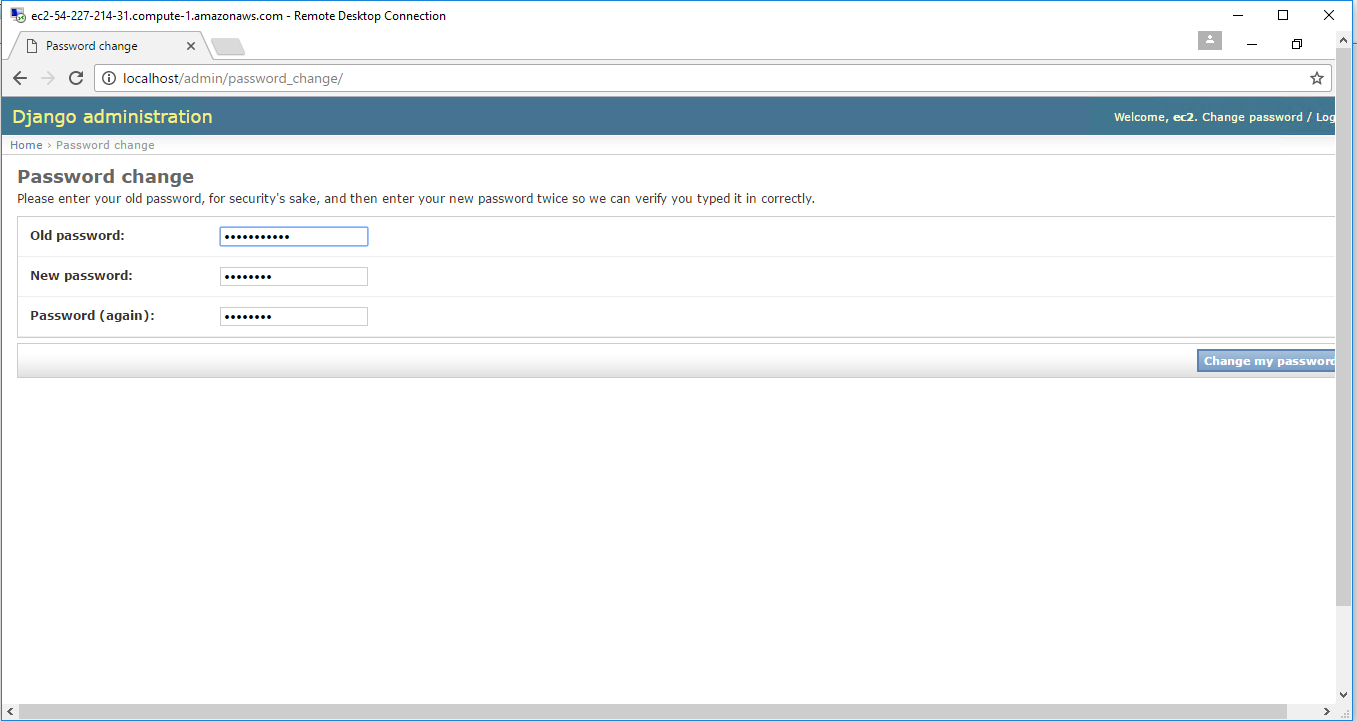
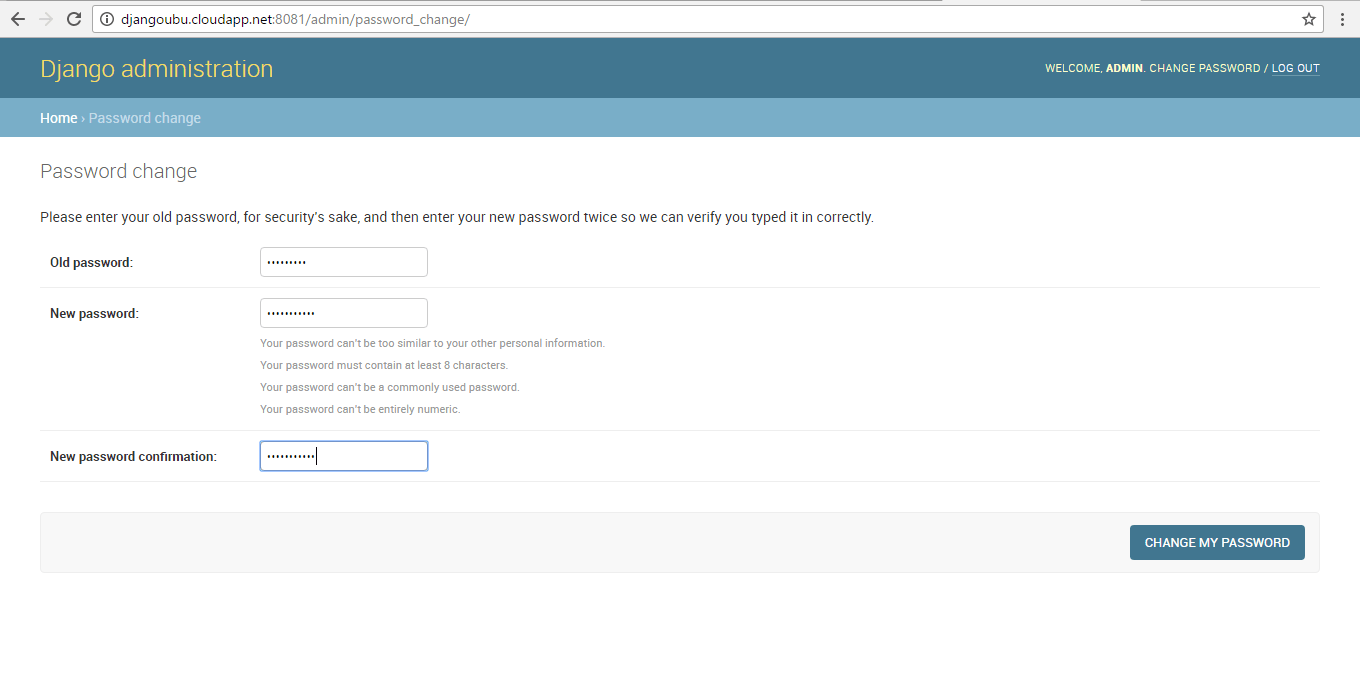
Step 19.Change password
Azure
Installation Instructions For Ubuntu
Note: How to find PublicDNS in Azure
Step 1) SSH Connection: To connect to the deployed instance, Please follow Instructions to Connect to Ubuntu instance on Azure Cloud
1) Download Putty.
2) Connect to virtual machine using following SSH credentials:
- Hostname: PublicDNS / IP of machine
- Port : 22
Username: Your chosen username when you created the machine ( For example: Azureuser)
Password : Your Chosen Password when you created the machine ( How to reset the password if you do not remember)
Step 2) Application URL: Access the application via a browser at “http://PublicDNS”
Step 3) Other Information:
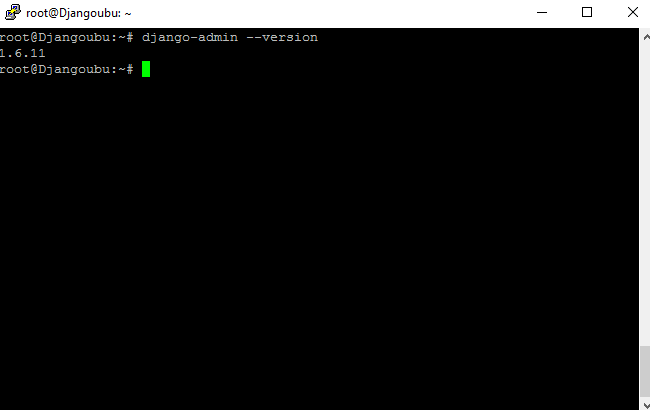
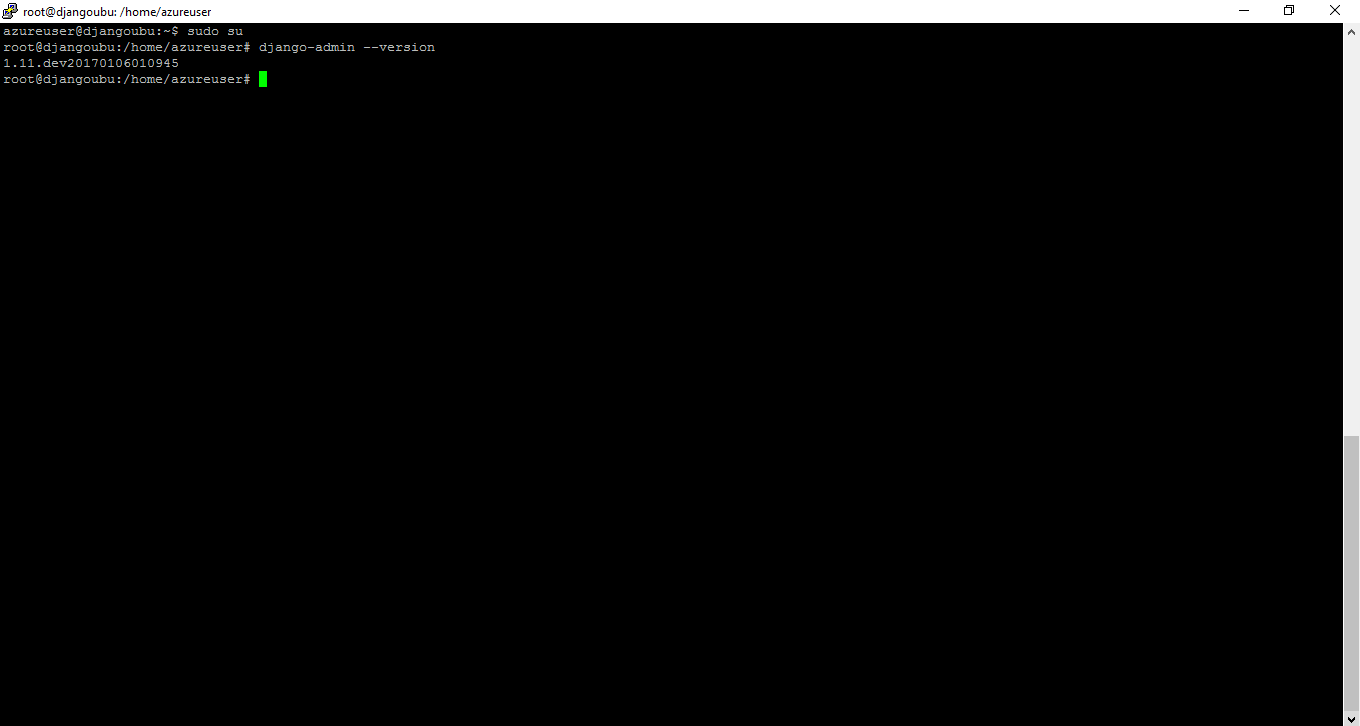
Version – Django 1.6.11
Note: You can use the django-admin command to create a project:
django-admin startproject projectname
1. Default installation path: will be in your web root folder “/var/www/html/”
2. Default ports:
- Linux Machines: SSH Port – 22
- Http: 8080
Configure custom inbound and outbound rules using this link
3. To access Webmin interface for management please follow this link
Installation Instructions For CentOS
Note: How to find PublicDNS in Azure
Step 1) SSH Connection: To connect to the deployed instance, Please follow Instructions to Connect to Centos instance on Azure Cloud
1) Download Putty.
2) Connect to virtual machine using following SSH credentials:
- Hostname: PublicDNS / IP of machine
- Port : 22
Username: Your chosen username when you created the machine ( For example: Azureuser)
Password : Your Chosen Password when you created the machine ( How to reset the password if you do not remember)
Step 2) Application URL: Access the application via a browser at “http://PublicDNS”
Step 3) Other Information:
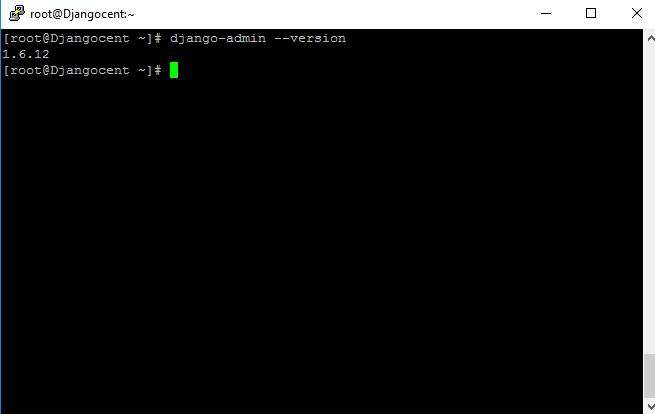
Version – Django 1.6.12
Note: You can use the django-admin command to create a project:
django-admin startproject projectname
1. Default installation path: will be on your web root folder “/var/www/html/”
2. Default ports:
- Linux Machines: SSH Port – 22
- Http: 8080
Configure custom inbound and outbound rules using this link
3. To access Webmin interface for management please follow this link
Step by Step Screenshots


- Installation Instructions For Windows
- Installation Instructions For Ubuntu
- Installation Instructions For Redhat
Installation Instructions For Windows
Step 1) VM Creation:
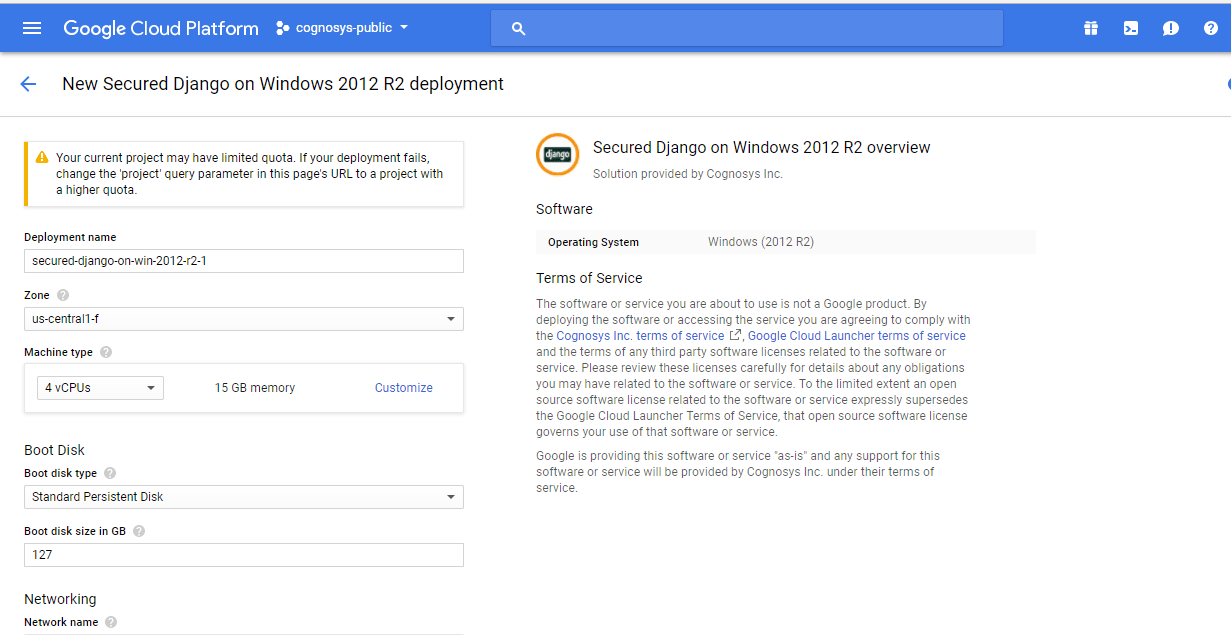
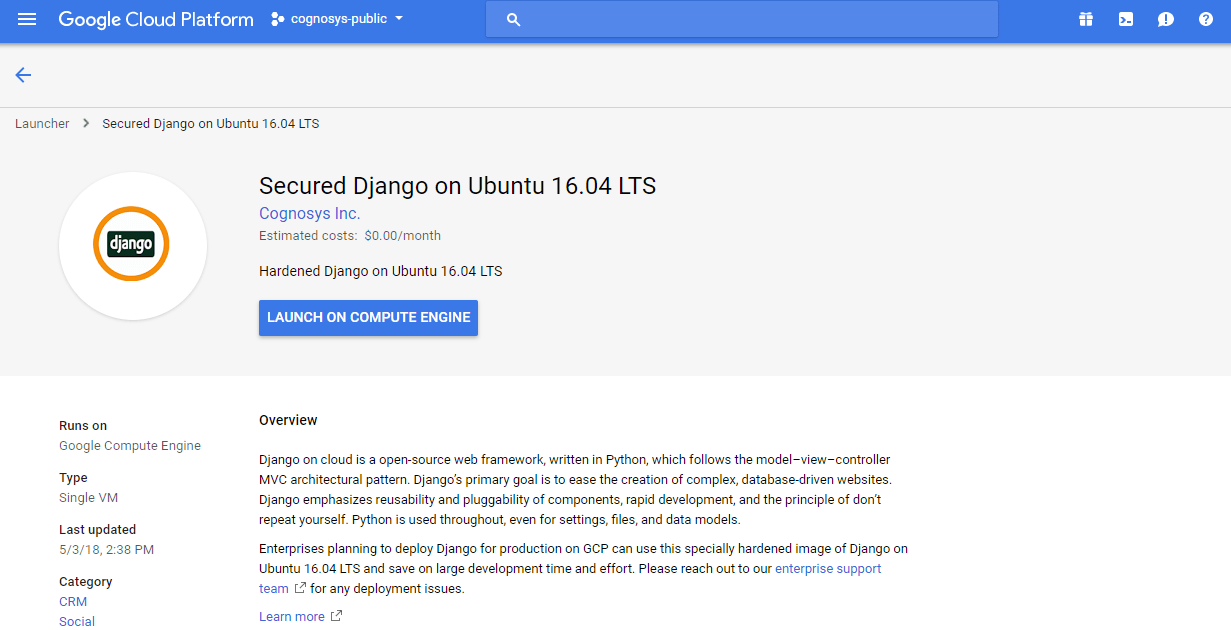
1.Click the Launch on Compute Engine button to choose the hardware and network settings.
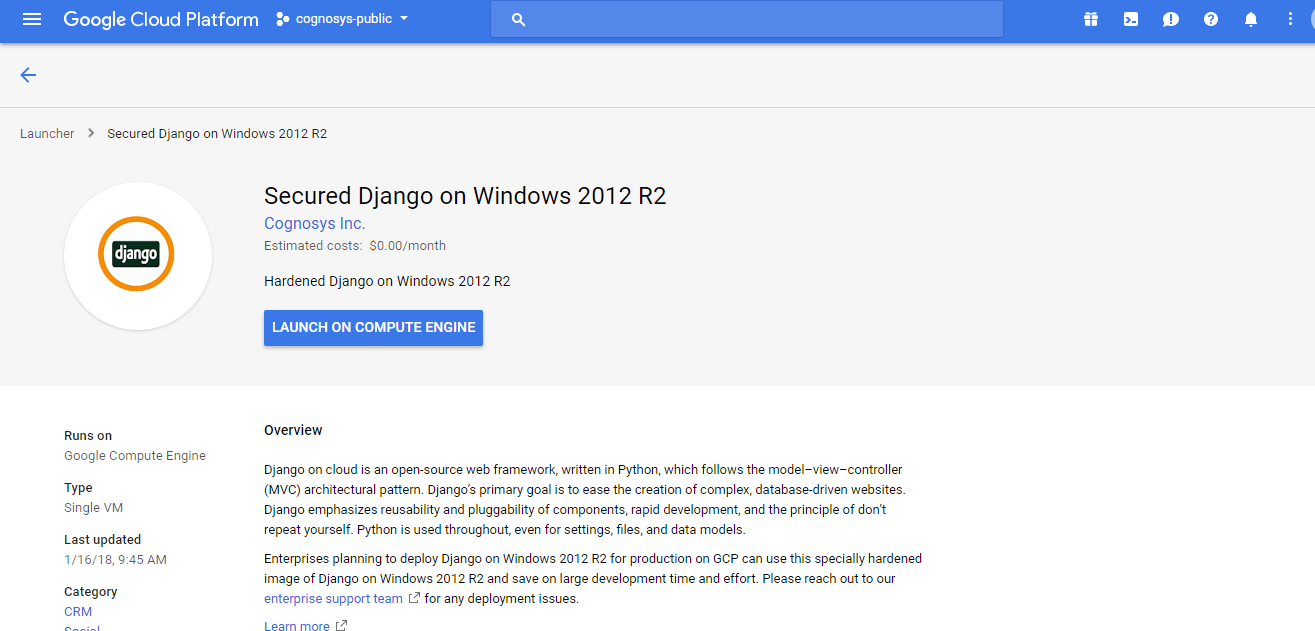
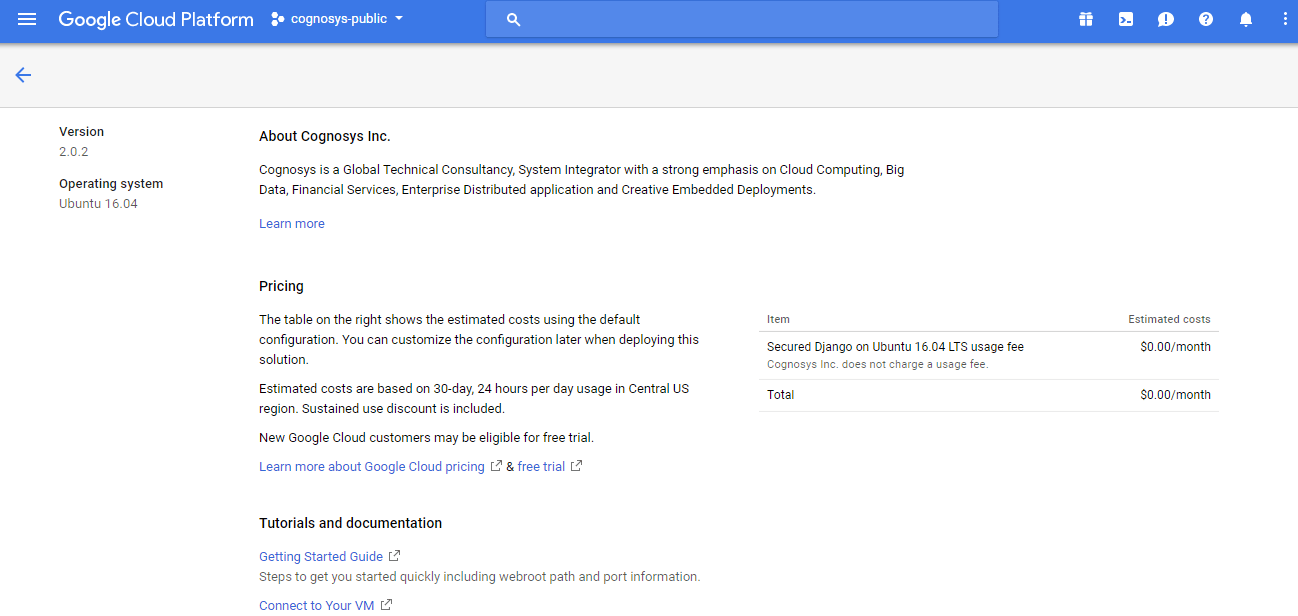
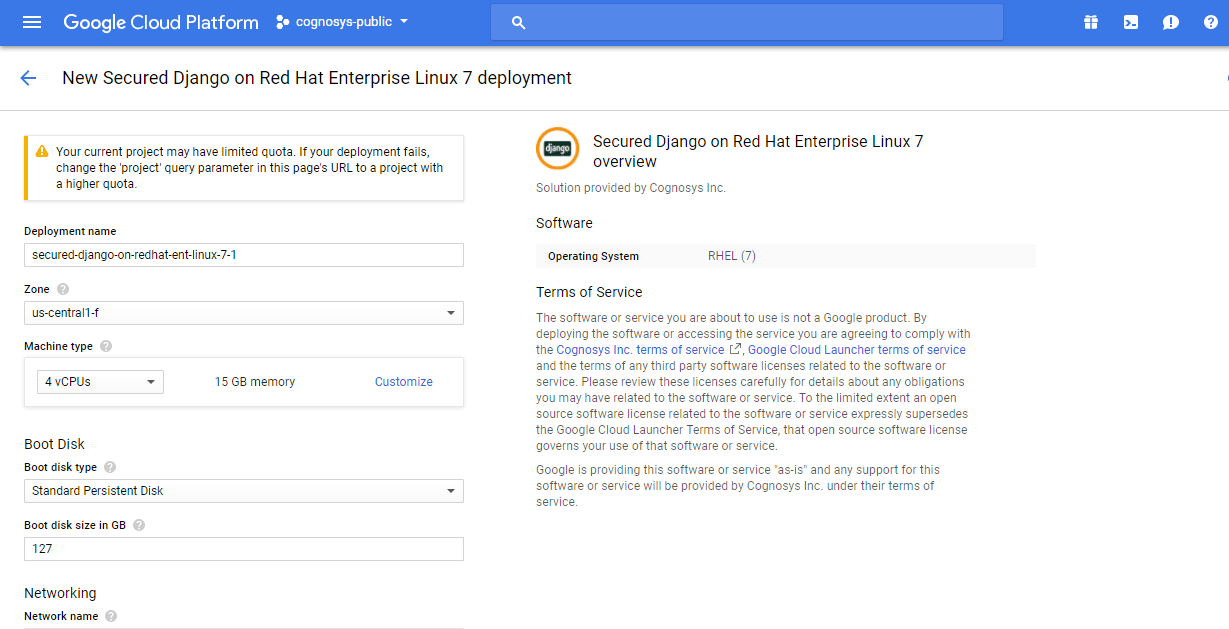
2.You can see at this page, an overview of Cognosys Image as well as some estimated costs of VM.
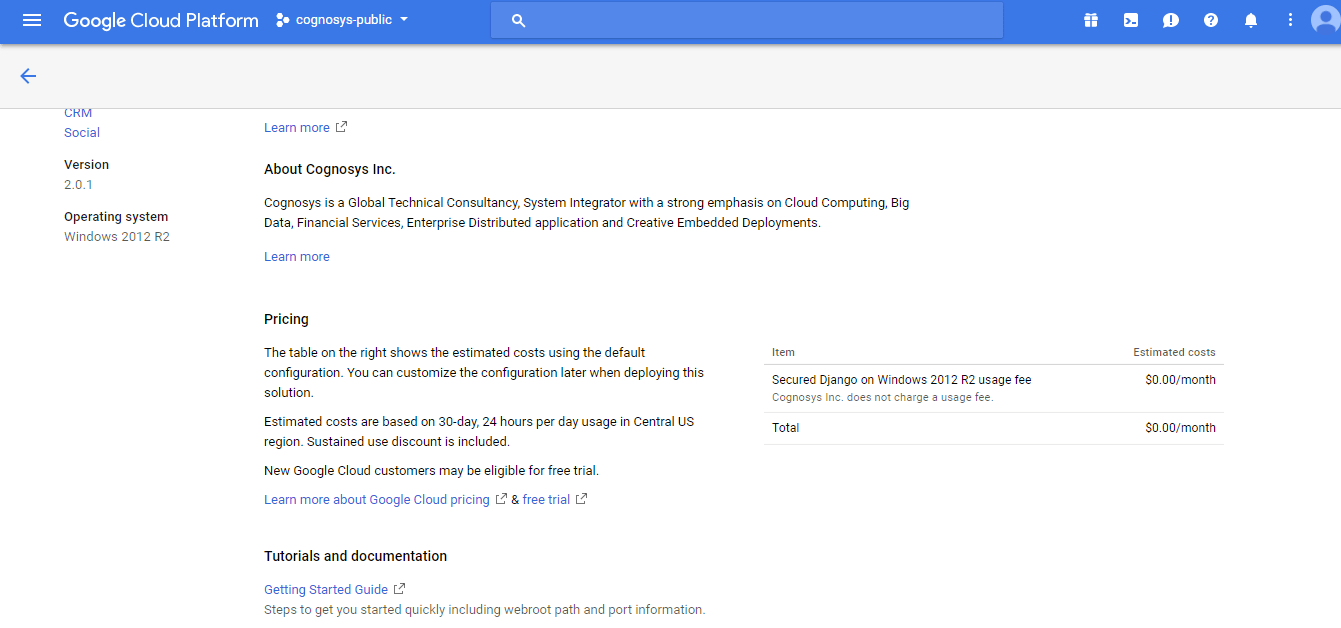
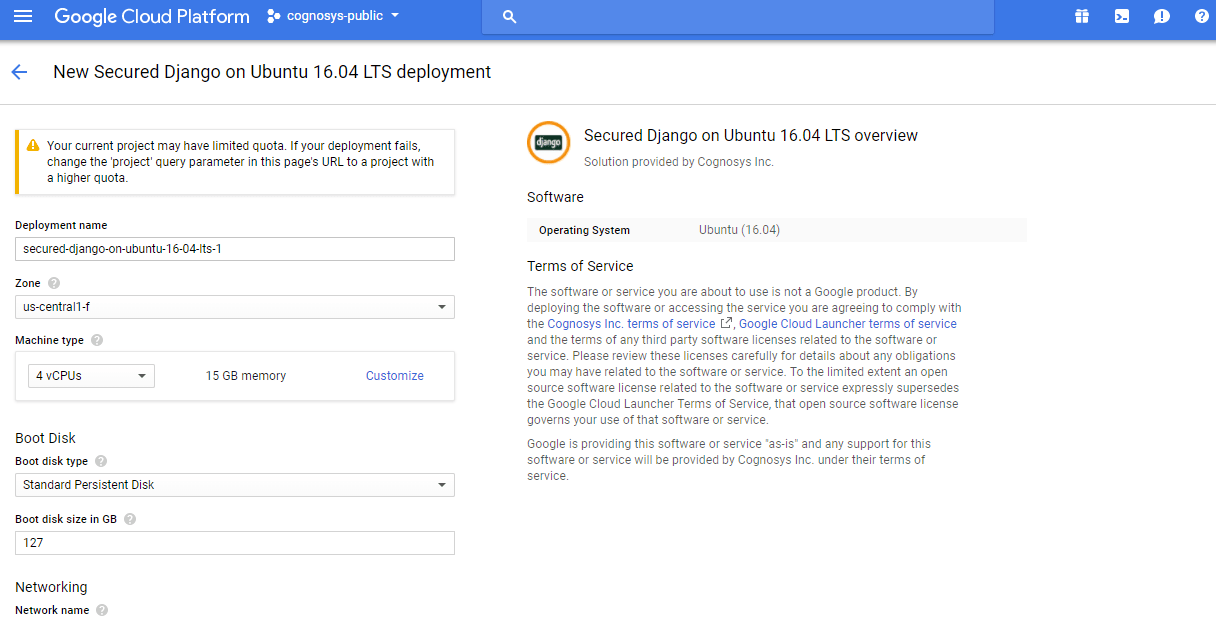
3.In the settings page, you can choose the number of CPUs and amount of RAM, the disk size and type etc.
 Step 2) RDP Connection: To initialize the DB Server connect to the deployed instance, Please follow Instructions to Connect to Windows instance on Google Cloud
Step 3) Application URL: Access the application via a browser at “https://localhost/admin”
Step 4) How Can We Get Started With Django?
To get started, we suggest the following steps:
1. Open Command Prompt by Clicking on Desktop Icon and choose path for project ( For Example: cd C: )
2. Enter in Command Prompt – virtualenv name_of_env ( For Example: virtualenv test )
3. Enter in Command Prompt – cd name_of_env ( It will go to your Env Directory )
4. Enter in Command Prompt – pip freeze ( To check ENV Version )
5. Enter in Command Prompt – .\Scripts\activate ( TO actiavte ENV )
6. Enter in Command Prompt – pip freeze ( To see Django Version , If empty then follow 8th step )
7. Enter in Command Prompt – pip install django==1.6.5 ( It will install Django latest version )
8. Enter in Command Prompt – pip freeze ( To see Django Version , If empty then follow 8th step )
9.Enter in Command Prompt – python .\Scripts\django-admin.py startproject projectname
10.Enter in Command Prompt – cd project name
11.Enter in Command Prompt – python manage.py syncdb
12.Fill all the details – Username(optional) || Mail ID(optional) || Password(Compulsory)
13. Enter in Command Prompt – python manage.py runserver 0.0.0.0:80
Installation Instructions For Ubuntu
Step 1) VM Creation:
- Click the Launch on Compute Engine button to choose the hardware and network settings.

- You can see at this page, an overview of Cognosys Image as well as some estimated costs of VM.

- In the settings page, you can choose the number of CPUs and amount of RAM, the disk size and type etc.

Step 2) SSH Connection: To connect to the deployed instance, Please follow Instructions to Connect to Ubuntu instance on Google Cloud
1) Download Putty.
2) Connect to the virtual machine using SSH key
- Hostname: PublicDNS / IP of machine
- Port : 22
Step 3) Application URL: Access the application via a browser at “https://localhost/admin”
Step 4) How Can We Get Started With Django?
To get started, we suggest the following steps:
1. Open Command Prompt by Clicking on Desktop Icon and choose path for project ( For Example: cd C: )
2. Enter in Command Prompt – virtualenv name_of_env ( For Example: virtualenv test )
3. Enter in Command Prompt – cd name_of_env ( It will go to your Env Directory )
4. Enter in Command Prompt – pip freeze ( To check ENV Version )
5. Enter in Command Prompt – .\Scripts\activate ( TO actiavte ENV )
6. Enter in Command Prompt – pip freeze ( To see Django Version , If empty then follow 8th step )
7. Enter in Command Prompt – pip install django==1.6.5 ( It will install Django latest version )
8. Enter in Command Prompt – pip freeze ( To see Django Version , If empty then follow 8th step )
9.Enter in Command Prompt – python .\Scripts\django-admin.py startproject projectname
10.Enter in Command Prompt – cd project name
11.Enter in Command Prompt – python manage.py syncdb
12.Fill all the details – Username(optional) || Mail ID(optional) || Password(Compulsory)
13. Enter in Command Prompt – python manage.py runserver 0.0.0.0:80
Installation Instructions For Redhat
Step 1) VM Creation:
- Click the Launch on Compute Engine button to choose the hardware and network settings.

2.You can see at this page, an overview of Cognosys Image as well as some estimated costs of VM. 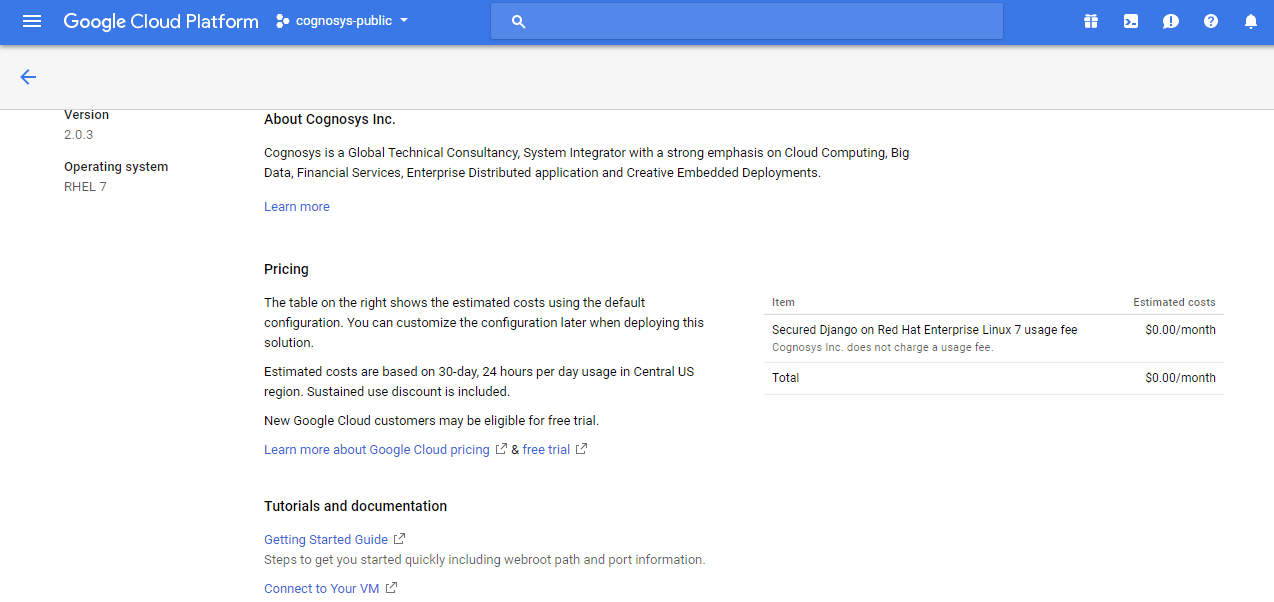
3.In the settings page, you can choose the number of CPUs and amount of RAM, the disk size and type etc.
Step 2) SSH Connection: To connect to the deployed instance, Please follow Instructions to Connect to Ubuntu instance on Google Cloud
1) Download Putty.
2) Connect to the virtual machine using SSH key
- Hostname: PublicDNS / IP of machine
- Port : 22
Step 3) Application URL: Access the application via a browser at http://<yourip>/django
A) You will see the page where you can configure your site data with site name, django admin name etc.
B) On next page you will see configuration success message.
C) You can login to the django admin portal with the django username and its generated password from point A shown above.
D) You can access the configured site at http://yourIP/django
Step 5) Other Information:
1.Default ports:
- Linux Machines: SSH Port – 22
2. To access Webmin interface for management please follow this link
Step 4) How Can We Get Started With Django?
To get started, we suggest the following steps:
1. Open Command Prompt by Clicking on Desktop Icon and choose path for project ( For Example: cd C: )
2. Enter in Command Prompt – virtualenv name_of_env ( For Example: virtualenv test )
3. Enter in Command Prompt – cd name_of_env ( It will go to your Env Directory )
4. Enter in Command Prompt – pip freeze ( To check ENV Version )
5. Enter in Command Prompt – .\Scripts\activate ( TO actiavte ENV )
6. Enter in Command Prompt – pip freeze ( To see Django Version , If empty then follow 8th step )
7. Enter in Command Prompt – pip install django==1.6.5 ( It will install Django latest version )
8. Enter in Command Prompt – pip freeze ( To see Django Version , If empty then follow 8th step )
9.Enter in Command Prompt – python .\Scripts\django-admin.py startproject projectname
10.Enter in Command Prompt – cd project name
11.Enter in Command Prompt – python manage.py syncdb
12.Fill all the details – Username(optional) || Mail ID(optional) || Password(Compulsory)
13. Enter in Command Prompt – python manage.py runserver 0.0.0.0:80
