

Overview
Claroline is released under Open Source license e-learning platform not only used by schools and universities, but also by training centers, associations and companies. The platform is customizable and offers a flexible and custom-made working environment.With Claroline you will be able to create and administer courses and collaboration spaces online. Each course space provides a list of tools enabling the teacher to write a course description, publish documents in any format, develop learning paths, prepare online exercises as well as publish announcements and assignments.Based on free technologies like PHP and MySQL, Claroline is capable of hosting a large number of users easily due to its easy-handling tools.
If you would like to start your Claroline LMS website in a few clicks, check the Claroline Hosting package.You may also check our great Claroline video tutorials with detailed step by step instructions how to install, configure and manage your Claroline LMS website just in a few clicks.
Claroline was developed initially back in 2001 by UCLouvain in Belgium. It is now run by the Claroline Consortium, which has members spread out in many countries, and operates as a non-profit. The platform is quite simple to use and allows schools and companies to create their own digital learning platform to provide education to students and employees. It is an open source system, which is somewhat unusual when it comes to learning management systems.
It is also a free system to download and use for any reason, which makes it very attractive to many smaller companies. While the platform doesn’t have any strict size limitations, it is generally considered a good option for small to mid-sized companies and educational environments. It is even a great option for creating online learning services as a business model.
How to Install Claroline LMS:
With this Claroline hosting package you will never be on your own. Our expert Claroline technical support team will make sure that you have a bug-free and secure Claroline installation in less than 10 minutes, complete free of charge.The Claroline installation can be requested from the client’s area -> Get Support section -> Submit Support Ticket.
1.Create MySQL database and user for Claroline
Prior to install Claroline, you have to create a MySQL database and add a user with all privileges to it. You can do this by following the simple steps below or our video tutorial available at: Create MySQL DB
Log into your cPanel (located at https://yoursite.com:2082 for your domain) Go to MySql databases. Scroll down and find: Db: _________ [add]. Here your preferred database name should be entered. Then, click Add.
This will create a database in the format of cpanelusername_databasename, where cpanelusername is your cPanel account login username with TMDhosting. Databasename is the name you have typed for your database – in this tutorial we’ve used claroline.
Now scroll down to Users. Enter a username and password, and then click Add User.
This will create a username in the format of cpanelusername_username, where cpanelusername is your cPanel account login username with TMDHosting, and username is the one you have just created for your new database.
Please, scroll back up to locate the two drop down boxes with a button that says [Add User to Db].
In the drop-down select box on the left, choose your newly created username, and in the box on the right, choose your newly created database. Click Add User to Db.
2.Claroline download and installation
The above steps cover all the required actions you have to take regarding your database creation process. When you are ready you can download the installation package of Claroline. You can download Claroline from here. You will need the Claroline 1.x.xx package for Unix, Linux, Mac OS X.
When you have your Claroline installation package downloaded on your local computer, please extract the content on your local computer. You can upload the content of the Claroline folder from your local computer to your public_html directory using your favorite FTP client by following the instructions in our tutorial here.
When all the steps above are completed you may access your Claroline installation under your account via your browser using https://yourdomain.com/claroline/install.
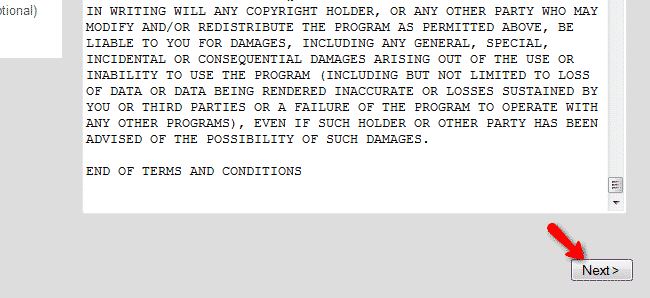
On the welcome page of your Claroline installation you will be provided with the general public license under which Claroline is licensed. Please review the license and proceed by clicking on the Next button.
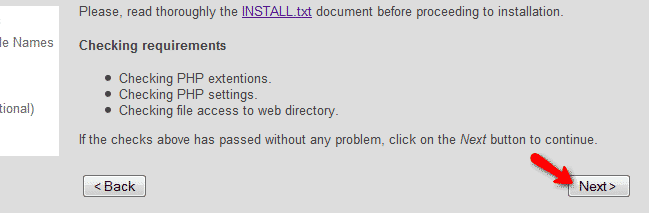
The second step performs a system configuration check. TMDHosting servers are fully compatible with Claroline and your checks should be passed without any difficulties. You may proceed with the installation by clicking on the Next button.
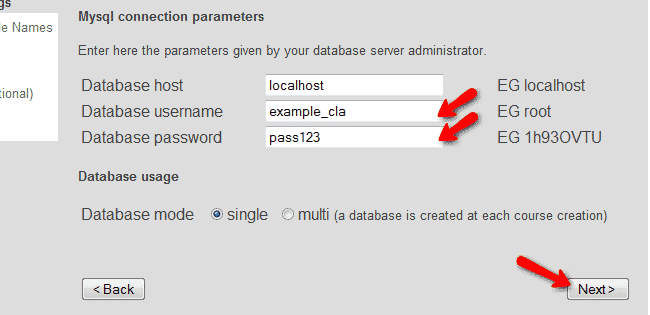
The MySQL Database settings page requires the Claroline MySQL database username and password to be input as well as the database host. Please use localhost for your database host and the username and password for your MySQL database that you have created earlier.
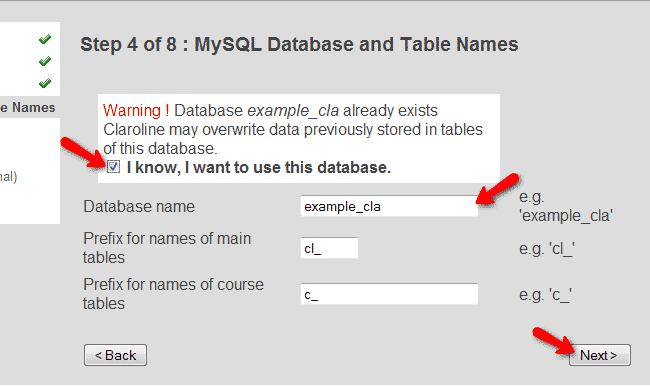
On the next step you should input your MySQL database name and check the box that you are aware of the fact that this database exist and you would like to use it. You may proceed with the installation process and click on the Next button.
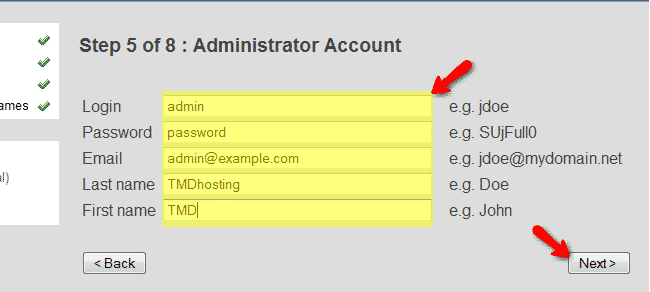
On the fifth step you can create your administrative account and set your personal information.
You can change your site name and main language settings via the platform settings page. Additionally, you can change your registration policy and password storage algorithm.

On the next page you can set related organization and campus contacts which are option steps and you can safely proceed by clicking on the next button.

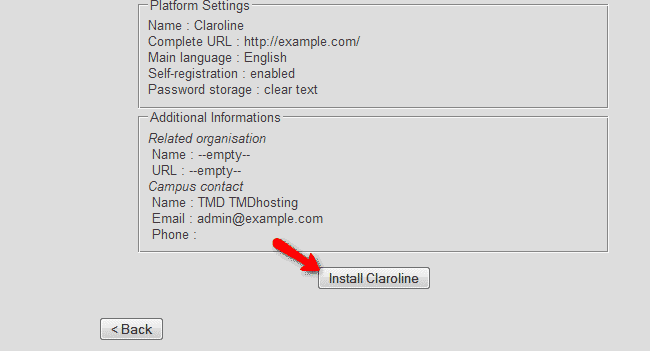
The last page of the installation provides you with a summary of all the applied settings. To complete the installation process, please click on the Install Claroline button on the bottom of the page.
If your installation is successfully completed you will be displayed with the following message:
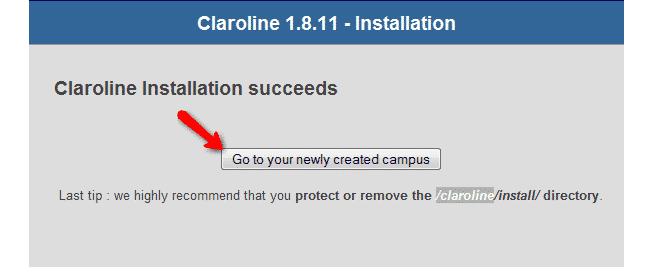
Be advised that you should remove the installation directory from your account for security reasons. You can perform this via your favorite FTP client. Simply access your account via FTP with your FTP client and navigate to the public_html/claroline/ directory where you should be able to locate the install/ directory. You can either rename or completely remove this folder.
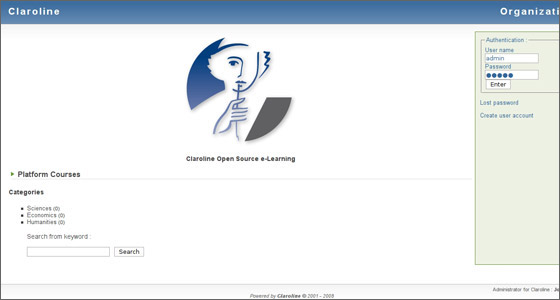
To create a new course with your Claroline application, you have to log in with your administrative details first.
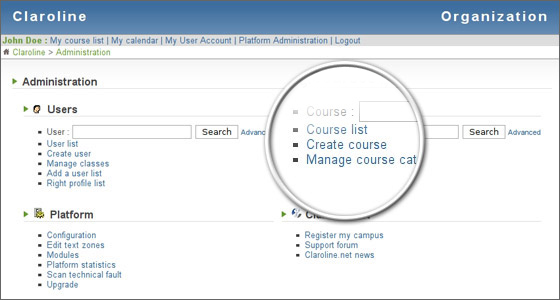
Then you need to create a new category of courses. To do this, go to the Platform Administration menu and click the “Manage course categories” link.
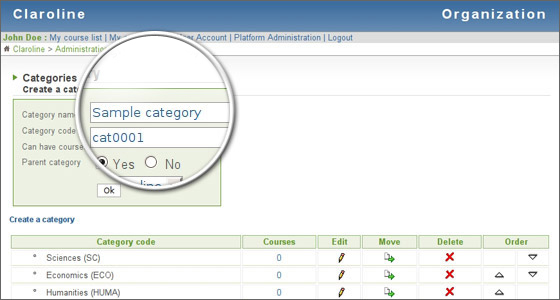
Next, click on the “Create category” link in the top left part of the screen.
Here you should enter the name for your category. For the purpose of this tutorial, we will use “Sample category”. Right after that you have to set a code for your category. You should save this code for future use.
When you are ready, just click on the “OK” button.
Now you should go to the “Platform Administration” menu and click on the “Create course” link.
Here you should insert the information for your course – its name, the correct category (Sample category in our case) and to specify the access level for this course.

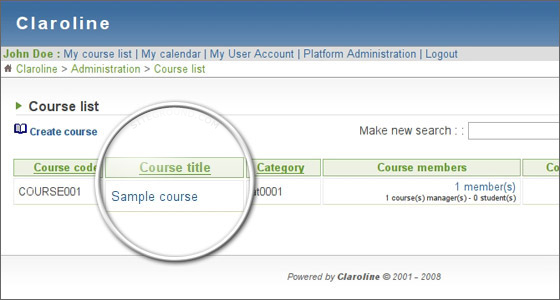
You course should be created successfully! Now you should enter the appropriate content in it. To do this, go to Platform Administration and choose Course list. Next, click on the “Sample course” link under the “Course Title” column.
From this page you can modify your course. First, you should start with adding text on its main page. To do this, click on the “Add text” link.
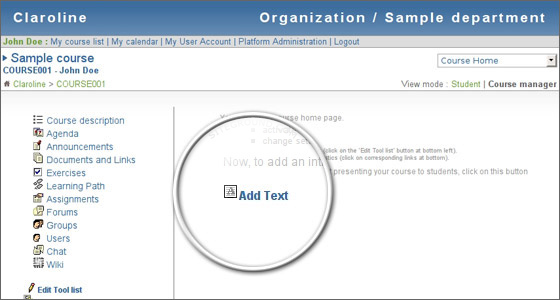
Once you do this, you will be forwarded to a friendly WYSIWYG(What You See Is What You Get) editor that will allow you to create an introduction page for your course. You will find it very intuitive and easy to use.

Your course is now ready! You can continue with adding documents, exercises and more information to it.
Create an Exercise in Claroline
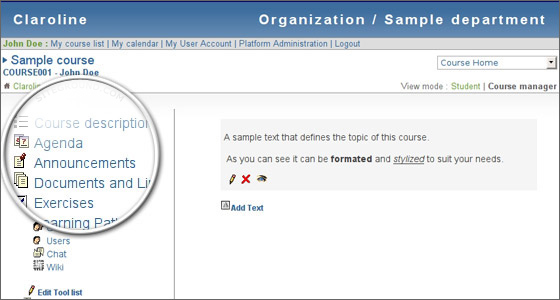
To add a new exercise, first select your course and click on the Exercises link on the left part of your screen.
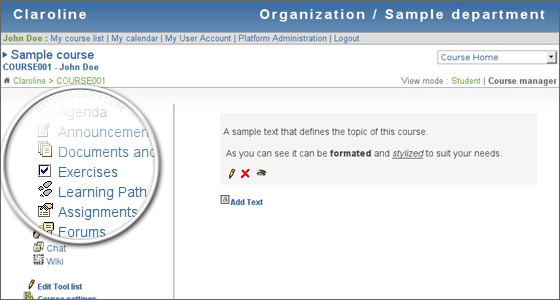
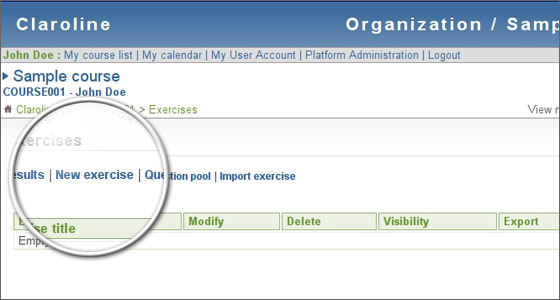
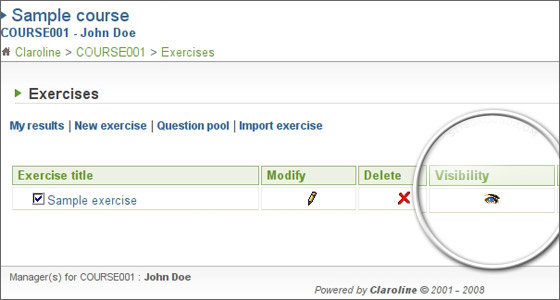
In this page, you will see the created exercises for your course. To add a new one, click on the “New exercise” link right above the table.
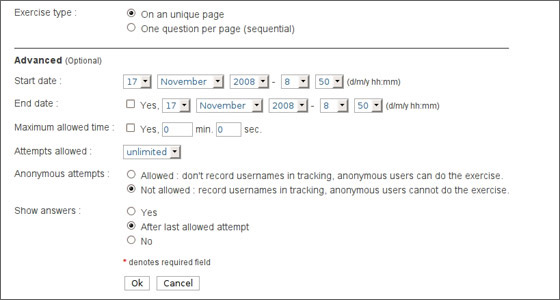
Now you have to enter all the information for the exercise – its title, start and end date, whether the answers should be shown or not, how many attempts your students can make, etc.
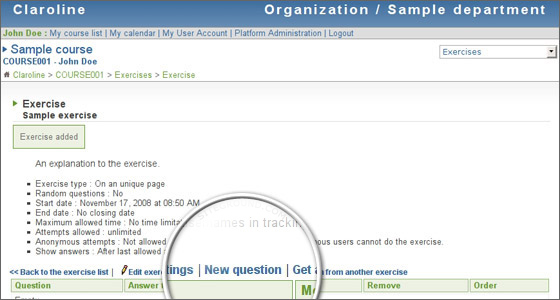
Once you have created the exercise, you have to add questions to it. Just click the “New question” link right above the table and you will be forwarded to the question creation page.
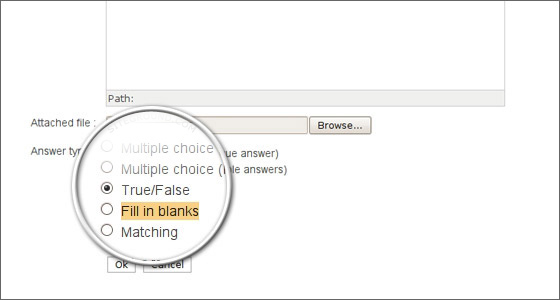
In this page you can create the question with all the relevant data for it. For the purpose of this tutorial, we will add a “True/False” type of question. There are, however, various options that you can choose from – Multiple choice (Unique answer), Multiple choice (Multiple answers), Fill in blanks, Matching or the one that we have just selected – True/False. Once you are ready, just click on the “OK” button at the bottom of your page.
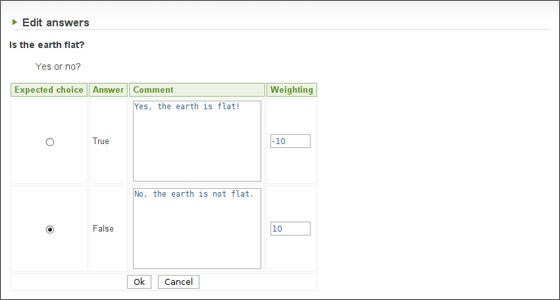
You should now type the answers to your question. First, under the “Expected choice” select the correct answer to the question (in our case – False). Then add any text next to it if you wish to describe the answer. Next, set the points that your students will receive if they answer correctly. For wrong answers you can set negative values if you wish to apply point penalties. Once you are ready, click on the “OK” button at the end of the page.
Now go back to your course and select the Exercise category. Then click on the eye icon order to make the exercise active.
Congratulations! Your exercise is now ready. Your students can start answering the questions.
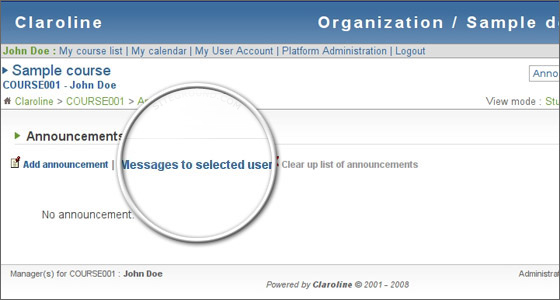
When you add new courses, exercises or documents, you can send an announcement to the e-mail addresses of your students. To do this, first select the appropriate course and click on the Announcements link from the left menu.
You can now select whether you want to send a new message to a selected student or to all users that are subscribed to the current course. If you want to send a message to selected students only, you should click on the “Messages to selected users” link.
In this page, you can select the users that you want to send the message to. Once ready, press the “Submit” button to send the message.

If you want to send an announcement to all of the students added to your course, you should click on the “Add announcement” link. In this page, you can attach resources (Documents, Exercises, etc) to the announcement. They will be added as links to the message that you are sending. In addition, you can set whether your students should receive an e-mail for the notification or not.
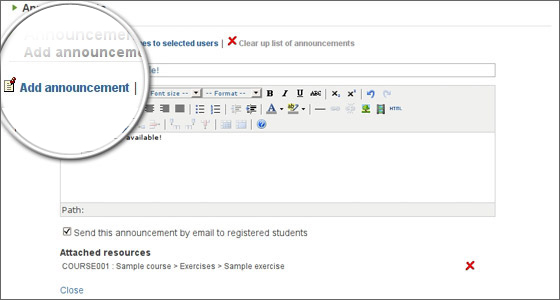
Once you are ready, click on the “OK” button at the bottom of the page and the announcement will be added.
CLAROLINE PROS:
·Price
This is one of the few free learning management systems out there, which is a big benefit.
· Weii Managed
The non-profit group does a good job at keeping the system updated and they incorporate many great features.
· Popular
It is likely the most popular free service, and is the second most popular learning system in Europe today.
CLAROLINE CONS:
·Support
While they do support the product itself, they don’t offer a full ‘help desk’ like most of the premium versions have. You will be responsible for running the system on your own.
· Extensions
While there are certainly ways to add functionality to this system, it is not as flexible as some of the other options out there.
-Claroline is an Open Source eLearning and eWorking platform allowing teachers to build effective online courses and to manage learning and collaborative activities on the web. Translated into 35 languages, Claroline has a large worldwide users and developers community.
Claroline is released under the GNU/GPL license.
Features
Features of Claroline:
Version : 1.11.10
Last Release Date: 03-10-2017
- Non Profits
- Public Administrations
- Small/Medium Businesses
- Software as a Service / Cloud Platforms
- Mac
- Windows
- Google Chrome
- Mozilla Firefox
- Internet Explorer
- Apple Safari
- BigBlueButton
- Office 365
- Documentation
- In Person
- Live Online
- Online Tutorials
- Online Community
- SCORM 1.2
- SCORM 2004
-Major Features of Claroline:
- Manage documents and links
- Create online exercices
- Develop learning path
- Coordinate group work
- Produce : assignments and wiki
- Discuss : chat and forum
- Organize : agenda and announcements
- Supervise : users and statisticsSign up:
videos
External embedded media removed for production hardening.
