1-click AWS Deployment 1-click Azure Deployment
Overview
ATutor is one of the most popular Open Source LCMS. It is suitable for creating online courses, school, high school, college and university web sites. It is written in PHP and requires a MySQL database. Its functionality and visualization can be extended with various modules and themes. Tutors can easily upload and manage the content which will be published for the students in a user-friendly environment.
LCMS (Learning Content Management System) is a software system used for creating, storing, managing and sharing learning content on different subjects. The administrators and tutors of a LCMS site upload the content, divided in separate courses. The students register in the system and enrol for the courses. The learning progress can be monitored and managed. Some LCMS come with collaboration tools like integrated chat and forum. Such applications are usually used in online schools and university web sites. Also, different corporations implement them in their web sites in order to provide adequate training for their employees or the users of their products and services.
ATutor Manual Installation:
Here,you are going to learn how to install aTutor manually. But before you start you should prepare a few things:
Create an empty MySQL database using cPanel > MySQL database wizard.Prepare the aTutor installation files. You can download the files from their official website at:http://atutor.ca/atutor/download.php
You will have an archive of the folder containing all the required files to install aTutor. Upload the content of that folder in your account via FTP. If you want to access your site using https://yourdomain.com/ you should upload the files in the /public_html/ directory. If you prefer to access the site using https://yourdomain.com/lms/ upload the files in /public_html/lms/ .
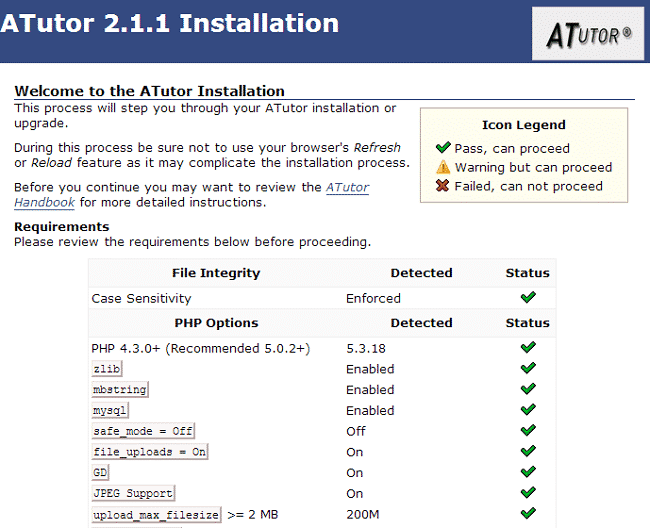
To start the installation process access the script using your browser. For the purpose of this tutorial we have uploaded our script in the public_html folder of our account. The installation process can be started using:https://yourdomain.com/install/
Now you should see the welcome screen of the ATutor installation:
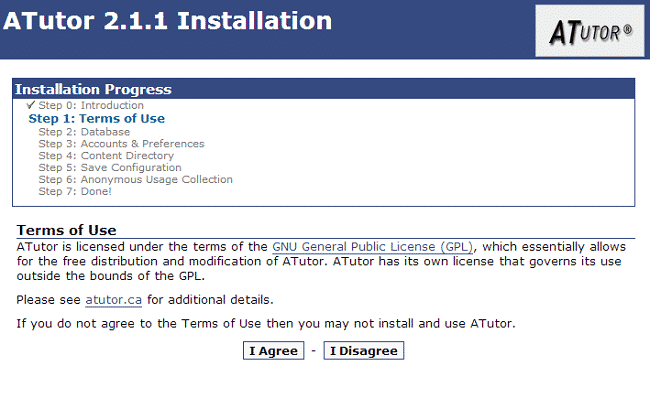
To proceed to the next step, scroll down to the bottom of the screen and click the “Install” button. On the next page you will see the terms of the user agreement. ATutor is licensed under the GNU general public license, which means that you can use the script for free and apply different types of modifications to it. Click the “I Agree” button to proceed to the next step:
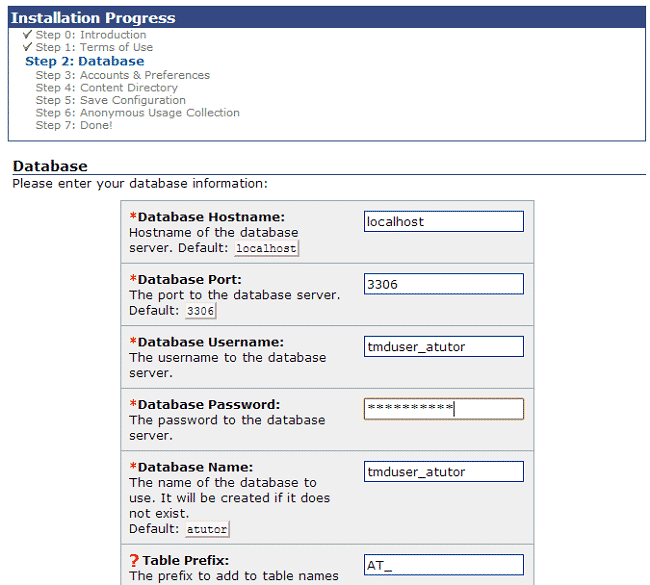
On the next page enter the MySQL database details that you have created in the beginning of this tutorial:
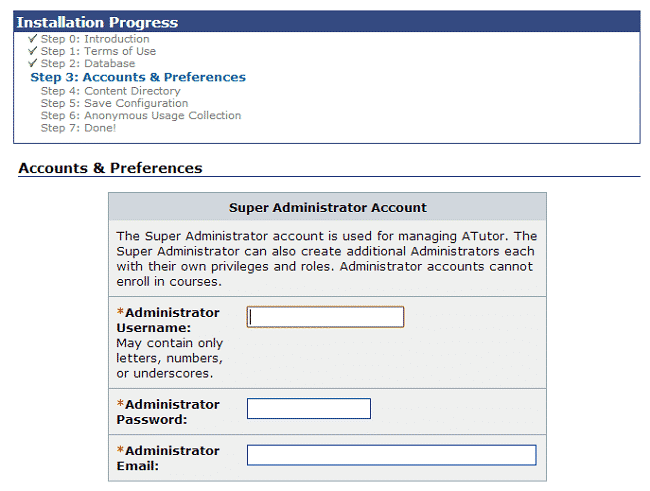
Proceed to the next step. The script will create the database tables. Wait for the process to finish and click the “Next” button. Now you will need to create your administrator’s account , system preferences and personal account. All the fields are self-explanatory, simply enter your preferences:
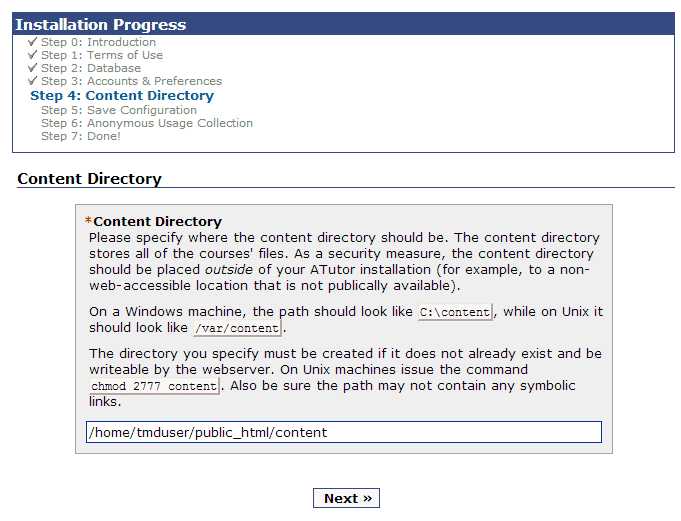
Click the “Next” button when you are done. ATutor will require you to set the path to your content directory. You will have to create new empty folder where you would like to store your ATutor data. You can easily create the file via FTP or cPanel > File Manager. Once you are done, fill in the path to that folder:
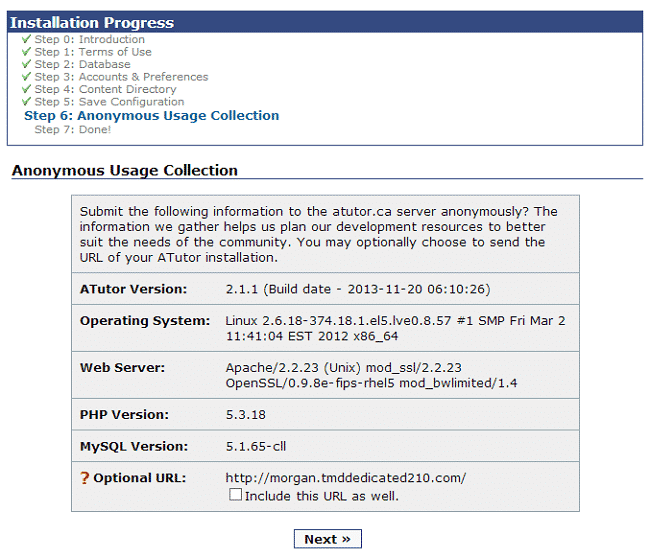
Again, click the “Next” button. The script will save the information you have set so far in its configuration file. Proceed to the next step. The script will submit the installation data to atutor.ca so that they can use the information to better suit the needs of their script users:
Click the “Next” button to finish the installation. Before you login to your website, make sure to remove the “Install” folder from your ATutor root directory and set read only permissions to the config.inc.php file. You can then safely login to your ATutor website:

ATutor Administration:
Home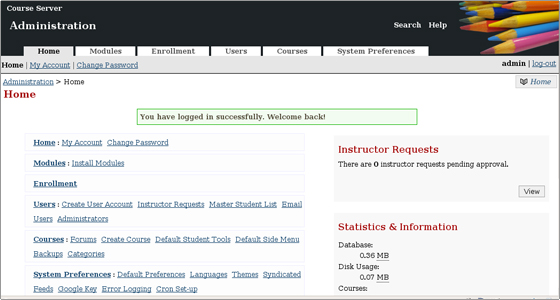

All the administrator features are listed under the Home section.
* My Account – You can directly modify your account’s name and the e-mail address.
* Change Password – Here you can change the administrator password.
Modules
This section allows you to list all the installed modules, enable, disable and filter them, delete or check their details.
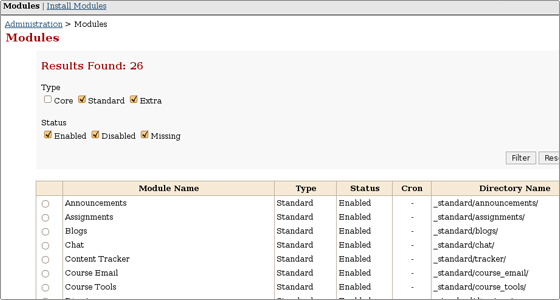
* Install Modules – Through this functionality the administrator can install each of the listed modules or upload additional ones.
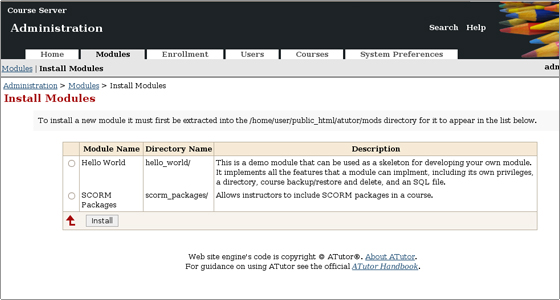
More details on how to install additional modules can be found here.
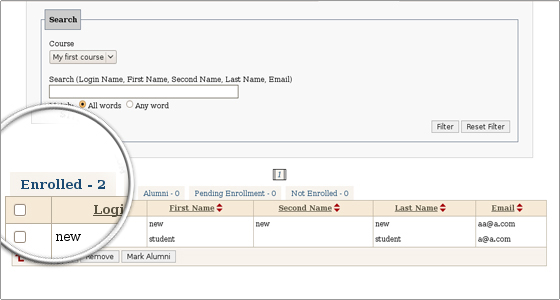
Enrollment
In this section you can check all the students enrolled for a defined course. The users’ privileges can be altered.
Users
In this section you can see the list of the users along with their status and contact details. The users can be edited and enrolled for defined courses. Their status can be altered.
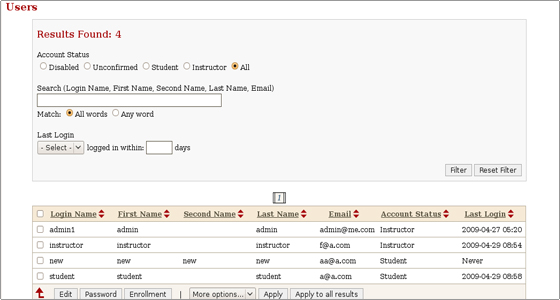
* Create User Account – Here you can create a new user and enter the personal details like the login data, the name, the e-mail address, the physical address, the web site and define the account status.

* Instructor Requests – If the System Preferences->Allow Instructor Requests option is turned on and Auto Approve Instructor Requests is disabled, the pending instructors accounts will be listed.
* Master Student List – The list is disabled by default. If enabled, the new registrations that are validated through the master list will be successful. The feature can be used for the students authentication through the previously assigned Student ID & Birth Date combination. Two more fields will appear on the Registration screen.
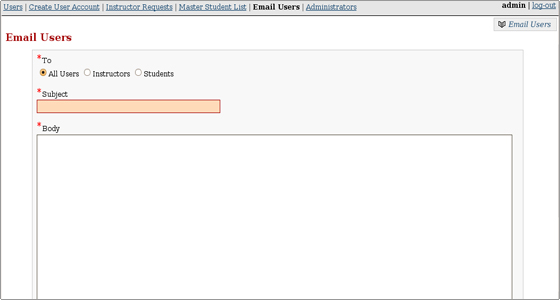
* Email Users – This option allows the administrators to send e-mails to the users (students, instructors) of the script. The reply-to address for the email can be specified in the System Preferences section.
* Administrators – Here you can edit the administrator details, add more administrators and check the activity logs.
ATutor Courses Administration:
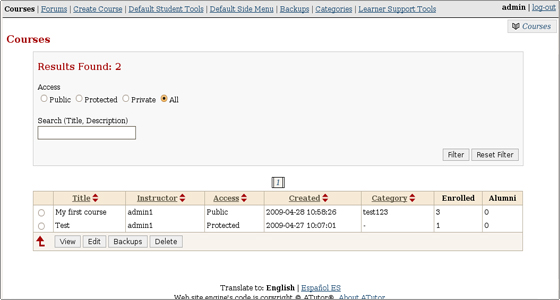
Courses
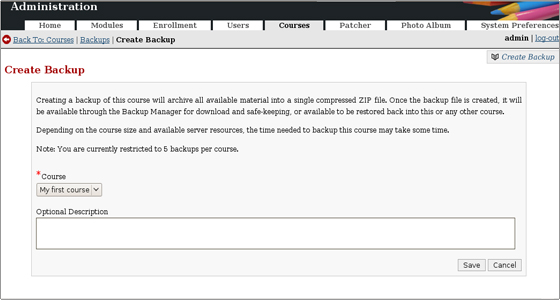
In this section the administrators can create, manage and delete courses, forums and course categories. They can generate course backups.
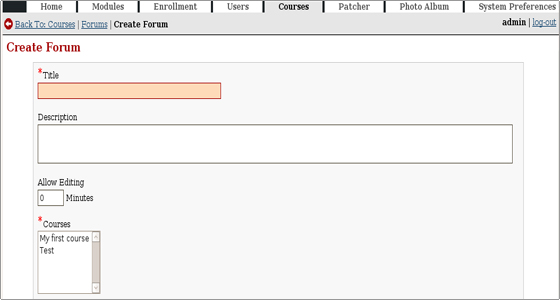
* Forums – New forums can be created or existing ones can be managed.
NB: The default ATutor 1.6.2 installation comes with the several
WARNING:
Illegal offset type in …menu_pages.php on line….
They can be fixed by applying the patch 0003 from the ATutor admin area -> Patcher.
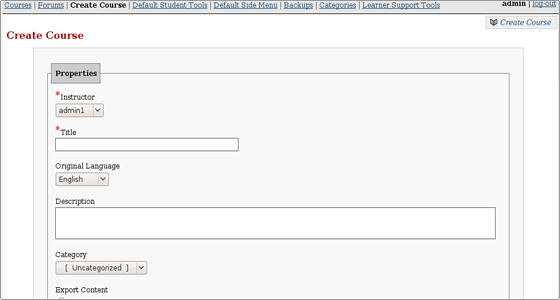
* Create Course – New courses can be created. The administrator can set the title, the instructor, the language, the description, the course size, the maximum upload file size and several more options.
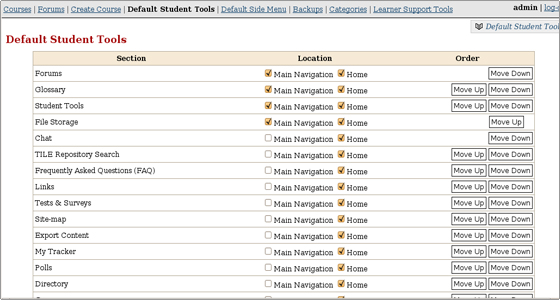
* Default Student Tools – The administrators can set the default students tools which will appear in the main navigation of the new courses.

* Default Side Menu – From here you can set the drop-down items which will appear on the side menu of the new courses.

* Backups – Courses backups can be created, downloaded and restored.
* Categories – You can set categories in which the courses can be grouped.
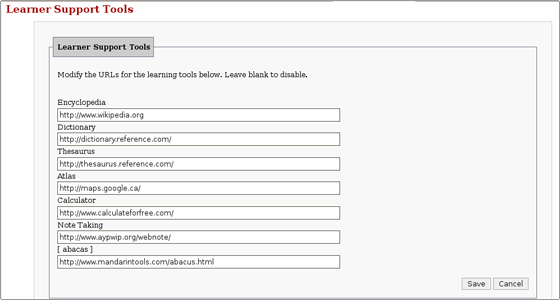
* Learner Support Tools – The URLs of different learner tools can be included.
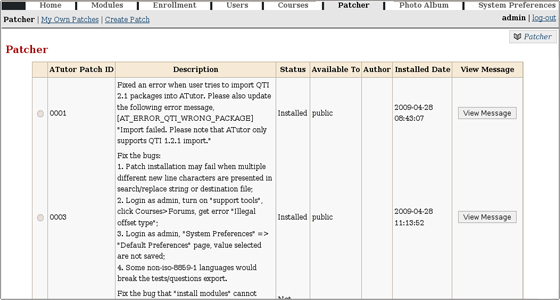
Patcher
It allows the administrators to patch their script installations when fixes or security upgrades are released.
* My Own Patches – Here you can find a list with your own patches created through the Create Patch functionality. You can edit or remove them.
* Create Patch – Here you can create your own patches.
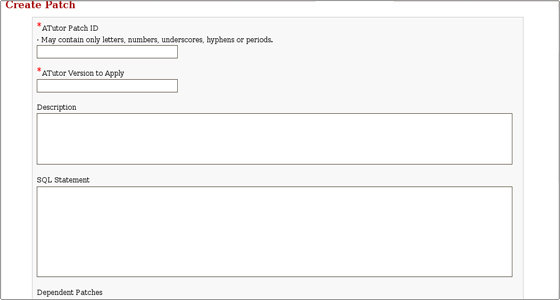
NB: You need to have some programming knowledge to create your own patches.
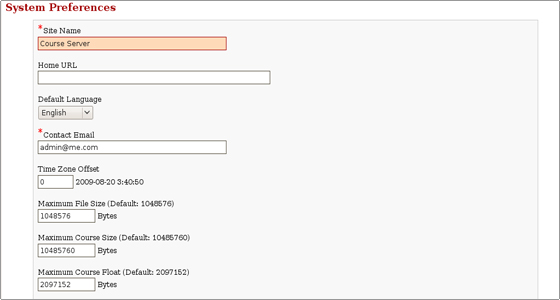
System Preferences
You can change some important ATutor settings like the site name, the home URL, the default language, the time zone offset, enable Pretty URLs and many more. Most of the options are self-explanatory.
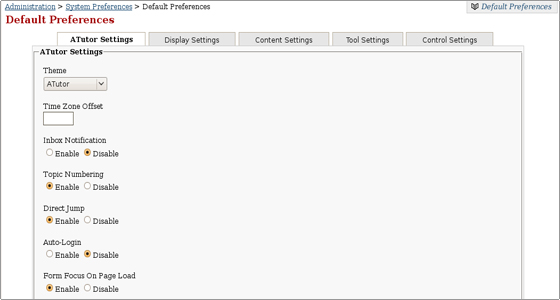
* Default Preferences – They are applied to new accounts after their creation. These settings are also valid for guests when they are accessing public courses.
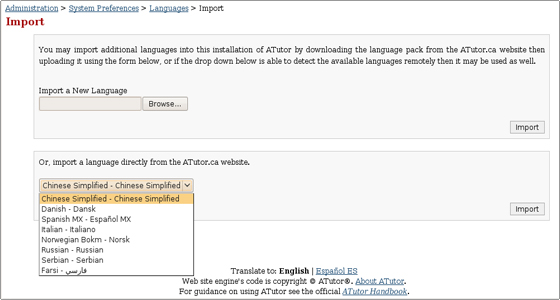
* Languages – You can manage the included languages, import new ones or take a part in the translation of the script in your language. The translation can be exported and shared with the ATutor community.
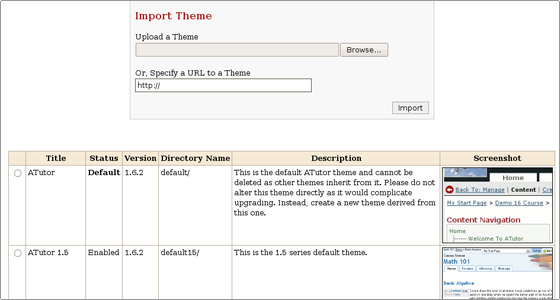
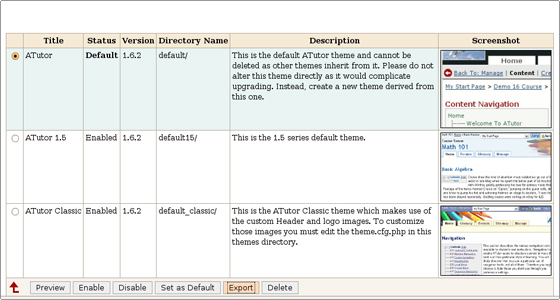
* Themes – You can import new themes and change the default one for your ATutor installation. There are also additional themes included in the script installation package.
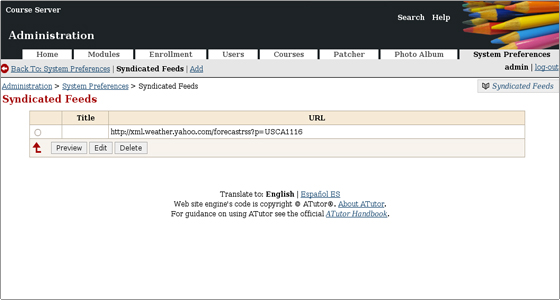
* Syndicated Feeds – Syndicate feeds can be displayed in the side menu of a course.
* Google Key – The Google search module can be included in ATutor as an external embedded resource. It can be used by the students. The administrators need to obtain a license key from http://google.com/apis before enabling the module.
* Error Logging – This tool will allow you to check the errors generated by your script or by the used patches and modules. It can be useful for troubleshooting an ATutor web site.
* Cron Set-up – You can set an automated event scheduler which will support the best functionality of the script. The Cron Job can be set through your cPanel->Cron Jobs. The Cron Job code should be: lynx -dump http://your-server.com/atutor/admin/cron.php?k=SECRET-KEY > /dev/null. The SECRET-KEY will be listed in the ATutor Cron Set-up area.
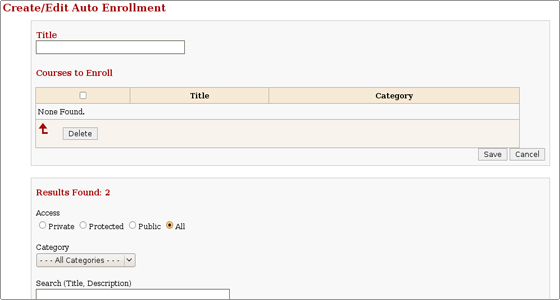
* Auto Enrollment At Registration – A unique URL can be created by the administrators. It will appear once the students register and through it they will be able to enrol to a defined number of courses.
Creating and managing content with ATutor:
In the following section we will show how to create a new course, associate a forum with it and manage the provided default student tools.
Managing default student tools
In this section we will review the most popular default student tools which can be used for your courses.
Once you log out from the administrator account and log in as an instructor, you can view the tools under your course page:
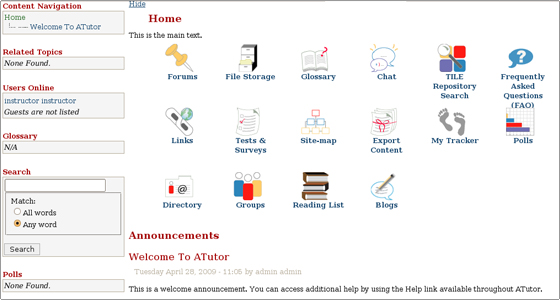
They are listed as follows:
- Forums – you can add a forum to your course and discuss related topics in it.
- Glossary – related terms can be included.
- File Storage – you can upload,download and store files on the server.
- Chat – you can use the integrated chat script to communicate with your students or with other instructors.
- TILE Repository Search – allows searches in the The Inclusive Learning Exchange repository.
- Frequently Asked Questions (FAQ) – the script can support FAQ sections for your courses.
- Links – links to different resources can be included.
- Tests & Surveys – tests and surveys can be added. They will be available for the enrolled students.
- Site-map – generates a site map.
- Export Content – the content can be exported as an IMS 1.1.3/IMS 1.1.4/SCORM 1.2 content package.
- My Tracker – monitors the learners progress.
- Polls – different pools can be created in order to gather the learners’ opinion.
- Directory – this section contains information for the instructors associated with the courses.
- Groups – different groups which will use same tools (Blogs, File Storage, Forums, Links) can be created.
- Reading List – the instructor can include details of recommended resources like books, files and URLs.
- Blogs – blogs can be created where the students can share their experience. There is an option for comments.
- Gradebook – tests and assignments can be added, marks can be entered and grade scales can be visualized.
Users management with aTutor:
In this section we will learn how to create, edit and delete different ATutor user types.
The ATutor script supports 3 types of user groups:
Administrator
Instructor
Student
Manage users
New users can register to your ATutor web site.Alternatively, you can create them from the admin area.
Enrollment for courses
Once the new user is created you can set the courses for which he/she will be enrolled. In this way the new user will have an access to the chosen courses.
ATutor Backups:
Before making any major modifications or performing upgrades to your live ATutor web site, we advise you to create a full web site backup.
In order to backup your ATutor application you have to:
- Backup all of your files and folders inside your ATutor installation folder. You can do that by downloading them via your favourite FTP client. You can find our comprehensive FTP tutorial here.
- Backup/Export your database. This task can be performed by using PHPMyAdmin. Check our tutorial on how to backup/restore MySQL database in order to create a backup of your ATutor database.
NB: Make sure that you choose the correct database which your ATutor application uses.
If you are unsure about the ATutor database name you will be able to find it in the atutor_folder/include/config.inc.php file. You can view this file through cPanel -> File manager.
ATutor Upgrade:
Before proceeding with the ATutor upgrade, we will recommend you to create a full backup of your ATutor installation. In this way you will be able to restore it in a case of a failed upgrade.
Define the folder of the aTutor application which you want to upgrade. The new and the old folders should be on the same directory level.
The versions after aTutor 1.6 are using the UTF-8 charset for the database. If the database is not converted, this means that your installation is older than aTutor 1.6. The conversion option will be provided during the upgrade procedure.
In order to complete the upgrade you should download the latest aTutor installation package from their official web site. Extract the archive under your computer. Then you should upload the extracted folder using cPanel -> FileManager for your hosting account or through an FTP Client. The uploaded folder should be placed under the public_html directory.
You can use your favorite FTP Client to remove the install folder and to make the include/config.inc.php file read-only. Also, through it you can copy the content folder under the new ATutor directory and remove the old one.
Edit include/config.inc.php using cPanel -> FileManager and define the content folder path in the following line:
define(‘AT_CONTENT_DIR’, ‘/home/user/public_html/atutor_directory/content/’);
Replace the above path with the correct one for your installation.
Then you can rename the new ATutor directory per your preference
ATutor tips and tricks:
Here, we will show you how to create your own ATutor theme.
How to create your own ATutor theme
We will show you the most preferred way to create a new theme. In order to complete the task, we will use the files of the default ATutor theme. We will export the theme from the ATutor admin area->System Preferences->Themes.
Once you have the theme files on your computer, you can edit their code.
We will call the new theme “my_theme”.
The necessary files for a new theme are:
- styles.css
- theme.cfg.php
- theme_info.xml
- screenshot.jpg
- include/header.tmpl.php
- include/footer.tmpl.php
The theme name should be entered in the theme_info.xml file. The line where the modification should be completed is:<title>my_theme</title>
If templates are not found under the new theme, they will be inherited from the default one.
In order to modify the theme files you will need some basic HTML, CSS and PHP knowledge.
Once you are ready with the modifications, put the above files in a folder called “my_theme”. Create an archive of it.
Then follow the steps for the installation of a new theme. Once the theme is installed, you can set it as the default and check the result.
If you need to perform further modifications on the theme files, look for them in atutor_directory/themes/my_theme. The files can be opened and edited through cPanel ->FileManager
Pros:
Its available both as open source and a hosted version . The hosted version has very affordable pricing and even scalability is not too steep. Can make your own courses on the platform and even import external files .
Cons:
The look and feel is like that of 90s ! Needs lift in GUI badly . Besides that , the ATutor icon at the bottom even on paid hosted version can be a big letdown for some people.
Benefits:
–Develop online courses and create eLearning content with ATutor’s free, open source learning management system (LMS).
–With ATutor, educators are able to assemble, package, and redistribute web-based instructional content, import content, and conduct courses online.
–ATutor is suitable for both small and large organizations, allowing all types of users to learn in an accessible, adaptive, and social learning environment.
–Communication tools enable learners to communicate with other users via their inbox using ATutor’s private mail, through discussion forums, chat rooms, or the ‘User’s Online’ tool.
–Format course materials without any HTML knowledge using the WYSIWYG editor, available as an extension of ATutor’s content editor.
-ATutor is an Open Source Web-based Learning Management System (LMS) used to develop and deliver online courses. Administrators can install or update ATutor in minutes, develop custom themes to give ATutor a new look, and easily extend its functionality with feature modules
Login
Registration
Browse Courses
Search People
Educators can quickly assemble, package, and redistribute Web-based instructional content, easily import prepackaged content, and conduct their courses online. Students learn in an accessible, adaptive, social learning environment. ATutor is released under the GNU GENERAL PUBLIC LICENSE.
Features
aTutor Features:
This is the list with the most popular features for the ATutor users:
Learners:
- Security: The passwords are encrypted and the forgotten ones must be reset.
- My Courses : Tutors and students are allowed to manage the courses they teach and/or are enrolled in.
- Inbox/Messaging : The system supports messaging between the users. They can send and receive private messages.
- Student Profile : Students can enter personal information like a name and a photo which will be displayed in their forum posts.
- Work Groups: The implemented collaboration solutions allow the users to work together on a defined problem.
- File Storage: All users can store and share their files through the system. A version control functionality is included.
- Group Blog: Each group can manage their own blog.
- Communication Tools: ATutor offers different communication solutions like a private mail, discussion forums, chat rooms and a “User’s Online” tool.
- Test Manager: Students can make tests, check and store the scores.
- Links Database: Web-based information can be added as links in the ATutor database.
- Course Search: The courses content can be searched with the corresponding tool.
Instructors:
- Instructor ATutor Handbook: A link to the ATutor Instructor documentation is provided in every section.
- Guest Access to Courses: Guests can access private courses using a link, provided by an instructor. The course can be viewed, but it can not be modified by guests.
- Course Tool Preferences: Instructors can pick only the necessarily tools for defined courses.
- Content Usage: Individual statistics are provided in order to identify issues with the content coverage and the learning progress of each person.
- Work Groups Manager: Different work groups can be created and managed by the instructors.
- File Storage: File Storage functionality allows files to be uploaded, stored and shared with different groups of users.
- Content Editor: HTML content can be created and published in the courses.
- Visual Editor: A JavaScript based WYSIWYG editor is included in the application.
- Reading List: A Reading List with external resources like books can be included by the instructors.
- Backup Manager: The courses can be stored through the backup functionality.
- News & Announcements: Instructors can post news and announcements to inform the students for the courses content and modifications. An RSS feed can be started.
- Polls: Polls can be used to gather students’ opinions.
- Forums: Multiple forums can be set for each of the courses.
- Course Email: Bulk e-mails can be sent to different users.
- Privileges: Tutors can promote students allowing access to different instructors tools.
- Addon Modules: FAQ, Google Search, RSS Feeds, EWiki, ACollab, ATalker Text-to-Speech and SCORM Packages modules are included in the quick installer functionality.
Administrators:
- Module Manager: Administrators can install, enable and disable modules. Some of them are included in the script’s installation package. The others can be integrated additionally.
- Patcher Module: Administrators can easily install different patches and security updates released by the ATutor developers.
- Administrator ATutor Handbook: A link to the ATutor Administrator documentation is provided in every section.
- Administrator Privileges: Specific privileges can be set for each administrator.
- Pretty URLs: Pretty URLs can be enabled. This will ease the search engines in the indexing of the public ATutor courses.
- Themes Manager: Themes can be modified and customized.
- Automated Installer and Upgrade: An easy solution for the ATutor upgrade.
- General Statistics: Shows system usage statistics.
- Secure Course Content: Prevents unauthorized access to courses.
- User Manager: Modification and management of users’ profiles.
- Enrollment Manager: Enrol students to courses.
- Course Manager: Manage courses, assign instructors.
- Backup Manager: Generate backups and download backups of courses.
- Course Categories: Set courses in corresponding categories.
- Language Manager: Import and manage language packs.
Developers:
- Instructions for developers on how to write ATutor core features and how to use the corresponding API are included.
-Major Features of ATutor:
- Accessibility
- Social Networking
- Things Current
- Security
- My Courses
- Inbox/Messaging
- Adaptive Navigation
- Work Groups
- File Storage
- Group Blogs
- Feedback
- Preference Settings
- Communication Tools
- Content Package Viewer
Videos
ATutor Demo
