1-click AWS Deployment 1-click Azure Deployment
Overview
- ApexSQL offers the most comprehensive set of SQL Server DBA and Developer tools, with a broad array of award-winning tools, backend by killer support SQL Server tools for DBAs and developers | ApexSQL
- All tools in ApexSQL Developer Studio are licensed per Developer making it easy to procure a license of ApexSQL Developer for each member of your SQL Developer team.
Open source PowerShell cmdlets
Run the toolkit from the CLI with a full, opensource library of cmdlets PowerShell. Modify and change pipelines yourself. Download and update our GitHub hostedwith changes and improvements
Web dashboard
The database DevOps tool to create and run CI/CD pipelines via point and click
Pipeline customization
Add, edit or remove steps to customize CI and CD pipelines. Change the order of steps. Disable and enable steps in a pipeline without removing them. Applies to PowerShell, Web dashboard and build server Plug-ins
Project support
Consume projects to provide powerful step customization capabilities and ensure that steps run the same via the DevOps toolkit as they do when running ApexSQL tools directly. Applies to PowerShell, Web dashboard and build server Plug-ins
Additional parameters
Add full CLI configuration, to add additional settings or override settings that exist in the project file. Applies to PowerShell, Web dashboard and build server Plug-ins
Saved data sources
Configure and save data sources including databases, source control, script folders, SQL script and Nuget packages, to be consumed by various steps in your pipeline. Make a change to a data source and have it automatically utilized in all steps that use it. Browse saved data sources via the dashboard console. Applies to PowerShell, Web dashboard and build server Plug-ins
Notifications
Configure email notifications for any and all events including a pipeline starting and ending as well as individual steps starting, finishing, failing and/or succeeding. Build notifications with a convenient user interface. Applies to PowerShell, Web dashboard and build server Plug-ins
Activity view
View all recently run pipelines by name, last run date and status. Applies to the Web dashboard only
User management
Create and save users profiles by permission level e.g. Administrator. Manage and edit user profiles directly via a centralized location e.g. Web dashboard page. Applies to PowerShell, Web dashboard and build server Plug-ins
Pipeline triggers
Set pipelines to commit on a schedule, manually or on a new commit. Applies to PowerShell, Web dashboard and build server Plug-ins
TeamCity build server plug-in
Fully integrate the ApexSQL DevOps toolkit into TeamCity build server. Create CI/CD pipelines using ApexSQL tools running by within the TeamCity build agent.
Azure DevOps Server build server plug-in
Integrate directly with Azure DevOps Server via an ApexSQL DevOps toolkit plug-in or integrate via PowerShell.
SQL code complete
Description
To enable the Auto-complete feature, navigate to the ApexSQL Complete menu, and click the Enable auto-complete command:

Once the feature is enabled each time the typing is started in the query window, the hint list appears, offering a hint to complete keyword, SQL fragment, or even entire SQL statement. Prior to the first appearance, the hint list loads SQL database objects based on one of the following:
The current database connection:

Database specified in the Use Statement:

Hint list management
The hint list can be managed from the Options window, under the General tab, that can be initiated by going to ApexSQL menu -> ApexSQL Complete -> Options:
The hint list offers context sensitive hints, and provides possible solutions based on the content of the current query. As an example, if the Use statement is entered, the first hints in the hint list will be available databases from the server:

The hint list offers the dill down to the column level:

Hint list transparency
In case where a quick overview of current SQL code is needed, when working with large scripts, hint list can be set as transparent, so the background SQL code will be available to explore. To invoke the hint list transparency, the CTRL key needs to be pressed:
Once the feature is enabled each time the typing is started in the query window, the hint list appears, offering a hint to complete keyword, SQL fragment, or even entire SQL statement.
Capturing who saw what in SQL Server
It’s important sometimes to know and have evidence of who-saw-what on specific SQL Server instances and databases. This can be a requirement you have to provide (e.g. to comply with HIPAA regulations) and there are several ways to ensure the capture of that information
In order to capture who-saw-what in SQL Server, it is important to know what was executed on the server. Even thoughandprovide partial information, in order to get the full details on who saw what, is the perfect tool for the job.
First let’s take a look how to manually capture this information. There are several ways to do that – one is through the use of specially developed stored procedures and functions. A database can be created so that all the access is done through stored procedures (allowing EXEC statements only, while prohibiting all queries and DML operations). The stored procedure returns the results from a query while at the same time logging the access in a specialized table along with additional information of interest (e.g. time of execution) if applicable
Similarly this can be done for DML operations using stored procedures, but these are more elegantly handled via triggers, which can be automatically created by a product like ApexSQL Trigger.
Anyway, these methods are fragile as they require disciplined programming ensuring that all code execution paths are covered and more importantly, they don’t provide a solution for ad hoc queries executed by trusted parties
SQL Server itself also offers a way to collect and monitor a wide range of events via SQL Server traces. Events related to the execution of queries, changes made to permissions, failed login attempts and other similar data are among them. SQL Server Profiler is an application that monitors all such events, but this application on its own is not an out-of-the-box solution for auditing. There are complex obstacles in the way of using it in an easy manner: everything has to be done manually, figuring out and capturing events, exporting and presenting the data, etc. and it still doesn’t solve the problem of trusted parties
How we capture who-saw-what data
ApexSQL Audit was developed to automate capturing, among other things, of who-saw-what data, and make compliance with auditing regulations easy. Tool is based on leveraging the SQL Server traces, the same technology used by SQL Server Profile, but, on top of it, the fault tolerance for a wide variety of scenarios is provided, as is additional processing of captured data, parsing for referenced objects, automatic transfers and loading into centralized repository, tamper-evident data storage and so on
ApexSQL Audit captures the following operations (there are more than 230 operations recognized by our parser) divided into several categories:
- DDL – CREATE, ALTER and DROP statements for all object types as well as rename and other similar operations
- DML – INSERT, INSERT BULK, SELECT INTO, WRITETEXT, UPDATE, MERGE, UPDATETEXT, DELETE and TRUNCATE TABLE
- Before – after – full audit trail including data as it existed before and after a change
- Query – SELECT, READTEXT and output parameters from EXEC
- Execute – calls to extended stored procedures, stored procedures, CLR procedures and functions
- Error – all operations that are issued as errors by SQL Server
- Warning – all operations that are issued as warnings by SQL Server
- Security – all operations that affect security of a SQL Server or one of its databases
The central ApexSQL Audit instance configuration dialog uses these categories to filter specific operations, and these can then be filtered even further on the object level for tables, views and other objects. Even more filtering, of course, is provided within the ApexSQL Audit’s reporting system
During the parsing process, we distinguish the difference between operations modifying or accessing objects. For example, the following statement will be captured, parsed and logged both in the DML and Query categories:The INSERT modifies Table1 while the SELECT accesses Table2. So this information is saved separately for later use in the reporting system, explicitly showing which object was modified and which one was accessed
The captured data may originate from the server hosting the central ApexSQL Audit instance or from other servers monitored by distributed ApexSQL Audit instances. In case of remote servers, the captured data has to be transferred automatically and safely to the central instance which then automatically loads it into ApexSQL Audit’s Central Repository Database. Transfers are initiated by the central instance contacting distributed instances and requesting the packages with captured data. If they exist, they are transferred via network and stored to a local folder of the central instance and from there read and data in them stored into the central repository database by the central instance itself
The transfer operation is repeated in an endless loop – transfer requests are constant while packages with captured data exist on the distributed instance; otherwise, if there are no available packages, the requests are resent every 3 seconds
To avoid dependency on the security level of the connection between the central and distributed instances, we use hash checks to validate the success of the transfer. If anything goes wrong, for example during the transfer or while the data is being saved, a new request will be issued for the same remote data package. The remote package file on the distributed instance is not deleted until it is successfully transferred which the central instance has to explicitly confirm
In case of multiple distributed instances, multiple requests are sent at the same time accordingly, optimizing performance by enabling faster transfer – slow transfer performance of one distributed instance won’t affect other transfers. Also, remote packages are compressed during the transfer to additionally improve performance. Currently, the maximum number of simultaneous connections is 16
To summarize, ApexSQL Audit relies on SQL Server traces. It configures traces based on user configuration set through GUI or uses the default configuration which is a set of common auditing requirements with optimal usage of the Central Repository Database. By default, who-saw-what queries (SELECT statements) are not captured because this category of statement is usually orders of magnitude more frequent than any other and its capturing would cause huge amounts of data being stored in the central repository database by default, whether it is needed or not. Of course, this is easily configurable through GUI
By default, ApexSQL Audit captures data modification statements, schema modification statements, executions of stored procedures, functions and dynamic statements, security changes and login activities
What’s new in ApexSQL Developer: ApexSQL Pump – SQL Server data import and export
We are excited to announce the release of another new SQL Server developer tool called This is a tool that can import and export data from the database in various file formats.
ApexSQL Pump is a standalone application with the possibility of running it via CLI. The application itself is very easy to use with the help of a wizard to guide the user through the process.
It can import data from 16 and export to 19 different data sources with the possibility to export table structure. All SQL data types are supported and the user can preview data. ApexSQL Pump can also import and export options template and can import multiple files into multiple tables on different servers.
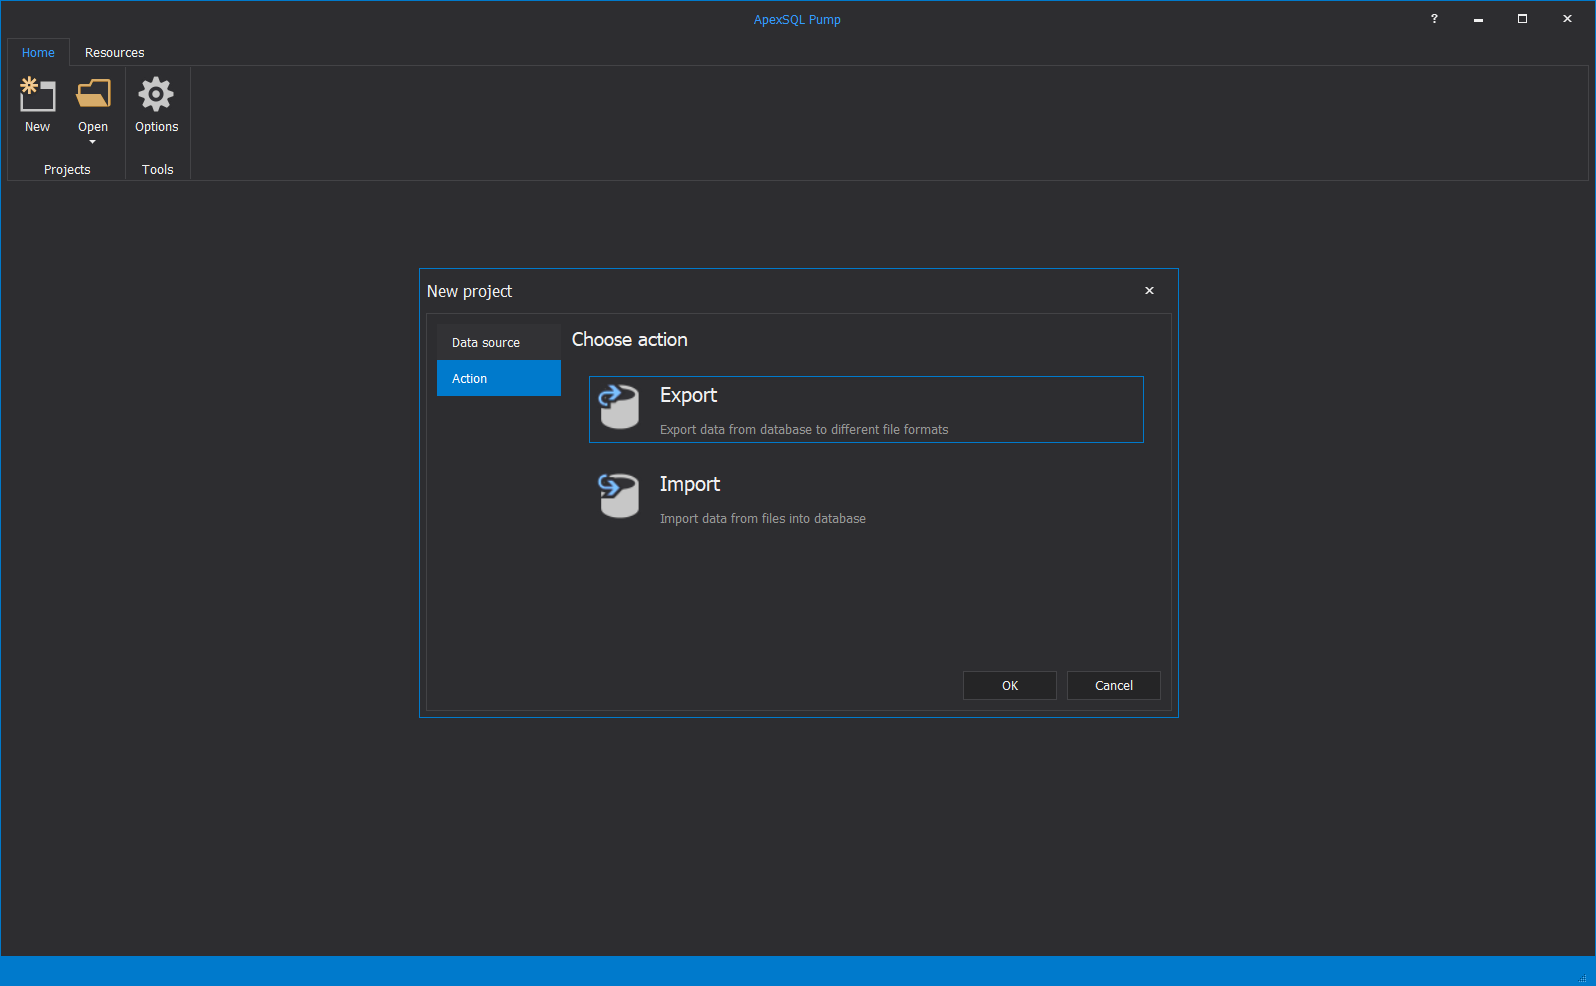
The user can either create a new project or open a previously saved project. When creating a new project, a New project dialog will appear for selecting SQL Server, Authentication and Database under the Data source tab:
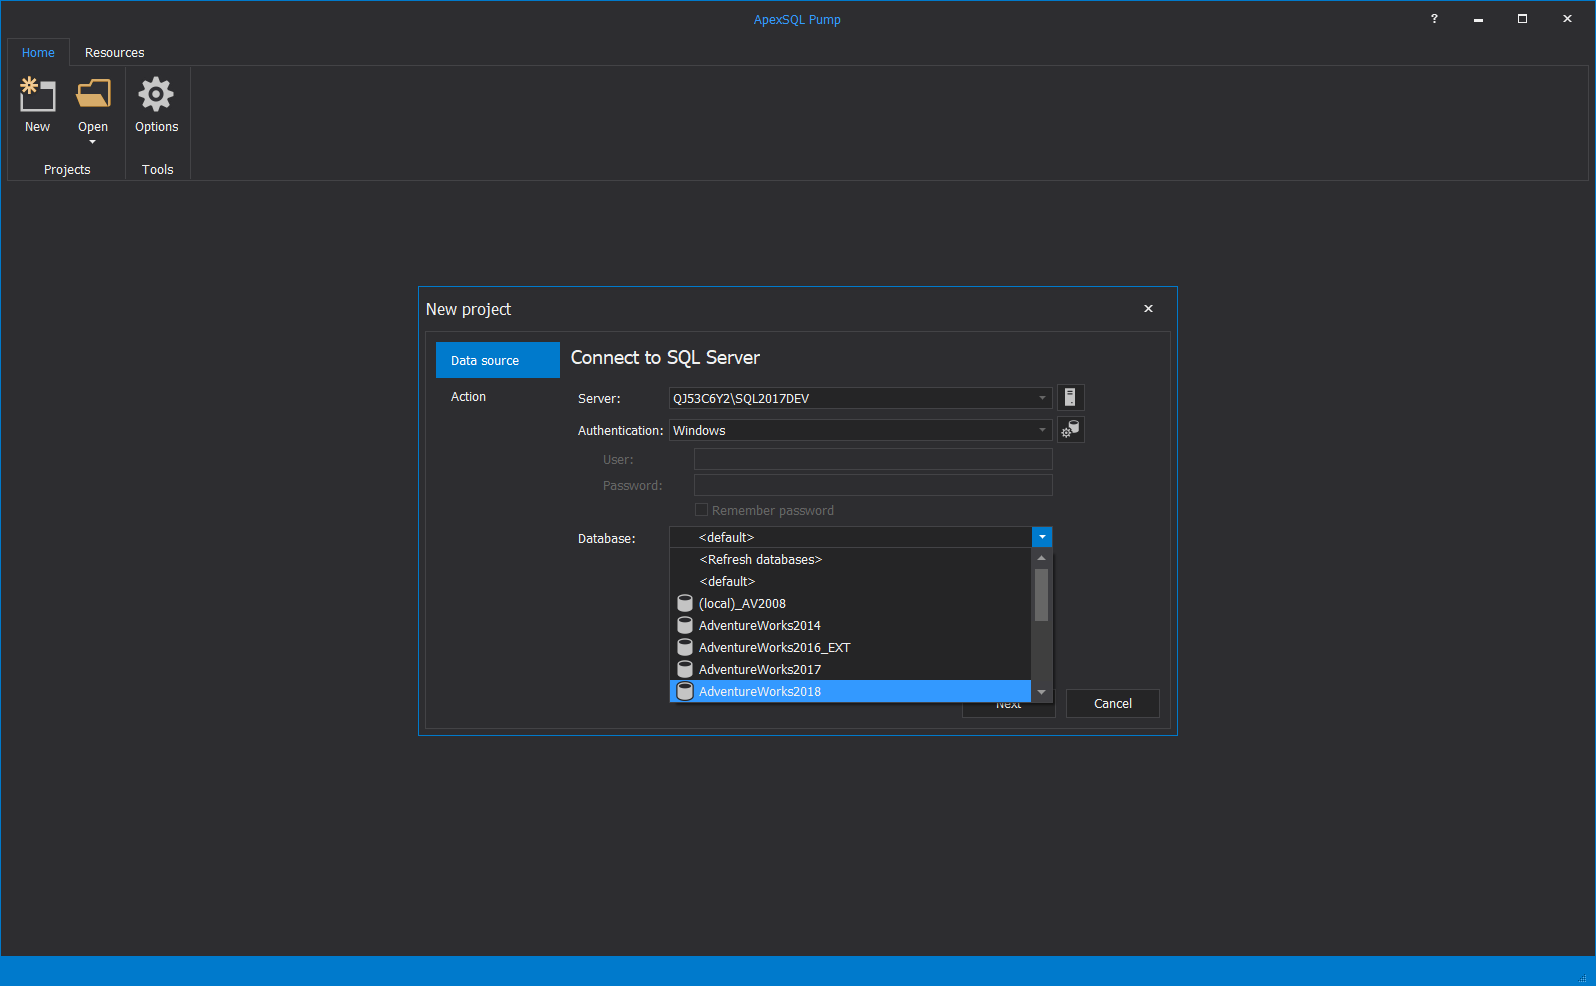
To proceed further, select the Action tab where either Export or Import option can be chosen:
This is the main grid where the loaded SQL database is shown. By default, all the tables and views are checked and on the right side is the Preview panel which allows user to preview the data before the process is started:
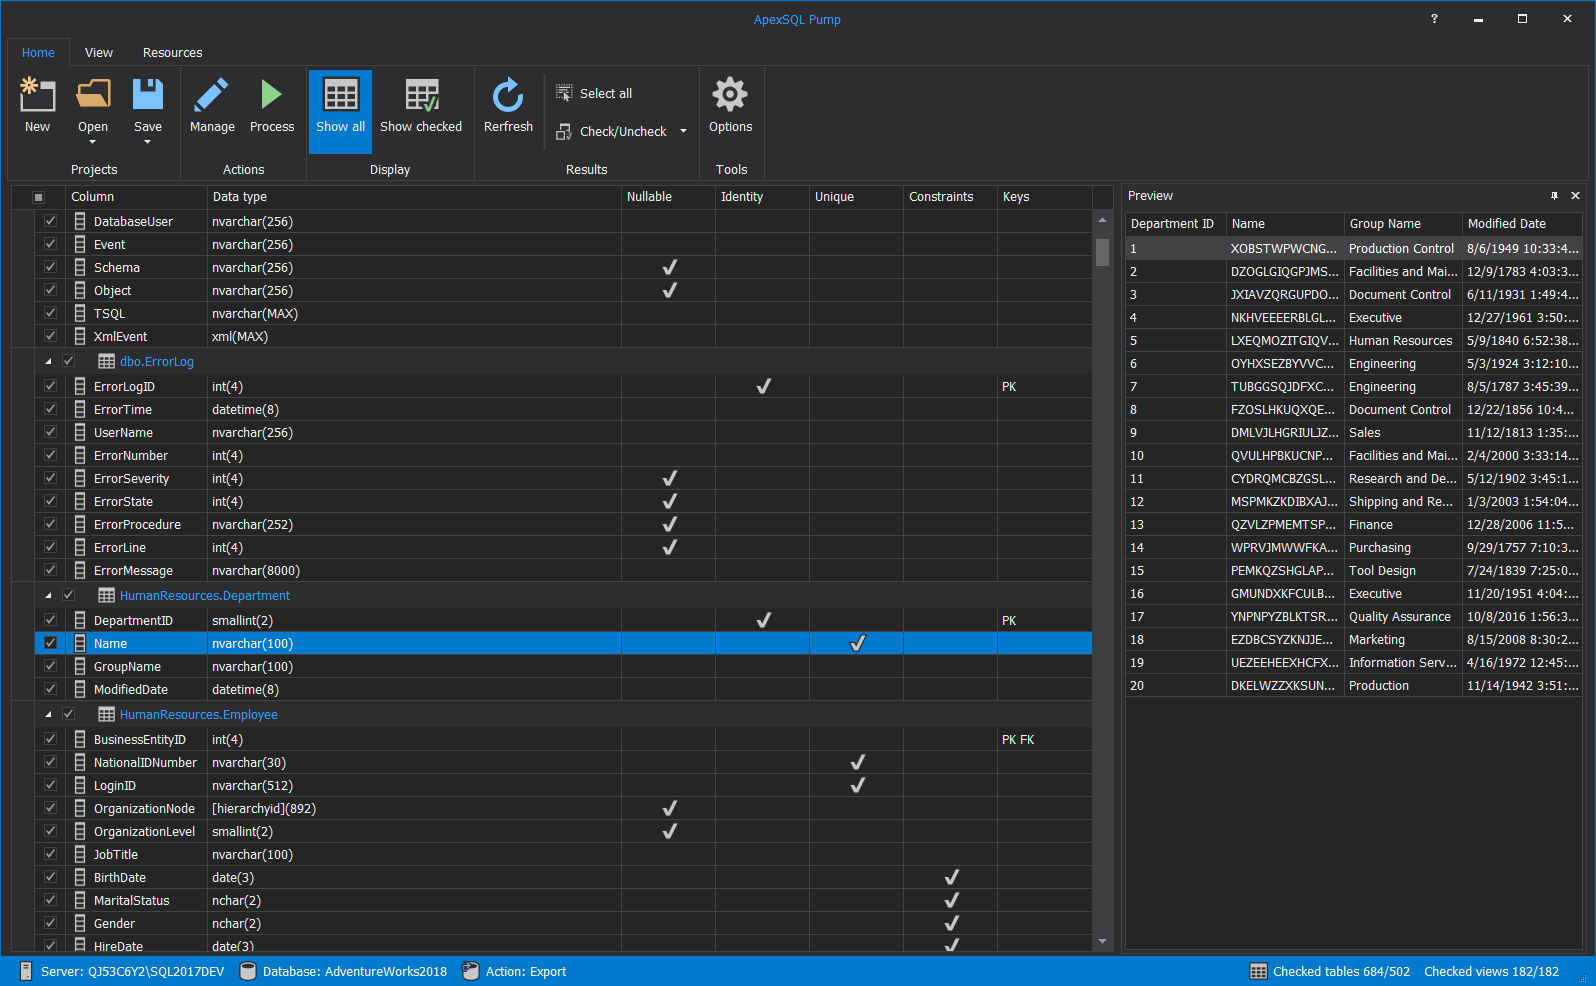
All the previously loaded tables can be seen here. In the Preview panel, the data that already exists in the selected table, from the table they selected on the left, can be seen. When another table is selected, the grid on the right will automatically change. In this step, certain tables can be unchecked in case they are not needed after seeing the table preview.
Export
When the Manage button for the export action is clicked, the next step is to select the file format. The window with all 16 available exporting formats can be seen, and one of them can be selected:
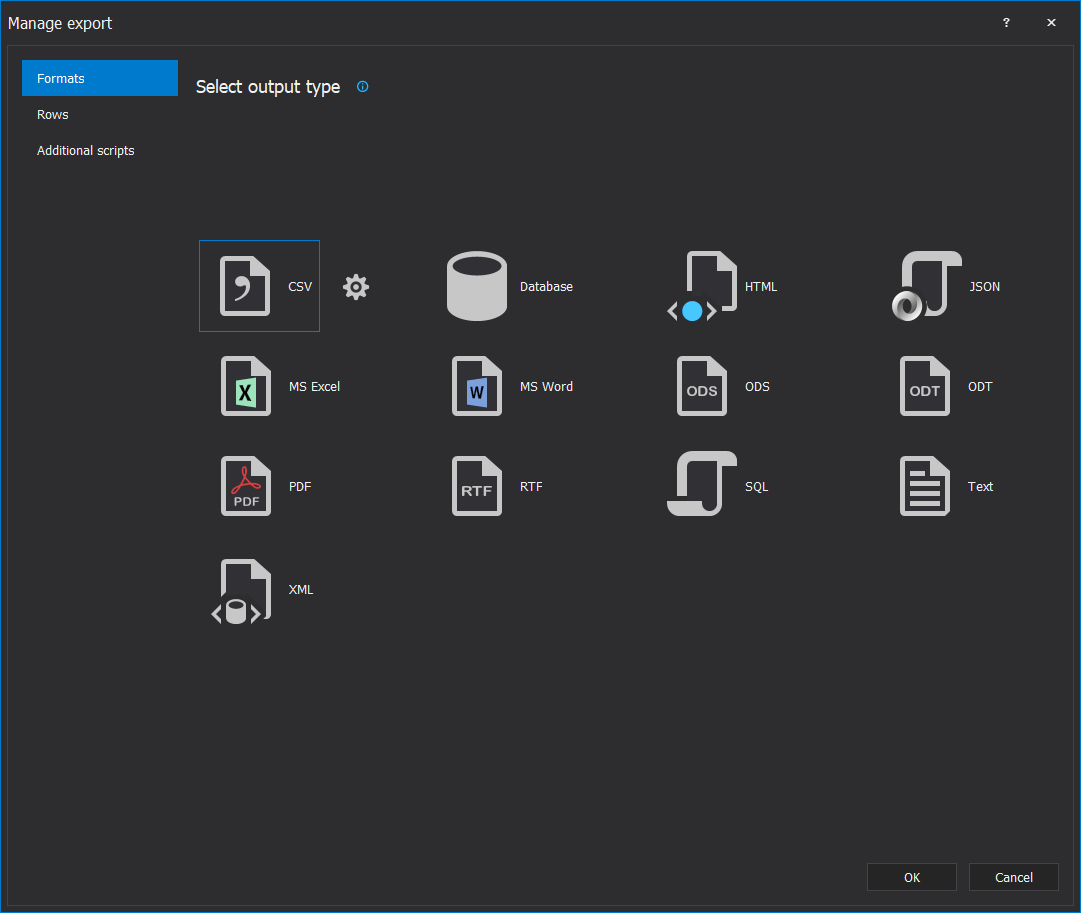
Note: Export to both Excel 1997-2003 and 2007 file formats are supported. Here, only one MS Excel item is shown, but in the next step, the format can be chosen. The same goes for MS Word and MS Access.
After this, the next steps are all options for the selected file format.
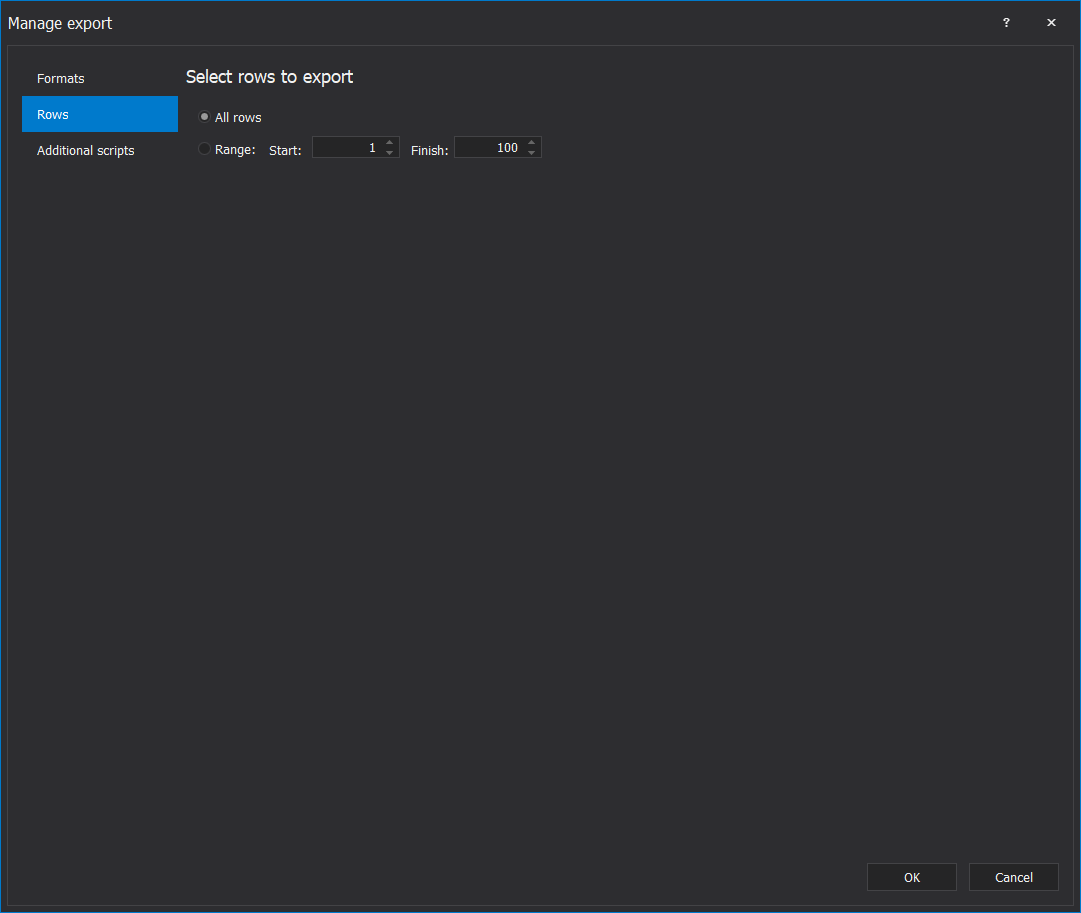
The rows selection is the next step in the Manage export window where All rows or a certain Range of rows can be selected:
It is possible to add the pre and post-deployment scripts under the Additional scripts tab that will be executed after the export is finished:
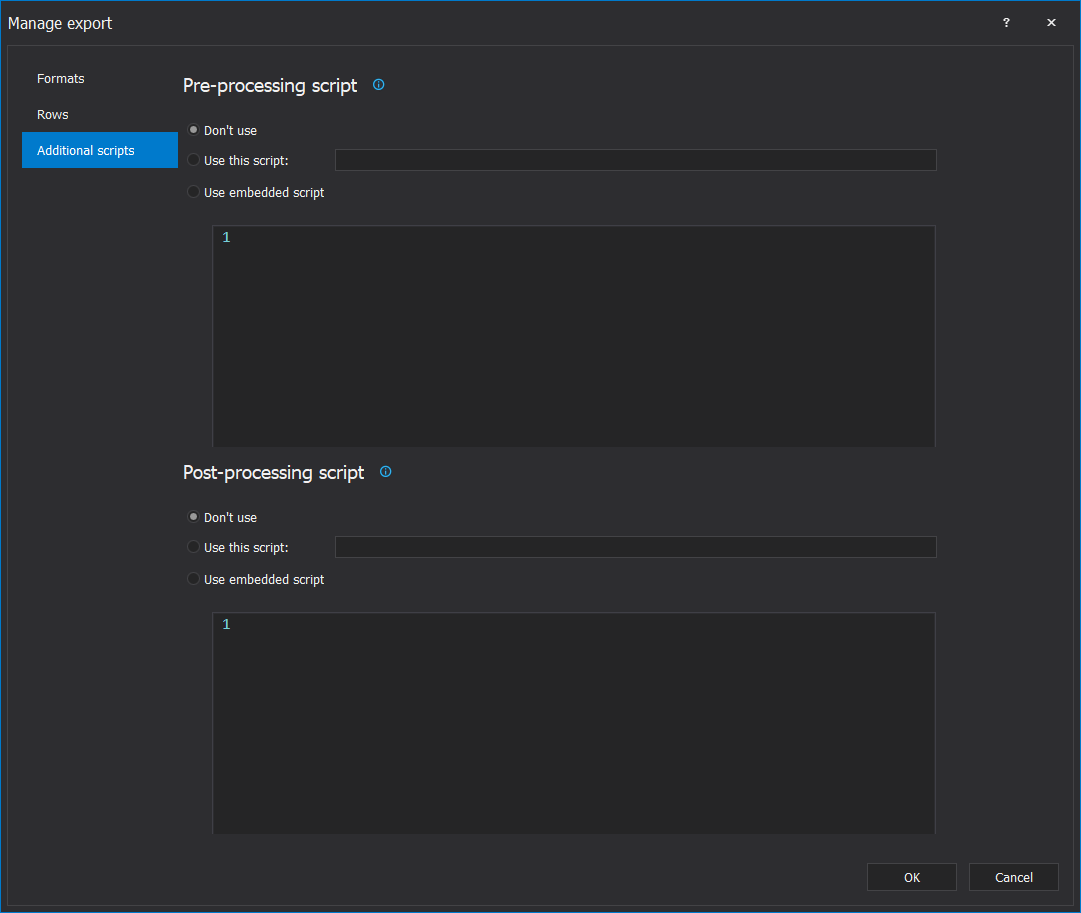
This step is optional, a script can be added if there is a need for that, but it can be skipped.
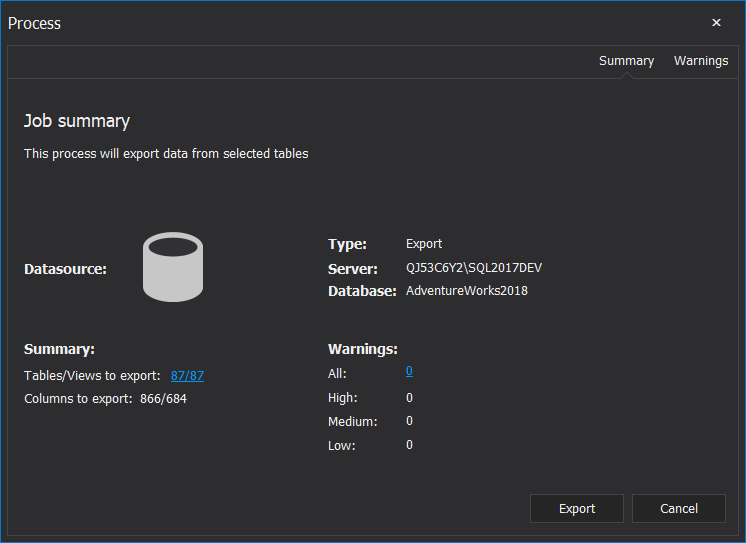
The last step is to click the Process button from the Home tab where the Export process will start and Job summary will be shown:
Import
ApexSQL Pump supports 13 different data sources for the import; one of them can be selected for the one task:
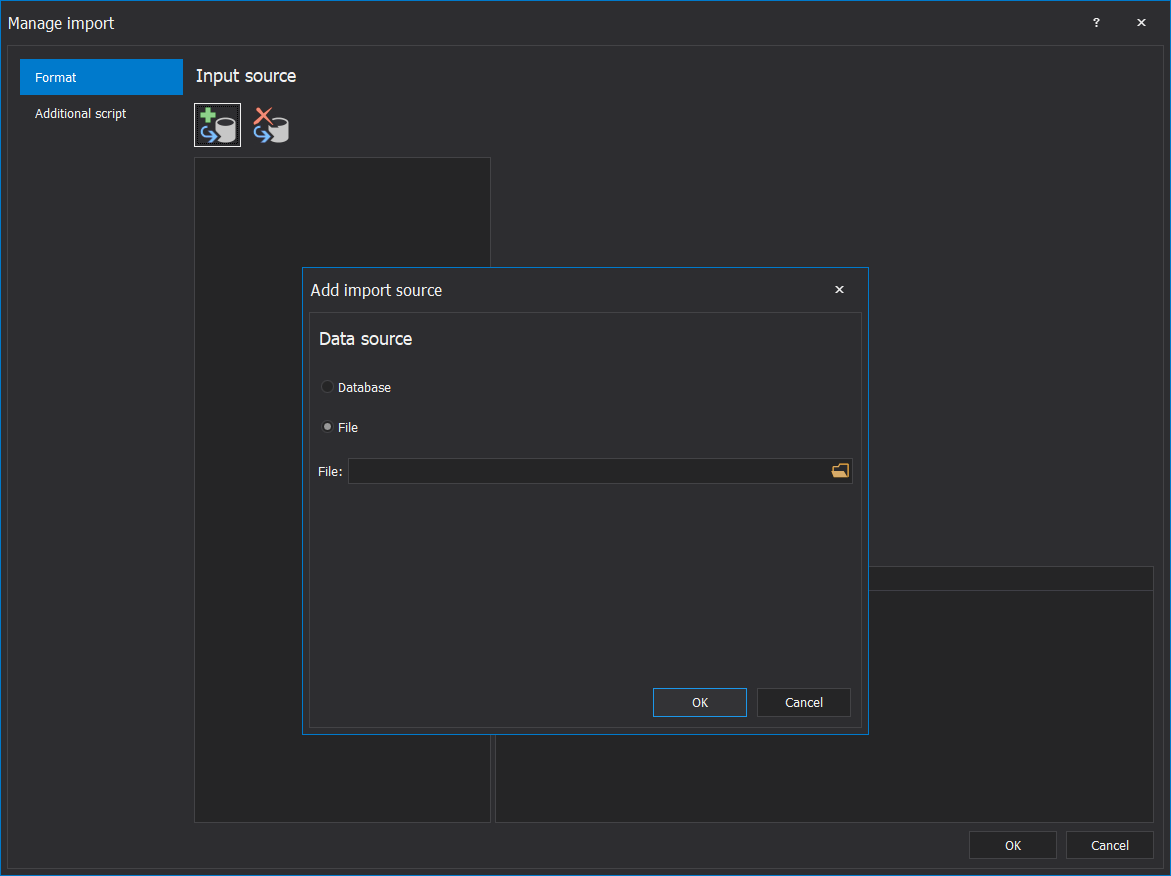
The next steps are options based on the input type. After options are set for the selected file format, the user needs to map all desired tables with data from a chosen file:
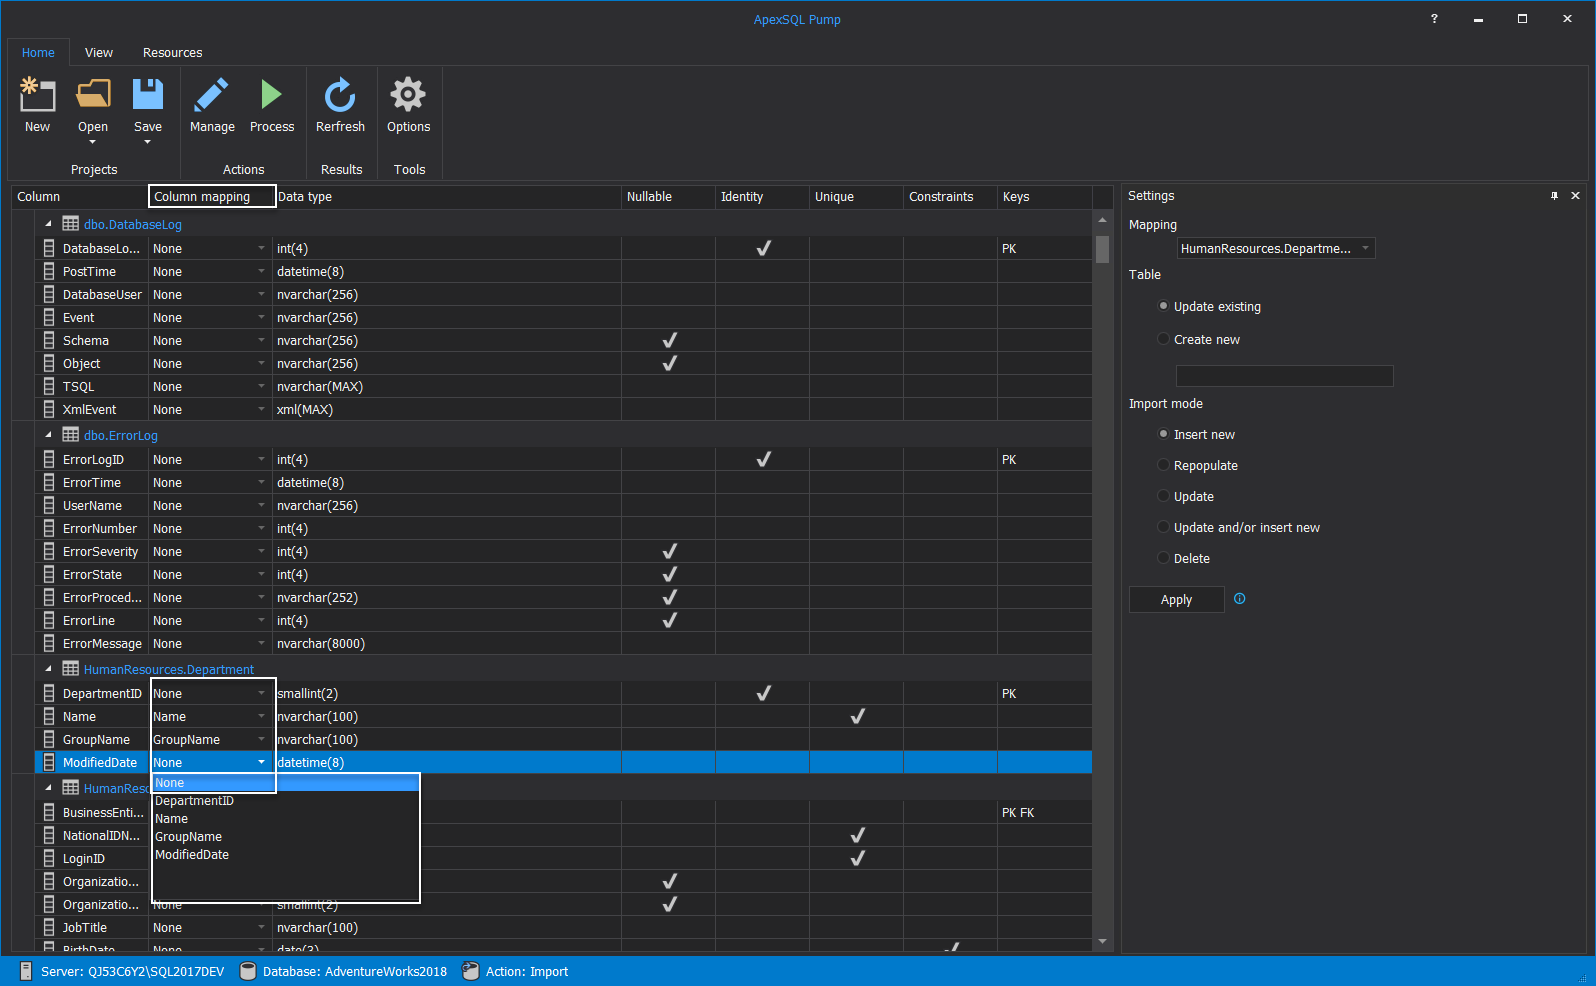
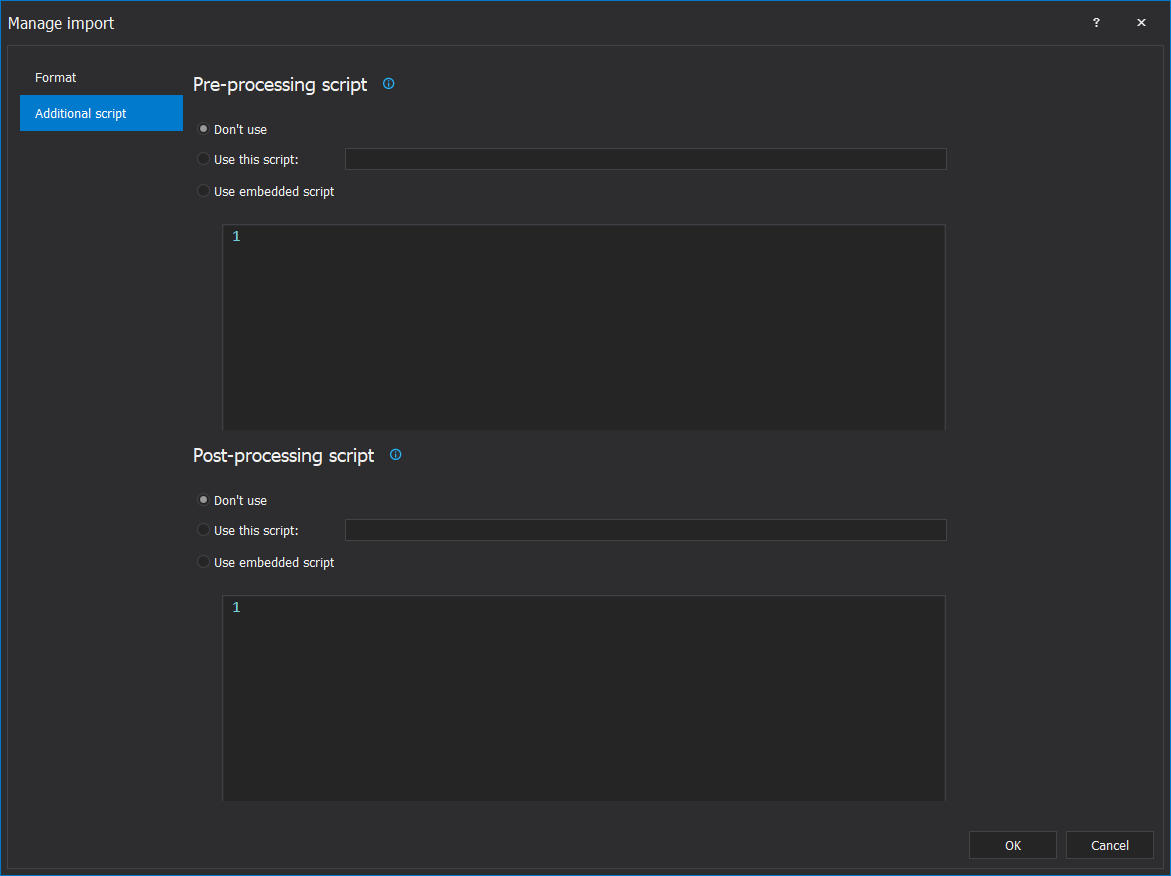
When the user maps all columns from all tables, in the last step there is a possibility to add pre and/or post-execution script:
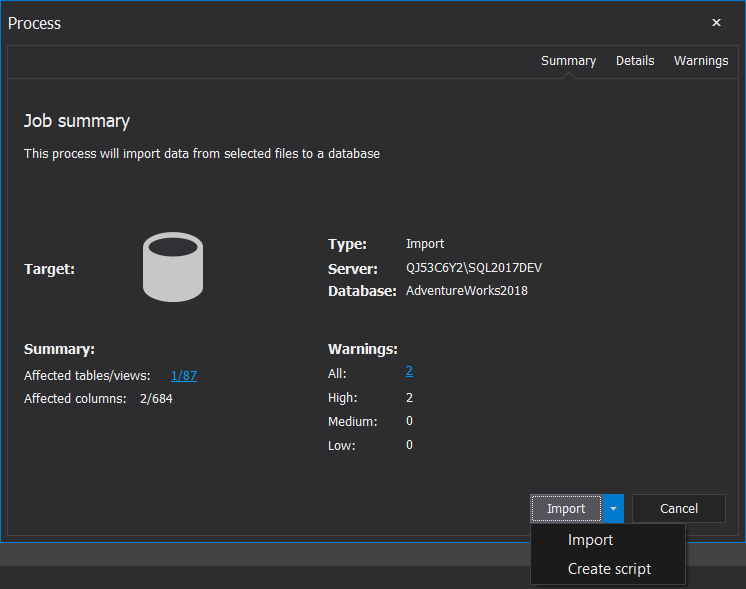
As it was in the last step for the export, here can be selected either to execute the task or to create the script to execute it later:
ApexSQL Developer includes 11 of ApexSQL’s SQL developer tools which currently include ApexSQL Build, ApexSQL Clean, ApexSQL Complete, ApexSQL Data Diff Professional, ApexSQL Diff Professional, ApexSQL Doc Professional, ApexSQL Generate, ApexSQL Refactor, ApexSQL Script Professional, ApexSQL Search and ApexSQL Source Control. All tools in ApexSQL Developer Studio are licensed per Developer making it easy to procure a license of ApexSQL Developer for each member of your SQL Developer team.
ApexSQL Developer on cloud for AWS
Features
Major Features of ApexSQL Developer:
1.Analyze and document
Graphical dependency analysis
Unused object clean up
External database analysis
Client code analysis
2. Source control management
Dedicated development model
Shared development model
Object locking
Object filtering
3. Developer productivity
SQL code auto-completion
Code structure viewer
Snippets
ab navigation
4. Compare and sync
Custom comparison key
Reports
Exports
Impact analysis
More Features :
Build from source control
Include static data in builds
Generate synthetic test data
Automatically run SQL unit tests
Add a data change audit trail
Document and report on changes
Create a data sync script
Create a schema sync script
Plug into popular build servers
Enforce SQL coding standards
Work with all popular SC systems
Trigger manually or automatically
AWS
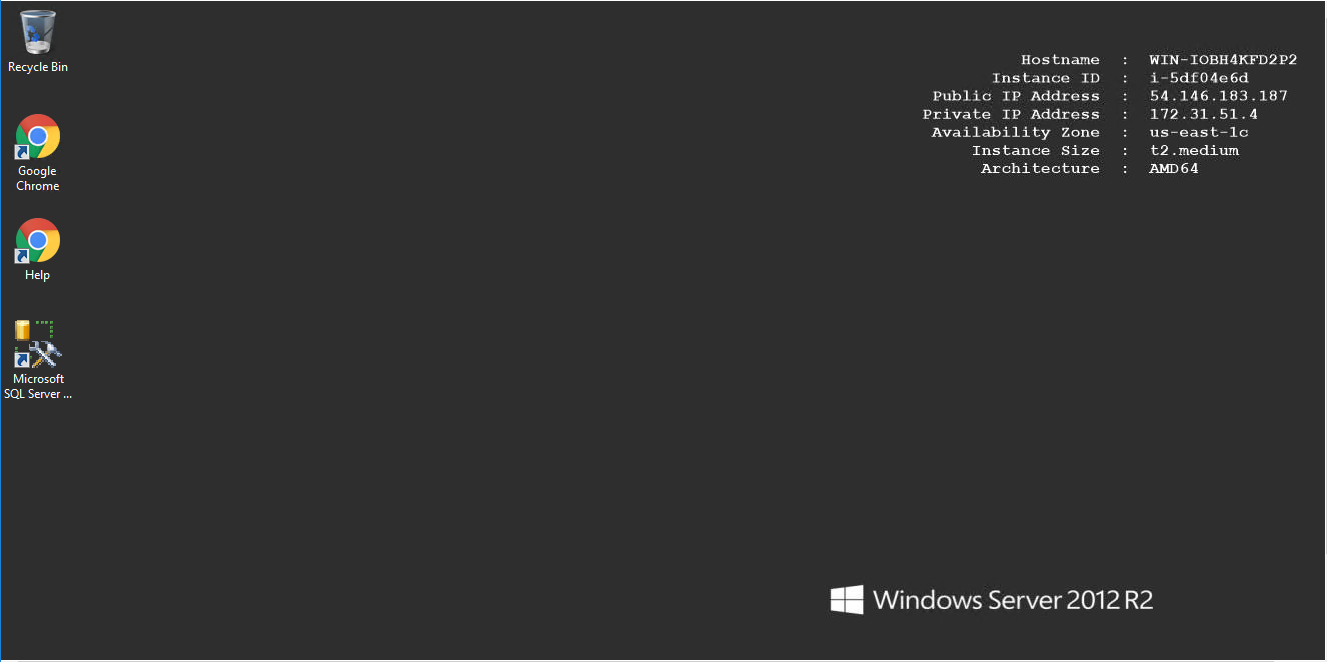
Installation Instructions For Windows
Note: How to find PublicDNS in AWS
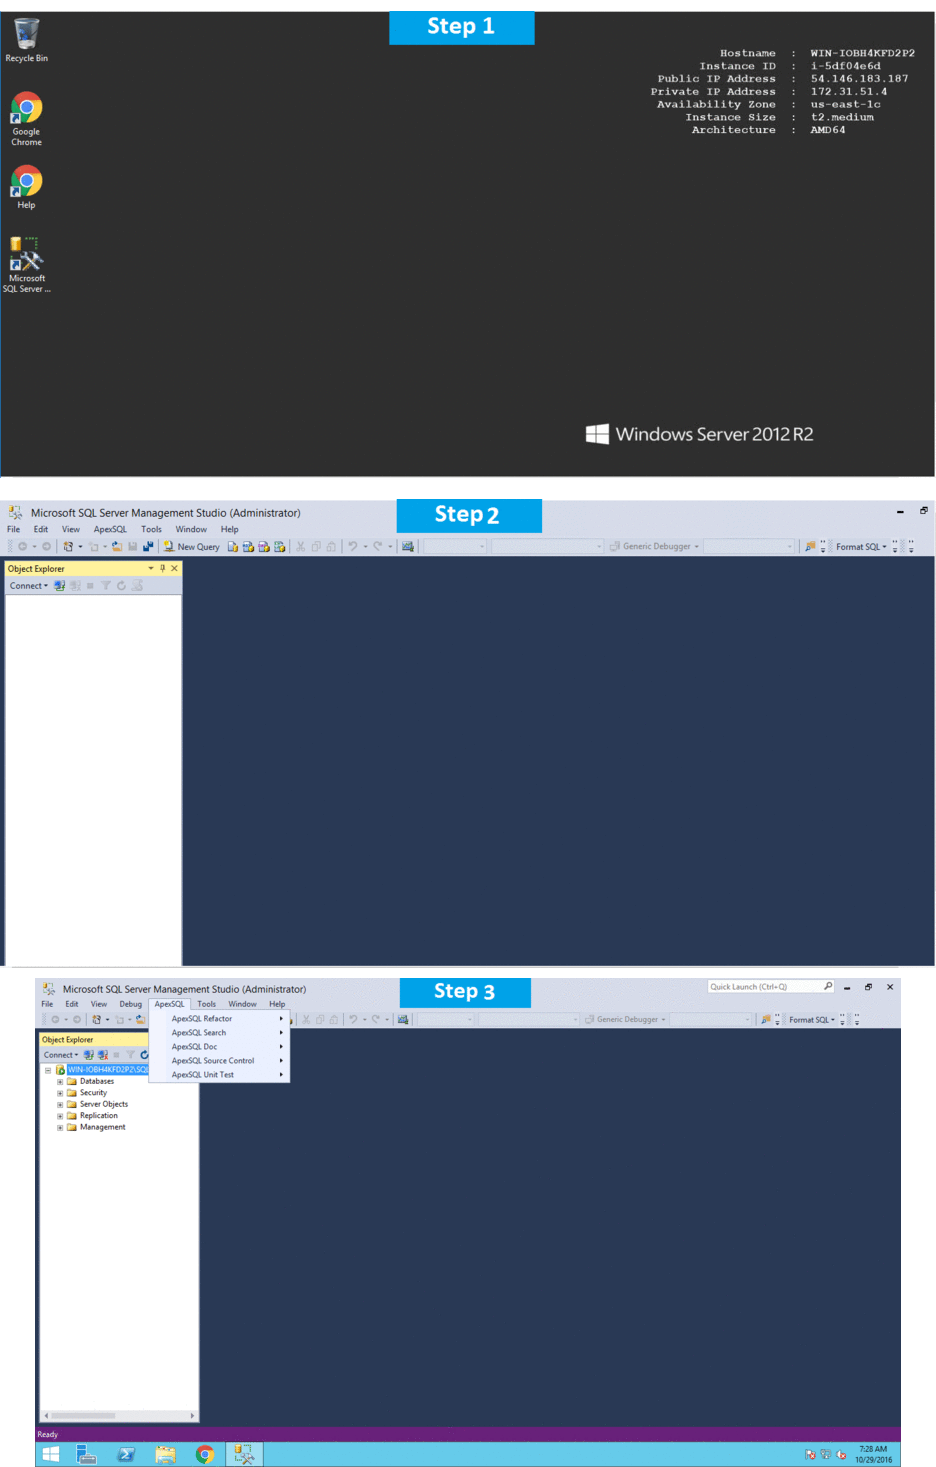
Step 1) RDP Connection: To connect to the deployed instance, Please follow Instructions to Connect to Windows instance on AWS Cloud
Connect to the virtual machine using following RDP credentials:
- Hostname: PublicDNS / IP of machine
- Port : 3389
Username: To connect to the operating system, use RDP and the username is Administrator.
Password: Please Click here to know how to get password .
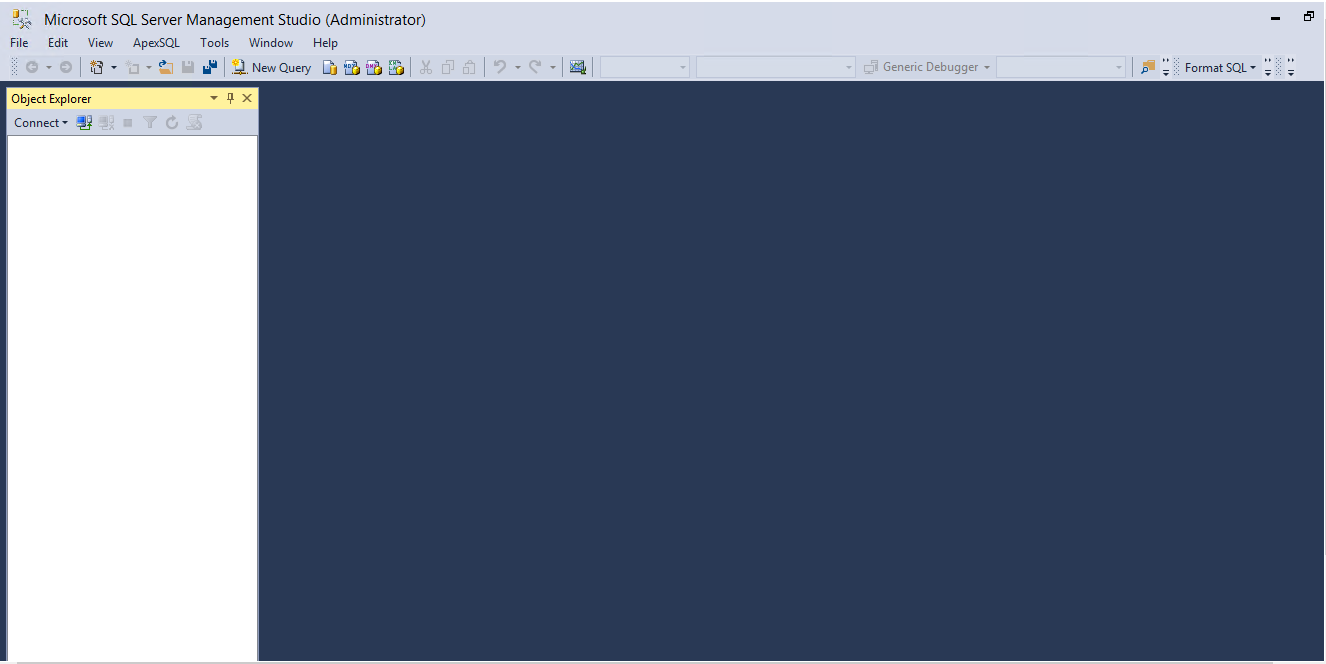
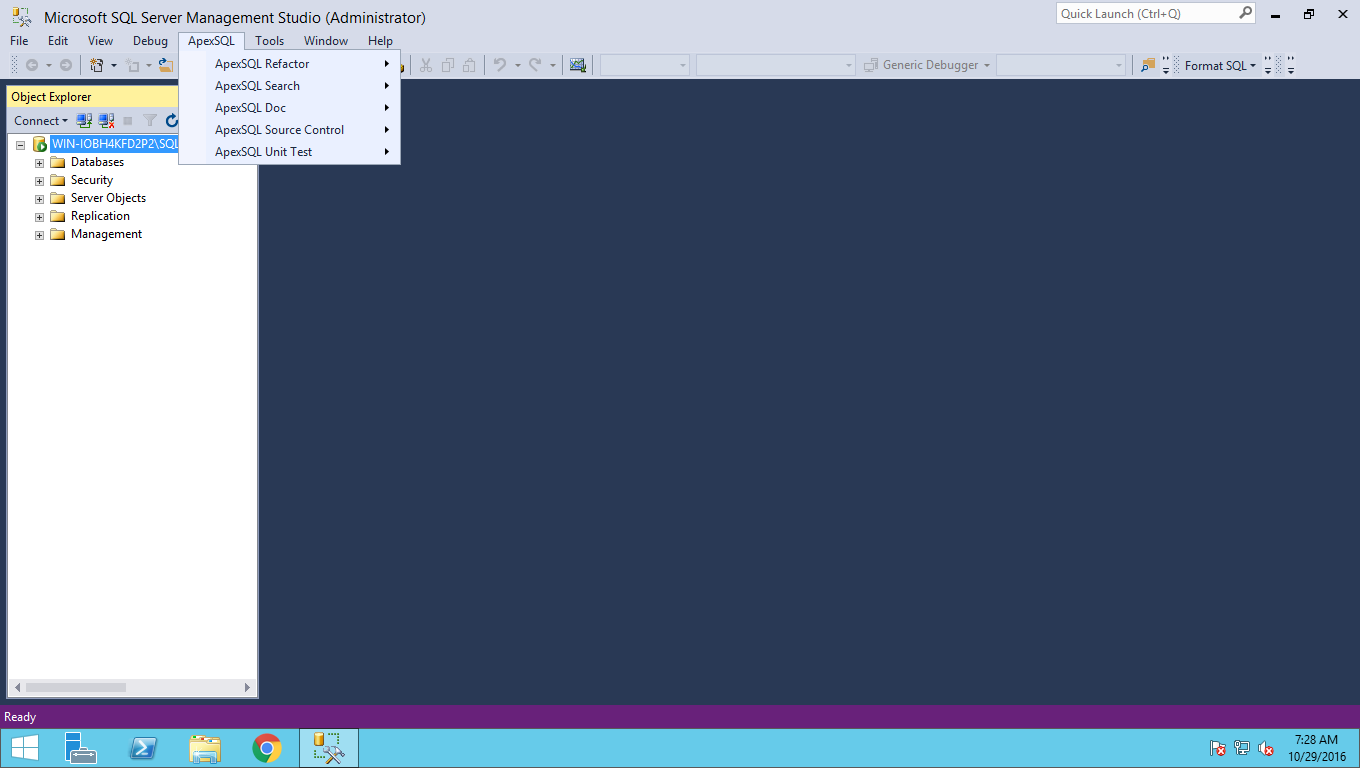
Step 2) On the Start page, type ApexSQL Developer and then click on ApexSQL Developer
Step 3) Other Information:
1.Default installation path: will be in your root folder “C:\Program Files\ApexSQL ”
2.Default ports:
- Windows Machines: RDP Port – 3389
- Http: 80
- Https: 443
Configure custom inbound and outbound rules using this link
Installation Step by Step Screenshots
