1-click AWS Deployment 1-click Azure Deployment 1-click Google Deployment
Overview
Media Wiki is free and an open-source wiki software runs on multiple websites. It is written in PHP programming language, the software optimized to handle large project which can have terabytes of content and more than thousands of clicks in one single second.It is licensed under the GNU General Public License. It is extremely powerful and scalable. Since it is free software, no warranty or guarantee of any kind is provided. It has been designed in a manner that it can run on a huge server farm for websites.
Why MediaWiki?
Written within the PHP coding language, MediaWiki powers Wikipedia,Wiktionary, Wikimedia Commons and thousands of other websites.MediaWiki was originally designed for Wikipedia developers, allowing them to create pages where thousands of users can efficiently view and navigate the same web-content simultaneously. MediaWiki has also been deployed as an
internal knowledge management system by private companies, as it is a powerful application with over 800 configuration settings and 2,000 extensions.If you have ever been interested in authoring web-content within the oftemulated, effective and internationally recognized style of Wikipedia, then MediaWiki is for you.
Historical Overview
Phase I: UseModWiki
Wikipedia was launched in January 2001. At the time, it was mostly an experiment to try to boost the production of content for Nupedia, a free-content, but peer-reviewed, encyclopedia created by Jimmy Wales. Because it was an experiment, Wikipedia was originally powered by UseModWiki, an existing GPL wiki engine written in Perl, using CamelCase and storing all pages in individual text files with no history of changes made.
It soon appeared that CamelCase wasn’t really appropriate for naming encyclopedia articles. In late January 2001, UseModWiki developer and Wikipedia participant Clifford Adams added a new feature to UseModWiki: free links; i.e., the ability to link to pages with a special syntax (double square brackets), instead of automatic CamelCase linking. A few weeks later, Wikipedia upgraded to the new version of UseModWiki supporting free links, and enabled them.
While this initial phase isn’t about MediaWiki per se, it provides some context and shows that, even before MediaWiki was created, Wikipedia started to shape the features of the software that powered it. UseModWiki also influenced some of MediaWiki’s features; for example, its markup language. The Nostalgia Wikipedia contains a complete copy of the Wikipedia database from December 2001, when Wikipedia still used UseModWiki.
Phase II: The PHP Script
In 2001, Wikipedia was not yet a top ten website; it was an obscure project sitting in a dark corner of the Interwebs, unknown to most search engines, and hosted on a single server. Still, performance was already an issue, notably because UseModWiki stored its content in a flat file database. At the time, Wikipedians were worried about being inundated with traffic following articles in the New York Times, Slashdot and Wired.
So in summer 2001, Wikipedia participant Magnus Manske (then a university student) started to work on a dedicated Wikipedia wiki engine in his free time. He aimed to improve Wikipedia’s performance using a database-driven app, and to develop Wikipedia-specific features that couldn’t be provided by a “generic” wiki engine. Written in PHP and MySQL-backed, the new engine was simply called the “PHP script”, “PHP wiki”, “Wikipedia software” or “phase II”.
The PHP script was made available in August 2001, shared on SourceForge in September, and tested until late 2001. As Wikipedia suffered from recurring performance issues because of increasing traffic, the English language Wikipedia eventually switched from UseModWiki to the PHP script in January 2002. Other language versions also created in 2001 were slowly upgraded as well, although some of them would remain powered by UseModWiki until 2004.
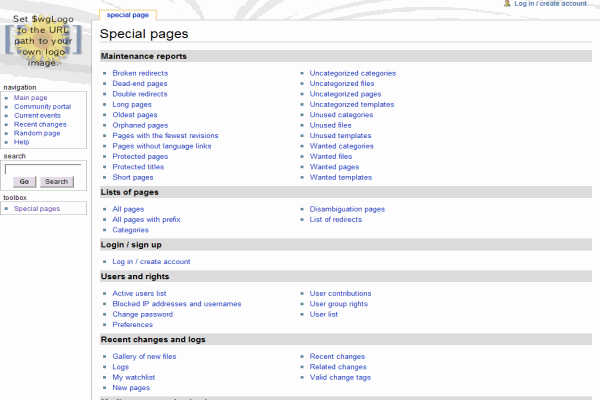
As PHP software using a MySQL database, the PHP script was the first iteration of what would later become MediaWiki. It introduced many critical features still in use today, like namespaces to organize content (including talk pages), skins, and special pages (including maintenance reports, a contributions list and a user watchlist).
Phase III: MediaWiki
Despite the improvements from the PHP script and database backend, the combination of increasing traffic, expensive features and limited hardware continued to cause performance issues on Wikipedia. In 2002, Lee Daniel Crocker rewrote the code again, calling the new software “Phase III” (http://article.gmane.org/gmane.science.linguistics.wikipedia.technical/2794). Because the site was experiencing frequent difficulties, Lee thought there “wasn’t much time to sit down and properly architect and develop a solution”, so he “just reorganized the existing architecture for better performance and hacked all the code”. Profiling features were added to track down slow functions.
The Phase III software kept the same basic interface, and was designed to look and behave as much like the Phase II software as possible. A few new features were also added, like a new file upload system, side-by-side diffs of content changes, and interwiki links.
Other features were added over 2002, like new maintenance special pages, and the “edit on double click” option. Performance issues quickly reappeared, though. For example, in November 2002, administrators had to temporarily disable the “view count” and “site” statistics which were causing two database writes on every page view. They would also occasionally switch the site to read-only mode to maintain the service for readers, and disable expensive maintenance pages during high-access times because of table locking problems.
In early 2003, developers discussed whether they should properly re-engineer and re-architect the software from scratch, before the fire-fighting became unmanageable, or continue to tweak and improve the existing code base. They chose the latter solution, mostly because most developers were sufficiently happy with the code base, and confident enough that further iterative improvements would be enough to keep up with the growth of the site.
In June 2003, administrators added a second server, the first database server separate from the web server. (The new machine was also the web server for non-English Wikipedia sites.) Load-balancing between the two servers would be set up later that year. Admins also enabled a new page-caching system that used the file system to cache rendered, ready-to-output pages for anonymous users.
June 2003 is also when Jimmy Wales created the non-profit Wikimedia Foundation to support Wikipedia and manage its infrastructure and day-to-day operations. The “Wikipedia software” was officially named “MediaWiki” in July, as wordplay on the Wikimedia Foundation’s name. What was thought at the time to be a clever pun would confuse generations of users and developers.
New features were added in July, like the automatically generated table of contents and the ability to edit page sections, both still in use today. The first release under the name “MediaWiki” happened in August 2003, concluding the long genesis of an application whose overall structure would remain fairly stable from there on.
MediaWiki Code Base and Practices
PHP
PHP was chosen as the framework for Wikipedia’s “Phase II” software in 2001; MediaWiki has grown organically since then, and is still evolving. Most MediaWiki developers are volunteers contributing in their free time, and there were very few of them in the early years. Some software design decisions or omissions may seem wrong in retrospect, but it’s hard to criticize the founders for not implementing some abstraction which is now found to be critical, when the initial code base was so small, and the time taken to develop it so short.
For example, MediaWiki uses unprefixed class names, which can cause conflicts when PHP core and PECL (PHP Extension Community Library) developers add new classes: MediaWiki Namespace class had to be renamed to MWNamespace to be compatible with PHP 5.3. Consistently using a prefix for all classes (e.g., “MW“) would have made it easier to embed MediaWiki inside another application or library.
Relying on PHP was probably not the best choice for performance, since it has not benefitted from improvements that some other dynamic languages have seen. Using Java would have been much better for performance, and simplified execution scaling for back-end maintenance tasks. On the other hand, PHP is very popular, which facilitates recruiting new developers.
Even if MediaWiki still contains “ugly” legacy code, major improvements have been made over the years, and new architectural elements have been introduced to MediaWiki throughout its history. They include the Parser, SpecialPage, and Database classes, the Image class and the FileRepo class hierarchy, ResourceLoader, and the Action hierarchy. MediaWiki started without any of these things, but all of them support features that have been around since the beginning. Many developers are interested primarily in feature development and architecture is often left behind, only to catch up later as the cost of working within an inadequate architecture becomes apparent.
Security
Because MediaWiki is the platform for high-profile sites such as Wikipedia, core developers and code reviewers have enforced strict security rules. To make it easier to write secure code, MediaWiki gives developers wrappers around HTML output and database queries to handle escaping. To sanitize user input, a develop uses the WebRequest class, which analyzes data passed in the URL or via a POSTed form. It removes “magic quotes” and slashes, strips illegal input characters and normalizes Unicode sequences. Cross-site request forgery (CSRF) is avoided by using tokens, and cross-site scripting (XSS) by validating inputs and escaping outputs, usually with PHP’s htmlspecialchars() function. MediaWiki also provides (and uses) an XHTML sanitizer with the Sanitizer class, and database functions that prevent SQL injection.
Configuration
MediaWiki offers hundreds of configuration settings, stored in global PHP variables. Their default value is set in DefaultSettings.php, and the system administrator can override them by editing LocalSettings.php.
MediaWiki used to over-depend on global variables, including for configuration and context processing. Globals cause serious security implications with PHP’s register_globals function (which MediaWiki hasn’t needed since version 1.2). This system also limits potential abstractions for configuration, and makes it more difficult to optimize the start-up process. Moreover, the configuration namespace is shared with variables used for registration and object context, leading to potential conflicts. From a user perspective, global configuration variables have also made MediaWiki seem difficult to configure and maintain. MediaWiki development has been a story of slowly moving context out of global variables and into objects. Storing processing context in object member variables allows those objects to be reused in a much more flexible way.
MediaWiki Manual Installation
Learn How to Install MediaWiki Manually
Pre-installation Steps
STEP 1 Database Setup
You should first make sure to create a MySQL database and user. After creating them, assign the MySQL user to the corresponding database and grant full privileges.
STEP 2 Upload Files
Once you have downloaded the release you want,you can upload it to your account using the File Manager tool or an FTP client.
MediaWiki Installation
Now you should open the folder where you extracted the files with your favorite browser. If you have extracted the files in a folder called wiki, then you should go to www.yourdomain.com/wiki. There you will be asked to set up your MediaWiki.

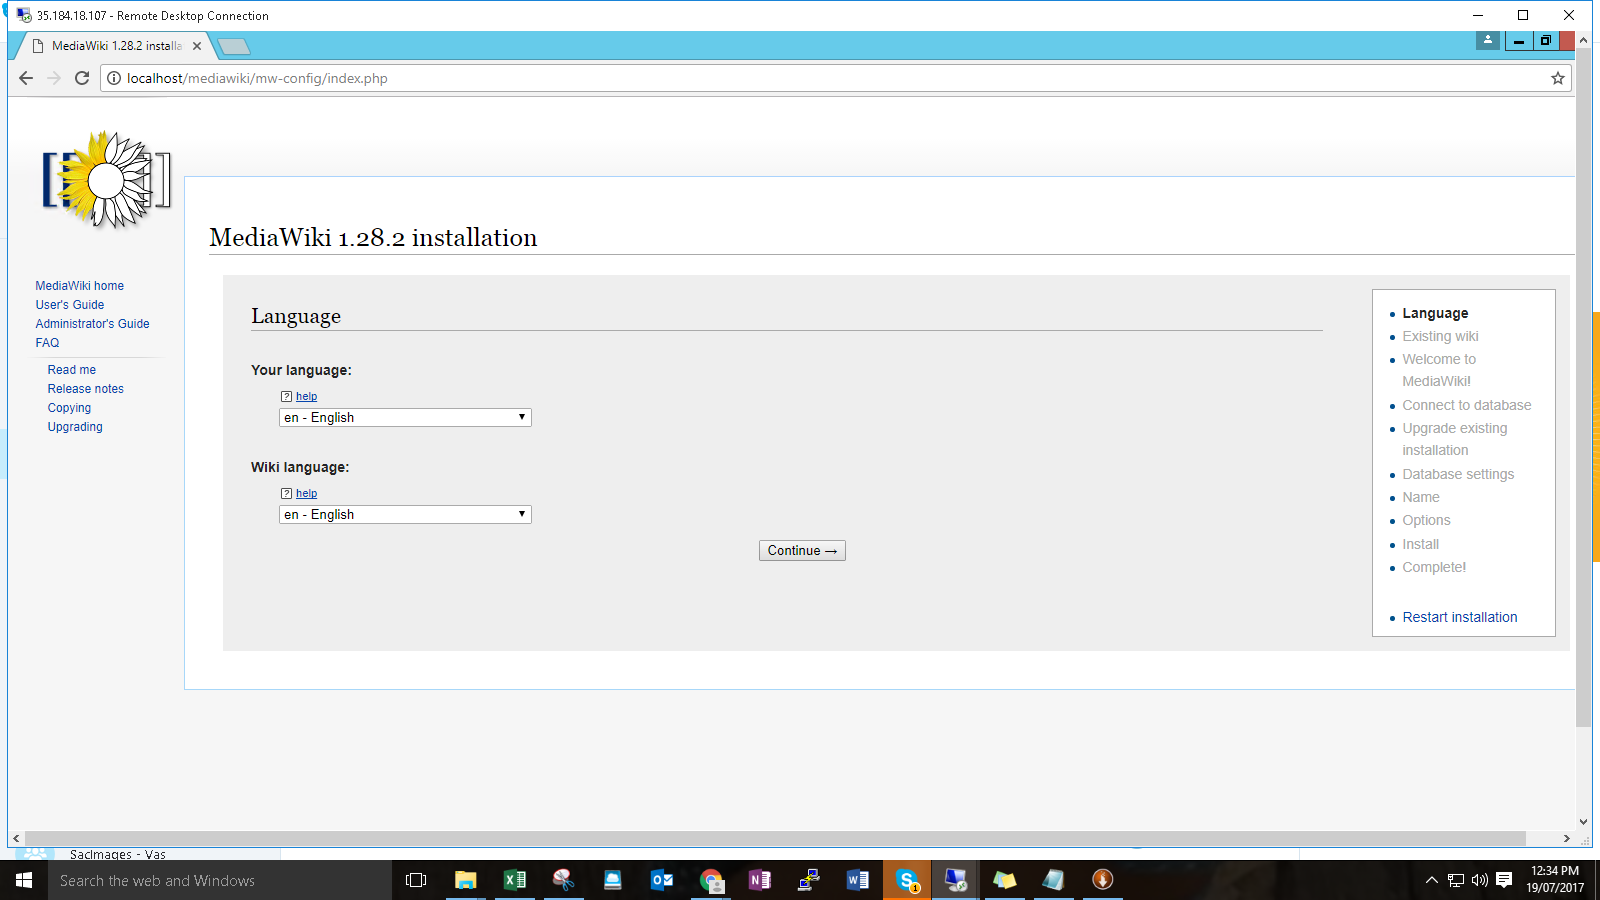
When you click on the set up the wiki link, you will be redirected to the installation page. First you will have to select a language to use for the MediaWiki installation and for the wiki itself.

Click Continue to proceed to the next page. Here some environmental checks will be done. MediaWiki can be installed without any problems on all SiteGround servers. You may see some warnings, but since they will not affect the installation, you can disregard them.

Press the Continue button to go to the next step of the installation process. On this page you will have to configure the database settings with the user and database you created in the beginning.

Select MySQL for Database type (PostgreSQL and SQLite are also supported, but MySQL is recommended). Type localhost for Database host and enter the name of the database you created earlier, as well as the username and password associated with it in their respective fields. When ready, click Continue.
On the next page you can choose the database storage engine and database character set for your MediaWiki. You can also set the database account for web access. Leaving the default settings here is recommended. To proceed, click Continue.

On the page that follows you should type the Name of wiki, Your username, Password and E-mail address. You can also choose whether you want to configure more settings using the Ask me more questions option or finalize the installation using I’m bored already, just install the wiki.

Let’s finalize the installation and click Continue. If you want to go back and make some changes, you can do it using the Back button on the next page. In case you do not want to do that, press the Continue button again.

You will see the installation process steps completed and you should click on the Continue button once again.

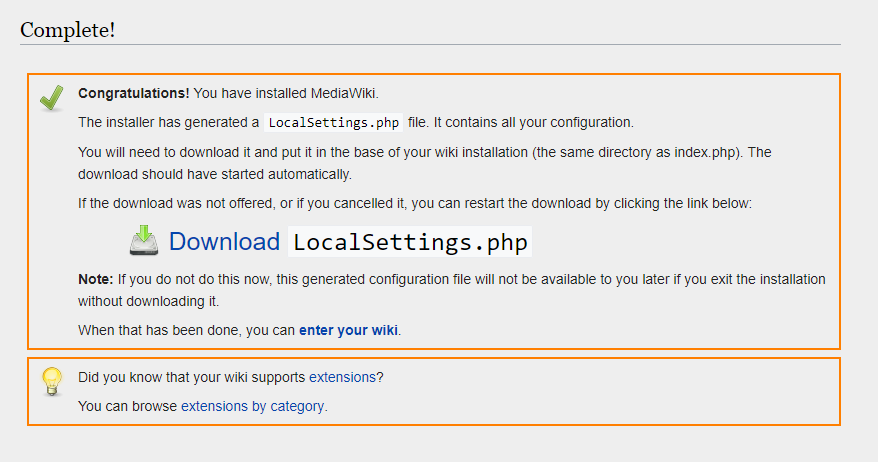
The installation will be fully completed and the LocalSettings.php file which contains the configuration will be suggested for download.

Download the file and upload it to the MediaWiki installation folder. Then you will be able to access your newly-installed MediaWiki.
MediaWiki Skins:How to Manage Your MediaWiki Skins
To review the available skins for your MediaWiki, first login as administrator. Then click on the Preferences button in the top right corner.

The next step is to choose the Appearance tab.

In the first section you would see the available skins for your application. The default skin is called Vector. You can preview each of the other ones by clicking the Preview button next to it. Once you choose the desired skin, select it and click on the Save button at the bottom of the page.

You can also change the logo of your wiki by altering the $wgLogo variable in LocalSettings.php to the name of the image you want to use as a logo.
MediaWiki Images:Enable and Manage Uploads in MediaWiki
The first step you need to take before uploading images, is to ensure the following:
- The images directory is writable. If not – you may easily change the folder’s permissions via the File Manager tool in your cPanel or over FTP.
- Upload in MediaWiki is enabled. To do this, you should open the LocalSettings.php file for editing and make sure that the $wgEnableUploads is set to true as shown below:
|
1
|
$wgEnableUploads = true;
|
- The file’s extension is allowed for upload. To confirm this, open the includes/DefaultSettings.php file for editing. Then search for the $wgFileExtensions variable. It should look like the line below:
|
1
|
$wgFileExtensions = [ ‘png’, ‘gif’, ‘jpg’, ‘jpeg’, ‘webp’ ];
|
If the file’s extension is not present, you can edit the file and add it manually. As an alternative, you may allow most file types to be uploaded by changing the $wgStrictFileExtensions variable to false.
|
1
|
$wgStrictFileExtensions = false;
|
- You should also make sure you are logged in the MediaWiki application.
Upload Permissions
By default, all registered users can upload files. To change this, you have to modify the $wgGroupPermissions variable in includes/DefaultSettings.php. To prevent normal users from uploading files, you should set:
|
1
|
$wgGroupPermissions[‘user’][‘upload’] = false;
|
To create a special group called uploadaccess, and allow members of this group to upload files, you should set:
|
1
|
$wgGroupPermissions[‘uploadaccess’][‘upload’] = true;
|
To allow autoconfirmed (non-newbie) users to upload files, you should set:
|
1
|
$wgGroupPermissions[‘autoconfirmed’][‘upload’] = true;
|
Uploading Directly from a URL
You can allow users to directly upload files from a URL. To allow this, in includes/DefaultSettings.php you should set:
|
1
|
$wgAllowCopyUploads = true
|
To add an image to a post, you need to indicate it in your post as an image using:
|
1
|
[[image:test.png]]
|
(where test.png is the name of the image).

You can also add thumbnailed images using:
|
1
|
[[image:test.png|thumb|caption]]
|
The image can be aligned so that you can add text next to it. Here is an example how to create a left aligned image:
|
1
|
[[image:test.png|left|thumb|50px|]]
|
Change a Page’s Name:How to Change a MediaWiki Page Name
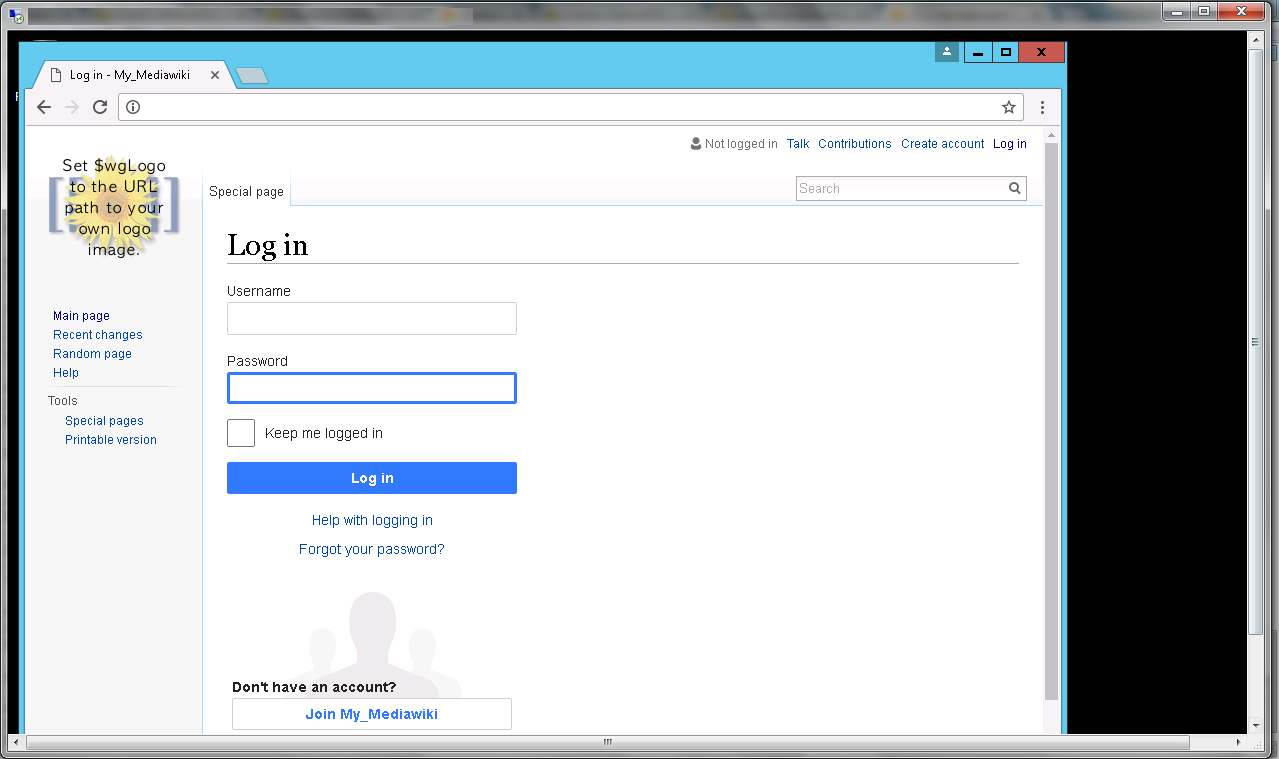
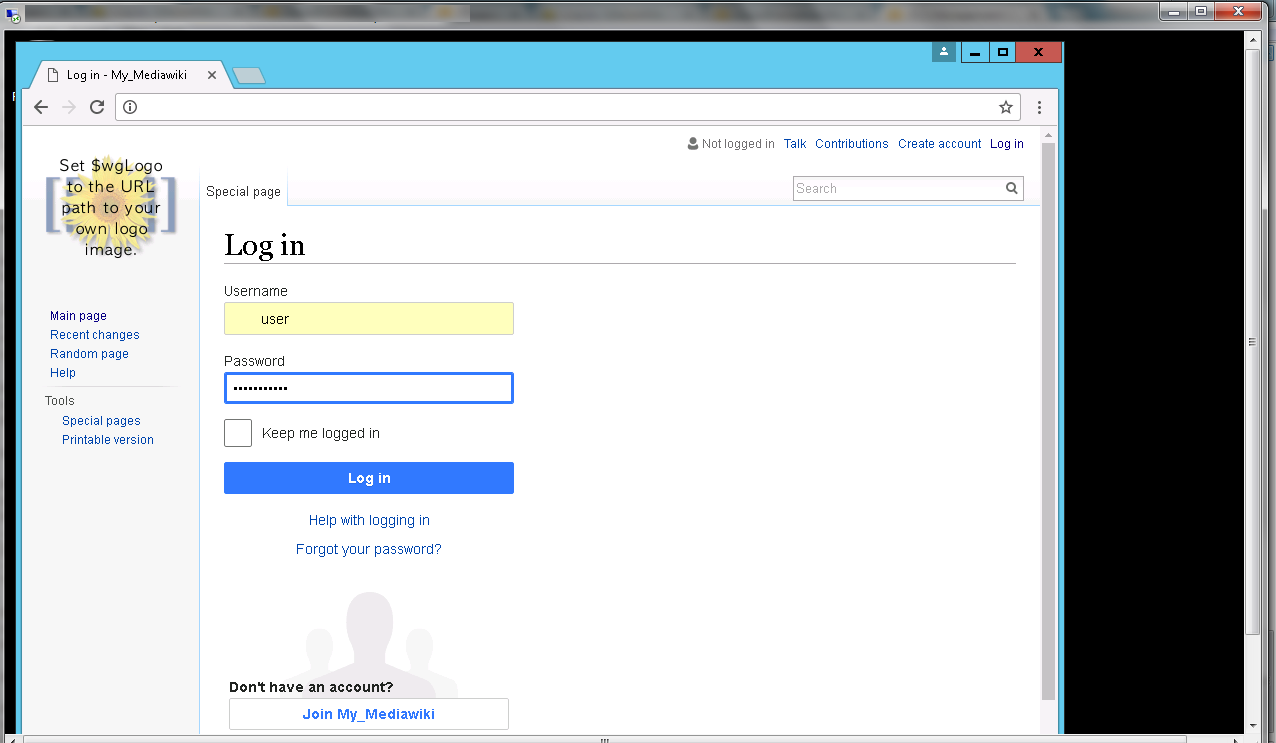
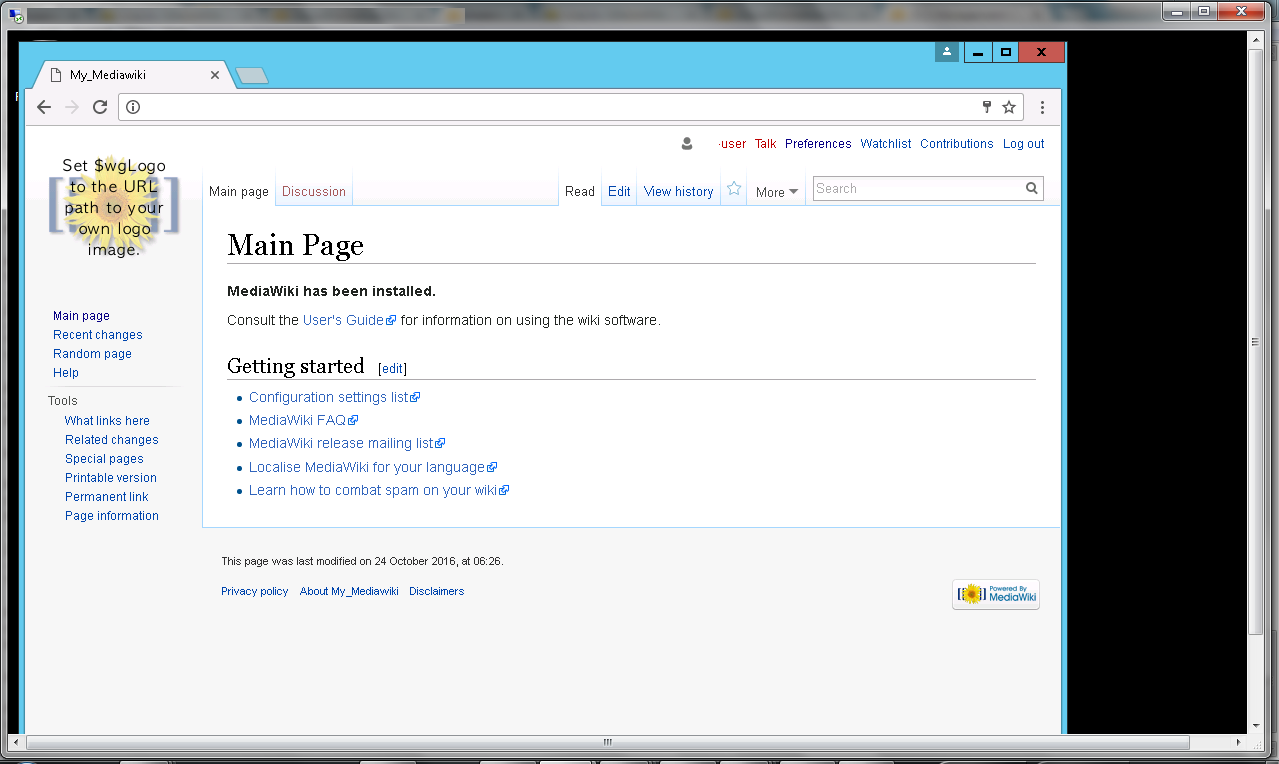
In order to change the name of a page, for example the name of the Main Page, you will first need to login as Administrator. You can do this by clicking on the Log in link at the top right corner of your page.

Then you should type in the admin username and password you set during the installation.
Now that you are logged in as administrator, you need to click on the More tab at the top of the page and choose Move from the drop down menu.

You would be redirected to a new page where you may change the title of the page by filling out the New title field.

MediaWiki allows you to choose if you want to leave a redirect from the old URL to the new one and if you want to watch both pages. When ready, just click on the Move page button.
Add Links to Posts
How to Add Links to MediaWiki Posts
The first thing you need to do in order to edit the page is to click on the Edit button at the top of the page.

In order to add links, you can paste the link directly in the format http://www.yourlink.com, e.g.:
If you paste http://www.siteground.com/, the http://www.siteground.com/ URL would show up on the front page:


As an alternative you can use the [http://www.yourlink.com/ Link Name] format if you want to use a name for the link instead of direct URL. Again, taking our website as an example, it should look like this:
|
1
|
[http://www.siteground.com/ SiteGround]
|
Adding the above code in the post would result in showing the SiteGround word on the front end which would lead to http://www.siteground.com/.

Sections and Categories
Sections in MediaWiki are created by adding their headers to the desired post.
You can use the example below and replace Section, Subsection and Sub-Subsection with the names you would like to give to your sections:
|
1
2
3
|
==Section==
===Subsection===
====Sub–subsection====
|

When ready – click on the Save Changes button. Here is a preview of how our example would look like after saving:

Create Categories
In order to add a page to a category in MediaWiki, you need to use the following syntax:
|
1
|
[[Category: Category Name]]
|
You can add a page to multiple categories.

The result will be:

To create the category itself, you can click on it and edit and save it just like any other page in MediaWiki.
Extensions in MediaWiki
Install and Enable Extensions in MediaWiki
The installation of most extensions in MediaWiki consists of downloading the extension’s archive and extracting it in the extensions/ folder within your MediaWiki installation. For the purpose of this tutorial we would use the Score extension.
After uploading the extension and extracting it in extensions/, you can enable it simply adding the wfLoadExtension( ‘ExtensionName’ ) line in the bottom of the LocalSettings.php file, e.g.:
|
1
|
wfLoadExtension( ‘Score’ );
|
Generally, each extension should have a Readme file that will explain if it needs any special actions taken before the installation.
For this one a few other lines should be added and configured in the LocalSettings.php file:
|
1
2
3
4
|
$wgScoreLilyPond = ‘/path/to/your/lilypond/executable’; /* required */
$wgScoreAbc2Ly = ‘/path/to/your/abc2ly/executable’; /* if you want ABC to LilyPond conversion */
$wgScoreTimidity = ‘/path/to/your/timidity/executable’; /* if you want MIDI to Vorbis conversion */
$wgScoreTrim = true; /* Set to false if you don’t want score trimming */
|
And the directory lilypond/ should be created in this case.
That’s it! Your extension is successfully installed now.
MediaWiki Optimization
How to Optimize MediaWiki
MediaWiki is among the most scalable web applications. Its efficient design allows it to support sites as huge as Wikipedia while at the same time it can be perfectly optimized even for the smallest personal wiki.
MediaWiki optimization using Caching
Mediawiki supports a wide variety of caching options such as eAccelerator, Database and others. In our case we will use a simple file caching because it works on any kind of server and does not cause additional MySQL overhead.In order to enable the File Caching for MediaWiki, open your LocalSettings.php file. Then at the bottom add the following 3 lines:
|
1
2
3
|
$wgUseFileCache = true;
$wgFileCacheDirectory = “/home/cpaneluser/public_html/appfolder/cache”;
$wgShowIPinHeader = false;
|
The first line enables the file caching option.
The second line specifies in which directory the cached content should be stored. Make sure to substitute /home/cpaneluser/public_html/appfolder with the exact location of your MediaWiki script. If your cPanel username is siteground and the installation is located in a subfolder named wiki, the line would look like the one below:
|
1
|
$wgFileCacheDirectory = “/home/siteground/public_html/wiki/cache”;
|
The third line is set, so that all anonymous visitors to your MediaWiki see the same content, which allows improving the caching.
Besides that make sure to comment (delete) the line which contains the $wgMainCacheType variable in order to avoid a misconfiguration.
Finally, access your wiki pages for a while and then check the size of the /home/cpaneluser/public_html/cache directory. If the cache is working this directory size should increase slowly.
Optimization tweaks
Check your MySQL slow log and see what slow queries you have for the MediaWiki database. Very often slow queries are caused by certain options such as the Page Counters. Here is an example MySQL slow query:
|
1
2
|
Executed 37 min ago for 2 sec on Database —> YOUR_USER_wiki.
UPDATE /* 127.0.0.1 */ `page` SET page_counter = page_counter + 1 WHERE page_id = 8
|
In this case it would be best to turn off the Page Counters. For this purpose add the following line to your LocalSettings.php file:
|
1
|
$wgDisableCounters = true;
|
Your MySQL slow logs may vary. That’s why you might need to search for disabling the functionality associated with them.
Benefits Of Media Wiki:
· Initial Setup
Getting the website up and running is quite easy. Whether you use the one-click installation tool included with all hosting packages or you choose to download and install it manually, you won’t have any trouble. The initial setup really only takes a few minutes, and most people will find that they can go through the main settings without much effort as well.
· Plugins
The plugins that are available are easy to find and install, even for those without much website experience. When you look through the list of plugins on the official site, however, you will likely be disappointed in how many there are. For this platform to really be great, they need to work on having additional plugins developed and released.
· Themes
There don’t seem to be any themes that are officially published by the ImpressCMS site. This means you will have to go out to third party theme developers to find what you’re looking for. There are some developers that release their themes for this CMS, but you’ll likely have to go to multiple different places to find the ones you like.
·Customization
Customization with this platform is quite easy, but there isn’t too much that you’ll need to change. Most of the options are done through the admin control panel, which is fairly standard and easy to interface with. If you really want to make your site stand out, this may not be the best platform. If you want your site to operate well and be easy to use, however, this is a great option.
·SEO Friendly
ImpressCMS is an average option when it comes to SEO. There is nothing that will hurt your site’s rankings, but there isn’t anything that will really help you to push them to the top either. I didn’t see any plugins to help with SEO though, which is something many people will be disappointed about.
Cost of Running
The system itself is completely free and from what I can tell so are the plugins that they offer. The platform is also quite fast and properly coded, which means you won’t likely need to move up to a higher end hosting package unless you are getting a lot of visitors to your site. Overall, this is a very affordable content management system.
Long-term maintenance and support
MediaWiki development is backed by an organization with an annual budget. One need not worry that in the foreseeable future the code base will be completely abandoned by its developers and become unmaintained.
Suitability for huge, highly active wikis
It has been designed with scalability for high-usage, high-profile sites that are prone to spam, hacking and other attacks.
Lots of content to borrow
If you use wiki software other than MediaWiki, the Wikipedia content might have to be reformatted or you might have to start from scratch.
Editing interface
Its user interface has been localized in many different languages. This is made more important factor to use MediaWiki.
Application programming interface (API)
It has a web API that provides direct, high-level access to the data contained in the databases.
-MediaWiki is a software wiki package written in PHP, originally for use on Wikipedia. It is now used by several other projects of the non-profit Wikimedia Foundation and by many other wikis.MediaWiki is designed to be run on a large server farm for a website that gets millions of hits per day. MediaWiki is an extremely powerful, scalable software and a feature-rich wiki implementation that uses PHP to process and display data stored in a database, such as MySQL.MediaWiki is a open source wiki package written in PHP.MediaWiki makes it very easy to link wiki pages using a standard syntax.MediaWiki is owned by MediaWiki (https://www.mediawiki.org/wiki/MediaWiki) and they own all related trademarks and IP rights for this software.

Cognosys Provides Hardened images of MediaWiki on the cloud ( AWS marketplace, Azure and Google Cloud Platform).
Deploy MediaWiki securely on cloud i.e. AWS marketplace, Azure and Google Cloud Platform (GCP)
Secured MediaWiki on CentOS 7.3
Secured MediaWiki on Ubuntu 14.04 LTS
Secured MediaWiki on Windows 2012 R2 https://www.youtube.com/watch?v=nvCb7O2CfGM&t=1s
Features
MediaWiki is a highly-developed, multi-faceted software that has grown over time to encompass a number of needs for collaborative communities. As such, its features are numerous and usually in flux, but there are some key concepts and tools that MediaWiki is best known for.
- An interface that allows for editing of the wiki’s content.
- Tools that allow for a structured and controlled system of user rights.
- Namespaces to help separate and prioritize content.
- Magic words to help construct information.
- A platform that allows for easy development of add-ons to the software, known in MediaWiki vernacular as extensions.
- A job queue that is designed to help a wiki perform background tasks at a rate that allows for the tasks to be completed in a timely manner without adversely affecting the technical performance of the wiki.
-Major Features Of MediaWiki
- Links with shortcuts, arrangement depends on skin
- Skins: Different ways to present the site.
- User styles: Users can adapt the look and feel of the site through custom CSS on their user pages.
- “Stub” threshold: Users can see links to articles below a certain size rendered in a different color
- Printable versions of articles can be generated
- Auto-number headings in an article (optional)
- Intra-page Anchors
- Generate a table of contents for long articles (optional)
- Automatically turn ISBN numbers into links to an editable list of booksellers
- XHTML-compatible output (or darn close to it), tidy integration
Multimedia and extensions
- File upload feature allows to upload graphics or sound files
- Mathematical formulas using LaTeX syntax
- Automatic resizing of images using ImageMagick or libgd, simple syntax for image captions and image alignment
- WikiHiero for Egyptian hieroglyphs (needs separate installed components)
- EasyTimeline for time charts (needs separate installed components)
Keeping track of edits
- Watchlist Every page has a link “Watch this article for me”.
- User contributions in the sidebar of each user page list all articles the user has worked on, according to the database.
- Extended recent changes with dynamic collapsing of edits to the same article and quick links to diff the edit, show the article history, show the user page, show the user talk page, or block the user (for sysops)
- “Related changes”: View a filtered version of Recent Changes to the pages linked from the current page.
- Side-by-side diffs – the diffs are shown side-by-side and changed portions of lines are highlighted, making it much easier to see what’s what. Additionally, a diff is shown during an edit conflict so you can see exactly what you need to reintegrate.
- Real names. Users can (optionally) specify a “real name” they want to use for author credits.
- On-page credits. Administrators can enable an on-page paragraph giving credit to editors who’ve worked on a page.
Backend
- Database-driven (MySQL and PostgreSQL are both supported)
- Parser caching: rendered pages are cached to reduce redundant processing
- Output caching: complete page output can be optionally saved as static HTML files for serving to other clients; support for Squid proxies
- Cookie-based account and login system, but anonymous users can also edit pages
- All revisions of an article are stored (optionally compressed)
- RSS syndication available for many special pages
- RDF metadata
AWS
Installation Instructions For Centos
Installation Instructions For CentOS
Step 1) SSH Connection: To connect to the deployed instance, Please follow Instructions to Connect to CentOS instance on AWS Cloud
1) Download Putty.
2) Connect to the virtual machine using SSH key Refer this link:
- Hostname: PublicDNS / IP of machine
- Port :22
Step 2) Database Login Details :
- MYSQL Username : root
- MYSQL Password : Passw@rd123
Step 3)Application URL: Access the application via a browser at http://PublicDNS/Mediawiki
Step 4) Other Information:
Note :- Please do the initial Mediawiki setup with http://YourIP/Mediawiki
1.Default installation path: will be in your web root folder “C:\inetpub\wwwroot\Mediawiki”
2.Default ports:
- Windows Machines: RDP Port – 3389
- Http: 80
- Https: 443
- Mysql ports: By default, these are not open on Public Endpoints. Mysql:3306
Configure custom inbound and outbound rules using this link
AWS Steps to configure the stack:
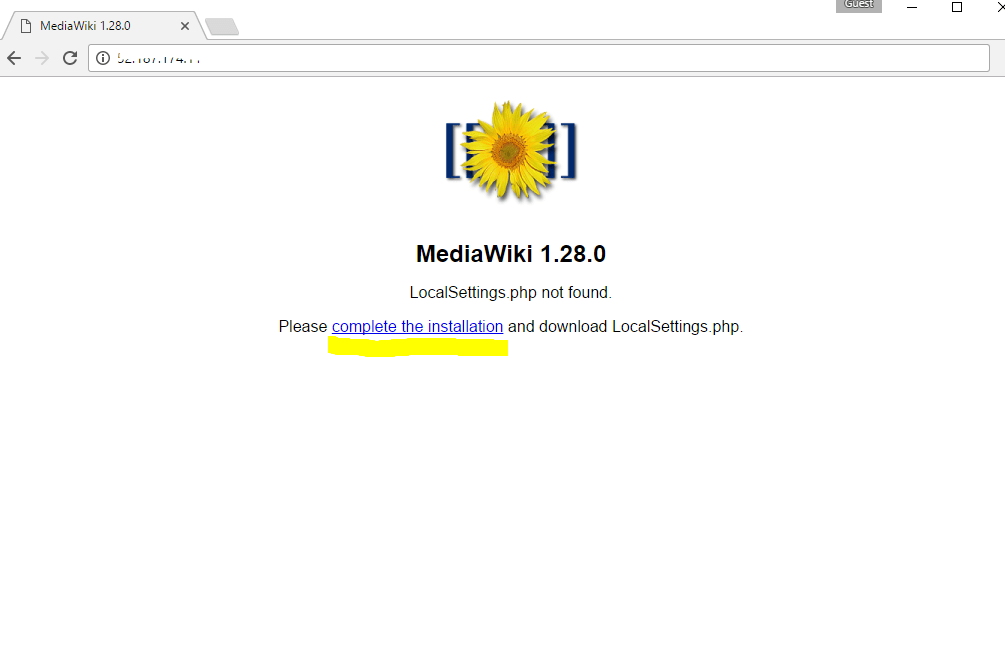
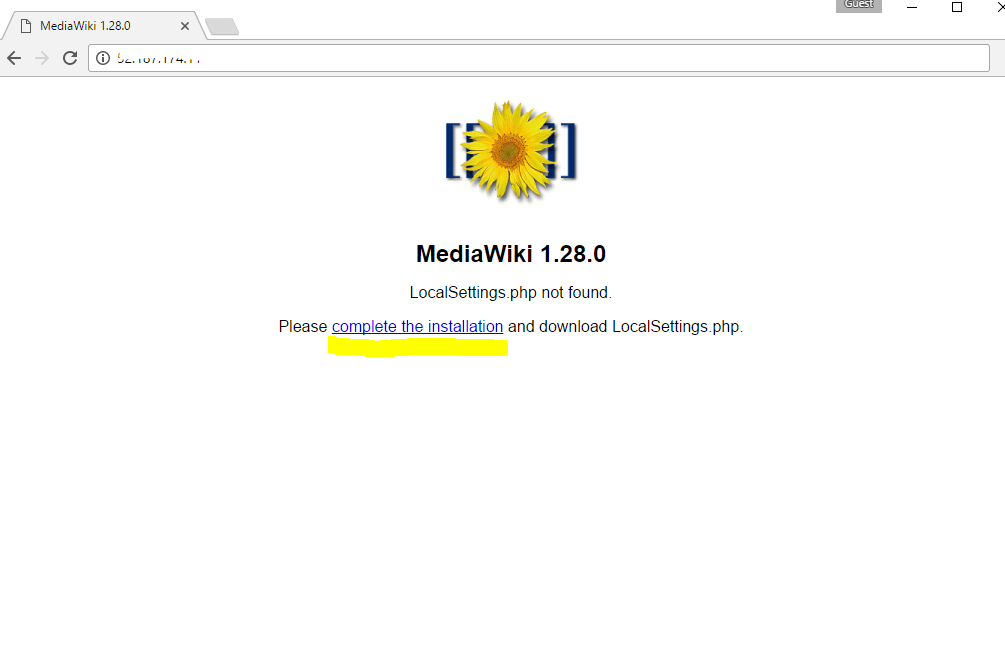
Step 1: When you open http://PublicDNS/Mediawiki you shall see screen like:
Step 2: Click on Complete the installation and select defaults till you reach DB configuration.
In DB configuration step you can select MySQL and database details as Host localhost DB my_wiki with user my_wiki and password Passw@rd123
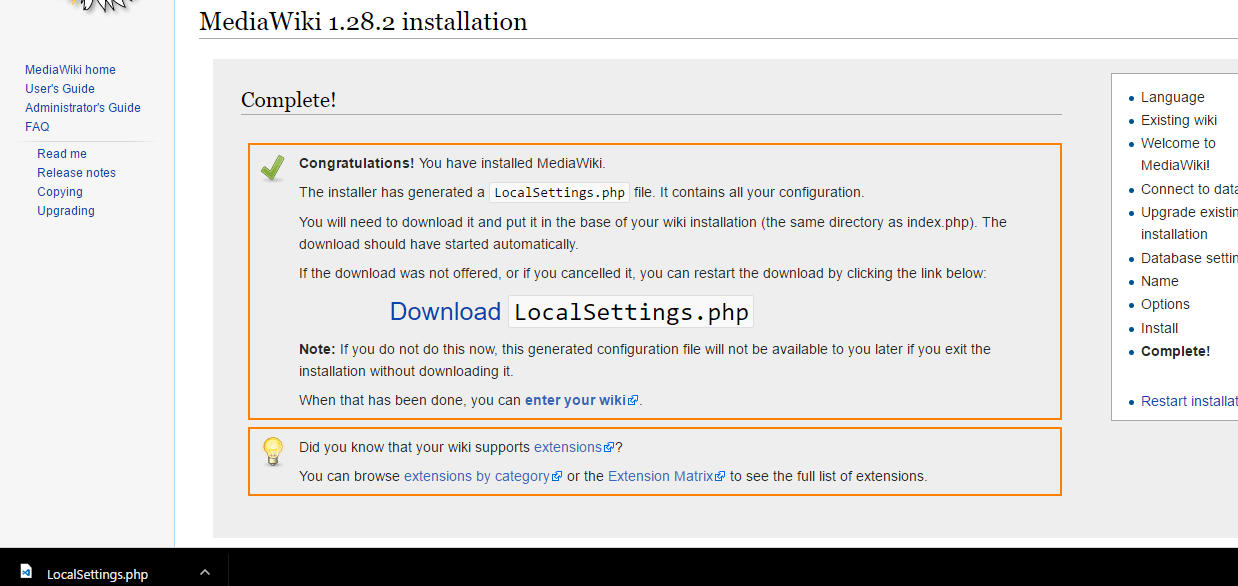
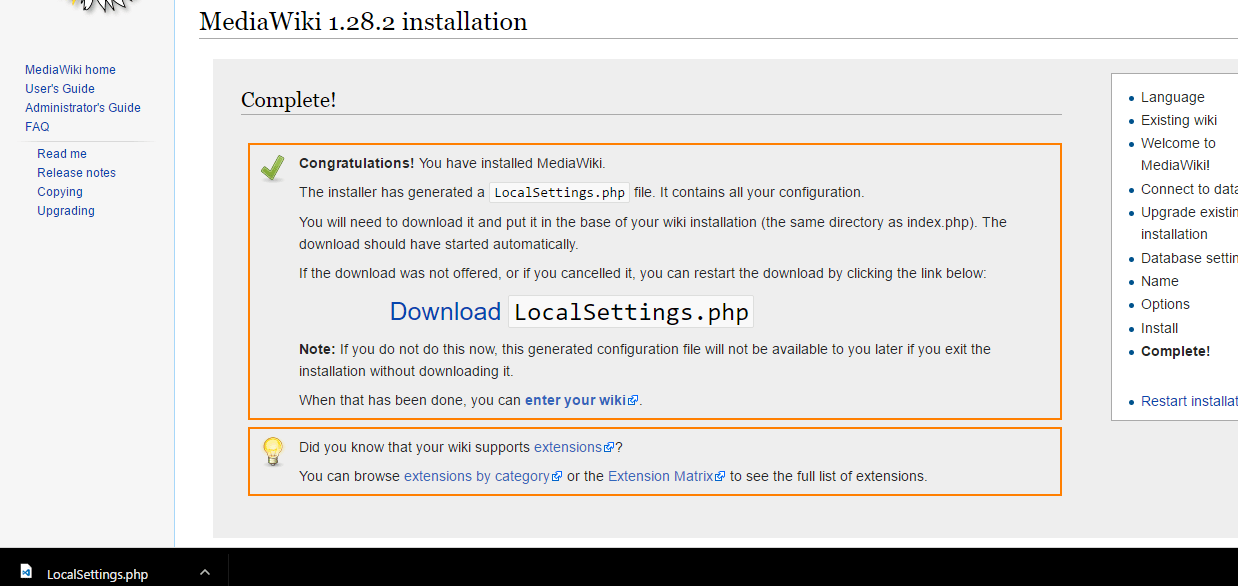
Step 3: After finishing the setup you can see page like below which will download LocalSetting.php
Copy this file in root path as mentioned above from the RDC of the machine “C:\inetpub\wwwroot\Mediawiki”
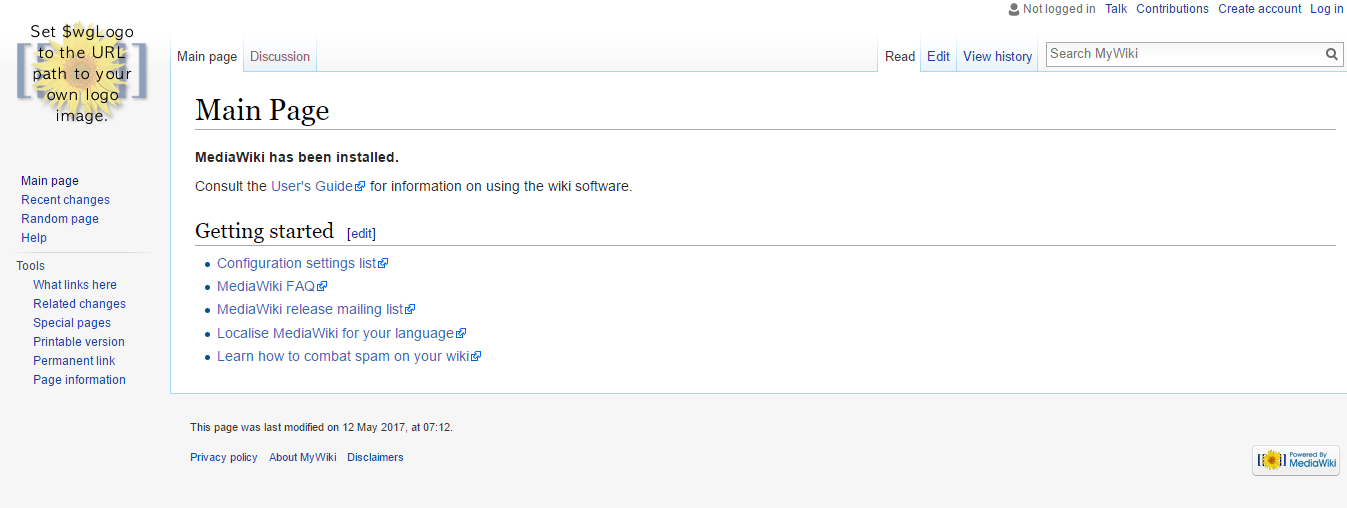
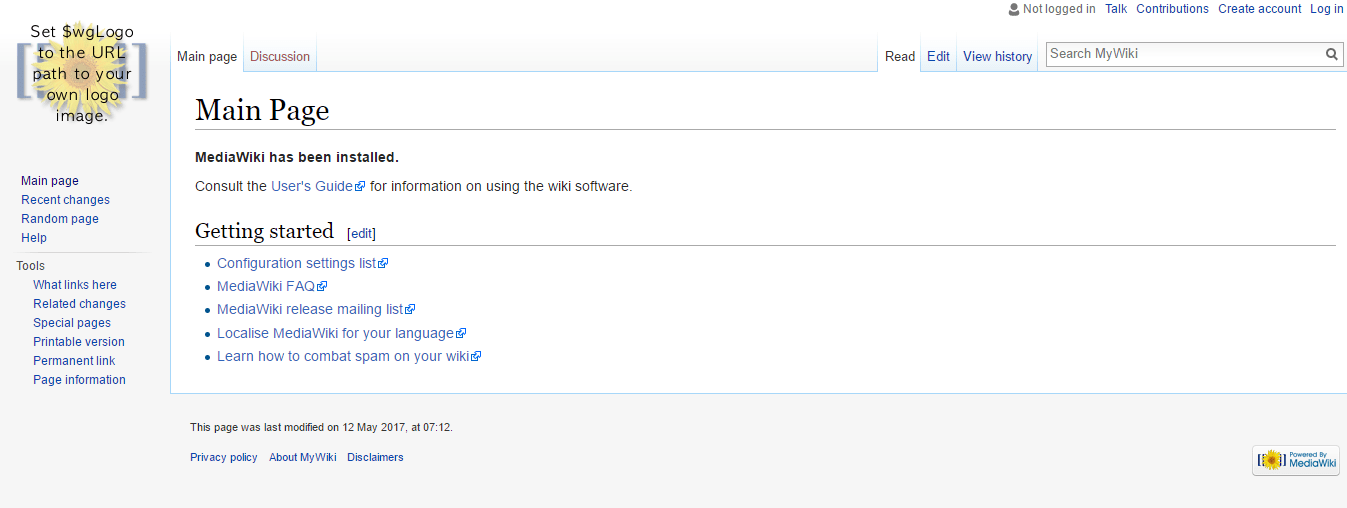
Step 4: After this file is copied you can successfully access the site
Azure
- Installation Instructions For Ubuntu
- Installation Instructions For Windows
- Installation Instructions For Centos
Installation Instructions For Ubuntu
Note: How to find PublicDNS in Azure
Step 1) SSH Connection: To connect to the deployed instance, Please follow Instructions to Connect to Ubuntu instance on Azure Cloud
1) Download Putty.
2) Connect to virtual machine using following SSH credentials:
- Host name: PublicDNS / IP of machine
- Port : 22
Username: Your chosen username when you created the machine ( For example: Azureuser)
Password: Your Chosen Password when you created the machine ( How to reset the password if you do not remember)
Step 2) Database Login Details:
- MYSQL Username: root
- MYSQL Password: Passw@rd123
Note: For Stack Database: DB my_wiki with user my_wiki and password Passw@rd123 has already been created.Please use this database for you Stack Configuration.
Step 3) Application URL: Access the application via a browser at http://PublicDNS/
Step 4) Other Information:
1.Default installation path: will be in your web root folder “/var/www/html/”
2.Default ports:
- Linux Machines: SSH Port – 22
- Http: 80
- Https: 443
- MySQL ports: By default these are not open on Public Endpoints. MySQL :3306
3. To access Webmin interface for management please follow this link
Configure custom inbound and outbound rules using this link
Installation Instructions for Windows
Note: How to find PublicDNS in Azure
Step1 ) RDP Connection: To connect to the deployed instance, Please follow Instructions to Connect to Windows instance on Azure Cloud
1) Connect to virtual machine using following RDP credentials :
- Hostname: PublicDNS / IP of machine
- Port : 3389
Username: Your chosen username when you created the machine ( For example Azureuser)
Password : Your Chosen Password when you created the machine ( How to reset the password if you do not remember)
Step 2 ) Database Login Details:
- MYSQL Username: root
- MYSQL Password: Passw@rd123
Step 3 )Application URL: Access the application via a browser at http://PublicDNS/Mediawiki
- Username: azureuser
- Passward: Passw@rd123
Step 4 ) Other Information:
1.Default installation path: will be in your web root folder “C:\inetpub\wwwroot\Mediawiki”
2.Default ports:
- Windows Machines: RDP Port – 3389
- Http: 80
- Https: 443
- Mysql ports: By default, these are not open on Public Endpoints. Mysql:3306
Configure custom inbound and outbound rules using this link
Steps to configure the stack:
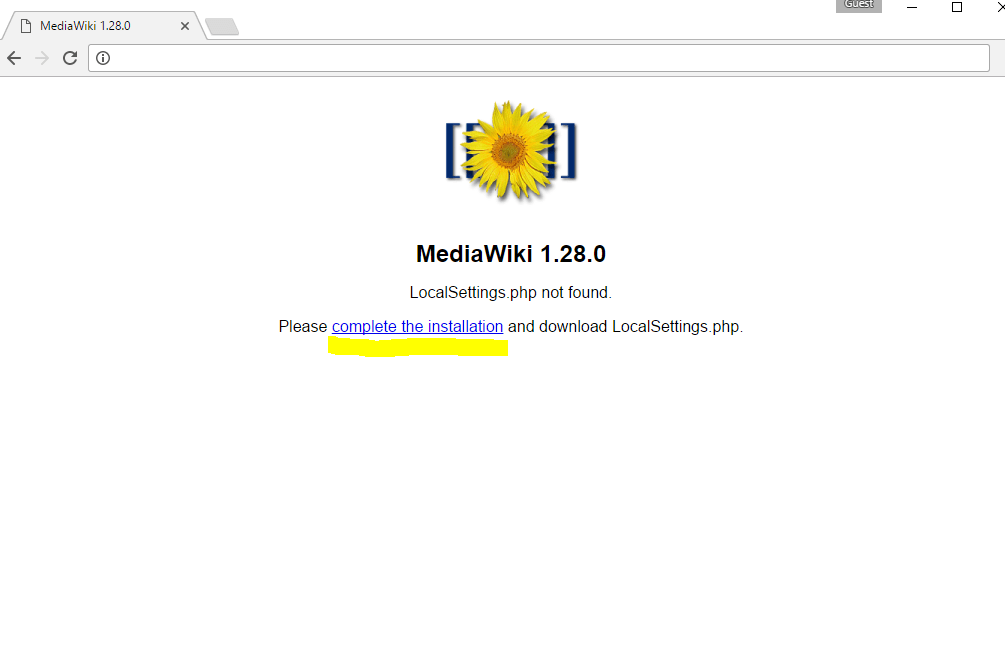
Step 1: When you open http://PublicDNS/Mediawiki you shall see the screen like:
Step 2: Click on Complete the installation and select defaults till you reach DB configuration.
In DB configuration step you can select MySQL and database details as Host localhost DB my_wiki with user my_wiki and password Passw@rd123
Step 3: After finishing the setup you can see page like below which will download LocalSetting.php
Copy this file in root path as mentioned above from the RDC of the machine “C:\inetpub\wwwroot\Mediawiki”
Step 4: After this file is copied you can successfully access the site
Installation Instructions For Centos
Note: How to find PublicDNS in Azure
Step 1) SSH Connection: To connect to the deployed instance, Please follow Instructions to Connect to CentOS instance on Azure Cloud
1) Download Putty.
2) Connect to virtual machine using following SSH credentials:
- Host name: PublicDNS / IP of machine
- Port : 22
Username: Your chosen username when you created the machine ( For example: Azureuser)
Password: Your Chosen Password when you created the machine ( How to reset the password if you do not remember)
Step 2 ) Database Login Details:
- MYSQL Username: root
- MYSQL Password: Passw@rd123
Note: For Stack Database: DB my_wiki with user my_wiki and password Passw@rd123 has already been created.Please use this database for you Stack Configuration.
Step 3 )Application URL: Access the application via a browser at http://PublicDNS/
Step 4) Other Information:
1.Default installation path: will be on your web root folder “/var/www/html/”
2.Default ports:
- Linux Machines: SSH Port – 22
- Http: 80
- Https: 443
- MySQL ports: By default these are not open on Public Endpoints. MySQL :3306
3. To access Webmin interface for management please follow this link
Configure custom inbound and outbound rules using this link
Step by Step Screenshots
- Installation Instructions For Windows
- Installation Instructions For Ubuntu
- Installation Instructions For Redhat
- Installation Instructions For CentOS
Installation Instructions for Windows
Step 1) VM Creation:
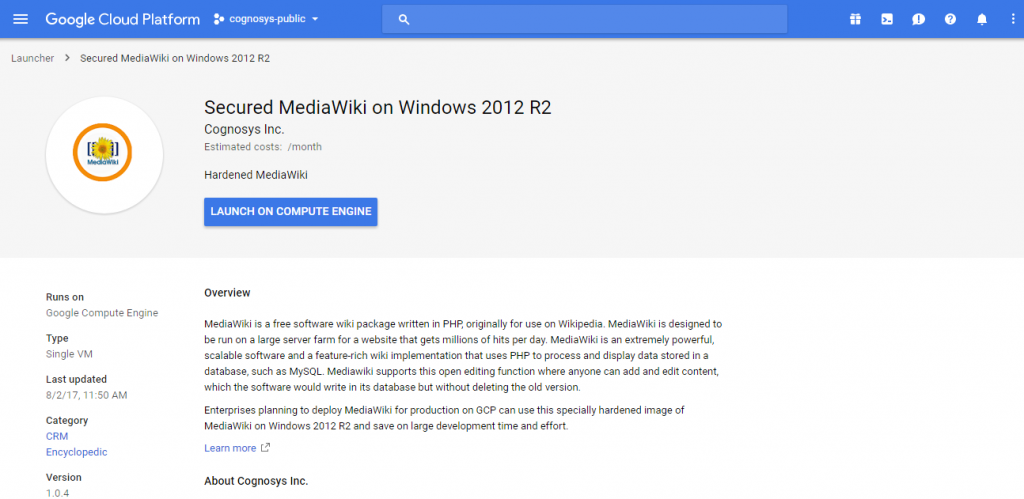
- Click the Launch on Compute Engine button to choose the hardware and network settings.
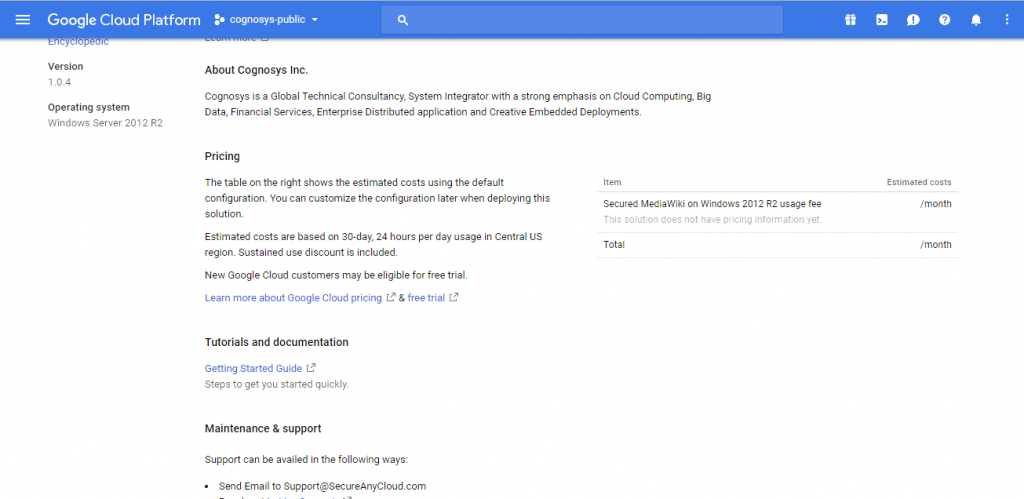
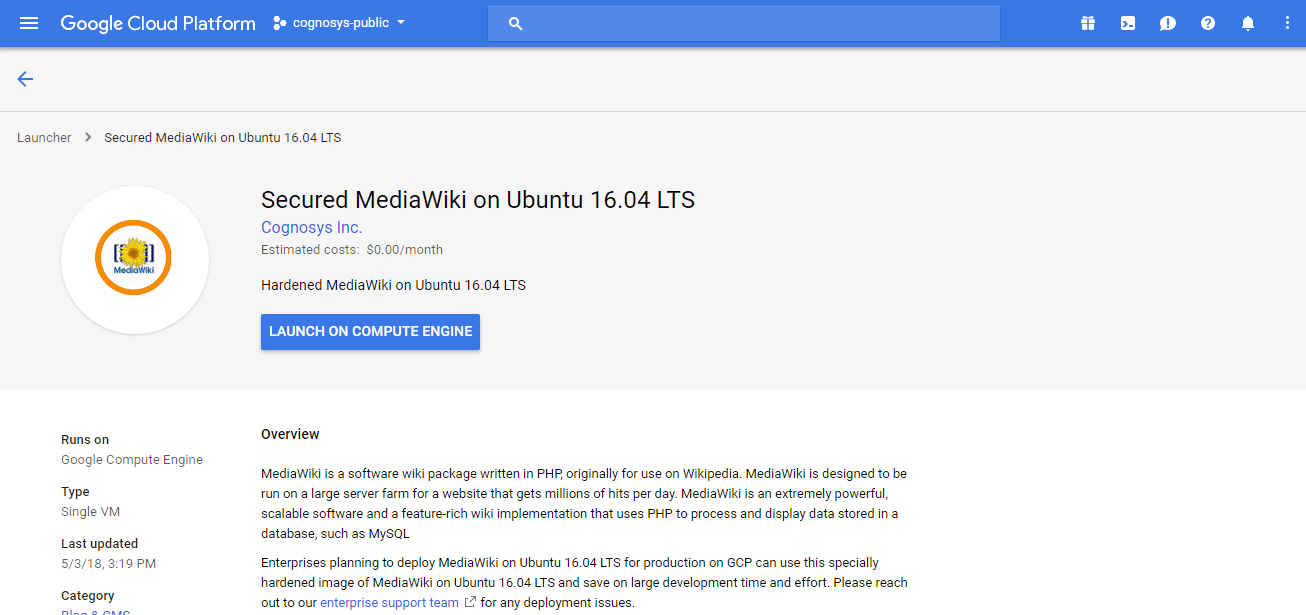
2.You can see at this page, an overview of Cognosys Image as well as estimated cost of running the instance.
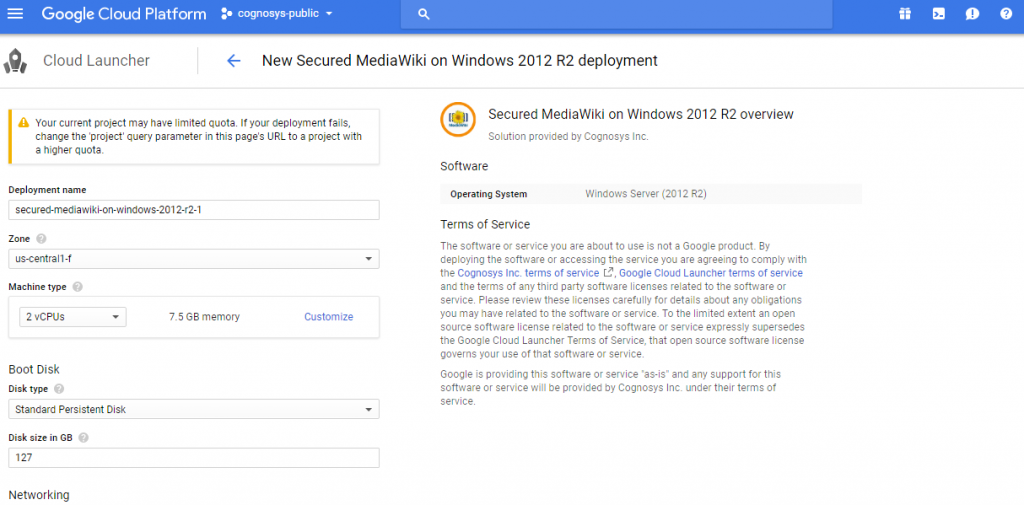
3.In the settings page, you can choose the number of CPUs and amount of RAM, the disk size and type etc.
Step 2) RDP Connection: To initialize the DB Server connect to the deployed instance, Please follow Instructions to Connect to Windows instance on Google Cloud
Step 3) Database Login Details:
The below screen appears after successful deployment of the image.
For local MySQL root password, please use the temporary password generated automatically during image creation as shown above.
i) Please connect to Remote Desktop as given in step 2 to ensure stack is properly configured and DB is initialized.
ii) You can use MySQL server instance as localhost, username root and password as shown above.
If you have closed the deployment page you can also get the MySQL root password from VM Details “Custom metadata” Section.
Step 4 )Application URL: Access the application via a browser at http://PublicDNS/Mediawiki
After completing the installation copy the LocalSettings.php file to /var/www/htmlYou can use any sftp client to transfer the file.And use sudo to copy it to /var/www/html
Please use MySQL root user with the password set during deployment or refer to metadata field value of the instance for the password.
Please change the password after first login.
During configuration of the stack you can use the local MySQL server and create a new database.
Or use the MySQL database my_wiki which has already been created.
Please create your own user with access restricted to this database for use in the configuratioAfter completing the installation copy the LocalSettings.php file to /var/www/htmlYou can use any sftp client to transfer the file.And use sudo to copy it to /var/www/html
Steps to configure the stack:
Step 1: When you open http://PublicDNS/Mediawiki you shall see the screen like:
Step 2: Click on Complete the installation and select defaults till you reach DB configuration.
Step 3: After finishing the setup you can see page like below which will download LocalSetting.php
Copy this file in root path as mentioned above from the RDC of the machine “C:\inetpub\wwwroot\Mediawiki”
Step 4: After this file is copied you can successfully access the site
Step 5 ) Other Information:
1.Default installation path: will be in your web root folder “C:\inetpub\wwwroot\Mediawiki”
2.Default ports:
- Windows Machines: RDP Port – 3389
- Http: 80
- Https: 443
- Mysql ports: By default, these are not open on Public Endpoints. Mysql :3306
Installation Instructions For Ubuntu
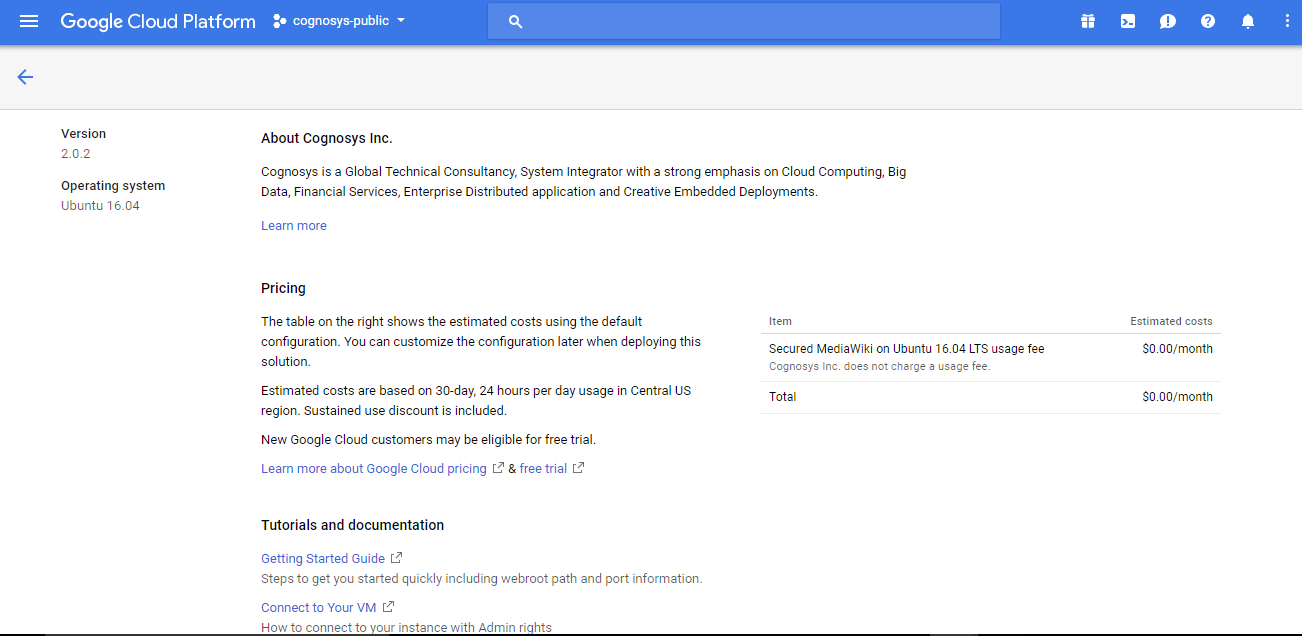
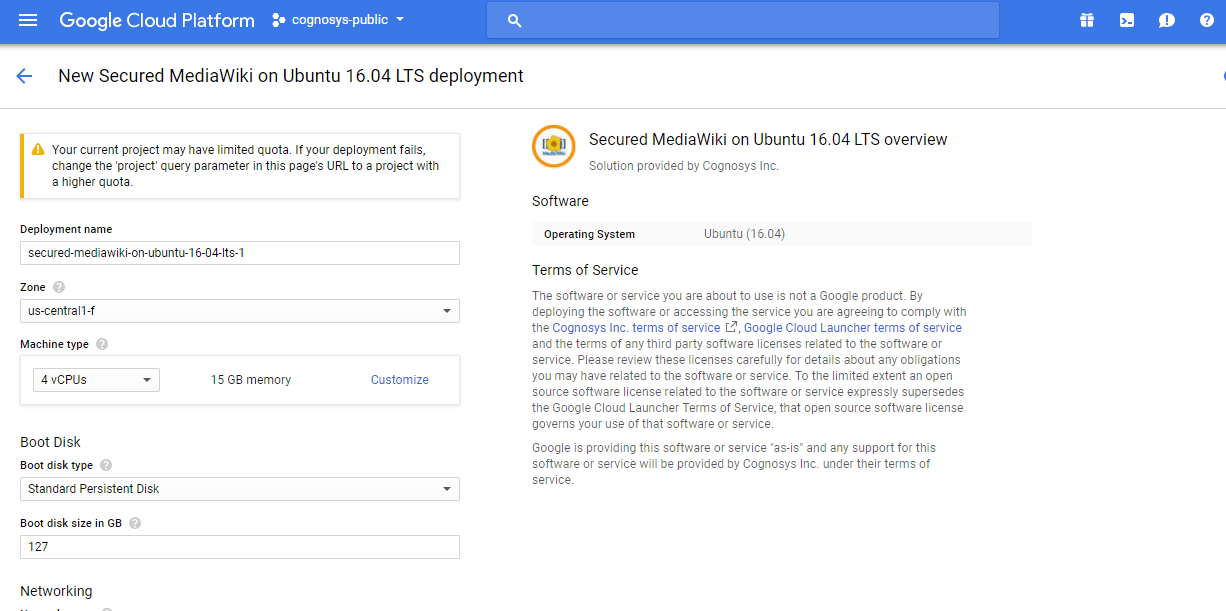
- Click the Launch on Compute Engine button to choose the hardware and network settings.

- You can see at this page, an overview of Cognosys Image as well as some estimated costs of VM.

- In the settings page, you can choose the number of CPUs and amount of RAM, the disk size and type etc.

Step 2) SSH Connection: To connect to the deployed instance, Please follow Instructions to Connect to Ubuntu instance on Google Cloud
1) Download Putty.
2) Connect to the virtual machine using SSH key
- Hostname: PublicDNS / IP of machine
- Port : 22
Step 3) Database Login Details:
The below screen appears after successful deployment of the image.
For local MySQL root password, please use the temporary password generated automatically during image creation as shown above.
i) Please connect to Remote Desktop as given in step 2 to ensure stack is properly configured and DB is initialized.
ii) You can use MySQL server instance as localhost, username root and password as shown above.
If you have closed the deployment page you can also get the MySQL root password from VM Details “Custom metadata” Section
Step 4) Application URL: Access the application via a browser at http://PublicDNS/Mediawiki
Steps to configure the stack:
Step 1: When you open http://PublicDNS/Mediawiki you shall see the screen like:
Step 2: Click on Complete the installation and select defaults till you reach DB configuration.
Step 3: After finishing the setup you can see page like below which will download LocalSetting.php
Copy this file in root path as mentioned above from the RDC of the machine “C:\inetpub\wwwroot\Mediawiki”
Step 4: After this file is copied you can successfully access the site
Step 4) Other Information:
1.Default ports:
- Linux Machines: SSH Port – 22
2. To access Webmin interface for management please follow this link
Installation Instructions For Redhat
Step 1) VM Creation:
1.Click the Launch on Compute Engine button to choose the hardware and network settings.
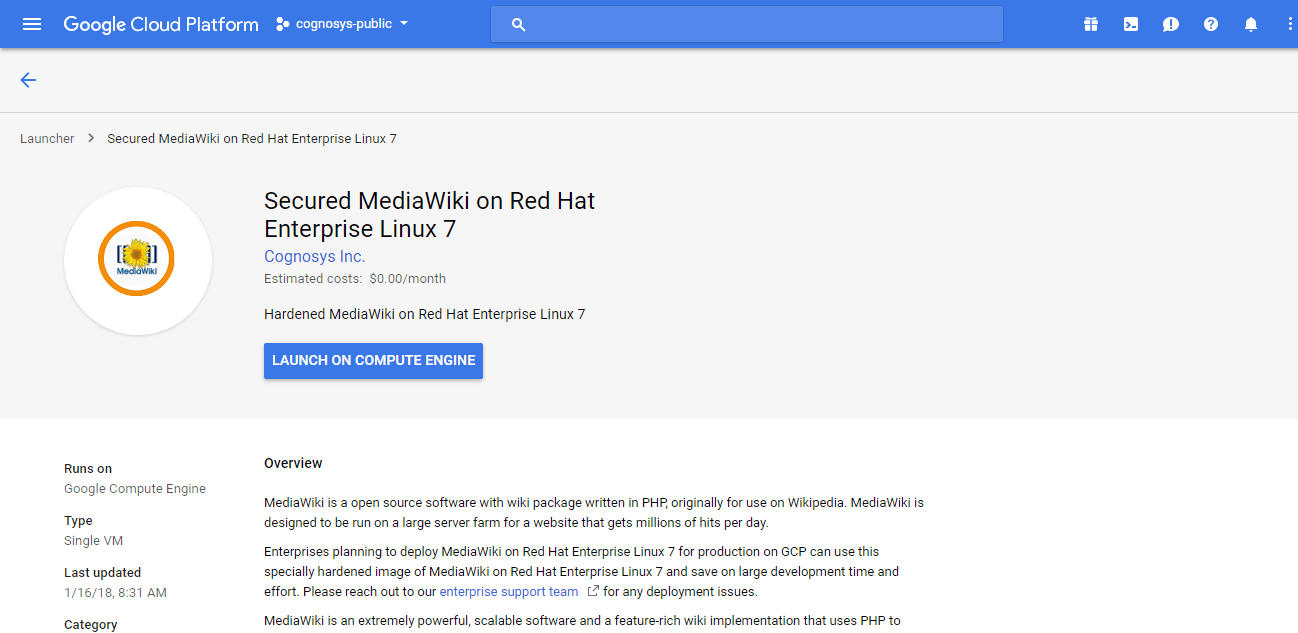
2.You can see at this page, an overview of Cognosys Image as well as some estimated costs of VM.
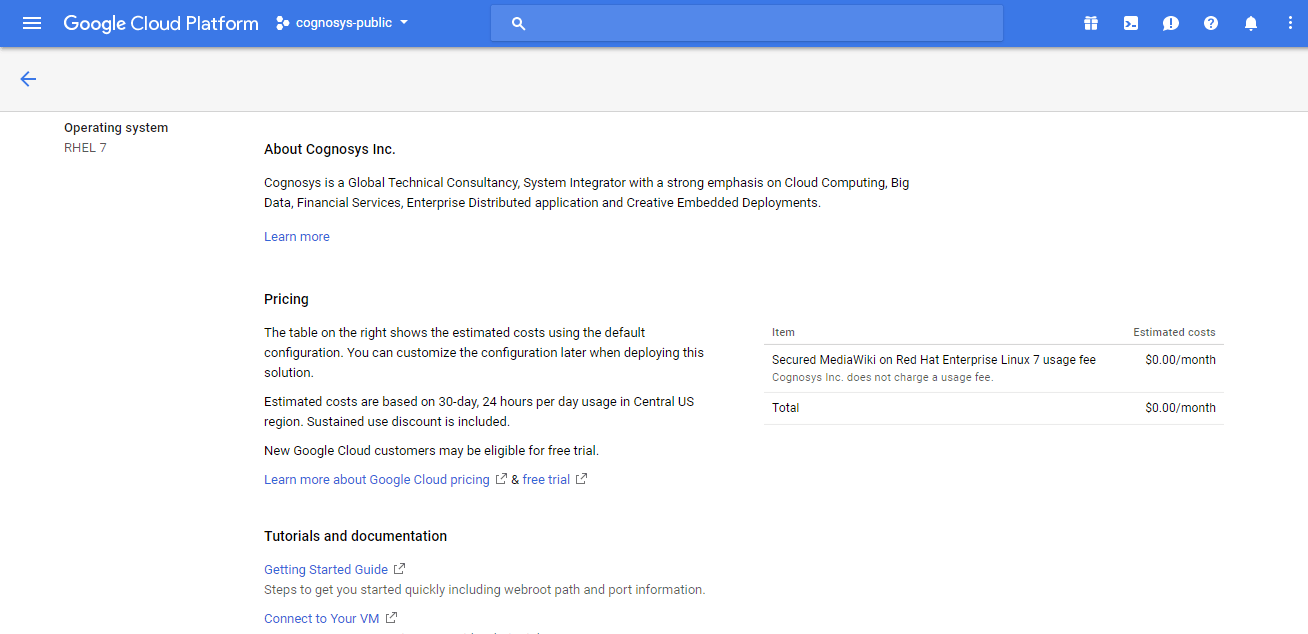
3.In the settings page, you can choose the number of CPUs and amount of RAM, the disk size and type etc.
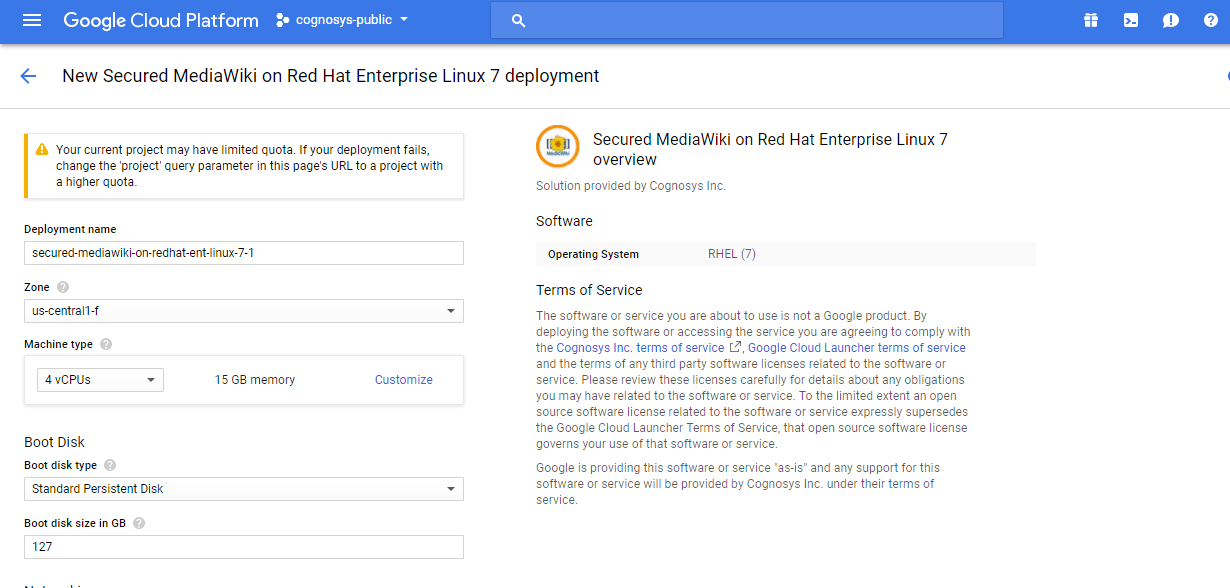
Step 2) SSH Connection: To connect to the deployed instance, Please follow Instructions to Connect to Redhat instance on Google Cloud
1) Download Putty.
2) Connect to the virtual machine using SSH key
- Hostname: PublicDNS / IP of machine
- Port : 22
Step 3) Database Login Details:
The below screen appears after successful deployment of the image.
For local MySQL root password, please use the temporary password generated automatically during image creation as shown above.
i) Please connect to Remote Desktop as given in step 2 to ensure stack is properly configured and DB is initialized.
ii) You can use MySQL server instance as localhost, username root and password as shown above.
If you have closed the deployment page you can also get the MySQL root password from VM Details “Custom metadata” Section
Step 4)Application URL: Access the application via a browser at http://PublicDNS/Mediawiki
Steps to configure the stack:
Step 1: When you open http://PublicDNS/Mediawiki you shall see the screen like:
Step 2: Click on Complete the installation and select defaults till you reach DB configuration.
Step 3: After finishing the setup you can see page like below which will download LocalSetting.php
Copy this file in root path as mentioned above from the RDC of the machine “C:\inetpub\wwwroot\Mediawiki”
Step 4: After this file is copied you can successfully access the site
Step 5) Other Information:
1.Default ports:
- Linux Machines: SSH Port – 22
2. To access Webmin interface for management please follow this link
Installation Instructions For CentOS
Step 1) SSH Connection: To connect to the deployed instance, Please follow Instructions to Connect to CentOS instance on Google Cloud
1) Download Putty.
2) Connect to virtual machine using following SSH credentials:
- Hostname: PublicDNS / IP of machine
- Port : 22
Username: Your chosen username when you created the machine
Password : Your Chosen Password when you created the machine ( How to reset the password if you do not remember)
Step 2) Other Information:
1.Default ports:Linux Machines: SSH Port – 22
2. To access Webmin interface for management please follow this link
Videos
Secured MediaWiki on CentOS 7.3
Secured MediaWiki on Ubuntu 14.04 LTS
MediaWiki Installation
Secured MediaWiki on Windows 2012 R2


