1-click AWS Deployment 1-click Azure Deployment
Overview
TestLink is a test management tool used for project management, bug tracking and test management. It tracks a central test management concept that helps to communicate easily for quick development of tasks across QA teams and other stakeholders. It keeps the requirement specification and test specification in sync. Test-link is most widely used web based open source test management tool. It matches both requirements specification and test specification together. User can create test project and document test cases using this tool. With Test-Link you can create an account for multiple users and assign different user roles. Admin user can manage test cases assignment task.
It supports both automated and manual execution of Test cases. The testers can generate Test Plan and Test Report in a fraction of the time with this tool. It supports test reports in various formats like Excel, MS word, and HTML formats. Apart from these, it also supports integration with many popular Defect tracking system like JIRA, MANTIS, BUGZILLA, TRAC, etc. Since it is a web-based tool, multiple users can access its functionality at the same time with their credentials and assigned roles.
Login to TestLink
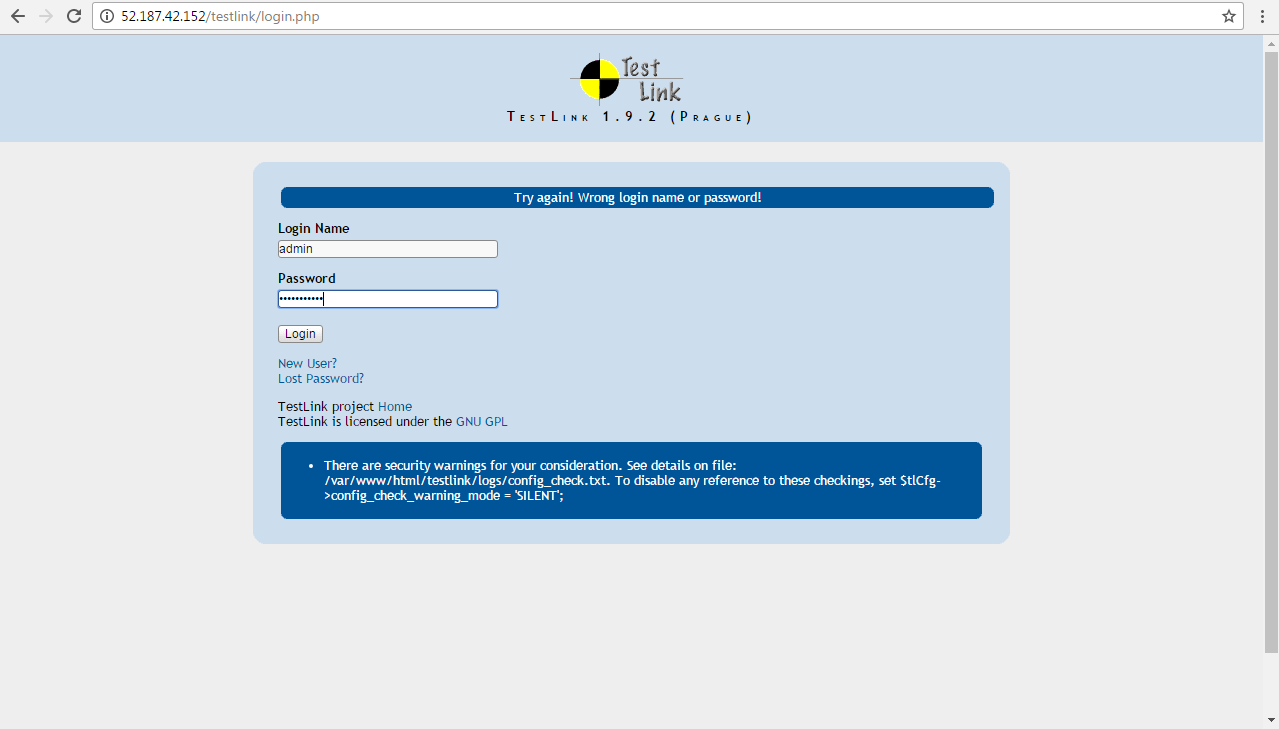
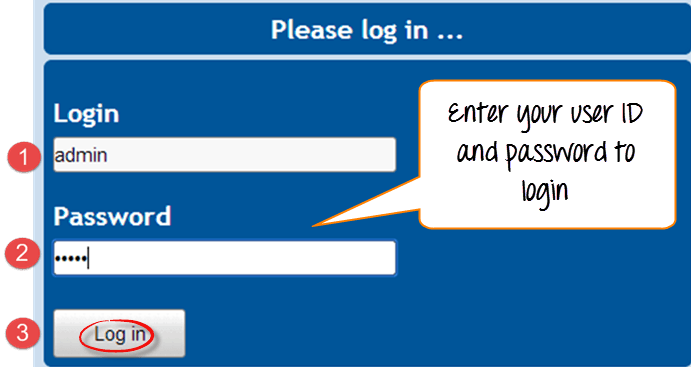
Step 1 : Open the Testlink home-page and enter the login details
1-Enter the userID – admin
2-Enter the password
3-Click on the login tab
Creating a Test Project
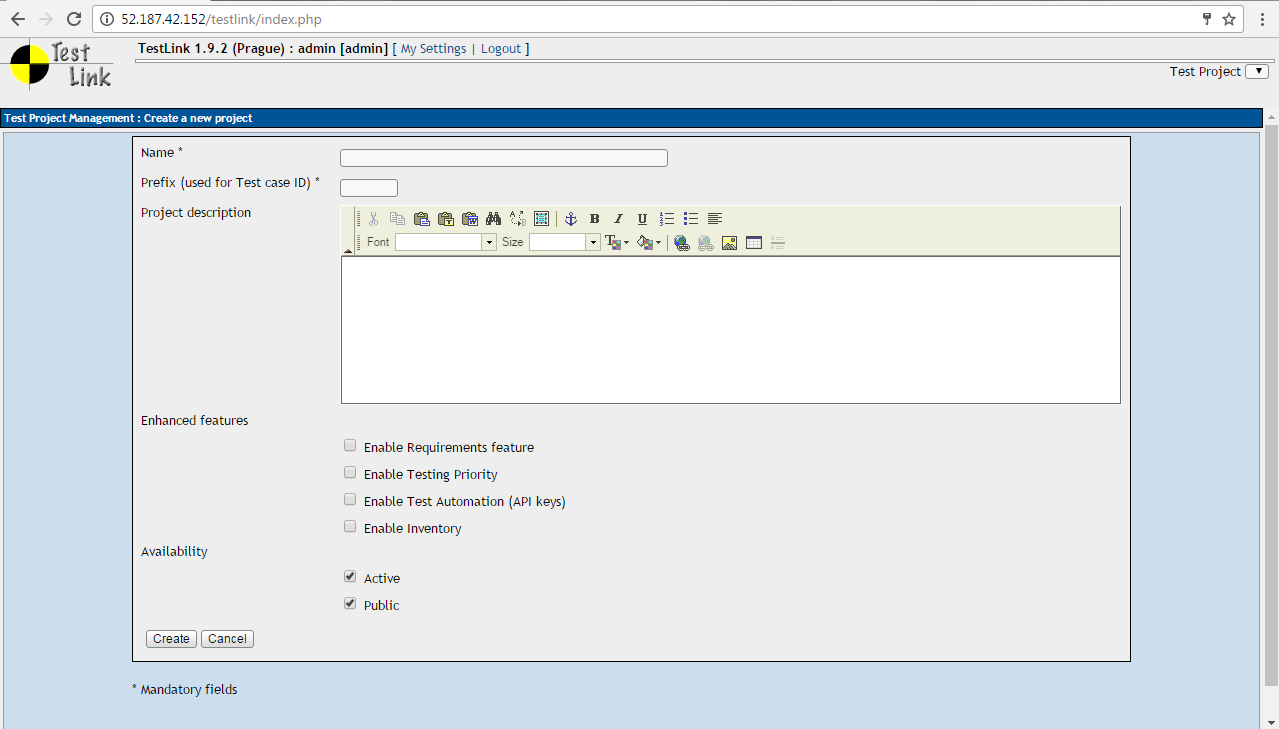
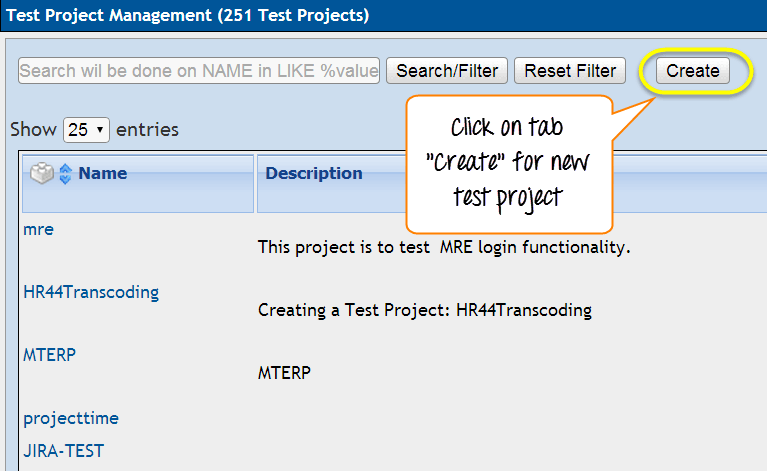
Step 1: In the main window click on Test Project Management, it will open another window

Step 2: Click on the tab “create” to create a new project.
Step 3: Enter all the required fields in the window like a category for a test project, name of the project, prefix, description, etc. After filling all necessary details, click on tab “Create” at the end of the window.
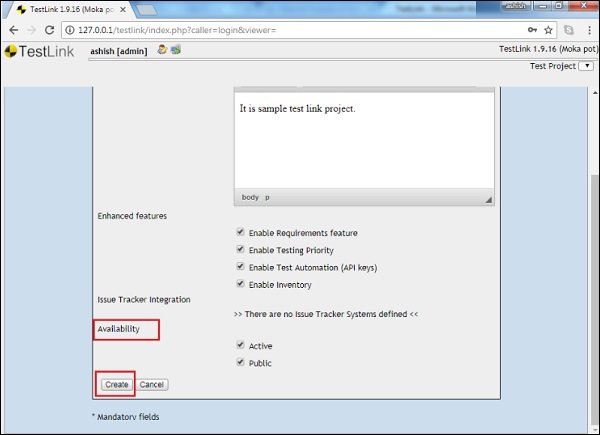
This will create your project successfully.
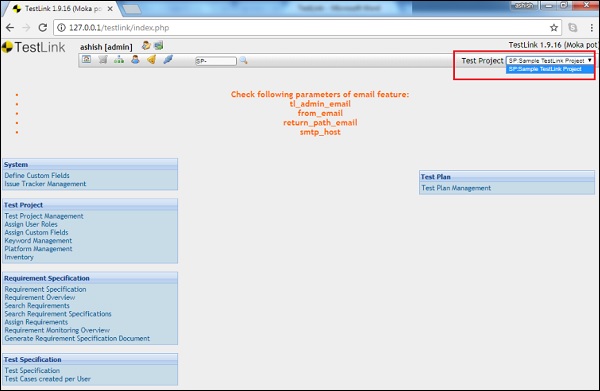
Clicking the Create button adds the project along with Delete and Active/Inactive switch for Requirement and Active features as shown in the following screenshot.
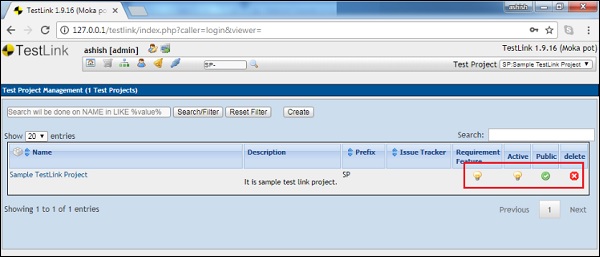
Step 3 − You can view the project by selecting a project name from the “Test Project” dropdown at the top right corner of the screen as seen below
Create Test Plan and Test Build in Test Link
Once a Test Project has been created by Admin we can create a Test Plan. Now we will learn about How to create a Test Plan as it is next step after creating project in Test Link.First of all we need to understand what Test Plan is. Test Plan is Combines Test Scope, Milestones, Test suit and Test Cases. Test Plan is the basic unit for executing all the test cases of a project.In test plan, test scope defines as information about particular requirements. User should create test case according to the test scope. Test case must be created under the test suits.Now we can conclude that this all units are related to each other. You can create test plan from test plan management option.
Log in to the test link first as an admin. Then select project for which you want to create test plan. Then navigate to ‘Test Plan’ screen.
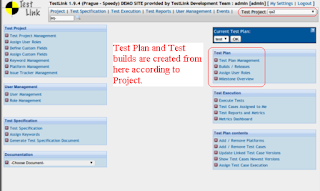
As we can see on image, Test Plan contains 4 units.
->Test Plan Management
->Builds/Releases
->Assign User Roles
->Milestone Overview
Test Plan Management creates the test plan for a test project. According to test releases we can make Builds from ‘Build’ option.We will learn about how to create a new build too. Build plays the best role in test case management. As per the development of product, Developers provide releases to tester in step by step.Here in test link we can create different builds as per release came from developers. We can create test plan for each build which will help us to notify the all the releases of a Test Project.
For Creating a Test plan we need to log in with proper credentials then Select your project from ‘Test Project’ drop down afterwards move on ‘Test Plan’ screen.
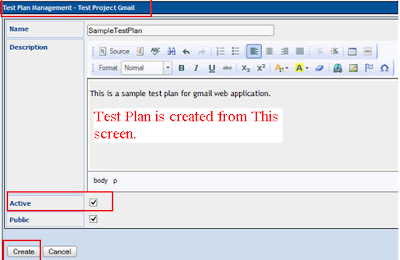
After clicking on ‘Create’ button you will navigate to the above screen from where you can create test plan. You need to enter all the information which has been asked here.
First field is ‘Test Plan Name’, Enter the name of your Test plan.
Now we are moving for Description. It is important entity of this part. Description should be including as per the company procedure so everyone can verify all created plan and build easily.
Test scope should be included in Test Description. What should be test, what should not be test; this all information about the test project must be included in this field.Test environment, Test infrastructure, Test tool, Risk this all information should be entered in description. This is all about description field.Now move on to next field, this is ‘Active’ button. It is indicates that this plan is active. If test plan is in active mode then this button should be selected properly.If test plan is completed successfully and you don’t need it further then you can mark it uncheck. It will indicate that test plan is not in working mode now.Next filed is ‘Public’ which indicates that you are sharing this test plan with another team. It is not private. For that you need to check mark on it.Afterwards click on ‘Create’ button. This is the steps of creating test plan in test link.
Now we will move on creating builds in test link. For this, you need to log in with the test link and select ‘Test Project’ then move on to ‘Test plan’ screen and click on ‘Builds/Releases’.

After clicking on ‘Builds/Releases’, click on ‘Create’ button. Then you will navigate on above screen.
As per the Test Plan we need to enter here all information properly. Let’s Start with Build Name.Give the build name with numbers so it will be easier for us to compare releases with different versions. For example ‘Test_Build_1.0.0.’.Next filed is description, here we need to enter all the information about build specifications. How long this build will be worked out this should be mentioned in this field.If this build is ‘Active’ then check mark on this field. If its test plan is ‘Active’ then this build should be active. If test plan is inactive then and only then its build can be checked as inactive.Now next filed is ‘Public’, Check mark on this field so we can share this build to team.Last but important field is ‘Release Date’; we need to mention ‘Release date’ as per the plan. This is mandatory in build planning.Now click on ‘Create’ button so your build will be created successfully. This is all about Test plan and Test build creation.
Test Specification in Test Link
Test specification is contains Test suits for a Test project and this test suit contains test cases for all module of the test project.We can generate test specification documents from here only. For working with Test specification functionality we needs to log in with test link first.Then we need to select Test project for which we needs to create test cases. First of all you assign that project to the primary level tester then he can be able to create test suits and test cases.Without assignment a tester cannot create test cases. Test link also provides facility to generate reports according to assignment of project.Now we can move on next step.
Login with Test link and enter your credentials. Then you will navigate to the home page of test link.

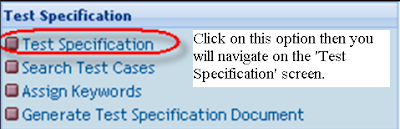
As you can see here, Test Specification screen is there on home page. Go to that screen and click on Test Specification option.Test specification has 4 units. 1. Test Specification, 2. Assign Keywords, 3. Search test case, 4. Generate test specification documents.Here from this 4 option we are going to select ‘Test Specification’ unit.
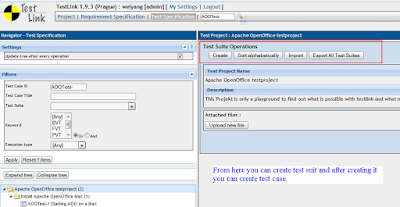
After clicking on this, test link will navigate you on Test specification screen.
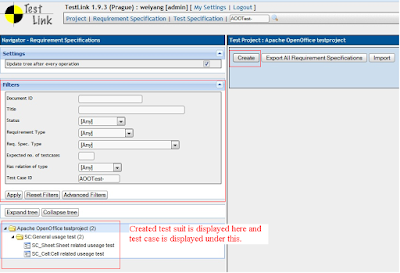
You can see here the sample test suits and test cases which are placed under test suit.
Once you will navigate on test specification screen, you will see the icon . Click on this icon  and it will display you the below screen for adding test suit.

Now click on ‘Create’ button. Then you will navigate to below screen.
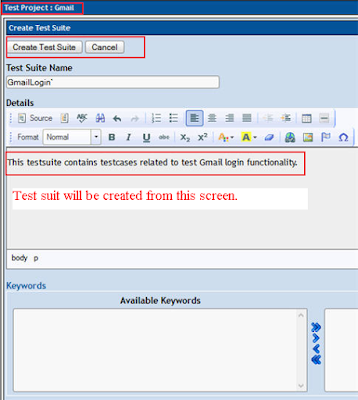
Now Enter your test suit name in given field. Enter the name of your project module as a name of test suit for which you need to create test cases.It will help you to search test cases as per the modules. Then next filed are description details.
Enter all the details about your module in this filed. For example what is the major functionality of the module? How it will impact on all over application? How it will integrate with other modules? This all details must be entered properly in this filed.
Next field is ‘Available Key words ’. For searching the test suit we can give a key word to the test suit. You can enter this key word to this field.
Now click on ‘Create Test Suit’ button which is placed on top of the page. After clicking on it, your test suit will be created and displayed on the test specification screen.
This is the main steps to create test suit. Now we will move on to create test cases. For creating test cases we need to select a test suit for which we need to create test cases.
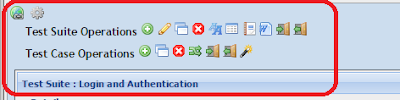
After selecting the test suit, you need to click on that setting button for creating test cases. This is the all about test specification procedure in test link.
Test Case Writing in Test Link
We have learnt about create test suit in test specification. Now we can move on to writing test cases. This is the major feature of test link. Test link manages test case prime and properly.As the part of the procedure, Test case can be generated only after generating the test suits. This is key rule of test link. Thus, we need to create test suit for creating test case.For creating test cases first if all we need to enter its precondition. We can generate test case as per our scenario in test project and as per test scenario precondition should be entered.
Now we are moving to create test cases in test link. For that first of all you need to log in with test link. Then enter credentials for same and navigate to the home page.
Afterwards click on ‘Test specification’ button. Now test link will navigate you to the test specific screen. Here you will see the below screen.
Test suit name should be a module name of an application so manager can identify easily which test cases is written in it. Test cases must be describing as a scenario of testing an application.
For example, Test Suit name is ‘Login Procedure’ and here Test case can be ‘Enter Valid User Id and Password’. Afterwards you need to create steps for the same for ex. 1. Enter Valid User ID. 2. Enter Valid Password. 3. Click on Log in button.
This is all about creating test cases Now this is not enough you need to write Expected result as well like Expected result of above scenario is ‘After clicking on log in button application must be navigate to the home page’.
Below are the steps for creating test cases in test link:
After creating a suit, you need to click on suit and then you will get below screen.
As per the image, you can see the ‘+’ sign here, click on it and you will navigate to the next screen.
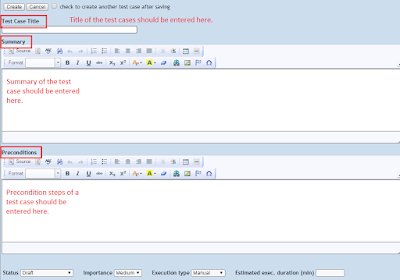
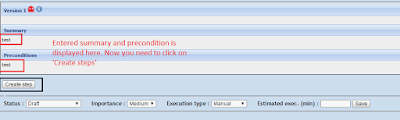
First filed will be displayed as ‘Test Case Title’, you can enter test cases title accordingly. Then Summary and Preconditions field is displayed. Here you can add summary of test case and then you need to enter preconditions for a scenario as per you application requirement.Afterwards click on ‘Create’ button and you will navigate to another screen where Entered ‘Summary’ and ‘Pre-Condition’ will be displayed. You can verify it from this screen and update it in case you made any mistake.
Move to next, you can see here ‘Create Steps’ button. Click on this button. Afterwards application will navigate you one the page where you can write your steps of test scenario.
As per explained above you can create test cases. After writing the test scenario you need to enter expected result. Without expected result a scenario can’t be save.
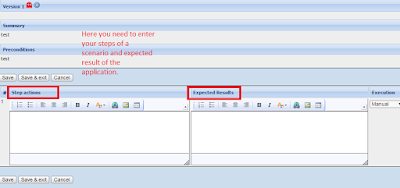
You can verify your summary and Precondition on screen before you write test steps for scenario. Then Next step is writing your steps and expected result on given filed and save it as per the image.Here you can see the field ‘Execution’ in which you need to select an option as per your execution process. If you will execute test case manually then you need to select here ‘Manually’ option otherwise select ‘Automation’.‘Save and Exit’ option is also present here, it save your test step and navigate you on next step creation filed and simple save will save your test case only.
After saving your test case it takes place under a test suits. Thus, Test manager can verify accordingly.
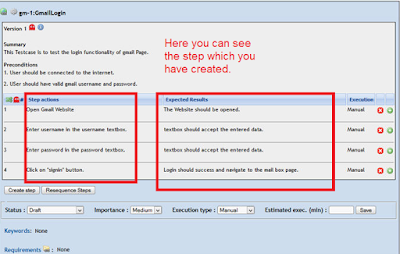
As per the image you can edit the steps of the test case and you can delete your test steps from right hand side icon.This is all about creating test case in test link. This is major functionality of test link. Do take care for creating test case because according to it another procedure will work in test link.After creating the test cases you need to assign it on build as well as a tester for executing it.
Execution of test cases in TestLink
We have created test cases for a test project in previous article now we can move towards to execute test cases in test link.This is one of the best functionality of test link which indicates test manager that how many test cases are executed and how many test cases are failed. For executing test cases, Admin needs to assign test cases to the tester. Then and only then they can run the test scenario as per test cases.
If Test case runs successfully with expected result then tester can passed this test case in test link. After passing the test cases it will be highlighted with green color.
Now if test case is not run successfully then tester needs to post an issue for that scenario that this test case is not run as per expected result and developer need to resolve the error.
For above situation, Test cases will be failed by tester and he needs to mention issue ticket in comment that why he fails a test case. Once a developer will resolve the problem then he can again pass this test case and change his comment by ‘Verified and passed the test case’.
Before passing a test case tester needs to perform a test scenario of failed test case. If he is sure that expected result is coming for a test scenario then he can pass test case again.
Make sure that tester mentioned test case priority while creating test case. As per mentioned priority report will be generated for high, medium and low level scenarios. Due to this Test manger can verify the report that how many high level scenario have been tested and how application is stable.
Now we will move on steps which we need to perform for executing test cases in test link. First of all you need to login with test link. Enter your credentials and tab on ‘Login’ button. Afterwards select your test project.
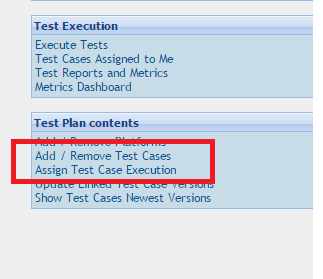
Here you will navigate on home page where you can find ‘Test Plan Contents’ tab.
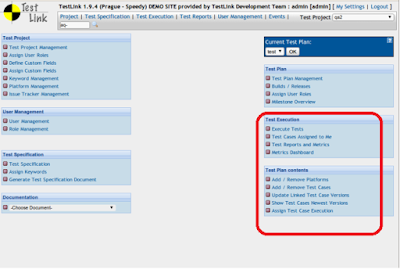
Now you need to assign test cases to a user so they can execute test cases. User will not able to run test cases if admin does not assign any test cases to them. Now click on ‘Assign Test cases execution’ option in test plan contents tab.
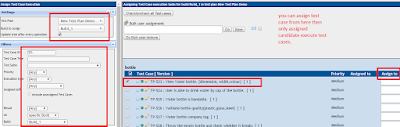
Application will navigate you on below page. Here you will find that created test cases is placed left side. You need to select Test plan, Test Build and select filters as per your need from screen then need to click on ‘Apply’ button. Thus you will get all the created test cases and test suit on the page.
Now you need to select a test suit first then select test case as per the image. Afterwards you can assign this test case to a tester. Click on ‘Assign to’ tab and then select the name of user to whom you want to assign this test case and save the changes.
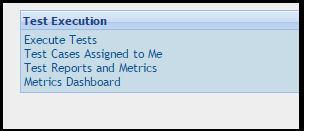
Test link gives you facility to assign test cases in bulk. For that you need to check test cases from screen and then assign it from ‘Bulk Assignment’ tab. You can also remove and edit rights for same. Only one user can execute test cases at a time.Now again come on home page and Click on ‘Test Execution’ tab then click on ‘Execute Tests’.
Then application navigates you on the page where you can find your test cases for execution. Now select you test case and verify steps as per test scenario. If you have found expected result for an application then select ‘Pass’ status from bottom of the page and write a comment in box as ‘Verified test case’ and save the execution.
After execution you will find that a test case will get a comment as ‘Passed’ on top of the screen. Also it will display a name of user who passed it.
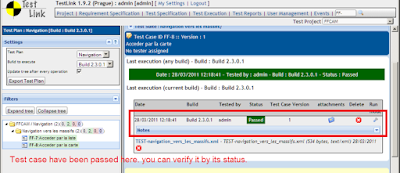
Passed test cases are turning on green color and same way you can failed the scenario and give comments accordingly.Failed test cases are turning to red. One that test scenario will resolved then user can executes again and then it will turn in to green again.This is the normal steps for execution test cases manually. Select Execution type as ‘Manually’ when you are creating test cases. Another option is executes test cases by Automation. We will learn it. This is all about running test cases successfully.
TestLink is a web based test management and test execution system. It enables quality assurance teams to create and manage their test cases as well as to organize them into test plans. These test plans allow team members to execute test cases and track test results dynamically.
TestLink is owned by TestLink (http://testlink.org/) and they own all related trademarks and IP rights for this software.
Deploy TestLink securely on cloud i.e. AWS marketplace and Azure with Reliable Services offered by Cognosys at one-click with easy written and video tutorials.
Secured Testlink on Centos 14.04 LTS
TestLink on cloud For Azure-Ubuntu
TestLink is released under the GNU GENERAL PUBLIC LICENSE
Features
TestLink Core Features
- Testing Supports
TestLink supports the following test methodologies −
Agile testing
Black box testing
Exploratory testing
Functional/Manual and Automation testing
Traditional testing
- Centralize & organize
TestLink tool creates, centralizes, organizes and manages test cases very effectively and efficiently.
Easily import test cases from CSV/XML and other management tool.
It can create multiple versions of test cases for comparison and uses.
It can share test case repository across different projects, releases and sprints
- Manage & Track Execution
It supports run and re-run of test execution suites. It kicks off automation suite as well using XML-RPC.
It captures step-by-step test execution history with detailed explanation.
It supports test run specific configuration and parameters.
- Notification
Email can be sent for a particular task to users.
Use @mention to get the attention of a specific team member at Comments/Description.
- Power Search
TestLink supports powerful search functionality with Hotkeys features.
TestLink supports free text search.
TestLink supports syntax search.
- Reports
TestLink supports multiple reports.
It supports test case and test execution reports.
Requirement and traceability reports.
Defect reports.
It supports cross-project report as well.
- Scale with Team Growth
TestLink supports any business team and any project, irrespective of the size and complexity.
- Integration
TestLink supports numerous add-ins to connect with different softwares to make work easy.
Wide range of add-ins make it universal across the globe – JIRA, Mantis, Bugzilla, Trac, etc.
It also supports Rally and VersionOne integration
- Common Features
It supports Drag and Drop interface.
It supports Test Grid Analysis.
It can clone the entire test case repository along the project setting, such as email notification and more.
- Customization
It supports customization of UI using Smarty templates.
It supports to create and assign the user’s keyword.
Major Features of TestLink
- TestLink helps you to keep the test process under control
- It forms a repository for requirements and test cases, and relates these to builds,platforms and staff
- You allocate tests to staff who carry them out and record the results
- A wide variety of reports provide information on what has been done and what still needs to be done
- Enables quality assurance teams to create and manage their test cases as well as to organize them into test plans.
Azure
Installation Instructions For Ubuntu
Note : How to find PublicDNS in Azure
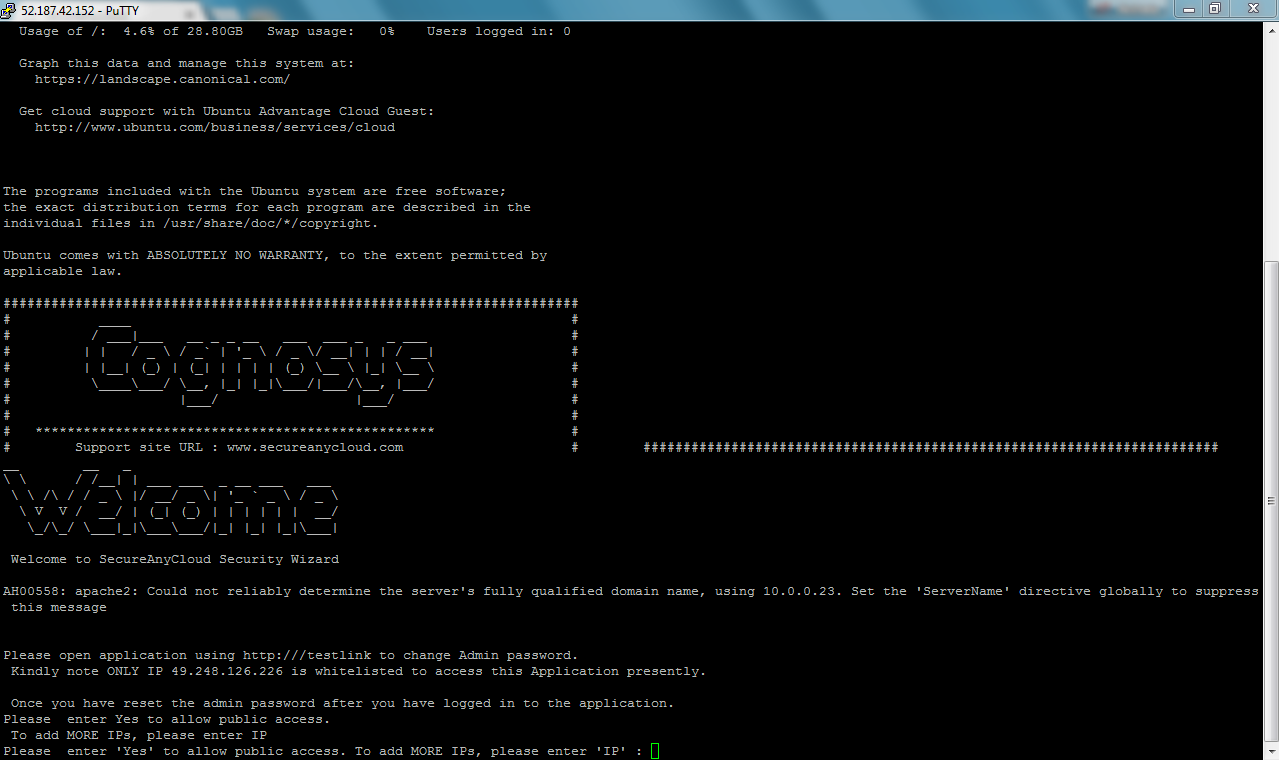
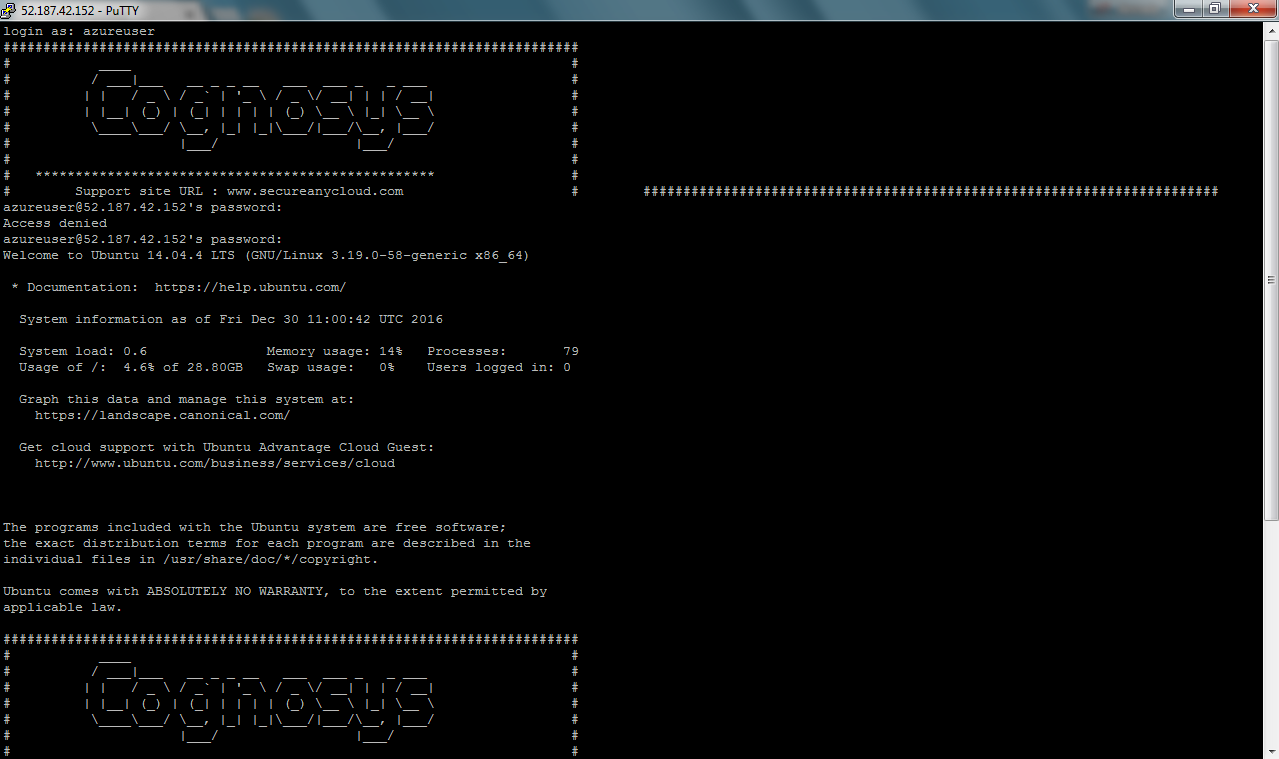
Step 1) SSH Connection: To connect to the deployed instance, Please follow Instructions to Connect to Ubuntu instance on Azure Cloud
1) Download Putty.
2) Connect to virtual machine using following SSH credentials:
- Hostname: PublicDNS / IP of machine
- Port : 22
Username: Your chosen username when you created the machine ( For example: Azureuser)
Password : Your Chosen Password when you created the machine ( How to reset the password if you do not remember)
Step 2) Database Login Details:
Username : root || Password : Passw@rd123
Note: Please change the password immediately after the first login.
Step 3) Application URL: Access the application via a browser at http://PublicDNS/Testlink
- Username : Admin
- Password : Passw@rd123
Step 4) Other Information:
1. Default installation path: will be in your web root folder “/var/www/html/Testlink”.
2. Default ports:
- Linux Machines: SSH Port – 22
- Http: 80
- Https: 443
- Mysql ports: By default these are not open on Public Endpoints. Internally. Mysql :3306
Configure custom inbound and outbound rules using this link
3. To access Webmin interface for management please follow this link
Installation Instructions For Centos
Note : How to find PublicDNS in Azure
Step 1) SSH Connection: To connect to the deployed instance, Please follow Instructions to Connect to Centos instance on Azure Cloud
1) Download Putty.
2) Connect to virtual machine using following SSH credentials:
- Hostname: PublicDNS / IP of machine
- Port : 22
Username: Your chosen username when you created the machine ( For example: Azureuser)
Password : Your Chosen Password when you created the machine ( How to reset the password if you do not remember)
Step 2) Database Login Details:
Username : root || Password : Passw@rd123
Step 3) Application URL: Access the application via a browser at http://PublicDNS/Testlink
- Username : Admin (Please create new user and delete this user)
- Password : Passw@rd123
Step 4) Other Information:
1. Default installation path: will be in your web root folder “/var/www/html/Testlink”
2. Default ports:
- Linux Machines: SSH Port – 22
- Http: 80
- Https: 443
- Mysql ports: By default these are not open on Public Endpoints. Internally Mysql :3306
Configure custom inbound and outbound rules using this link
Azure Step by Step Screenshots