
1-click AWS Deployment 1-click Azure Deployment 1-click Google Deployment
Overview
Apache solr is an open source enterprise search platform, written in Java, from the Apache Lucene project. Its major features include full-text search, hit highlighting, faceted search, real-time indexing, dynamic clustering, database integration, NoSQL features[1] and rich document (e.g., Word, PDF) handling. Providing distributed search and index replication, Solr is designed for scalability and Fault tolerance.[2] Solr is the second-most popular enterprise search engine after Elasticsearch.[3]
Solr runs as a standalone full-text search server. It uses the Lucene Java search library at its core for full-text indexing and search and has REST-like HTTP/XML and JSON APIs that make it usable from most popular programming languages. Solr’s external configuration allows it to be tailored to many types of application without Java coding and it has a plugin architecture to support more advanced customization.
Apache Lucene and Apache Solr are both produced by the same Apache Software Foundation development team since the two projects were merged in 2010. It is common to refer to the technology or products as Lucene/Solr or Solr/Lucene.
Solr is a search server built on top of Apache Lucene, an open source, Java-based, information retrieval library. It is designed to drive powerful document retrieval applications – wherever you need to serve data to users based on their queries, Solr can work for you.
Here is a example of how Solr could integrate with an application:
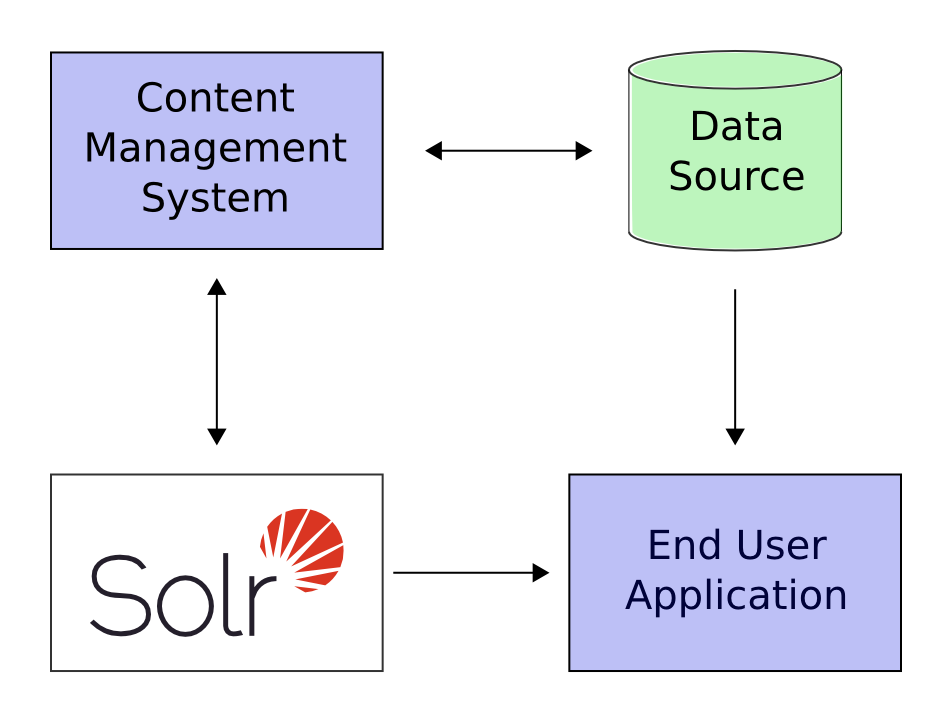
In the scenario above, Solr runs alongside other server applications. For example, an online store application would provide a user interface, a shopping cart, and a way to make purchases for end users; while an inventory management application would allow store employees to edit product information. The product metadata would be kept in some kind of database, as well as in Solr.
Solr makes it easy to add the capability to search through the online store through the following steps:
- Define a schema. The schema tells Solr about the contents of documents it will be indexing. In the online store example, the schema would define fields for the product name, description, price, manufacturer, and so on. Solr’s schema is powerful and flexible and allows you to tailor Solr’s behavior to your application. See Documents, Fields, and Schema Design for all the details.
- Feed Solr documents for which your users will search.
- Expose search functionality in your application.
Because Solr is based on open standards, it is highly extensible. Solr queries are simple HTTP request URLs and the response is a structured document: mainly JSON, but it could also be XML, CSV, or other formats. This means that a wide variety of clients will be able to use Solr, from other web applications to browser clients, rich client applications, and mobile devices. Any platform capable of HTTP can talk to Solr. See Client APIs for details on client APIs.
Solr offers support for the simplest keyword searching through to complex queries on multiple fields and faceted search results. Searching has more information about searching and queries.
If Solr’s capabilities are not impressive enough, its ability to handle very high-volume applications should do the trick.
A relatively common scenario is that you have so much data, or so many queries, that a single Solr server is unable to handle your entire workload. In this case, you can scale up the capabilities of your application using SolrCloud to better distribute the data, and the processing of requests, across many servers. Multiple options can be mixed and matched depending on the scalability you need.
Apache Solr – Architecture
In this chapter, we will discuss the architecture of Apache Solr. The following illustration shows a block diagram of the architecture of Apache Solr.

Solr Architecture ─ Building Blocks
Following are the major building blocks (components) of Apache Solr −
- Request Handler − The requests we send to Apache Solr are processed by these request handlers. The requests might be query requests or index update requests. Based on our requirement, we need to select the request handler. To pass a request to Solr, we will generally map the handler to a certain URI end-point and the specified request will be served by it.
- Search Component − A search component is a type (feature) of search provided in Apache Solr. It might be spell checking, query, faceting, hit highlighting, etc. These search components are registered as search handlers. Multiple components can be registered to a search handler.
- Query Parser − The Apache Solr query parser parses the queries that we pass to Solr and verifies the queries for syntactical errors. After parsing the queries, it translates them to a format which Lucene understands.
- Response Writer − A response writer in Apache Solr is the component which generates the formatted output for the user queries. Solr supports response formats such as XML, JSON, CSV, etc. We have different response writers for each type of response.
- Analyzer/tokenizer − Lucene recognizes data in the form of tokens. Apache Solr analyzes the content, divides it into tokens, and passes these tokens to Lucene. An analyzer in Apache Solr examines the text of fields and generates a token stream. A tokenizer breaks the token stream prepared by the analyzer into tokens.
- Update Request Processor − Whenever we send an update request to Apache Solr, the request is run through a set of plugins (signature, logging, indexing), collectively known as update request processor. This processor is responsible for modifications such as dropping a field, adding a field, etc.
Apache Solr – Search Engine Basics
A Search Engine refers to a huge database of Internet resources such as webpages, newsgroups, programs, images, etc. It helps to locate information on the World Wide Web.
Users can search for information by passing queries into the Search Engine in the form of keywords or phrases. The Search Engine then searches in its database and returns relevant links to the user.
Search Engine Components
Generally, there are three basic components of a search engine as listed below −
- Web Crawler − Web crawlers are also known as spiders or bots. It is a software component that traverses the web to gather information.
- Database − All the information on the Web is stored in databases. They contain a huge volume of web resources.
- Search Interfaces − This component is an interface between the user and the database. It helps the user to search through the database.
How do Search Engines Work?
Any search application is required to perform some or all of the following operations.
| Step | Title | Description |
|---|---|---|
| 1 | Acquire Raw Content | The very first step of any search application is to collect the target contents on which search is to be conducted. |
| 2 | Build the document | The next step is to build the document(s) from the raw contents which the search application can understand and interpret easily. |
| 3 | Analyze the document | Before indexing can start, the document is to be analyzed. |
| 4 | Indexing the document | Once the documents are built and analyzed, the next step is to index them so that this document can be retrieved based on certain keys, instead of the whole contents of the document.
Indexing is similar to the indexes that we have at the end of a book where common words are shown with their page numbers so that these words can be tracked quickly, instead of searching the complete book. |
| 5 | User Interface for Search | Once a database of indexes is ready, then the application can perform search operations. To help the user make a search, the application must provide a user interface where the user can enter text and initiate the search process |
| 6 | Build Query | Once the user makes a request to search a text, the application should prepare a query object using that text, which can then be used to inquire the index database to get relevant details. |
| 7 | Search Query | Using the query object, the index database is checked to get the relevant details and the content documents. |
| 8 | Render Results | Once the required result is received, the application should decide how to display the results to the user using its User Interface. |
Take a look at the following illustration. It shows an overall view of how Search Engines function.
Apart from these basic operations, search applications can also provide administration-user interface to help the administrators control the level of search based on the user profiles. Analytics of search result is another important and advanced aspect of any search application.
Installation & Configuration of Apache solr server 4.6 on Windows Machine
Apache Solr is an open-source search platform built upon java library. It’s one of the most popular search platform used by most websites so that it can search and index across the site and return related content based on the search query.
For more detailed information, please visit http://lucene.apache.org/solr/
So let’s begin with solr installation. To install Solr on the windows system, the machine should have [JRE] Java Runtime Environment with the right version.
Step 1: Go to cmd prompt and check for JRE with correct version.
If JRE is available in your system it will show you the version. If not then you have to install JRE
Step 2: Download require solr version from below url
https://archive.apache.org/dist/lucene/solr/
For this tutorial i have downloaded 4.6.1 from https://archive.apache.org/dist/lucene/solr/4.6.1/ Download solr-4.6.1.zip File
Step 3: Extract the Zip folder in your machine.now go to extarcted solr folder. Get inside the example folder and execute the command
java -jar start.jar
As soon as you run the above command solr will start with default port 8983. That can be accessible on http://localhost:8983/solr/#/
RELATED INSIGHT
Configure Apache Solr with Drupal for better content search
This will install Solr and run in the background. By default it uses the port number 8983.
You can change default port number to one of your choice.

Step 4: To Configure solr with Drupal 7.x Download solr from https://www.drupal.org/project/apachesolr download the recomended version and install as we do normal module installation.
Step 5: Go to \apachesolr-7.x-1.8\apachesolr\solr-conf\solr-4.x copy all the files to solr server directory [solr-4.6.1\example\solr\collection1\conf\] and replace them with existing files.
After replacing your file should look like.

Now your solr admin page look like

Step 6: So we are almost done with solr server setup. Let’s configure on module level
To do this we need to go to solr setting page /admin/config/search/apachesolr/settings
Fill up mandatory detail like solr server url and description and hit on Test Connection button.
RELATED INSIGHT
How to highlight search results in Search API Solr View in Drupal 8
Step 7: Almost done with solr server setup and configuration, let’s do indexing by visiting default index page admin/config/search/apachesolr.

The above steps would cover up solr server installation in your windows machine with configured D7 Apache solr module.
Conclusion: The main objective of this blog is to let the windows user to install and configured solr server and also allowing them to configure with Drupal 7. In present situation we already have variant of solr server on the web but i have recommended to use 4.6.x for Drupal 7.
Apache solr is owned by Apache solr (http://lucene.apache.org/solr/) and they own all related trademarks and IP rights for this software.
Cognosys provides hardened and ready to run images of Apache solr on all public cloud ( AWS marketplace and Azure).
Deploy your Apache solr securely on cloud i.e. AWS marketplace and Azure with Reliable Services offered by Cognosys at one-click with easy written and video tutorials.
Features
Major Features of Apache solr
Apache Solr comes with a rich set of features that can be utilized by enterprises to make the search experience unique and effective. Let’s take an overview of some of these key features. We will understand how they can be configured in the next chapter at deeper level.
A search is effective when the searched information can be seen in different dimensions. For example, if a visitor is interested in buying a camera and he visits online shopping websites and searches for his model. When a user query is executed on the search, a search would rank and return a huge number of results. It would be nice, if he can filter out the results based on the resolution of the camera, or the make of the camera. These are the dimensions that help the user improve querying. Apache Solr offers a unique user experience that enables users to retrieve information faster.
Apache Solr provides a powerful full text search capability. Besides normal search, Solr users can run a search for specific fields, for example, error_id:severe. Apache Solr supports wildcards in the queries. A search pattern consisting only of one or more asterisks will match all terms of the field in which it is used, for example, book_title:*. A question mark can be used where there might be variations for a single character. For example, a search for ?ar will match with car, bar, jar and a search for c?t will match with cat, cot, cut. Overall, Apache supports the following power expressions to enable the user to find information in all possible ways as follows:
- Wildcards
- Phrase queries
- Regular expressions
- Conditional login (and, or, not)
- Range queries (date/integer)
Apache Solr search can generate indexes out of different file types including many rich documents such as HTML, Word, Excel, Presentations, PDF, RTF, E-mail, ePub formats, the .zip files, and many more. It achieves this by integrating different packages such as Lucene, and Apache Tika. These documents when uploaded to Apache Solr get parsed and an index is generated by Solr for search. Additionally, Solr can be extended to work with specific formats by creating customer handlers/adapters for the same. This feature enables Apache Solr to work best for enterprises dealing with different types of data.
When searching for information, Apache Solr returns results page-by-page starting with top K results. Each result row carries a certain score, and the results are sorted based on the score. The result ranking in Solr can be customized as per the application’s requirements. This allows the user’s flexibility to search more specifically for relevant content. The size of the page can be configured in Apache Solr configuration. Using pagination, Solr can compute and return the results faster than otherwise. Sorting is a feature that enables Solr users to sort the results on certain terms or attributes, for example, a user might consider sorting of results based on increasing price order on an online shopping portal search.
Apache Solr facets do not only help users to refine their results using various attributes, but they allow better browsing experience along with the search interface. Apache Solr provides schema-driven, context-specific facets that help users discover more information quickly. Solr facets can be created based on the attributes of the schema that is designed before setting up the instance. Although Apache Solr works on a schema defined for the user, it allows them to have flexibility in the schema by means of dynamic fields, enabling users to work with content of a dynamic nature.
AWS
Installation Instructions For Ubuntu
Note : 1. Please use “Apache solr” in the place of “stack_name”
2. How to find PublicDNS in AWS
Step 1) SSH Connection: To connect to the deployed instance, Please follow Instructions to Connect to Ubuntu instance on AWS Cloud
1) Download Putty.
2) Connect to virtual machine using following SSH credentials :
- Hostname: PublicDNS / IP of machine
- Port : 22
Username: To connect to the operating system, use SSH and the username is ubuntu.
Password : Please Click here to know how to get password .
Step 2) Database Login Details :
- MYSQL Username : root
- MYSQL Password : Passw@rd123
Step 3) Application URL: Access the application via a browser at http://PublicDNS/Apachesolr
Note: Open port 8081 on server Firewall.
Configure custom inbound and outbound rules using this link
Step 4)Other Information:
1. Default installation path: will be on your web root folder “/var/www/html/Apachesolr” ( Please see above Note for stack name)
2. Default ports:
- Linux Machines: SSH Port – 22 or 2222
- Http: 80 or 8080
- Https: 443
- Sql or Mysql ports: By default these are not open on Public Endpoints. Internally Sql server: 1433. Mysql :3306
- Open port 8081 on server Firewall.
Azure
Installation Instructions For Ubuntu
Note : How to find PublicDNS in Azure
Step 1) SSH Connection: To connect to the deployed instance, Please follow Instructions to Connect to Ubuntu instance on Azure Cloud
1) Download Putty.
2) Connect to virtual machine using following SSH credentials :
- Hostname: PublicDNS / IP of machine
- Port : 22
Username: Your chosen username when you created the machine ( For example: Azureuser)
Password : Your Chosen Password when you created the machine ( How to reset the password if you do not remember)
Step 2) Application URL: Access the application via a browser at http:/PublicDNS/
Step 3)Other Information:
1. Default installation path: will be on your web root folder “/var/www/html”
2.Default ports:
- Linux Machines: SSH Port – 22
- TCP : 8389
Note: Please allow 8983 port for remote access with http://<yourip>:8983
3. To access Webmin interface for management please follow this link
Configure custom inbound and outbound rules using this link
Installation Instructions For Centos
Note : How to find PublicDNS in Azure
Step 1) SSH Connection: To connect to the deployed instance, Please follow Instructions to Connect to Centos instance on Azure Cloud
1) Download Putty.
2) Connect to virtual machine using following SSH credentials :
- Host name: PublicDNS / IP of machine
- Port : 22
Username: Your chosen username when you created the machine ( For example: Azureuser)
Password : Your Chosen Password when you created the machine ( How to reset the password if you do not remember)
Step 2) Application URL: Access the application via a browser at “http:/PublicDNS”
Step 3) Other Information:
1. Default installation path: will be on your web root folder “/var/www/html/”
2.Default ports:
- Linux Machines: SSH Port – 22
- TCP : 8389
Note: Please allow 8983 port for remote access with http://<yourip>:8983
3. To access Webmin interface for management please follow this link
Configure custom inbound and outbound rules using this link
Azure Step by Step Screenshots
Product name

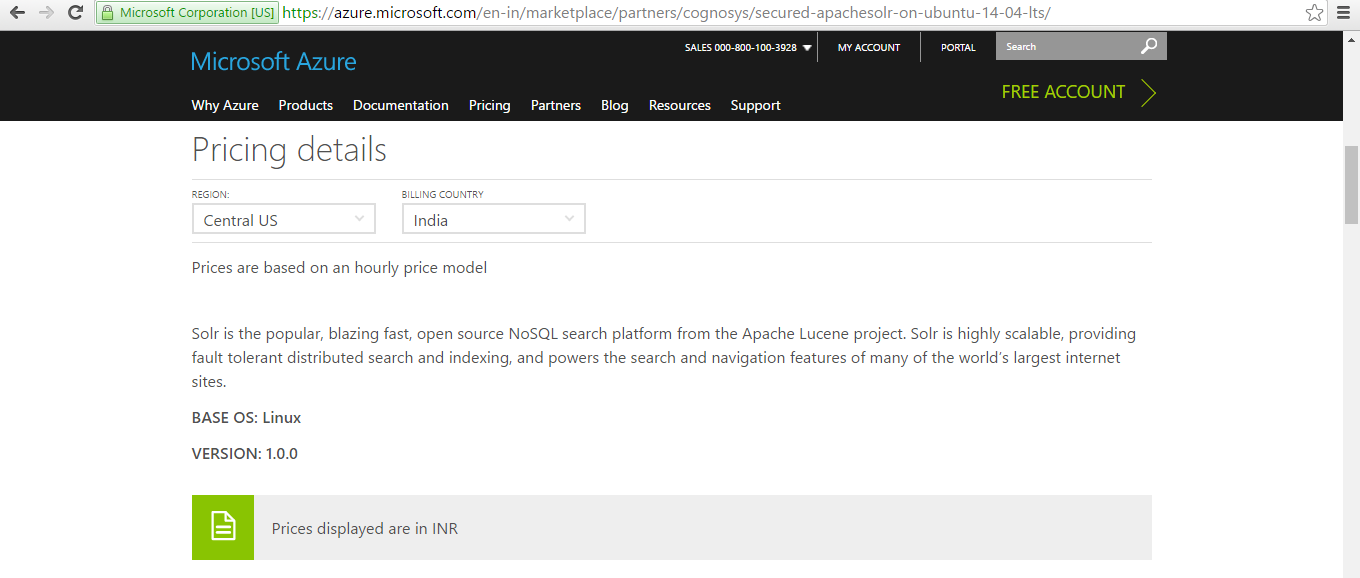
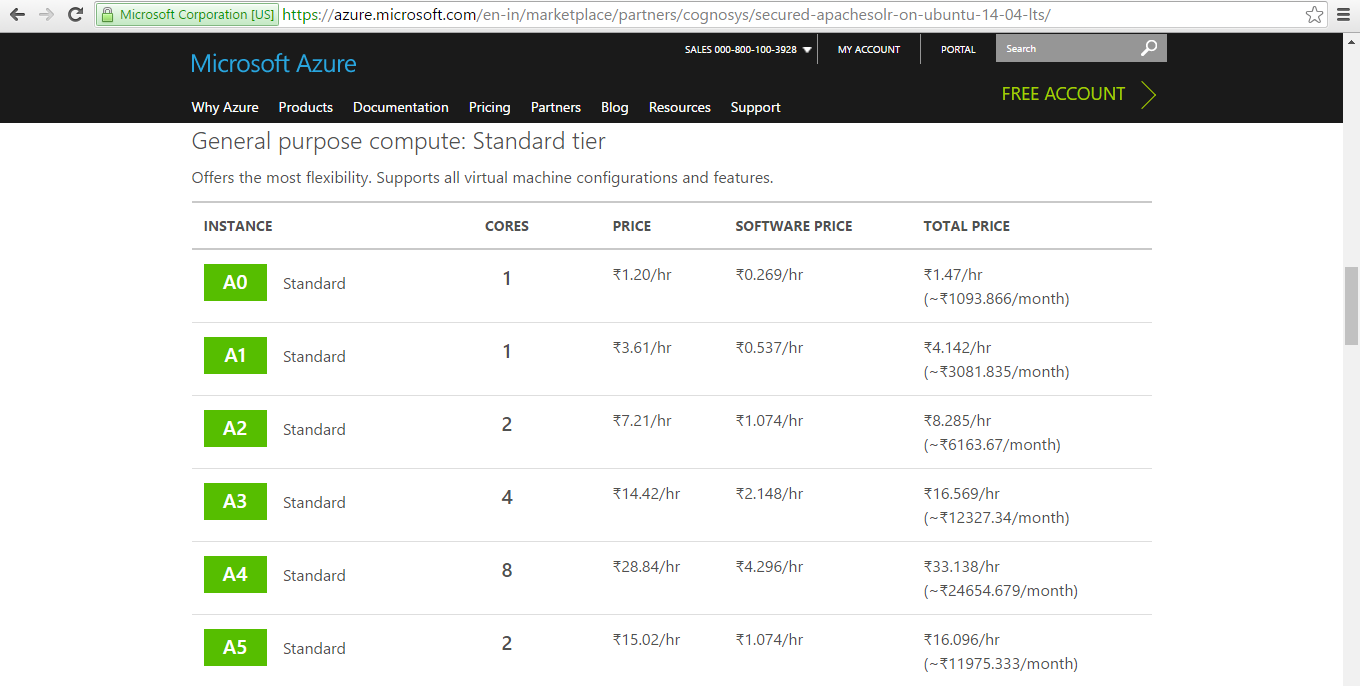
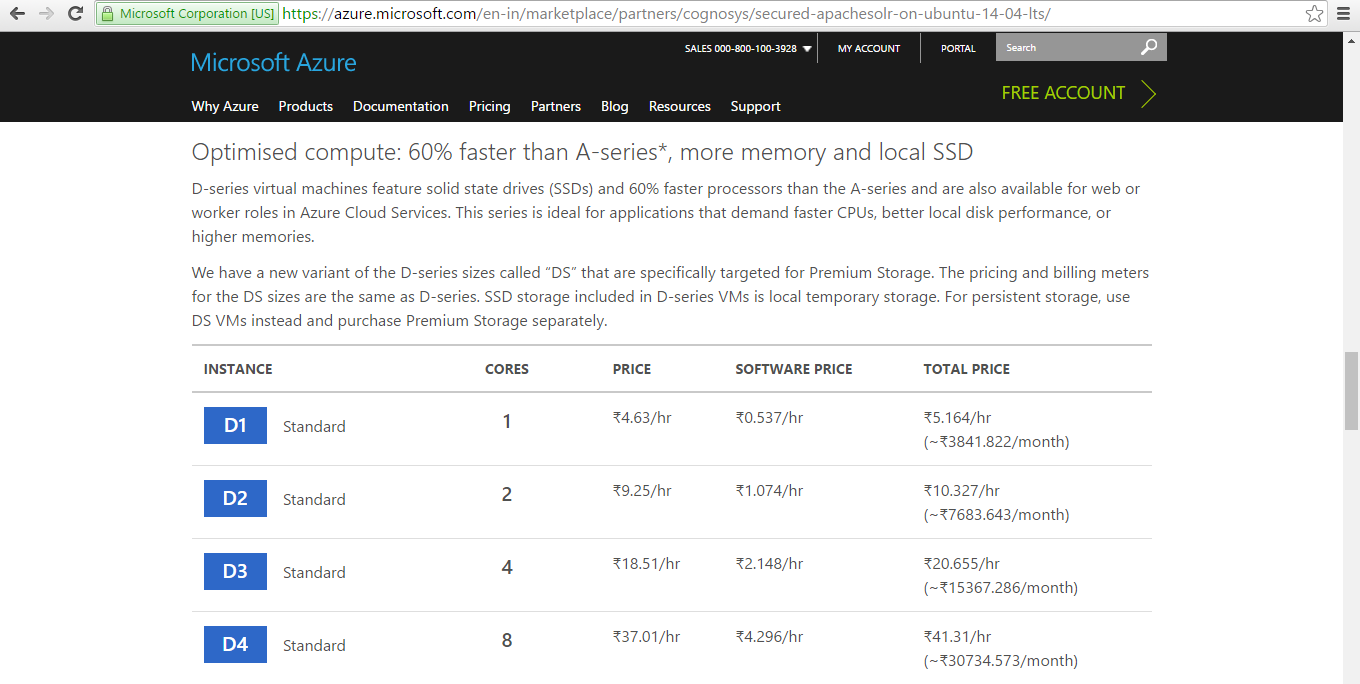
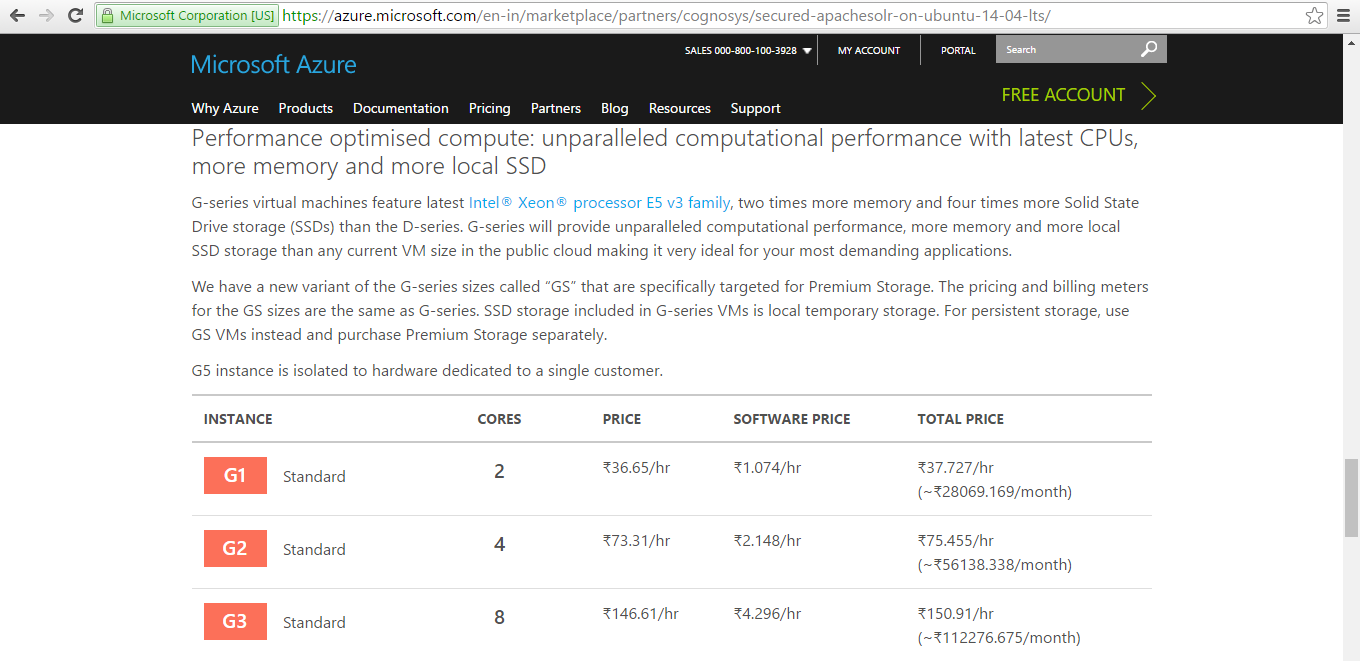
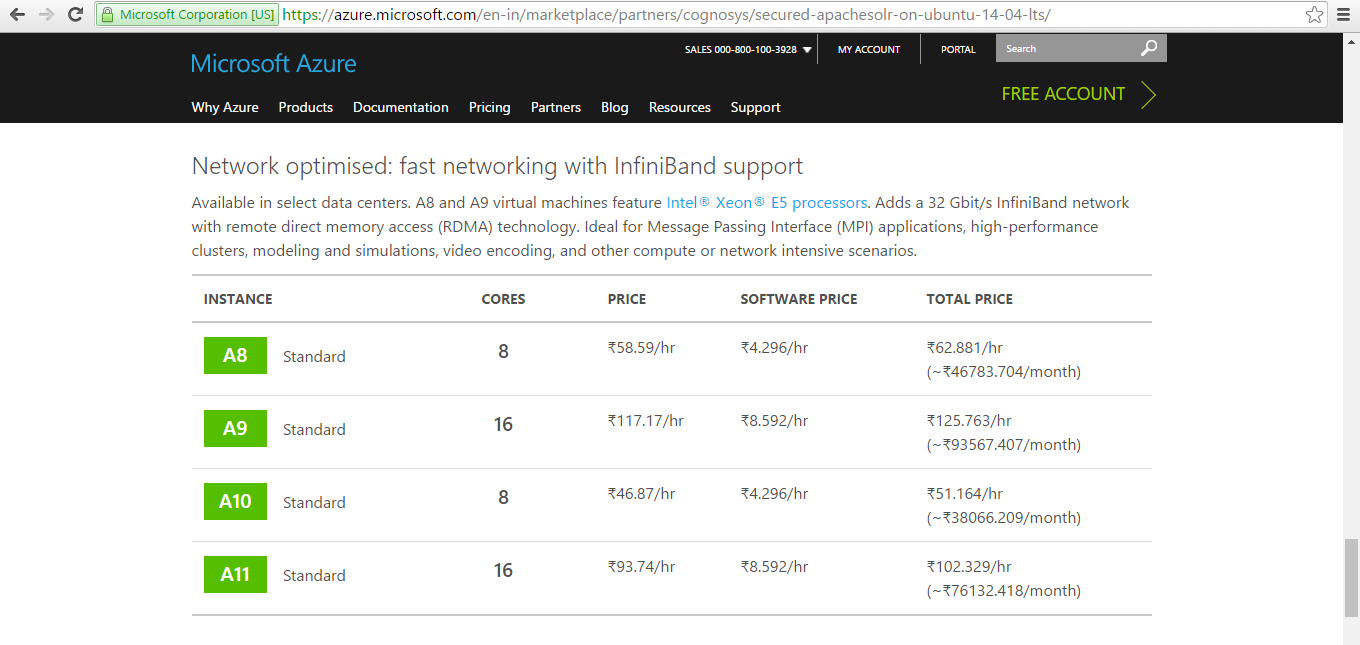
 Pricing Details
Installation Instructions For Windows
Step 1) VM Creation:
1.Click the Launch on Compute Engine button to choose the hardware and network settings.
2.You can see at this page, an overview of Cognosys Image as well as some estimated costs of VM.
3.In the settings page, you can choose the number of CPUs and amount of RAM, the disk size and type etc.
Step 2) RDP Connection: To initialize the DB Server connect to the deployed instance, Please follow Instructions to Connect to Windows instance on Google Cloud
Step 3) Database Login Details:
The below screen appears after successful deployment of the image.

For local MySQL root password, please use the temporary password generated automatically during image creation as shown above.
i) Please connect to Remote Desktop as given in step 2 to ensure stack is properly configured and DB is initialized.
ii) You can use MySQL server instance as localhost, username root and password as shown above.
If you have closed the deployment page you can also get the MySQL root password from VM Details “Custom metadata” Section
Step 3) Application URL: Access the application via a browser at http://PublicDNS/Apachesolr
Note: Open port 8081 on server Firewall.
Step 4)Other Information:
1. Default installation path: will be on your web root folder “/var/www/html/Apachesolr”
2.Default ports:
- Windows Machines: RDP Port – 3389
- Http: 80
- Https: 443
Videos
Apache Solr Tutorial 1: Download and Install
Embedded media removed during static cleanup.
