
Overview
Ubuntu 17.04 – High Performance Hardened – TCP BBR Ubuntu is the most popular operating system running in hosted environments, as it is the most popular server Linux distribution. For Stack specific support: Contact Stack Developer Team
Ubuntu 17.04 – High Performance Hardened – TCP BBR
Ubuntu is the most popular operating system running in hosted environments, as it is the most popular server Linux distribution.
For Stack specific support: Contact Stack Developer Team (Since we do not own the IP for the stack,Stack developers should be contacted for any support)
This Image is made specially for Enterprise Customers who are looking for deploying a secured Ubuntu 17.04 – High Performance Hardened – TCP BBR installation instead of just putting up a vanilla install.
For Stack specific support: Contact Stack Developer Team (Since we do not own the IP for the stack, Stack developers should be contacted for any support)
Ubuntu 17.04 Desktop Installation:
Minimum requirements for Ubuntu 17.04
Dual core processor (2 GHz) or better
- 2 GB RAM
- 25 GB Hard Disk Space
- DVD drive or a USB port for the installation media
- Internet if possible
:
- Download Ubuntu 17.04
Once the ISO file is downloaded then burn it to USB drive or DVD and make it bootable. In this article I am assuming you are going to install Ubuntu 17.04 on a fresh system(64-bit)
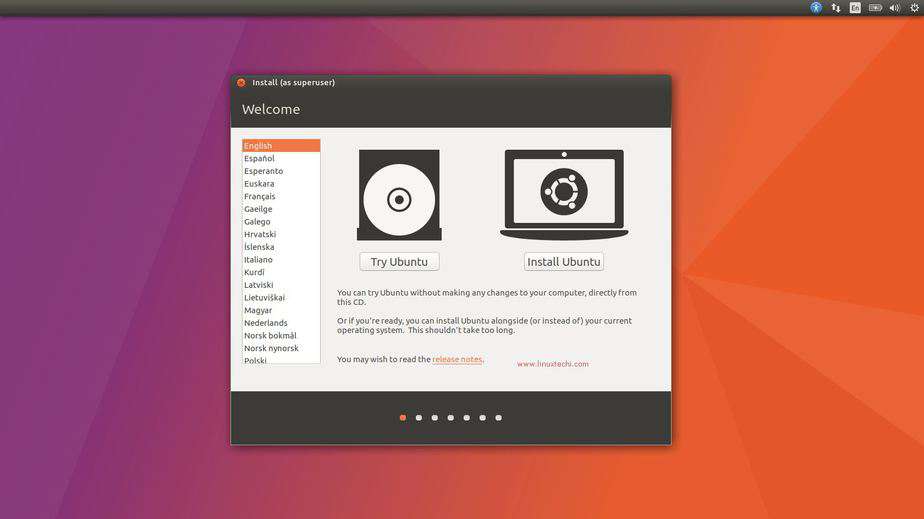
Step:1 Boot Your System with above created bootable USB or DVD
Select “Install Ubuntu”
Step:2 Install third party software during Ubuntu 17.04
In case your system is connected to the internet then you can select both options else leave the options untick.
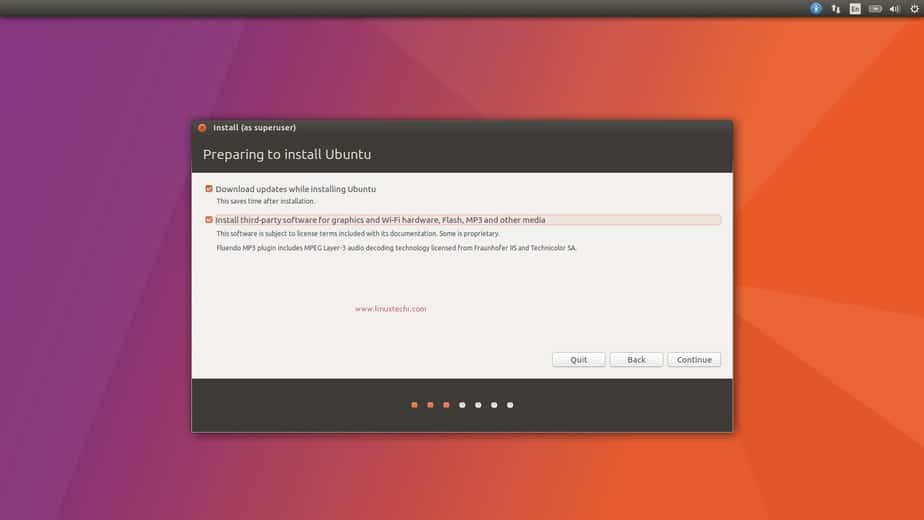
Click on continue
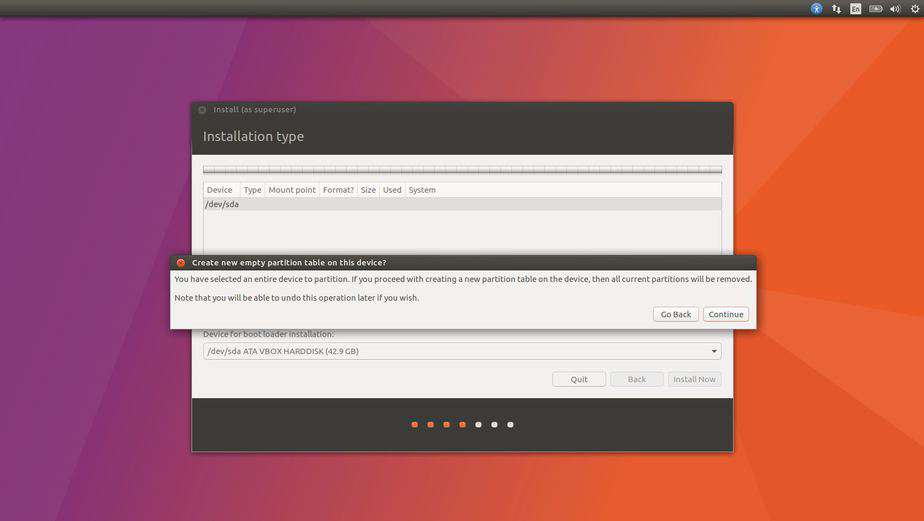
Step:3 Select the Installation type
In this step we will decide whether we will create our own partition table or will allow the installer to create partitions itself. But in my case I will create my own partition, so to do this select “something else” option and then click on Continue

In the next window we will see which disk is available and its disk space.
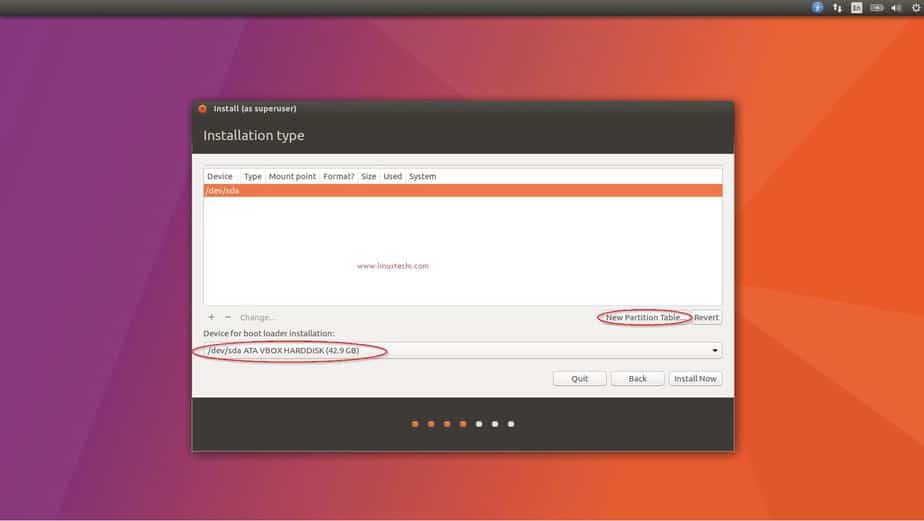
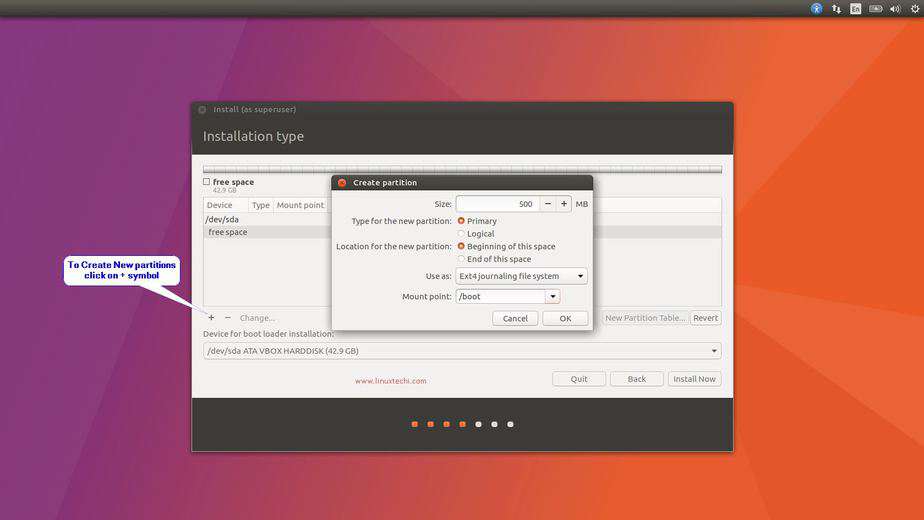
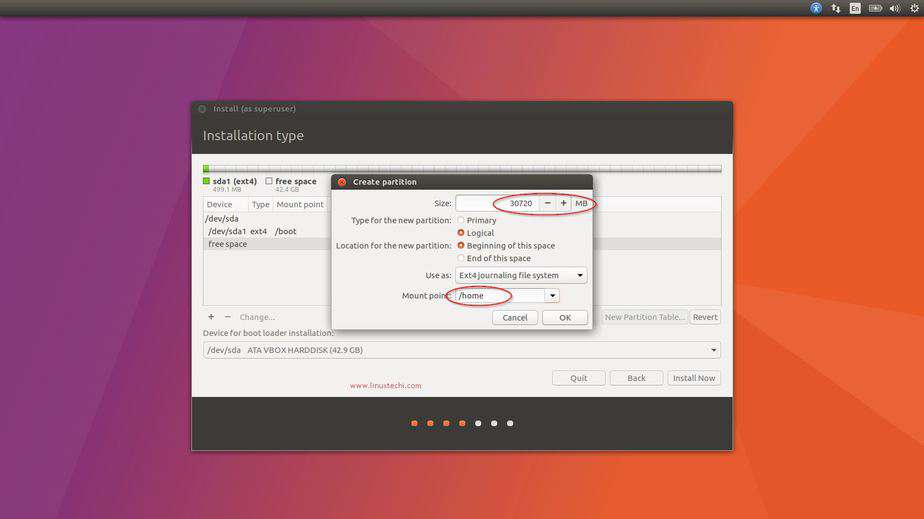
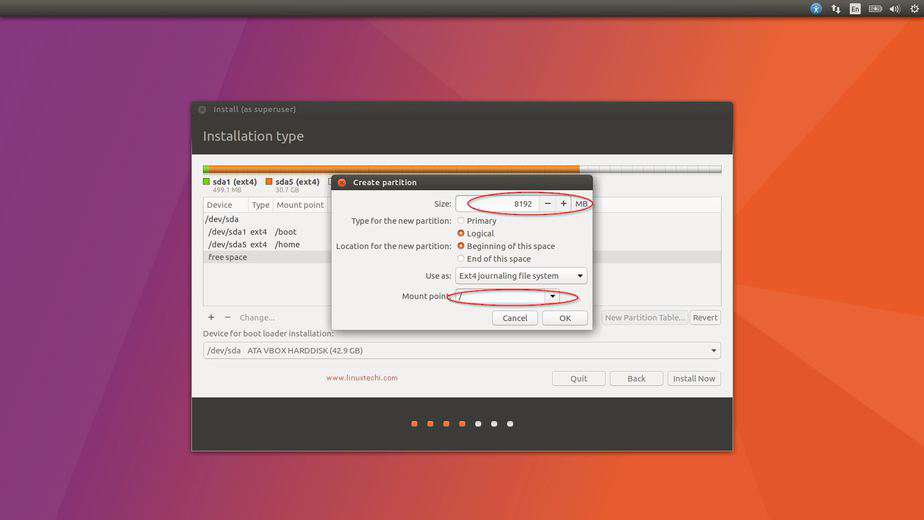
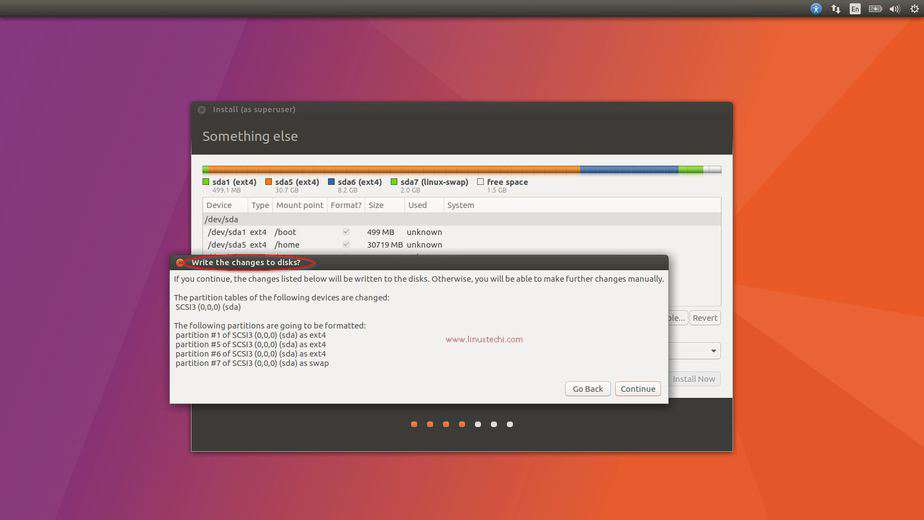
As we we can see I have around 42 GB disk space on the /dev/sda. I will create following partitions on this disk
- / boot = 500 MB (ext4 file system)
- /home = 30 GB (ext4 file system)
- / = 8 GB (ext4 file system)
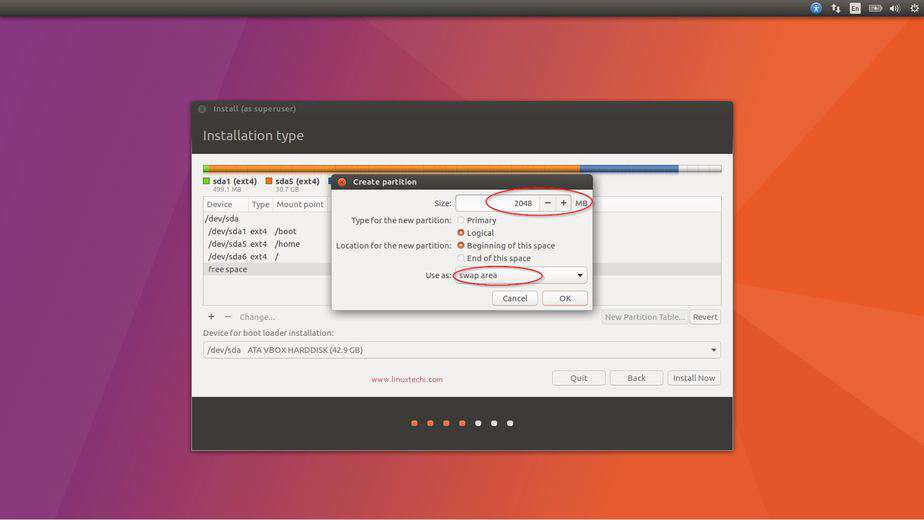
- Swap Partition = 2 GB
To start creating partitions, click on “New Partition Table” option as shown in the above window.
Click on Continue
Create /boot partition of size 500 MB
Create /home partition of 30 GB. Example is shown below
Create / partition of 8 GB.
Create Swap partition of 2 GB
Once you are done with partitions, click on “Install Now” option.Then in the next window select continue to write changes to the disk.
Step:4 Select your respective location and keyboard layout as per your setup
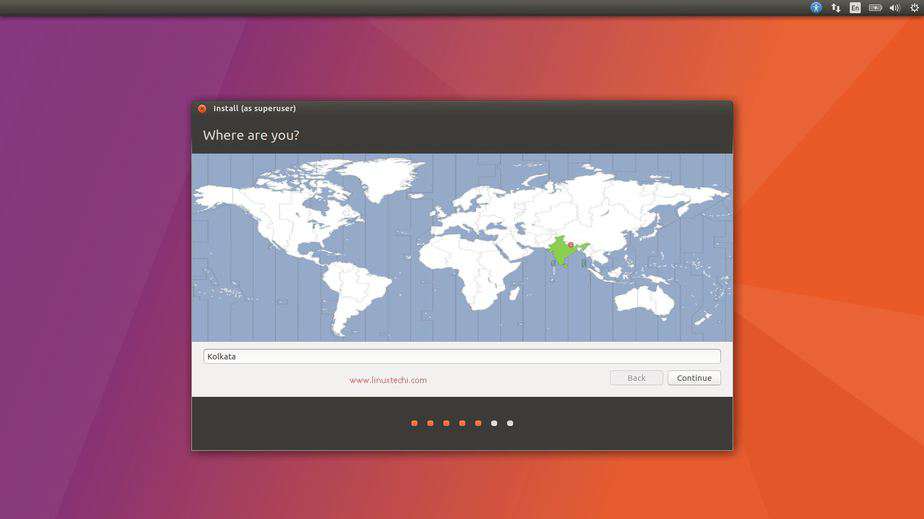
Click on Continue
Click on Continue to Proceed Further.
Step:5 Specify Your Username and system’s host name
In this step specify the user name that will be created during the installation and sudo rights will allocated to this user. Apart from this specify the hostname that you want set for your system. In my case I am using the followings
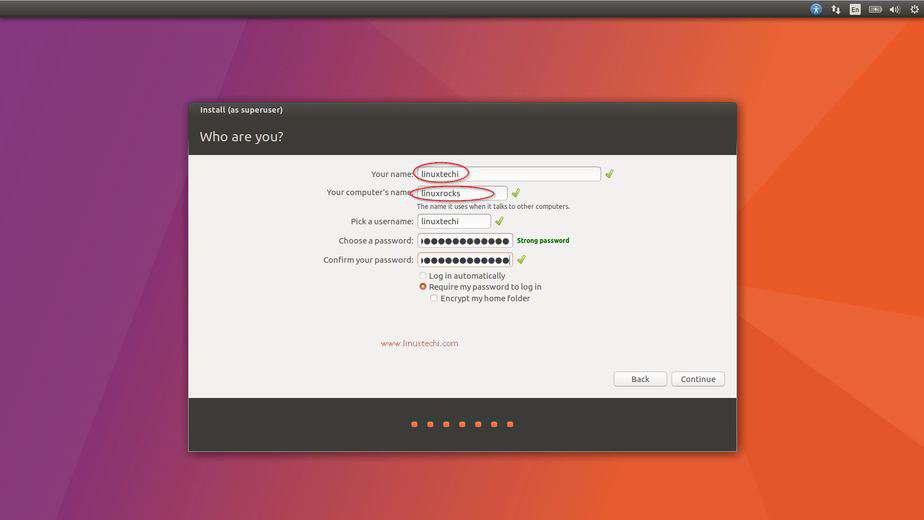
Click on Continue…
Step:6 Installation started and is in progress
At this step installation will start as shown.
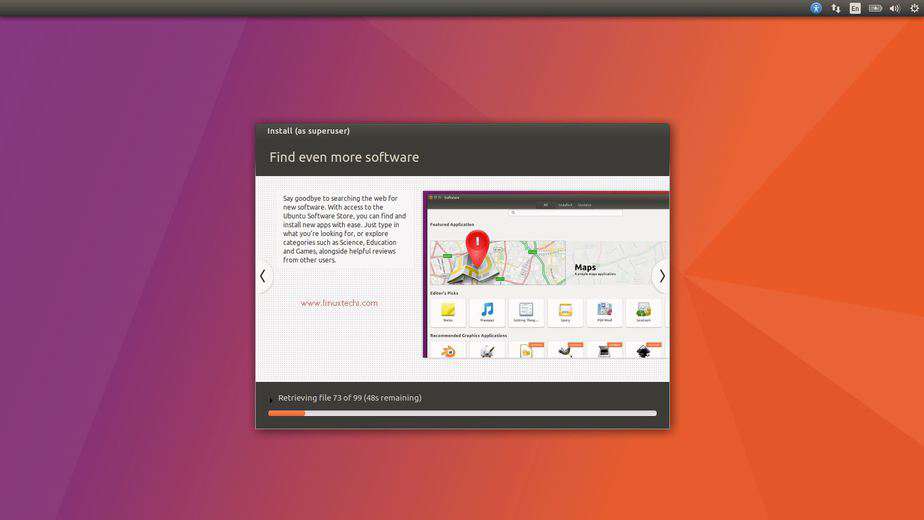
Once the installation is completed, we will be prompted to restart the system

Click on “Restart Now”
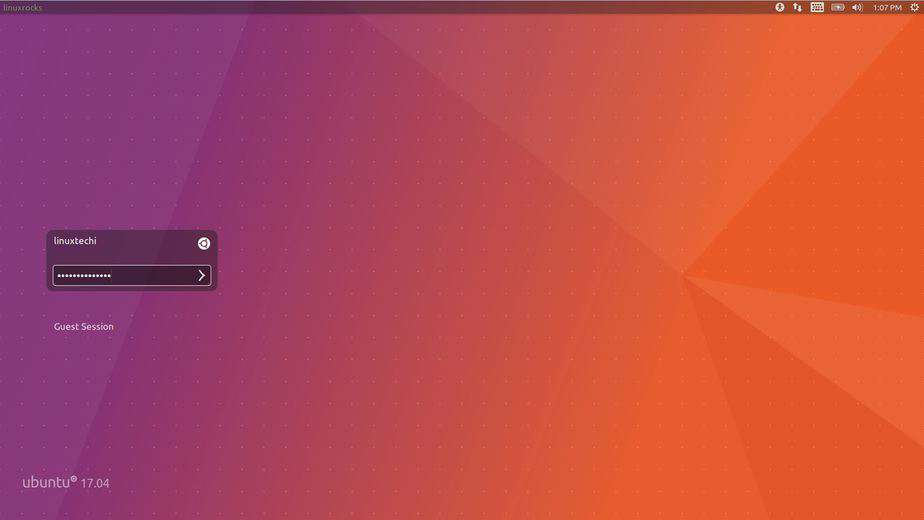
Step:7 Login Screen after reboot
Use the same user name and its credentials that you have created during the installation. In my case user name is ‘linuxtechi’
TCP BBR has significantly increased throughput and reduced latency for connections.
BBR – Bottleneck Bandwidth and Round-trip propagation time is a new congestion control algorithm developed at Google. Congestion control algorithms that decides how fast to send data.
Ubuntu is built on Debian’s architecture and infrastructure, to provide Linux server, desktop, phone, tablet and TV operating systems
Ubuntu’s goal is to be secure “out-of-the box”. By default, the user’s programs run with low privileges and cannot corrupt the operating system or other users’ files.
For increased security, the sudo tool is used to assign temporary privileges for performing administrative tasks, which allows the root account to remain locked and helps prevent inexperienced users from inadvertently making catastrophic system changes or opening security holes.
Ubuntu is owned by Ubuntu(https://www.ubuntu.com/) and they own all related trademarks and IP rights for this software.
