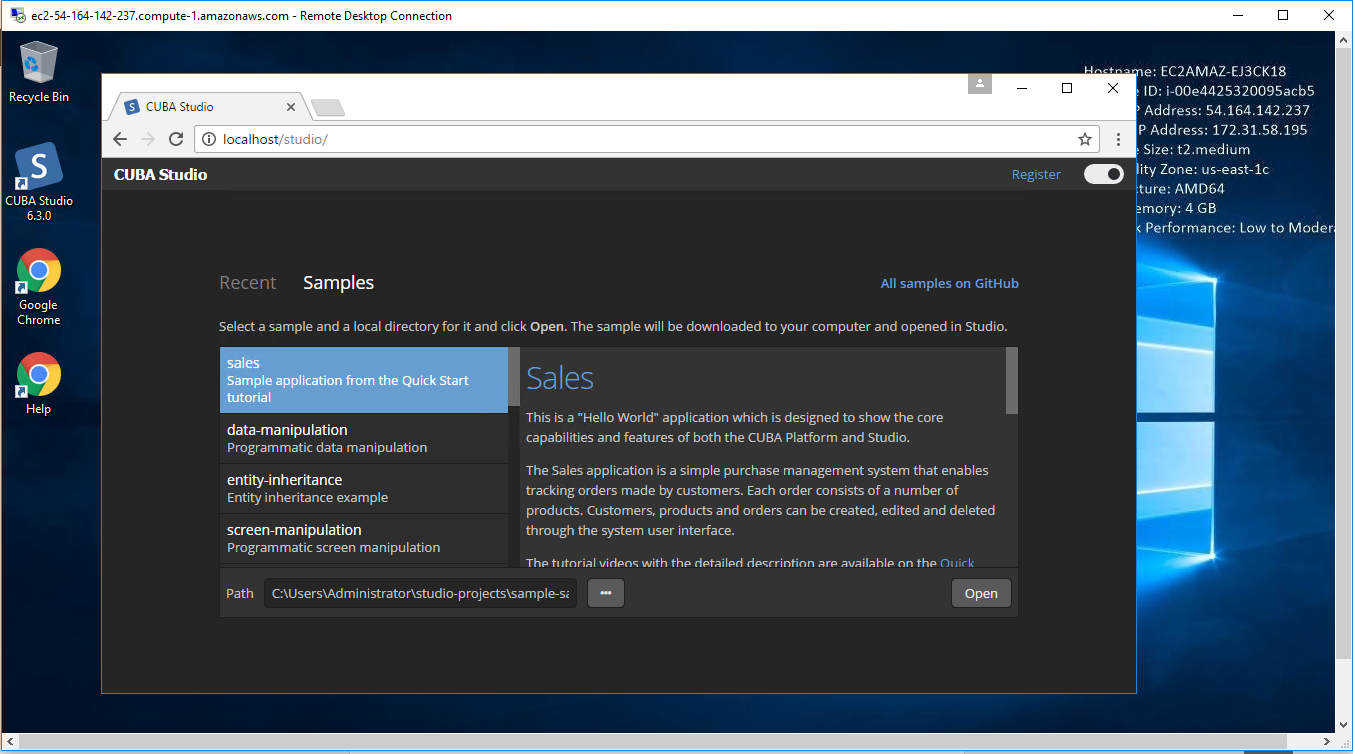
1-click AWS Deployment 1-click Azure Deployment
Overview
Cuba Studio is a specialized web development tool, that streamlines building applications upon CUBA Platform. With Studio, applications are up and running within minutes. The Studio is designed to be used in parallel with a Java IDE, so developers do not have to abandon their beloved working environments.
Cuba Studio is owned by Cuba Studio (www.cuba-platform.com) and they own all related trademarks and IP rights for this software.
Cuba Studio is available in free and commercial editions. The free version of CUBA Studio is a fully functional web development tool, but it limits the size of the application’s data model. It is ideal to bootstrap a project and explore platform features. Further development may be continued free of any charges purely in a Java IDE like IntelliJ IDEA Community edition or Eclipse.
CUBA Platform provides Rapid Application Development environment for easy start and fast development of modern business web applications on Java. CUBA ecosystem combines: – Modern and scalable architecture with solid and intuitive API based on mainstream JVM technologies – A marketplace with a rich collection of ready-to-use add-ons that cover all typical requirements for business applications and can be enabled with a mouse click. – CUBA Studio – a RAD IDE on top of IntelliJ IDEA with awesome visual designers and code generation capabilities that keep developers out of boring routine and facilitate fast learning. The framework is open source with Apache 2.0 license. Full documentation, guides, video tutorials and a prolific community forum are available at www.cuba-platform.com.


CUBA Platform is a full stack Java framework for enterprise applications development. Compared to popular frameworks like Grails it offers a higher level of abstraction, still allowing direct access to the low level API. CUBA Studio takes care of project and build files, database scripts, screens scaffolding, visual design and other routine tasks, enabling developer to focus on the application logic. With a wide range of out of the box components this provides massive development time savings, proven by hundreds of delivered projects. CUBA Platform is developed by Haulmont.
CUBA Platform is an open source framework intended to streamline the development process of business applications. It combines proven architecture, ready-to-use enterprise-grade components and productive tooling, so you can deliver modern web applications faster than ever before.
In this quick start we will scratch the surface of CUBA and develop a very simple, but fully functional conference planner application. It will show three main things for creating any web application: how to design data model, how to manipulate data, how to create business logic and, finally, how to create a user interface. As an example, we will create a simple, but fully functional version of an application that will help with session planning for a conference. In fact, this tutorial will be just enough for you to start your own CUBA application, so let’s get started. In this tutorial, we will use CUBA Studio, so please install it before you begin and accept trial subscription to have access to the visual designers.
Sample code repo: https://github.com/cuba-platform/sample-session-planner.
Creating an empty project
Let’s create an empty CUBA project and name it SessionPlanner using the corresponding Intellij IDEA menu.
We will use Java 8 as the default JDK.

Data Model Creation
The first task – creating entities. The business domain model has only two classes: Speaker and Session. The relation is one-to-many. One speaker can conduct many sessions.

For a starter, let’s create the Speaker entity. To do this, we can use a link on project’s welcome page:

Or just right-click on the “Data Model” node in CUBA Project Tree on the left side of the screen and select “New -> Entity”

Enter entity’s name – Speaker and create attributes according to the specification:
| Name | Type | Mandatory | Other constraints |
| firstName | String (255) | Yes | |
| lastName | String (255) | ||
| String (1024) | Yes | “Email” validator |
In CUBA we use standard JPA entities, so you can create them using either code editor or visual designer. Just click “+” icon and add attributes to the entity, CUBA Studio will generate class members for you.

In CUBA, you can specify a format for a proper entity display as a string in the UI using “Instance Name”. For the speaker, we will select both the first and last names.

If we have a look at the “Text” tab on the bottom of the entity designer, we can see just a JPA-annotated java class. The generated code can be updated if needed, designer will be updated accordingly when you switch to the “Designer” tab.
Let’s move further and create the Session entity and link it to our Speaker class. Fields specification table follows. The session end time will be a calculated value, being one hour from the start.
| Name | Type | Mandatory |
| topic | String (255) | Yes |
| startDate | DateTime | Yes |
| endDate | DateTime | |
| speaker | Association to “Speaker” entity, many-to-one cardinality | Yes |
| description | String (2000) |
The principle is pretty much the same, but the “speaker” attribute will be selected in the UI, so we need to specify “lookup” in “Lookup Actions” section of the editor and “Dropdown” as a Lookup type. Finally, the field definition should look like this:

Creating Calculated Attribute
In CUBA, you can add field calculation logic using an entity’s lifecycle callbacks. You need to create a method and mark it with a proper java annotation. The method will be invoked automatically. Let’s add a method that will be invoked at the “PrePersist” lifecycle phase. To do this, you can click on button “Lifecycle Callbacks” on the top on the entity designer window and select the desired lifecycle stage.

Name the method “updateEndDate” and mark it with @PreUpdate annotation in addition to @PrePersist. We will create a separate method for the session end time calculation, to reuse it in the application later.
public static Date calculateEndDate(Date startDate) {
  return Date.from(startDate.toInstant().plus(1, ChronoUnit.HOURS));
}
And then we’ll invoke the method from the lifecycle handler that we created in the previous step:
@PrePersist
@PreUpdate
public void updateEndDate() {
endDate = calculateEndDate(startDate);
}
That’s it. Our domain model has been created.
Database Creation
By default, CUBA Studio uses HSQL database during the development stage and generates SQL scripts specific for this RDBMS. Select “CUBA -> Generate Database Scripts” menu to create SQL for the database creation. You can review the generated scripts in the pop-up window before saving them as project files. Please note that those scripts are a part of the project, you can find them under “Main Data Store” node in the project tree.

You can modify the scripts if you want to add some specific things like additional indexes or insert statements for the initial data.

Click on “Save and close” button to save scripts. To apply those scripts and create the database, just select “CUBA -> Create Database” menu. Apart from application tables, CUBA creates system tables where we store information about users, roles, tasks, etc.
That’s it. The database has been created. Now we can create a simple UI for CRUD operations over the data in the database.
Generating CRUD Screens
CUBA Studio contains a UI screen generation wizard that helps us to create basic, but useful UI screens:
- Browser – to show the list of entities in a grid
- Editor – to edit one entity instance using a form-like user interface
First, we will create screens to work with speakers. Since this entity is pretty simple, we will use the default parameters for the screen creation. Start a wizard by clicking on “Create Screen” menu item in “Screens” menu on the top of the entity designer.

You can also start screen generation wizard by right-clicking on an entity in CUBA Project tree and selecting “New -> Screen” from the context menu.

For the “Speaker” entity, we will create default browser and editor. Select “Browser and Editor” on “Screen Templates” tab in the wizard and click “Next”

Leave default parameters on the next screen and click “Next”.

In the next step, you can change the screen titles and application menu item name. Then click “Finish” to generate CRUD screens.

As you can see, each screen consists of two parts: a controller, written in java, which is responsible for internal screen logic and events handling and an XML layout that defines the screen appearance. In our case, the browser will consist of files “speaker-browse.xml” and “SpeakerBrowse.java” and editor – “speaker-edit.xml” and “SpeakerEdit.java” accordingly. Source files are located under “Generic UI -> Screens” menu in CUBA Project tree.

Please note the “DATA” section in the XML screen descriptors – it defines how the data is fetched from the database.
<data readOnly="true">
   <collection id="speakersDc"
               class="com.company.sessionplanner.entity.Speaker"
               view="_local">
       <loader id="speakersDl">
           <query>
               <![CDATA[select e from sessionplanner_Speaker e]]>
           </query>
       </loader>
   </collection>
</data>
You can easily navigate between screen controller, descriptor and linked entities with CUBA Studio using buttons on the top of the window:


Creating a browser and editor for sessions
Run the screen generation wizard, select “Entity browser and editor screens” option and click “Next”.
On the next screen we will create “Browse view” and “Edit view” for the screens. In CUBA Platform, Entity View specifies which fields will be fetched from the database. This information can be used not only during the screen creation but also for the proper API design.
Create a separate view for the “Session” entity to include the speaker reference for the browser screen. In the “Browse View” dropdown select “Create view…”

In the popup window enter “session-browse-view” in the “Name” field and select “speaker” attribute in attributes selection tree. The final configuration will look like this:

By selecting “speaker” attribute we instruct CUBA to fetch data from the “Speaker” table to show a speaker’s first and last names on the session browser screen.
Press “OK” to save the new entity view.
For a session, we do not expose its end date for editing, because we will generate it. Create “session-edit-view” as an Edit view, but in the “Extends” dropdown select “_minimal” and then select all fields except “endDate”. This instructs CUBA not to fetch this attribute value from the database, but it will be saved during pre-persist or pre-update lifecycle phase. See “Creating Calculated Attribute” section for reference. Also, a widget on the screen will not be generated. Your view editor should look like this:

Press “OK” to save new entity view.
Now we’re OK to finish screen generation. Press “Next”, edit screen headers if needed. Now we need to tweak the editor screen a bit. If you open a session editor descriptor, you will see that “description” field is generated as a single-line text field.

Let’s convert it to multi-line. The easiest way is to open the XML text and change tag “textField” to “textArea” for the tag with id=“descriptionField”
<form id="form" dataContainer="sessionDc">
   <column width="250px">
       <textField id="topicField" property="topic"/>
       <dateField id="startDateField" property="startDate"/>
       <lookupPickerField id="speakerField" optionsContainer="speakersDc" property="speaker">
           <actions>
               <action id="lookup" type="picker_lookup"/>
           </actions>
       </lookupPickerField>
       <textArea id="descriptionField" property="description"/>
   </column>
</form>
Also please note that “endDate” is not shown on the editor screen, but you can see it on the session browser screen.
Running the application in development mode
To run the CUBA application you can use either run configuration on the top on the IDE window

Or select “CUBA -> Start Application Server” from the main menu.

After some time you can access the application using the browser. The URL will be displayed in the Run toolbox in IDEA. In our case it will be http://localhost:8080/app . Open the URL in your web browser and log into the application using “admin” as a username. The password is “admin” by default. You can find screens for entities manipulation under “Application” menu.
Then let’s add some data to the database: a couple of speakers and two sessions for them scheduled for the rest of the week. You can try to enter invalid email for a speaker and see that email validator works as expected.


Generated screens are good for basic operations, but in the real world, UI is usually more complex.
Customizing the User Interface
Let’s add a calendar view to browse visits in addition to the grid view. For the browser screen, we’ll add tab control, put a calendar on it and provide a functionality to edit and reschedule sessions using this calendar like in the picture below:

Open session-browse.xml file in designer and find “Tab Sheet” container in the component palette

Drag the TabSheet under a “filter” component in the component tree, then assign an id – “sessionsTabs” to it using “Properties” tab in the palette screen.

It is recommended to assign an id for each control, so we can refer to it. Components tree should look like this:

Drag two “Tab” components under “sessionsTabs” and assign ids “calendarTab” and “tableTab” to them. Then set captions “Sessions Calendar” and “Sessions Table” for these tabs accordingly.

Then collapse “sessionsTable” component and drag it to “tableTab”.

You will see that layout is broken because of our changes.

To fix this, we need to use a proper component that will expand to all screen area. Select “layout” component and set “expand” property to “sessionTabs” instead of invalid property “sessionsTable”, this will expand the tabsheet to the whole screen.

Now find “Calendar” component in the components palette and drag it on the “calendarTab” component in layout. Assign an id – “sessionsCalendar” to it.

Set “expand” property value for the “tableTab” container to “sessionsTable” and for “calendarTab” to “sessionsCalendar”.

In CUBA, UI components can be bound to entities and their properties.
Let’s bind the calendar to the data collection fetched in the screen. Just assign its “dataContainer” property to “sessionsDc”. Then bind:
- startDateProperty to a session’s start Date
- endDateProperty to a session’s end Date
- captionProperty to a session’s topic
- And descriptionProperty to a session’s description

To practice with the XML editor along with layout designer, we can update the descriptor and make the calendar to show only working hours and add navigation buttons. Try it, the XML editor supports autocomplete, so you won’t enter wrong attribute names. The calendar tag should look like this after you add three properties marked with bold font in the snippet below:
<calendar id="sessionsCalendar" dataContainer="sessionsDc" startDateProperty="startDate"
         endDateProperty="endDate" captionProperty="topic" descriptionProperty="description"
   firstVisibleHourOfDay="8" lastVisibleHourOfDay="18" navigationButtonsVisible="true"/>
To see the changes in the UI, you don’t need to restart the application, just reopen the screen in the application. CUBA framework supports hot deploy for screens. Now you can see sessions are displayed on the calendar.
Using Screen API
When we interact with the UI, events are generated, therefore CUBA gives you an API that you can use to subscribe to those events to handle them. Let’s handle a click on a calendar’s entry and invoke the session editor. For screen manipulations, CUBA provides a screen builder API that we will use.
In the SessionBrowse controller code editor click on “Subscribe to Event” button on the top of the window

and select CalendarEventClickEvent in the event selection popup, then press OK.

The empty method will be generated for you.
@Subscribe("sessionsCalendar")
private void onSessionsCalendarCalendarEventClick(Calendar.CalendarEventClickEvent event) {

}
To use screen manipulation API, we need to add ScreenBuilders service into the controller. Click on “Inject” button on the top of the window and select screenBuilders service form Screen API section in the popup window.
Another way for the injection (and subscription) – press Alt+Insert key combination in the editor and select “Inject” in the popup menu:

To search for the service, just start typing its name and then use “Up” and “Down” keys to navigate between services available for injection.

After screen builder service is injected, invoking a screen becomes a chain of method calls.
We need an editor for the session class with this (browser) as a parent screen. Then we want to edit the session entity received within the event object. The editor will be opened in the dialog mode. When the editor is closed, we need to reload all data to the browser screen. After that, we should show the editor that we have just built. In the handler’s code it will look like this:
@Subscribe("sessionsCalendar")
private void onSessionsCalendarCalendarEventClick(Calendar.CalendarEventClickEvent event) {
   Screen screen = screenBuilders.editor(Session.class, this)
           .editEntity((Session) event.getEntity())
           .withLaunchMode(OpenMode.DIALOG).build();
   screen.addAfterCloseListener(afterCloseEvent -> {
       getScreenData().loadAll();
   });
   screen.show();
}
That’s it. You can reopen the sessions browser screen in the running application and invoke the editor by clicking on the session in the calendar .

The editor doesn’t look nice, so we need to adjust its width and height. In the IDE, open the screen’s XML descriptor, select “dialogMode” property and set “width” and “height” properties to “auto”.

Go to the application and reopen the editor by closing it and clicking on the session in the calendar again. Now it looks nicer.

Adding Business Logic
Now we will use CUBA Studio to create a service that implements business logic and use this service in a screen. It will be a service for session rescheduling that will check that one speaker doesn’t have two sessions at the same time.
Right-click on the service node in the CUBA project tree and select “New ->Service”. This will open a service creation dialog. Enter “SessionService” as an interface name, SessionServiceBean as an implementation name will be generated automatically.

Create a method “rescheduleSession” in the interface like in the code snippet below:
public interface SessionService {
   String NAME = "sessionplanner_SessionService";

   boolean rescheduleSession(Session session, Date newStartDate);
}
The method will accept a session and a new session date and time. If we are able to reschedule the session, we save it with a new start date and time and if not – just return false as the service execution result.
To implement the method, open code editor for the SessionServiceBean class, you can find it under “Middleware – Services” node in the CUBA project tree:

You’ll see that the class is empty and invalid:

Press Alt+Insert in class’ body and select “Implement methods in the popup menu:

Select “rescheduleSession” method, the code stub will be generated:
@Service(SessionService.NAME)
public class SessionServiceBean implements SessionService {

   @Override
   public boolean rescheduleSession(Session session, Date newStartDate) {
       return false;
   }
}
For the service, we will use CUBA API for data access – DataManager class. With this class we’ll create a JPQL query to check if there are any sessions scheduled for the speaker in a defined time span. Then we will check the query result and, depending on it, update the session with a new start date or just exit from the method with a corresponding result.
Inject the DataManager into the service by pressing Alt+Insert in the class body and select “Inject” from the popup menu:

Select DataManager in the popup window:

The method implementation is on the snippet below:
@Override
public boolean rescheduleSession(Session session, Date newStartDate) {

   Date newEndDate = Session.calculateEndDate(newStartDate);

   int sessionsSameTime = dataManager.load(Session.class)
           .query("select s from sessionplanner_Session s where " +
                   "s.startDate < :newEndDate and s.endDate > :newStartDate " +
                   "and s.speaker = :speaker " +
                   "and s.id <> :sessionId")
           .parameter("newStartDate", newStartDate)
           .parameter("newEndDate", newEndDate)
           .parameter("speaker", session.getSpeaker())
           .parameter("sessionId", session.getId())
           .list().size();

   if (sessionsSameTime == 0) {
       session.setStartDate(newStartDate);
       dataManager.commit(session);
       return true;
   }

   return false;
}
Please note that we’ve reused the method that was created earlier in the section “Creating Calculated Attribute”:
Date newEndDate = Session.calculateEndDate(newStartDate);
The service is ready, now let’s add it to the session browser screen. It will be invoked for the session drag-and-drop in the calendar. If the session cannot be rescheduled, we show an on-screen notification using the notification API that we will add to the screen.
Go to session browser screen’s controller and inject the newly created service into the screen controller code as we did for Screen API. Then inject the “Notifications” API in the same way. And finally, subscribe to the “CalendarEventMove” event for the calendar component similar to what we did for the session editor invocation.
Then we can create the following code in the event handler:
@Subscribe("sessionsCalendar")
private void onSessionsCalendarCalendarEventMove(Calendar.CalendarEventMoveEvent event) {

   Session session = ((EntityCalendarEvent<Session>)event.getCalendarEvent()).getEntity();

   if (!sessionService.rescheduleSession(session, event.getNewStart())) {
       notifications.create(Notifications.NotificationType.WARNING)
       .withCaption("Session "+session.getTopic()+" cannot be rescheduled to "+event.getNewStart()+" due to a conflict")
       .show();
   }

   getScreenData().loadAll();
}
To have the new service redeployed, we need to restart the application, we can use the same “Run” button in IDEA.

After restarting we can open sessions calendar – and voila! We have drag-and-drop rescheduling functionality for the calendar! Let’s test it by adding an extra session and trying to reschedule it.
Adding Branding
You can customize CUBA applications by changing default text in standard screens like main screen or login screen. Let’s update text according to the application business domain – conference planning.
Open main message pack file – “messages.properties” which is situated under “Generic UI – Main Message Pack” node in CUBA project tree.

It is a standard java .properties file, so you can edit it freely, adding new message keys and updating existing ones. Update messages to reflect the purpose of the application. The example is below:
application.caption = CUBA Session Planner
application.logoImage = branding/app-icon-menu.png
application.logoLabel = Session Planner

loginWindow.caption = Login
loginWindow.welcomeLabel = Welcome to Session Planner!
loginWindow.logoImage = branding/app-icon-login.png

menu-config.application-sessionplanner = Planner
menu-config.sessionplanner_Speaker.browse=Speakers
menu-config.sessionplanner_Session.browse=Sessions
With CUBA’s hot deploy feature, all we need is to log out and log in to the application again to see the changes.
Marketplace
The framework comes with a marketplace that contains plenty of components, so you can easily add useful features like charts or maps support to the existing application. You can install those components right from the studio using the “CUBA -> Marketplace” menu.

Traditionally, since the very beginning of the computing era, enterprise software development has faced one challenge when, naturally, it is supposed to be focused on solving real business problems, but at the same time developers have to spend significant time and efforts on the technical side of the solution, such as architecture and generic functionality implementation.
In response to this disbalance between technical focused and problem oriented programming, a number of frameworks emerged, which were intended to raise the abstraction level and release developers from low level routine. Also, to increase development efficiency, development tools have become smarter and smarter over years. One of the best examples of the early 2000s is Borland Delphi, which hugely increased development speed of desktop applications.
In the past decade enterprise software has evolved a lot, raising the need for a new generation of high productivity frameworks and development tools. So, in this article we will have a look at the CUBA Platform – an open source framework, combining solid architecture, ‘must have’ features of any enterprise application and rapid application development tools, aimed to boost development productivity.
How is CUBA Platform different from other frameworks?
The main differentiator from most other Java frameworks is that CUBA Platform is a high level framework. This means that it abstracts developers from underlying technologies – such as Vaadin, Spring and EclipseLink – so they can focus on the business tasks, empowered by a rich set of features and development tools. At the same time, CUBA does not restrict access to low level code, providing the confidence that the framework can be adapted to the needs of a project.
CUBA Platform brings most value when developing enterprise applications, which typically require complex data models, tens or hundreds of screens, support for running various business processes, strong security requirements and so on.
What’s under the hood?
CUBA applications have a standard three-tier architecture. The nexus is metadata – the knowledge of the application data model. First, it makes all visual components data-aware. So, for instance a table knows it is displaying certain attributes of a driver entity, and a label knows that it is displaying a date. Similarly, metadata helps visual components to talk to the data layer via ORM – defining the graph of objects which should be uploaded or updated. The same applies to the security subsystem, report generator and other parts of the platform.
The rich web UI is declarative: you define screens layout in a visual editor or XML choosing from 70+ visual components ranging from all sorts of buttons to Google Maps and dynamic charts. Then you add the initialization and event handling logic in Java controllers. Considering data aware components, you can create a sophisticated UI very quickly and it will remain easy to maintain, thanks to clear separation between code and layout. If the choice of available components is not enough, there is a facility to integrate external JavaScript, GWT or Vaadin components.
An important part of CUBA user interface is the Generic Filter – a component which allows users to create their own search conditions. A developer just needs to drop the component to a browser screen (a screen showing a list of entities) and forget about it. Users or administrators will define conditions they want to search on themselves.
All user actions are controlled by the security subsystem. The role based model controls CRUD access down to entity attributes, and even certain screen components or custom tokens which you can use in your code. Row level security helps to control access to certain data records – for example users from a regional department will only see documents created by this department. The security settings are configured at runtime in the UI of your application, so all changes can be done by system administrators on the fly. Finally, all changes to the data are logged, so you will see who changed what and when – handy for debriefing when something went wrong!
In addition to the above, CUBA provides many features out of the box, including:
- User management and administration tools
- Report management
- Business process management with an integrated visual designer
- Multilanguage interface and multiple timezones support
- Full text search
- Generic REST API
Where can I deploy my application?
When it comes to the deployment stage and environment options, you have a lot of freedom here. CUBA applications can be deployed in a variety of configurations, starting from a single server running everything, to highly available configurations with separate middleware and web clusters. The platform supports PostgreSQL, Oracle Database, Microsoft SQL Server, MySQL and HSQL (typically used for prototyping) out of the box, and you can switch from one to another as your project grows. It is also important that CUBA applications can be deployed to any Java EE Web Profile server, such as Jetty, Tomcat, Glassfish or Websphere. Of course you can encapsulate your application in Docker and/or run it in popular PaaS clouds like CloudFoundry, OpenShift or Jelastic.
Sounds good, so how do I develop CUBA applications?
All you need to develop applications with CUBA Platform is Java SE, XML and JPQL – which makes your application code more uniform and easier to maintain. This also makes your development team more flexible – you don’t really need a subteam of Web developers or Java EE gurus.
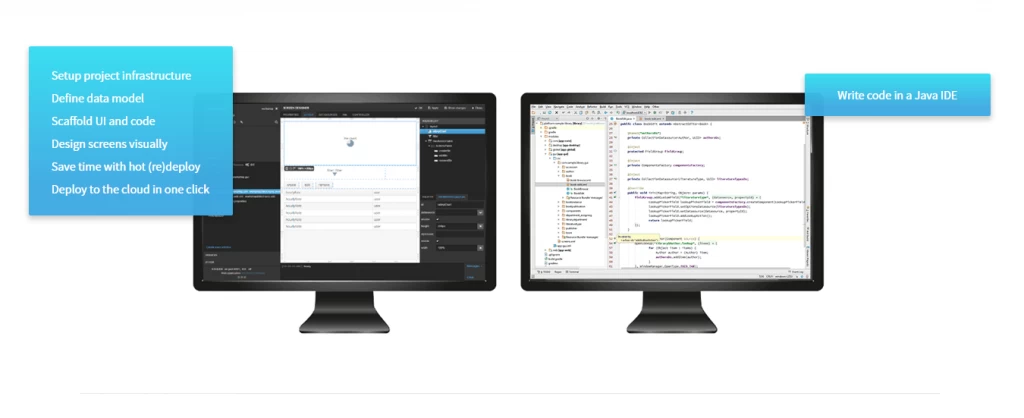
You create your business logic in an IDE of your choice like IntelliJ IDEA or Eclipse, but CUBA also features Studio – a supplementary visual tool which automates the whole range of CUBA-specific tasks:
- sets up project infrastructure
- enables visual design of UI and data model
- scaffolds CRUD screens with multiple layout options
- keeps DB up-to-date by automatically generating and running update scripts
- generates stubs for handlers, services, etc.
All changes between Studio and the IDE are synchronized, so you have full freedom to choose where to make them. And to boost developer performance even further, Studio automatically hot deploys all your code except for the data model. Thus, Studio eliminates a lot of routine work and boilerplate code without restricting the tools you use to write code.
If you think of upgrading your legacy system to a modern stack, CUBA has an answer for this too. Studio features a migration tool, which will convert a legacy database to CUBA-compliant and automatically generate screens based on the DB schema. Thus you will only need to add custom screens and migrate business logic.
CUBA Studio Installation
- Prerequisites
-
- Make sure that Java SE Development Kit (JDK) 8 is installed by running the following command in the console:
java -versionThe command should return the Java version, e.g.
1.8.0_152. - If you are using OpenJDK on Linux, install OpenJFX, for example:
sudo apt-get install openjfx - If you connect to the internet via a proxy server, some Java system properties must be passed to the JVM running Studio and Gradle. These properties are explained here: http://docs.oracle.com/javase/8/docs/technotes/guides/net/proxies.html (see properties for HTTP and HTTPS protocols).
It is recommended to set these properties system-wide in the
JAVA_OPTSenvironment variable. The Studio launch script passesJAVA_OPTSto the Java executable.
- Make sure that Java SE Development Kit (JDK) 8 is installed by running the following command in the console:
- Fresh installation of CUBA Studio
-
- Download an appropriate installer or ZIP archive from https://www.cuba-platform.com/download.
- Run the installer or unzip the archive to a local directory, e.g.
c:\work\studio. - Launch the installed application or open the command line, go to
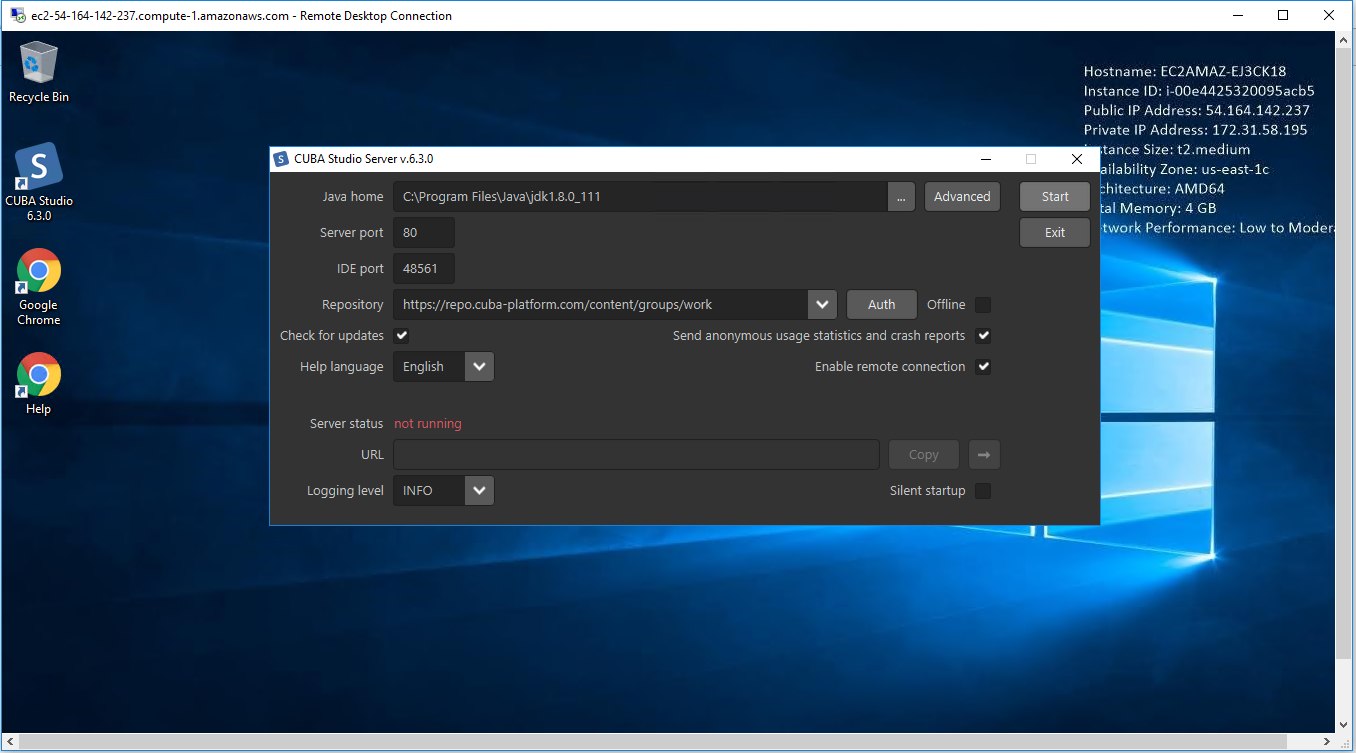
bindirectory and runstudio.batorstudiodepending on your operating system. - In the CUBA Studio Server window, enter the following parameters:
- Server port − CUBA Studio server port (the default port is 8111).
- Remote connection – by default, Studio accepts connections only from localhost. Select this checkbox if you need to connect to this Studio instance from a remote host.
- Silent startup – if selected, the Studio server starts in tray and opens UI in default browser automatically. This option is available only for Windows.

- Click Start to run the Studio server.
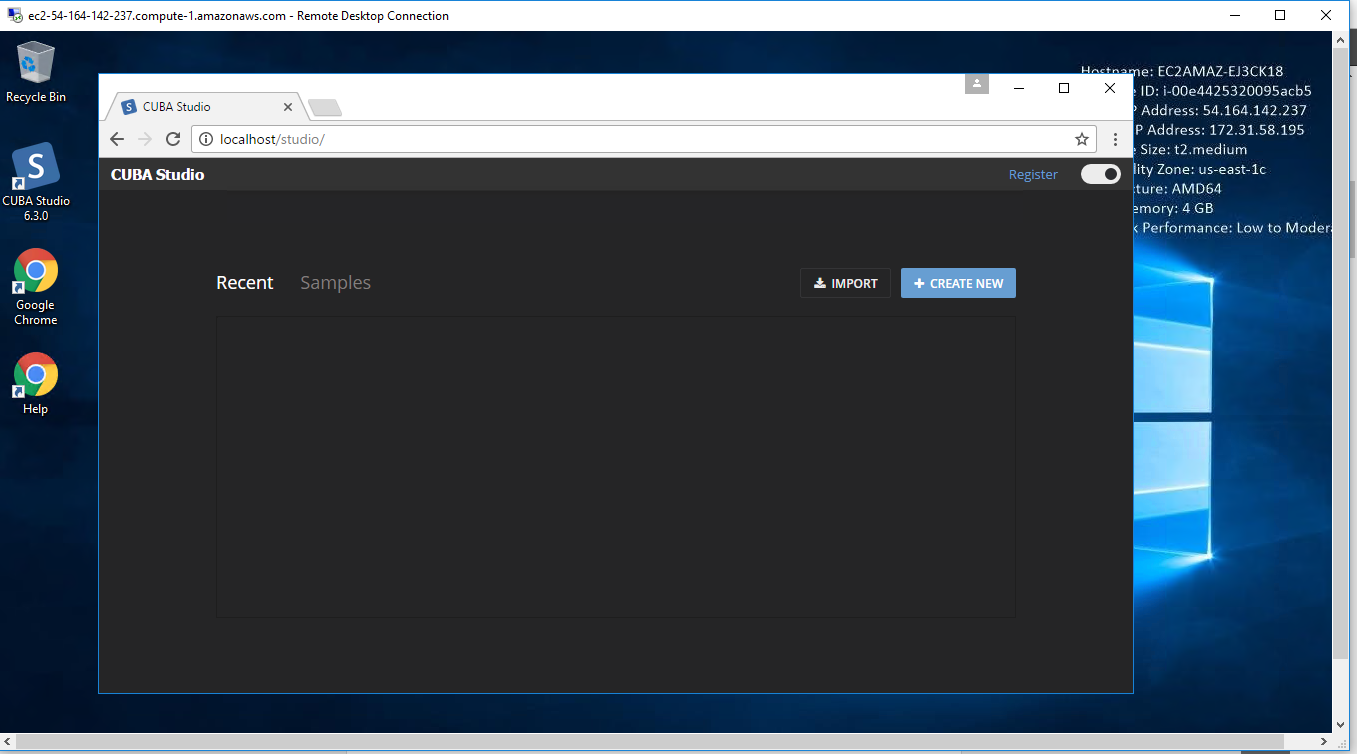
When the web server is started, the URL of the Studio interface will appear in the URL field. By clicking →, you can open the address in your default web browser; by clicking Copy you can copy the address to the clipboard.
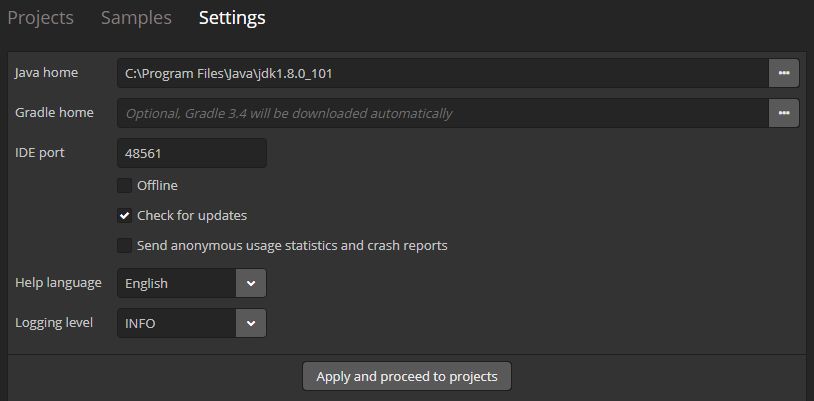
- Open the specified URL in the web browser and switch to the Settings tab in the Studio web interface. Enter the following parameters:
- Java home − JDK installation to be used for building and running projects. If you have set the
JAVA_HOMEenvironment variable as described in the beginning of this chapter, it will appear in this field. Otherwise, Studio will try to find your Java installation itself. - Gradle home – Gradle installation to be used for building projects. Leave it empty; in this case, the required Gradle distribution will be downloaded automatically.
If you want to use a local Gradle distribution, enter a path to the respective directory. Current version of the project build system is tested with Gradle 4.3.1.
- IDE port − IDE plugin listening port (the default port is 48561).
- Offline – enable working with projects without an Internet connection, provided that all the required libraries have been previously downloaded from the repository.
- Check for updates – check for new versions on every start.
- Send anonymous statistics and crash reports – enable Studio to send error statistics to developers.
- Help language – built-in help language.
- Logging level – the logging level: TRACE, DEBUG, INFO, WARN, ERROR, or FATAL. INFO by default.

- Java home − JDK installation to be used for building and running projects. If you have set the
- Click Apply and proceed to projects.
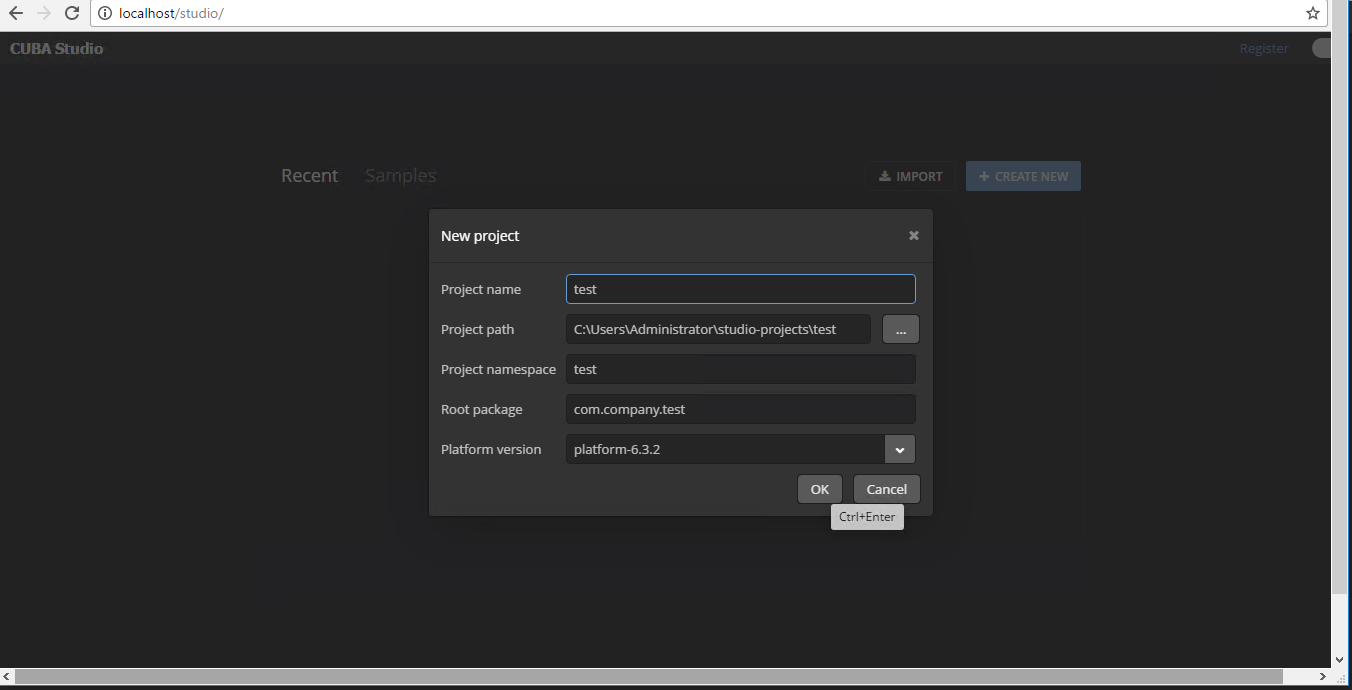
- Click Create new to create a new project, or Import to add an existing one to the Recent list.
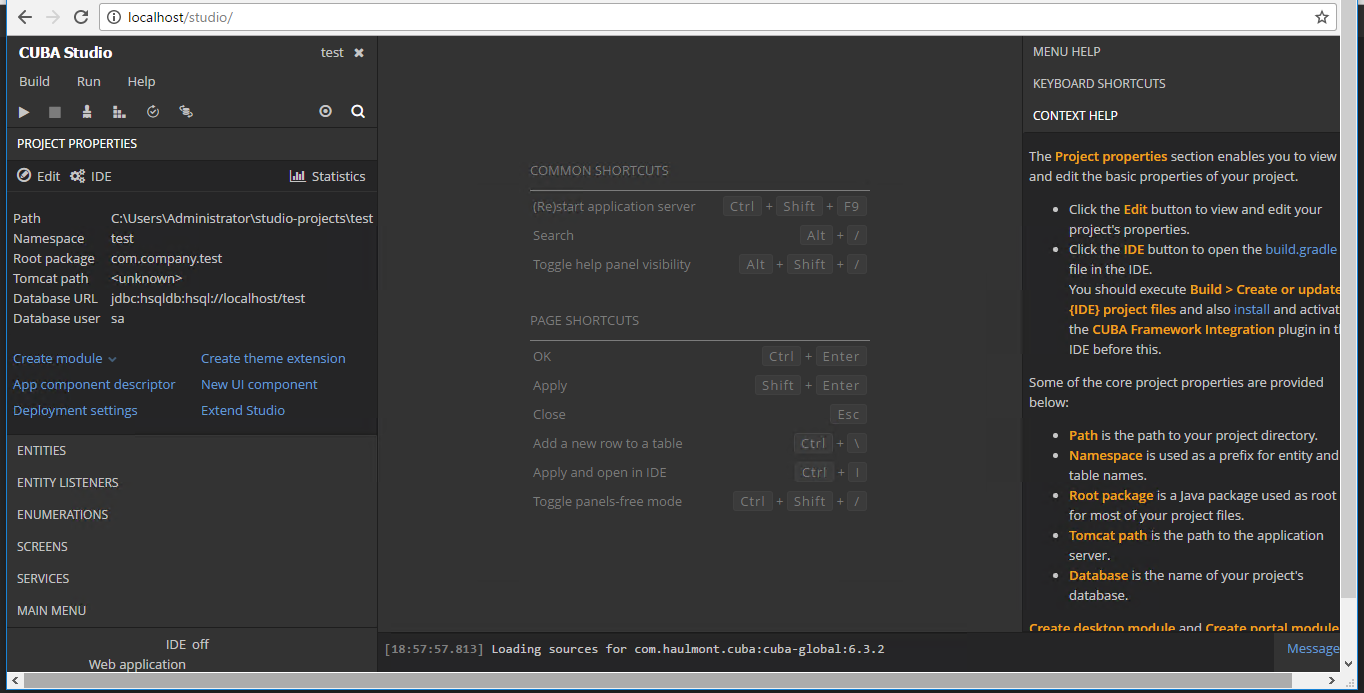
- Once the project is opened, Studio will download the source code of the platform components and save it to the local folder. Before building the project, it is recommended to wait until the download is finished and make sure that the background task indicator in the bottom left corner has faded out.
- Updating CUBA Studio
-
If you are updating Studio to a newer bug-fix version (e.g. from 6.5.0 to 6.5.1), install it to the existing folder, e.g. on Windows it would be
C:\Program Files (x86)\CUBA Studio 6.5. When installing a new minor or major version, use a separate folder, e.g.CUBA Studio 6.6.If installed from Windows EXE installer or ZIP archive, Studio supports auto-update on newer bug-fix releases. Update files are saved in the
~/.haulmont/studio/updatefolder. In case of any problems with the new version, you can remove the update files and Studio will revert to the version installed manually.Auto-update does not work for minor and major releases and if Studio was installed from macOS DMG. In this case, you should download new installer and run it manually.
Cuba Studio on Cloud for AWS
Features
Major Features of Cuba Studio
A huge amount has happened recently. Following the official launch of CUBA on 1st of June, we have rolled out a new release, published our first article on a few Java sites and presented the platform at the Devoxx UK сonference in London. But before the rush continues, about it is an apt time to articulate the philosophy behind CUBA.
The first words associated with enterprise software development will probably be: slow, routine, complex and convoluted – nothing exciting at all! A common approach to combat these challenges is raising the level of abstraction – so that developers can operate with interfaces and tools encapsulating internal mechanisms. This enables the focus on high-level business requirements without the need to reinvent common processes for every project. Such a concept is typically implemented in frameworks, or platforms.
The previous CUBA article explained why CUBA is more than just a bunch of well-known open-source frameworks comprehensively integrated together. In brief, it brings declarative UI with data aware visual components, out-of-the-box features starting from sophisticated security model to BPM, and awesome development tools to complement your chosen IDE.
You can easily find more details on our Learn page, so instead of listing all of them I’ll try to “raise the abstraction level” and explain the fundamental principles of CUBA.
Practical
The platform is a living organism, and its evolution is mostly driven by specific requests from developers. Of course, we constantly keep track of emerging technologies, but we are rather conservative and employ them only when we see that they can bring tangible value to the enterprise software development. As a result, CUBA is extremely practical; every part of it has been created to solve some real problem.
Integral
Apart from the obvious material features, the visual development environment provided by CUBA Studio greatly reduces the learning curve for newcomers and juniors. It is even more important that the platform brings a unified structure to your applications. When you open a CUBA-based project, you will always know where to find a screen, or a component inside of it; where the business logic is located and how is it invoked.
Such an ability to quickly understand and change the code written by other developers cannot be underestimated as a significant benefit to continual enterprise development. An enterprise application lifecycle may last tens of years and your solution must constantly evolve with the business environment, regardless of any changes in your team. For this reason, the flexibility to rotate, or scale up or down the team when needed, is one of the major concerns for the companies, especially those who outsource development or have distributed teams.
Open
One of the key principles of CUBA is openness. This starts with the full platform source code, which you have at hand when you work on a CUBA-based project. In addition, the platform is also open in the sense that you can change almost any part of it to suit your needs. You don’t need to fork it to customize some parts of the platform – it is possible to extend and modify the platform functionality right in your project. To achieve this, we usually follow the open inheritance pattern, providing access to the platform internals. We understand that this can cause issues when the project is upgraded to a newer platform version. However, from our experience, this is far less evil than maintaining a fork, or accepting the inability to adapt the tool for a particular task.
We could also make a number of specific extension points, but in such case we would have to anticipate how application developers will use the platform. Such predictions always fail, sooner or later. So instead we have made the whole platform extension-friendly: you can inherit and override platform Java code including the object model, XML screens layout and configuration parameters. Transitively, this remains true for CUBA-based projects. If you follow a few simple conventions, your application becomes open for extension, allowing you to adapt the single product for many customers.
Symbiotic
CUBA is not positioned as a “thing-in-itself”. When a suitable and well-supported instrument already exists and we can integrate with it without sacrificing platform usability, we will integrate with it. An illustration of such integrations is full-text search and BPM engines, JavaScript charts and Google Maps API. At the same time, we have had to implement our ownreport generator from scratch, because we could not find a suitable tool (technology and license wise).
The CUBA Studio follows this principle too. It is a standalone web application and it doesn’t replace your preferred IDE. You can use Studio and the IDE in parallel, switching between them to accomplish different tasks. WYSIWYG approach, implemented in Studio, is great for designing the data model and screens layout, while the classic Java IDE is the best for writing code. You can change any part of your project right in the IDE, even things created by Studio. When you return to Studio, it will instantly parse all changes, allowing you to keep on developing visually. As you see, instead of competing with the power of Java IDEs, we follow a symbiotic approach. Moreover, to raise coding efficiency, we’ve developed plugins for the most popular IDEs.
When we integrate with a third-party framework, we always wrap it in a higher level API. This enables replacing the underlying implementation if needed and makes the whole platform API more stable long term and less dependent on the constant changes in the integrated third-party frameworks. However, we don’t restrict the direct use of underlying frameworks and libraries. It makes sense if CUBA API does not fit a particular use case. For example, if you can’t do something via Generic UI, you can unwrap a visual component and get direct access to Vaadin (or Swing). The same applies for data access; if some operation is slow or not supported by ORM, just write SQL and run it via JDBC or MyBatis. Of course, such “hacks” lead to more complex and less portable application code, but they are typically very rare compared to the use of standard platform API. This knowledge of inherent flexibility and a sense of “Yes you can” adds a lot of confidence to developers.
Wide use area
We recommend using CUBA if you need to create an application with anything starting from 5-10 screens, as long as they consist of standard components like fields, forms, and tables. The effect from using CUBA grows exponentially with the complexity of your application, independent of the domain. We have delivered complex projects in financial, manufacturing, logistics and other areas. As an example, a non-obvious, but popular use case is using CUBA as the backend and admin UI, while creating the end-user interface with another, lighter or more customizable web technology.
AWS
Installation Instructions For Windows
Note: How to find PublicDNS in AWS
Step 1) RDP Connection: To connect to the deployed instance, Please follow Instructions to Connect to Windows instance on AWS Cloud
1) Connect to the virtual machine using following RDP credentials:
- Hostname: PublicDNS / IP of machine
- Port : 3389
Username: To connect to the operating system, use RDP and the username is Administrator.
Password: Please Click here to know how to get password .
Step 2) Click the Windows “Start” button and select “All Programs” and then point to CUBA Studio.
Step 3) Other Information:
1. Application URL : Access the application via a browser at http://PublicDNS/CUBA Studio
2.Default installation path: will be in your root folder “C:\Program Files (x86)\CUBA Studio 6.3.0”
3.Default ports:
- Windows Machines: RDP Port – 3389
- Http: 80
- Https: 443
Note: Click on Desktop icon – Press start then App will open in browser.
Configure custom inbound and outbound rules using this link
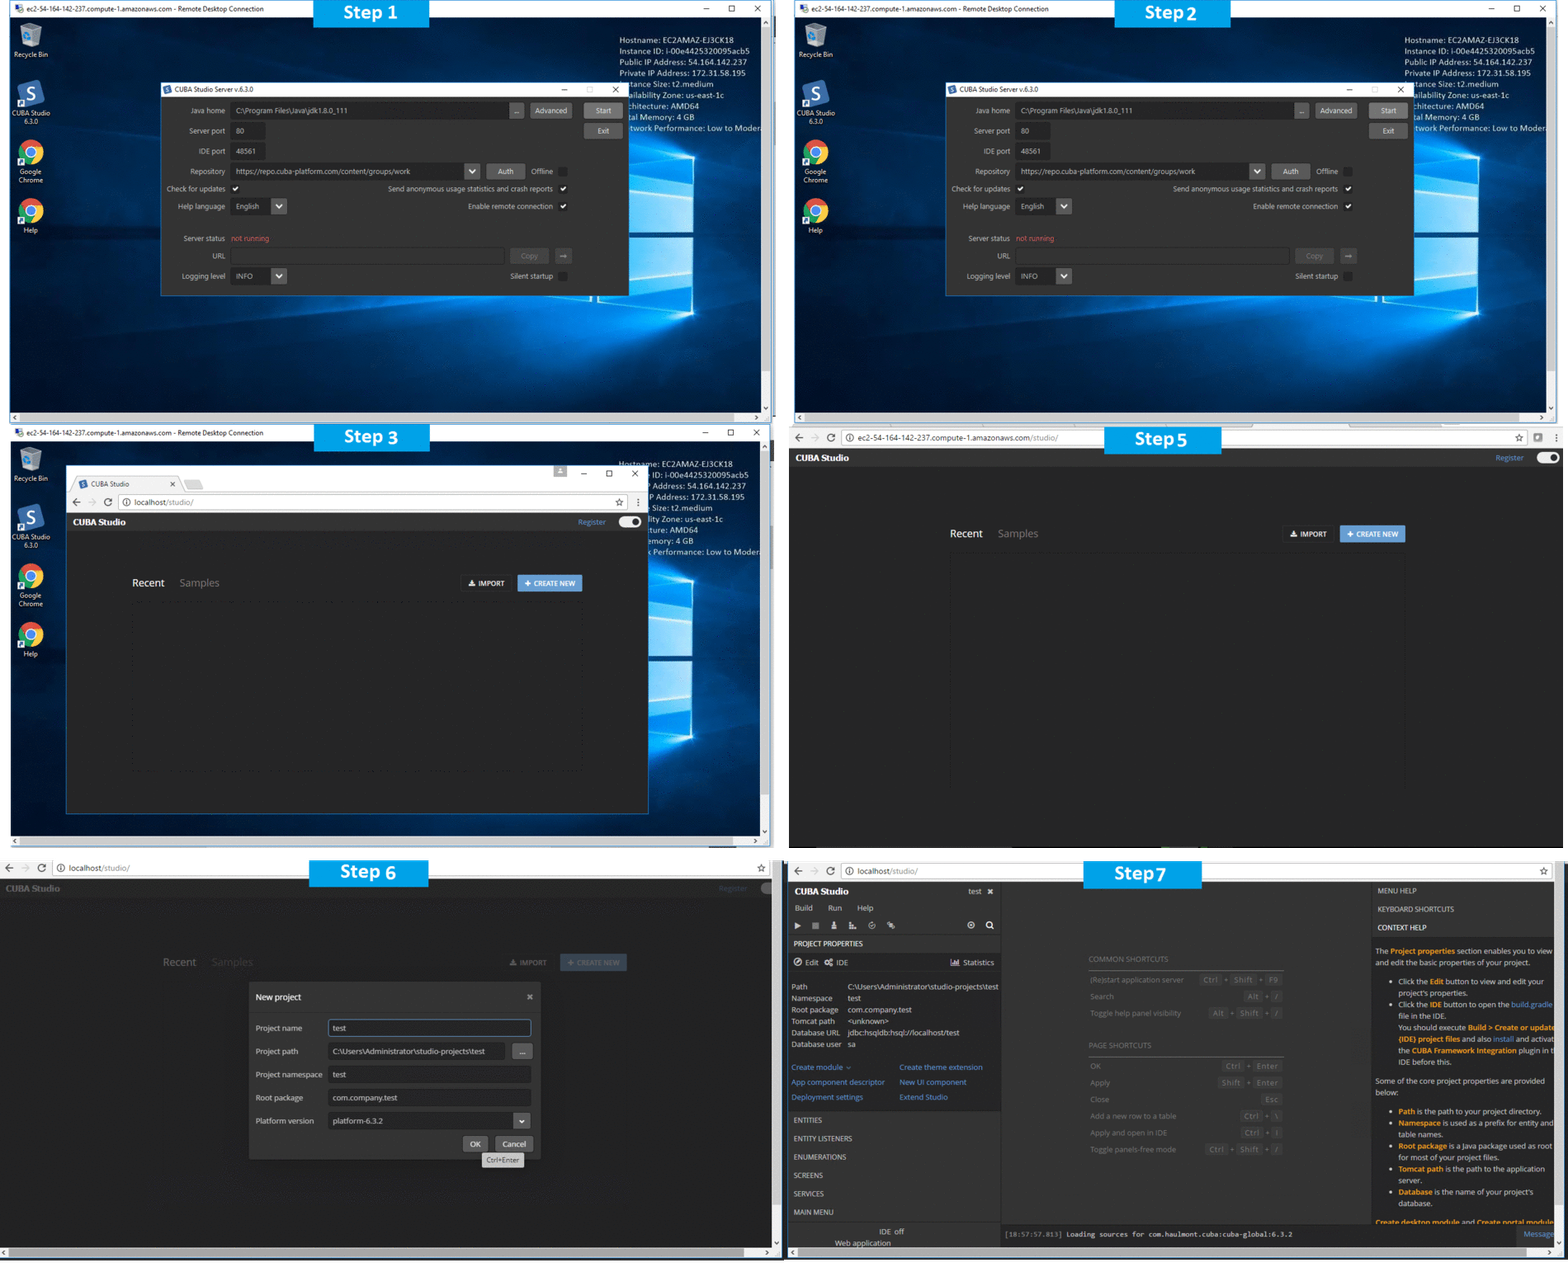
Installation Step by Step Screenshots


