
1-click AWS Deployment 1-click Google Deployment
Overview
Visual Studio 2017 is the most powerful Universal Windows Platform development environment. It brings unparalleled productivity improvements, a streamlined acquisition experience and enhanced debugging tools for Universal Windows Platform developers.
Redefined fundamentals
We have focused on enhancing the efficiency of basic tasks you encounter every day, starting with a brand-new lightweight and modular installer, a faster and more responsive IDE from start-up to shut down and a new way to view, edit and debug any code without projects and solutions.
Brand-new lightweight and modular installation tailored to your needs – The new lightweight and componentized installer breaks Visual Studio down into independent workloads so you can install just what you need, helping you get to coding much faster. The Universal Windows Platform development workload gives you the right tools to be productive in authoring, debugging and publishing UWP apps. If something is missing, you will be able to add it later using the Visual Studio Installer.

Faster startup and shorter solution load time – Visual Studio is three times faster for a cold start and two to three times faster for solution loading. This has been made possible by moving extensions out of the startup path using an on-demand-load approach and optimizing and deferring cache initializations. For example, the first launch startup times have improved from 206 seconds in VS 2015 to 64.2 seconds in VS 2017.
Boosted Productivity
In Visual Studio 2017, we have made improvements to code navigation, IntelliSense, refactoring, code fixes and debugging to save you time and effort on everyday tasks irrespective of language or platform.
IntelliSense – You can now blaze through authoring your XAML with the new IntelliSense completion for x:Bind and namespace completion.

IntelliSense has been enhanced with improved filtering that makes long lists much more manageable. IntelliSense is also smarter with CamelCase search and the ability to select the best matching result from the list instead of simply picking the top result.

Code refactoring – Visual Studio 2017 expands the set of refactorings and fixes to help you maintain a readable code base and accelerate your development workflows. For example, you can de-clutter your XAML using the “Remove Unnecessary Namespaces” quick fix and retain only those you need. If you end up removing a namespace that you need later, the “add missing namespace” quick fix helps you add it back.

Navigation – Navigate To is much more powerful with better filtering and preview. We have also enhanced Find All Reference by adding color, grouping and a peek preview in the Find All References window.

Run to Click – Run to Click does exactly what it sounds like; it executes a program until it reaches the targeted line of code and breaks in debug mode. Essentially, it removes the need for developers to constantly add, hit and remove temporary breakpoints by combining all these actions into one click.

Streamlined Azure Development
Visual Studio 2017 comes with a suite of Connected Services that enables you to easily create engaging cloud-first applications powered by Microsoft Azure. Directly from the IDE, you can configure and connect to an Azure Mobile App Service to enable cloud storage, push notifications, authentication and social integration. You can also connect to HockeyApp for app analytics, beta distribution, in-app feedback and track customer metrics.

Five star UWP app development
Discover accessibility and performance issues with the new UI Analysis tool – The UI Analysis tool examines the elements in your app and helps you quickly discover hard-to-find issues around accessibility and UI performance. Additionally, it points to exactly what needs to be done to fix these issues, resulting in high performant five-star apps.

Edit XAML for a running app with runtime editing tools – XAML Edit and Continue lets you change your XAML while the app is running and get immediate feedback. On its own, Edit and Continue is amazingly powerful. When combined with the UI Debugging tools, developers can fix problems faster than ever before and create performant, adaptive and stunning UI.
Auto-generate visual assets for your UWP apps – The brand new manifest asset generator enables you to create all the visual assets for your app from within the Manifest Designer. Using a single source image, you can now create tiles, logos, icons and splash screens at any or all scales to fit every type of device your app targets. We take care of adhering to all the design guidelines suggested for Windows 10 apps like padding and background colors.

Visual Studio Community 2017 RC can be downloaded from the link below. You need to have a Microsoft account to download the package. https://www.visualstudio.com/downloads/
After clicking on the link above, the following download page appears:
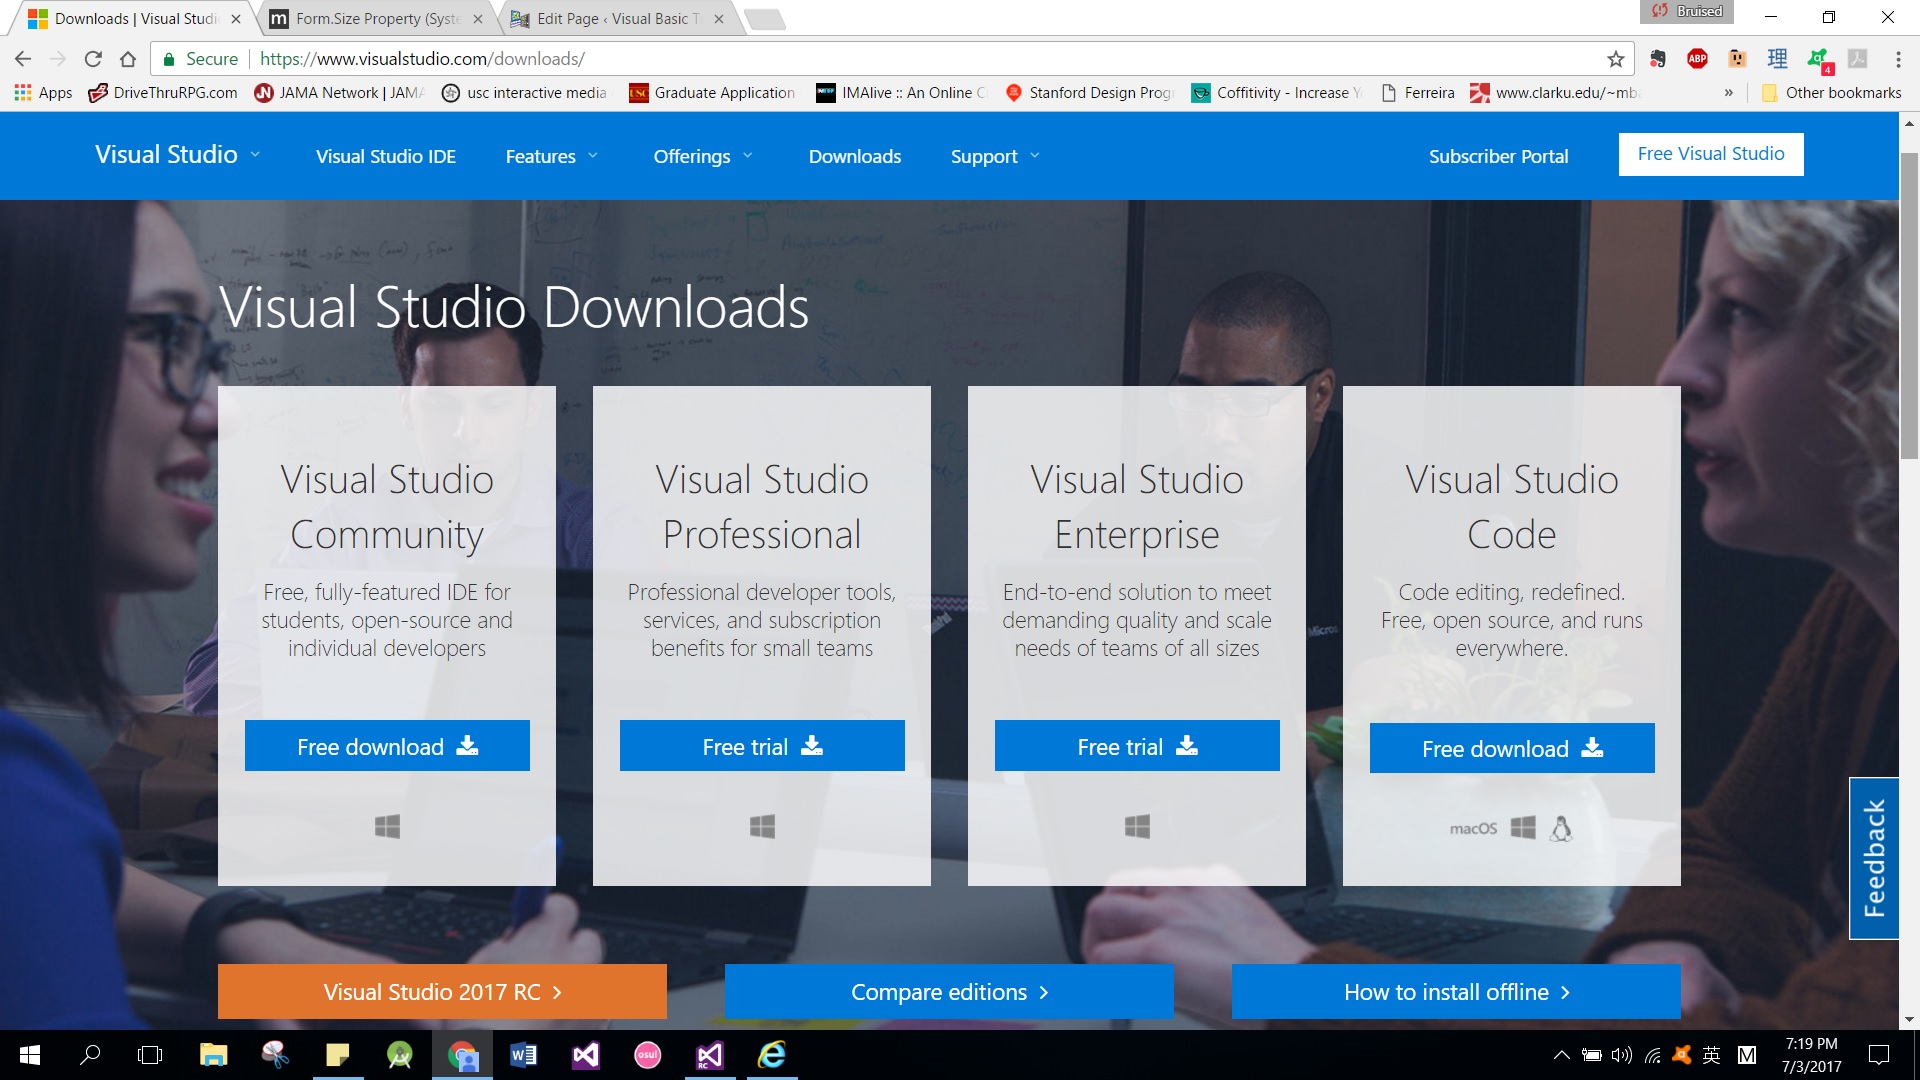
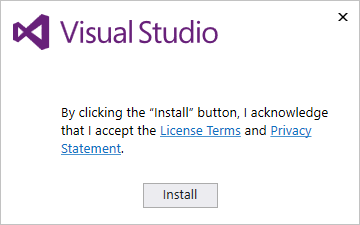
After downloading the file, run the VS2017RC community installer file vs_community__695901156.1467100807 (7).exe. If you receive a User Account Control notice, click Yes. Next, it will ask you to acknowledge the Microsoft License Terms and the Microsoft Privacy Statement, as shown below. Click Install to continue.
You’ll see several status screens that show the progress of the installation. After the installer is finished installing, it’s time to pick the feature set that you want, as shown in below figure. Since we are keen on developing Visual Basic 2017 desktop app, we will select the .NET desktop development component. Besides that, you might want to install a particular language by clicking the Language packs. After making your selections, click install.
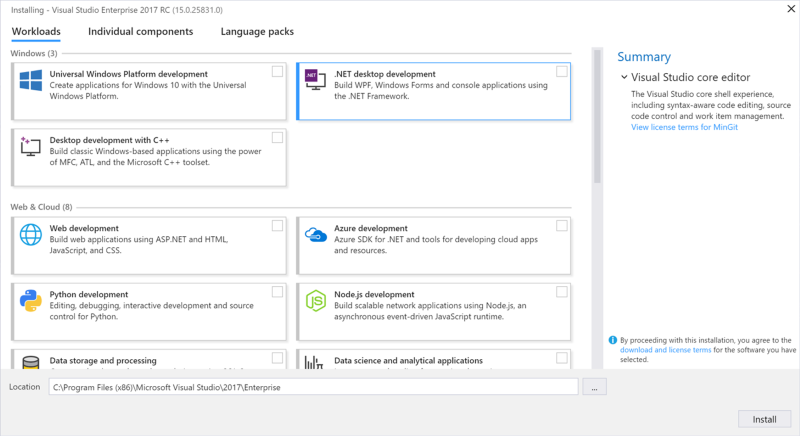
Upon completion of the installation, you are now ready to launch Visual Studio 2017 RC and start programming in Visual Basic 2017The .NET Desktop application development in Visual Studio 2017 is designed for building WPF, Windows Forms, and console apps using.NET Framework. With shorter solution load time, improved IntelliSense, code navigation, and refactoring save you time and effort on everyday tasks, you can build desktop apps with great UI and better performance.
Visual Studio Community 2017 Start Page
When you first launch Visual Studio Community 2017, the following start Page appears, as shown in the below figure:

Now click on New Project under Start to launch the New Project window,as shown in below figure:

In the New Project window, you can build many kinds of applications using different programming languages. They are Visual Basic, Visual C#, Visual C++, Visual F#, JavaScript, Python and more. As we are only dealing with Visual Basic, we shall click on Visual Basic Windows Form APP(.NET Framework). Before you continue, enter the application name at the bottom. Change the default name WindowsApplication1 to My First vb2017 project.
Visual Basic Community 2017 Integrated Development Environment
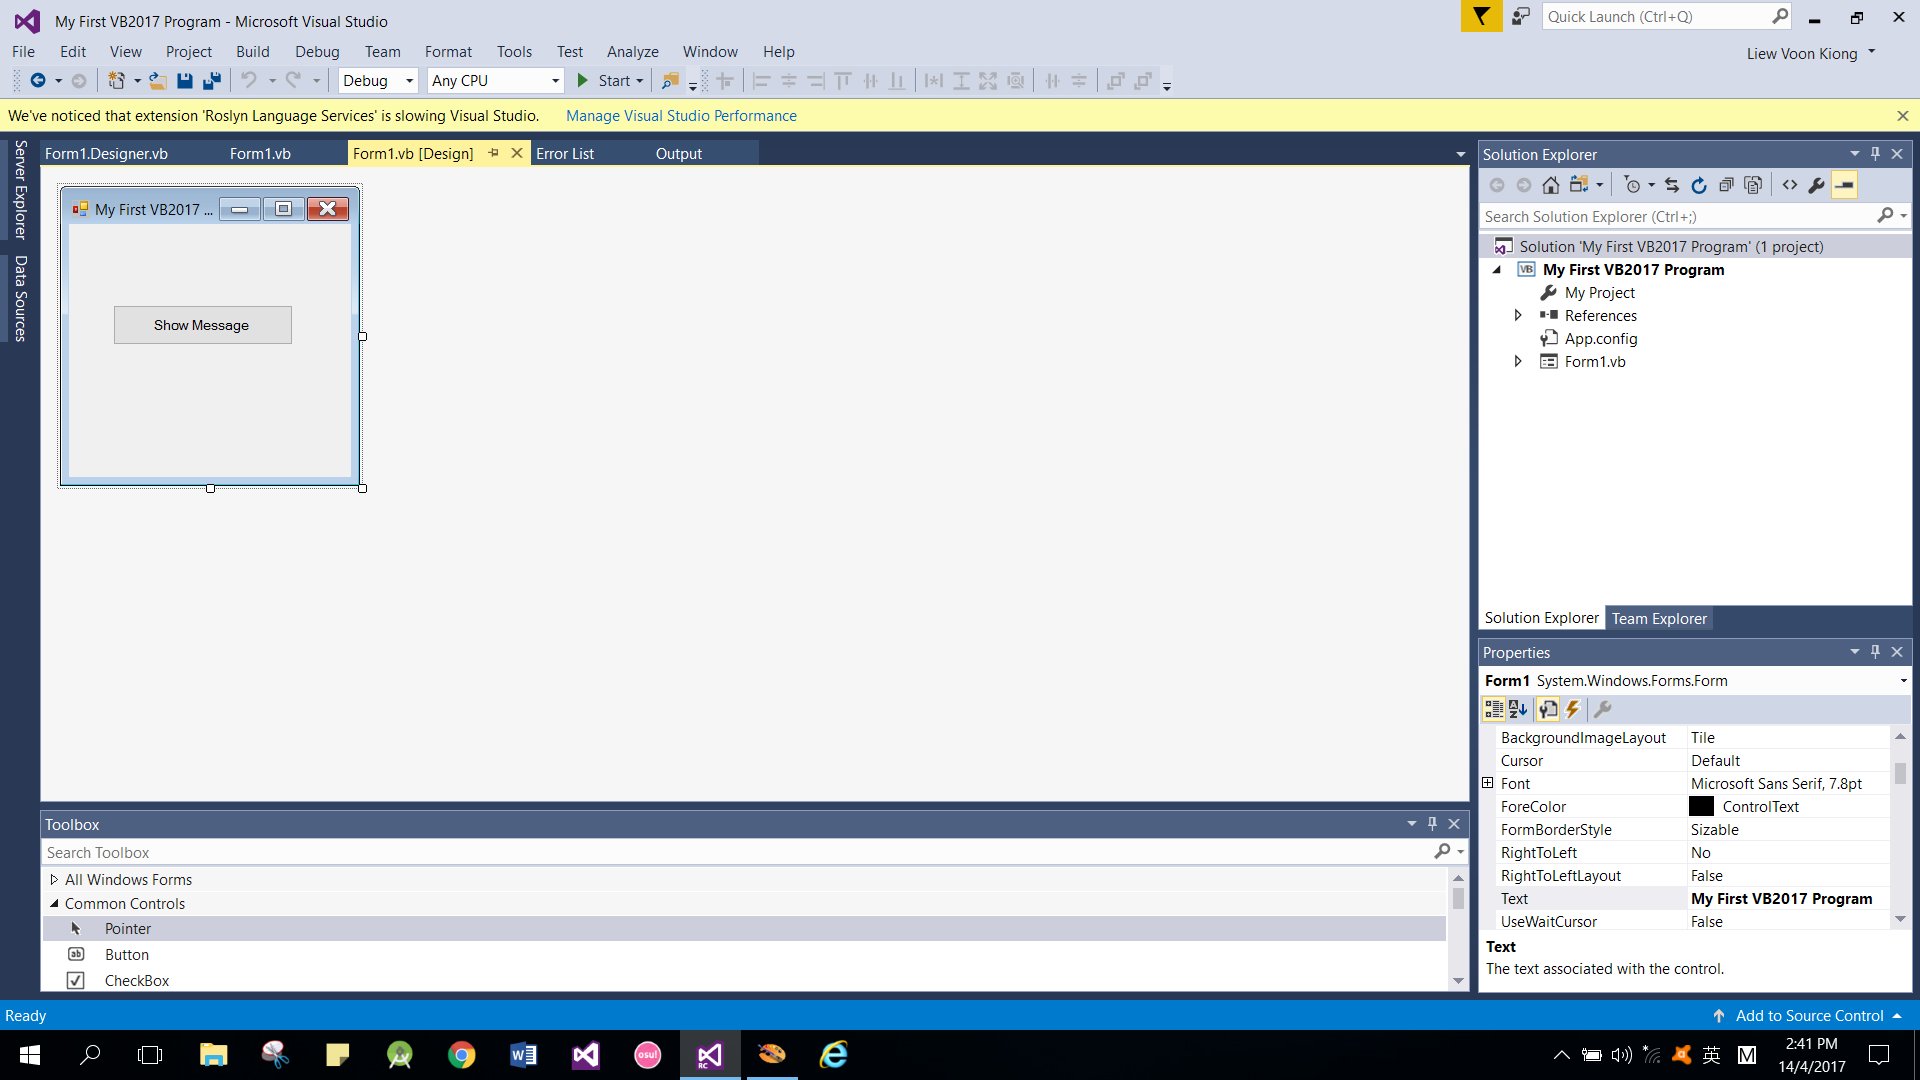
Upon clicking Windows Form Application, the Visual Basic Community 2017 Integrated Development Environment appears, as shown in below figure. You can see that the name of the project you entered earlier appears on the top right corner of the IDE.

Visual Basic Community 2017 IDE comprises a few windows, the Form window, the Solution Explorer window and the Properties window. It also consists of a toolbox which contains many useful controls that allow a programmer to develop his or her Visual Basic 2017 programs. The toolbox can be hidden or dragged to the bottom or side of the window.
Now, we shall proceed to show you how to create your first program in Visual Basic 2017. First, change the text of the form to My First vb2017 Program in the properties window, it will appear as the title of the program. Next, insert a button and change its text to Show Message. The design interface is shown in below figure:
Click on the Show Message button to bring up the code window and enter the following statement between Private Sub and End Sub procedure, as shown in the below figure:
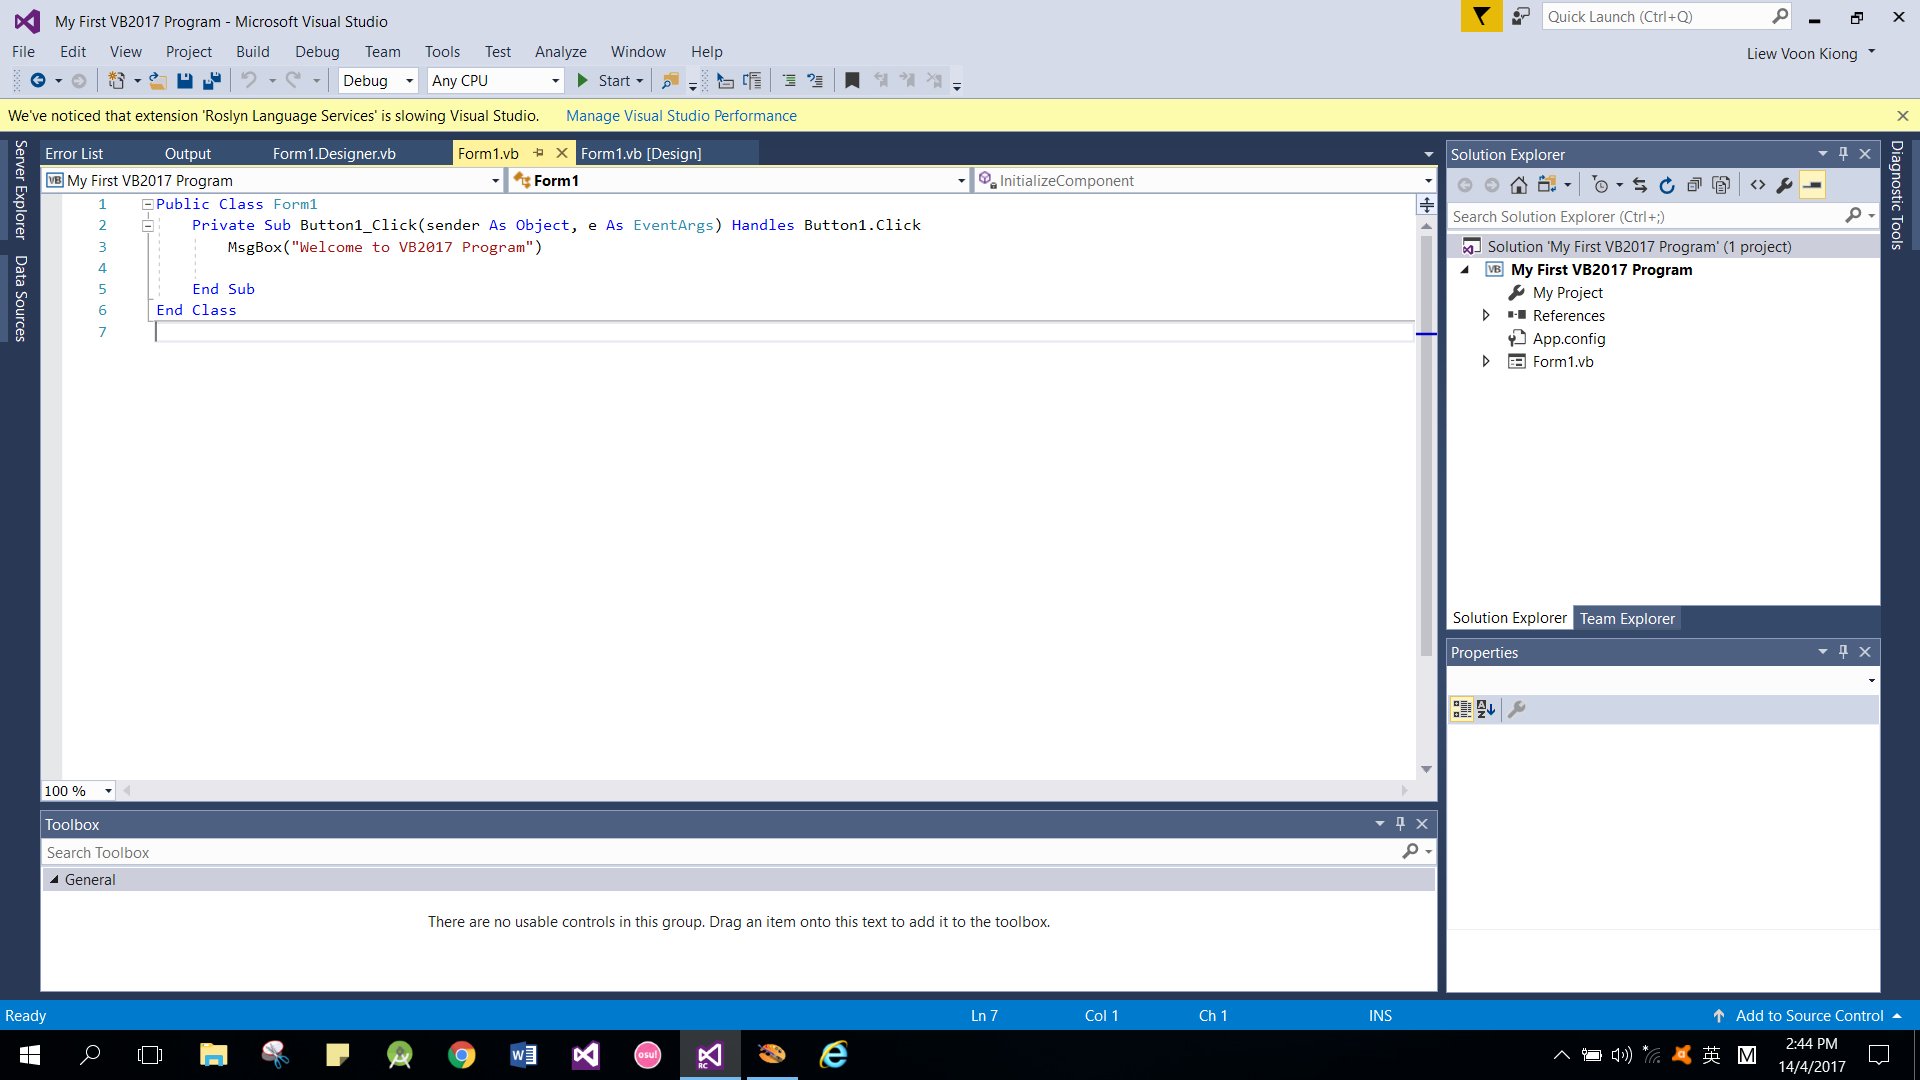
When you run this program and click on the show Message button, you should get the following popup message box.

Advantages of using visual Studio
-The numerous editions of this program are all easy to use. As a developer, the Visual Studio will help you to maintain your code from the onset. It has features such as improved Go To and Inspection Setting, which makes it possible.
-It can handle diverse programming languages perfectly well, which is one of the things that make it unique. It has various tools for that.
-Visual Studio can be best described as a complete tool. In other words, it has everything you need for your software development project.
-This tool is also super easy to setup. Even as a beginner, you won’t struggle with the installation process, including how to use it.
Disadvantages of using Visual Studio
-Most computers cannot handle the demands of the tool. The reason is due to high hardware consumption. Your computer needs to have suitable hardware available before you can utilize all the features on the tool.
-The community edition is free but limited in diverse areas. But if you need to use the enterprise edition, which has more features, you have to pay more. The enterprise edition of this software development tool is also a bit on the high side.
-This tool is selective when it comes to the choice of the operating system. It works best on a computer with Windows operating systems. It’s not that it doesn’t work on Mac. There is a Visual Studio version for the Mac operating system. But it is not as complete as the Windows version. In other words, you won’t find some of the useful features in it.
Microsoft Visual Studio Community 2017 is a new full-featured edition that enables you to unleash the power of Visual Studio to develop cross-platform solutions. A free, fully-featured, and extensible IDE for creating modern applications for Windows, Android, and iOS, as well as web applications and cloud services.
Visual Studio Community Edition is a free version of Visual Studio similar in feature set to the Professional Edition. Individual developers are free to use Community for building free and paid apps as well has open source software.
Visual Studio Community Edition on Cloud runs on Amazon Web Services (AWS) and Google Cloud Platform (GCP) is built to work well in a wide variety of network and machine conditions.
Cognosys Provides Hardened images of Visual Studio Community Edition on the cloud ( AWS marketplace, Azure and Google Cloud Platform).
Deploy Visual Studio Community Edition securely on cloud i.e. AWS marketplace, Azure and Google Cloud Platform (GCP)
Features
Major Features of Visual Studio Community
- Extend functionality with Visual Studio plugins: Unlike the Express version, Microsoft Visual Studio Community features plugin support, offering programmers access to thousands of extensions in the Visual Studio Gallery.
- Create, debug and compile apps for any platform: Programmers can experiment with C++ , AJAX, JavaScript, CSS, ASP.NET, Silverlight and the list of compatible languages does not end here. Its functionality can be extended to support languages such as Python.
- Azure SDK integration: Allowing you to upload your projects to Azure and analyze their performance and efficiency using the Application Insights service.
- Professional-grade development environment: Microsoft Visual Studio Community is a full-featured edition of Visual Studio, whose functionality can be extended using plugins in the official gallery, so as to ease the development process
Seven Awesome New Features In Visual Studio 2017
1. EditorConfig Built In
The EditorConfig project has been available for Visual Studio 2015, but it required you to install a plugin to take advantage of the code-style configuration tool. With the release of 2017, EditorConfig is now built into the IDE. This means you can simply create an .editorconfig file in the root of your solution and check it into your source control. This will get your whole team using the same code format rules (once you can all agree on what they should be).
2. New Visual Studio Installer
Visual Studio 2017 also comes with a new installer. The new installer lets you put together an install of Visual Studio customized to the type of development you’re doing. You can install only the features you will need every day and leave out things that you might never need. This is a great way to keep the IDE small and snappy.
3. Manage Visual Studio Performance
The Manage Visual Studio Performance (under the Help menu) allows you to view the performance of your Visual Studio IDE and can even give you suggestions about extensions that might be impacting the performance of your environment! This includes turning on Lightweight Solution Load, which doesn’t load all the projects in a solution when you open the solution, only when you begin to work in that project. You can still navigate through the code, but the project won’t be loaded until you actually start to work with that project.
4. Mobile Development
With Microsoft’s acquisition of Xamarin a few years ago, .NET developers have been enjoying the Xamarin for free as a plugin to Visual Studio 2015. In Visual Studio 2017, it’s now one of the install options when installing Visual Studio! This is a signal that cross-platform, mobile development is now a first-class citizen in your Microsoft development toolbelt!
5. Live Unit Testing
Unit testing has been permeating every development stack over the last decade and Microsoft has followed the trend by making Live Unit Testing available. This means as you change your code, Visual Studio will let you know if your changes will break unit tests, or if they will not be covered by unit tests; in real time.
Running unit tests has almost always been an extra step of your development workflow, but with the Live Unit Testing indicators in your editor popping up as you edit code, it just happens. You can also click on an indicator in the editor and it will show you which tests are exercising that line of code. Unit testing for the win, anyone?
6. Better Javascript Support
With the proliferation of Javascript and Javascript frameworks like Angular, React, Ember, and Vue, it’s no surprise that VSCode has really gleaned a lot of support from the developer community. VSCode has excellent support for Javascript (ES5 and ES6) as well as framework support for Angular and React, including JSX.
7. Docker Support Built-In
With the adoption of containerization, microservices, and Microsoft’s own work with Docker to help support Windows Containers, it’s no surprise that developers are looking for tighter integration with Docker for their development environments. In Visual Studio 2015 (Update 3), you could install the Visual Studio Tools For Docker and get integrated support for Docker containers. Visual Studio 2017, builds this feature in and when choosing the application template from the File -> New menu, you can choose to turn on Docker support, giving you all the goodness of the plug-in, built in to Visual Studio.
AWS
Installation Instructions for Windows
Note: How to find PublicDNS in AWS
Step 1) RDP Connection: To connect to the deployed instance, Please follow Instructions to Connect to Windows instance on AWS Cloud
Connect to the virtual machine using following RDP credentials:
- Hostname: PublicDNS / IP of machine
- Port : 3389
Username: To connect to the operating system, use RDP and the username is Administrator.
Password: Please Click here to know how to get password
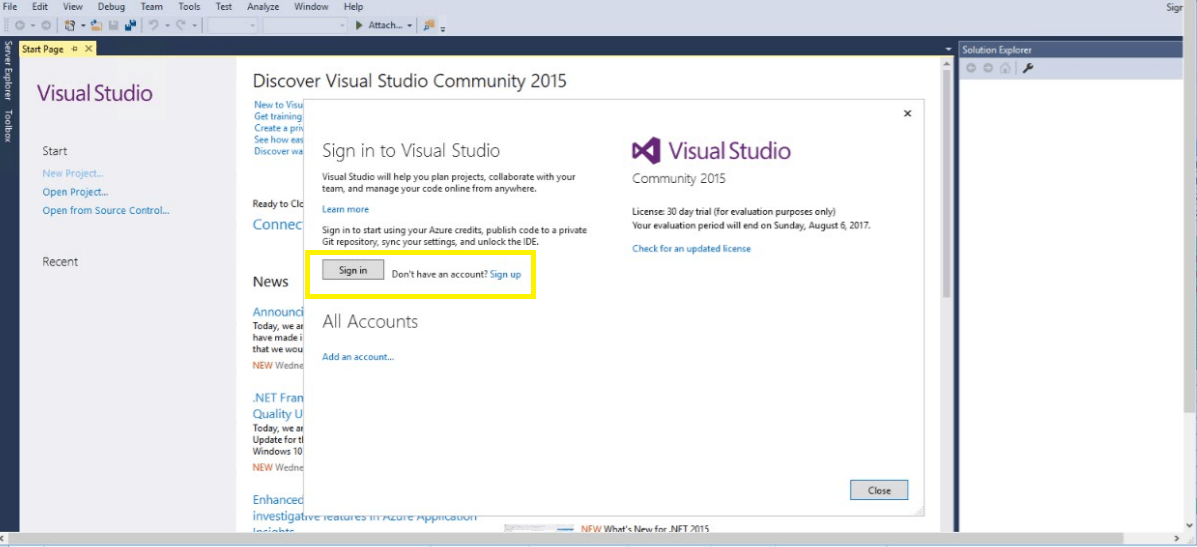
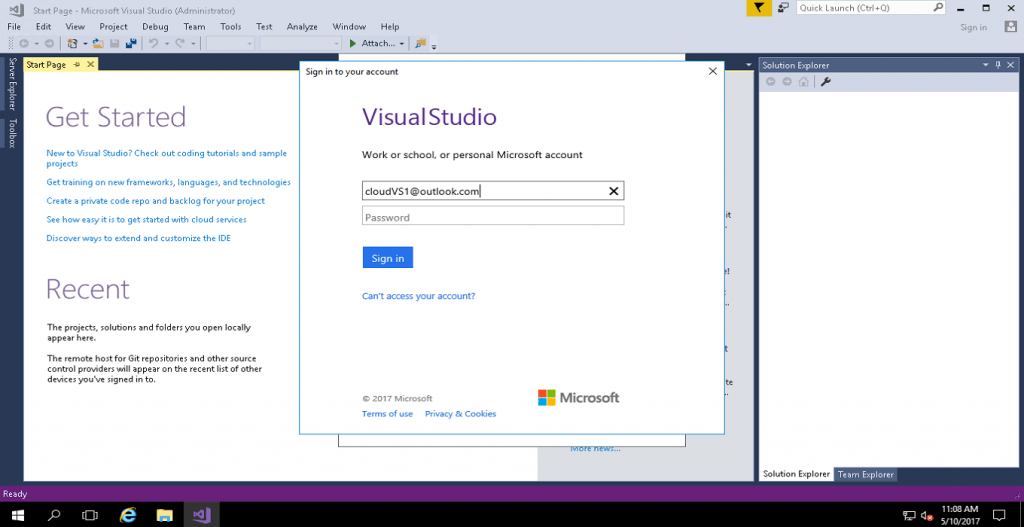
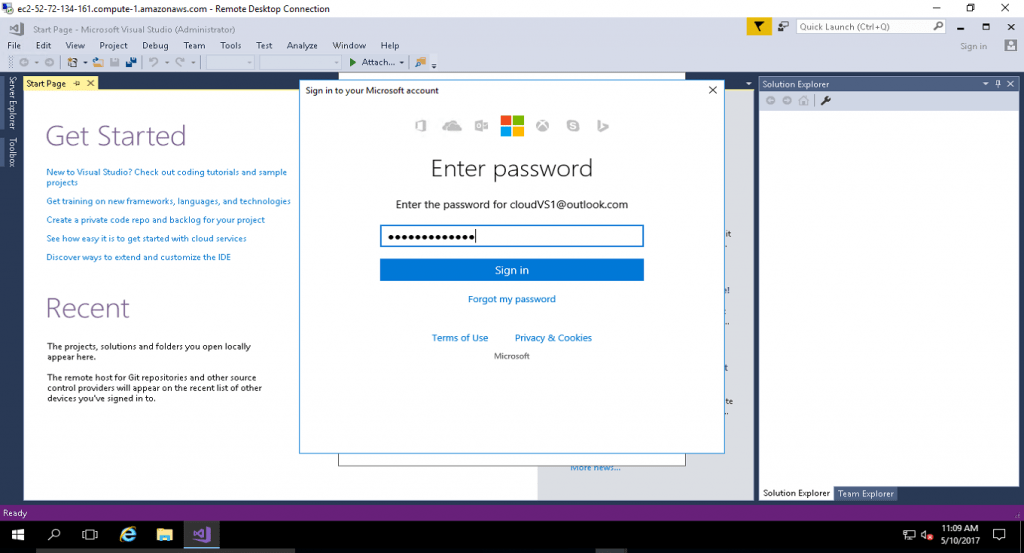
Step 2) Visual Studio Connection: To Connect Microsoft Visual Studio in Windows Server, Please follow Instructions to Connect Microsoft Visual Studio
Note : Please use a Microsoft account to unlock the VS2017 IDE by signing in with your MS account.
Note that you may need to sign out and then sign in again.
You can sign up for MS account here if you do not have one.
Step 3) Other Information:
1.Default installation path: “C:\Program Files (x86)\Microsoft Visual Studio\2017\Community\Common7\IDE”
2.Default ports:
- Windows Machines: RDP Port – 3389
- Http: 80
- Https: 443
Configure custom inbound and outbound rules using this link
Installation Instructions for Windows
Step 1) VM Creation:
- Click the Launch on Compute Engine button to choose the hardware and network settings.
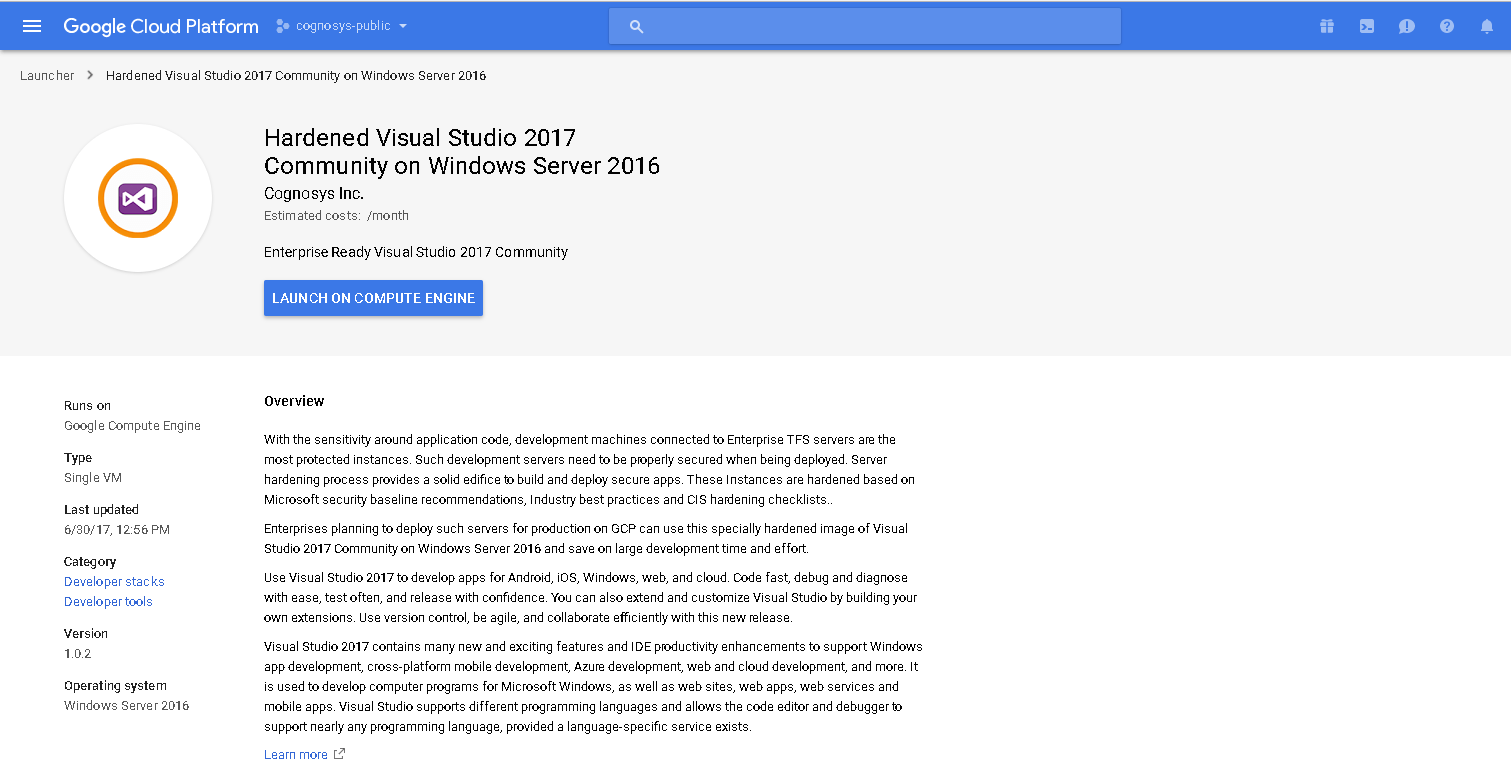 2.You can see at this page, overview of Cognosys Image as well as some estimated costs of VM.
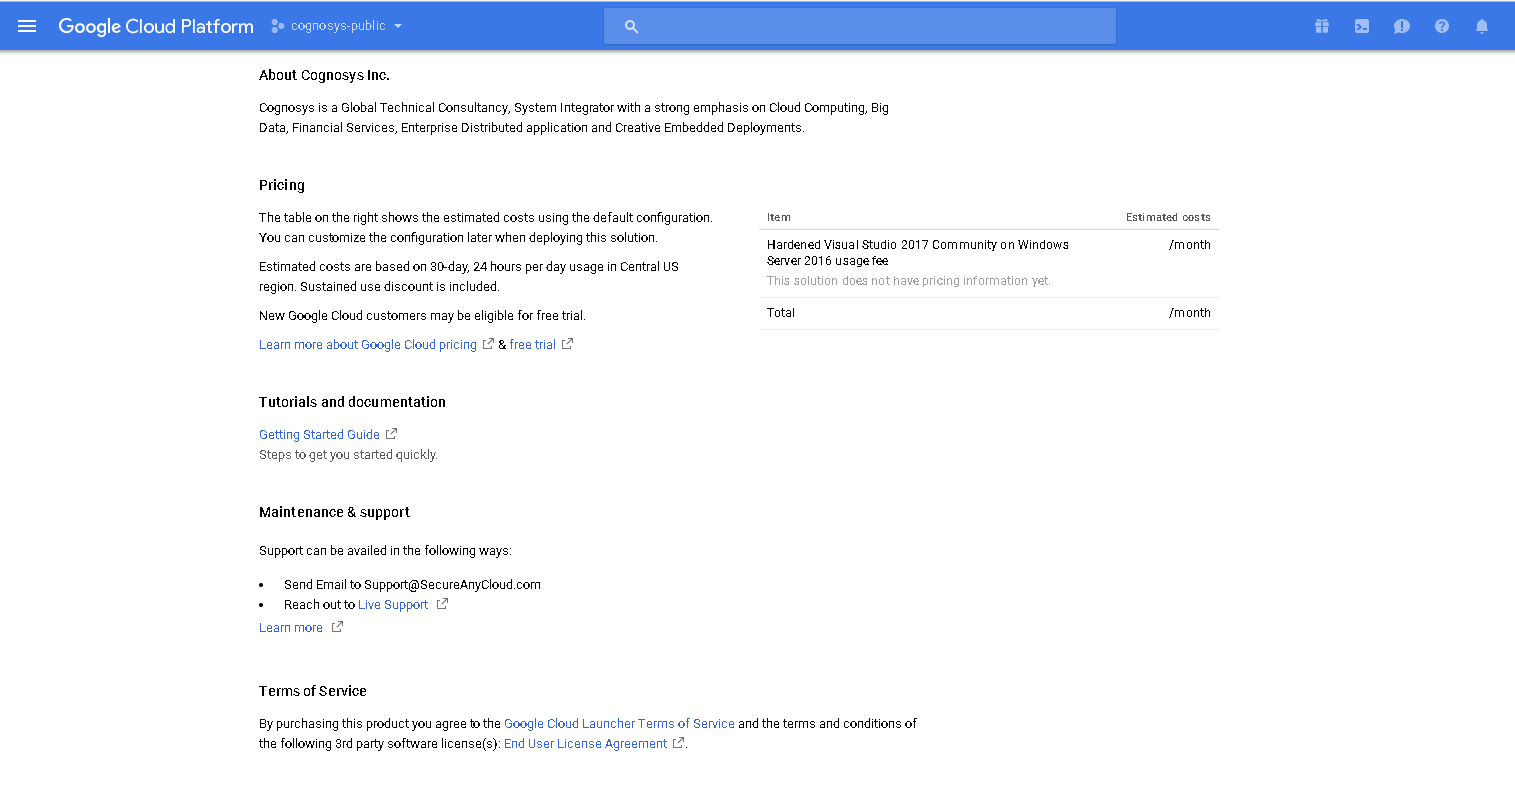 3.In the settings page, you can choose the number of CPUs and amount of RAM, the disk size and type, etc.

Step 2) RDP Connection: To connect to the deployed instance, Please follow Instructions to Connect to Windows instance on Google Cloud
Step 3) Visual Studio Connection: To Connect Microsoft Visual Studio in Windows Server, Please follow Instructions to Connect Microsoft Visual Studio
Note: To activate Visual Studio community version kindly sign into your Visual Studio account with Microsoft ID.
Step 4) Other Information:
1. Default installation path: “C:\Program Files (x86)\Microsoft Visual Studio\2017\”
2. Default ports:
- Windows Machines: RDP Port – 3389
- Http: 80
- Https: 443
Video
