1-click AWS Deployment 1-click Azure Deployment 1-click Google Deployment
Overview
Microsoft SQL Server Standard provides all the fundamental database, reporting, and analytics capabilities. It also includes basic availability features and disaster recovery. Microsoft SQL Server Standard can run non-mission critical applications, deliver standard reporting and analytics, and build rich content management applications.Few benefits of using SQL Server Standard are as follows:
1.Free version available for development or the educational industry with minor limitations compared to the full version.
2.Easy to configure
3.Adaptability to future technology enhancements
4.Reduced complexity
5.Dynamic Resource Allocation – disk and memory usage can scale to meet the changing demands on the infrastructure.
6.Professional, enterprise-level database management, such as supporting triggers for Microsoft products and close integration with the .NET framework.
7.iSQL – this essential tool enables users to perform interactive queries and build stored procedures, then view them in a graphical representation to display the steps the processor will use to execute.
The SQL Server database architecture
SQL Server maps the database over a set of operating system files that store the database objects. Physically, a SQL Server database is a set of two or more operating system files. Each database file has two names:
SQL Server database files can be stored on either a FAT or an NTFS filesystem. You can create three types of SQL Server database files, listed as follows:
- Primary data file: This is the initial default file that contains the configuration information for the database, pointers to the other files in the database, and all of the database objects. Every database has one primary data file. The preferred filename extension for a primary data file is
.mdf. Although you can store user objects within the main data file, but it is not recommended. - Secondary data file: Secondary data files are optional and used to hold user database objects. You can create one or more secondary files within the database to hold the user database objects. The recommend filename extension for a secondary data file is
.ndf. Secondary data files can be spread across multiple disks and are useful as the database’s additional storage area. - Transaction log file: This is the log file for the database that holds information about all database modification events. The information in the transaction log file is used to recover the database. A database can have one or more transaction log files. Multiple transaction log files do not improve database performance as the SQL Server database engine writes log information sequentially. The recommended filename extension for transaction logs is
.ldf.
SQL Server uses pages as a basic unit of data storage. The disk space allocated to a data file (.mdf or .ndf) in a database is logically divided into pages that are numbered contiguously from 0 to n. SQL Server performs disk I/O operations at a page level, which means that the SQL Server database engine reads or writes the whole data page during the Data Manipulation Language (DML) operation.
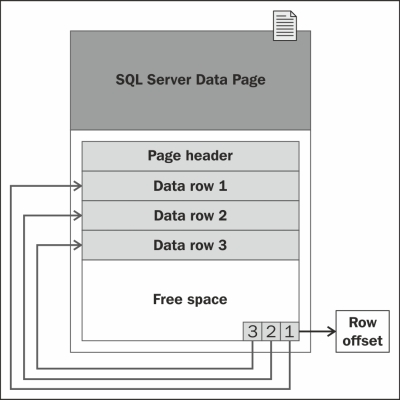
In SQL Server, the page is an 8 KB block of contiguous disk space. SQL Server can store 128 pages per megabyte of allocated storage space. Each page starts with 96 bytes of header information about the page. If the rows are small, multiple rows can be stored on a page, as shown in the following diagram:
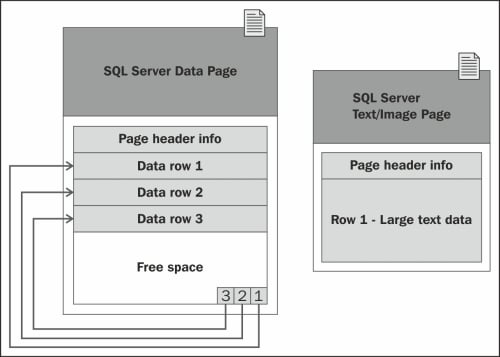
The rows of a SQL Server table cannot span multiple pages of data. That is why the rows are limited to a maximum of 8,060 bytes of data. However, there is an exception to this rule for data types that are used to store large blocks of text. The data for such data types is stored separately from the pages of the small row data. For example, if you have a row that exceeds 8,060 bytes, which includes a column that contains large blocks of text, SQL Server dynamically moves this text to a separate text/image page, as shown in the following diagram:
Extents
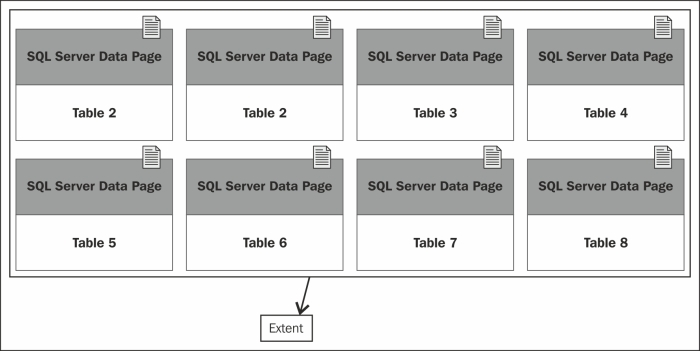
An extent is eight contiguous pages (64 KB) of disk storage. SQL Server can store 16 extents per megabyte of allocated storage space. A small table can share extents with other database objects to make better use of available space, with the limitation of eight objects per extent. Each page in an extent can be owned by different user objects as shown in the following diagram:
SQL Server database transaction log files contain the information that is needed to recover the SQL Server database if a system failure occurs. A database can have one or more transaction log files. SQL Server records each DML operation performed against the database in the transaction log file. When a system failure occurs, SQL Server enters into the automatic recovery mode on startup, and it uses the information in the transaction log to recover the database. The automatic recovery process rolls committed transactions forward (which means that it makes changes to the database) and reverts any uncommitted transactions post system failure.
SQL Server divides the physical transaction log file into smaller segments called Virtual Log Files (VLFs). The virtual log file only contains a log record for active transactions. SQL Server truncates the virtual log file once it is no longer contains active transactions. The virtual log file has no fixed size, and there is no fixed number of virtual log files per physical transaction log file. You cannot configure the size and number of virtual log files; the SQL Server database engine dynamically manages the size and number of the virtual log files each time you create or extend the physical transaction log file.
SQL Server tries to keep the number of virtual log files to a minimum; however, you will end up with too many virtual log files if you incorrectly size the physical transaction log file or set it to grow in small increments. This is because whenever the physical transaction log file grows, the SQL Server database engine adds more virtual log files to the physical transaction log file. Having too many virtual log files can significantly impair the performance of the database. Therefore, you need to periodically monitor the physical transaction log file to check for a high number of virtual log files. You can run DBCC LOGINFO to check the number of the virtual log files in the database. The following is the syntax of this command:
USE [YourDatabaseName];
DBCC LOGINFO;
You can also use DBCC SQLPREF to view the amount of space available in the transaction log file.
The following diagram illustrates the workings of the transaction log during the data manipulation language operation:
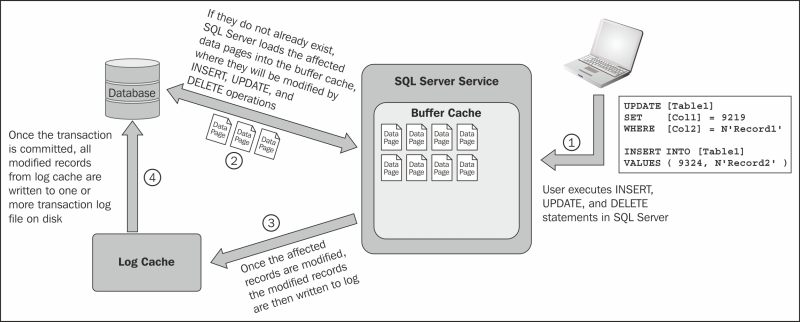
The SQL Server database transaction log acts as a write-ahead log (as SQL Sever writes to the log before writing to the disk) for modifications to the database, which means that the modification of the data is not written to disk until a checkpoint occurs in the database. For example, as illustrated in the previous diagram, when you execute an INSERT, UPDATE, or DELETE statement, the SQL Server database engine first checks the buffer cache for the affected data pages. If the affected data pages are not in the buffer cache, the SQL Server database engine loads these affected data pages into a buffer cache.
The SQL Server database engine then logs the operation in the log cache, which is another designated area in memory. When the transaction is committed, the modifications associated with the transaction are written from the log cache to the transaction log file on disk. Completed transactions are written to the database periodically by the checkpoint process.
In SQL Server databases, you can group the secondary data files logically for administrative purposes. This administrative grouping of data files is called filegroups. By default, the SQL Server databases are created with one filegroup, also known as the default filegroup (or primary filegroup) for the database. The primary database is a member of the default filegroup. You can add secondary database files to the default filegroup; however, this is not recommended. It is recommended that you create separate filegroups for your secondary data files. This is known as a secondary filegroup (or user-defined filegroup). The SQL Server database engine allows you to create one or more filegroups, which can contain one or more secondary data files. Transaction log files do not belong to any filegroup. You can query the sys.filegroups system catalog to list all of the information about filegroups created within the SQL Server database.The main advantage of filegroups is that they can be backed up or restored separately, or they can be brought online or taken offline separately.
HOW TO INSTALL SQL SERVER 2014 STANDARD EDITION
There are multiple editions of SQL Server 2014 (Enterprise Edition, Enterprise Core Edition, Business Intelligence Edition, Standard Edition, Web Edition, Express and Developer Edition). SQL Server 2014 has a free edition – Express and while the server itself lacks some options that other editions have, SQL Server 2014 Management Studio is the same and can be used with each of these.
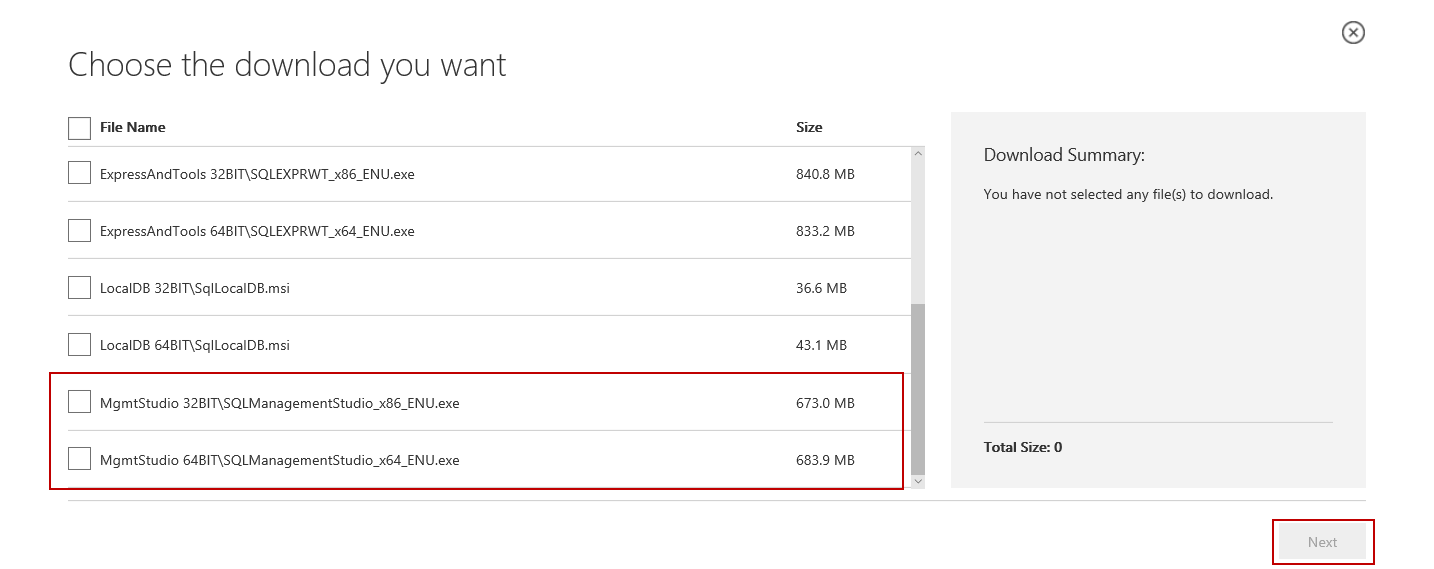
The bottom two files are MgmtStudio 32BIT\SQLManagementStudio_x86_ENU.exe and MgmtStudio 64BIT\SQLManagementStudio_x64_ENU.exe and you should choose one of these according to the operating system running on the machine(32 or 64 bit), on which SQL Server Management Studio will be installed.
If you aren’t sure which operating system type is installed on your machine, you can check it by right-clicking in My Computer>Properties. The current operating system will be specified under System type.
After selecting the desired file, click on the Next button in the bottom-right corner and the download will begin.
Installation
The downloaded file should be in .exe format with size of approximately 650 MB. Double-click on it to run the installation:
- The window for choosing directory to which the extracted files will be saved is shown. After choosing the directory click the Ok button and extraction will begin
- When the extraction is completed, it’ll take a couple of seconds until the SQL Server 2014 setup processes the current operation. After that, the following window will open:
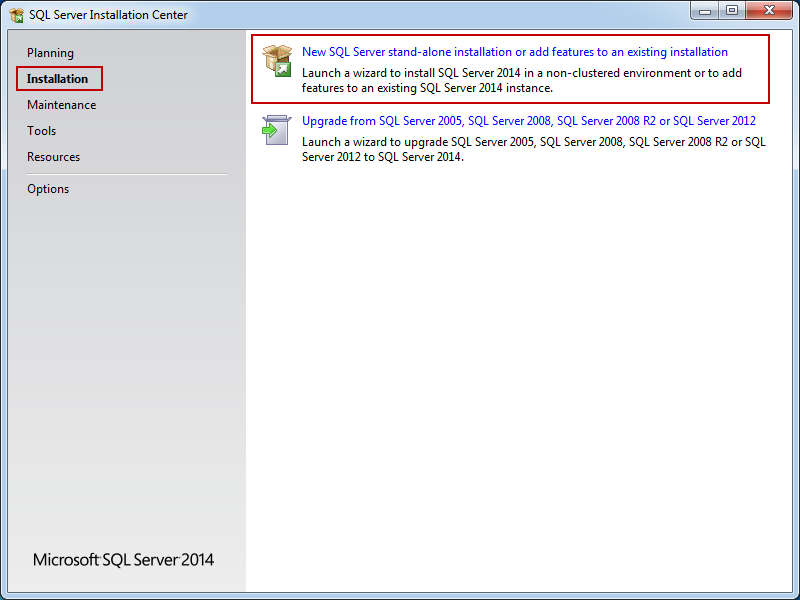
 This is the primary installation screen and the other SQL tools installation can be started here as well. If not already selected – select the Installation tab in the top-left corner of the SQL Server Installation Center.For installing SQL Server Management Studio alone, select the New SQL Server stand-alone installation or add features to an existing installation option (as in the screenshots above).
Once the installation wizard starts the SQL Server Installation Center can be closed.
- It’ll take a couple of seconds for the setup rules to be checked (pre-requisites on the operating system). If all the requirements are meet, the SQL Server 2014 setup will start with the License Terms tab as a first step:
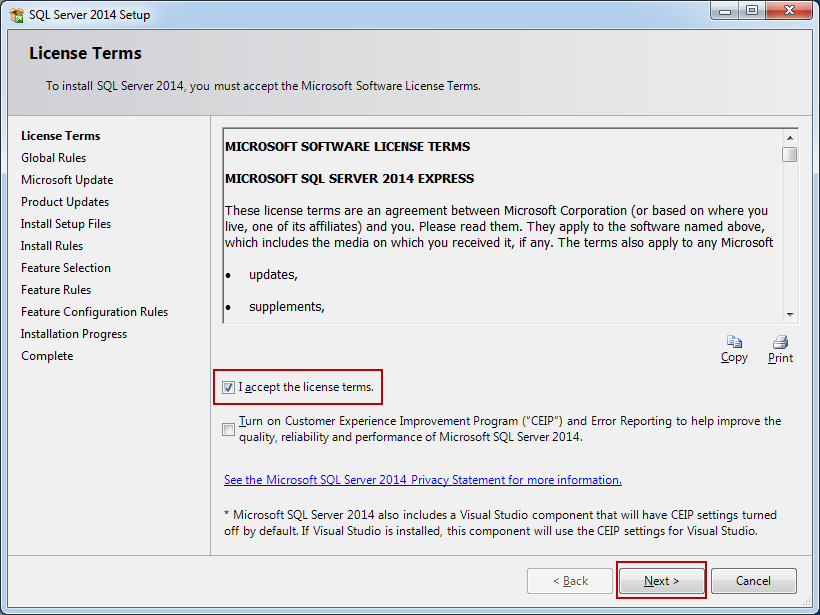 To proceed with the installation, read the license terms and then check the I accept the license terms checkbox. The CEIP (Customer Experience Improvement Program) checkbox is optional, but if it’s checked, the program will be able to collect information about the computer hardware and how the product is being used (without interrupting users); the next releases of SQL Server are upgraded based on this information.After checking the I accept the license terms, the Next button can be clicked to proceed.
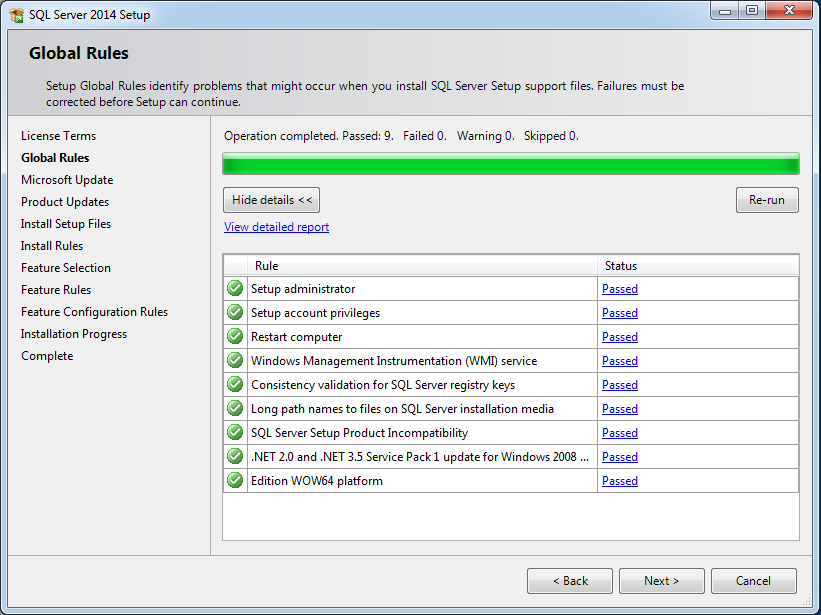
 - The next step is the Global Rules. Setup Global Rules identify problems that might occur when installing SQL Server 2014. Which rules are those in some extent depends on which operating system you are installing to but usually include the following:
- Whether the logged-in user is a system administrator with appropriate privileges (a must be)
- Whether there are any reboots pending from other installers
- Whether required .NET components are available
- Whether there is support for long pathnames where the installation media resides
- The consistency of any SQL Server Registry keys
If all the rules are passed, the Global Rules step will be processed and skipped automatically. If some rules don’t pass, you must correct these in order for setup to be able to continue:
- The next step of the setup is the Microsoft Update. It’s optional and whether you select it or not, the installation will be able to proceed after clicking the Next button.Once checked this option gives the opportunity to download the update and incorporate it with the installation. This action will take some time, as those updates need to be downloaded as well.If you proceeded without checking for updates or it is checked, but there aren’t any updates available, the Product Updates step will be skipped:
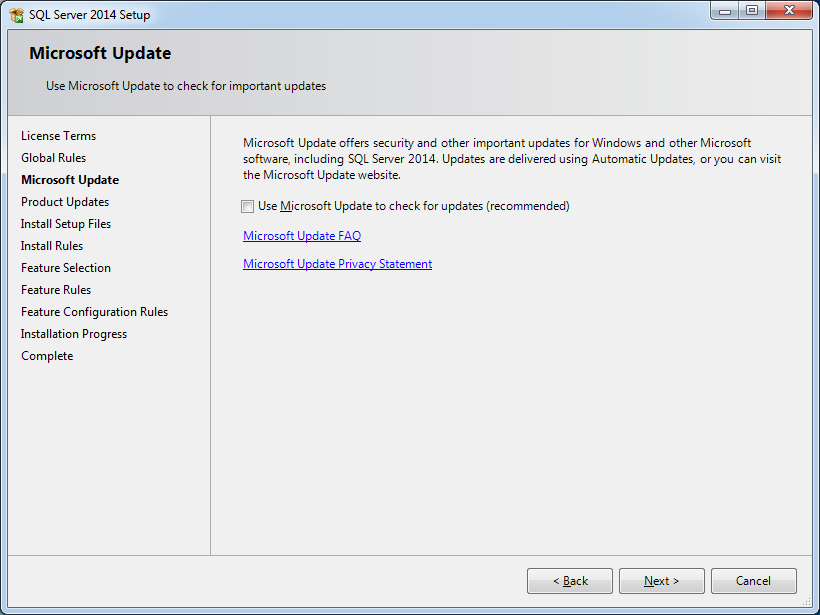
It’s recommend that the Microsoft update option is checked to ensure all patches are applied.
- Install Setup Files and Install Rules steps are automatically processed. However, the Install Rules is yet another step where the setup wizard is checking if certain software requirements are met:
- Need for reboot in order for changes to apply
- Whether there are some previous releases of SQL Server
- Validation of SQL Server registry keys
- Whether the computer is a domain controller
- Security settings
Every rule in the list has a status (whether it’s passed or failed); clicking those links provides additional information if something went wrong.
One rule that will almost certainly throw a warning is Window Firewall. This issue specifically can be solved by adding SQL Server and its features to Windows Firewall exception list. Otherwise, SQL Server Management Studio is unable to connect to remote servers.
If some of these don’t pass, they must be corrected in order that setup can be continued:

- In Feature Selection step the only options that needs to be checked in order to install SQL Server Management Studio is Management tools – basic and sub item: Management tools – Complete, however, SQL Client Connectivity SDK will be installed by default, whether you checked it or not.Each feature has prerequisites which are shown in the Prerequisites for selected features field located right of the Features field, and if some are missing, those will be installed along with SQL Server Management Studio:
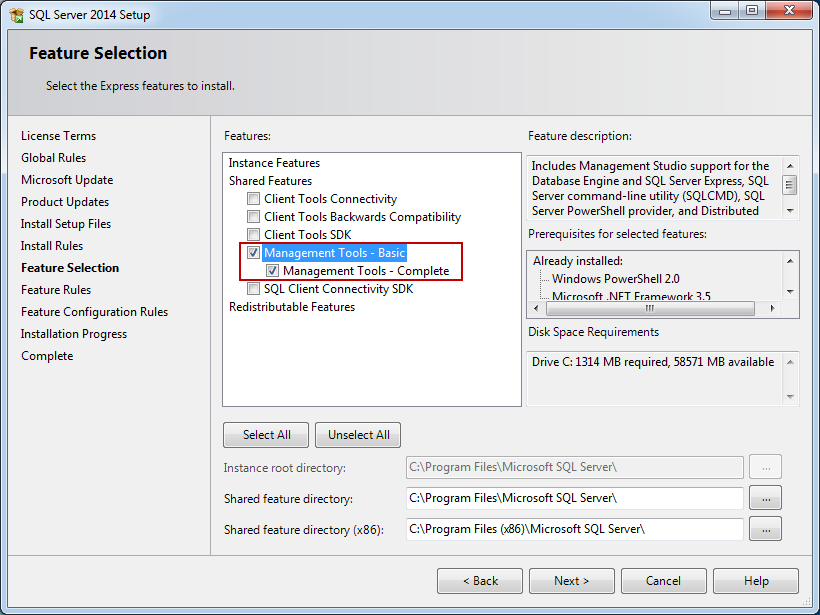 In addition, there is a short description for each feature in the Feature description field for more details.
SQL Server Management Studio will be installed in default directory on system partition, but below the Features field it can be altered in which directory you want these shared components installed (as shown in image above)
- After you proceeded on the Next button, Feature Rules and Feature Configuration Rules steps will be processed automatically if all the Feature Rules are met:
- Prior Visual Studio 2010 instances requiring update
- Microsoft .NET Framework 3.5 Service Pack 1 is required.
You must repair failures for the installation to be able to proceed.
The update required for Visual Studio is contained on the SQL Server installation media and it’s named VS10sp1-KB983509.msp.
When all the rules are passed and the Feature Rules and the Feature Configuration Rules steps are processed automatically, the installation process will start in Installation Progress step.
- The SQL Server Management Studio installation process should take no more than approximately 4 minutes if there is no actual server installed on the machine After the installation process is completed, the last step of the installation wizard will be presented:<p
 In the Complete step, the summary for all the installed features and status of installation for each one, will be shown.In the field bellow, labeled Details, will be additional links for Release notes, Sample databases (applicable only if you have server installed on the machine), Microsoft Updates, etc.Also, a link will be presented on which you can find Summary log saved as txt file.
SQL Server Benefits
1. Various editions to choose from. What will be especially important for your company on our Microsoft SQL Server pros and cons list is the choice of available editions. You can choose from among the following ones, according to your needs:
- Enterprise
- Standard
- Developer
- Web
- Express
2. Product documentation and Microsoft Premier support. With Microsoft Premier support, you’ll have access to a network of skilled specialists from Microsoft’s dedicated support teams. If you have any problems using MSSQL, they’ll help you sort things out.
3. On-premises and cloud database support. If it suits your business goals, you can offload the administration and management of your databases to the cloud with Azure SQL Database or SQL Server on Azure Virtual Machines.
4. SQL Server tools and applications. Microsoft SQL Server comes with many useful tools that will speed up database design, development, troubleshooting, and maintenance, including (but not limited to):
- SQL Server Management Studio
- Azure Data Studio
- SQL Server Data Tools
- SQL Server Profiler
For example, companies that have a data warehouse running on the MSSQL platform can easily integrate it with Analysis Services and Power BI without having to buy third-party software; everything is available on the MS Data platform.
5. Support for use on Linux. SQL Server 2017 is the first version that also runs on Linux. Here’s a list of supported Linux distributions:
- Red Hat Enterprise Linux
- SUSE Linux Enterprise Server
- Ubuntu 16.04
- Docker Engine
This makes it much easier for companies that already have many servers running on Linux to install and run SQL Server on those machines—no need to buy new Windows Server licenses, for example.
SQL Server Drawbacks
1. Expensive pricing. The first drawback on our Microsoft SQL Server pros and cons list is purely financial. Many organizations cannot afford to pay for the Enterprise edition. The current cost is $14,256 for a per-core license.
2. Complicated licensing. SQL Server licensing can be quite difficult to understand and is always changing.
Database Specialist Use: SQL Server Benefits
1. Plenty of career opportunities. Are you interested in database administration, performance tuning, or T-SQL programming? Would you like to design and implement data cleansing and extract, transform, and load operations? Are you keen on data mining and online analytical processing? Or do you see yourself as a dashboard and interactive reports designer or developer? As we mentioned in our list of pros and cons of Microsoft SQL Server, the platform gives you many possibilities to suit your career aspirations.
2. Free Developer edition. The SQL Server Developer edition is completely free and includes all enterprise SQL Server features. You can just download, install, and configure your own development environment and explore all features and functionalities of the latest SQL Server version.
3. A growing community. SQL Server has a thriving community. There are many community-hosted global events, like SQL Saturday, as well as conferences, educational materials, and a great network of highly skilled professionals who are always ready to help you (the hashtag #sqlhelp works very well on Twitter).
4. Useful online documentation. Personally speaking, I find the online documentation for Microsoft SQL Server very detailed and well structured. There are also plenty of whitepapers and useful demos that help you to understand a specific topic in greater detail.
Database Specialist Use: SQL Server Drawbacks
1. Complex performance tuning. Query optimization and performance tuning can be difficult for data specialists who don’t have deep, specialized knowledge. However, this isn’t really a problem if you’re a beginner, as you won’t be performing much query optimization anyway (unless you operate on very large data sets).
2. Lack of native support for source control. The closing point of our list of pros and cons of Microsoft SQL Server is related to source control: it is not native in SQL Server. To maintain all changes made to database objects, you’ll need to use third-party tools.

–SQL Server Standard 2014 is designed for serving as a back end for internal applications, or even powering a dynamic website. It offers basic subset of database, reporting and analytic capabilities.
Standard edition of SQL server 2014 provides basic availability and disaster recovery with up to two node fail-over clustering, log shipping and peer-to-peer replication. As basic availability and disaster recovery with two node failover clustering, log shipping and peer-to-peer replication.
Cognosys Provides Hardened images of SQL Server Standard 2014 on the cloud ( AWS marketplace, Azure and Google Cloud Platform).
Deploy Standard edition of SQL server 2014 securely on cloud i.e. AWS marketplace, Azure and Google Cloud Platform (GCP)
We also provide the different edition’s of SQL Server 2014 such as SQL Server 2014 Web Edition, SQL Server 2014 Express and SQL Server Enterprise 2014.
SQL Server 2014 SP2 Standard Edition on Windows 2012 R2
SQL Server Standard 2014 on cloud for AWS
Features
New Features in SQL Server 2014
In-Memory OLTP Engine
SQL Server 2014 enables memory optimization of selected tables and stored procedures. The In-Memory OLTP engine is designed for high concurrency and uses a new optimistic concurrency control mechanism to eliminate locking delays. Microsoft states that customers can expect performance to be up to 20 times better than with SQL Server 2012 when using this new feature.
Microsoft has enhanced AlwaysOn integration by expanding the maximum number of secondary replicas from four to eight. Readable secondary replicas are now also available for read workloads, even when the primary replica is unavailable. In addition, SQL Server 2014 provides the new Add Azure Replica Wizard, which helps you create asynchronous secondary replicas in Windows Azure.
3. Buffer Pool Extension
SQL Server 2014 provides a new solid state disk (SSD) integration capability that lets you use SSDs to expand the SQL Server 2014 Buffer Pool as nonvolatile RAM (NvRAM). With the new Buffer Pool Extensions feature, you can use SSD drives to expand the buffer pool in systems that have maxed out their memory. Buffer Pool Extensions can provide performance gains for read-heavy OLTP workloads.
4. Updateable Columnstore Indexes
When Microsoft introduced the columnstore index in SQL Server 2012, it provided improved performance for data warehousing queries. For some queries, the columnstore indexes provided a tenfold performance improvement. However, to utilize the columnstore index, the underlying table had to be read-only. SQL Server 2014 eliminates this restriction with the new updateable Columnstore Index. The SQL Server 2014 Columnstore Index must use all the columns in the table and can’t be combined with other indexes.
5. Storage I/O control
The Resource Governor lets you limit the amount of CPU and memory that a given workload can consume. SQL Server 2014 extends the reach of the Resource Governor to manage storage I/O usage as well. The SQL Server 2014 Resource Governor can limit the physical I/Os issued for user threads in a given resource pool.
6. Power View for Multidimensional Models
Power View used to be limited to tabular data. However, with SQL Server 2014, Power View can now be used with multidimensional models (OLAP cubes) and can create a variety of data visualizations including tables, matrices, bubble charts, and geographical maps. Power View multidimensional models also support queries using Data Analysis Expressions (DAX).
7. Power BI for Office 365 Integration
Power BI for Office 365 is a cloud-based business intelligence (BI) solution that provides data navigation and visualization capabilities. Power BI for Office 365 includes Power Query (formerly code-named Data Explorer), Power Map (formerly code-named GeoFlow), Power Pivot, and Power View.
8. SQL Server Data Tools for Business Intelligence
The new SQL Server Data Tools for BI (SSDT-BI) is used to create SQL Server Analysis Services (SSAS) models, SSRS reports, and SSIS packages. The new SSDT-BI supports SSAS and SSRS for SQL Server 2014 and earlier, but SSIS projects are limited to SQL Server 2014. In the pre-release version of SQL Server 2014, SQL Server Setup doesn’t install SSDT-BI. Instead, you must download SSDT-BI separately from the Microsoft Download Center.
9. Backup Encryption
One welcome addition to SQL Server 2014 is the ability to encrypt database backups for at-rest data protection. SQL Server 2014 supports several encryption algorithms, including Advanced Encryption Standard (AES) 128, AES 192, AES 256, and Triple DES. You must use a certificate or an asymmetric key to perform encryption for SQL Server 2014 backups.
10. SQL Server Managed Backup to Windows Azure
SQL Server 2014’s native backup supports Windows Azure integration. Although I’m not entirely convinced that I would want to depend on an Internet connection to restore my backups, on-premises SQL Server 2014 and Windows Azure virtual machine (VM) instances support backing up to Windows Azure storage. The Windows Azure backup integration is also fully built into SQL Server Management Studio (SSMS).
Major Features of SQL Server Standard 2014
1. Cross-Box Scale Limits
2. High Availability
3. Scalability and Performance
4. Security
5. Replication
6. Management Tools
7. RDBMS Manageability
8. Development Tools
9. Programmability
AWS
Installation Instructions For Windows
Installation Instructions For Windows
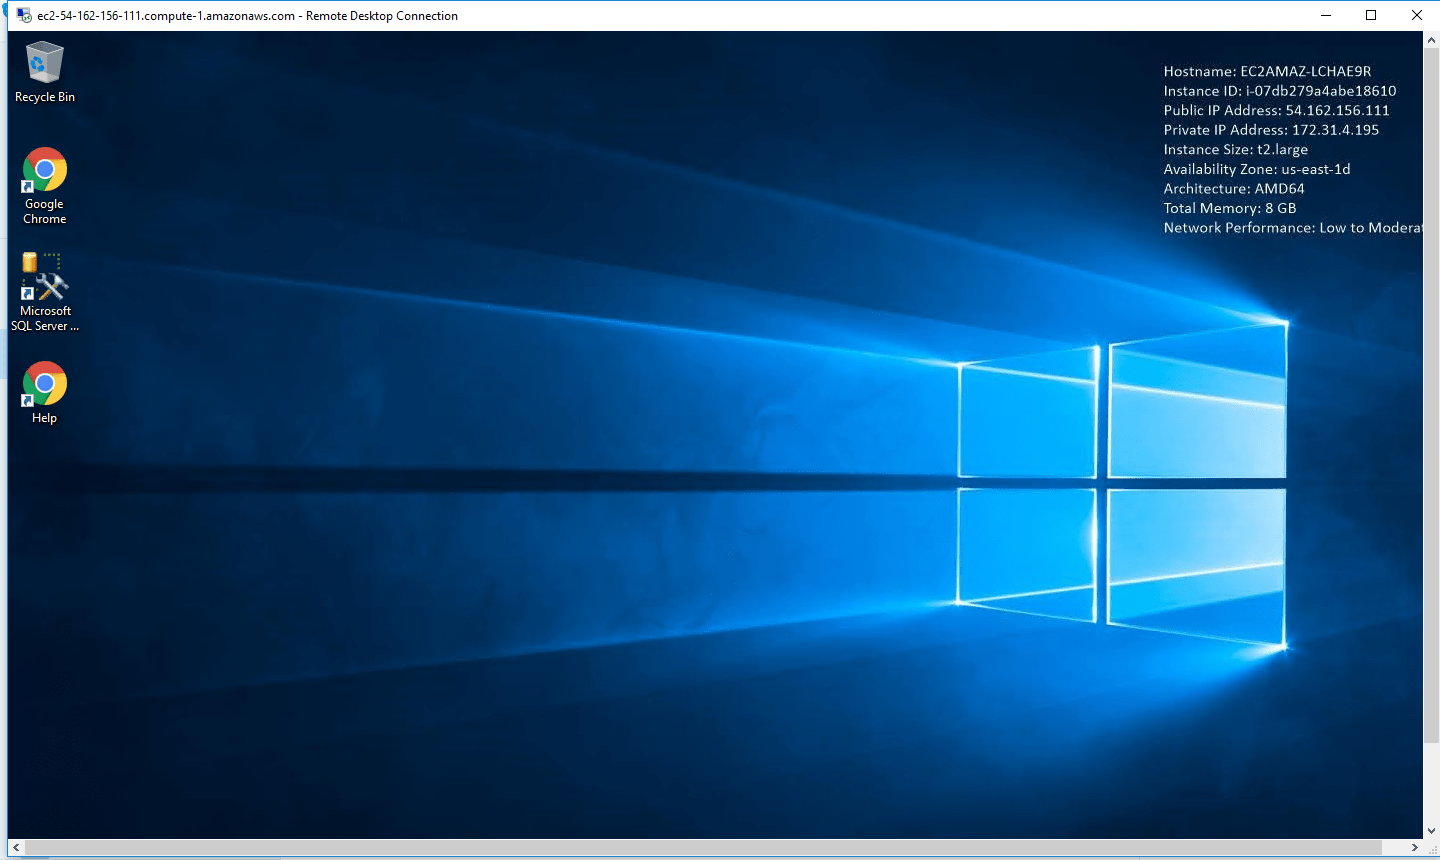
Step 1) RDP Connection: To connect to the deployed instance, Please follow Instructions to Connect to Windows instance on AWS Cloud
1) Connect to the virtual machine using following RDP credentials:
- Hostname: PublicDNS / IP of machine
- Port : 3389
Username: To connect to the operating system, use RDP and the username is Administrator.
Password: Please Click here to know how to get password
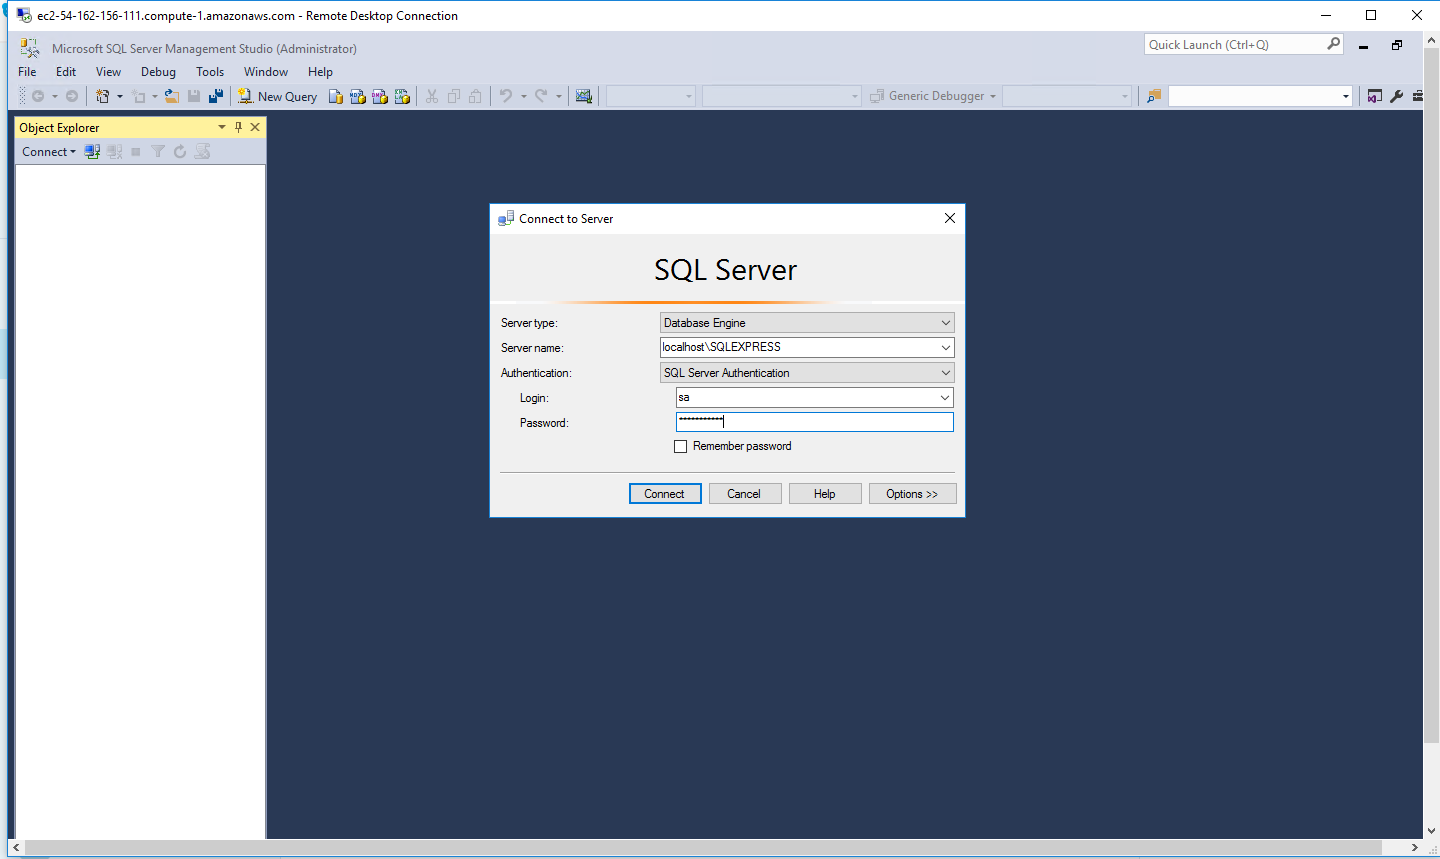
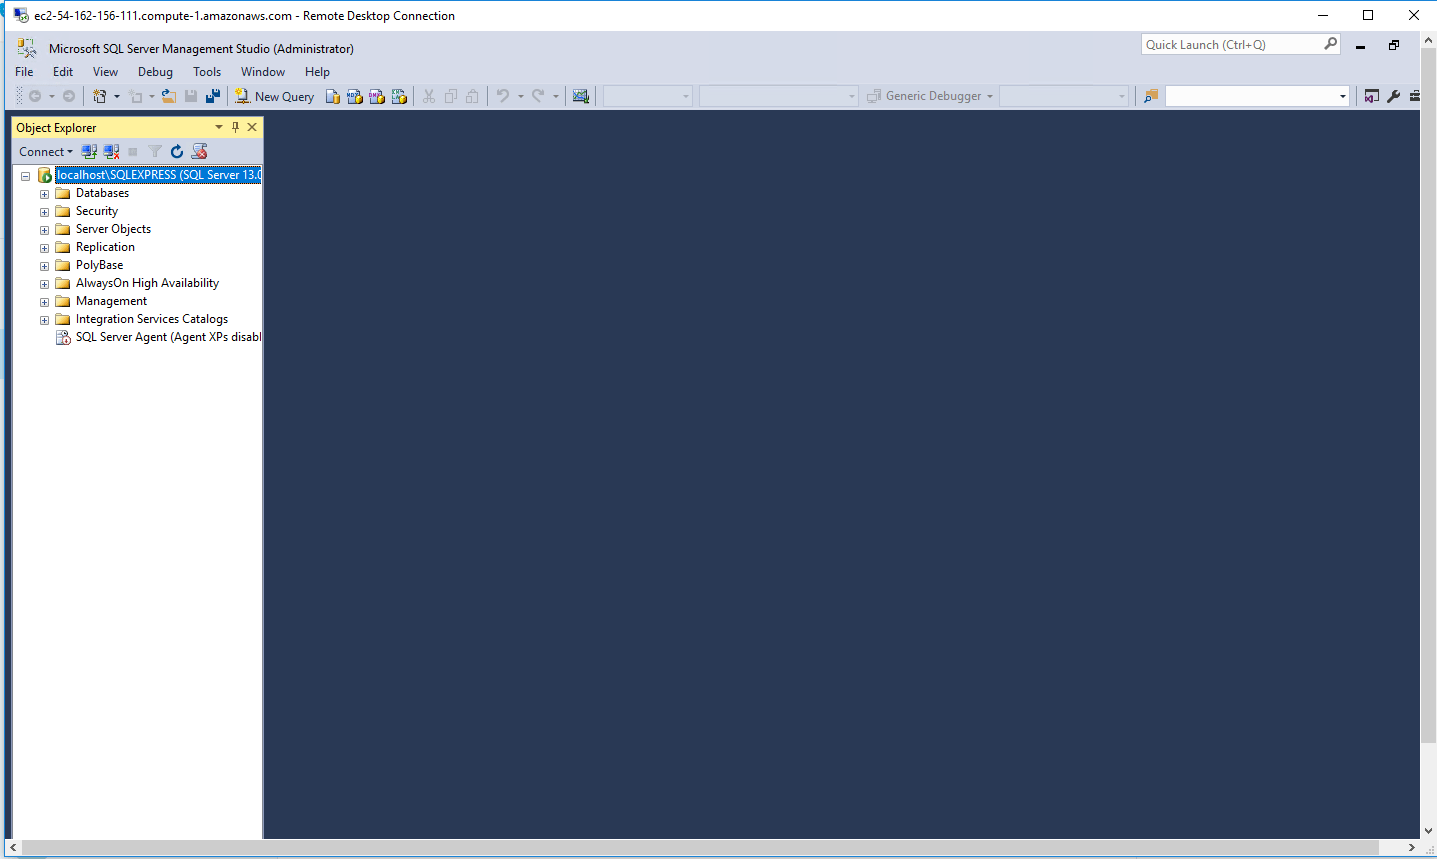
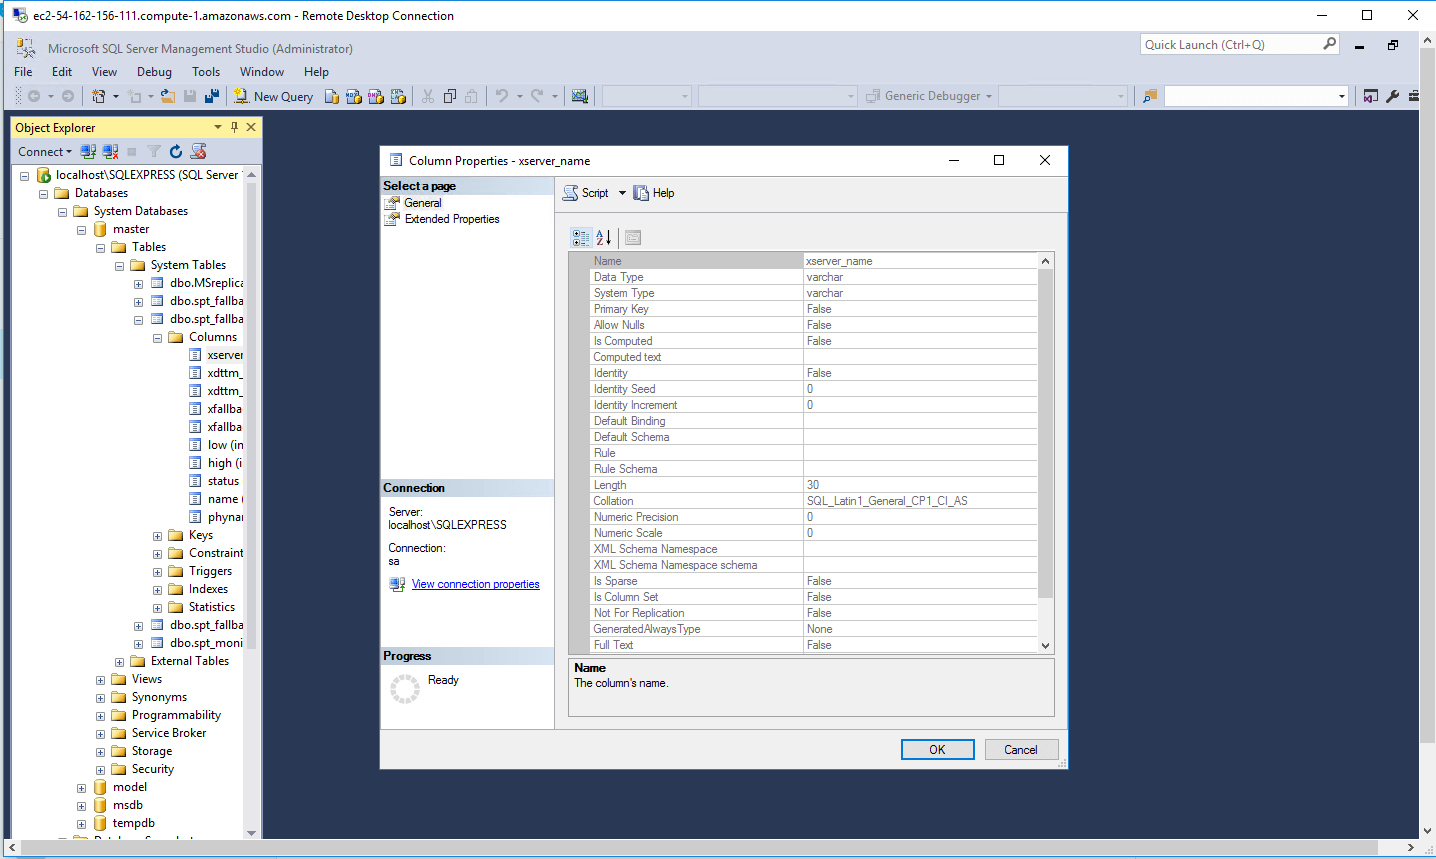
Step 2) SQL Connection: To Connect Microsoft SQL Server Management Studio in Windows server, Please follow Instructions to Connect Microsoft SQL Server Management Studio
Step 3) Database Credentials: You can Login by below SQL Database credentials
SQL UserName : sa || Password : Passw@rd123
Note: You can reset ‘sa’ password by using windows authentication to connect to local SQL instance. Please use localhost in the server name when connecting from inside the RDC

Note: Please change the password after the first login.
Step 4) Other Information:
1.Default ports:
- Windows Machines: RDP Port – 3389
- Http: 80
- Https: 443
- SQL Server Port: 1433 this is by default not allowed on the firewall for security.
Configure custom inbound and outbound rules using this link
Installation Step by Step Screenshots
Installation Instructions For Windows
Installation Instructions for Windows
Step 1) VM Creation:
- Click the Launch on Compute Engine button to choose the hardware and network settings

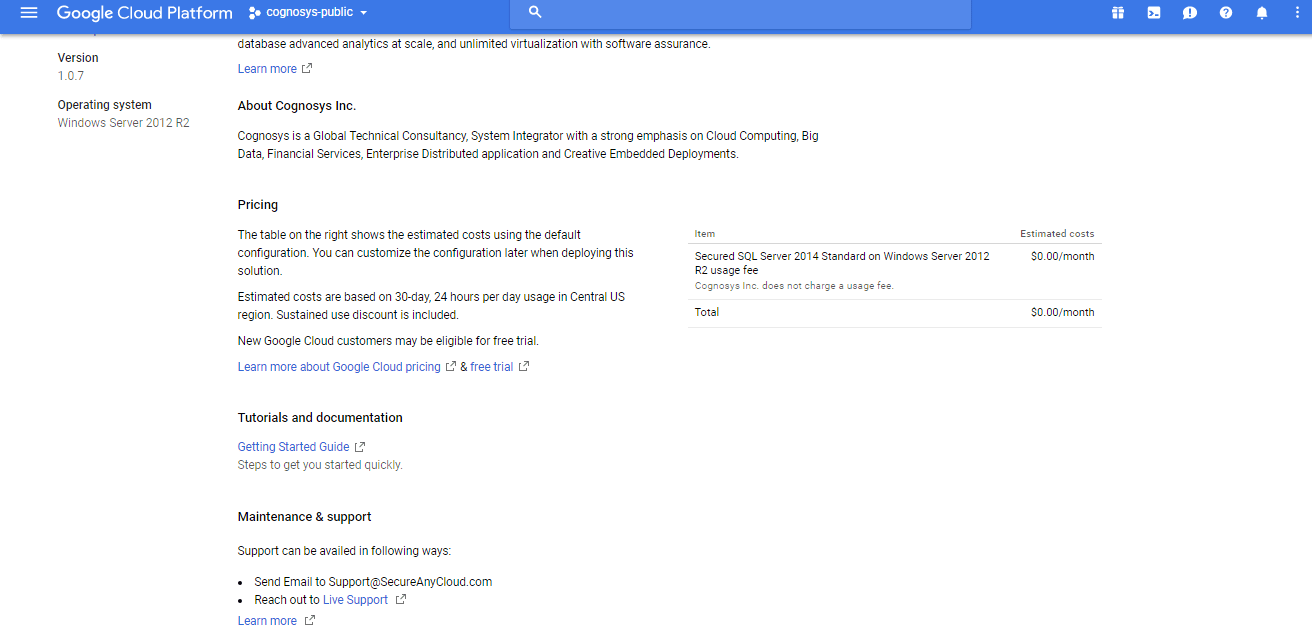
2. You can see at this page, an overview of Cognosys Image as well as estimated cost of running the instance.
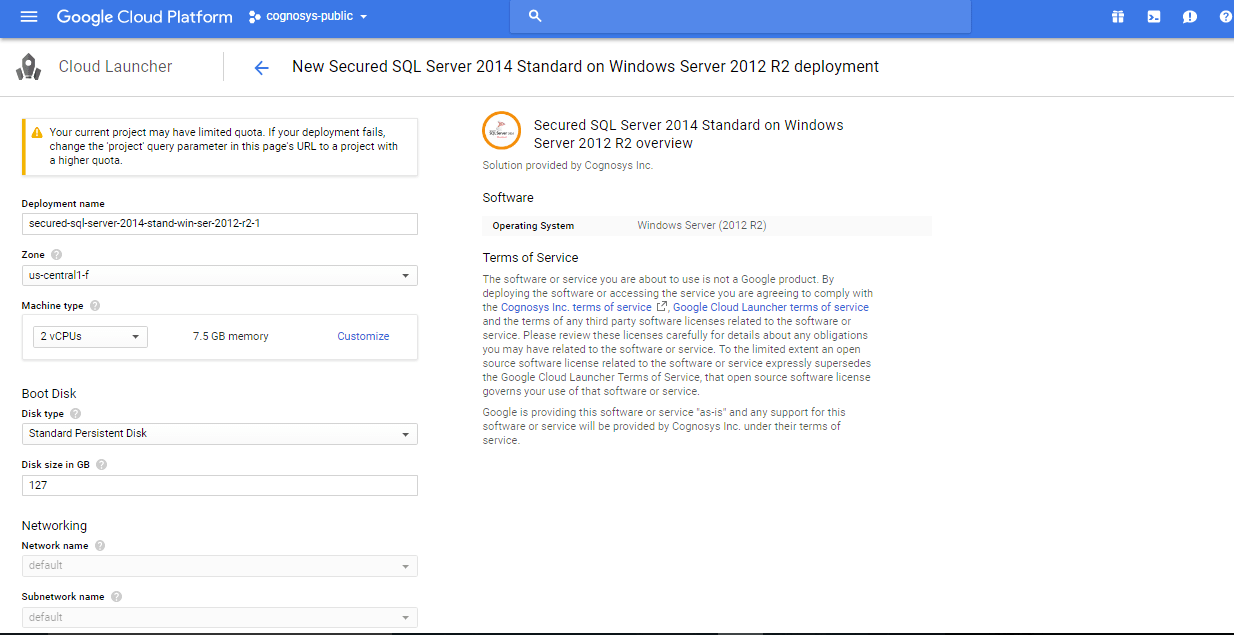
 3.In the settings page, you can choose the number of CPUs and amount of RAM, the disk size and type etc
Step 2) RDP Connection: To initialize local DB server connect to the deployed instance, Please follow Instructions to Connect to Windows instance on Google Cloud
Step 3) SQL Connection: To Connect Microsoft SQL Server Management Studio in windows server, Please follow Instructions to Connect Microsoft SQL Server Management Studio
Step 4) Database Credentials:
You can Login by below SQL Database credentials
SQL UserName : sa
The below screen appears after successful deployment of the image.
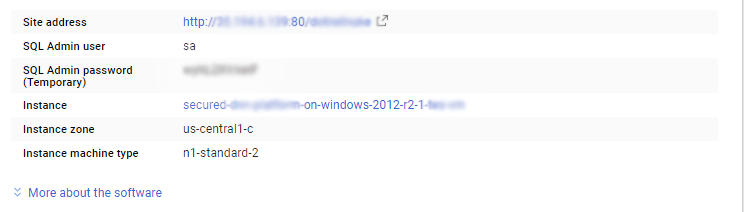
i) Please connect to Remote Desktop as given in step 2
ii) You can use SQL server instance as localhost. The SQL Server instance name to be used is “localhost” Connect to SQL Management Studio with username as sa and password provided in Custom Metadata.
If you have closed the deployment page you can also get the sa password from VM Details “Custom metadata” Section.
Step 5 ) Other Information:
1.Default ports:
- Windows Machines: RDP Port – 3389
- sql server port :1433: By default, this is blocked on Public interface for security reasons.
